
Xendit is a payment gateway that allows you to accept payments from customers through various payment methods. Qiscus Shop supports Xendit via Payment Session, the recommended integration method.
The previous Xendit Payment Link integration is now considered Legacy. We recommend migrating to Payment Session for better payment method coverage and reliability. Its setup steps are kept at Xendit Integration (Old Documentation).
Prerequisites & Setup
Before you begin, make sure you have an active Xendit account.
Step 1: Generate Your Xendit API Key
Log in to your Xendit Dashboard.
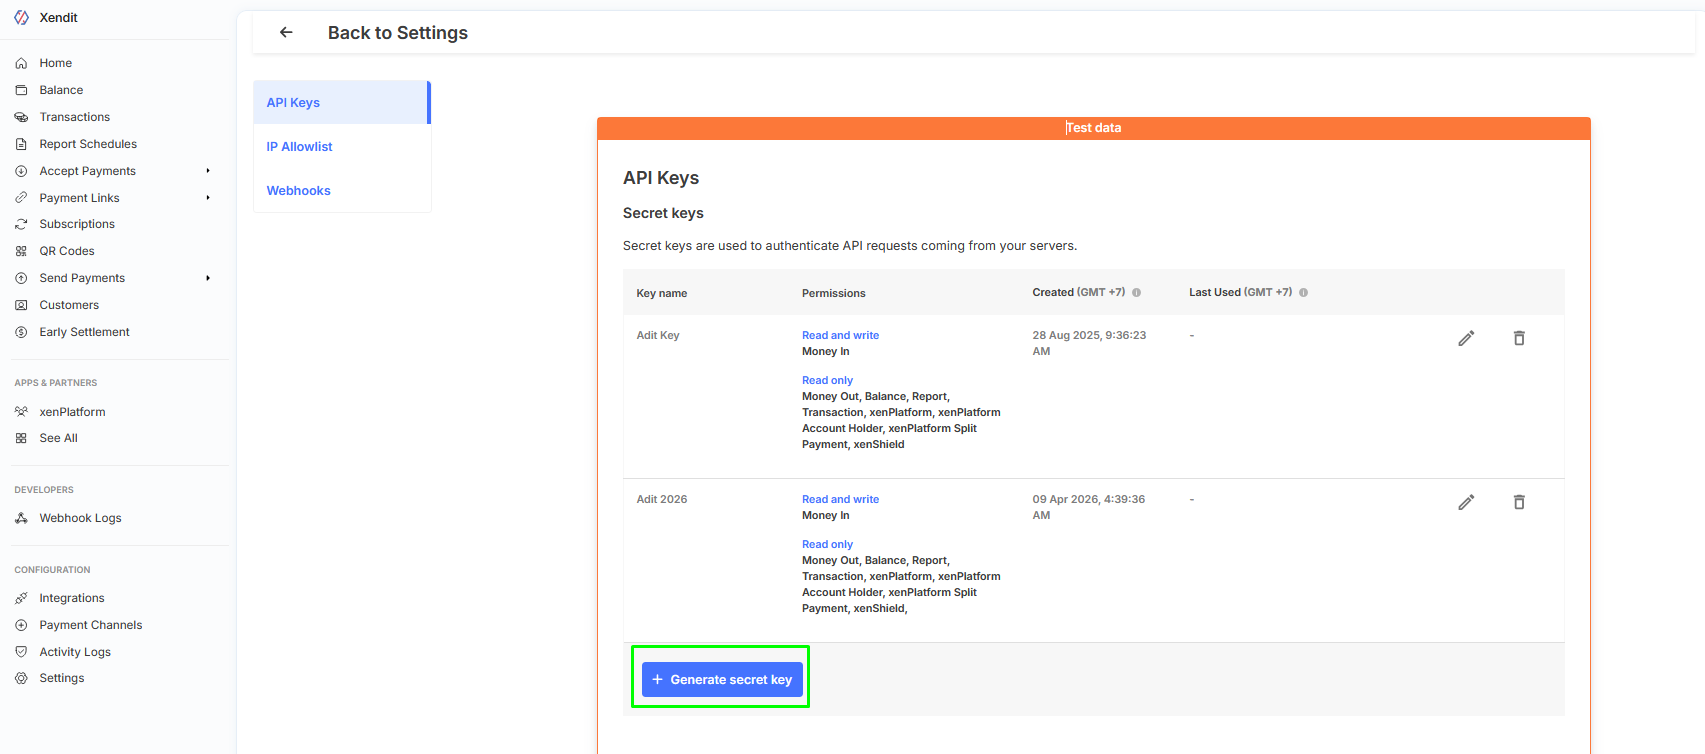
Navigate to Settings → API Keys.
Click Generate API Key.
Enter a name for your API key (e.g.
Qiscus Shop).Set the permissions as follows — leave everything not listed as None:
Permission | Setting |
|---|---|
Money-in products | Write |
Transaction | Read |
All other permissions | None |
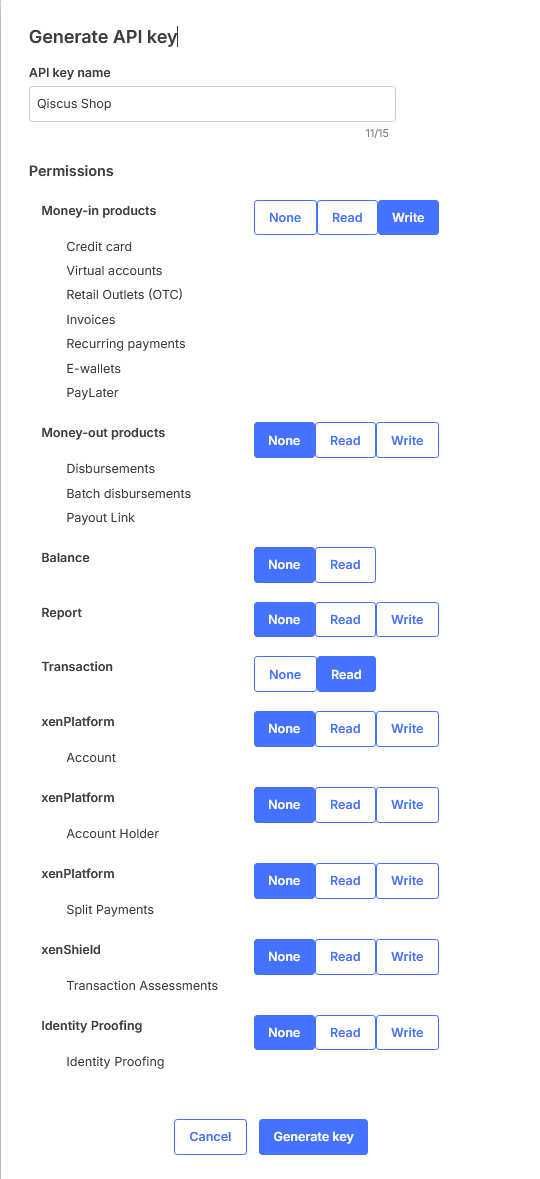
Money-in products → Write: Required to create Payment Sessions and accept payments via all supported channels (cards, virtual accounts, e-wallets, etc.)
Transaction → Read: Required for Qiscus Shop to verify payment status and automatically update order status.
Click Generate key.
Copy and save both the Public Key and Secret Key immediately — the Secret Key will only be shown once.
Step 2: Add Xendit as a Payment Gateway
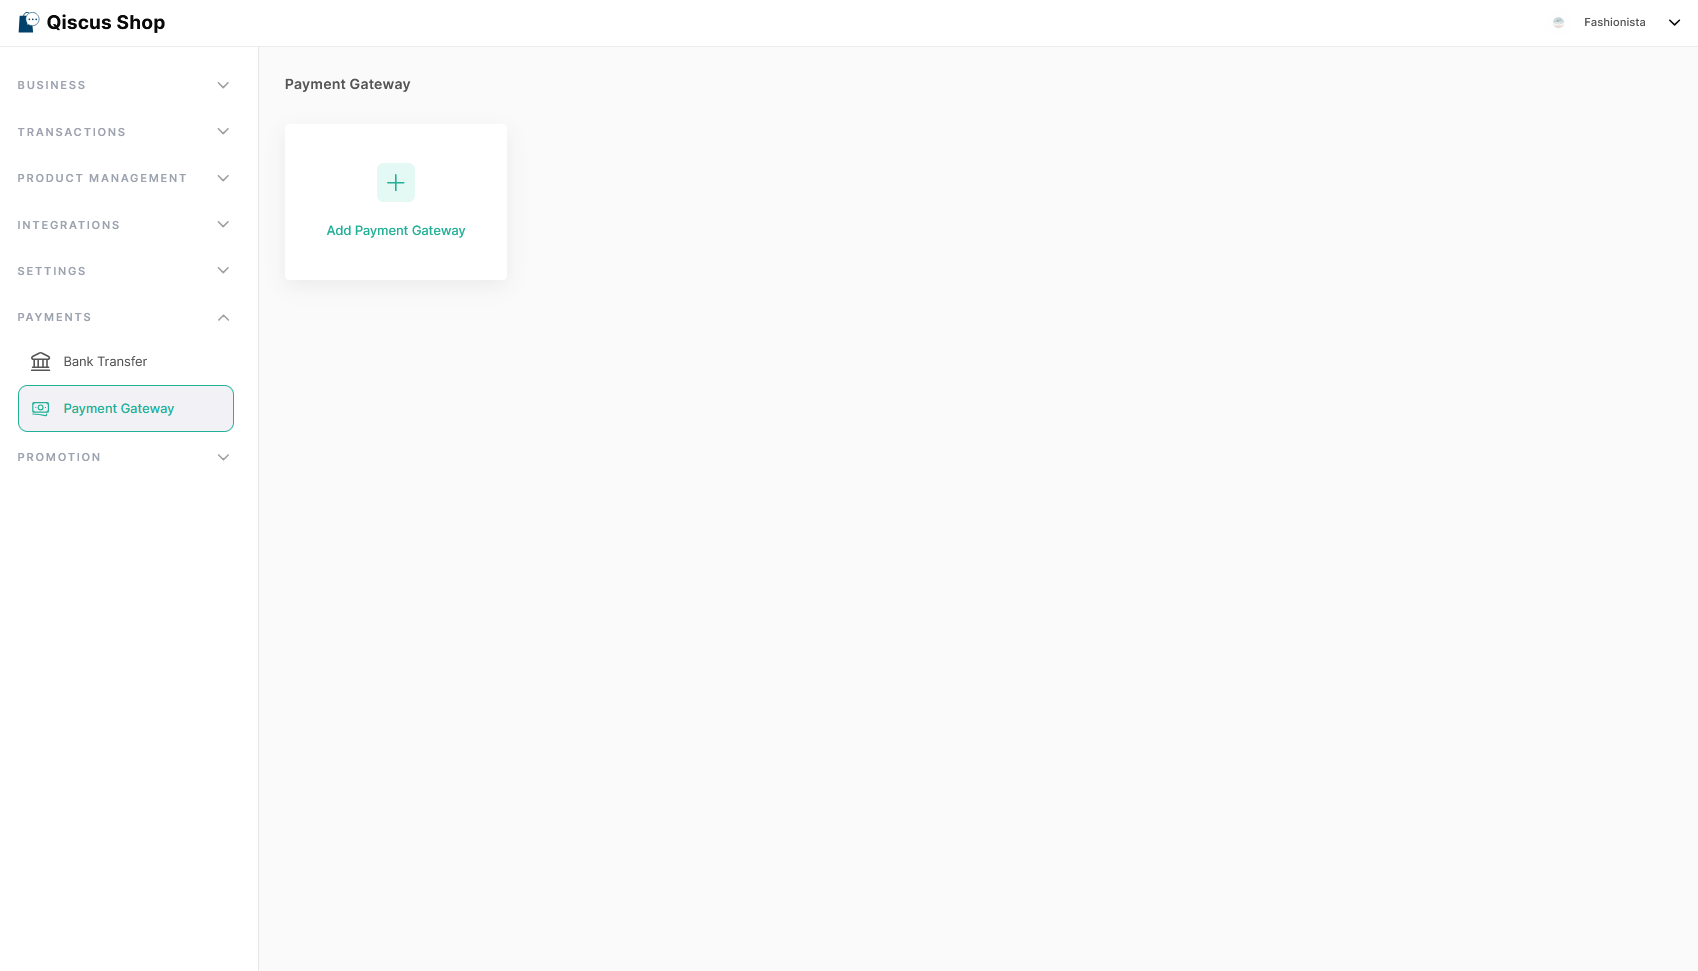
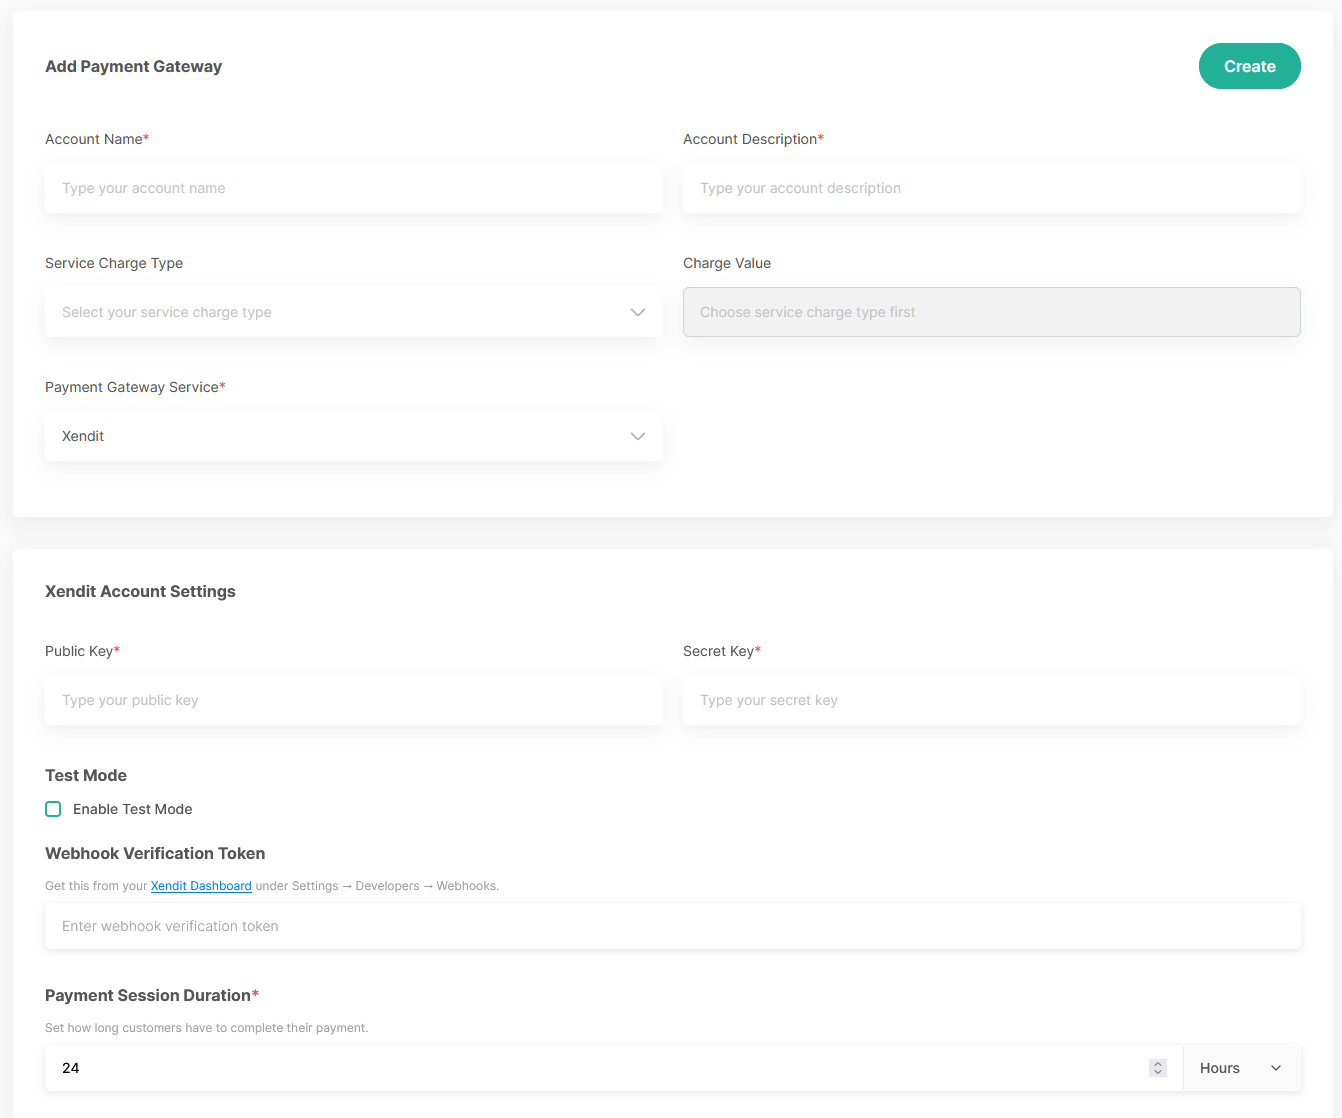
Go to Qiscus Shop Dashboard → Payment Gateway from the left sidebar.
Click Add Payment Gateway.
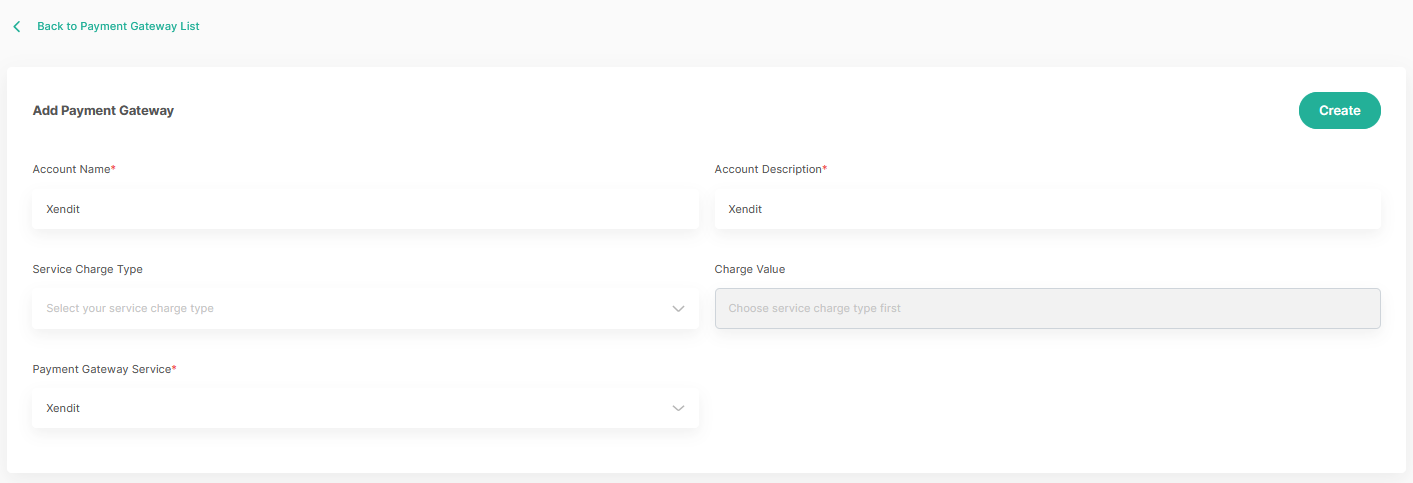
Fill in the following fields:
Field | Description |
|---|---|
Account Name | A name to identify this payment gateway (e.g. |
Account Description | A short description (e.g. |
Service Charge Type (optional) | Select whether to apply a service charge — choose |
Charge Value (optional) | Enter the charge amount based on the selected charge type |
Payment Gateway Service | Select Xendit from the dropdown |
Step 3: Configure Xendit Account Settings
Under the Xendit Account Settings section, fill in:
Field | Description |
|---|---|
Public Key | Your Xendit Public Key |
Secret Key | Your Xendit Secret Key |
Test Mode
Check Enable Test Mode if you want to run the integration in a sandbox environment before going live.
When Test Mode is enabled, make sure to use your Xendit test API keys.
Webhook Verification Token
Enter the webhook verification token used to validate that incoming webhook callbacks genuinely originate from Xendit.
Get this token from your Xendit Dashboard under Settings → Developers → Webhooks.
Payment Expiry Duration
Set how long customers have to complete their payment. This overrides the expiry set in your Xendit dashboard.
Enter a value and select a time unit:
Minutes,Hours, orDays. The default is24Hours, the minimum is 15 minutes, and the maximum is 30 days.Once the duration elapses without payment, the order is cancelled and payment reminders stop.
Step 4: Configure Payment Channels
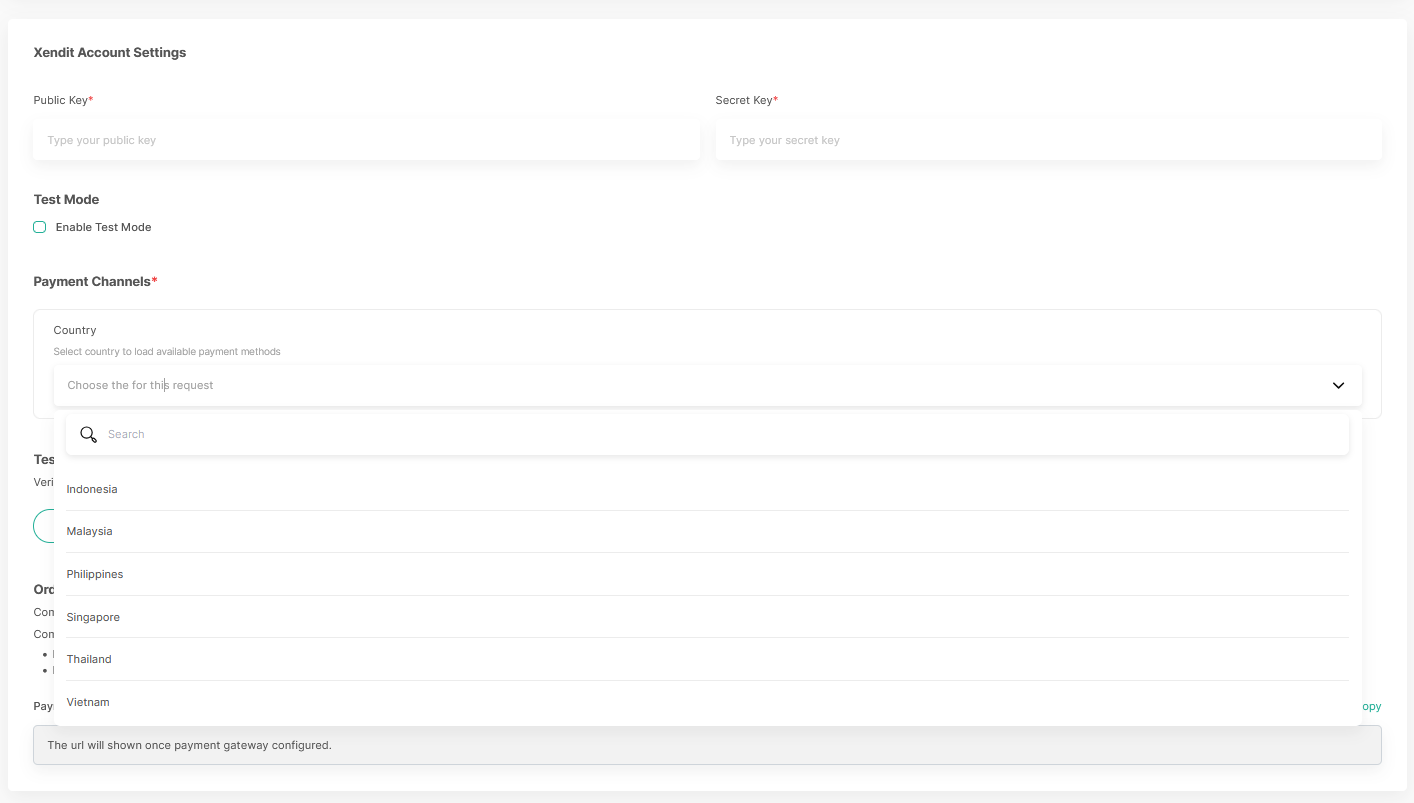
Under the Payment Channels section:
Select a Country from the dropdown.
The system will use your store's currency combined with the selected country to determine which payment methods are available.
Only payment methods supported for that country and currency combination will be shown.
Select the payment methods you want to enable for your customers.
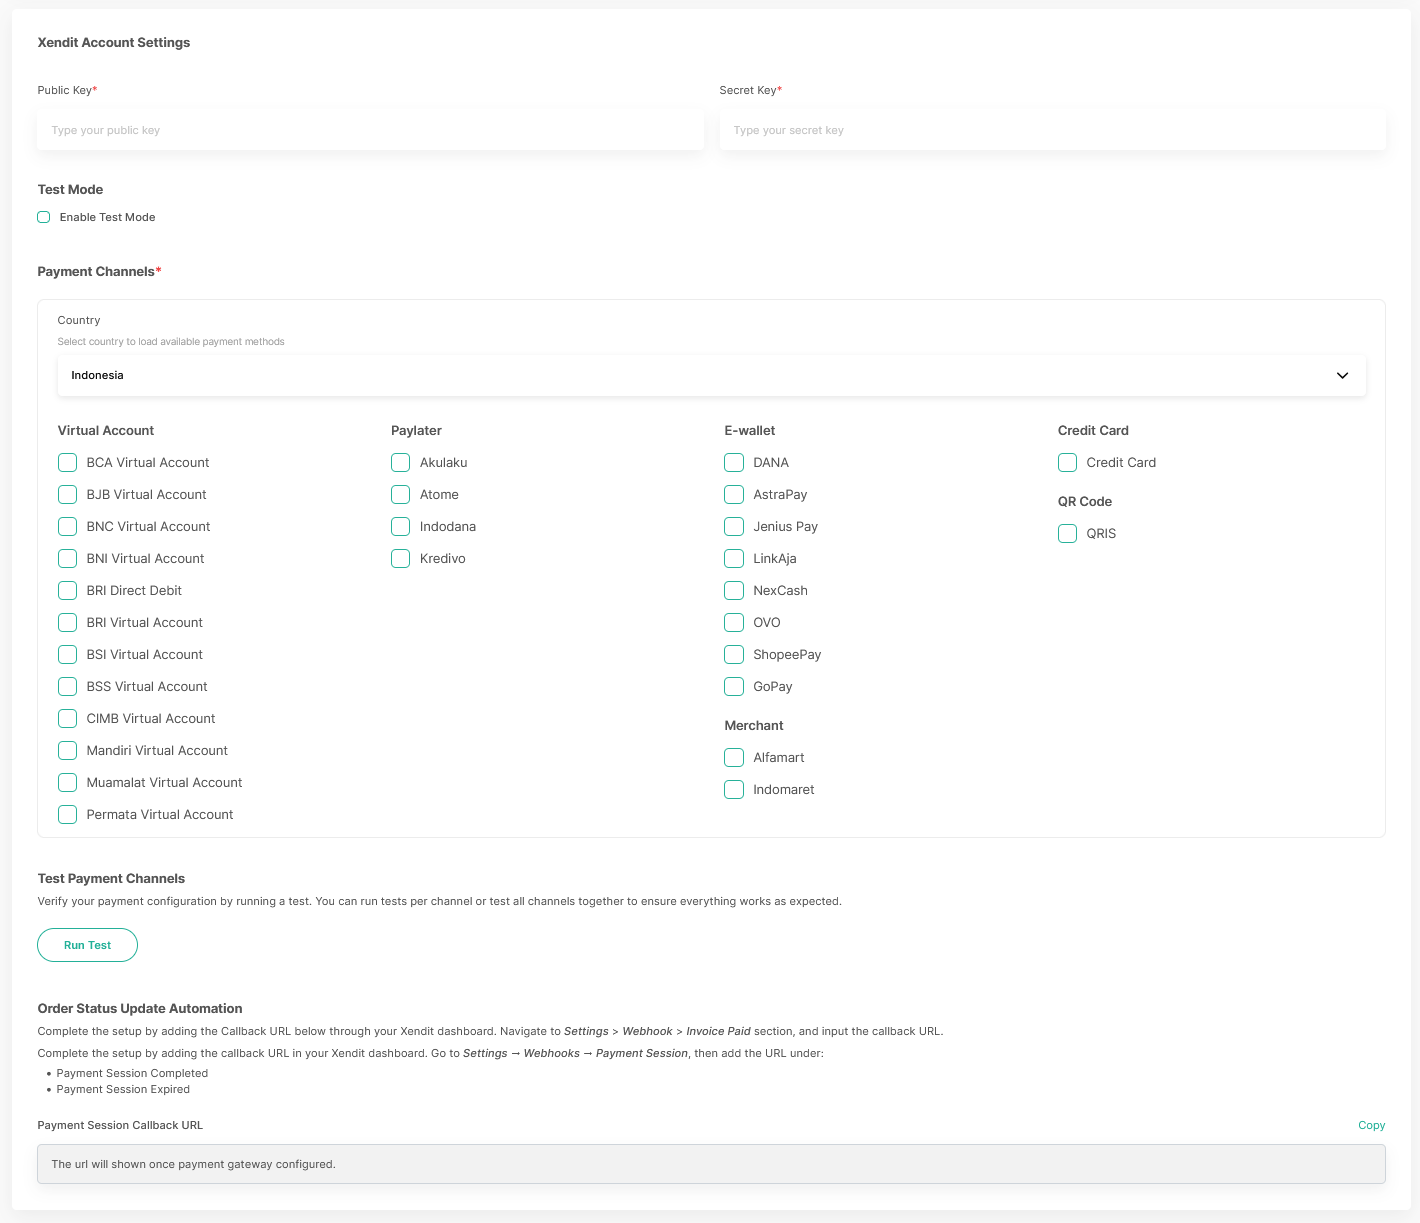
Tip: Make sure your store currency matches the currency used in your Xendit account to avoid payment method loading issues.
Step 5: Test Your Configuration
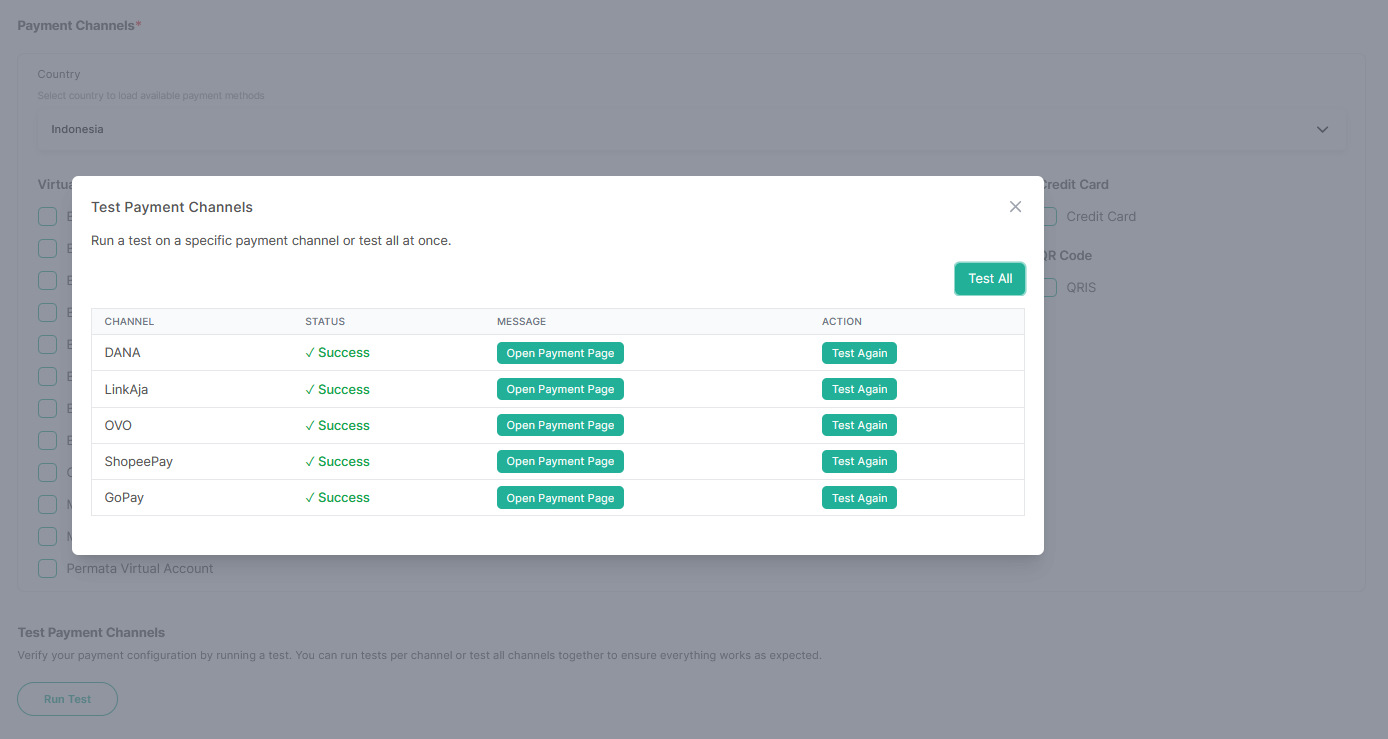
Under the Test Payment Channels section:
Click Run Test to verify your Xendit configuration.
You can test individual channels or run a full test across all configured channels.
Confirm all channels return a successful result before going live.
Step 6: Save the Configuration
Click the Create button at the top right of the page to save your Xendit Payment Gateway configuration.
Step 7: Set Up Order Status Update Automation
To automatically update your order status when a payment is completed, you need to configure the callback URL in your Xendit dashboard.
After saving, you will be redirected to the Payment Gateway list page. Find the Xendit gateway you just created and click Settings.
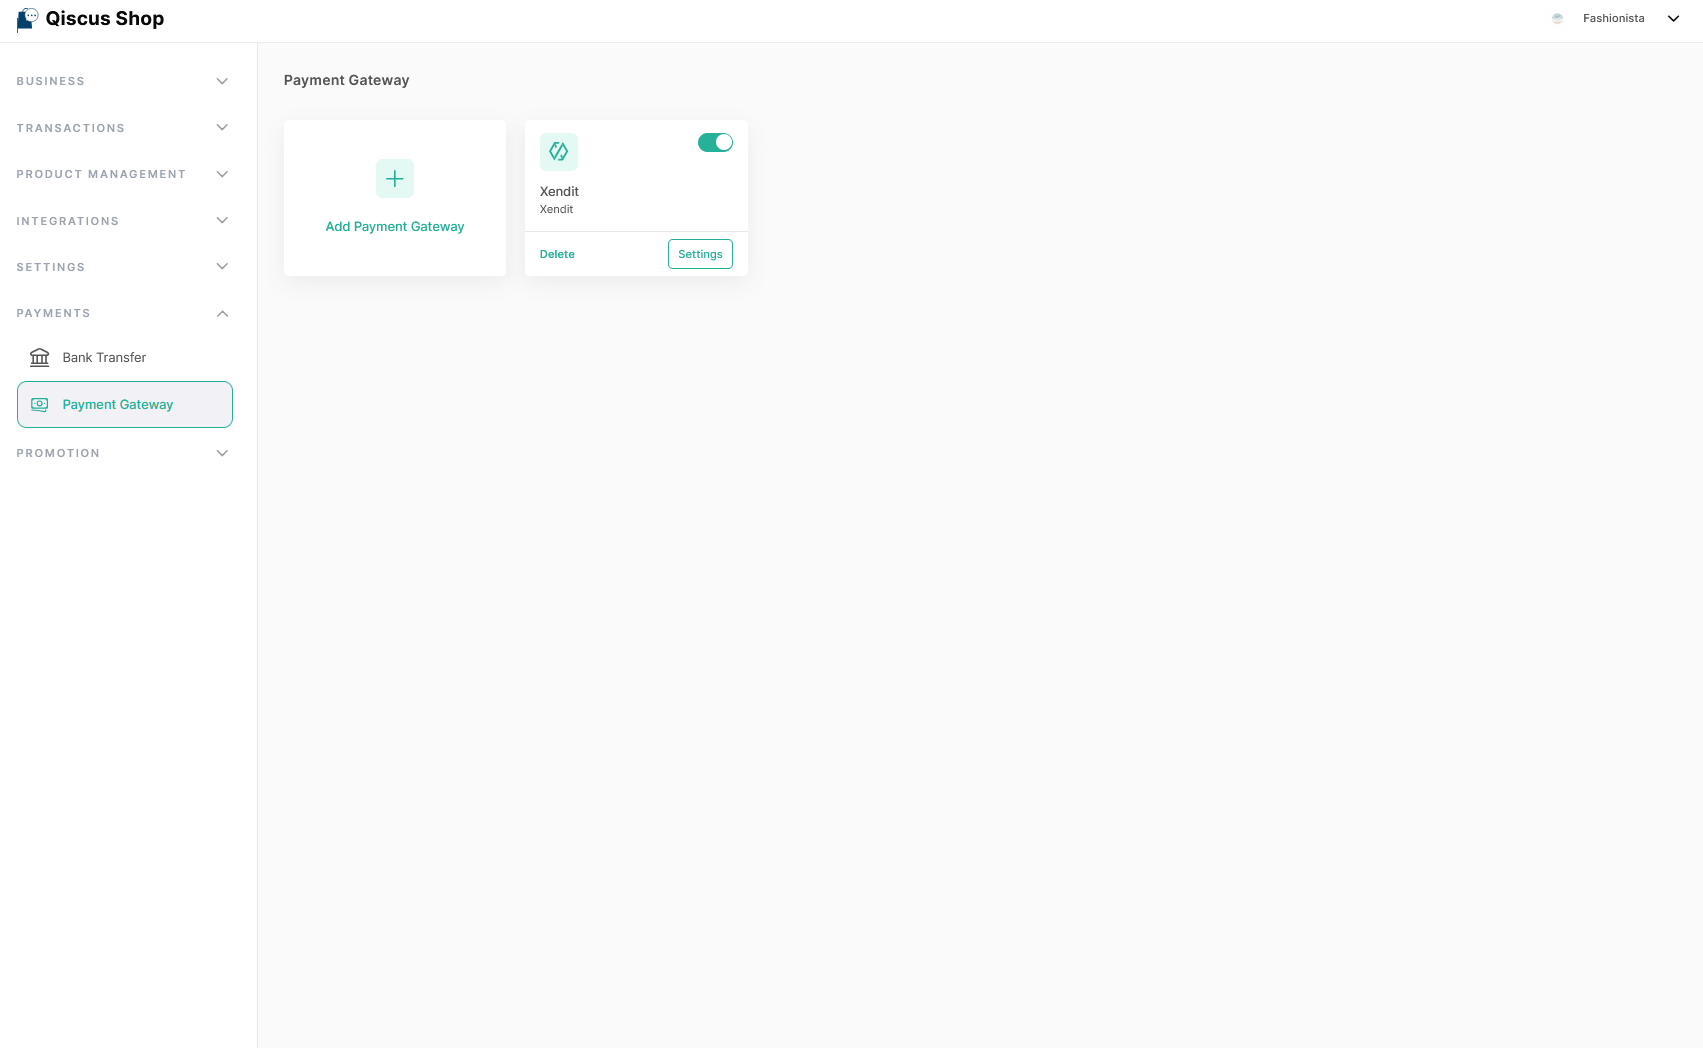
Scroll to the bottom of the page and copy the Payment Session Callback URL by clicking Copy.

Log in to your Xendit Dashboard.
Navigate to Settings → Webhooks.
Go to the Payment Session section.
Add the copied URL to the following webhook events:
Payment Session Completed
Payment Session Expired
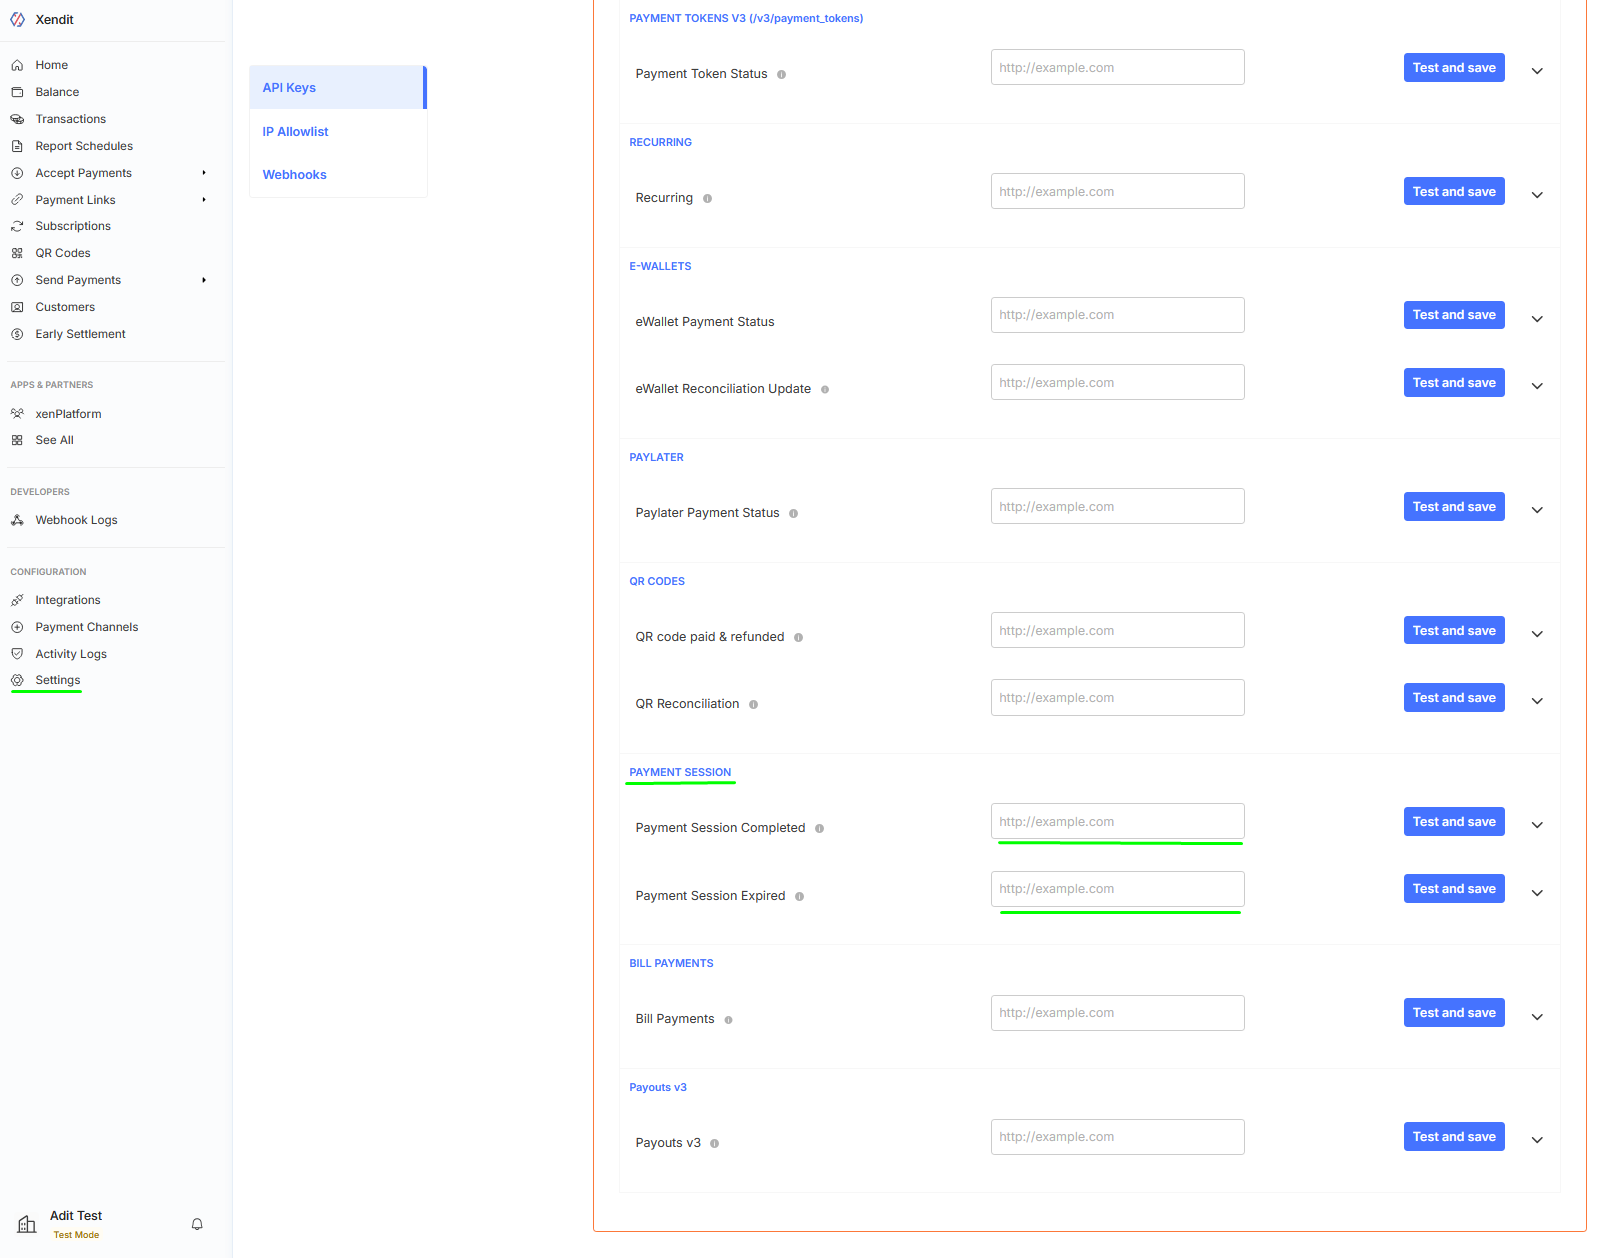
Save your webhook settings.
The callback URL is only available after the payment gateway has been saved. Complete Steps 2–6 first, then return to copy the URL.
Troubleshooting
Issue | Solution |
|---|---|
No payment methods appear | Check that your store currency matches the selected country's supported currency in Xendit |
Test fails | Verify your Public Key and Secret Key are correct and match the selected mode (Test/Live) |
Orders not updating | Confirm the callback URL is correctly added to the Payment Session section (not Invoices) in Xendit Webhooks |
Looking for a different provider? See Payments for the full list.