
The Products page is where you manage your entire catalog — viewing what's listed, adding new items, and setting up variants. This guide covers each of these in detail.
Viewing Your Product List
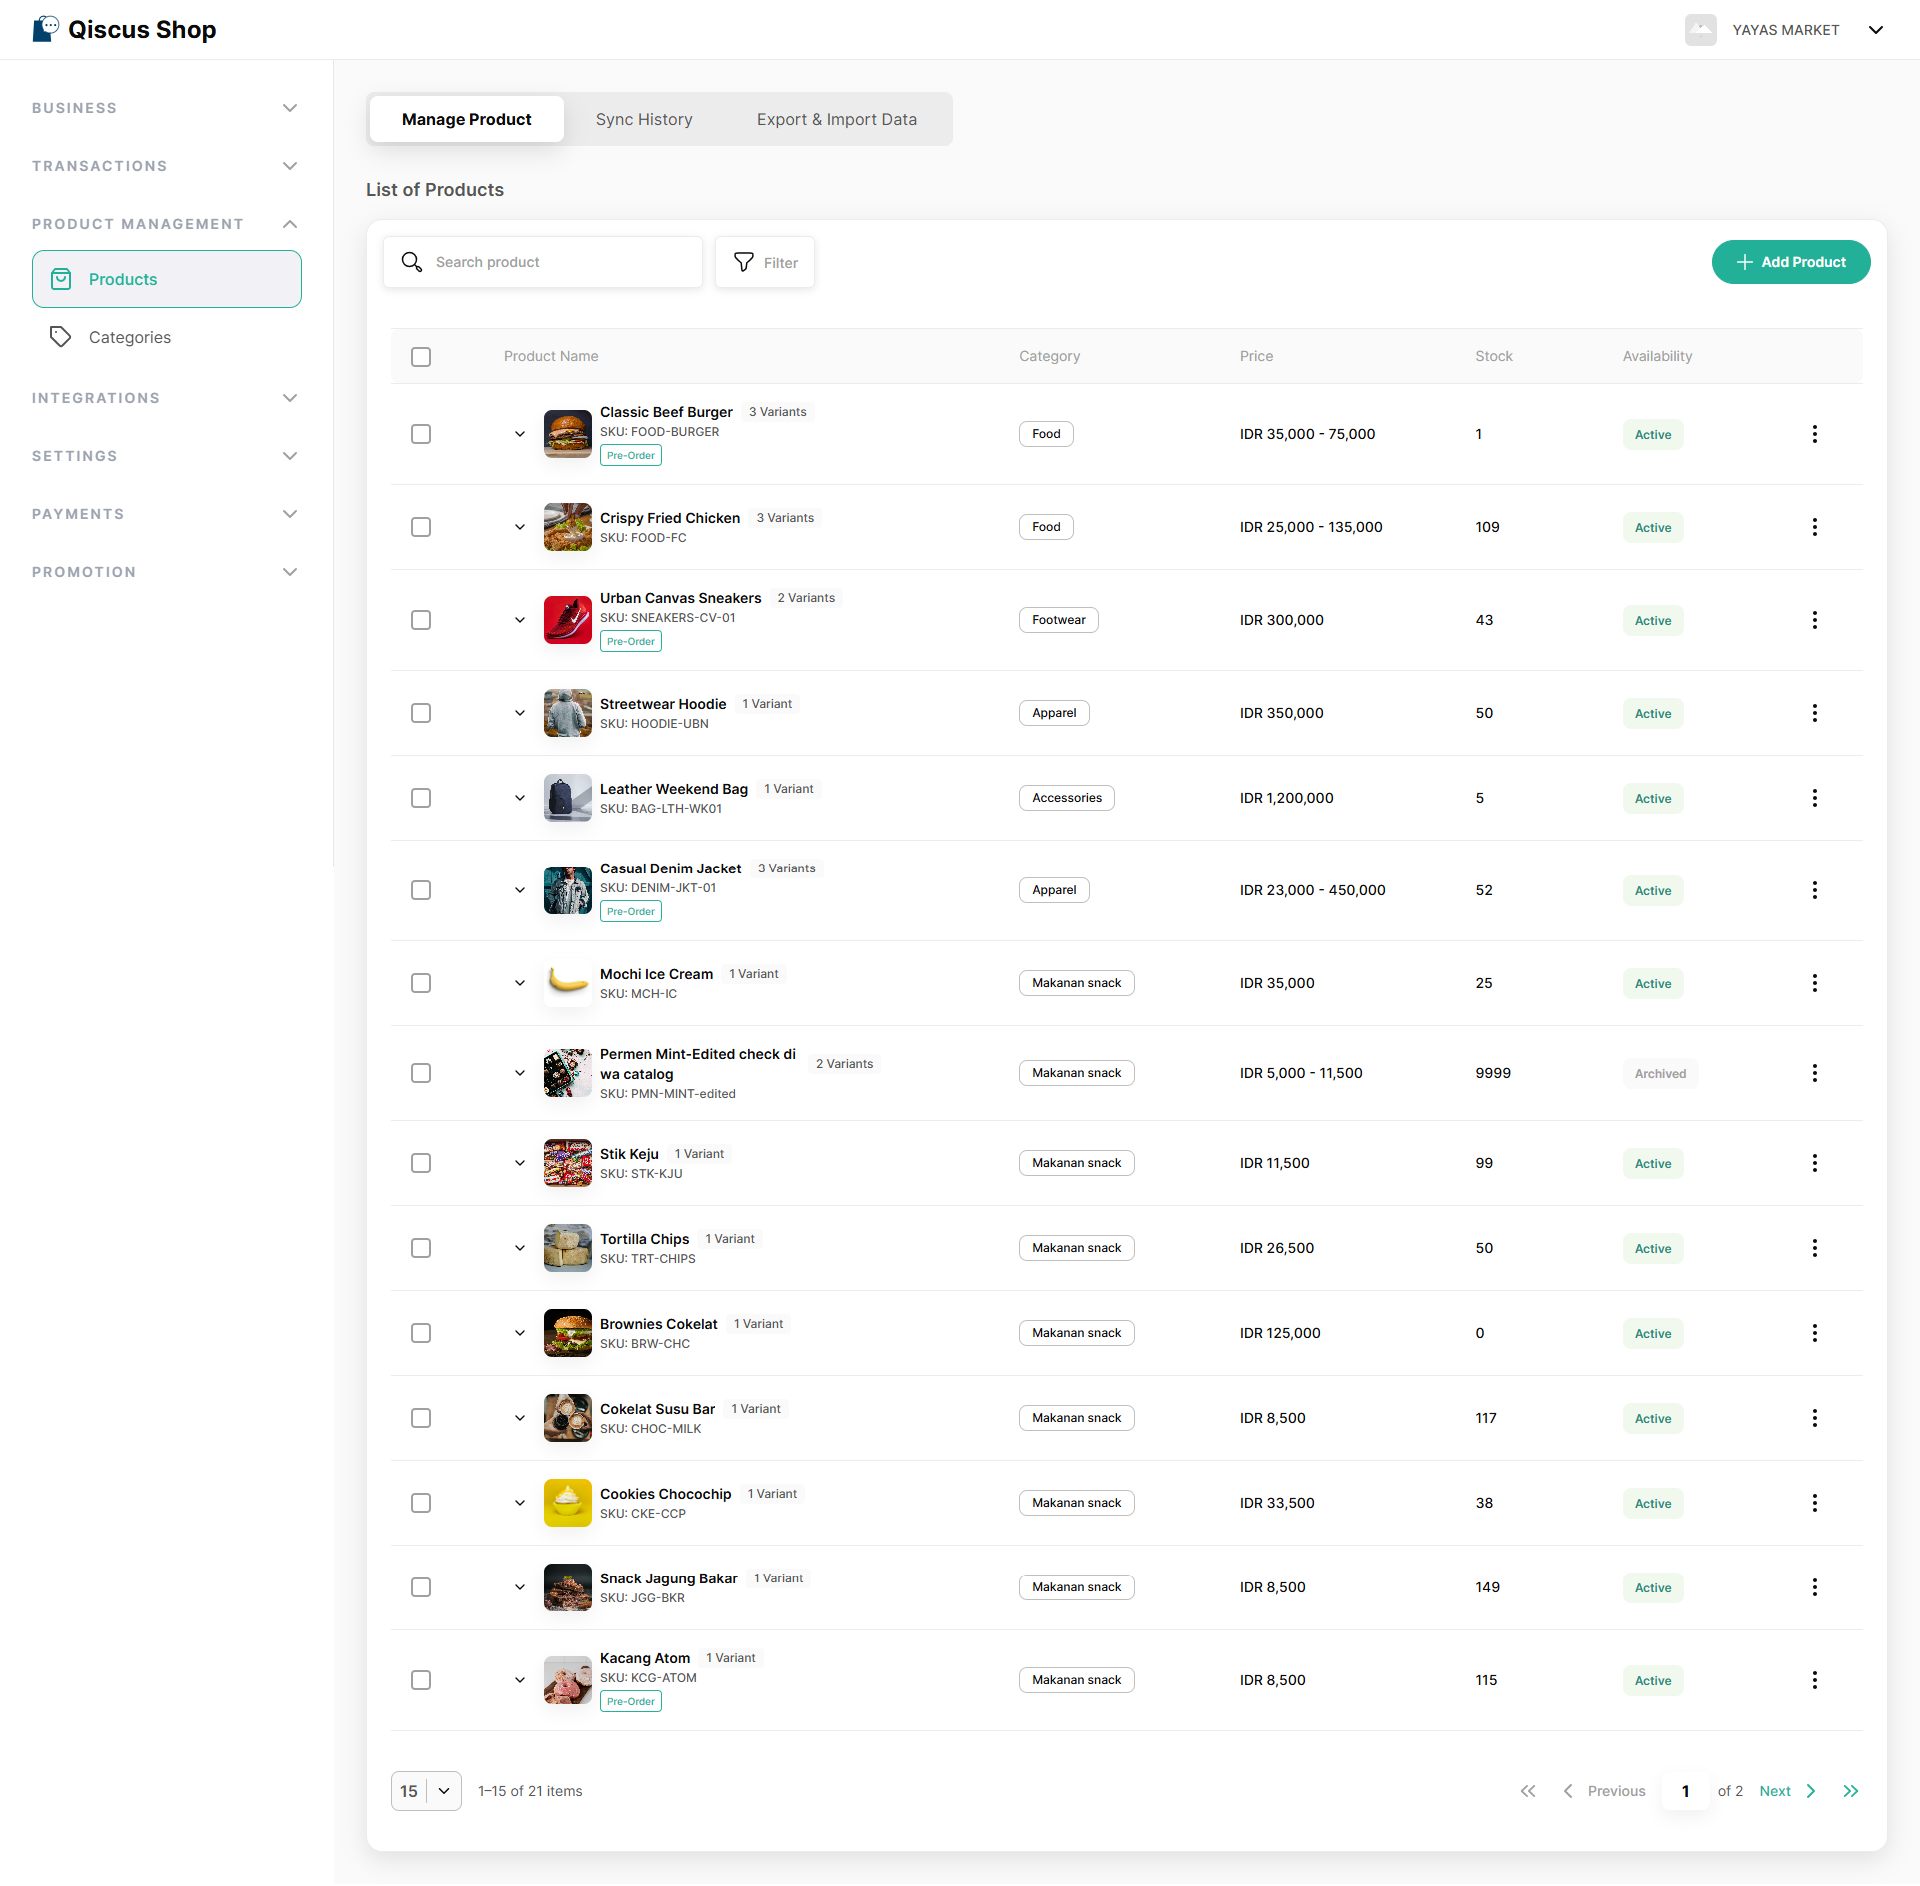
Under Product Management > Products, the List of Products page displays your full catalog: product photo, name, SKU, category, price, stock, and availability status.
Search: find a product quickly by typing its name into the search bar.
Variants: products with variants (e.g. different sizes or flavors) show an arrow (˅) next to their name — click it to view each variant's price and stock.
Availability: the status column shows whether a product is Active (visible in your store) or Archived (hidden from customers).
To add a new product, click + Add Product at the top right of the page.
Row Actions
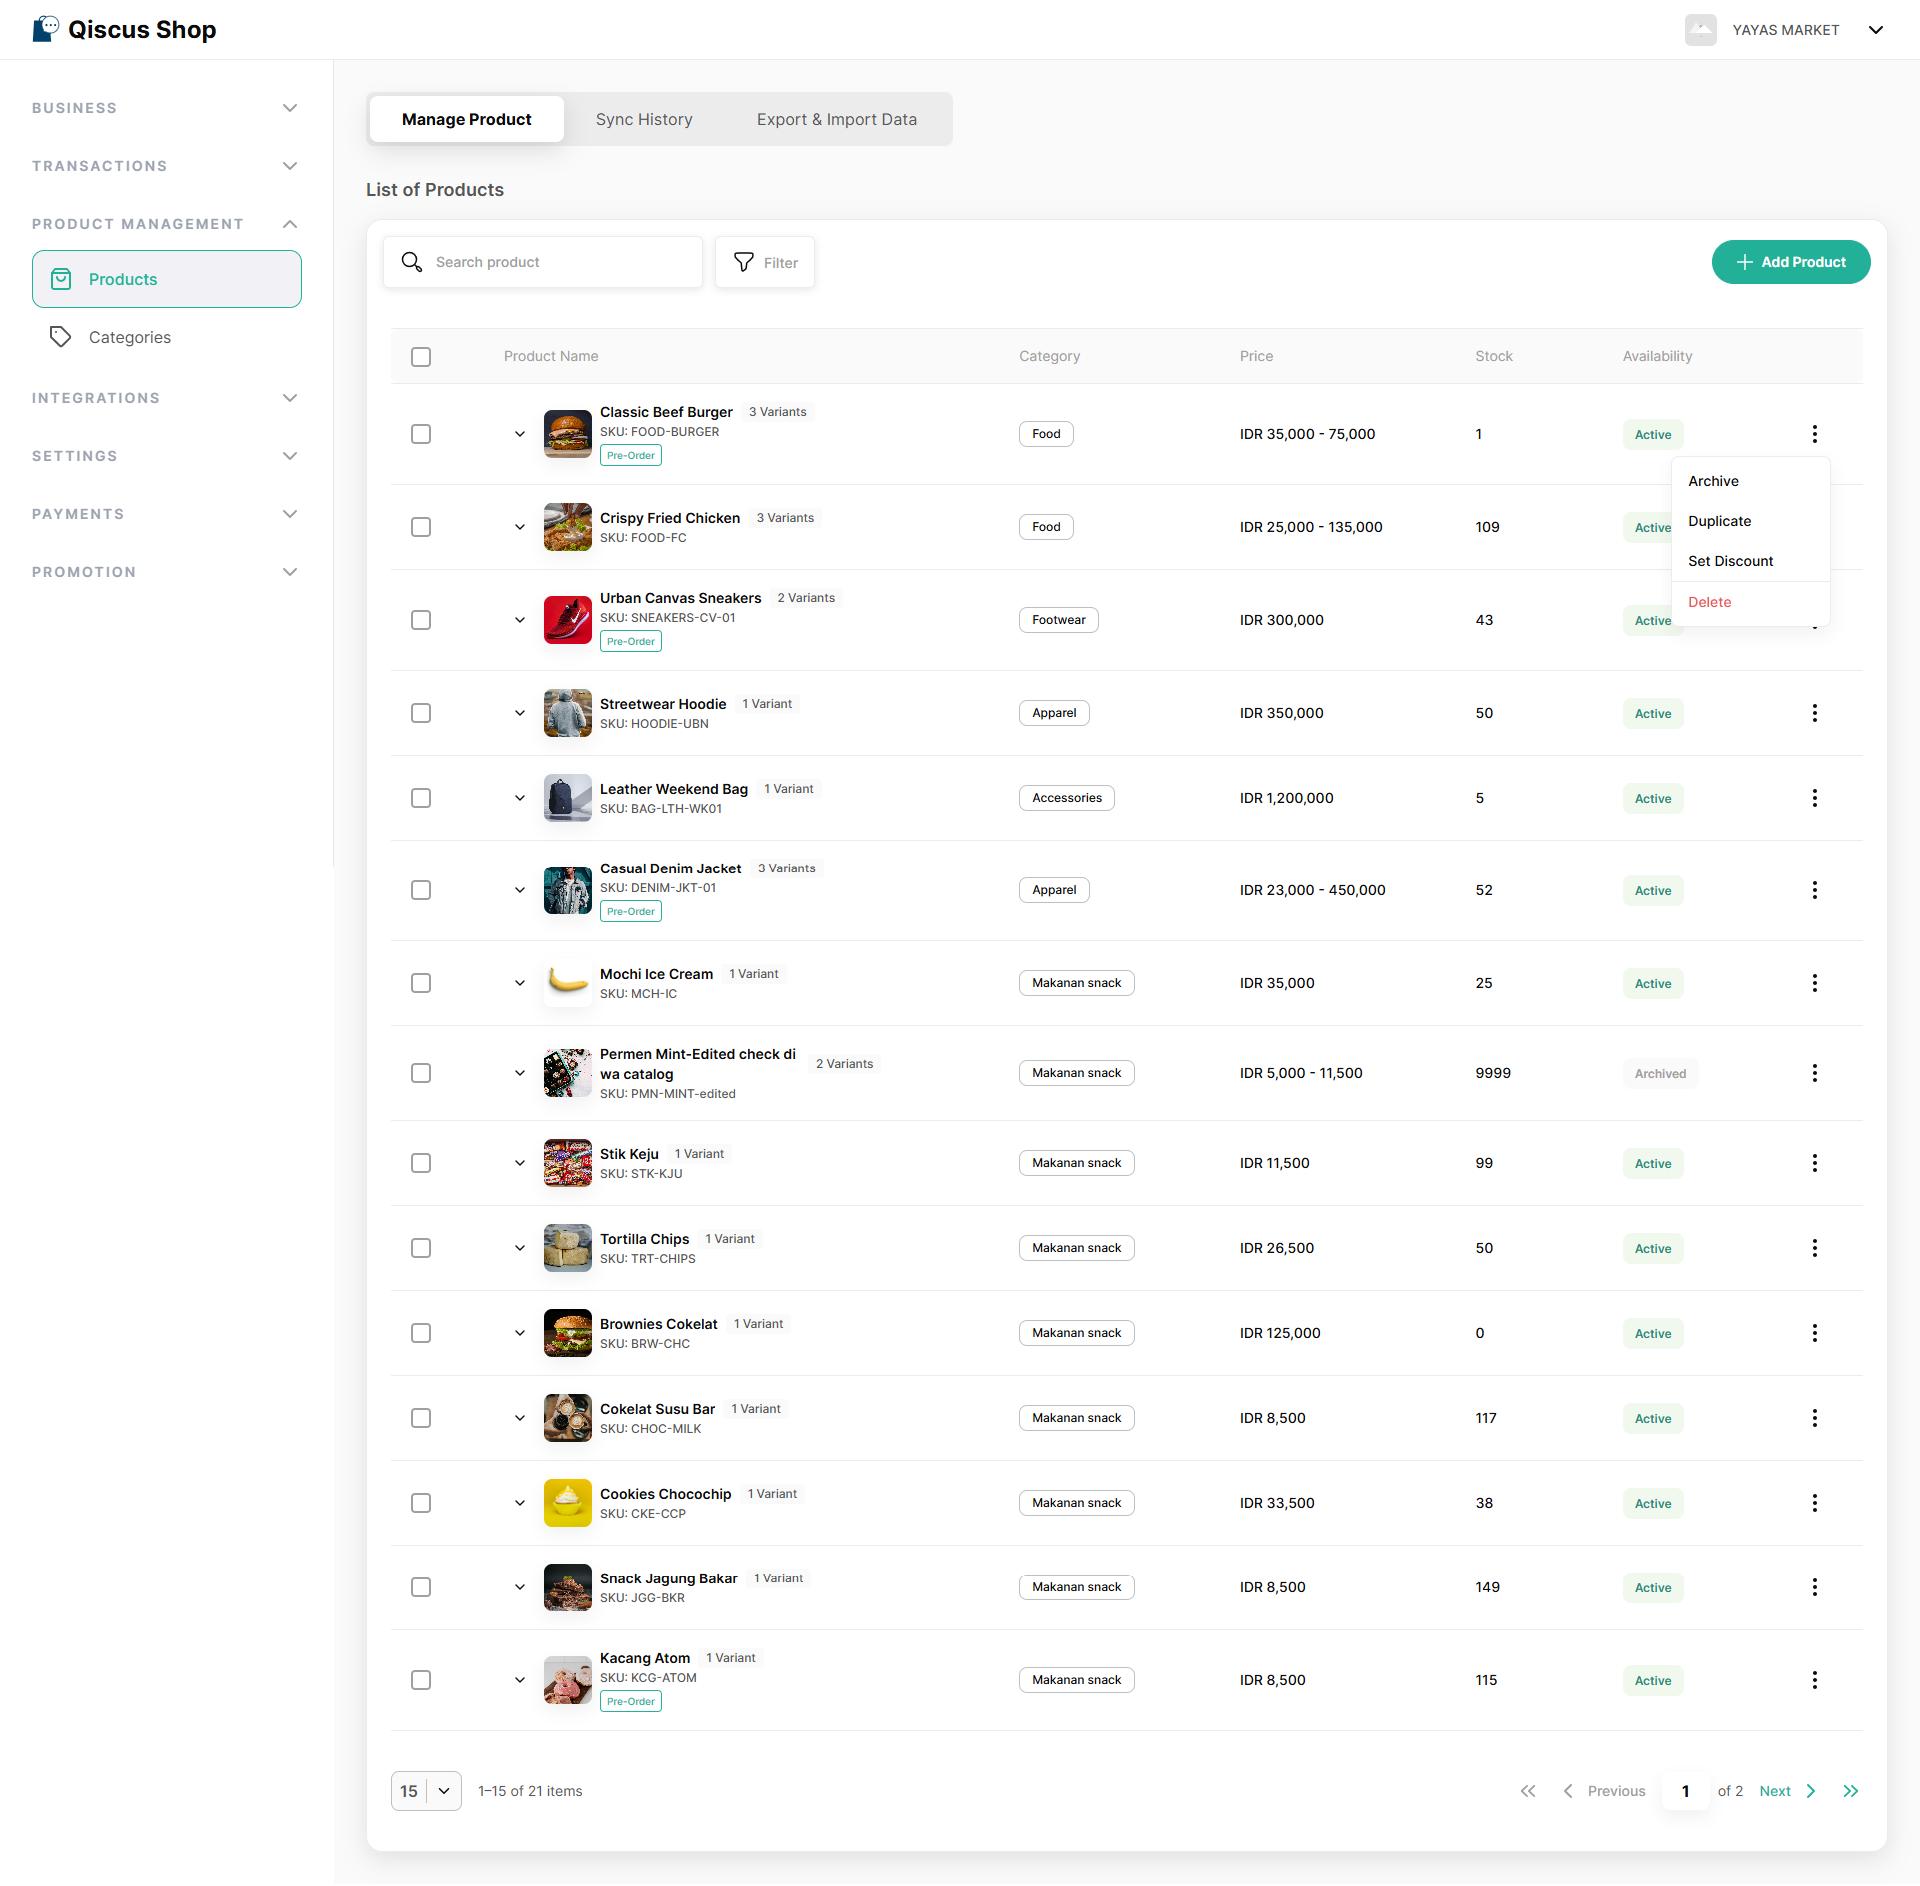
Each product row has a ⋮ menu with the following actions:
Archive: removes the product from your storefront without deleting it. It can be reinstated at any time via Activate. Because this may affect items already in a customer's cart, you'll be asked to confirm before proceeding.
Duplicate: creates a copy of the product — useful as a starting point for similar items.
Delete: permanently removes the product and its data. This action cannot be undone and may affect customers' active carts, so a confirmation is required.
Filtering Products
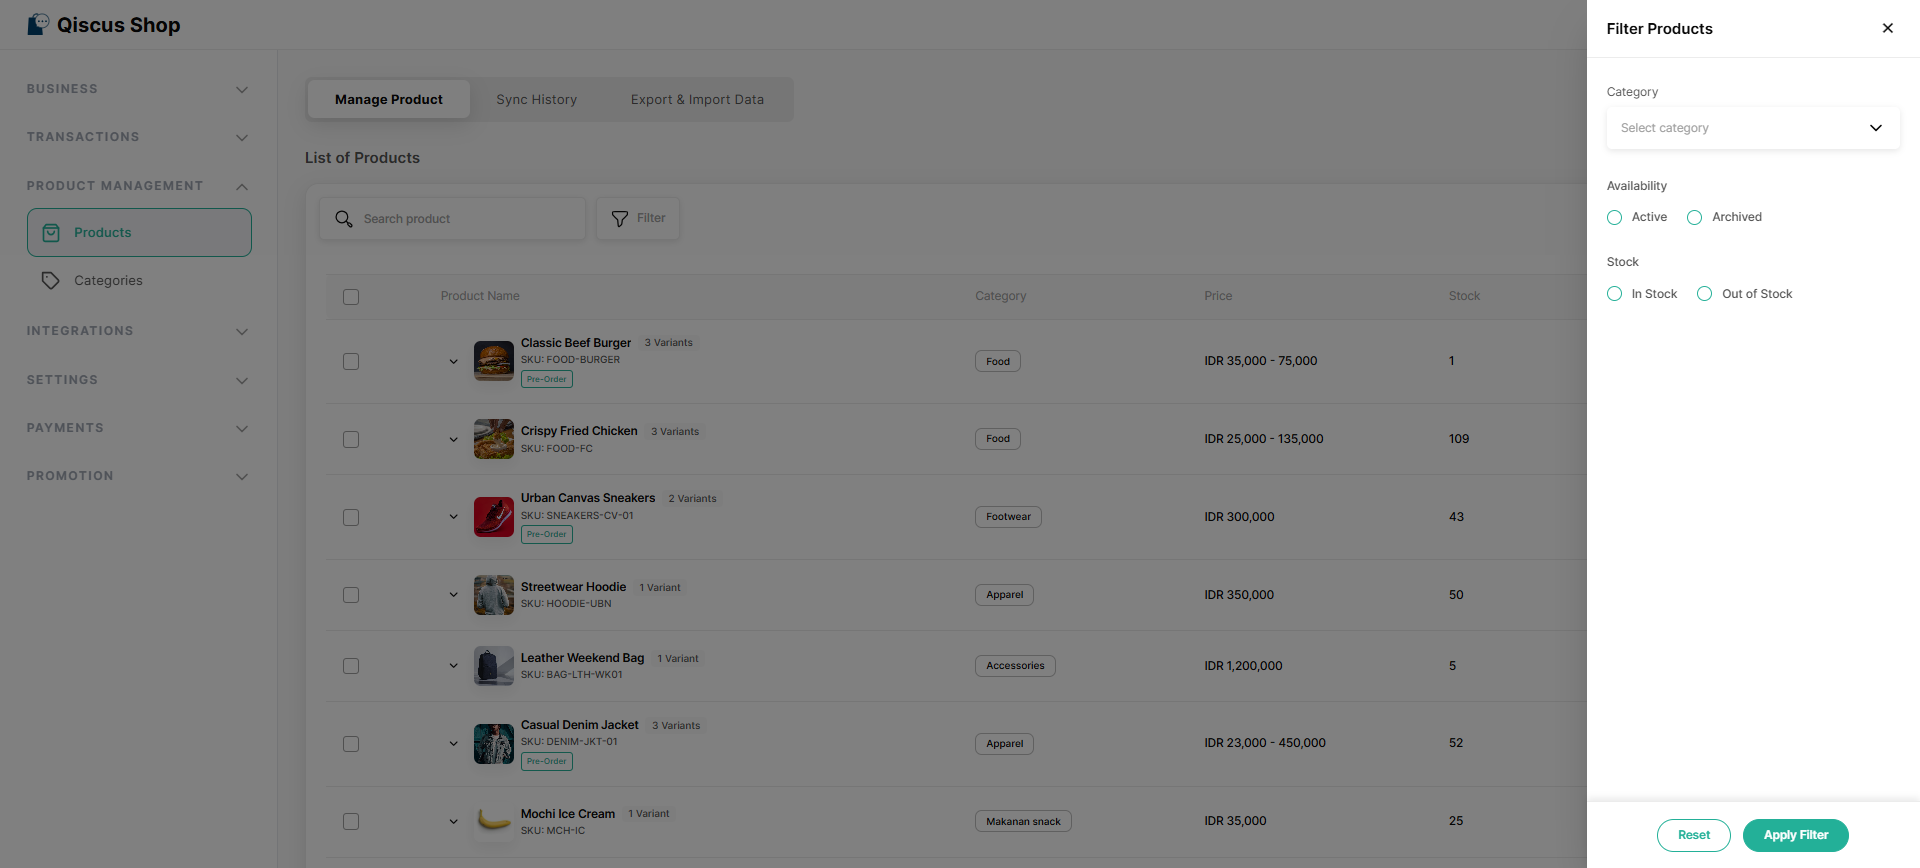
For larger catalogs, the Filter button lets you narrow the list by:
Category
Availability (Active or Archived)
Stock (In Stock or Out of Stock)
Select your criteria and click Apply Filter, or Reset to clear them.
Adding a New Product
Clicking + Add Product opens a two-step process: Product Information, followed by Product Variant.
Step 1: Product Information
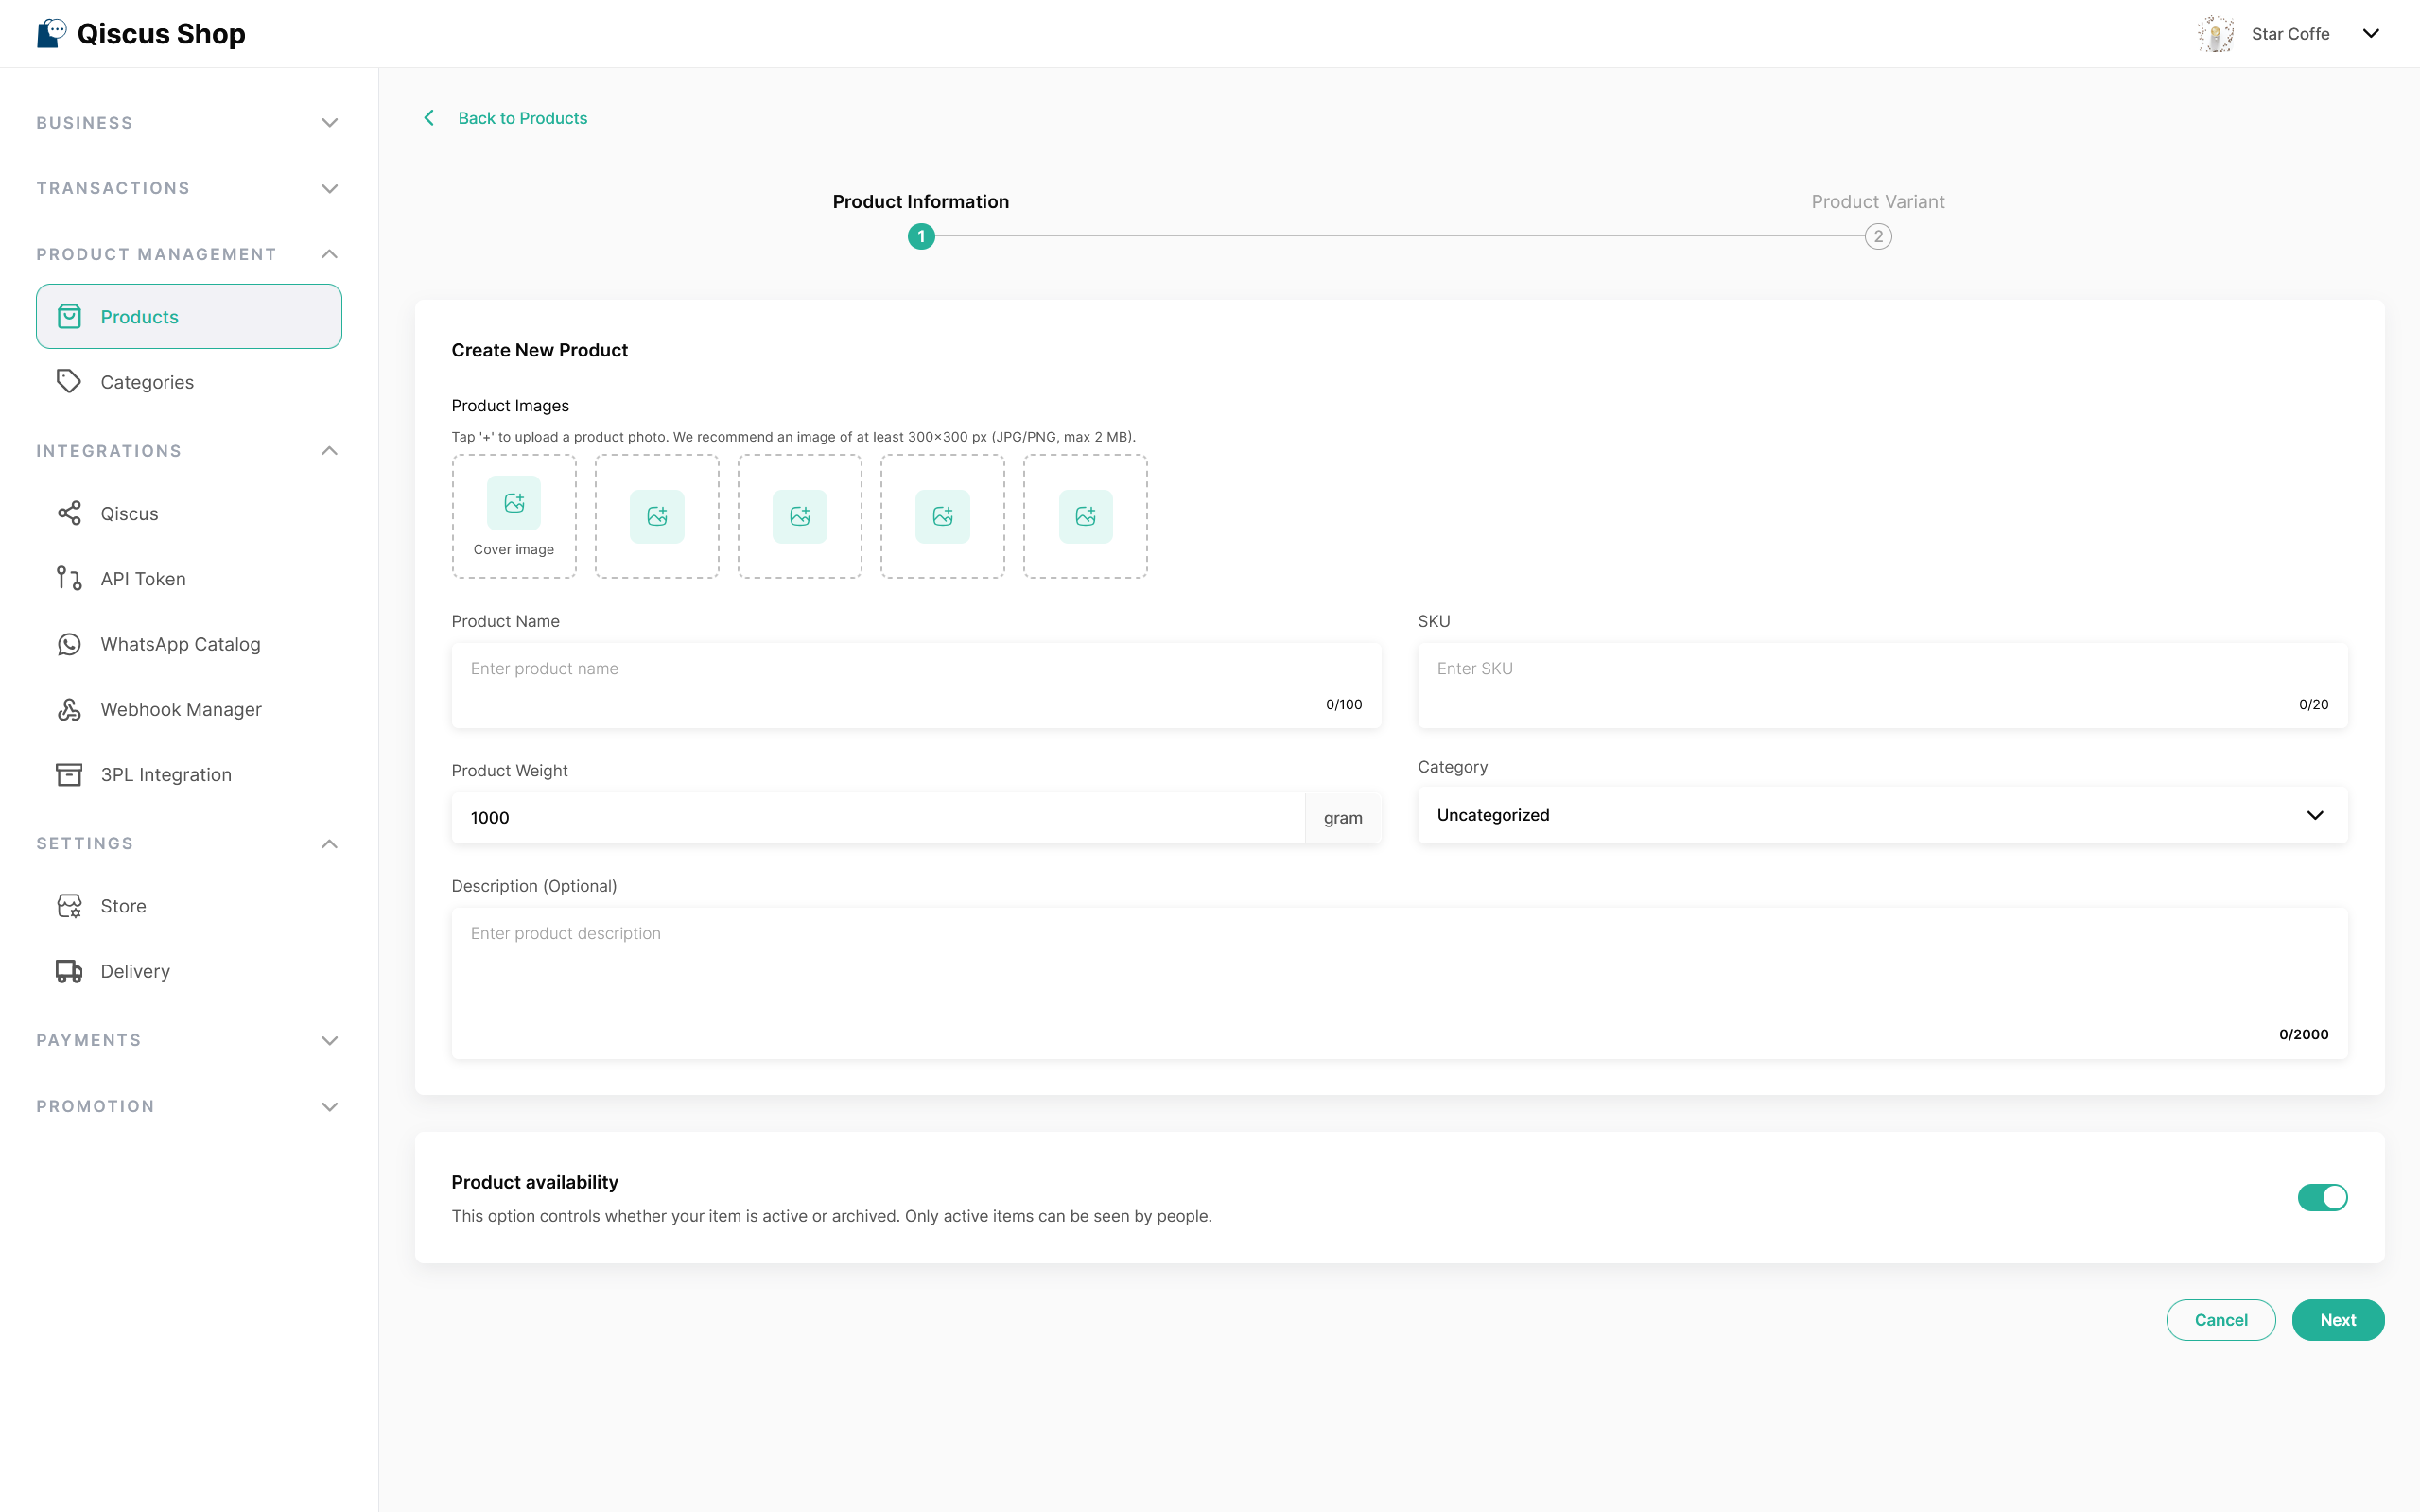
This step captures the product's core details:
Product Images: up to 5 photos (JPG/PNG, at least 300×300 px, max 2 MB each). The first image is used as the cover image and appears as the product's main photo in the catalog.
Product Name (max 100 characters): the name customers will see.
SKU (max 20 characters): a unique identifier for internal tracking.
Product Weight: entered in grams, primarily used for shipping calculations.
Category: the category the product is grouped under. Make sure the category already exists under Categories — otherwise, the product defaults to Uncategorized.
Description (optional, max 2000 characters): a brief summary of the product's key features or specifications.
Product Availability: a toggle to set the product as Active (visible and purchasable) or Archived (hidden, but can be reactivated later).
Click Next to proceed to the variant step, or Cancel to discard the product.
Step 2: Product Variant
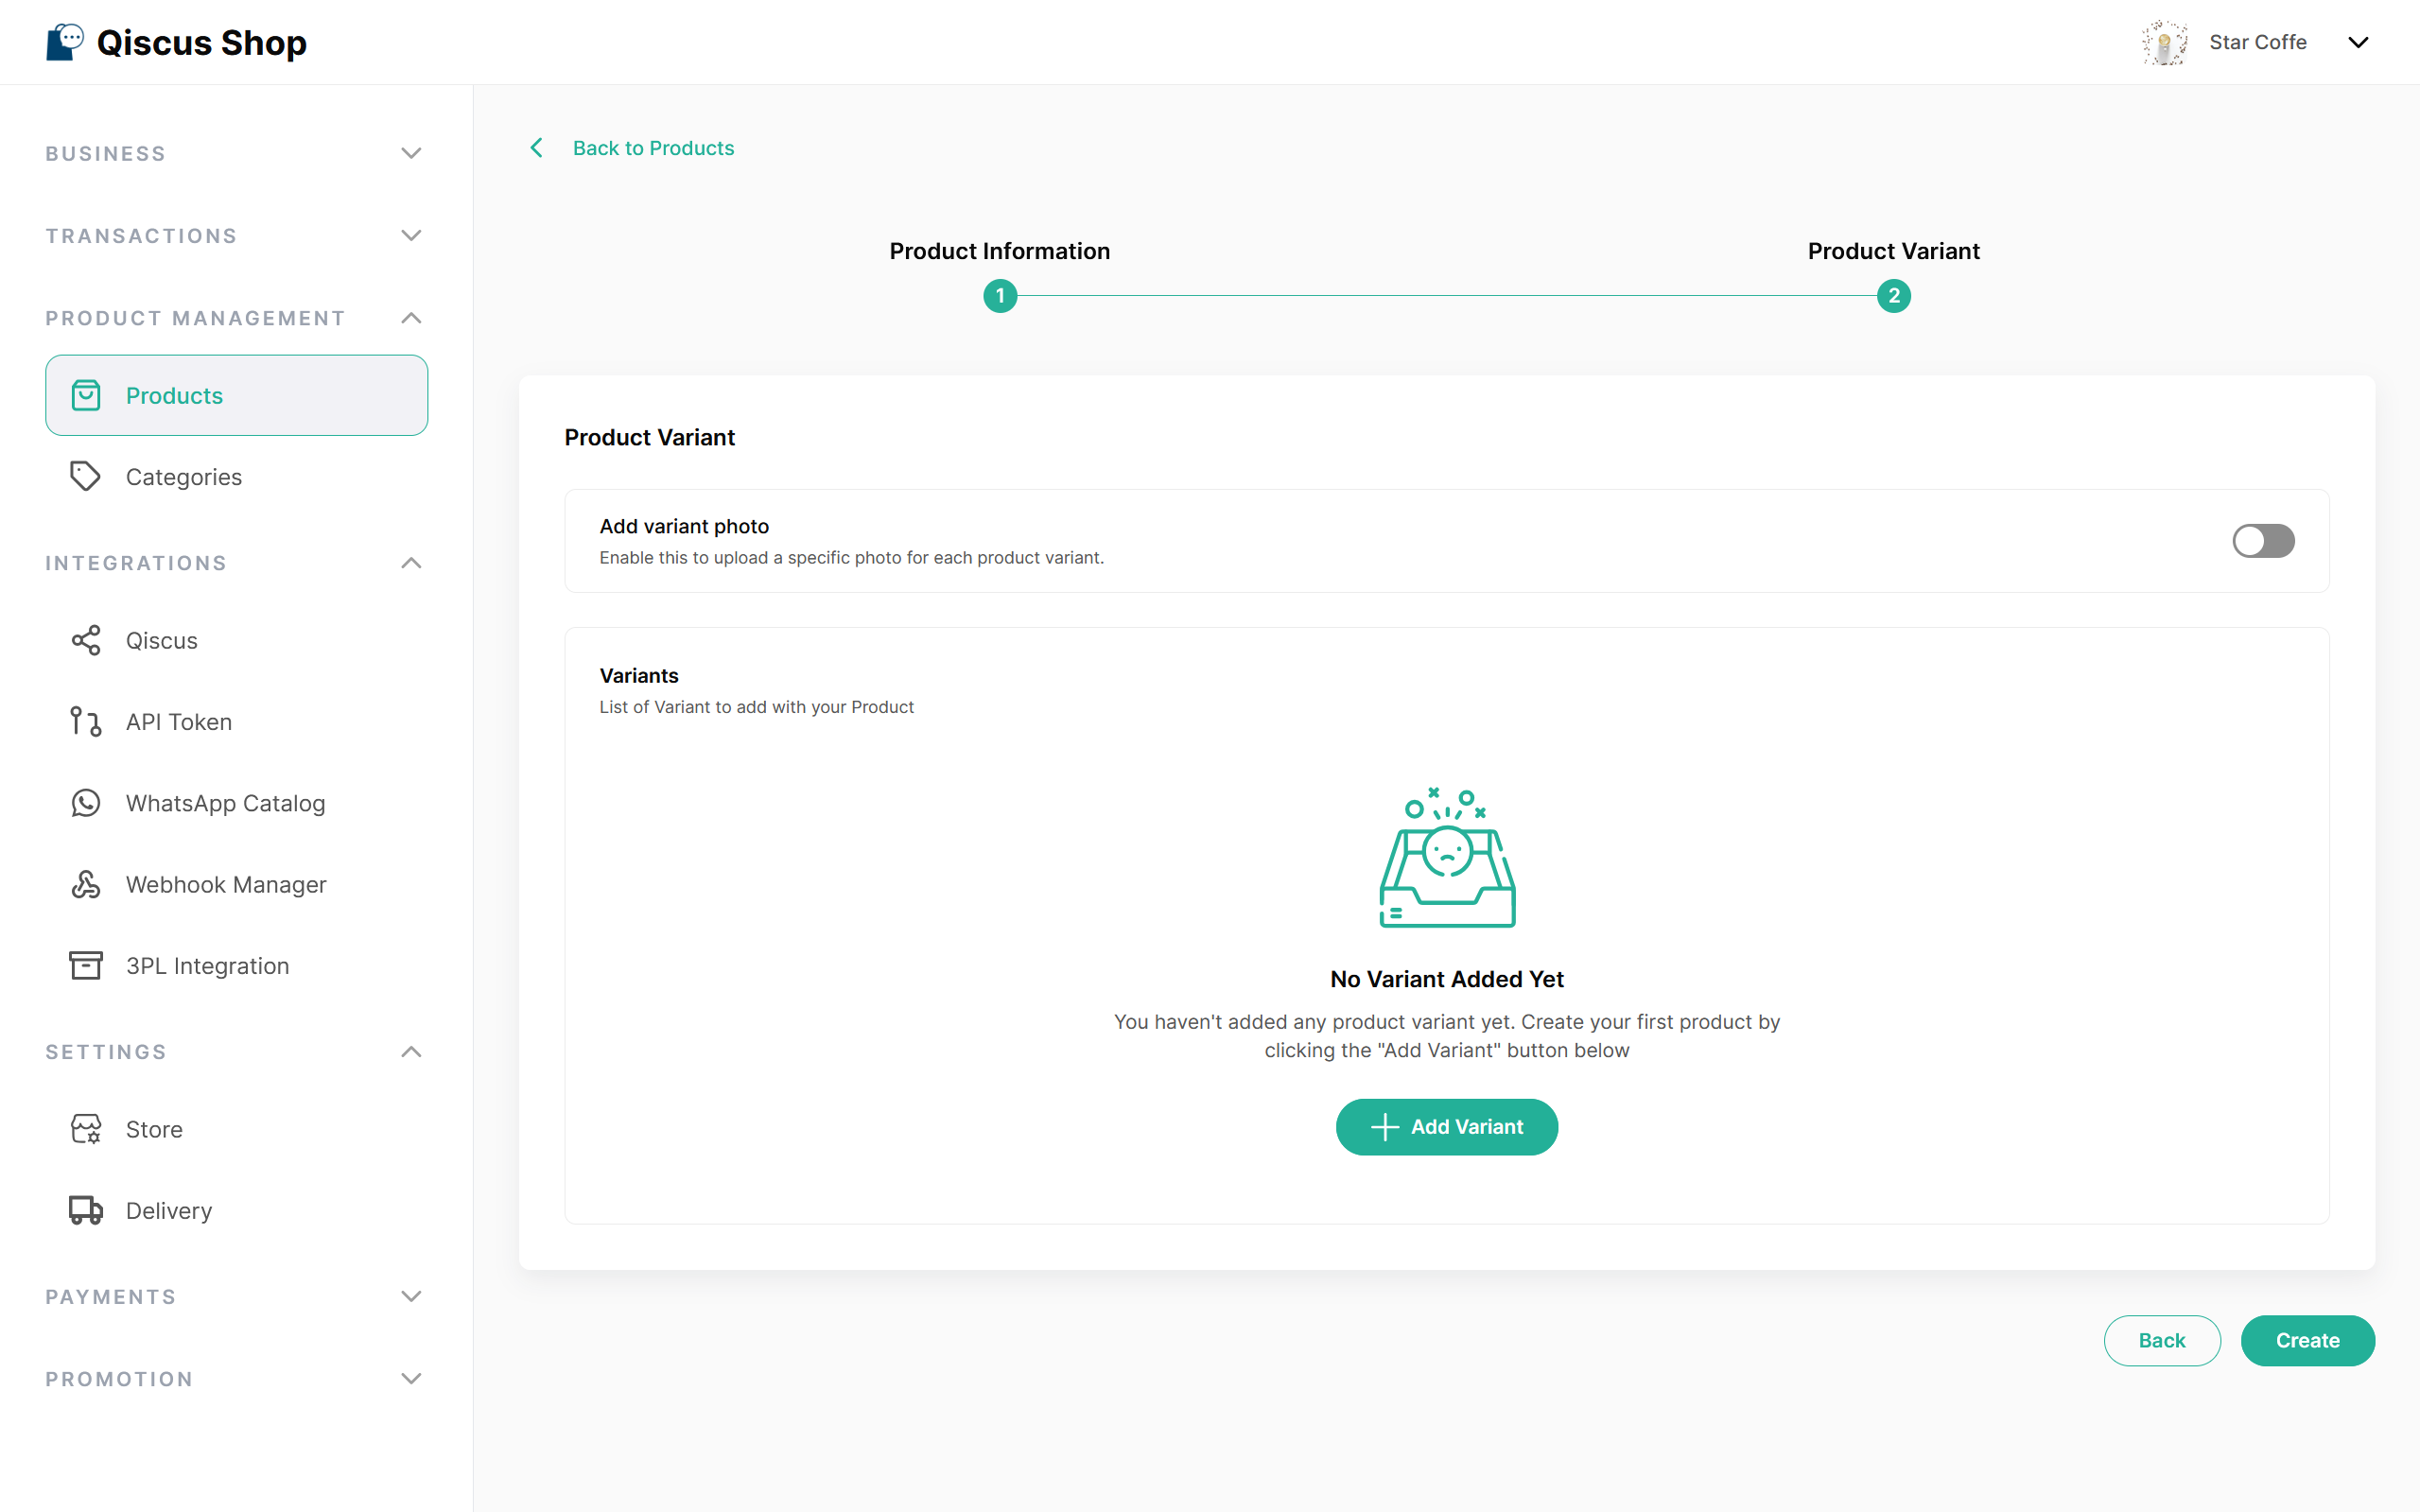
Every product requires at least one variant — this is where its price and stock are set. If the product doesn't have multiple options like different sizes or flavors, you can simply add a single variant to represent the product itself.
Enable Add variant photo if each variant should have its own image rather than sharing the product's main images. Then click + Add Variant to create one. Until at least one variant is added, this section displays a No Variant Added Yet state, and the product cannot be created.
Once at least one variant has been added, click Create to save the product, or Back to return to the previous step.
Add Variant Form
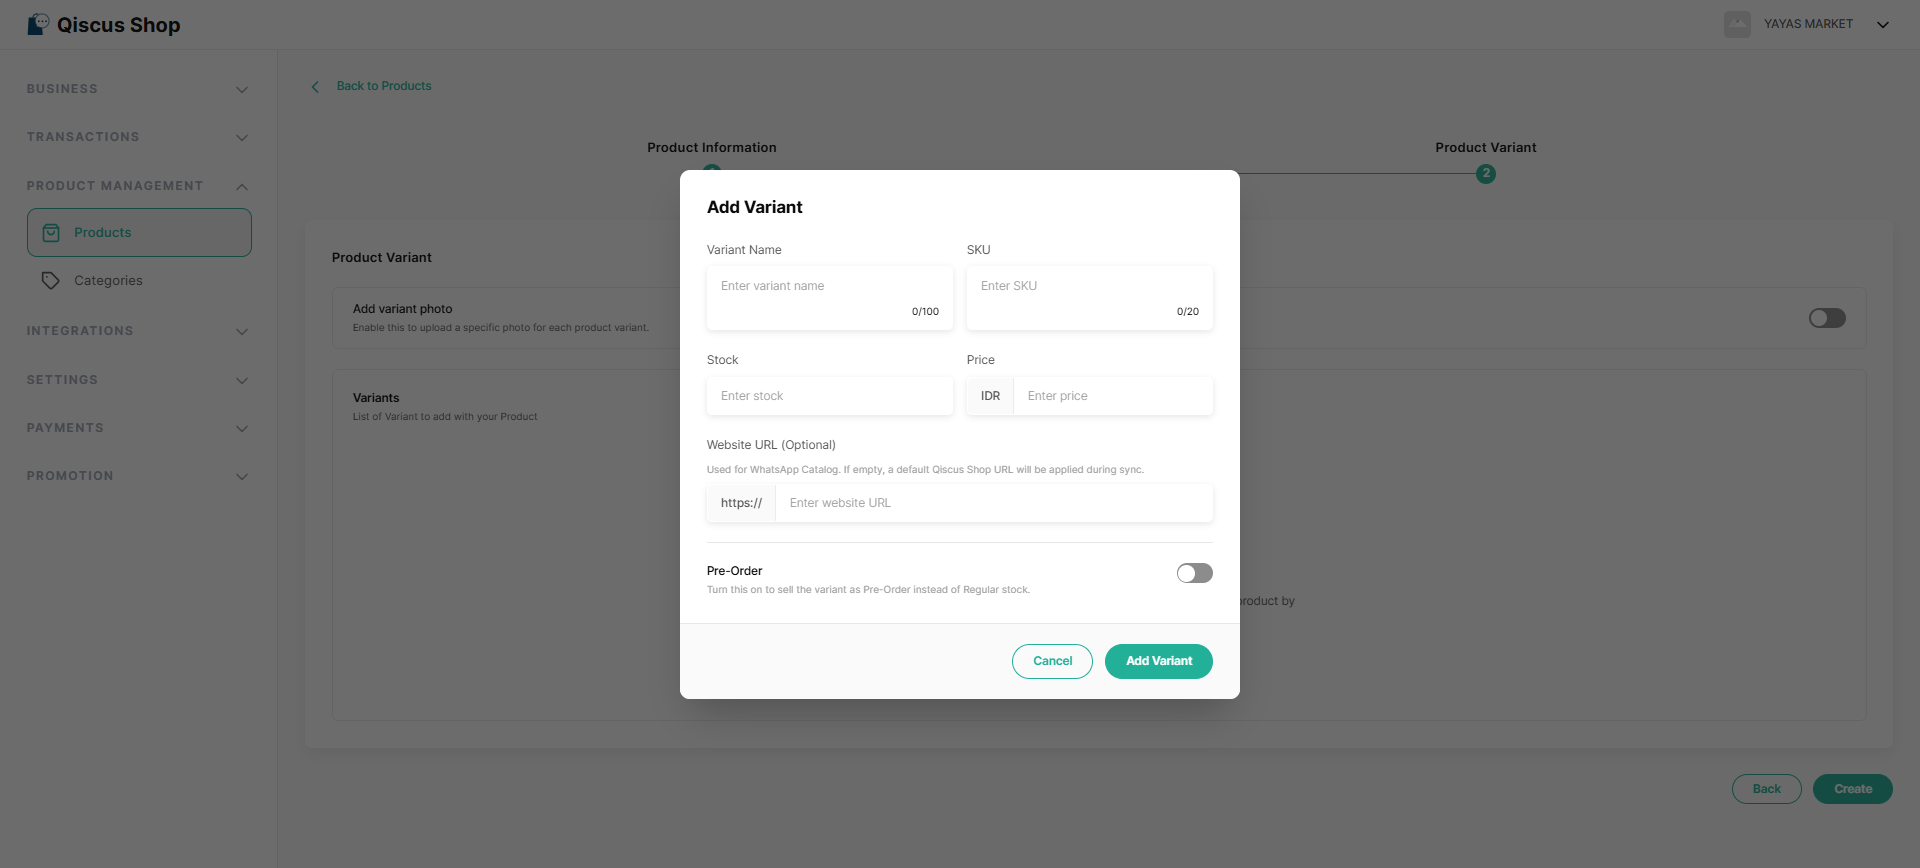
Each variant requires the following:
Variant Image: shown only if Add variant photo is enabled. Follows the same image guidelines as the product photos.
Variant Name (max 100 characters).
SKU (max 20 characters): unique to this variant.
Stock: available quantity.
Price: in IDR.
Website URL (optional): used for the WhatsApp Catalog integration. If left blank, a default Qiscus Shop URL is applied automatically during sync.
Pre-Order (toggle, off by default): "Turn this on to sell the variant as Pre-Order instead of Regular stock." Turning it on reveals a Days required to ship field (3-30 calendar days, required - saving without it shows "This field is required"). Turning it back off hides the field and returns the variant to Regular. Stock is shared between Regular and Pre-Order - there's no separate Pre-Order stock bucket. See Pre-Order for full details, including what happens when a Pre-Order variant is also in an active promotion.
Click Add Variant to save it, or Cancel to discard the entry.
Managing Added Variants
What each row shows
The variant list shows each variant's image, name, SKU, price, stock, and website URL. A variant set as Pre-Order also shows a Pre-Order badge, so you can tell at a glance which variants are Pre-Order without opening each one. See Pre-Order.
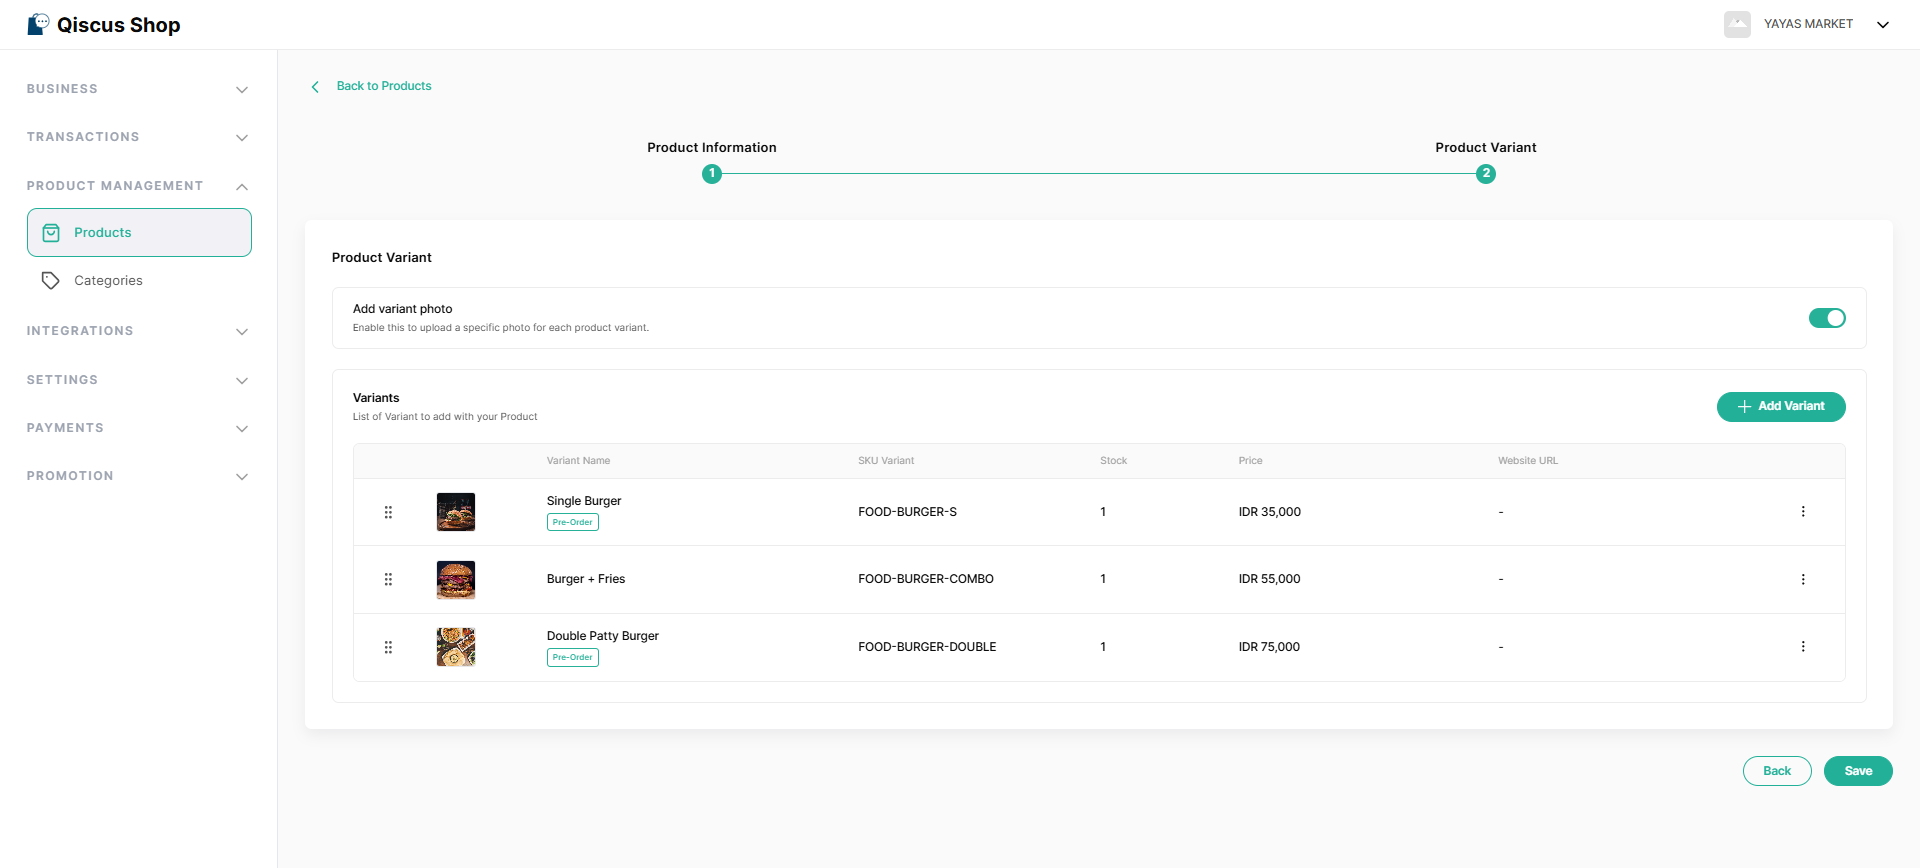
Added variants are listed in a table showing their name, SKU, stock, price, and website URL. Use the drag handle (⠿) on the left of each row to reorder them.
The ⋮ menu on each variant row provides two options:
Edit Variant: opens the same form used to create the variant, pre-filled with its current data. Click Save to apply changes.
Delete: removes the variant from the product.
While one of a product's variants is part of an upcoming or ongoing Flash Sale or Product Discount, its price, SKU, name, and attribute/variant structure can't be changed, and it can't be deleted. You can still update its stock, image, website URL, and availability. The product itself also can't be deleted while any of its variants are in an active promotion — remove the variant from the promotion first, or wait for the promotion to end or be cancelled, to lift the restriction.