Here's how to integrate with Xendit Payment Gateway:
Open the Qiscus Shop Dashboard.
Click on 'Payment Gateway' under the Payment menu group.
Click 'Add Payment Gateway'.
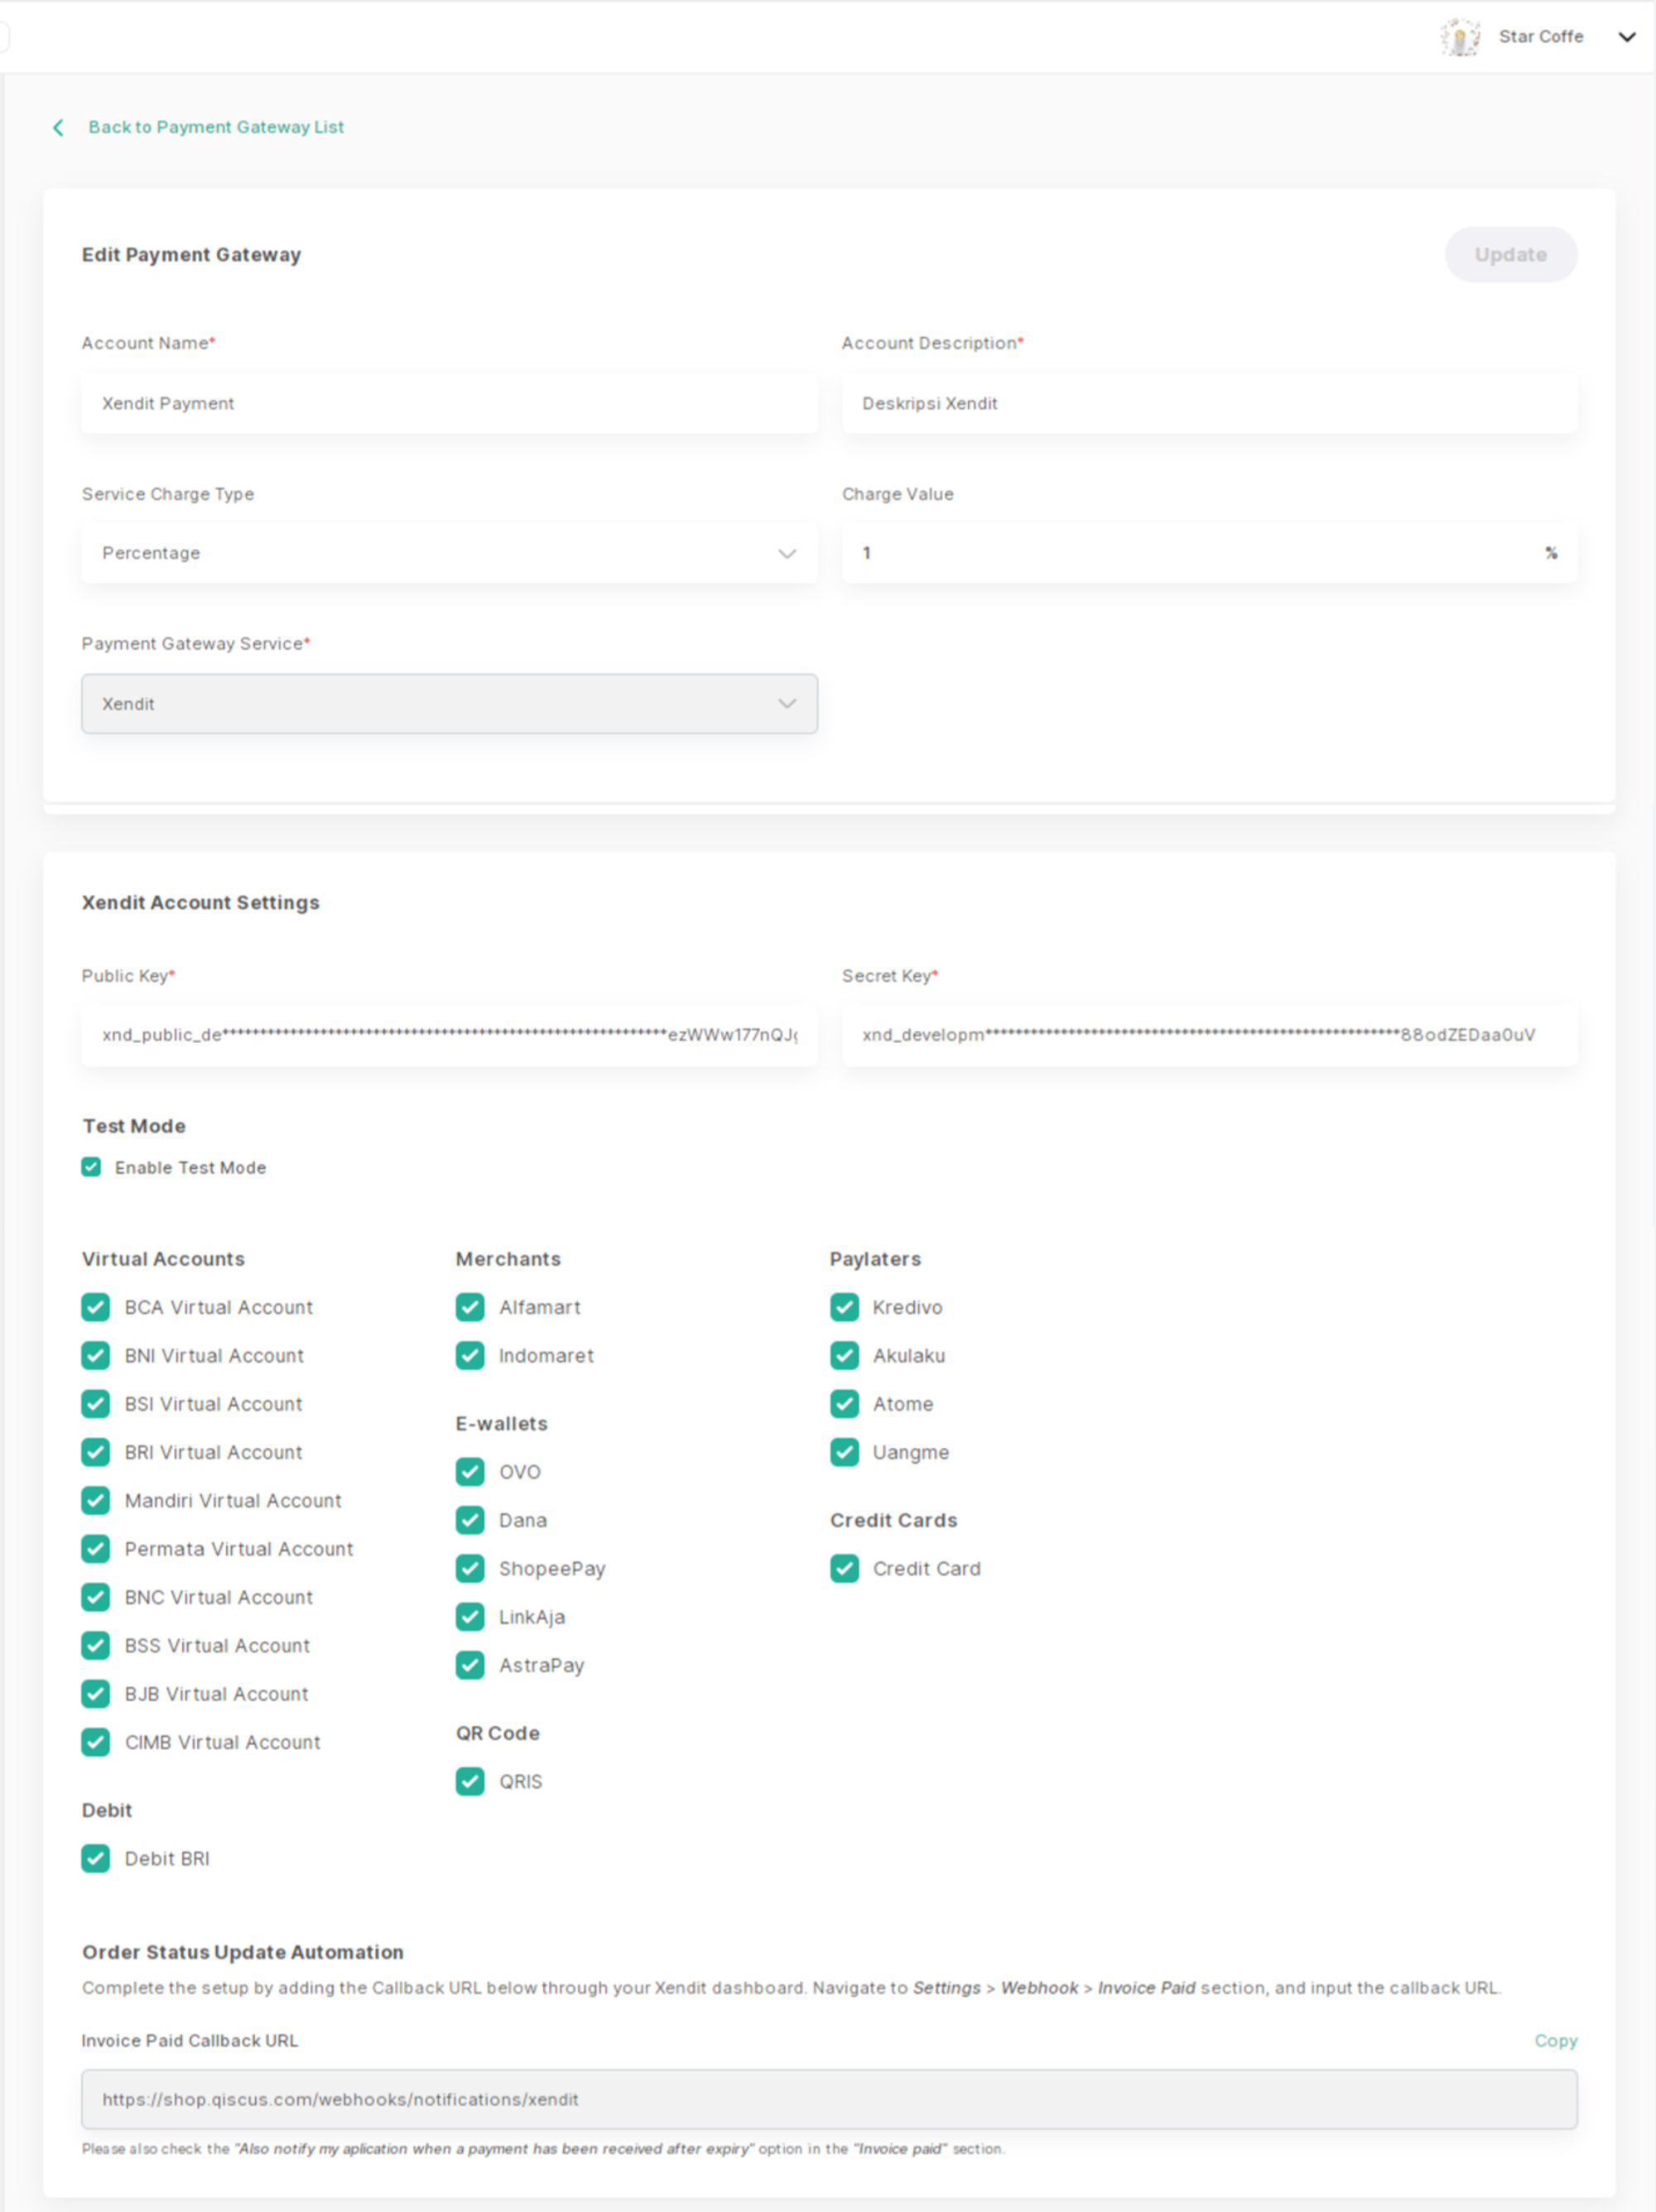
Enter the following details:
Account Name.
Account Descriptions
Choose the Service Charge Type: (1) percentage or (2) fixed. If you don't want to charge a service fee to the customer, you can leave this section empty.

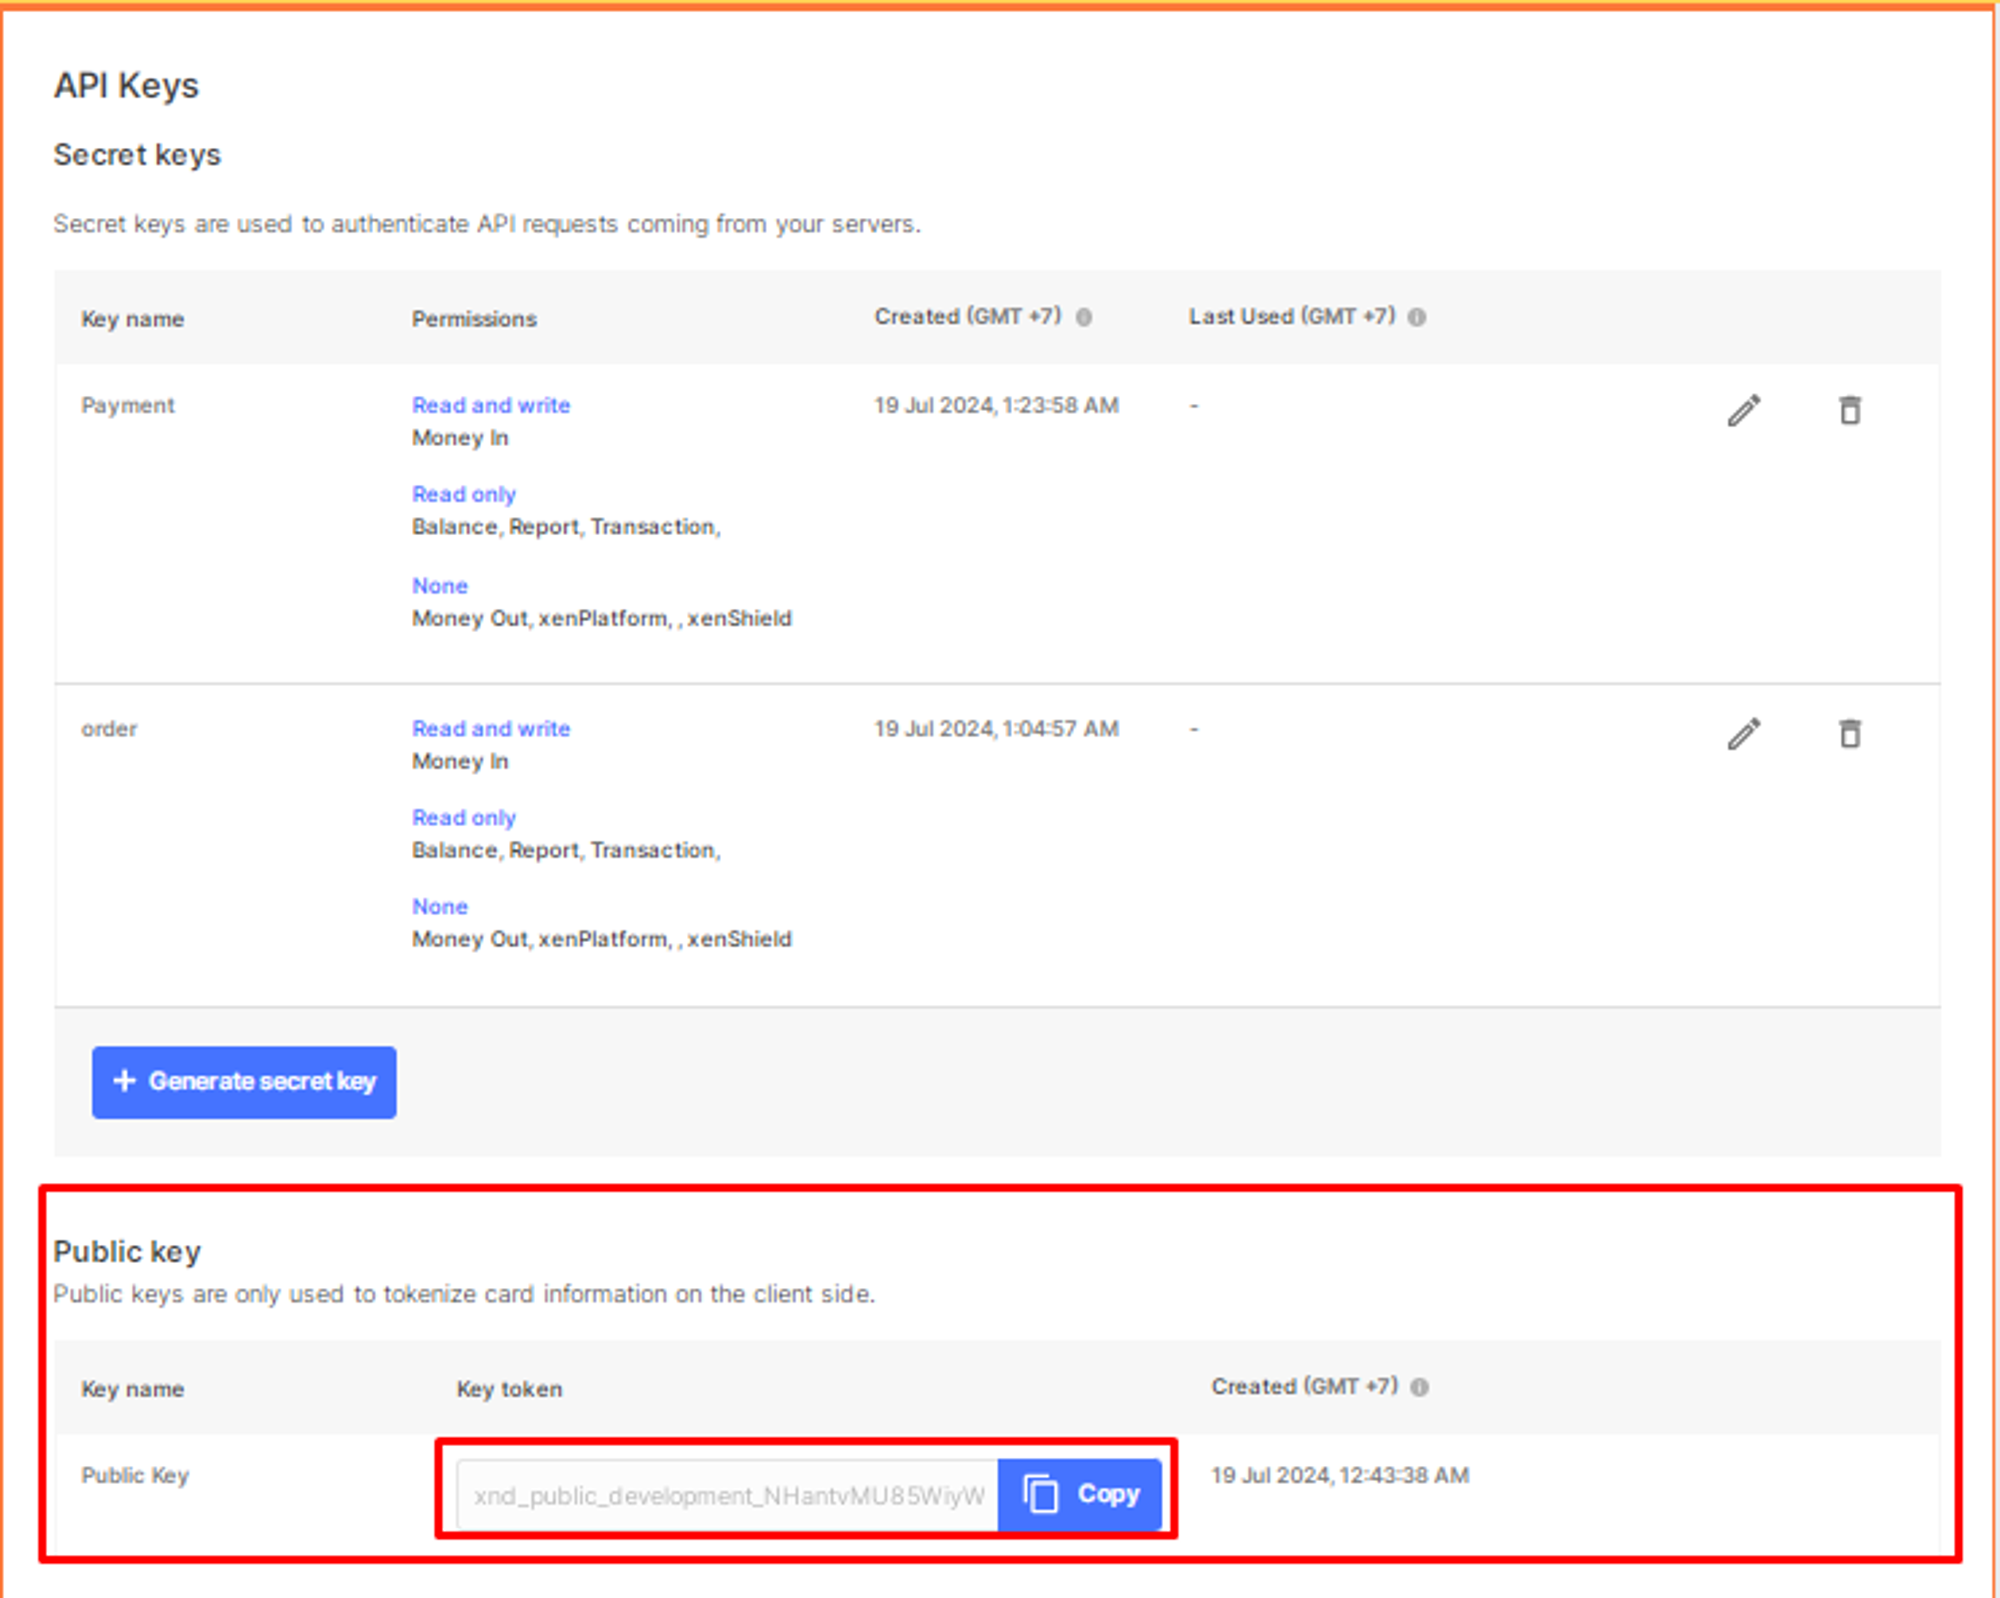
Select 'Payment Gateway Service: Xendit' The detailed information required can be obtained from the Xendit Dashboard under the 'Settings' > 'API Keys'. which includes:
Generate a secret key with the configuration: set "Money In" to "Write" and "Others" to "None.", copy the generated key and paste it into the available field in the Xendit account settings
Public Key
Test Mode -> Enable Test Mode
Payment Channels, including
Virtual account (e.g., BCA Virtual Account, BNI Virtual Account, BSI Virtual Account, BRI Virtual Account, Mandiri Virtual Account, Permata Virtual Account, BNC Virtual Account, BSS Virtual Account, BJB Virtual Account, CIMB Virtual Account).
Merchants (e.g., Alfamart, Indomaret).
E-Wallets (e.g., OVO, Dana, Shopee Pay, LinkAja, AstraPay).
PayLaters (e.g., Kredivo, Akulaku, Atome, Uangme).
Credit Cards.
Qris
Debit (e.g., BRI)
Then, click Save.
Setting Up Xendit Webhook for Automatic Order Status Updates
After successfully saving your Xendit account configuration in the Qiscus Shop Dashboard, follow these steps to enable automatic order status updates when a payment is completed: **
Log in to your Xendit Dashboard: Go to https://dashboard.xendit.com and sign in to your account.
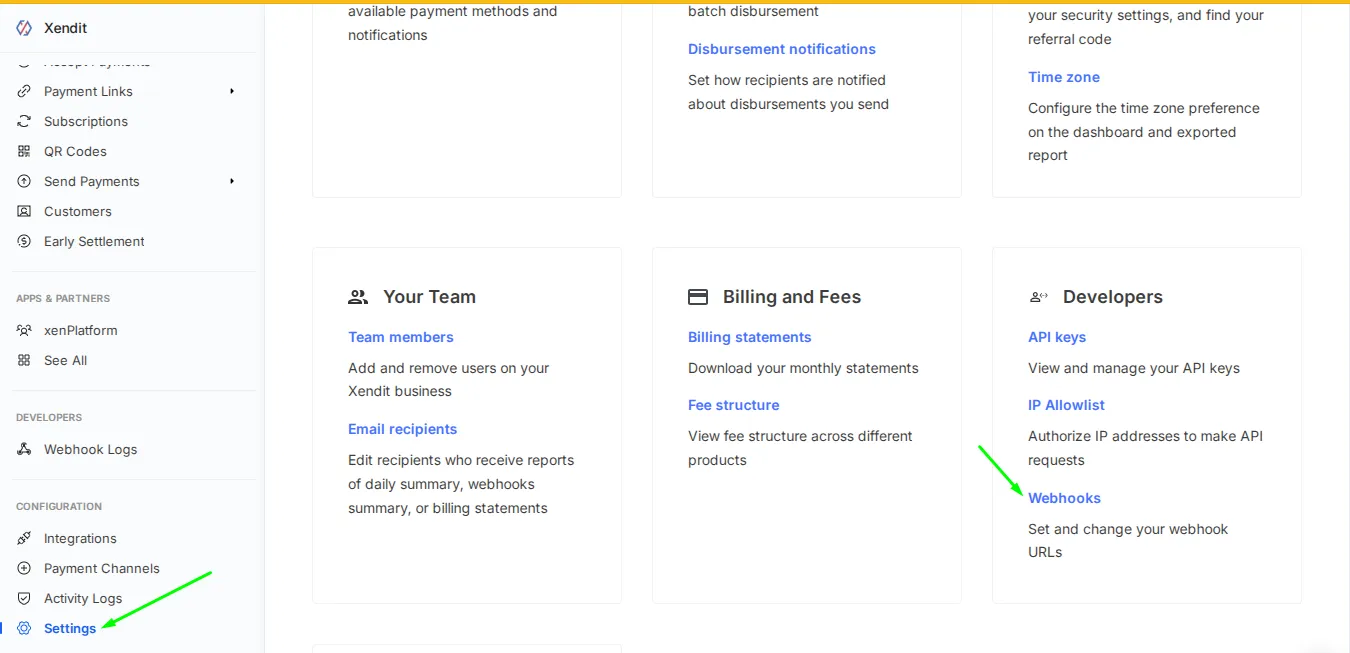
Navigate to the Webhook Settings:
Click on the Settings menu.
Go to Webhook.
Scroll to the Invoice Paid section.
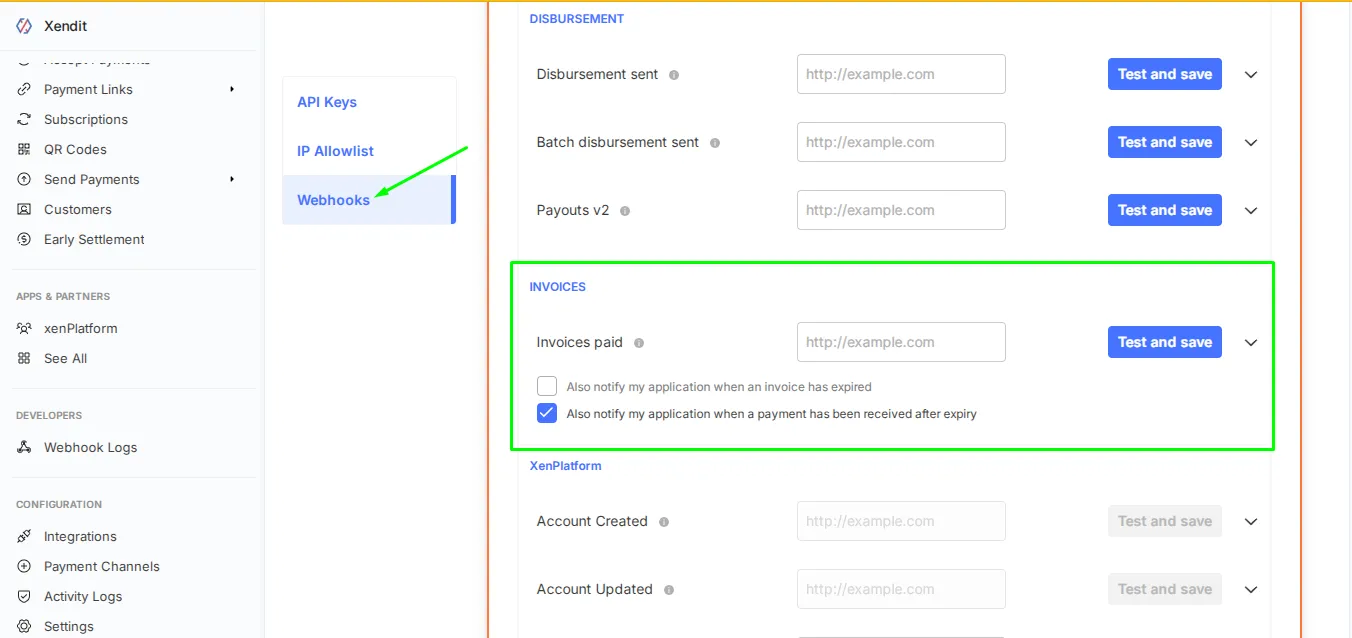
Enter the following URL in the "Invoice Paid" field: https://shop.qiscus.com/webhooks/notifications/xendit
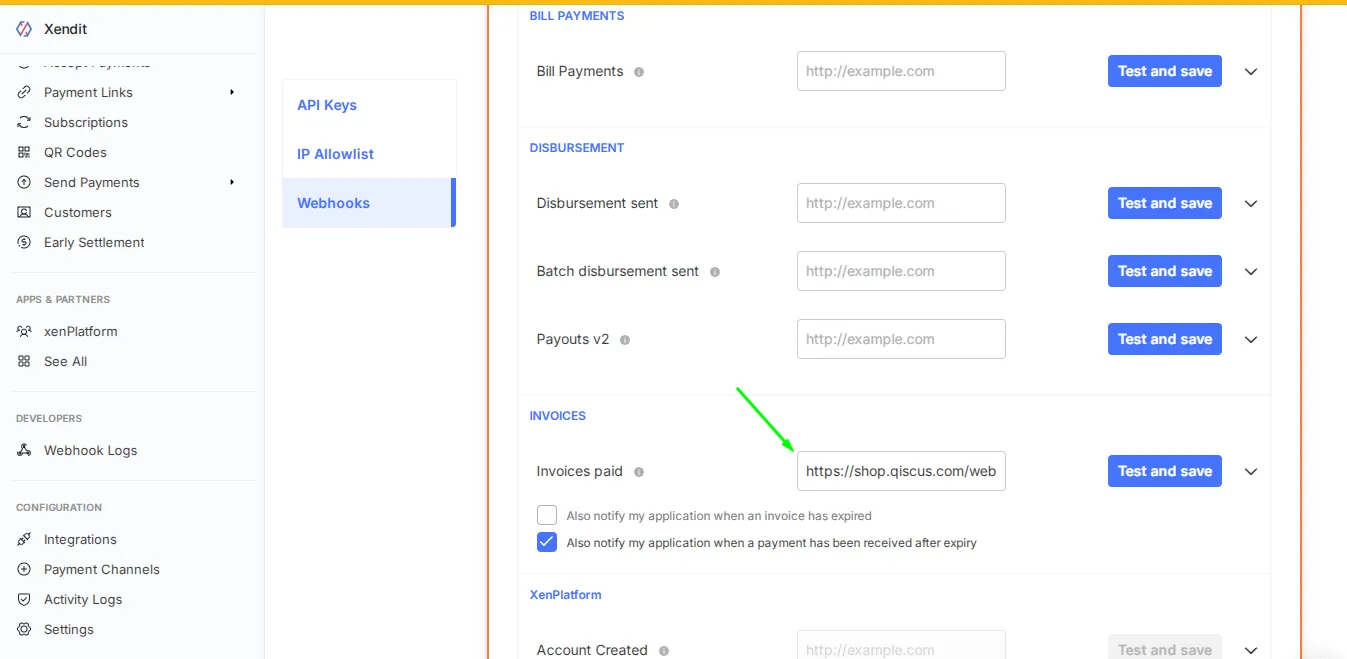
Enable the following option:
**Also notify my application when an invoice has expired**Enable this option to automatically receive notifications when an invoice has passed its payment expiry date. This notification allows your system to immediately update the order status to expired.**Also notify my application when a payment has been received after expiry**Enable this option to receive notifications when a payment is made after the invoice expiry. This feature helps your system update the order status more accurately in cases where payment is processed after the expiry date, but the notification is received later.
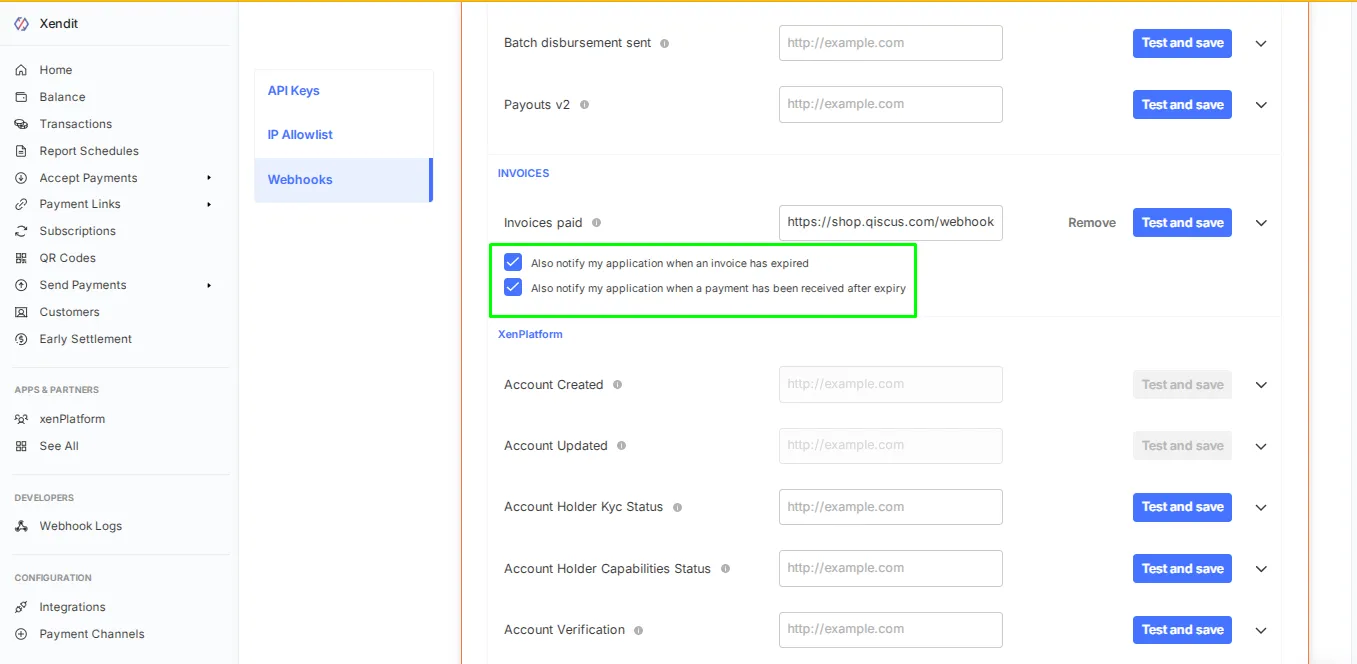
Click Test and Save to apply the changes. Once completed, Xendit will automatically notify your Qiscus Shop system whenever a payment is successfully made.