WhatsApp Catalog Integration allows you to sync products from Qiscus Shop to WhatsApp Catalog through Facebook Commerce Manager. This integration enables businesses to showcase products directly within WhatsApp conversations and power conversational commerce experiences such as product browsing and chatbot-based ordering.
Qiscus now introduces a new WhatsApp Catalog integration using Facebook SSO, designed to make the setup process simpler, more secure, and more reliable. With Facebook SSO, users can connect their Facebook assets seamlessly and benefit from near real-time product synchronization.
Benefits of Using WhatsApp Catalog Sync from Qiscus Shop
By syncing your WhatsApp Catalog from Qiscus Shop using Facebook SSO, you get:
- Simpler setup with Facebook SSO No manual token handling. Connect your Facebook account securely in just a few steps.
- Near real-time product synchronization Product updates from Qiscus Shop are sent immediately, with WhatsApp processing updates shortly after.
- Centralized catalog management Manage products, categories, and updates directly from Qiscus Shop.
- Flexible catalog visibility Use the catalog for chatbot-based ordering only, or manually enable catalog visibility in WhatsApp.
- Scalable product organization Product metadata is mapped intelligently to WhatsApp Catalog fields for easier bulk management.
How to Set Up WhatsApp Catalog Integration
A. Create Facebook Connection
Before you can create a WhatsApp Catalog integration, you need to connect your Facebook account to Qiscus Shop. This connection allows Qiscus to access your Business Portfolio, Catalog, and WhatsApp Business Account (WABA) securely through Facebook SSO.
Once connected, you can reuse this account for multiple catalog integrations without repeating the login process.
Steps to Connect Facebook Account:
- Navigate to WhatsApp Catalog from the left-side menu
- In the Qiscus Shop dashboard, open Integrations
- Click WhatsApp Catalog
- Then select the Facebook Account tab at the top of the page
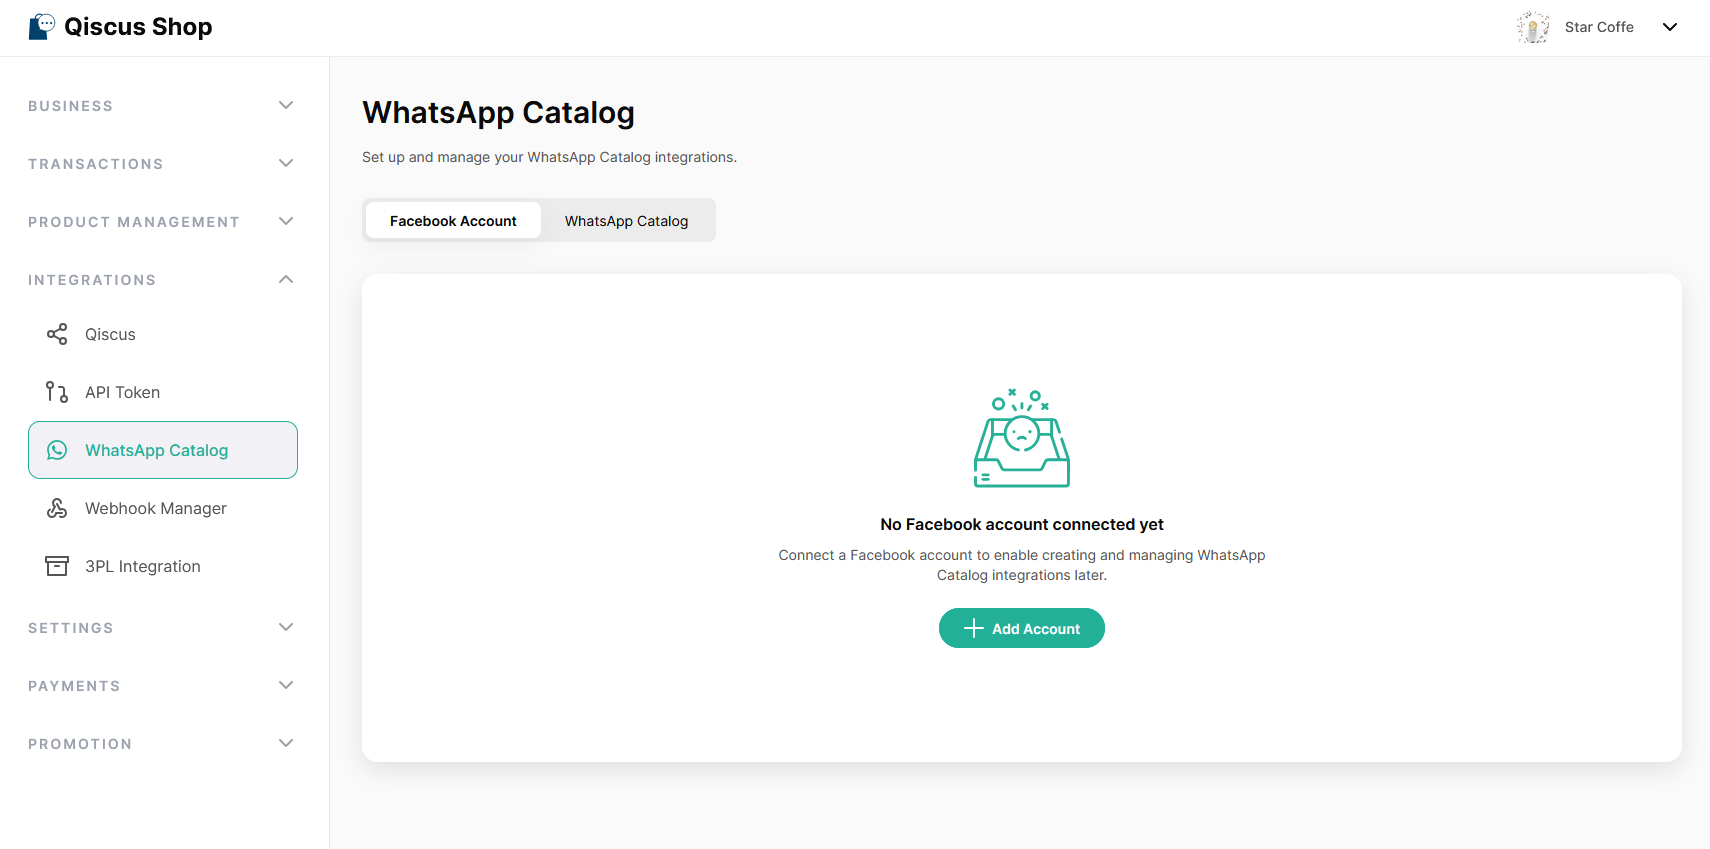
- Click Add Account
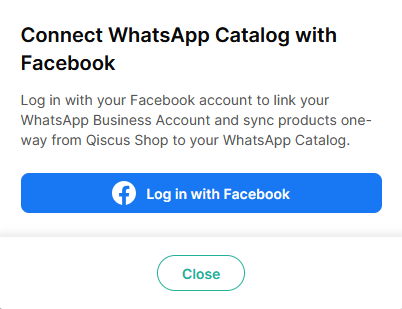
- You will be redirected to Facebook login
- Log in using your Facebook account
- Grant all required permissions to Qiscus Shop
- Once completed, your Facebook account will appear in the Facebook Account list
B. Create New WhatsApp Catalog Integration
After connecting your Facebook account, you can create a WhatsApp Catalog integration to start syncing products from Qiscus Shop to WhatsApp.
This setup links your Qiscus Shop product data with your Facebook Commerce Manager catalog and your WhatsApp Business Account (WABA). Once completed, your products will be automatically synchronized and ready to be used for conversational commerce, either through chatbot flows or direct catalog display in WhatsApp.
Before proceeding, make sure:
- You have already connected a Facebook account
- Your Facebook account has access to the Business Portfolio, Catalog, and WABA
- Your products and categories in Qiscus Shop are already prepared
To begin, create a new WhatsApp Catalog integration by following these steps:
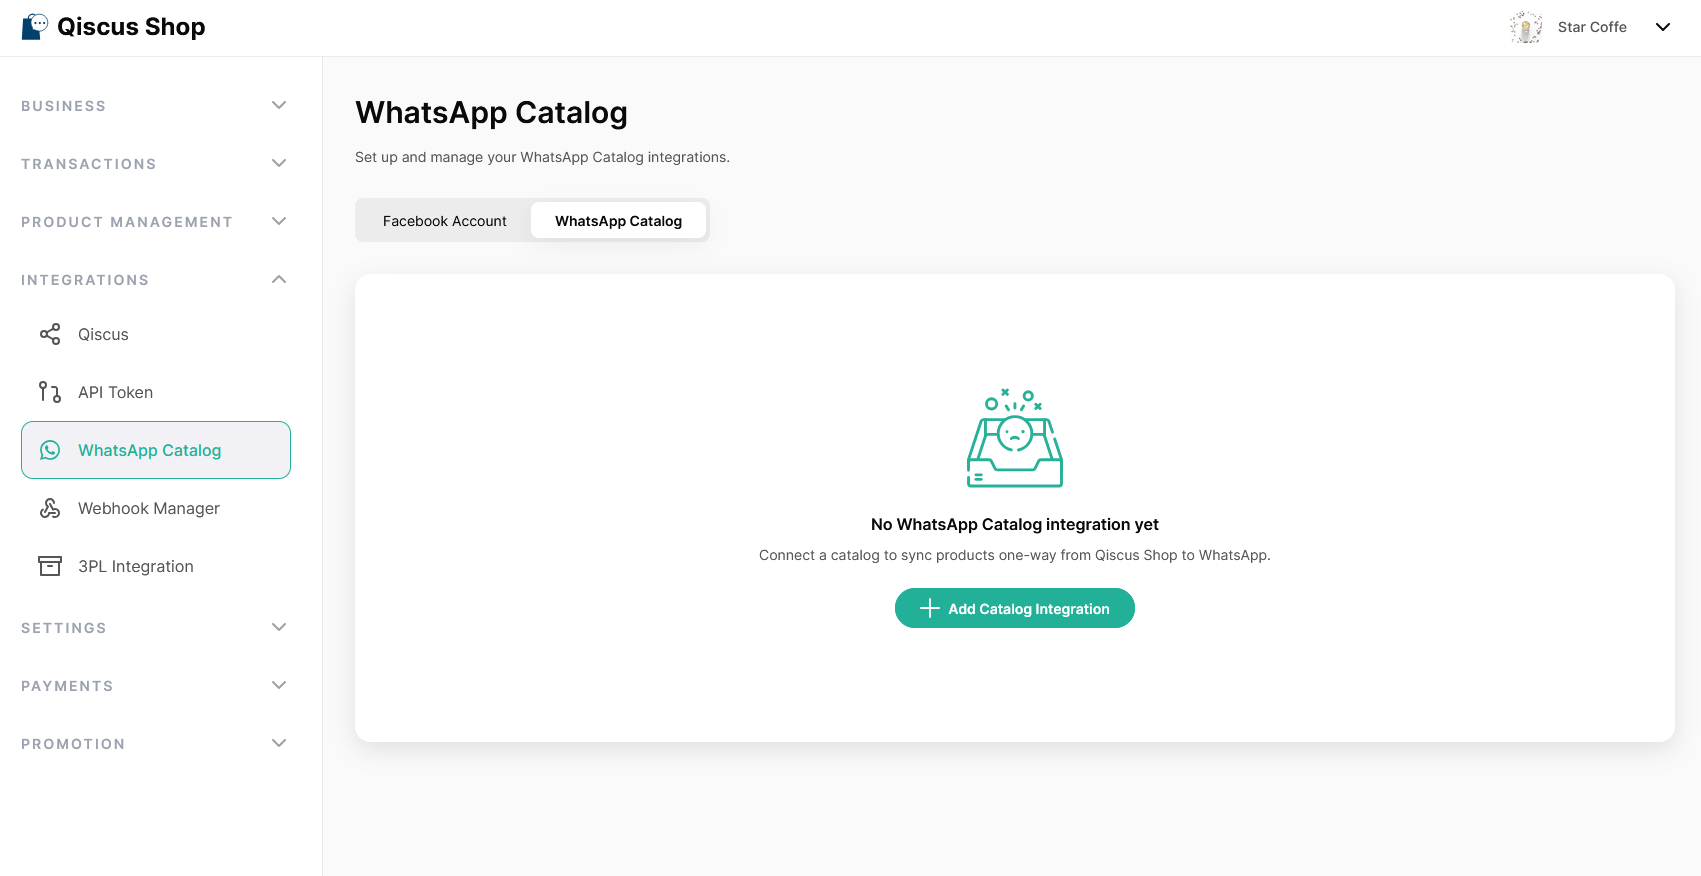
- Go to WhatsApp Catalog from the left-side menu, then open the WhatsApp Catalog tab and click Add Catalog Integration.
- Select your Facebook Account and choose the appropriate Business Portfolio.
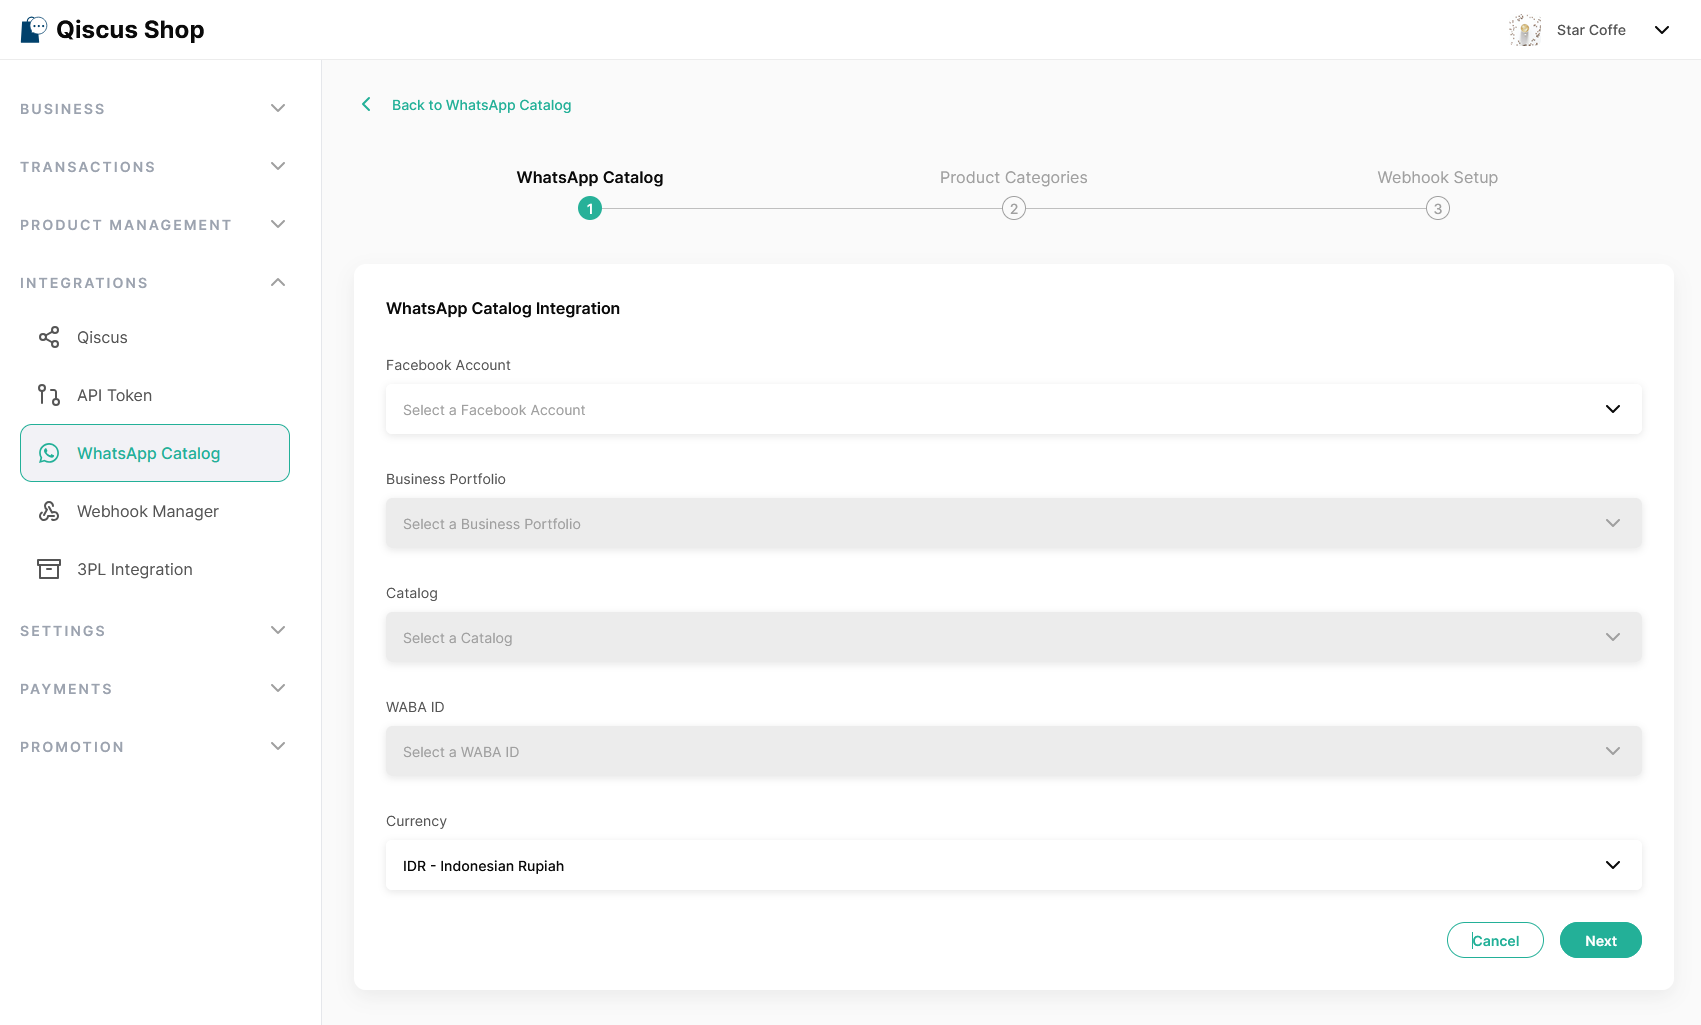
- Choose a WABA ID, Catalog Name and Currency
- The selected currency will follow your Qiscus Shop store currency configuration, so make sure your store currency is already set correctly before creating the integration.
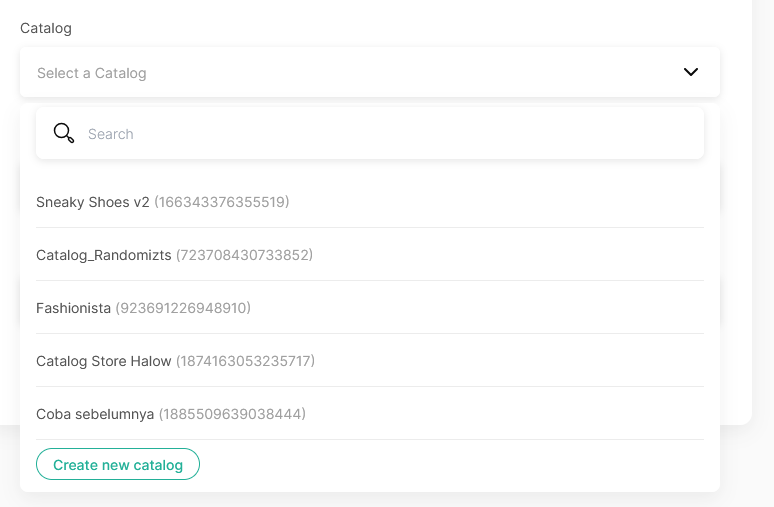
- Select an existing catalog from the dropdown (If you don’t have one, click Create New Catalog and complete the setup)
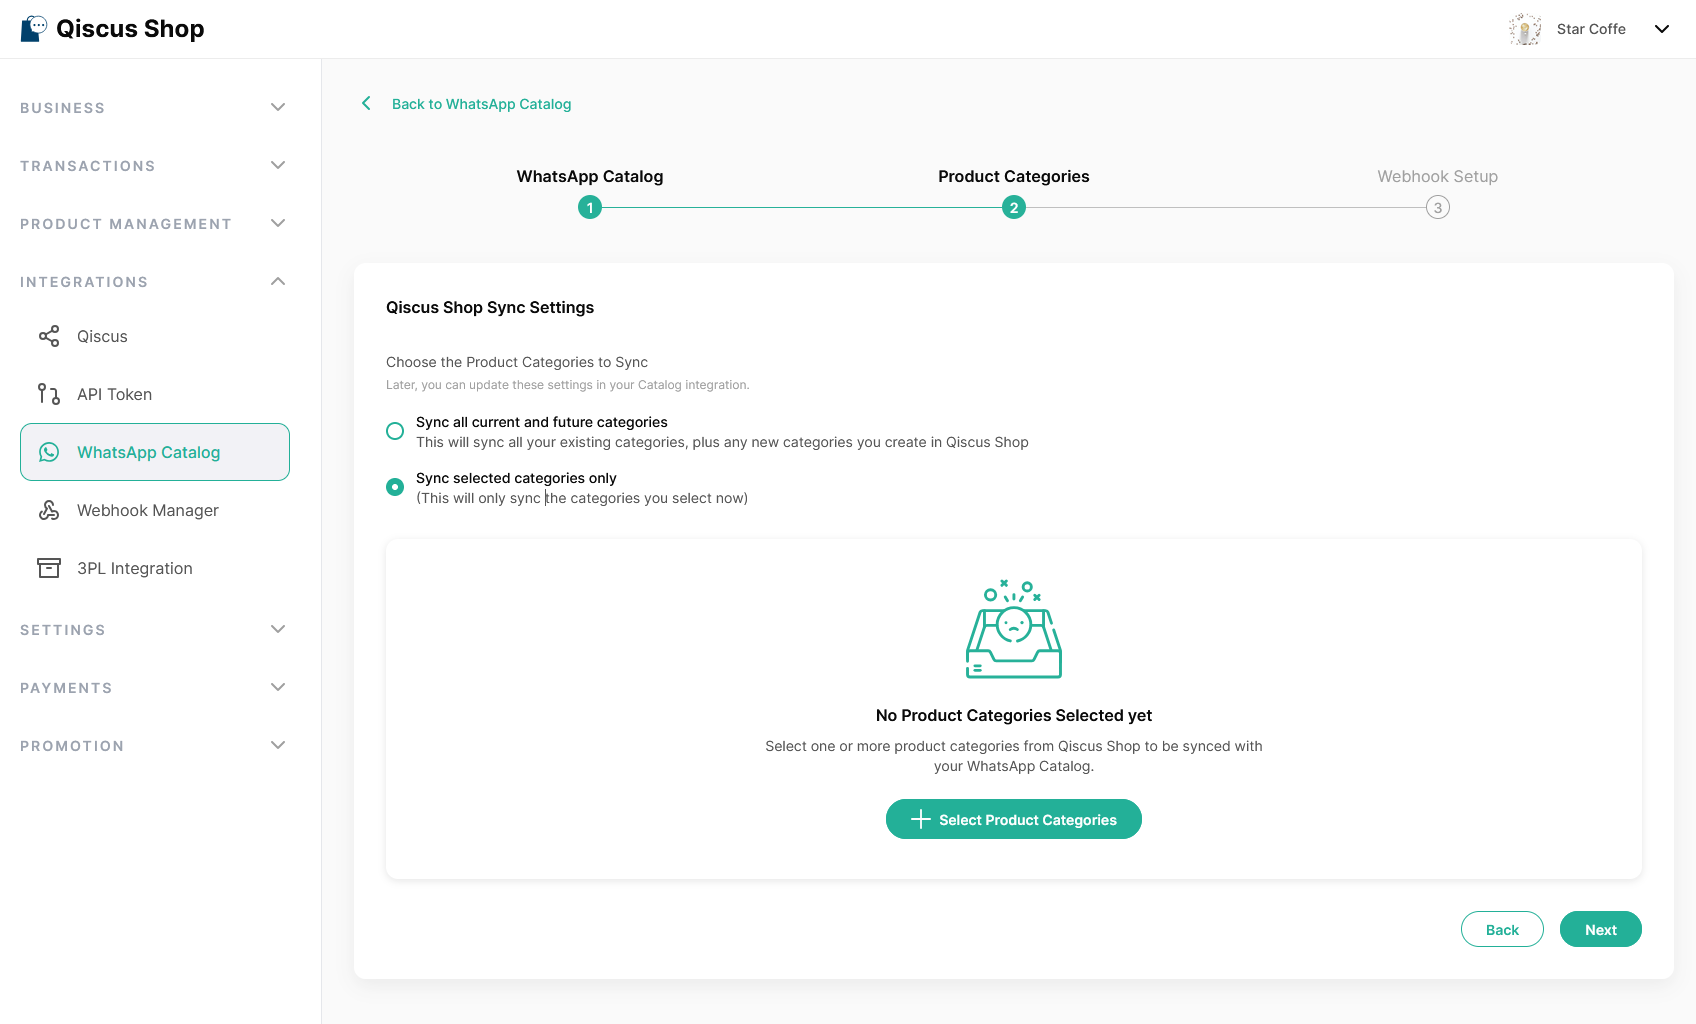
- Configure how product categories will be synced:
- Sync all current and future categories → automatically includes all categories
- Sync selected categories only → manually choose which categories to include
- Copy the Callback URL, then go to Qiscus Omnichannel → Settings → Bot Integration → Webhook, paste the URL, and save.
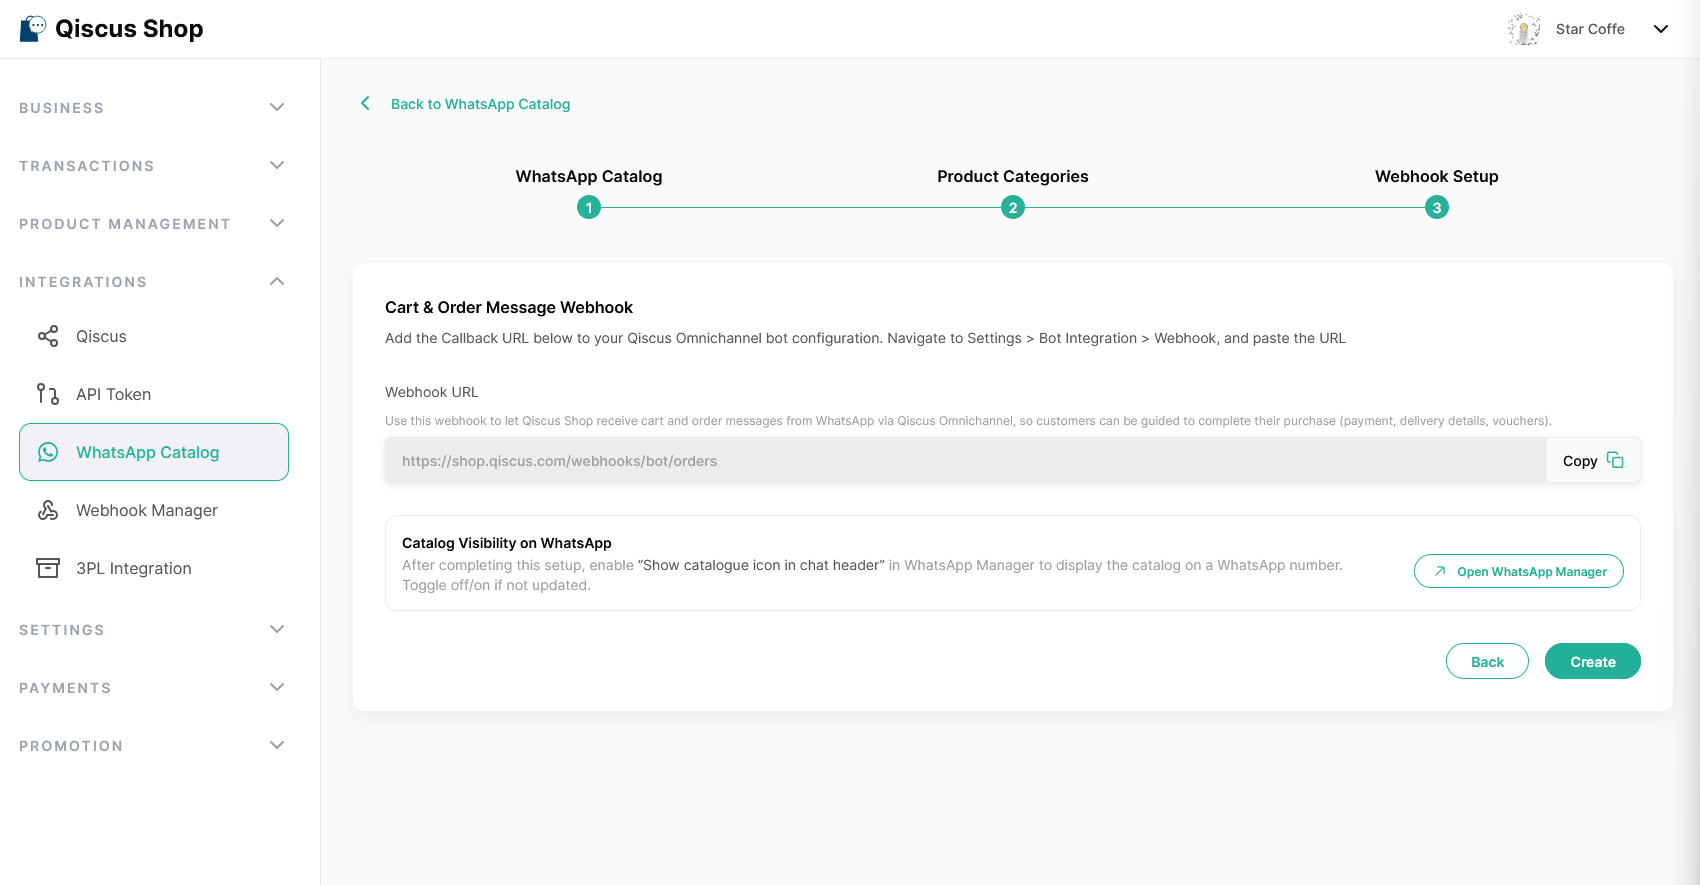
(Optional) Click Open WhatsApp Manager. This page will be used if you want to enable catalog visibility in the step number 8.
Click Create to complete the integration setup.
(Optional) If you want the catalog to appear in your connected WhatsApp phone number, click Open WhatsApp Manager, then enable catalog visibility for each phone number by turning on:
- Show catalogue icon in chat header
- Show "Add to basket" button on product pages and chat

Qiscus Shop syncs your product catalog to Meta Commerce Manager, and you can monitor the sync results there in near real-time.
If your catalog is already updated in Meta Commerce Manager but not yet visible in your WhatsApp phone number, this is part of Meta’s internal processing and not controlled by Qiscus Shop.
In this case, you may need to wait until Meta completes the synchronization to WhatsApp.
Catalog Integration Behavior
The following behaviors explain how the WhatsApp Catalog integration works, including how data is synchronized, managed, and maintained between Qiscus Shop and Meta Commerce Manager.
A. Near Real-Time Sync
Qiscus Shop automatically sends product updates to Meta Commerce Manager whenever changes are made in your store, such as product creation, updates, or deletions.
Updates are sent immediately from Qiscus Shop
Changes may appear in WhatsApp instantly or with a delay
Typical delay is 2–4 minutes, depending on Meta’s processing time
This means your catalog in Meta Commerce Manager will usually reflect the latest product data shortly after updates are made in Qiscus Shop.
B. Removing Synced Categories
When you stop syncing a category from Qiscus Shop, the integration will stop sending updates for that category.
- Existing products from that category will remain in Meta Commerce Manager
- They are not automatically removed from the catalog
- You need to remove them manually if they are no longer needed
This behavior allows you to prevent accidental product loss, but requires manual cleanup if you want to fully remove products.
C. Product Field Mapping
Because WhatsApp Catalog has limited product fields, Qiscus Shop maps some product data into available fields in Meta Commerce Manager.
Custom Label 1 → Product Category
Custom Label 0 → Product SKU
Brand → Store Name
You can use Custom Label 1 (Product Category) to organize, filter, or bulk manage products by creating a Product Set in Meta Commerce Manager.
This mapping helps maintain product structure even with platform limitations.
D. Token Expiration & Reconnection
This integration uses a Facebook access token to securely connect Qiscus Shop with Meta services.
The token may expire due to certain actions (e.g. changing your Facebook password or security settings)
When the token expires, product synchronization will stop automatically
A Token Expired banner will appear in Qiscus Shop
Click Reconnect to reauthorize and resume the integration
Reconnecting ensures the integration continues to function without needing to recreate it.
Widget Product Recommendation
The Qiscus Shop widget is an interface designed to assist agents in providing product recommendations to customers in the form of interactive messages. This product recommendation feature is specifically applicable to customers who come from the WhatsApp channel.
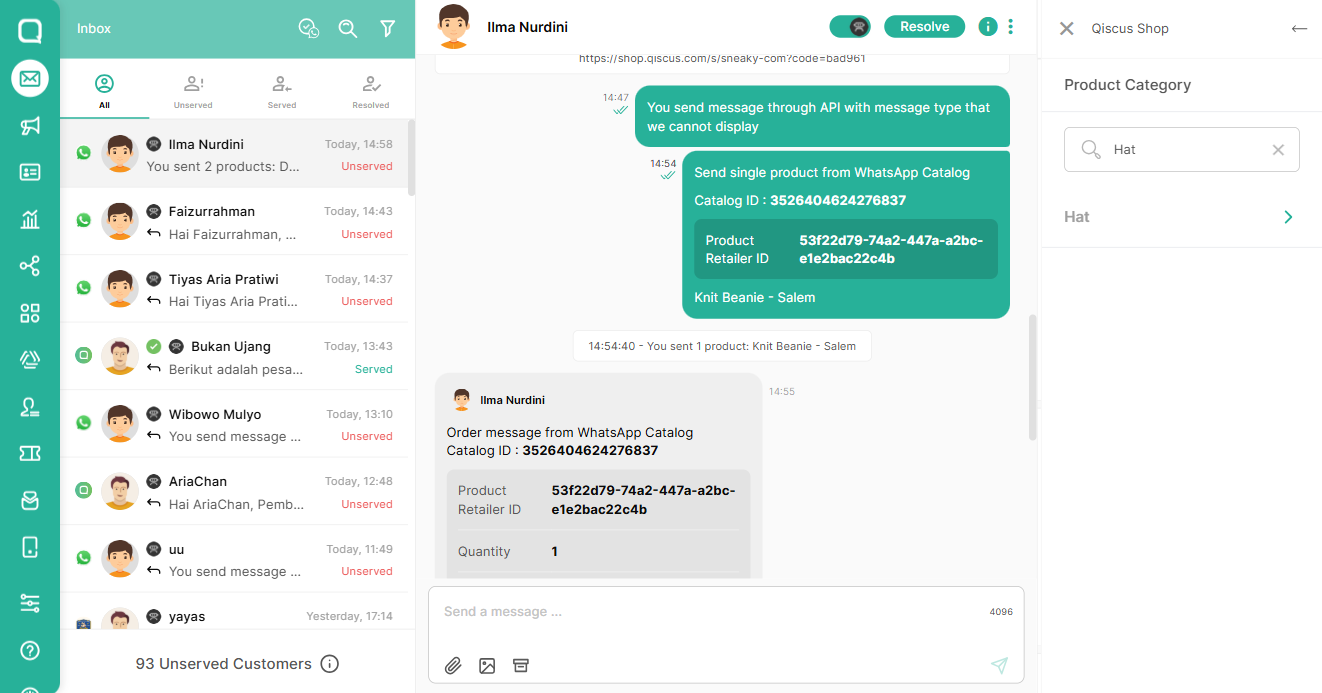
Using the Product Recommendation Widget
To send product recommendations to customers, follow these steps:
- Go to the Omnichannel Inbox.
- Open one of the rooms.
- Click the "Widget" button on the right-hand side under 'Chat & Customer info.'
- Select "Qiscus Shop."
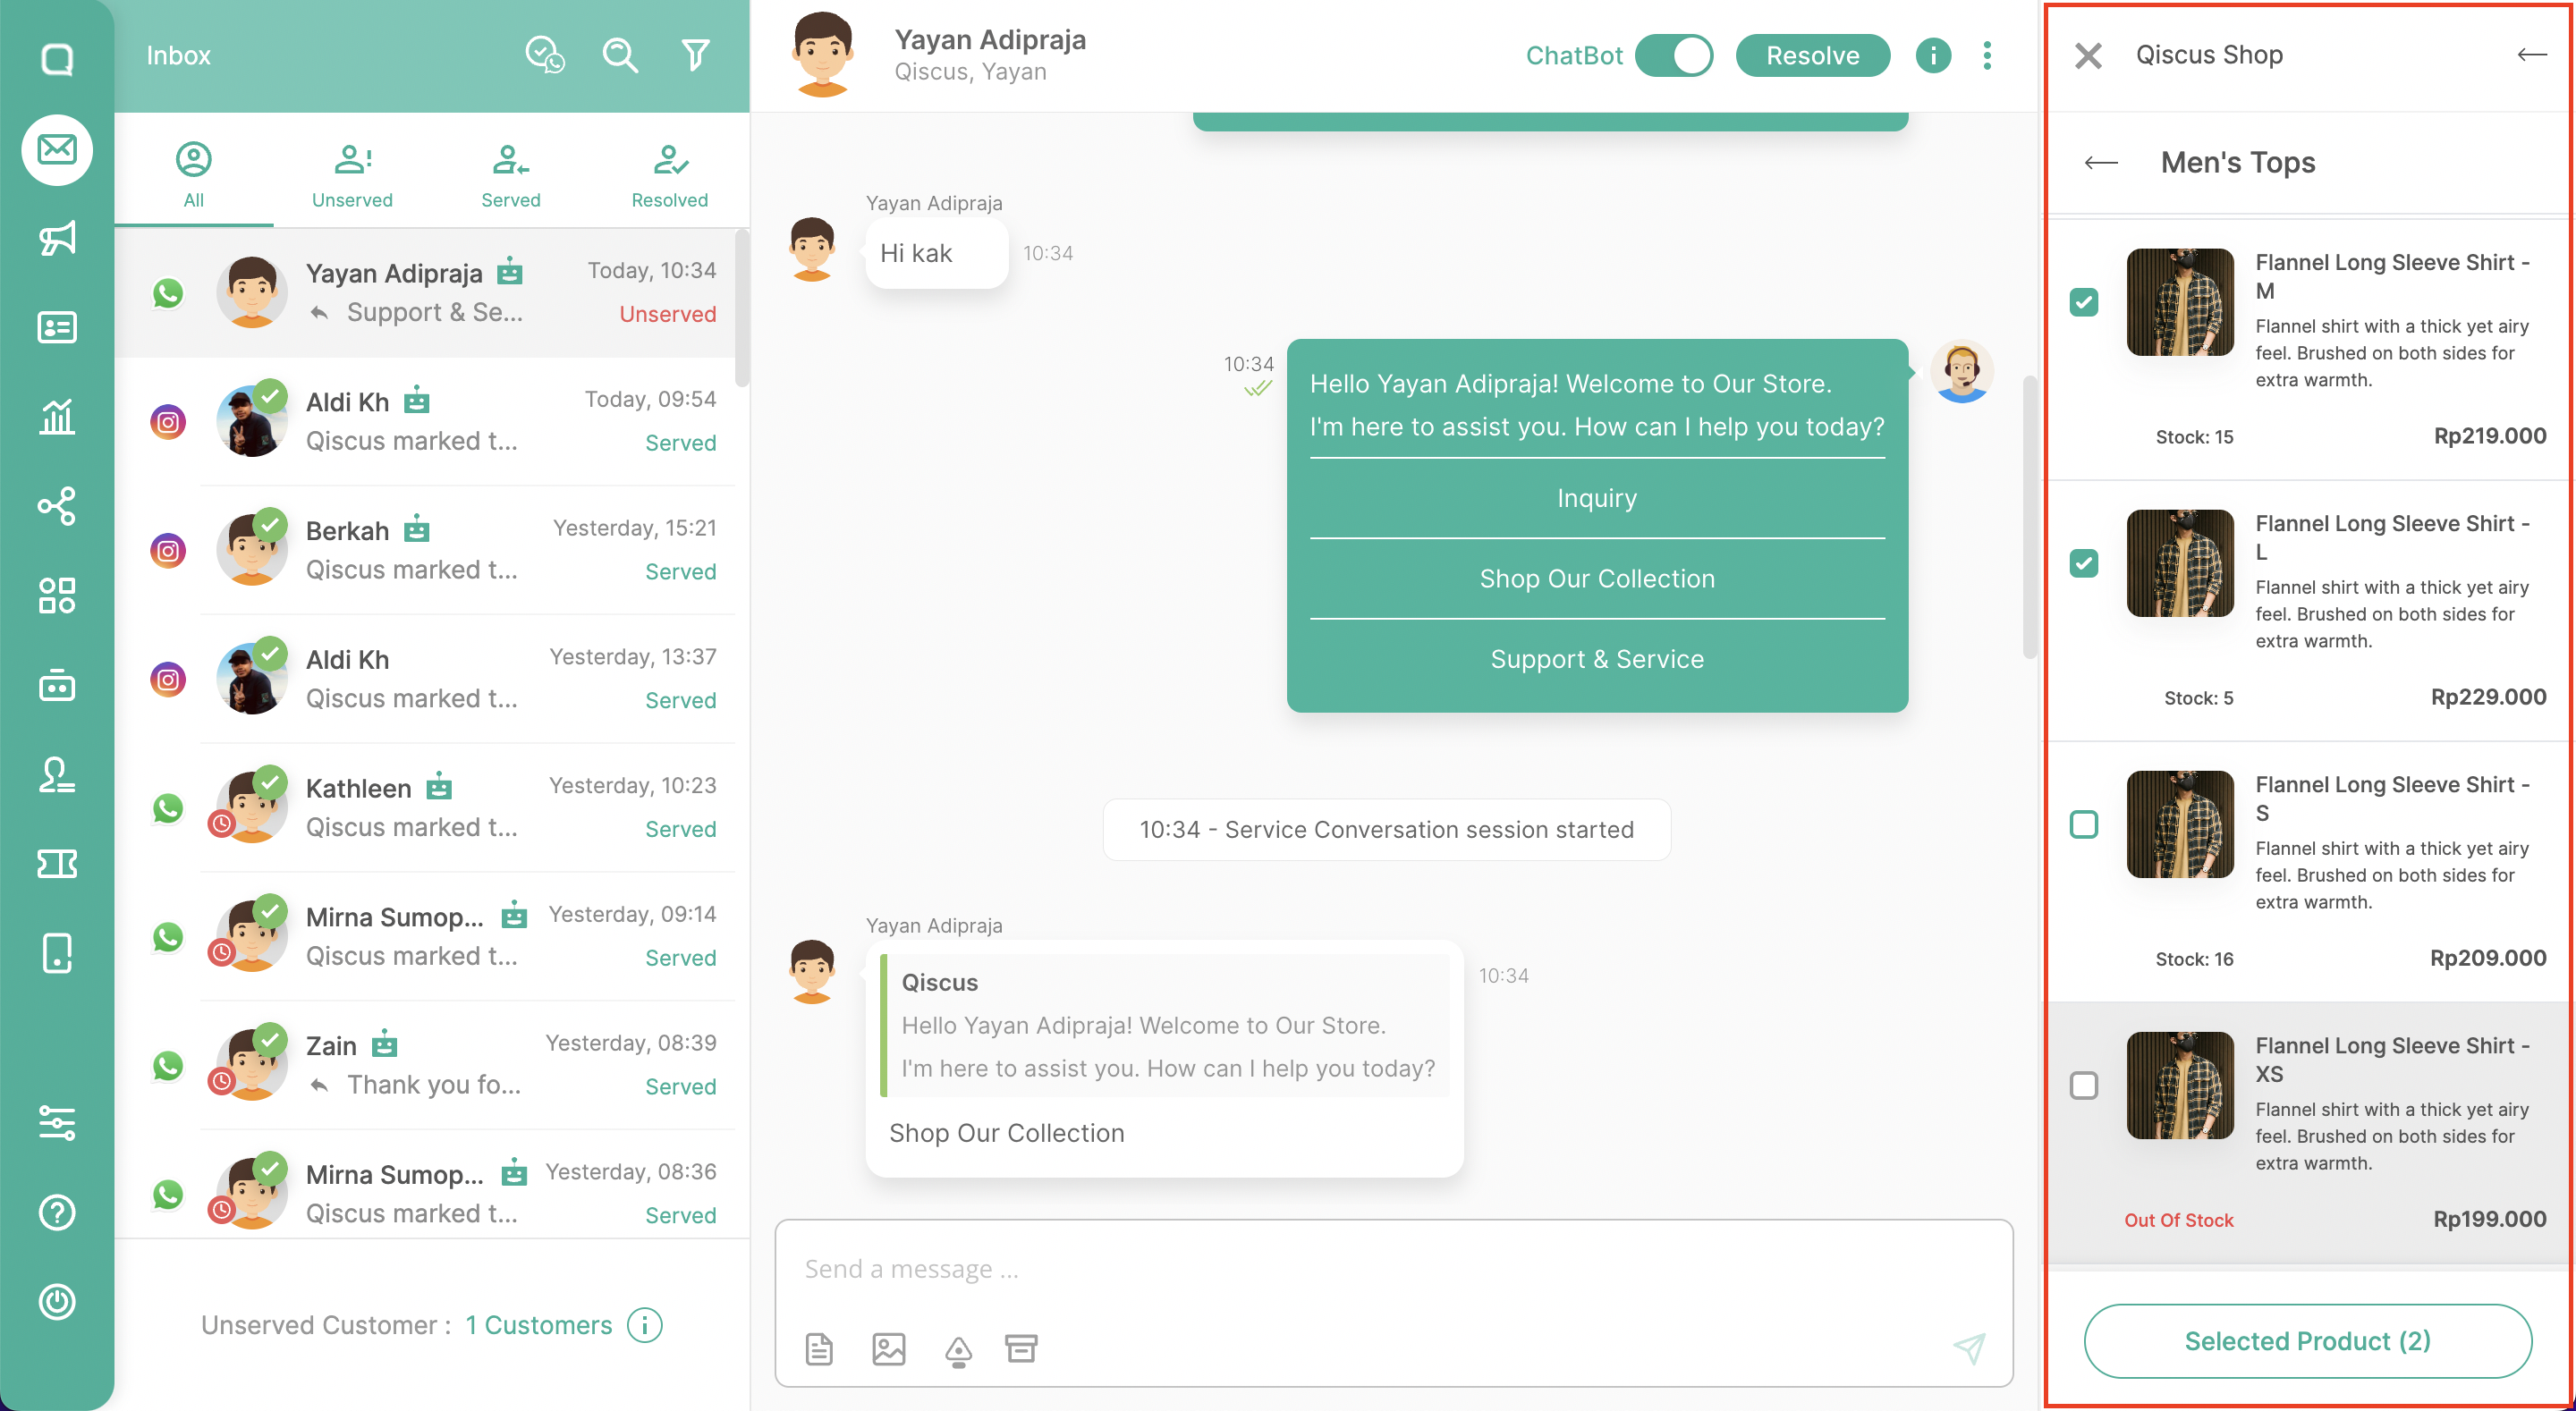
- The widget will display a list of products that have been onboarded through the Qiscus Shop Dashboard, provided you are currently in a room with a WhatsApp channel.
- Once the list of products is open, agents can choose one or several products.
- Send the product recommendations by clicking "Send Product Information".
Searching Products in the Product Recommendation Widget
To help agents find products faster and avoid confusion when selecting items, the Product Recommendation Widget supports product search.
Agents can search for products using:
- Product name
- Category name
- Product Retailer ID
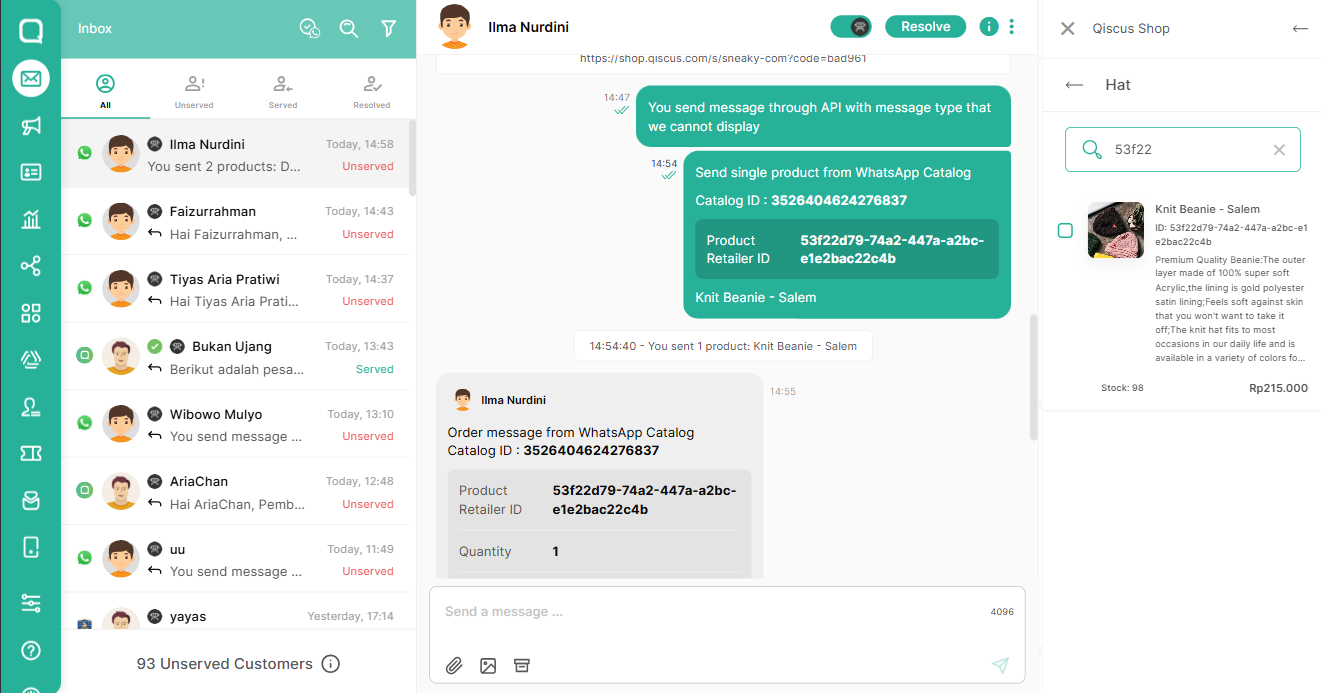
This search feature allows agents to quickly locate the correct product without scrolling through the entire list or memorizing product IDs. To further reduce confusion, the Product Retailer ID is also displayed on the Product Detail page, making it easier to match IDs with the corresponding products.
WA Catalog Order Process
The WA Catalog Order process allows customers to seamlessly place orders either directly from the catalog or through product recommendations sent by agents. This feature streamlines the ordering experience for WhatsApp users. The process works as follows:
Selecting Products
- Customers can browse the catalog and select products directly.
- Alternatively, agents can send product recommendations via the Qiscus Shop widget in interactive message format.
Receiving Order Details Once products are selected, the customer will receive a WhatsApp message containing the order details along with a link to complete their order.
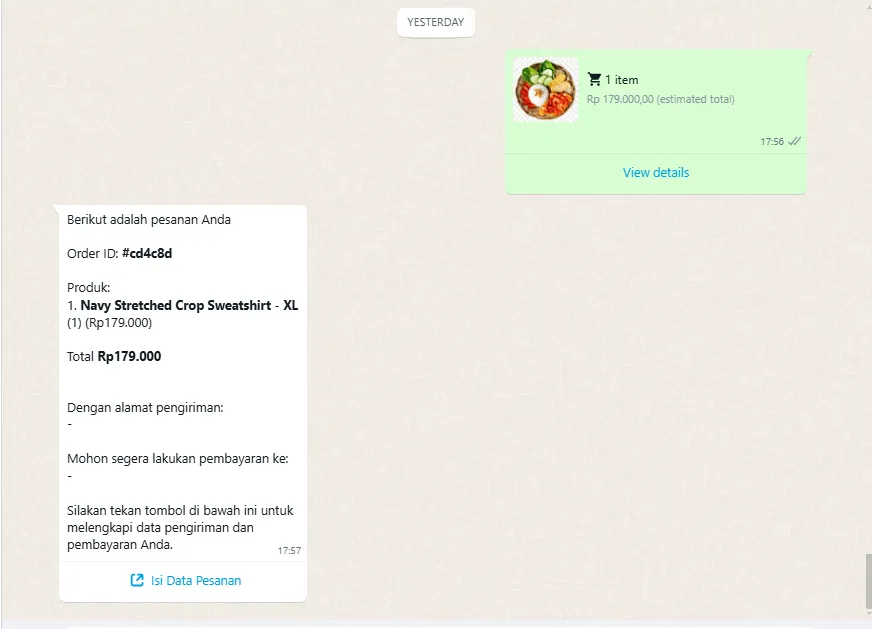
- Filling Order Details
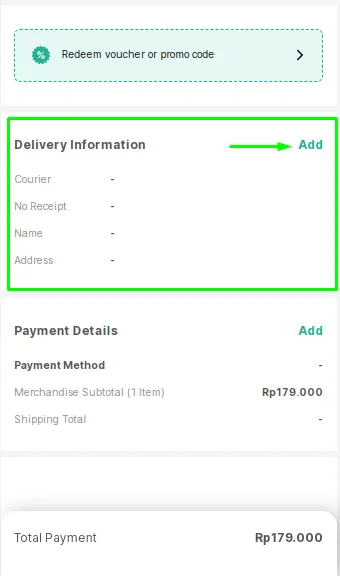
By clicking the provided link, the customer will be directed to a form where they can:
- Apply Voucher (Optional)
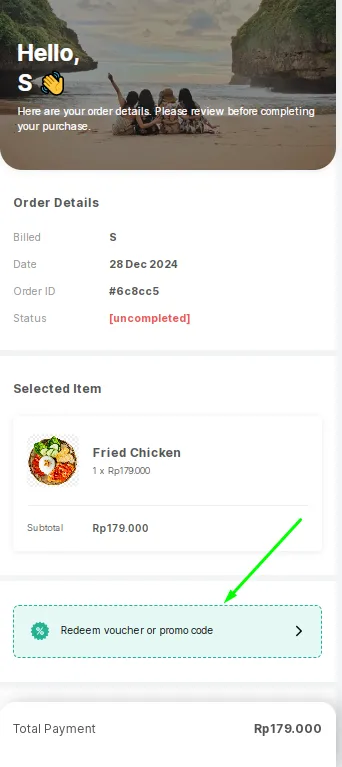
Customers have the option to apply various types of vouchers during the order process, including:
- Shipping Voucher: Provides discounts on delivery fees.
- Discount Voucher: Offers a percentage or fixed amount discount on the total order value.
- Enter Voucher Code: Customers can manually input a unique voucher code for additional benefits.

Vouchers and promo codes must be redeemed before the order status changes to "Unpaid." Once the delivery and payment details are submitted, the status will update to "Unpaid," and the voucher or promo code field will be locked, preventing further changes.
- Enter Delivery Information
Customers will need to provide detailed delivery information to proceed with their order. This process is divided into two steps to ensure clarity and ease of use:
i. Filling Personal and Address Details
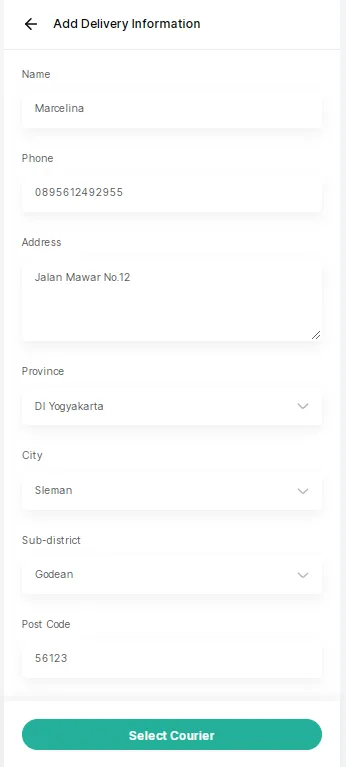
On the first page of the delivery information form, customers will be prompted to fill in the following details:
- Name: Full name of the recipient.
- Phone: Active phone number for delivery communication.
- Address: Complete address where the order will be delivered.
- Province: Select the province from a dropdown menu.
- City: Based on the selected province, customers can choose their city.
- Sub-district: Further specify the location by selecting the appropriate sub-district.
- Post Code: Enter the postal code corresponding to the delivery address.
ii. Selecting a Courier Service
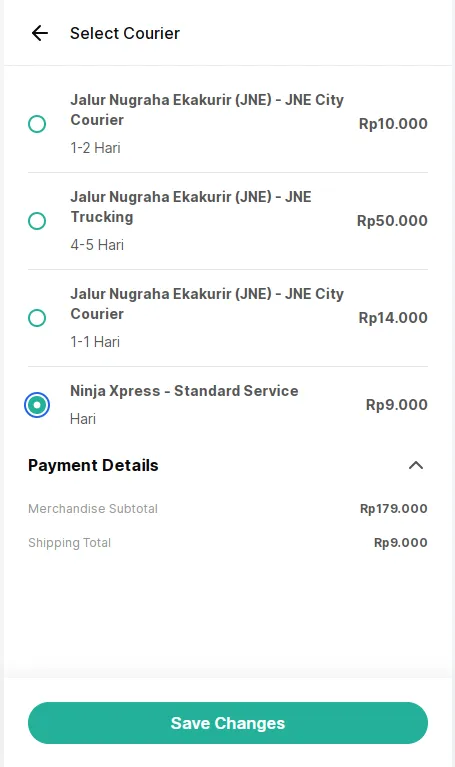
After completing the address details, customers will proceed to the next page, where they can:
- Choose a preferred courier service from the available options.
- Review the estimated delivery time and cost associated with each courier.
iii. Complete Payment Details
Customers will choose their preferred payment method to finalize the order.
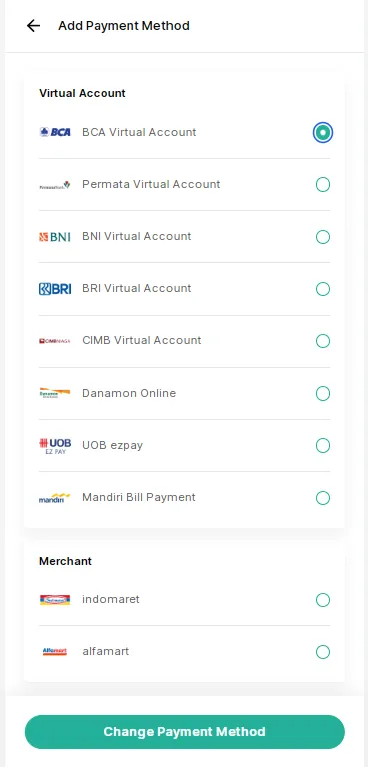
- Order Completion
After the customer applies vouchers (optional), fills in delivery details, and finalizes payment details, the order status will be updated to "Unpaid." At this stage, all submitted information—including voucher application, delivery details, and payment method—becomes final and cannot be changed.