The Store Information menu in Qiscus Shop provides essential tools for users to customize and manage their online store effectively. Users can edit key details such as the store name, set session expiration times for microsite visits, add a descriptive overview of their store, upload a banner image for visual branding, and set an icon that serves as a logo or favicon. Additionally, users can activate the Payment and Delivery modules by toggling their respective methods, enabling seamless transaction processing and shipping options. This suite of customization features empowers users to create a distinctive online presence tailored to their business needs and customer expectations.

To edit various store details, follow these steps:
Go to Settings: Navigate to the settings section of your platform.
Select Store: In the settings menu, select the "Store" option.
Choose the Store Information Tab: Click on the "Store Information" tab to access the details.
Edit Store Details: In the "Store Information" tab, you can edit the following details:
- Store Name: Enter a name that reflects the identity of your store.
- Session Expiration: Determine the expiration time of a microsite session, ranging from 1 to 1440 minutes (1 day). You can also disable the microsite expiry by entering 0 minutes.
- Description: Provide a brief overview of the store.
- Banner: Upload an image or graphic to be displayed at the top of the microsite.
- Icon: Upload a small image representing the store, often used as a logo or favicon.
- Delivery Method: Activate the Delivery module by toggling the Delivery Method option and then saving the changes.
- Payment Method: Activate the Payment module by toggling the Payment Method option and then saving the changes.
- Is Your Store Active?: Toggle this option to indicate whether your store is currently active.
- Save Changes: Click the "Save Changes" button to apply and save all the updates made to the store information.
Remove Store:
- Before you can remove the store, it's necessary to disable your account store to stop any ongoing transaction activities. Do this by turning off the "Is your store active?" toggle, then hit the "Save Changes" button.
- Disabling your store means you won't receive new orders, but existing orders can still be fulfilled by customers.
- Click on the "Remove Store" button. If you have any ongoing transactions, you'll be directed to the order page by clicking the "Go To Order Page" button. Make sure all transactions are completed, as removing the store is a permanent action.
- If all activities are completed, a pop-up notification will appear, warning that removing the store will prevent you from managing it further. To proceed with the removal, tick the box labeled "I understand and accept the consequences that occur after my store is deleted as stated above.".
- To finalize the process, click the "Delete Store" button.
- Once the store removal process is finished, you will be redirected to the list of stores.
Store Location
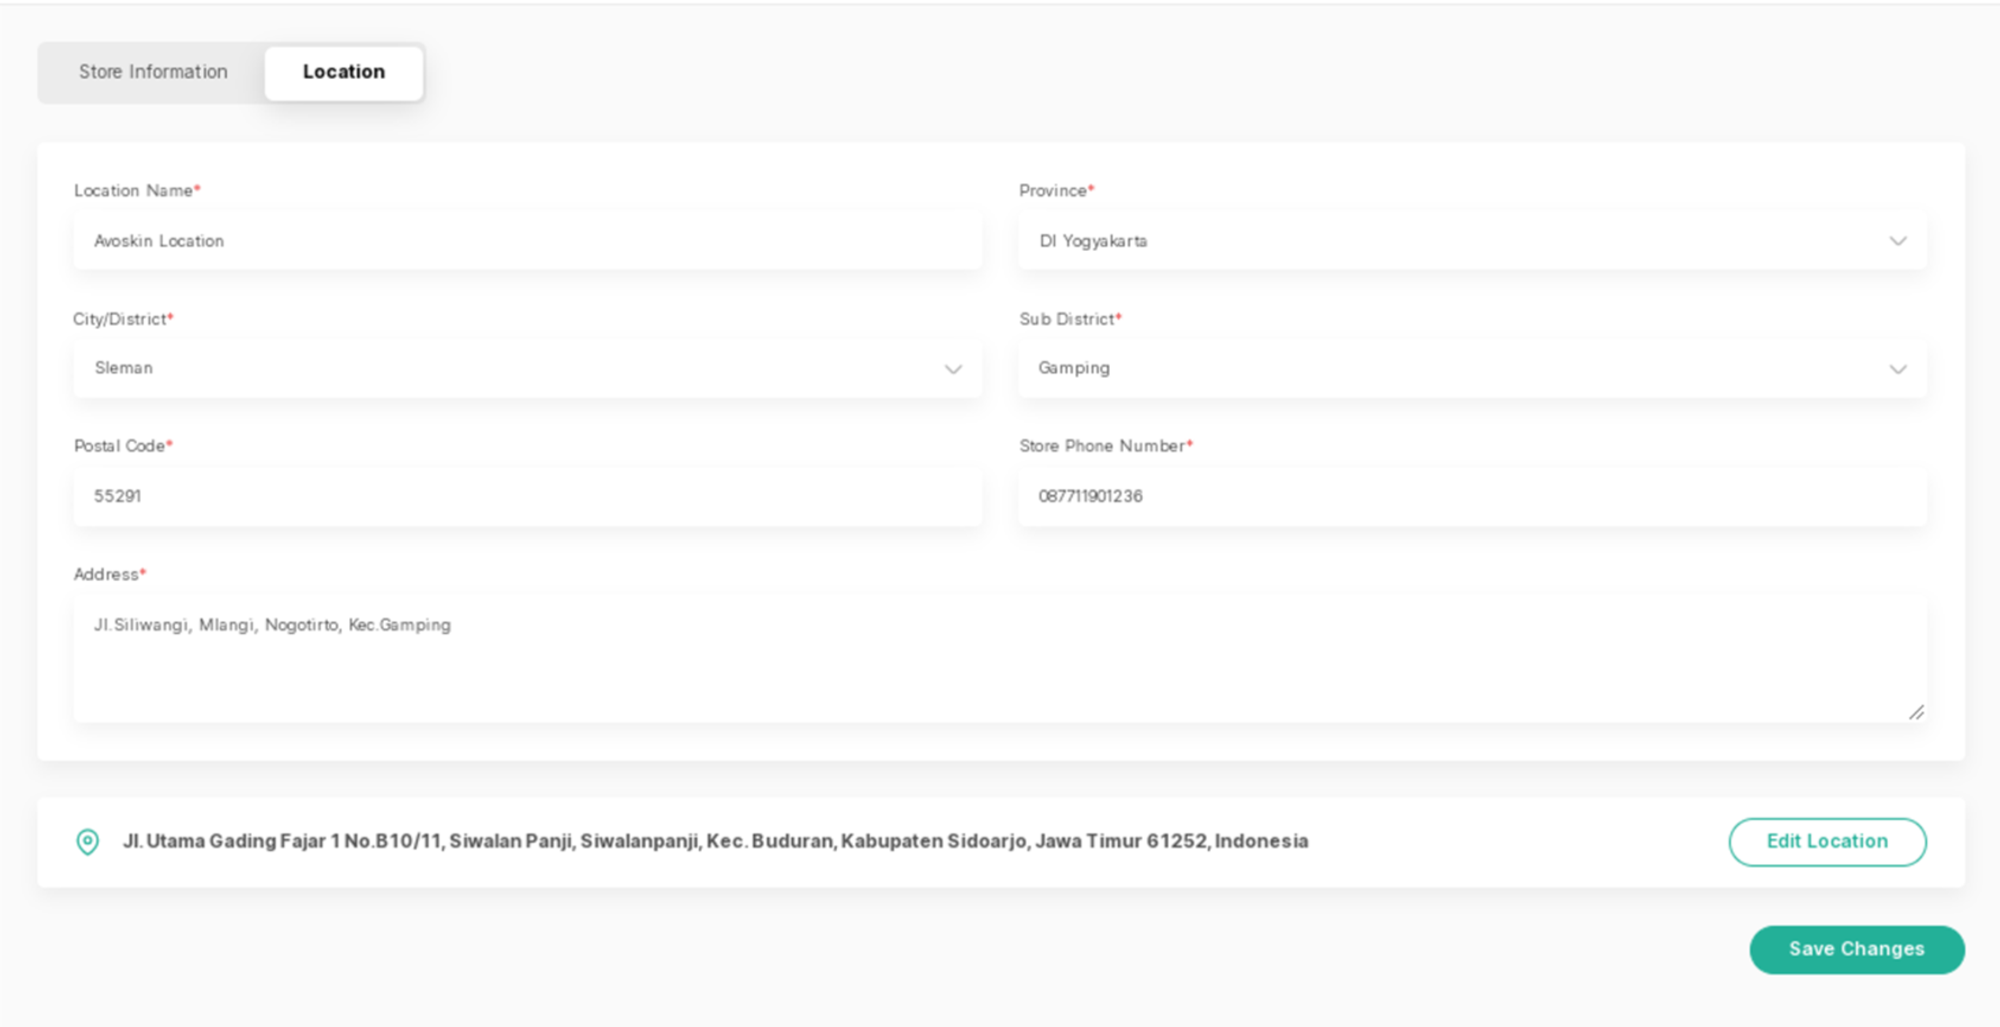
- Choose the Store Information Tab: Click on the "Store Information" tab to access the details.
- Edit Store Details:
In the "location" tab, you can edit the following details:
- Location Name
- Province
- City/District
- Subdistrict
- Postal Code
- Phone Number
- Address
- After filling in the information, click on the “Add Location” button to establish the precise location of your store.
- After confirming the accuracy of your location, click the “Use This Location” button to finalize the pinpointing of your store's location.
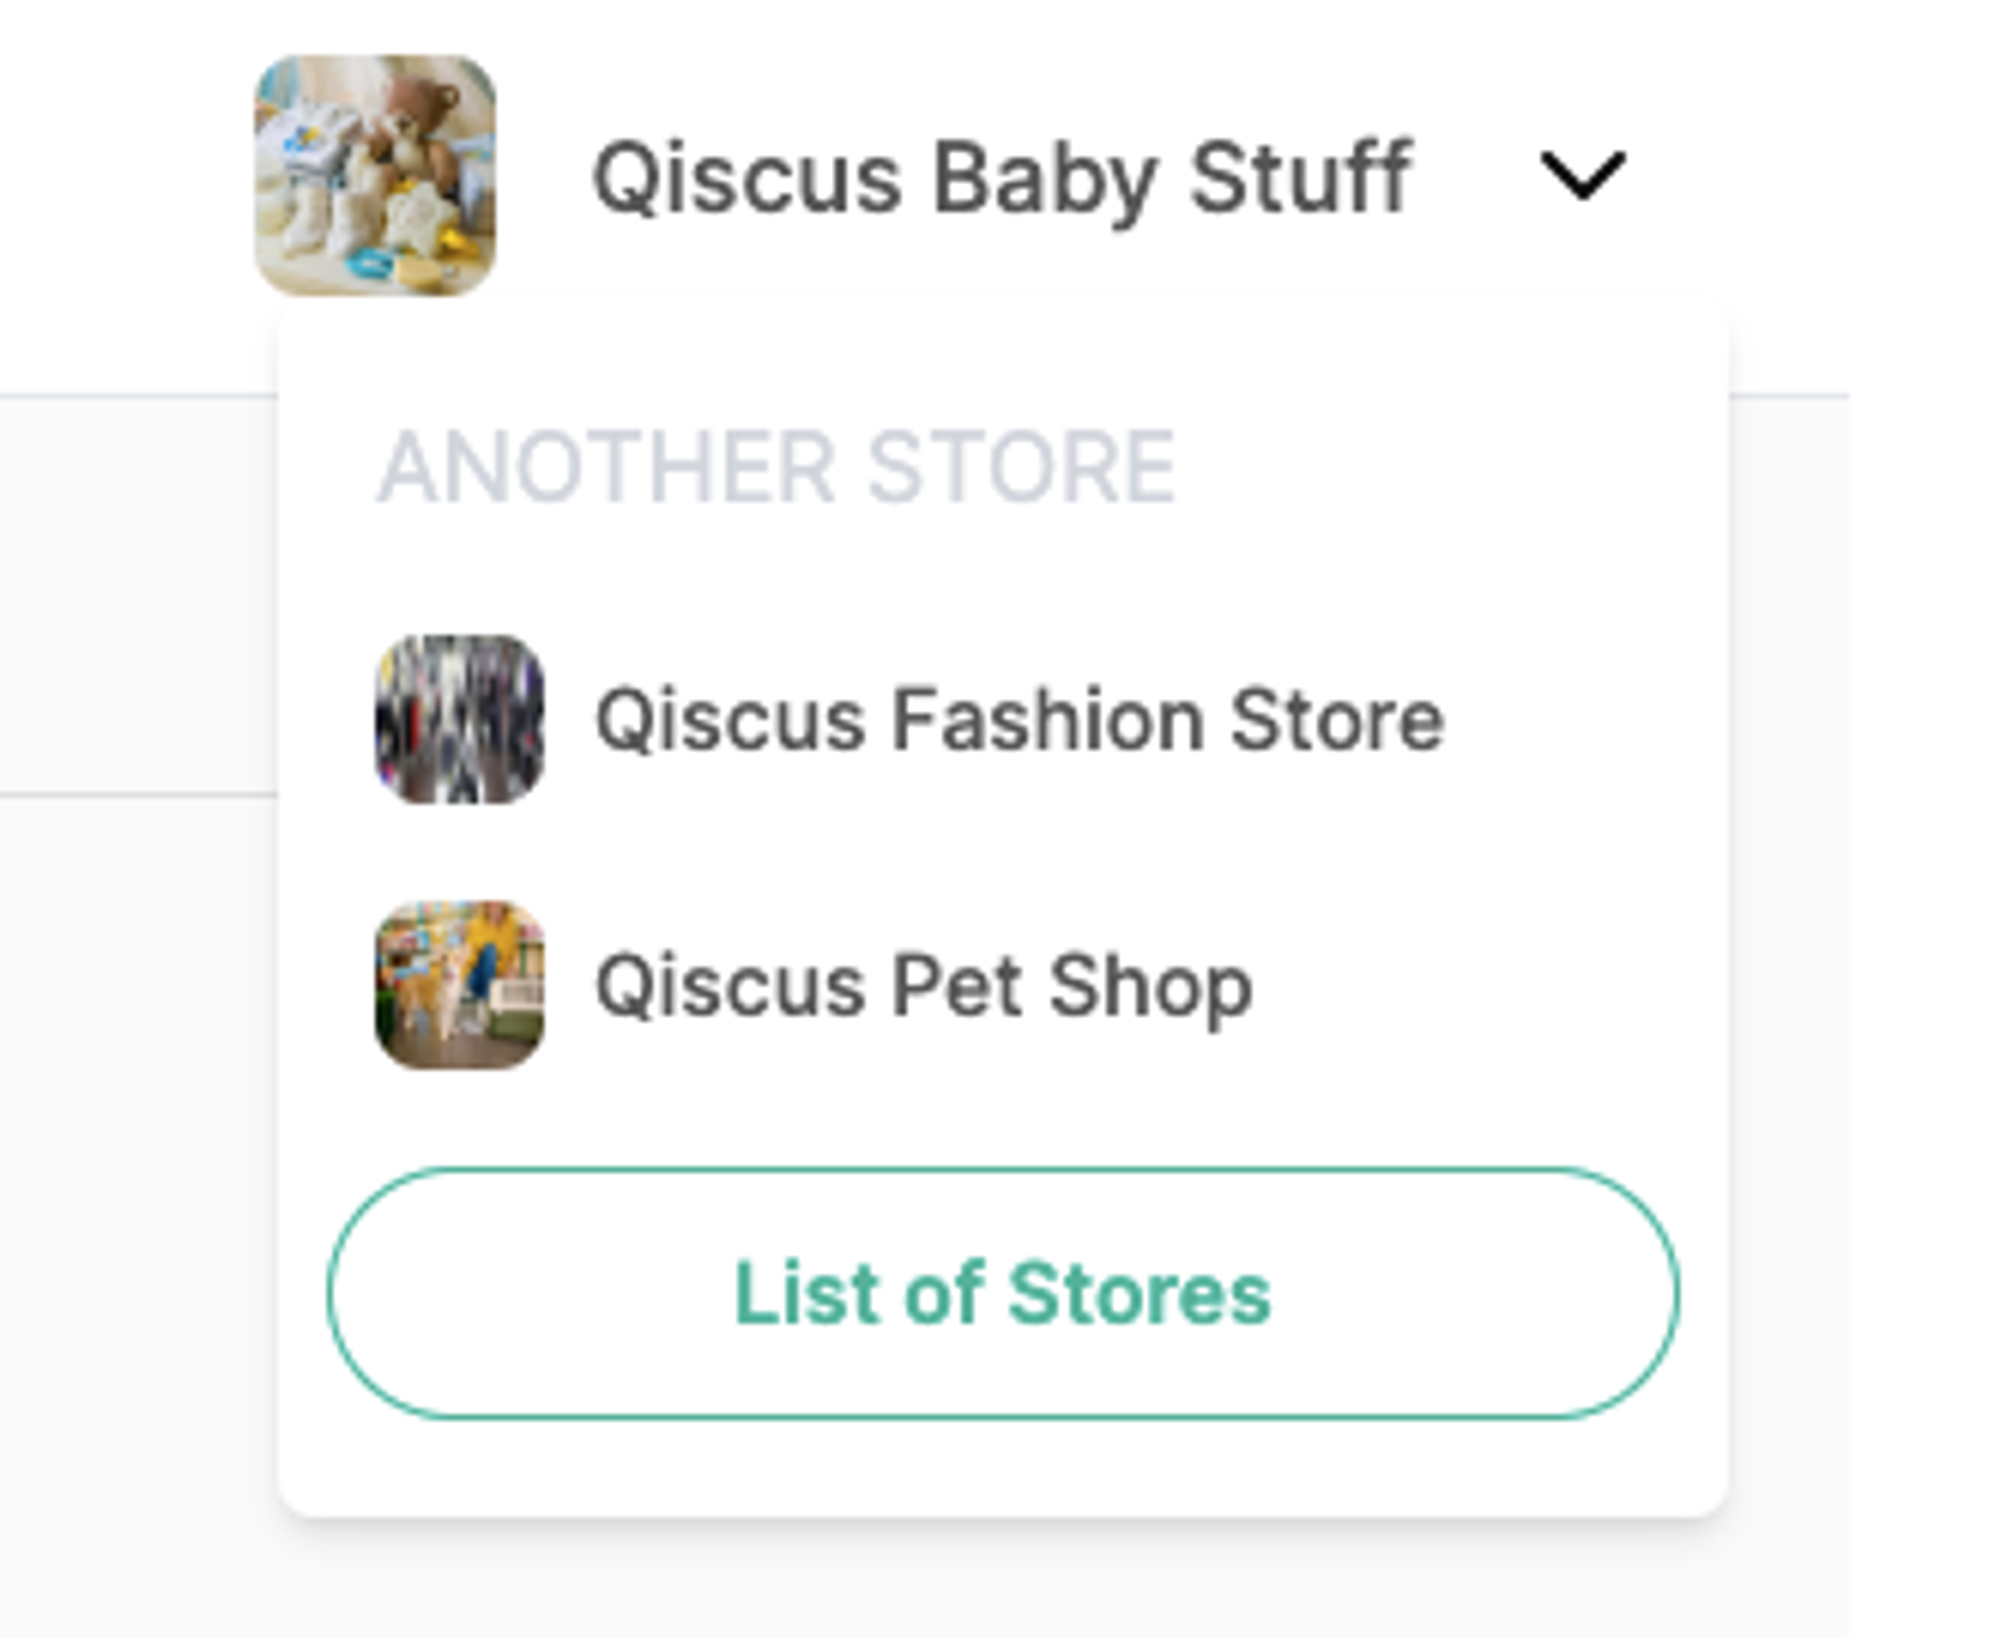
Easily Switch Stores
Switching stores is straightforward and doesn't require navigating back to the store list page. Here's the simplified process:
- Click on the store name located in the upper right corner.
- A dropdown will display all your stores.
- Simply click on the store you wish to switch to, and you'll be redirected immediately.