Message Center is a centralized feature in Qiscus Shop that allows admins to manage all messages sent to customers — from automated order updates to manually shared microsite links. This feature ensures that customers receive clear and timely updates while giving admins full control over message content, language, and delivery behavior.
Overview
Message Center allows you to manage all customer-facing messages sent automatically during the order process — from checkout to payment confirmation — as well as messages used when sharing your store’s microsite link.
With Message Center, you can:
- Configure messages for five key events: Share Microsite URL, Order Failed, Order Incomplete, Order Placed, Payment Reminder, Order Paid, Order Ready to Send, Order Sent, Order Completed, and Order Canceled
- Choose between Default Messages (available in English and Indonesian) or create your own Custom Messages
- Use placeholders (e.g.,
{{username}},{{order_id}},{{grand_total}}) to automatically include customer or order details in each message - Turn Automation Messages on or off for specific events, depending on your store’s needs
- Enable WhatsApp Fallback to ensure important automation messages are still delivered using approved WhatsApp templates when the 24-hour session window expires
- Preview messages in real time before saving any changes
Accessing Message Center
- Go to Qiscus Shop Dashboard
- Open the Store menu
- Click the Message Center tab (next to Location)
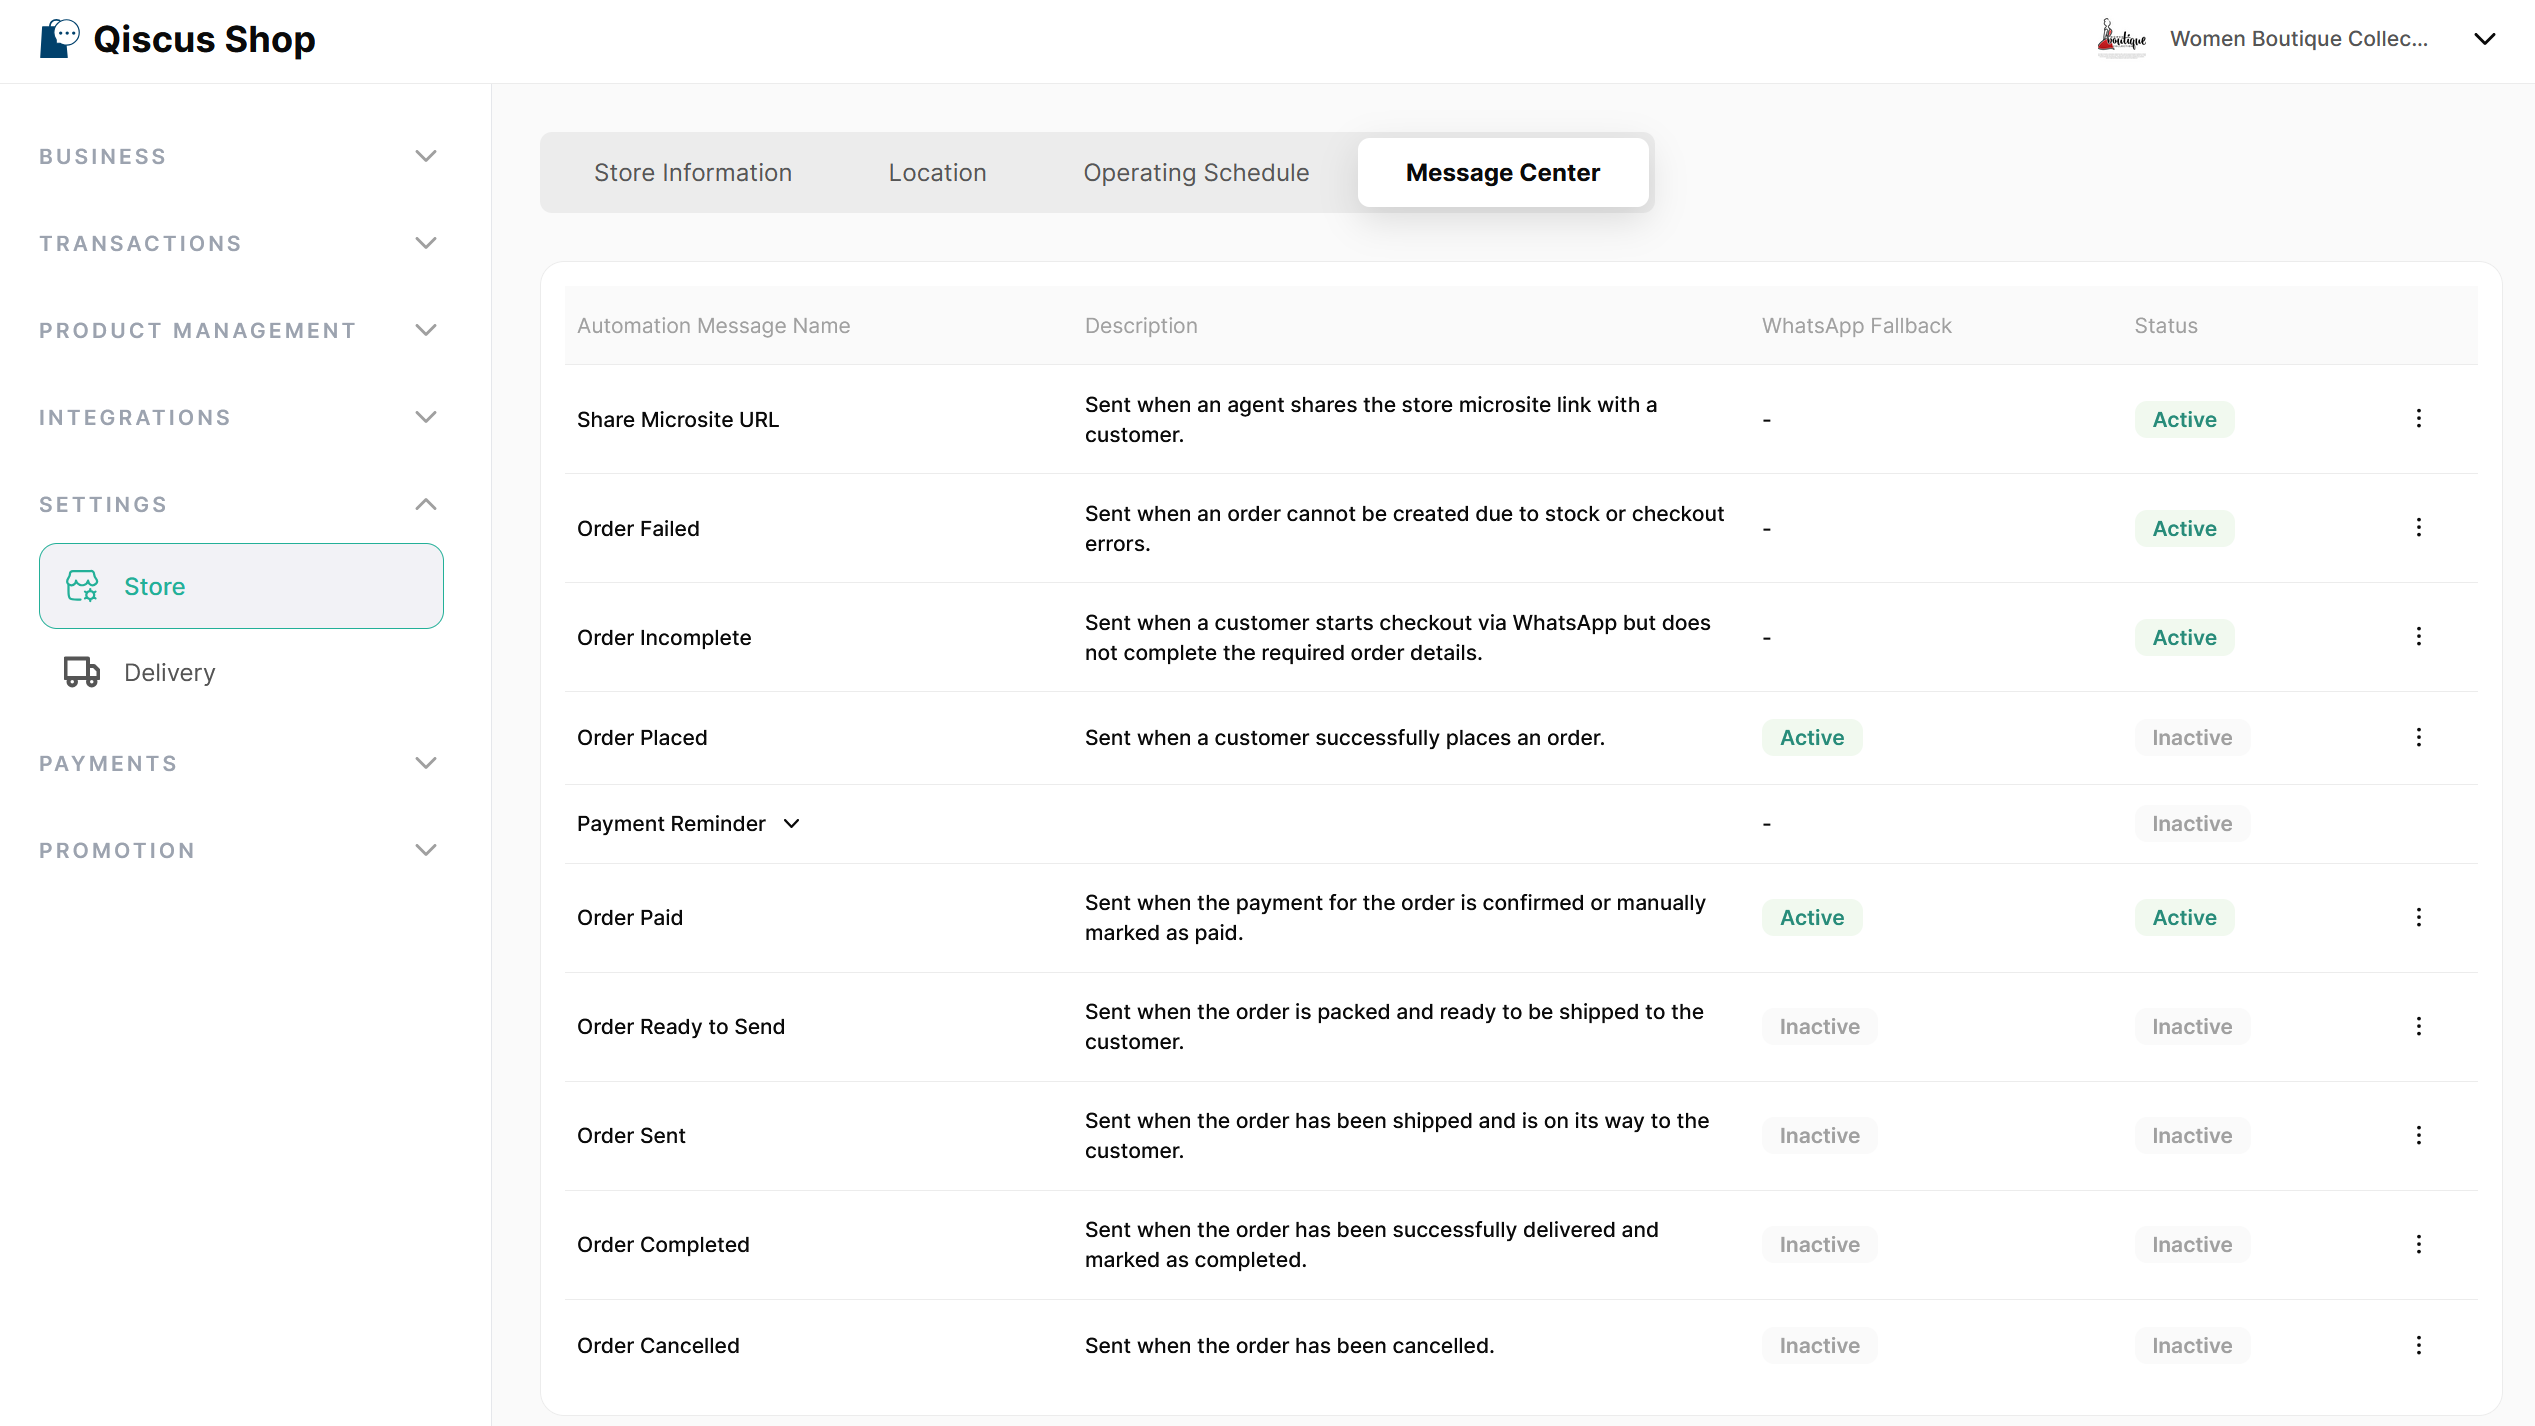
Available Events and Message Triggers
Inside Message Center, admins can manage messages for different order-related events. Each event represents a specific moment in the customer journey when a message can be sent.
There are ten available automation messages:
| Event | Trigger Type | Description |
|---|---|---|
| Share Microsite Share Microsite URL URL | Manual (triggered by agent) | Sends a message containing the microsite link that agents can manually generate and send to customers via Omnichannel. |
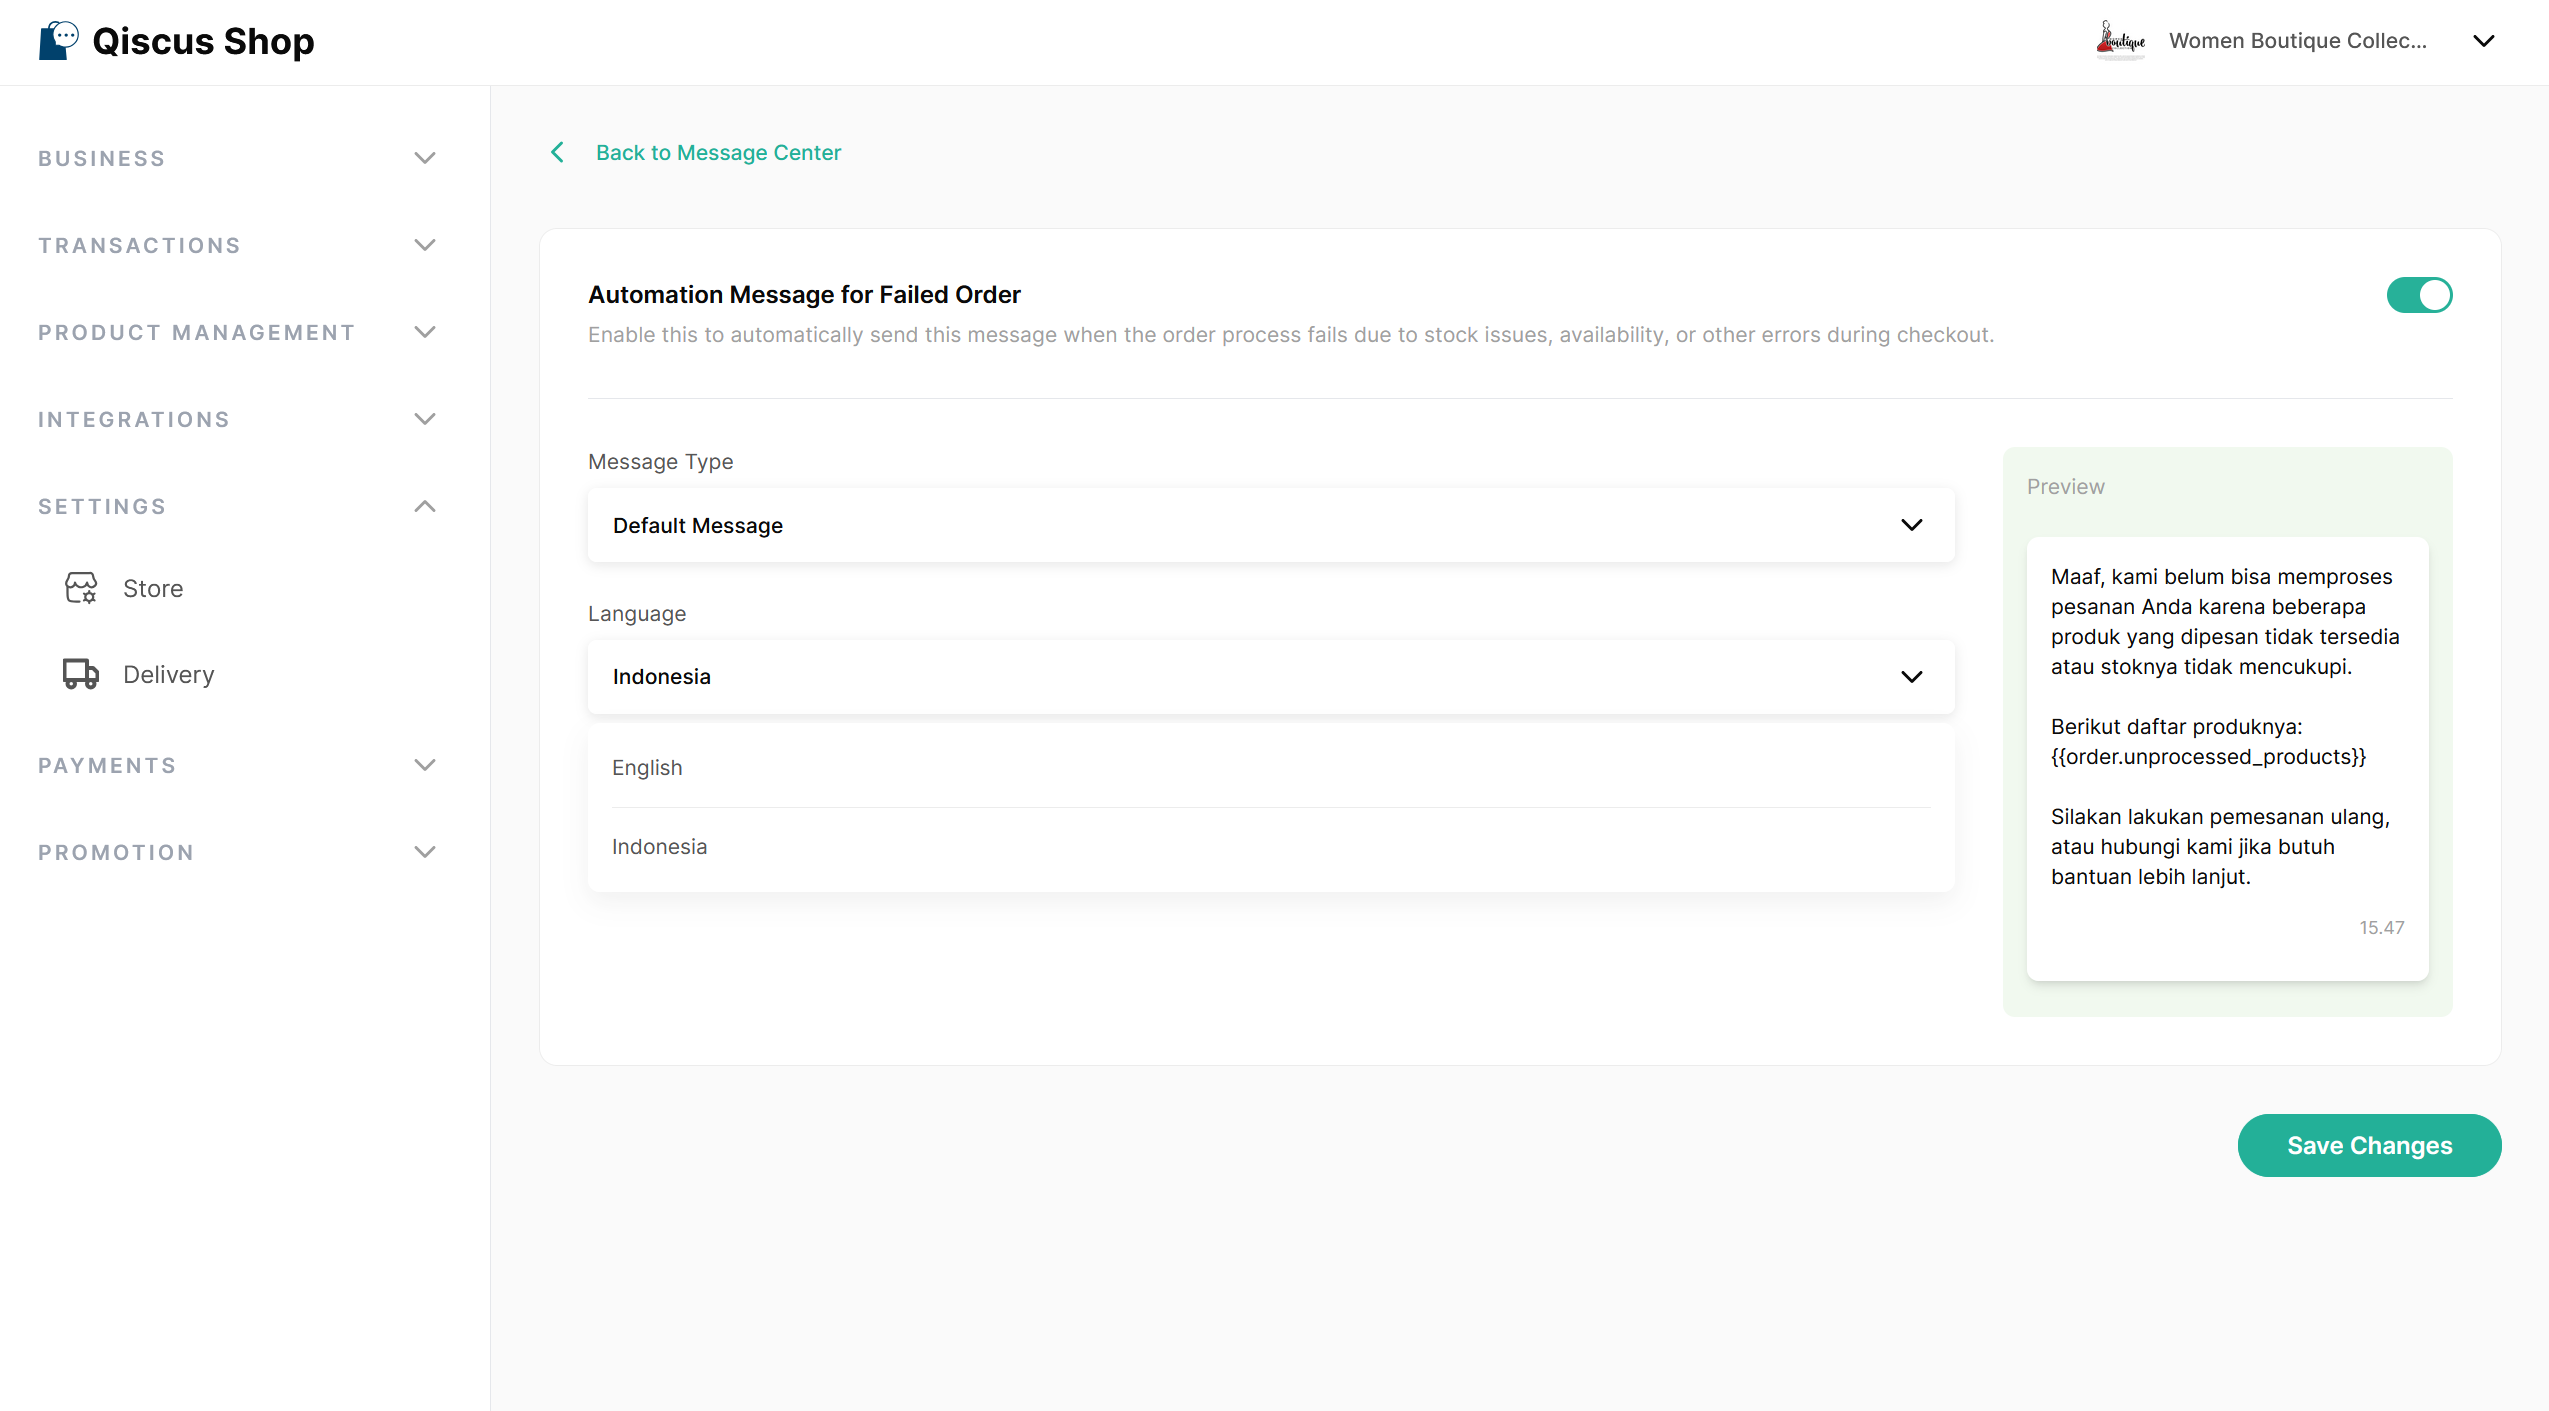
| Order Failed | Automatic | Sends a message when an order cannot be created due to stock issues, product unavailability, or checkout errors. |
| Order Incomplete | Automatic | Sends a message when a customer starts checkout via WhatsApp but hasn't completed the required delivery or payment details. |
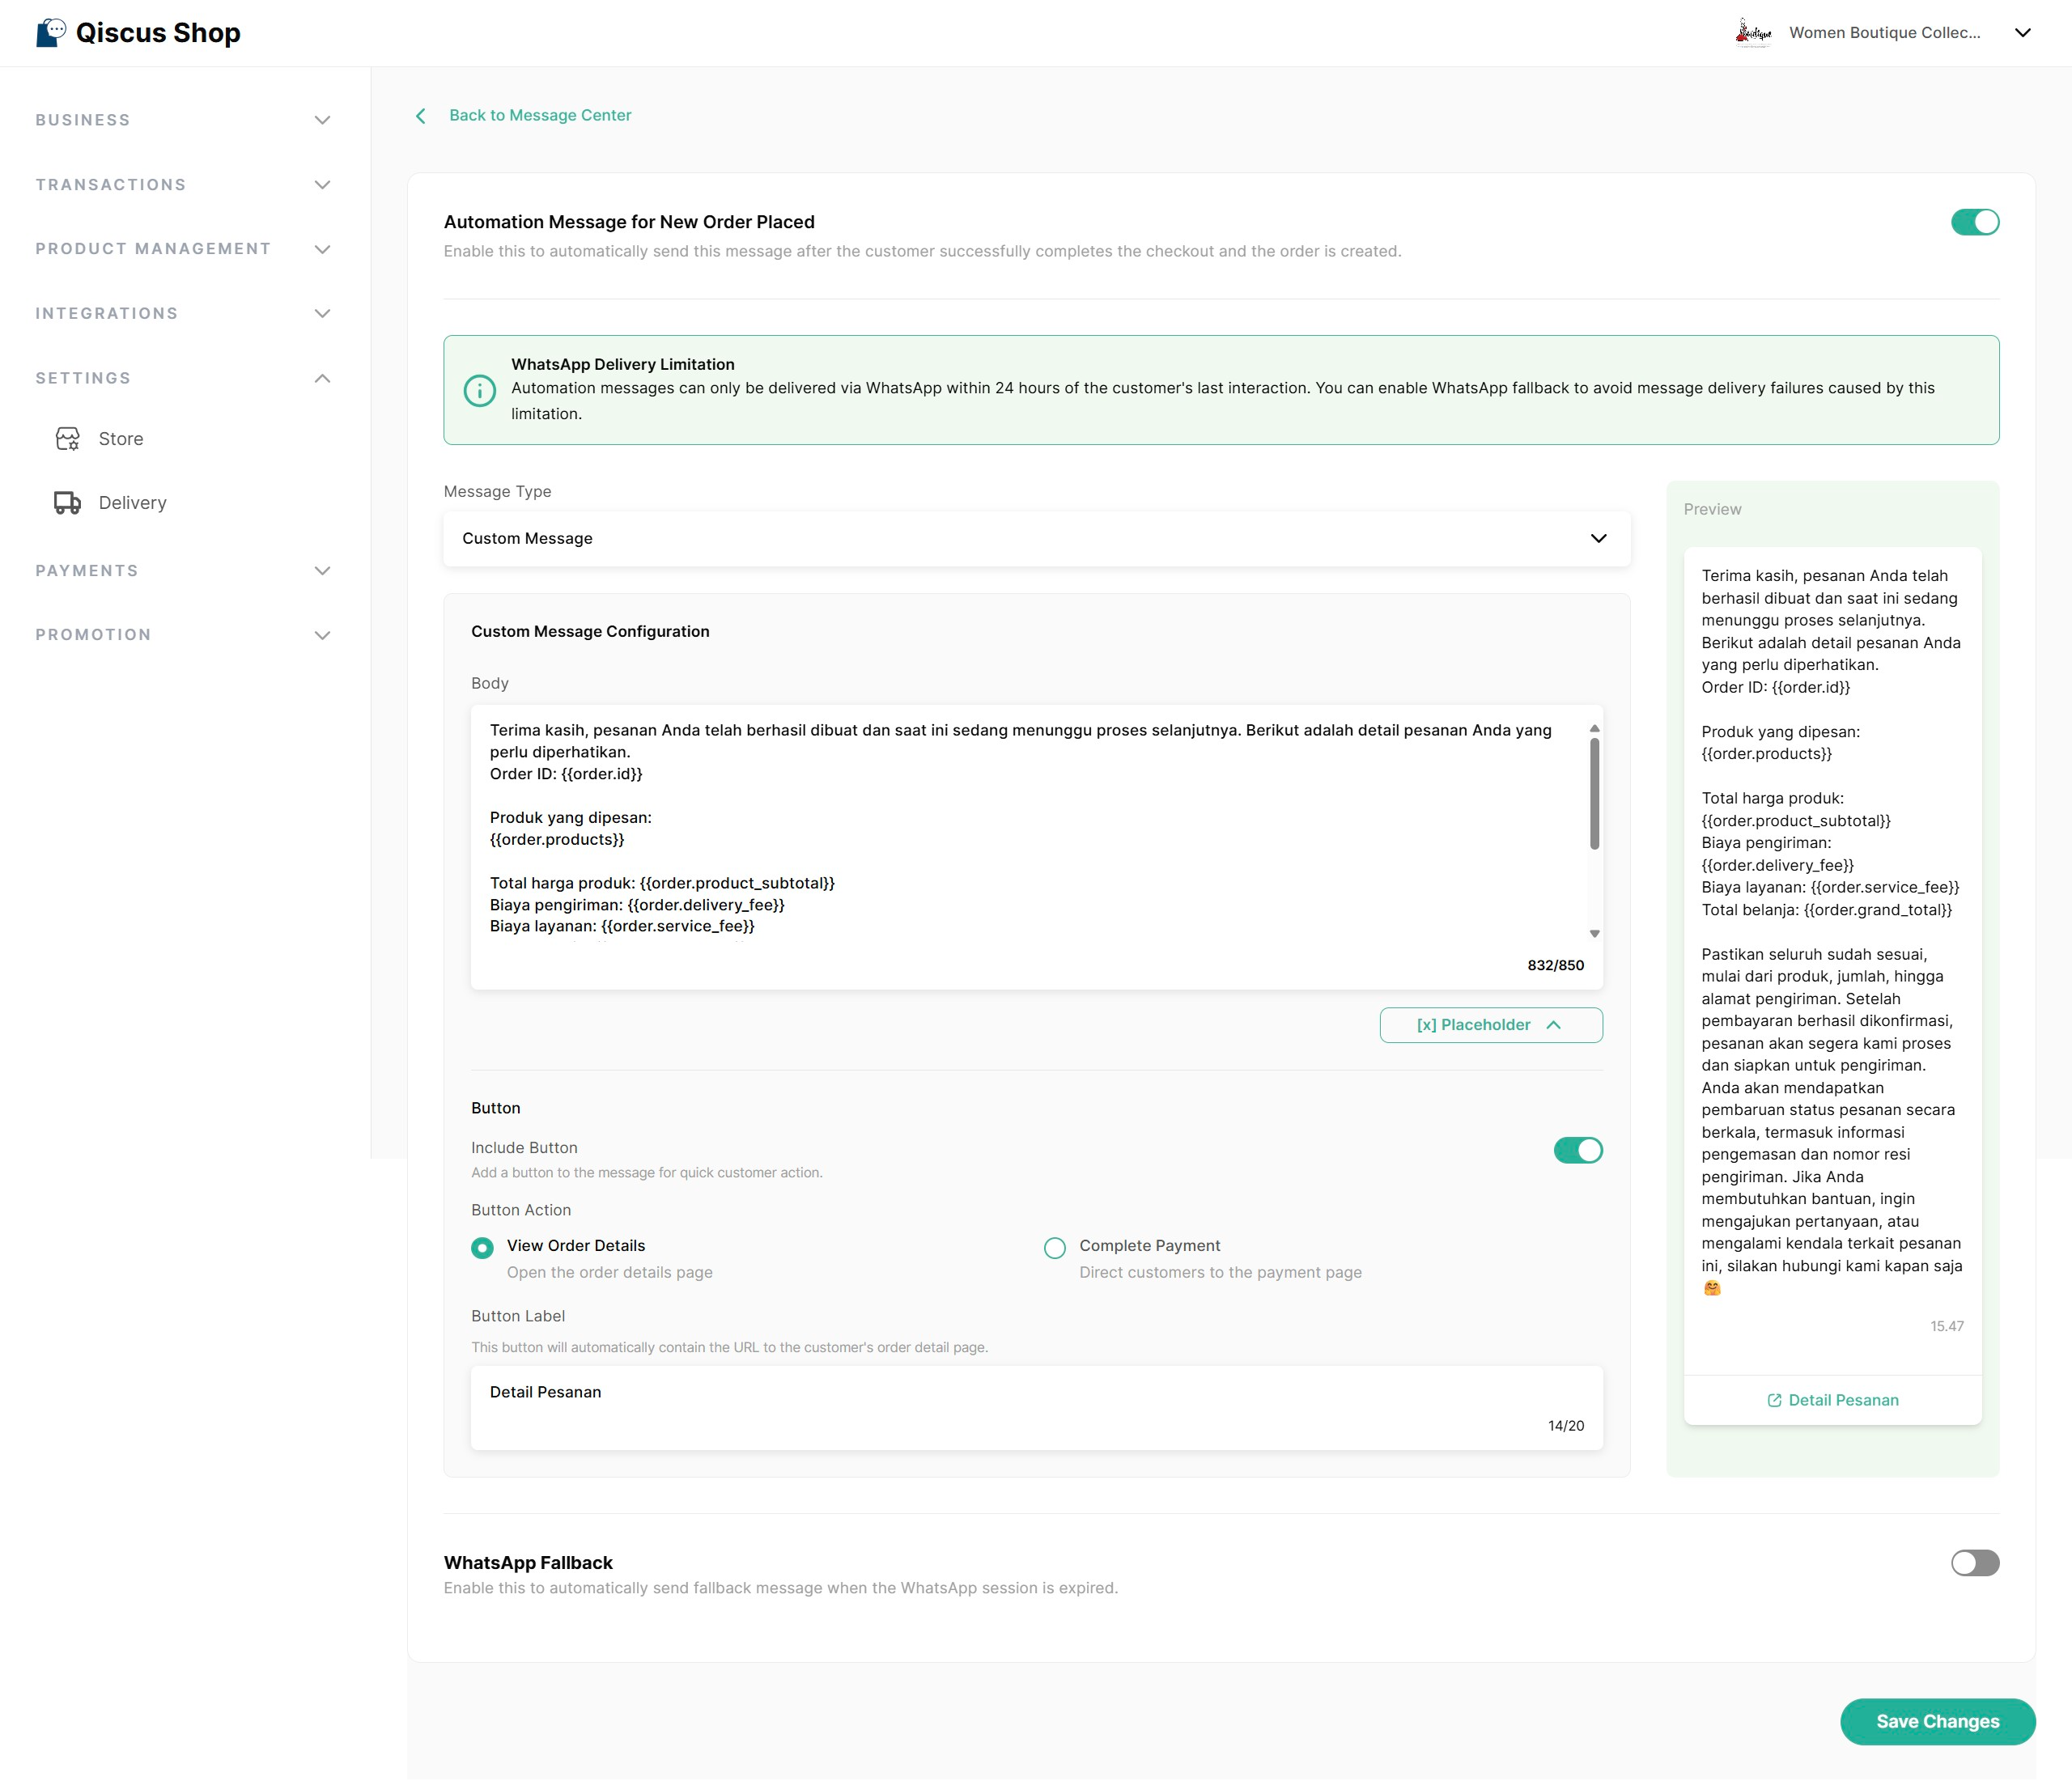
| Order Placed | Automatic | Sends a message after the customer successfully completes checkout and the order is created. |
| Payment Reminder | Automatic | Sends up to four scheduled reminders (Reminder 1–4) when an order is still unpaid. Only Reminder 1 is active by default. |
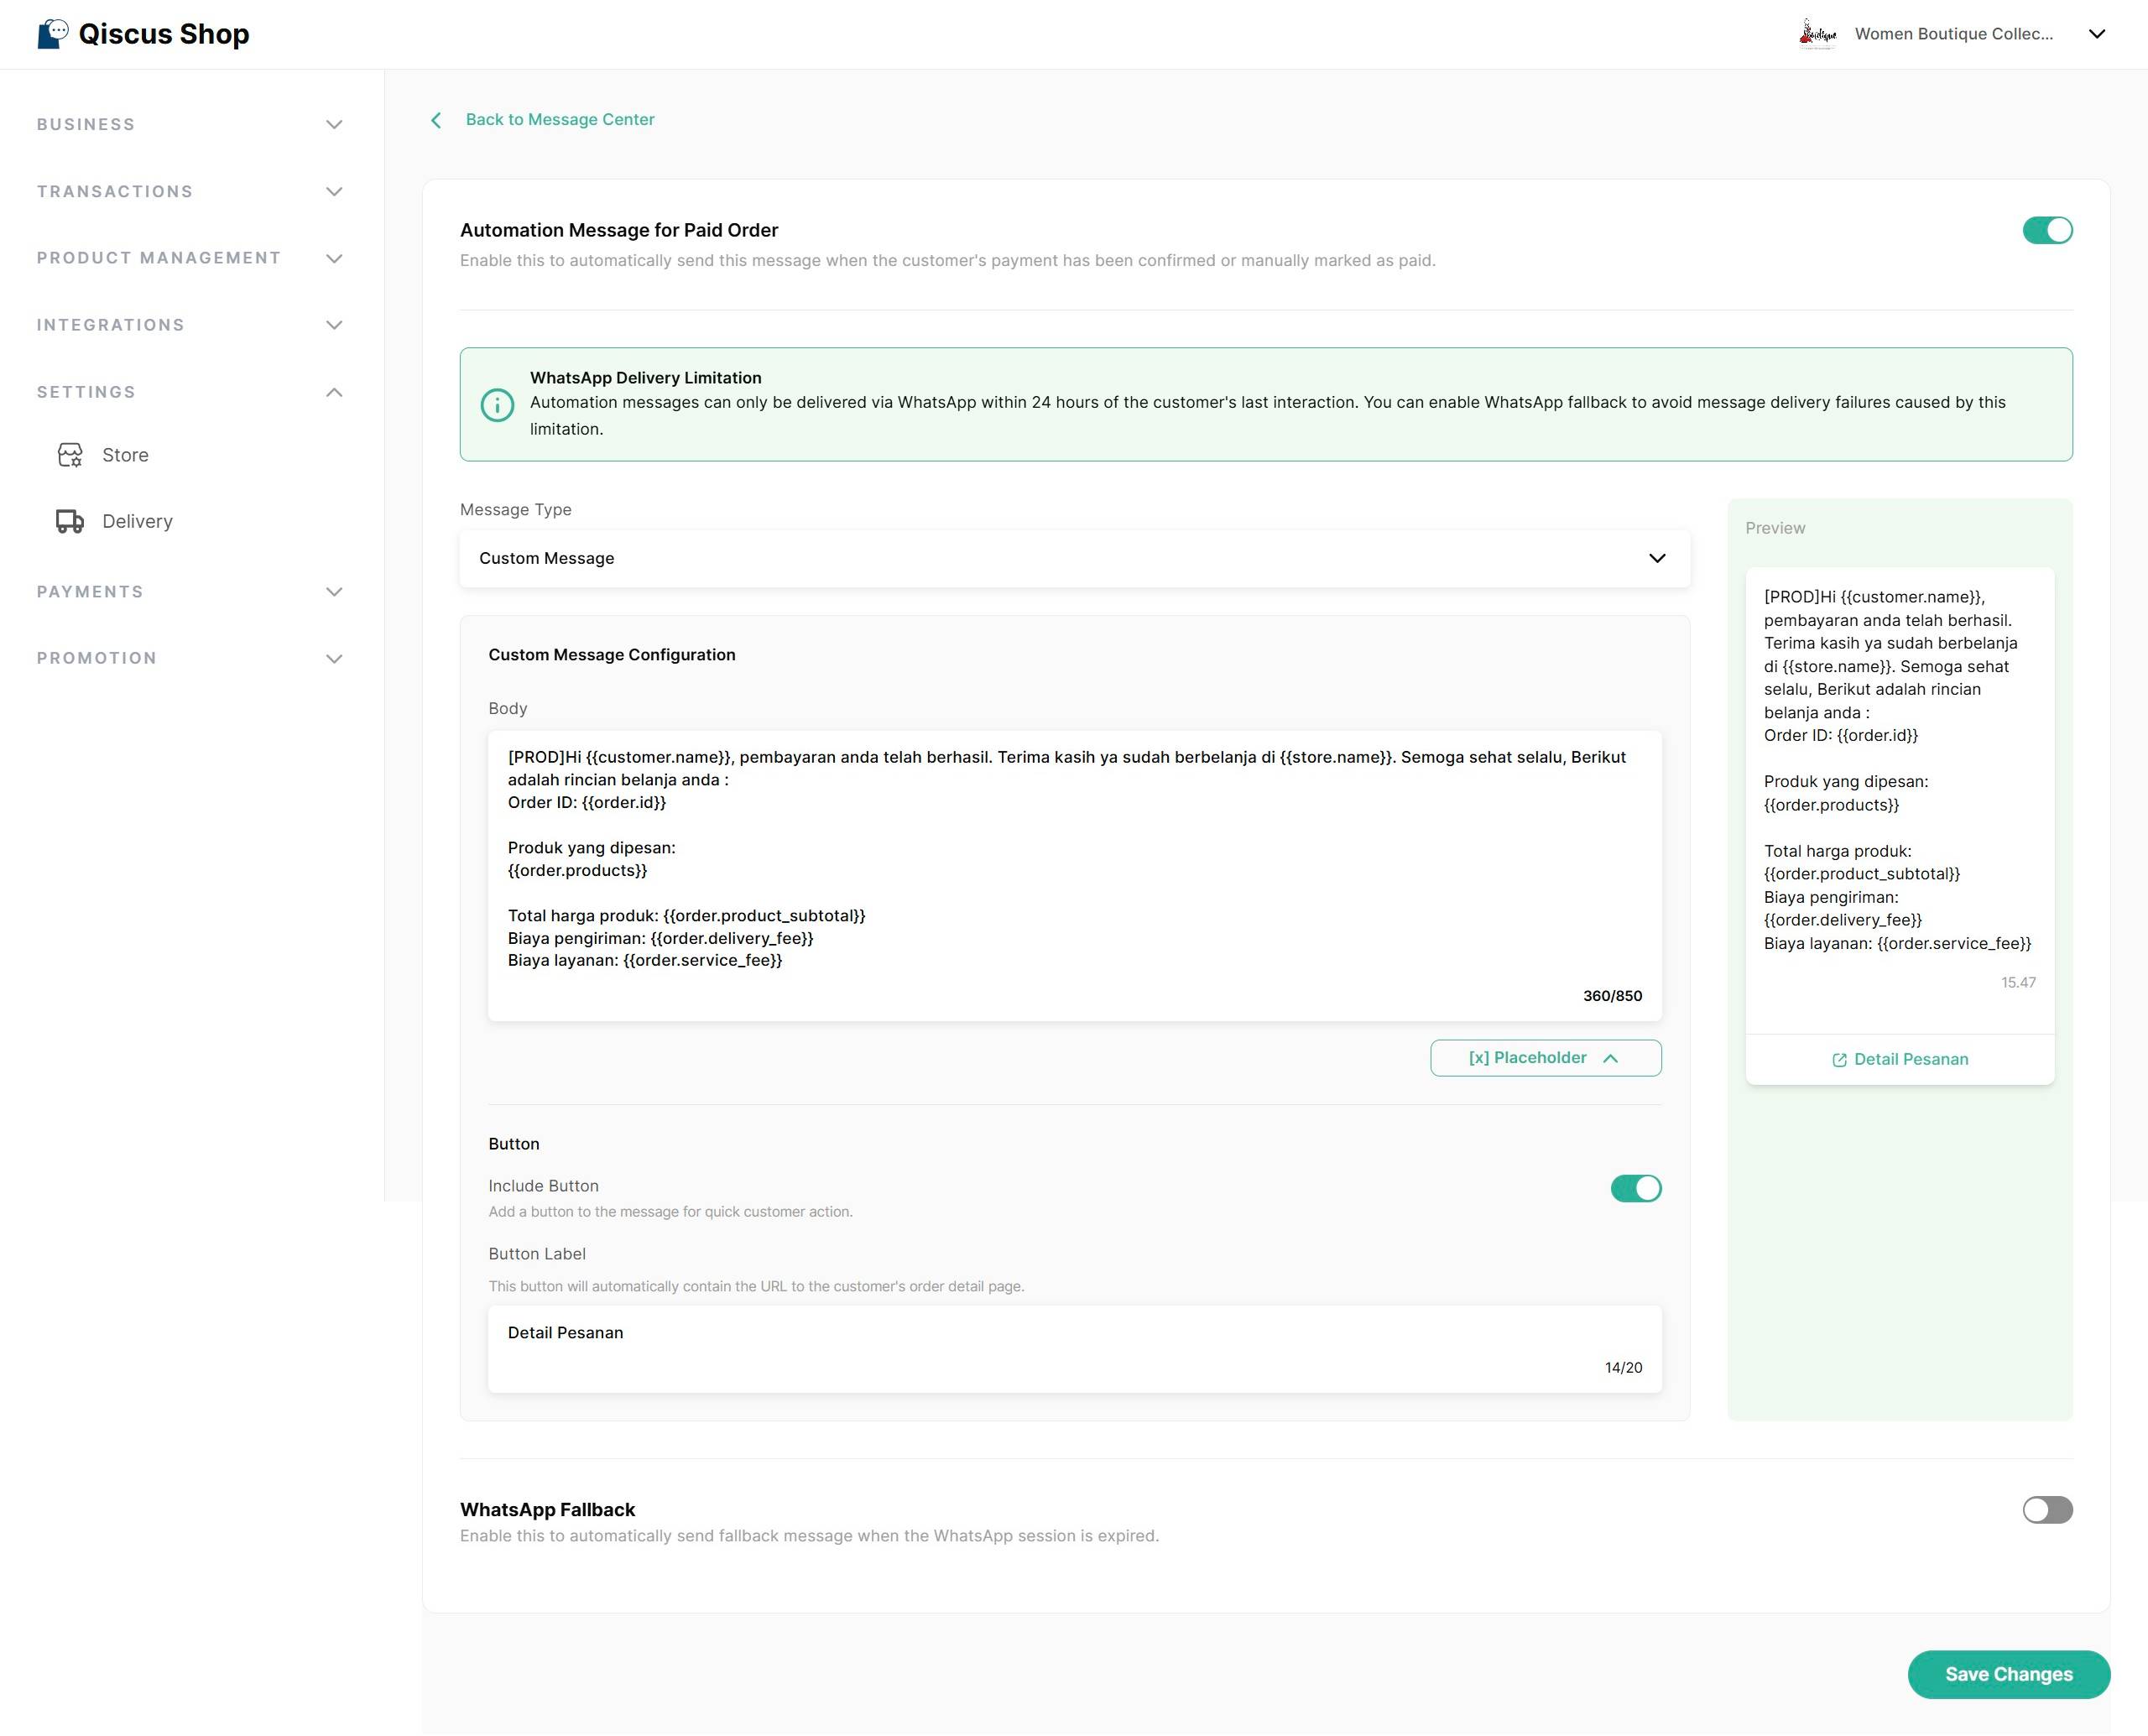
| Order Paid | Automatic | Sends a message when the customer's payment has been confirmed or manually marked as paid. |
| Order Ready to Send | Automatic | Sends a message when the order status changes to Packed. |
| Order Sent | Automatic | Sends a message when the order status changes to Sent. |
| Order Completed | Automatic | Sends a message when the order status changes to Completed. |
| Order Canceled | Automatic | Sends a message when the order status changes to Cancelled. |
For automatic events, each tab includes an Automation Message Toggle that controls whether the message will be sent when the event occurs. By default, this toggle is enabled. When the toggle is disabled, the system will not send the automation message to customers for that event.
For Order Placed, Payment Reminder, Order Paid, Order Ready to Send, Order Sent, Order Completed, and Order Canceled events, admins can optionally enable WhatsApp Fallback. When enabled, the system will send a WhatsApp template message if the automation message fails due to WhatsApp session expiry.
Configuring Automation Messages
Default Configuration
When a store is successfully created in Qiscus Shop, all automation messages are configured using Default Message with English as the default language.
Admins can update the message type, language, and content at any time from Message Center.
Message Type
For each event, you can choose the Message Type to determine how the message will be sent to customers.
1. Default Message
Choose this option to use ready-made templates provided by Qiscus Shop. Simply choose a language from the dropdown (available in English and Indonesian). The message preview will update automatically, allowing you to review how the final message will appear to customers before saving any changes.
2. Custom Message
Choose this option to write your own message and button label. This allows you to personalize the tone, structure, and content to match your store’s branding. You can also insert placeholders, which are dynamic variables that automatically display real customer or order data.
As you edit your message, the Preview section updates in real time to show exactly how the message will appear to customers.

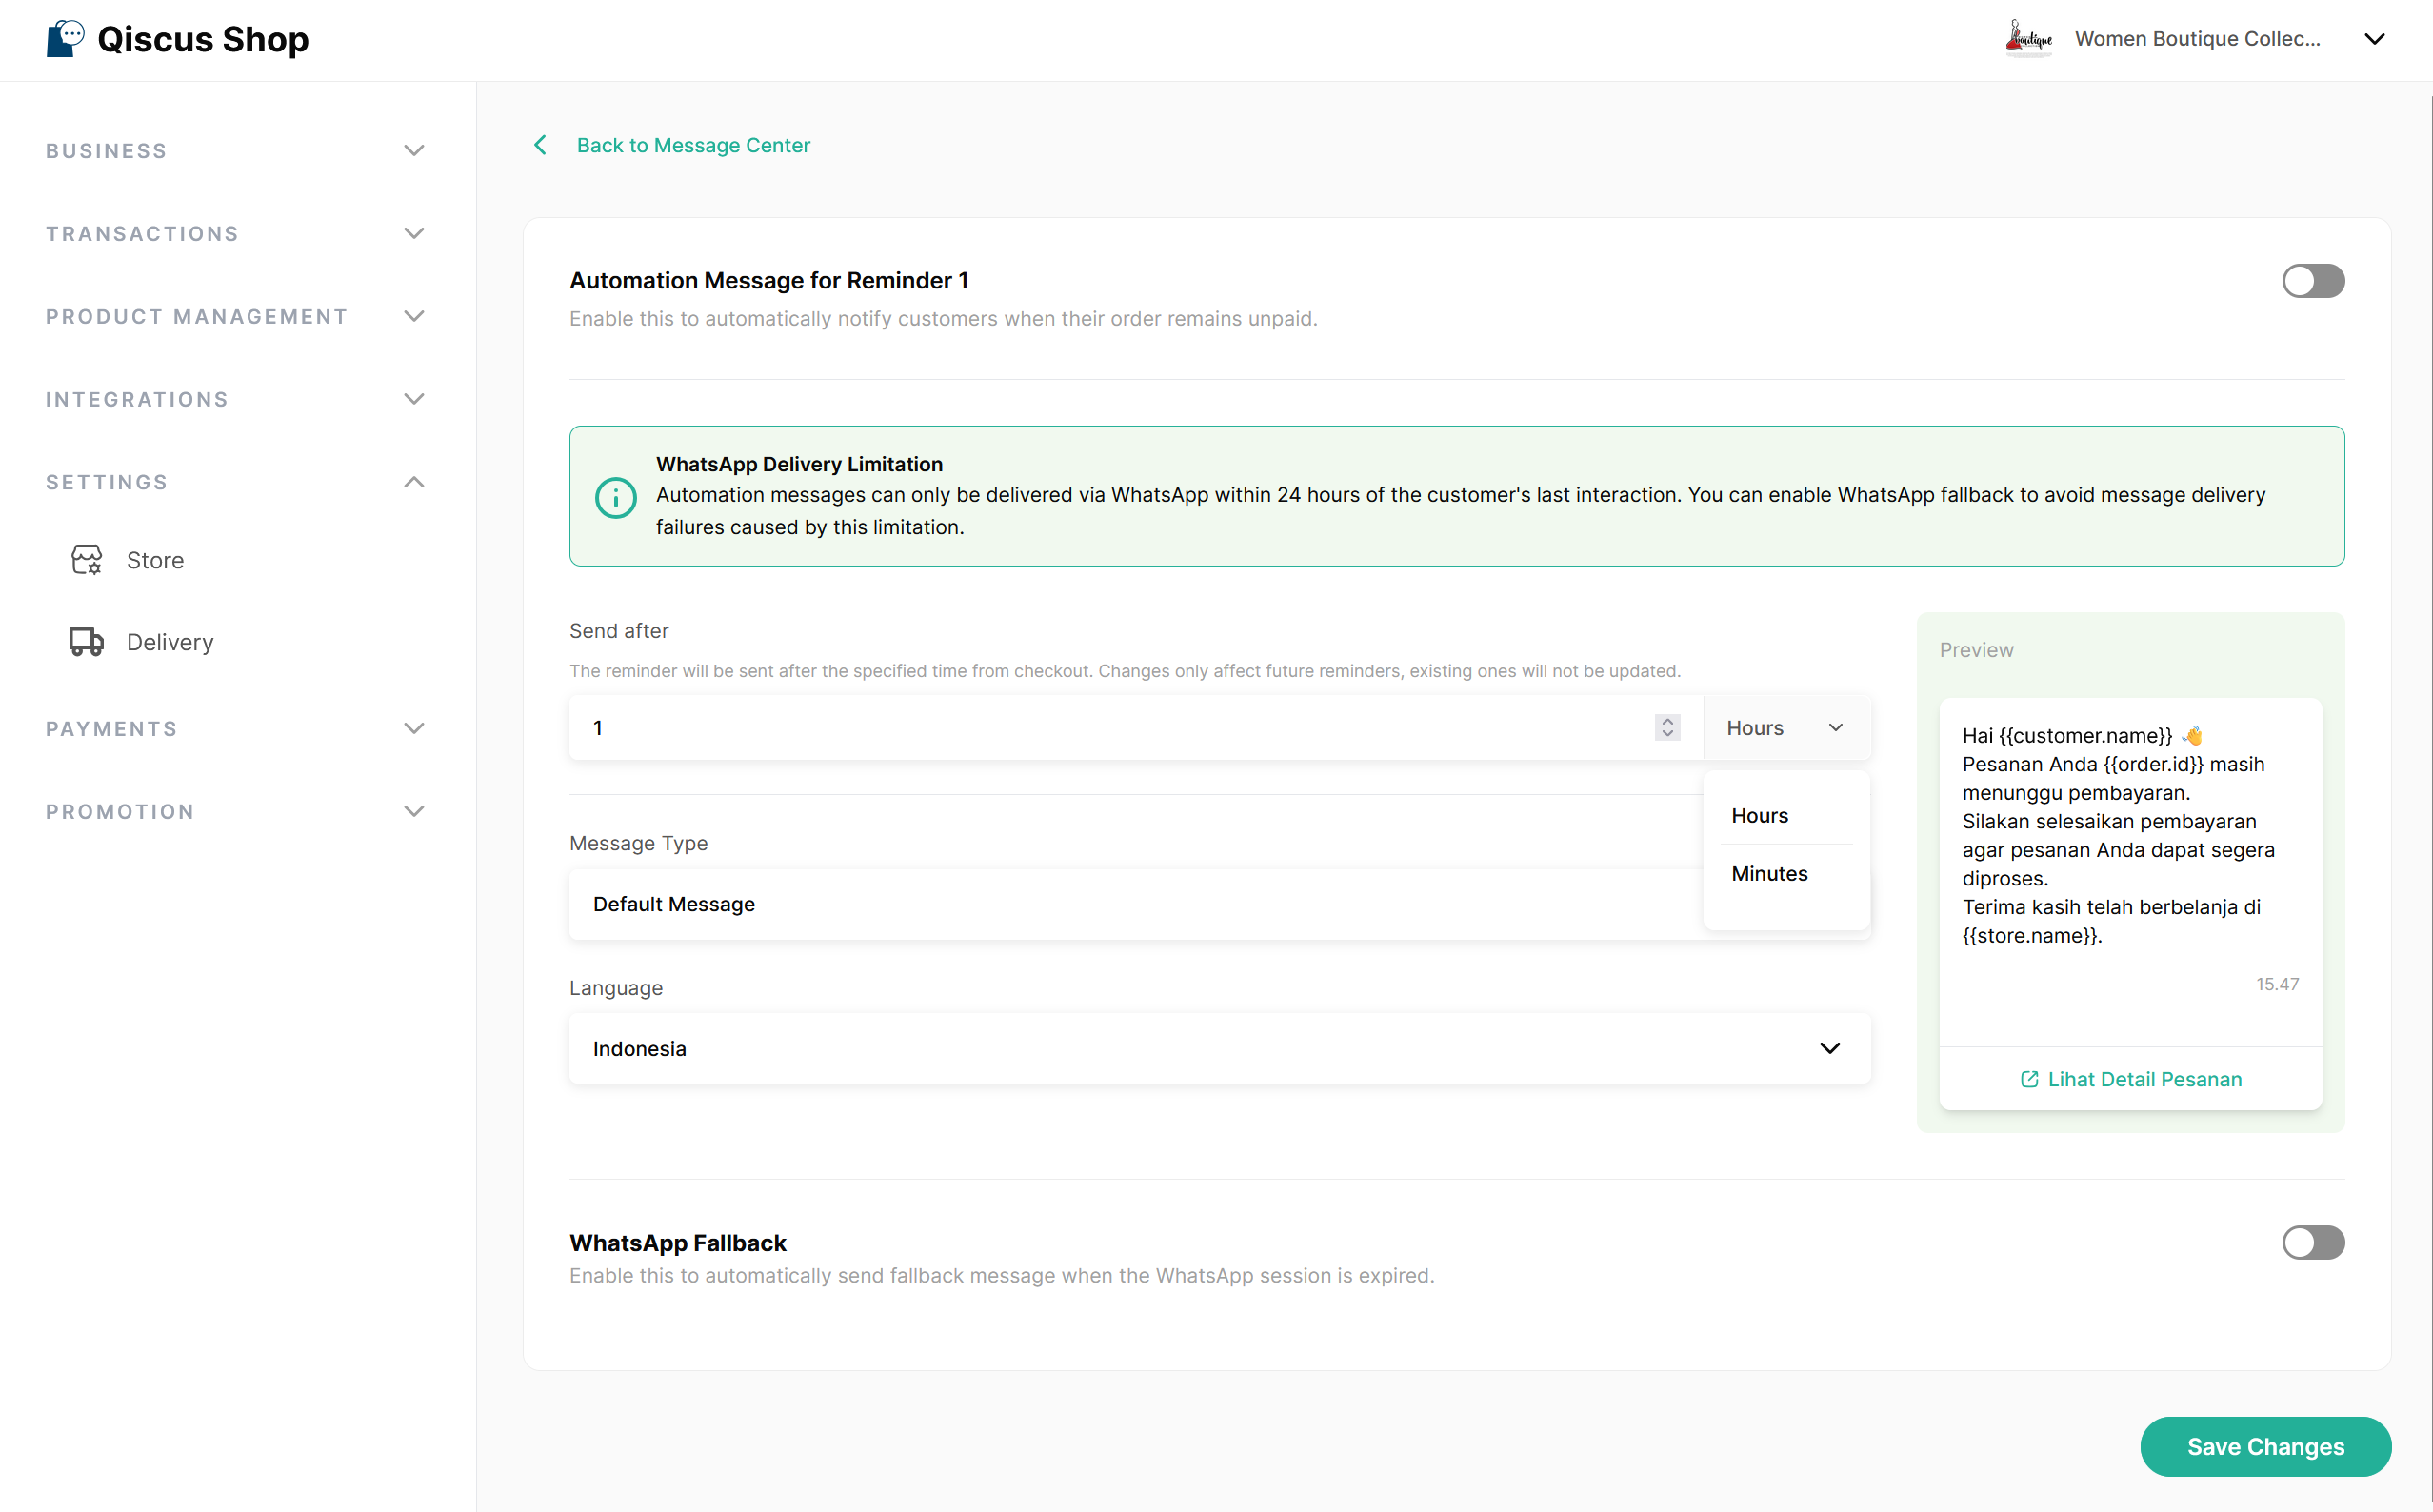
Payment Reminder
Payment Reminder sends up to four scheduled reminders (Reminder 1–4) when an order remains unpaid. By default, only Reminder 1 is active. Click the Payment Reminder row to expand and manage individual reminders.
Each reminder has a configurable Send After time that controls how long after the order is created the reminder will be sent. You can enter a numeric value and select either Hours (0–24) or Minutes (0–1440) as the unit. Send After cannot be set to zero; the system will show an error: Reminder time must be greater than 0. Note that any changes to Send After will only apply to reminders scheduled in the future and will not affect reminders already queued.
| Reminder | Default Time |
|---|---|
| Reminder 1 | 1 hour |
| Reminder 2 | 3 hours |
| Reminder 3 | 6 hours |
| Reminder 4 | 23 hours 30 minutes |
A reminder is sent only while the order is still Unpaid (and the payment link, if any, has not expired). It is automatically cancelled if the customer pays, the order is cancelled, or the payment link expires.
Button Configuration
On the Automation Message Detail page, you can configure whether a button is included in the message sent to the customer.
Include Button
Include Button is a toggle located above the Button Label field.
- Toggle ON (default): The Button Label field is visible and editable. The button appears in the message and in the preview panel.
- Toggle OFF: The Button Label field is hidden. The button is not shown in the message or preview panel. The saved label value is preserved.
This toggle is available for: Order Placed, Payment Reminder, Order Paid, Order Ready to Send, Order Sent, Order Completed, and Order Canceled.
Button Action
For Payment Reminder and Order Placed message types, you can choose what action the button performs when the customer taps it. This field appears when the Include Button toggle is turned ON.
- View Order Details (default) — Opens the order details page
- Complete Payment — Directs the customer to the payment page
For all other message types, the button always uses View Order Details and the Button Action field is not shown.
Supported Placeholders
Dynamic placeholders allow automatic data replacement in messages.
| Placeholder | Description |
|---|---|
{{store_name}} | Store name sending the message |
{{customer.name}} | Customer name (fallback: "Kak") |
{{order.unprocessed_products}} | Products that couldn't be processed (e.g., out of stock) |
{{order_id}} | Unique order ID (prefixed "#") |
{{order.products}} | List of ordered products and quantities |
{{order.product_subtotal}} | Total product price before fees |
{{order.delivery_fee}} | Delivery cost charged based on the selected shipping method |
{{order.service_fee}} | Additional service/platform fee |
{{order.grand_total}} | Final total including product subtotal, delivery, and service fees |
{{order_details_link}} | Link to the order details page |
{{order_receipt_link}} | Link to the digital receipt page |
{{order.awb}} | Shipping tracking number. Renders as empty if not set — message still sends. Available for: Order Sent, Order Completed, Order Canceled |
{{order.shipping_courier}} | Courier service name. Renders as empty if not set. Available for: Order Sent, Order Completed, Order Canceled |
{{order.payment_url}} | Payment gateway session URL. Available for: Payment Reminder, Order Placed |
{{order.discount_amount}} | Total discount from vouchers (product + shipping). Excludes flash sale discounts. Returns 0 if no discount applied. Available for: Order Incomplete, Order Placed, Payment Reminder, Order Paid, Order Ready to Send, Order Sent, Order Completed, Order Canceled |
WhatsApp Fallback Configuration
After 24 hours of no interaction, your store can no longer send normal (session) messages to customers. Because of this, any automation message triggered after the 24-hour window will fail to send.
To ensure customers still receive important updates — such as when their order has been successfully created or when their payment has been confirmed — you can enable WhatsApp Fallback.
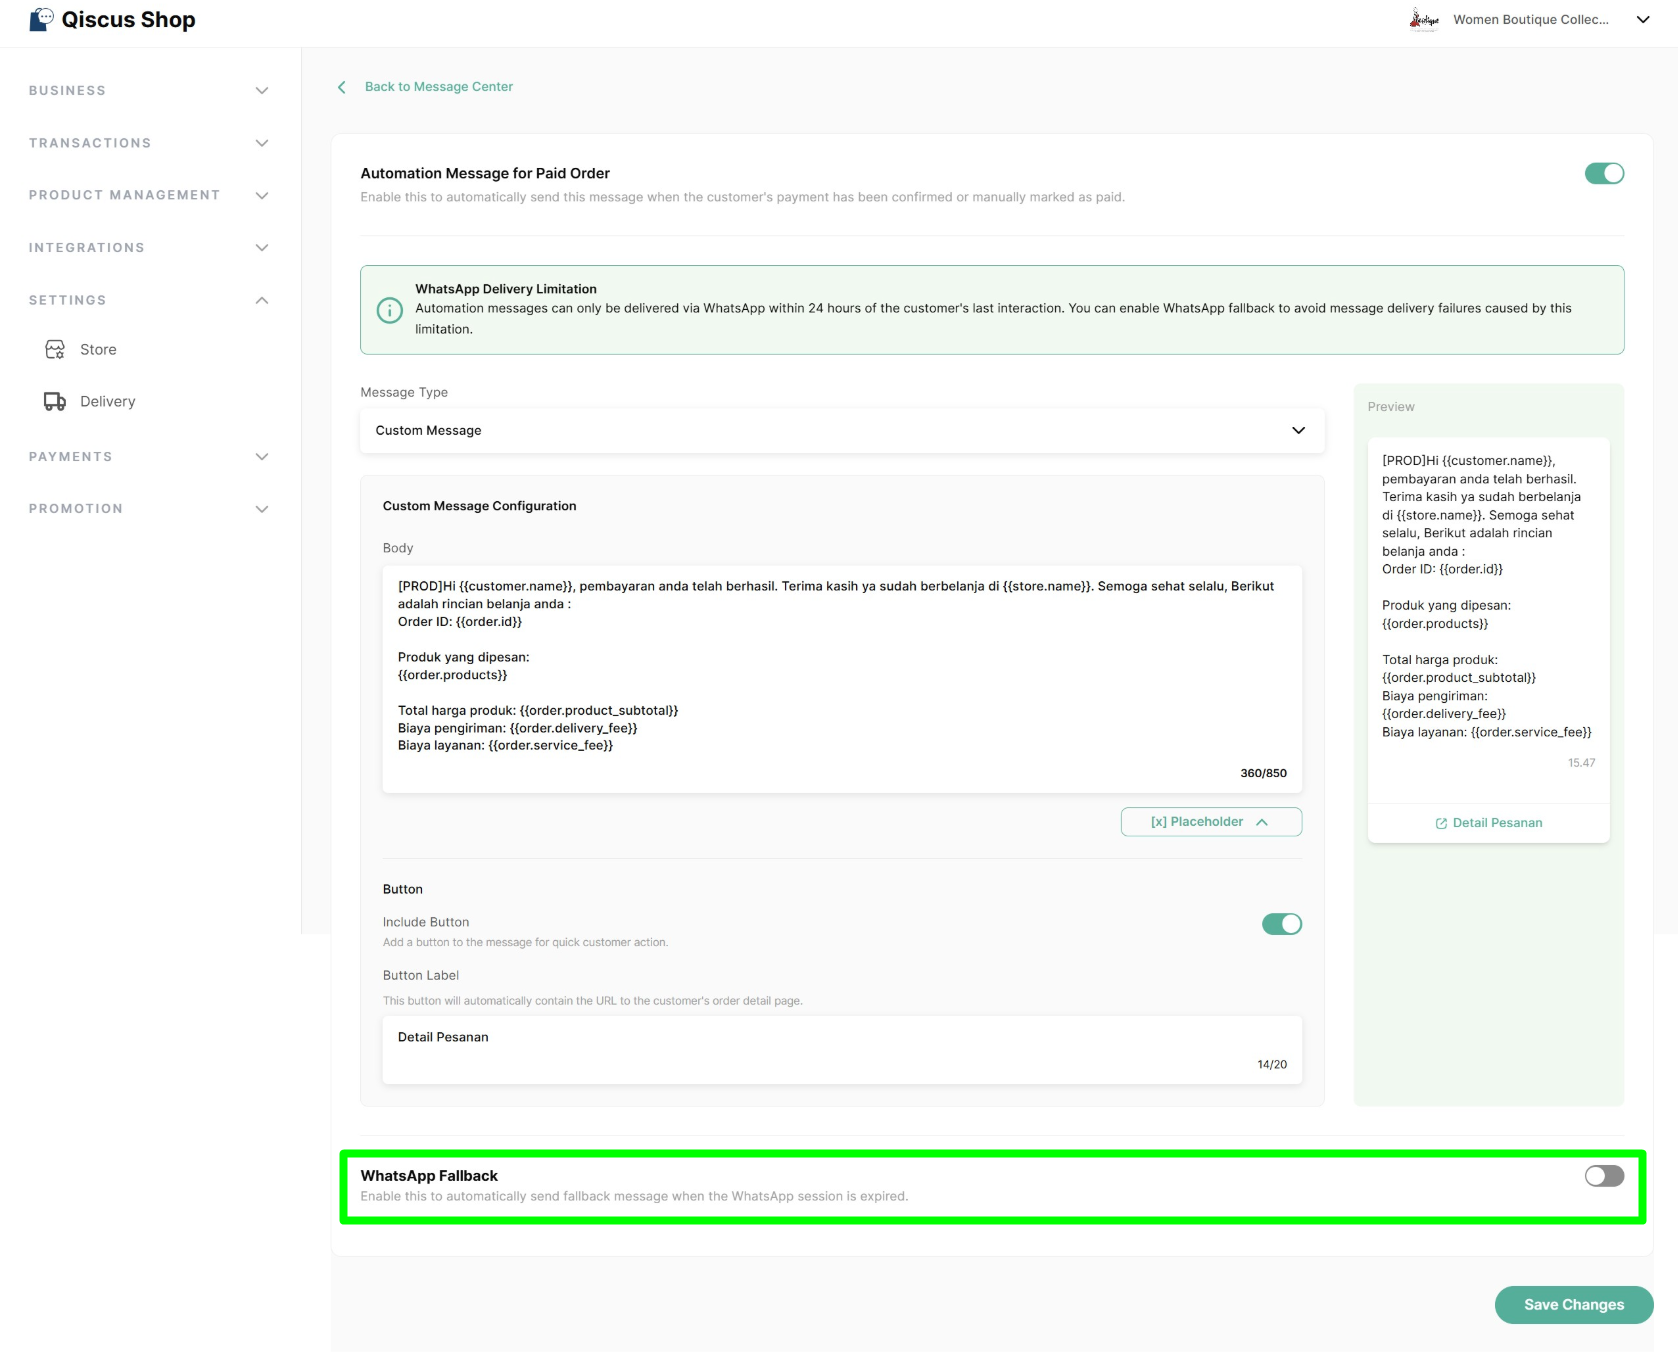
When WhatsApp Fallback is active, the system will automatically send a pre-approved WhatsApp template message whenever an automation message cannot be delivered due to session expiry.
How to Enable WhatsApp Fallback
Go to the event tab (Order Placed or Order Paid) in Message Center
Enable toggle WhatsApp Fallback to expand fields for fallback configuration
Select the template you want to use for fallback messages:
Choose a Template Type (24-Hour Message or Broadcast Message)
Select a Template Category, then choose the Template Name and Language
If the template includes variables (placeholders), fill them in according to your store’s needs
- Each variable can be filled using:
- Custom text, or
- Dynamic placeholders provided by Qiscus Shop (such as customer name, order details, or order paths)
- Each variable can be filled using:
If the selected template includes CTA buttons (e.g., Visit Website or Open Dynamic URL), to ensure the CTA button correctly directs customers to their order details or receipt pages, please ensure the template was originally created with the following base URL:
https://shop.qiscus.com/. After that, in the fallback configuration, fill the CTA button’s variable using dynamic path placeholders such as:{{order.details_path}}{{order.receipt_path}}
Review the Preview to see how the message will appear to customers
Click Save to confirm the configuration
Your fallback configuration is now active and ready to use
Unlike automation messages, fallback messages are sent using WhatsApp credits. Make sure your WhatsApp credit balance is sufficient to ensure fallback messages can be delivered successfully.
Important Notes
- Only approved WhatsApp templates can be used for fallback messages
- Templates from the following categories cannot be used: Authentication, Marketing Flow, Marketing Carousel, Utility Flow
- Fallback messages will be sent using the WhatsApp channel configured in WhatsApp Fallback, even when the automation message fails due to an expired WhatsApp room on a different channel, unless that channel has an identical approved template.
- When WhatsApp Fallback is disabled, automation messages will not be sent after the 24-hour WhatsApp session window expires
Automation Message & Fallback Delivery Status
You can monitor the delivery results of automation and fallback messages directly from the Order Details page.
- The Automation Message column shows the total number of messages that were sent and failed (e.g., Sent (1) · Failed (2))
- Hover over the status to view failure reasons such as WhatsApp session expired or insufficient credits
- If WhatsApp Fallback is enabled, fallback delivery results are also shown here
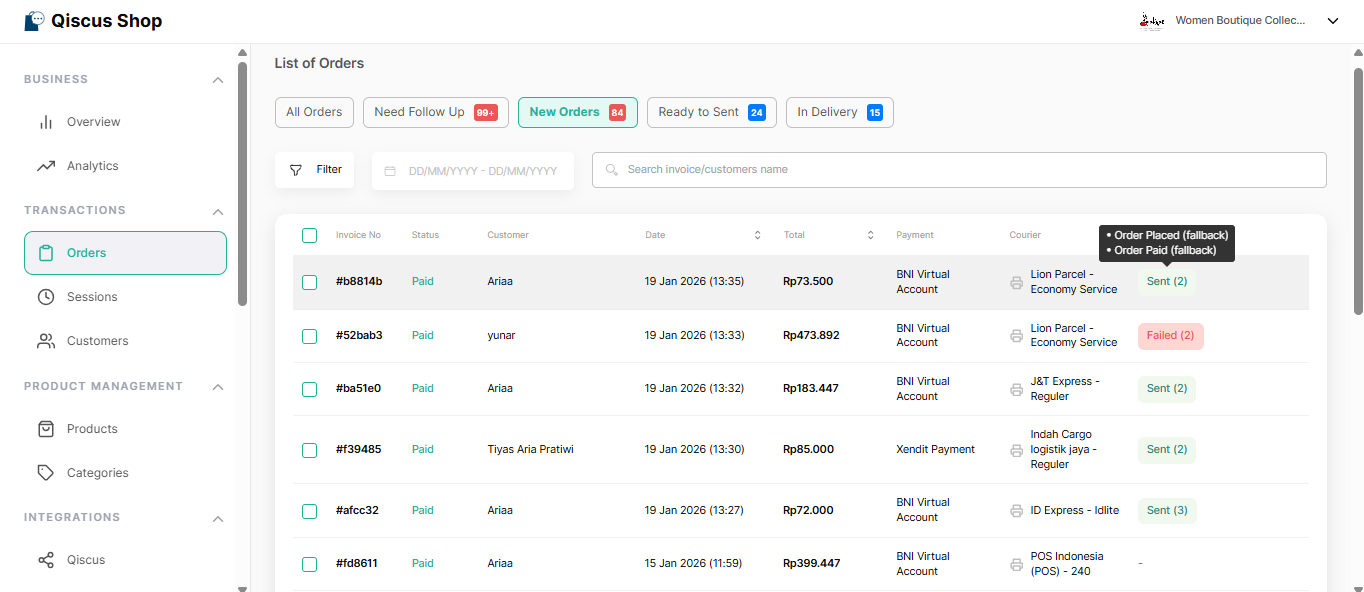
This helps admins quickly verify delivery status and identify issues without opening each chat manually.
Sharing Microsite URL via Omnichannel
The Share Microsite URL event is a manual message that allows agents to send the store’s microsite link directly to customers via Omnichannel.
Unlike other events, this message is triggered manually using a custom button in the chat interface.
Custom Button Setup
By default, the Omnichannel custom button for sharing the microsite URL is automatically created when a store is successfully set up in Qiscus Shop.
When created automatically:
- The Label Name of the custom button uses the store name
- The message configuration for Share Microsite URL is set to Default Message
- The default message language is English
In most cases, admins and agents do not need to perform any manual setup.
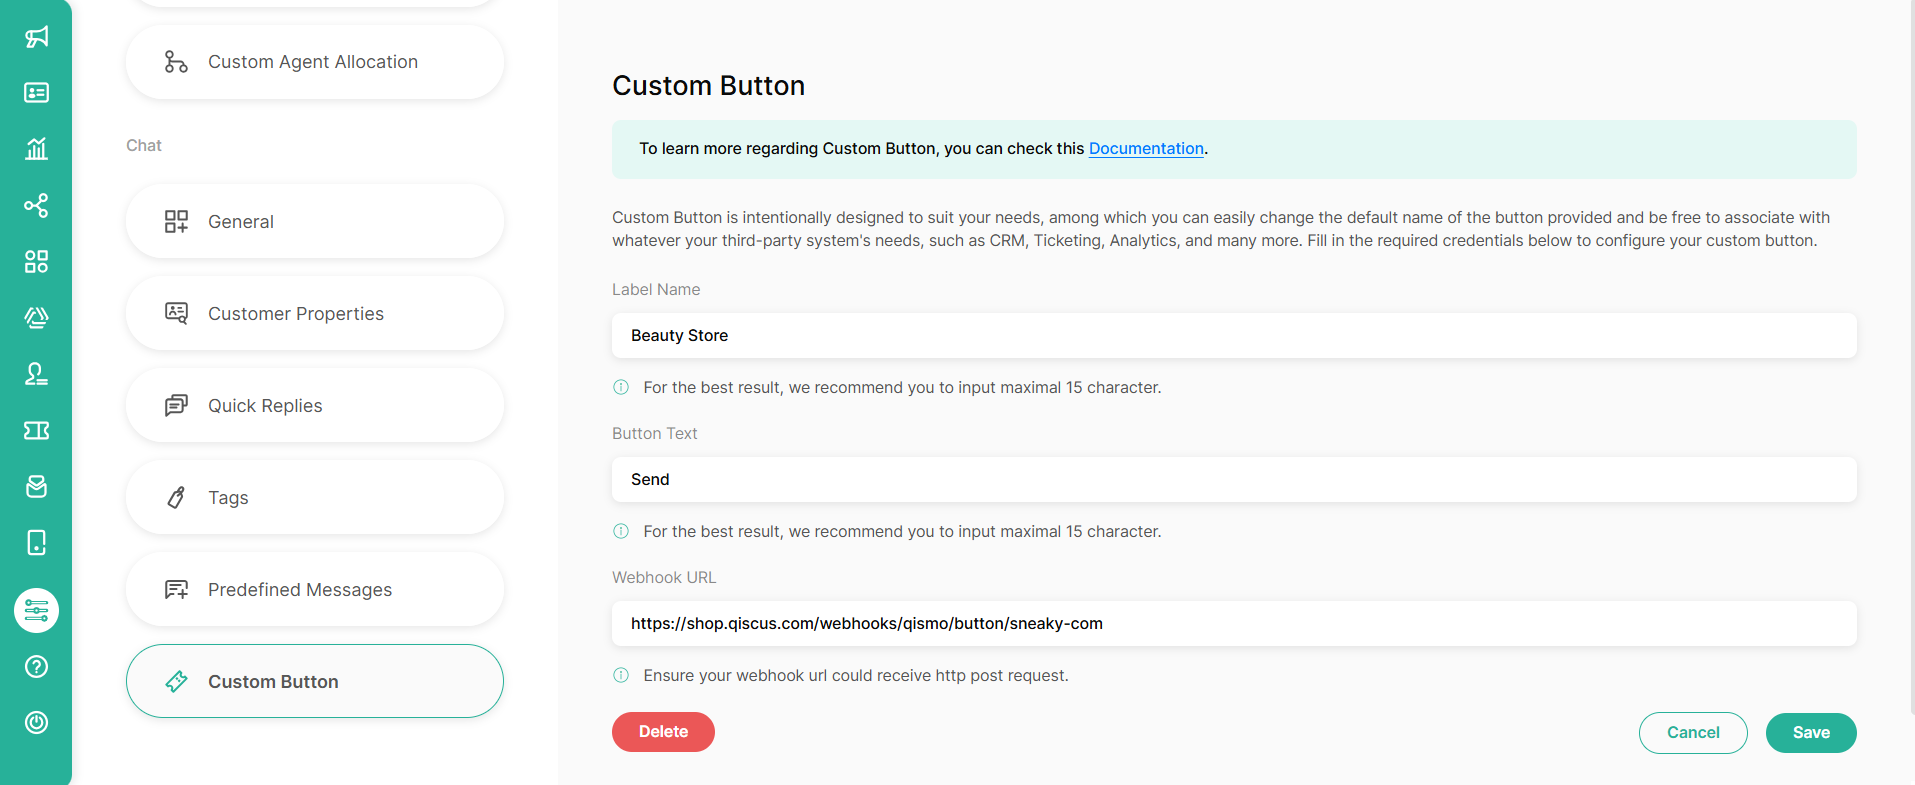
Manual Custom Button Setup (Optional)
If the custom button is missing or needs to be reconfigured, you can set it up manually by following these steps:
- Copy the Custom Button URL from the Share Microsite URL tab in Message Center
- Open Omnichannel
- Go to Settings
- From the left-side menu, select Custom Button
- Set the Label Name and Button Text as needed
- Paste the copied Custom Button URL into the Webhook URL field
- Click Save, and your custom button is ready to use.
Using the Custom Button
To share the microsite link with a customer:
- Open the customer’s chat room in Omnichannel
- Click the custom button that has been configured
Once clicked, the system will automatically trigger the Share Microsite URL message, generating and sending a personalized microsite link to the customer.

Customer Experience
Messages Sent to Customers
During their shopping journey, customers will automatically receive messages that match their order status:
- Order Failed
- Order Incomplete
- Order Placed
- Payment Reminder
- Order Paid
- Order Ready to Send
- Order Sent
- Order Completed
- Order Canceled
The message content sent to customers follows the automation message configuration set by the store admin in the Message Center. And any placeholders used in the message (such as customer name, order ID, etc) will be automatically populated with real-time values when the message is delivered.

If the customer’s WhatsApp session has expired (after 24 hours of no interaction):
- When WhatsApp Fallback is disabled, automation messages will not be sent via WhatsApp, but will still be delivered through other supported channels.
- When WhatsApp Fallback is enabled, the system will send the configured fallback message on WhatsApp instead of the automation message, while other channels continue to send automation messages as usual.
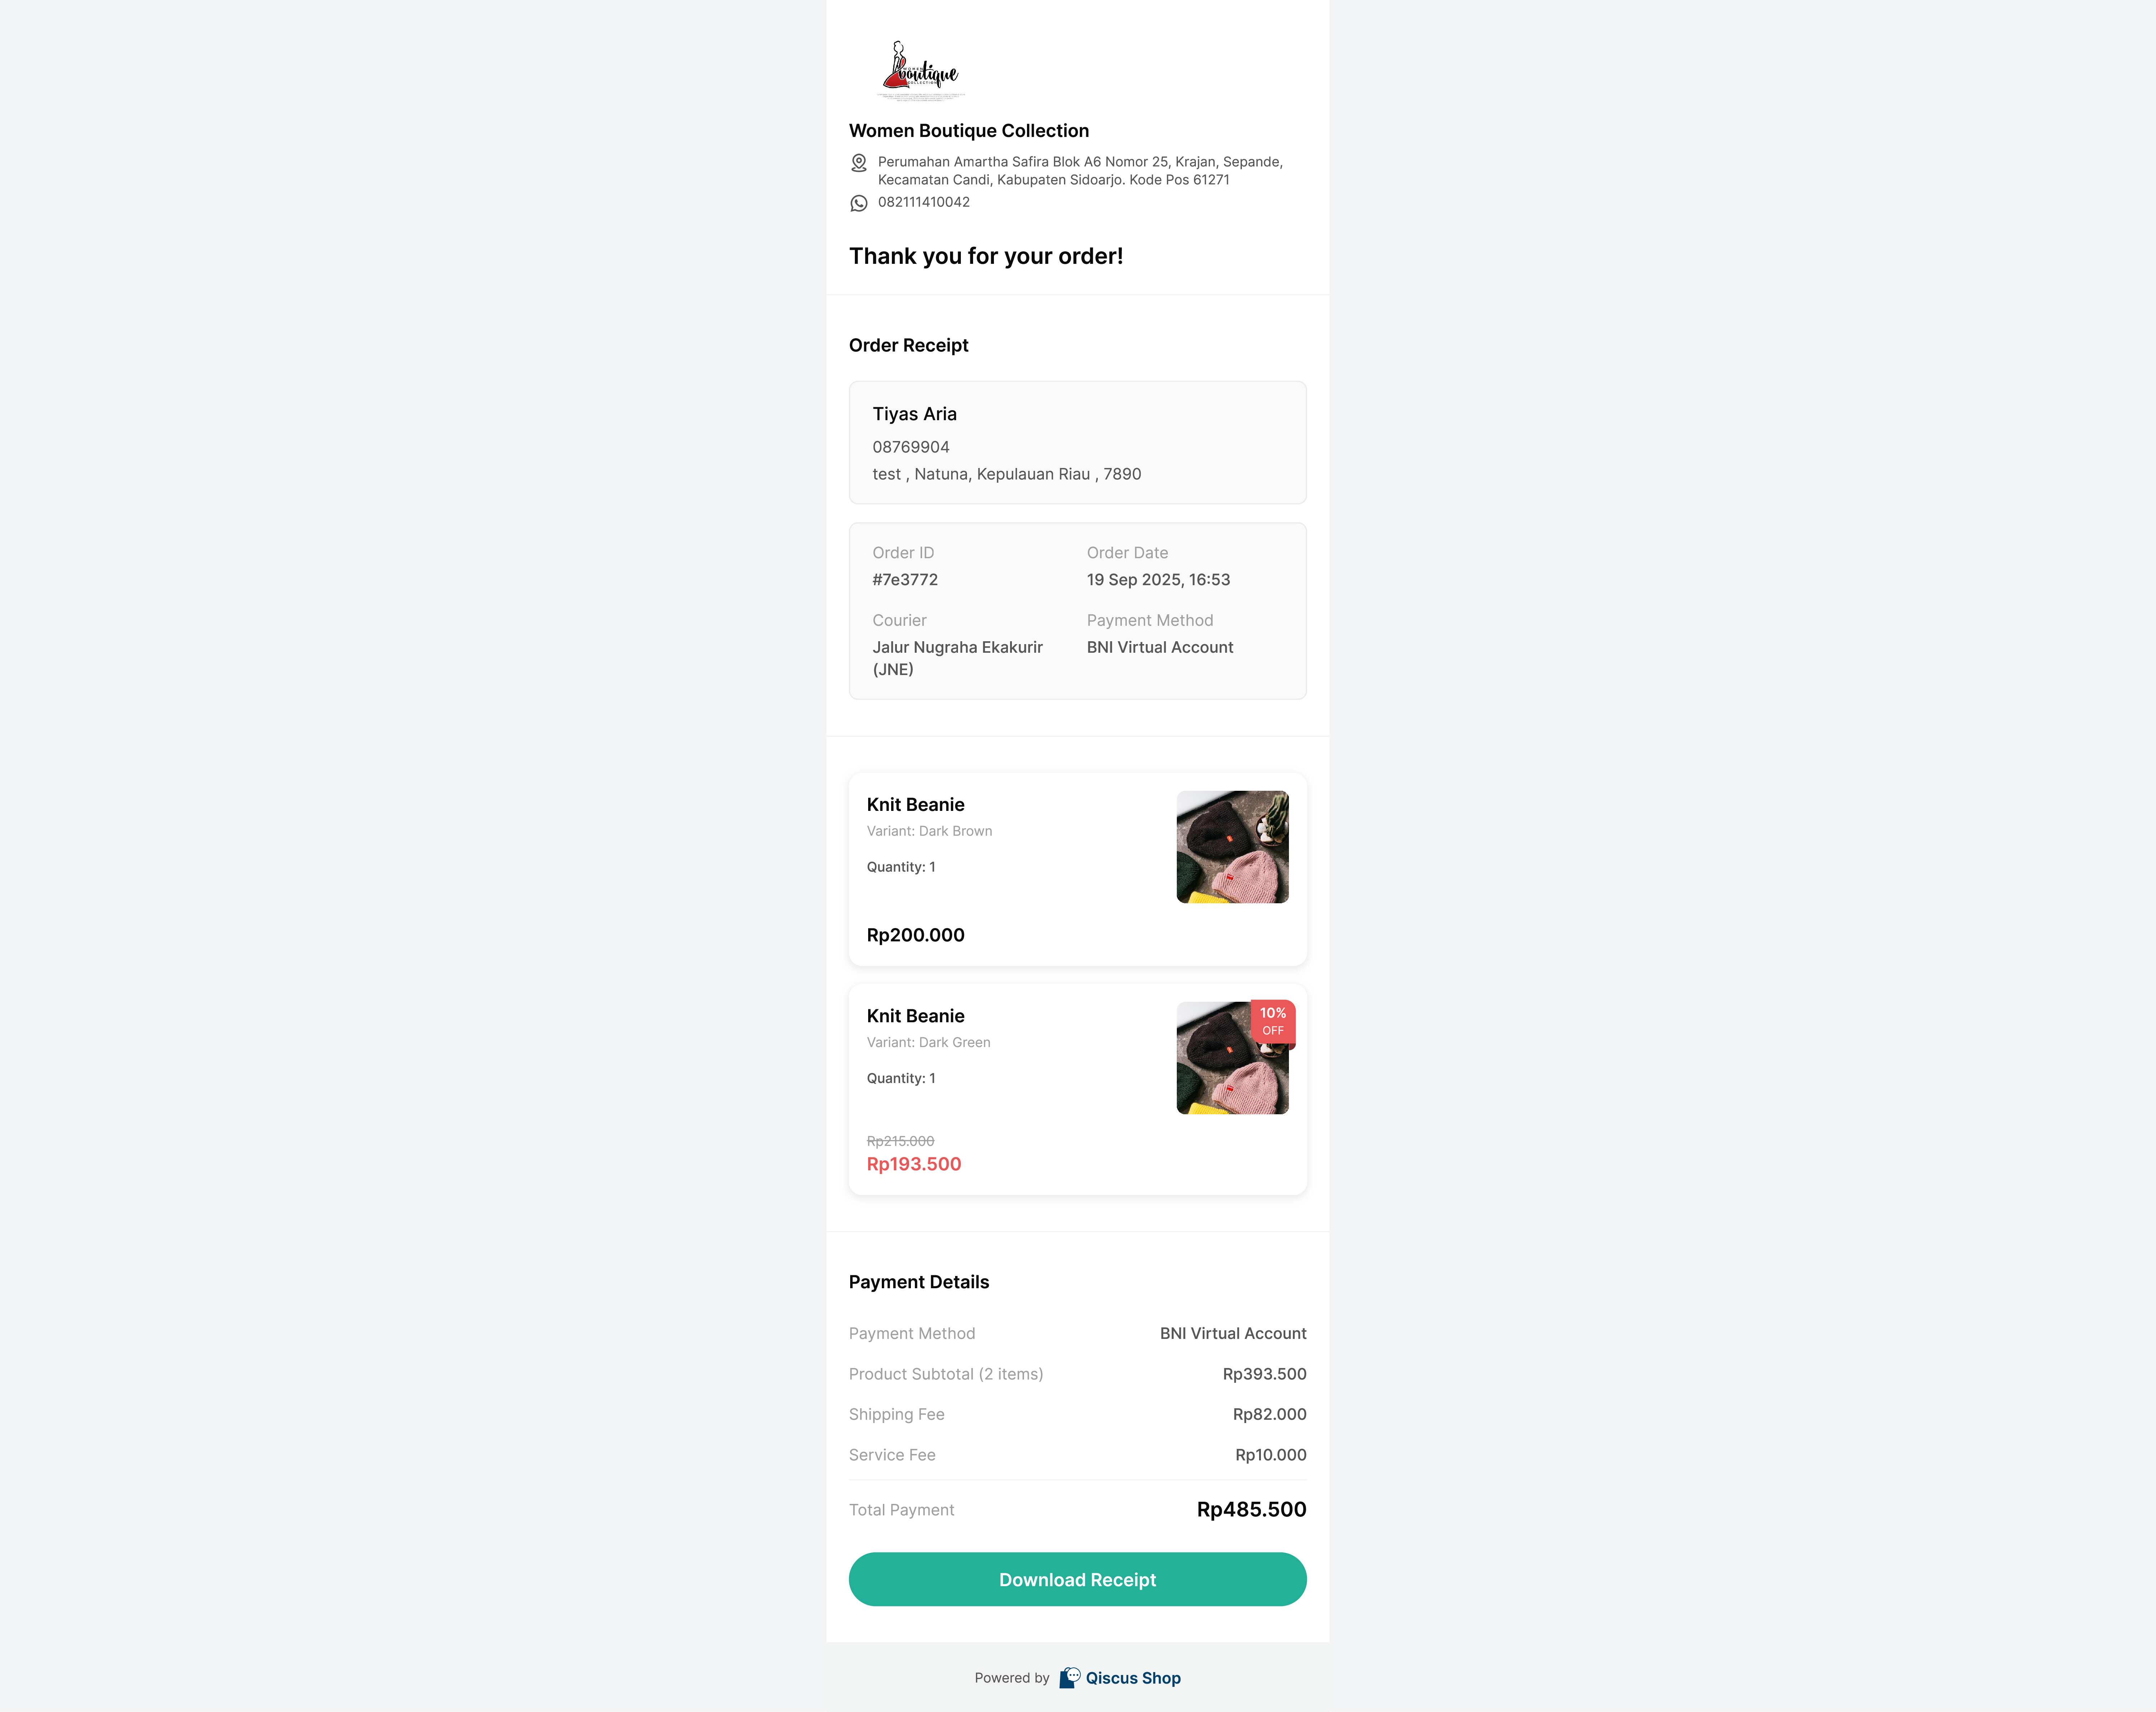
Order Receipt Experience
After a successful payment, customers can access their digital receipt through the Order Details page.
Once an order reaches the Paid status (and is not cancelled or refunded), the Order Details page will display a View Order Receipt button. Clicking this button opens the receipt page, where customers can review complete purchase information.
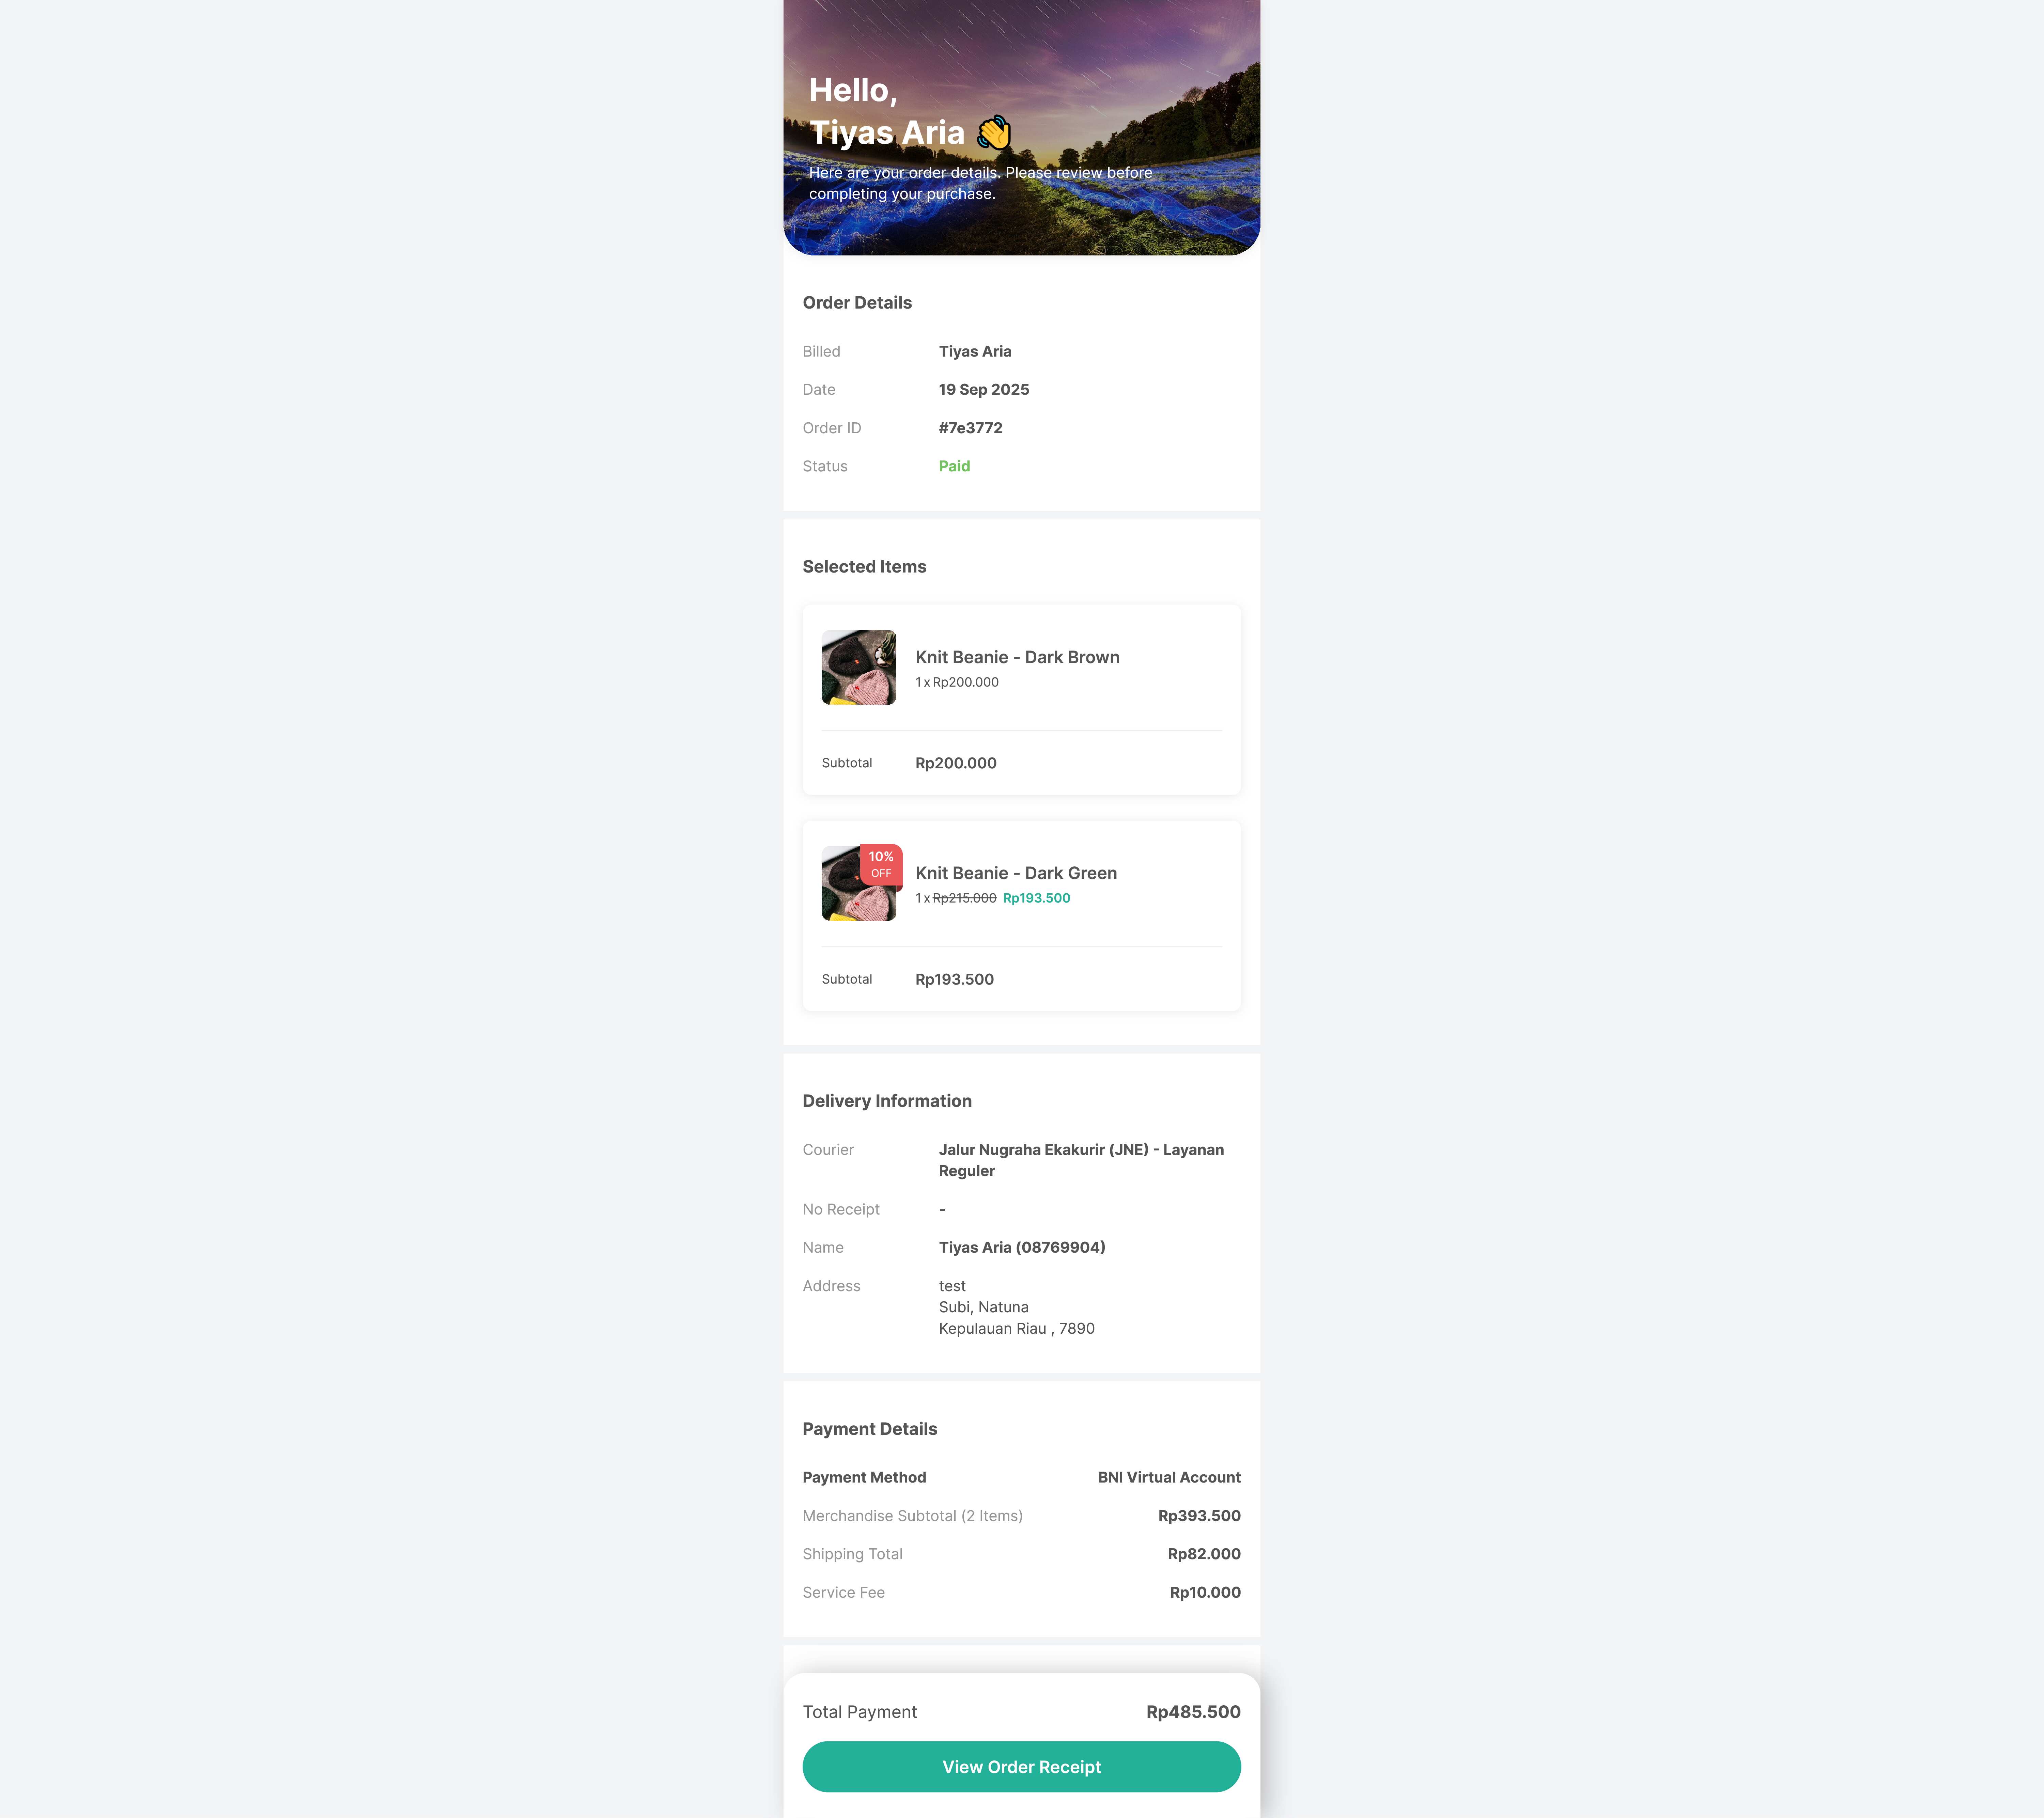
On the receipt page, customers can review full order details — including items, prices, payment information, and totals — and use the Download button to save the receipt in PDF format.