
WhatsApp Broadcast Template is used to manage broadcast message templates. You can add, search, delete, and view broadcast template details. You can create a WhatsApp Broadcast Template using the New Template button.
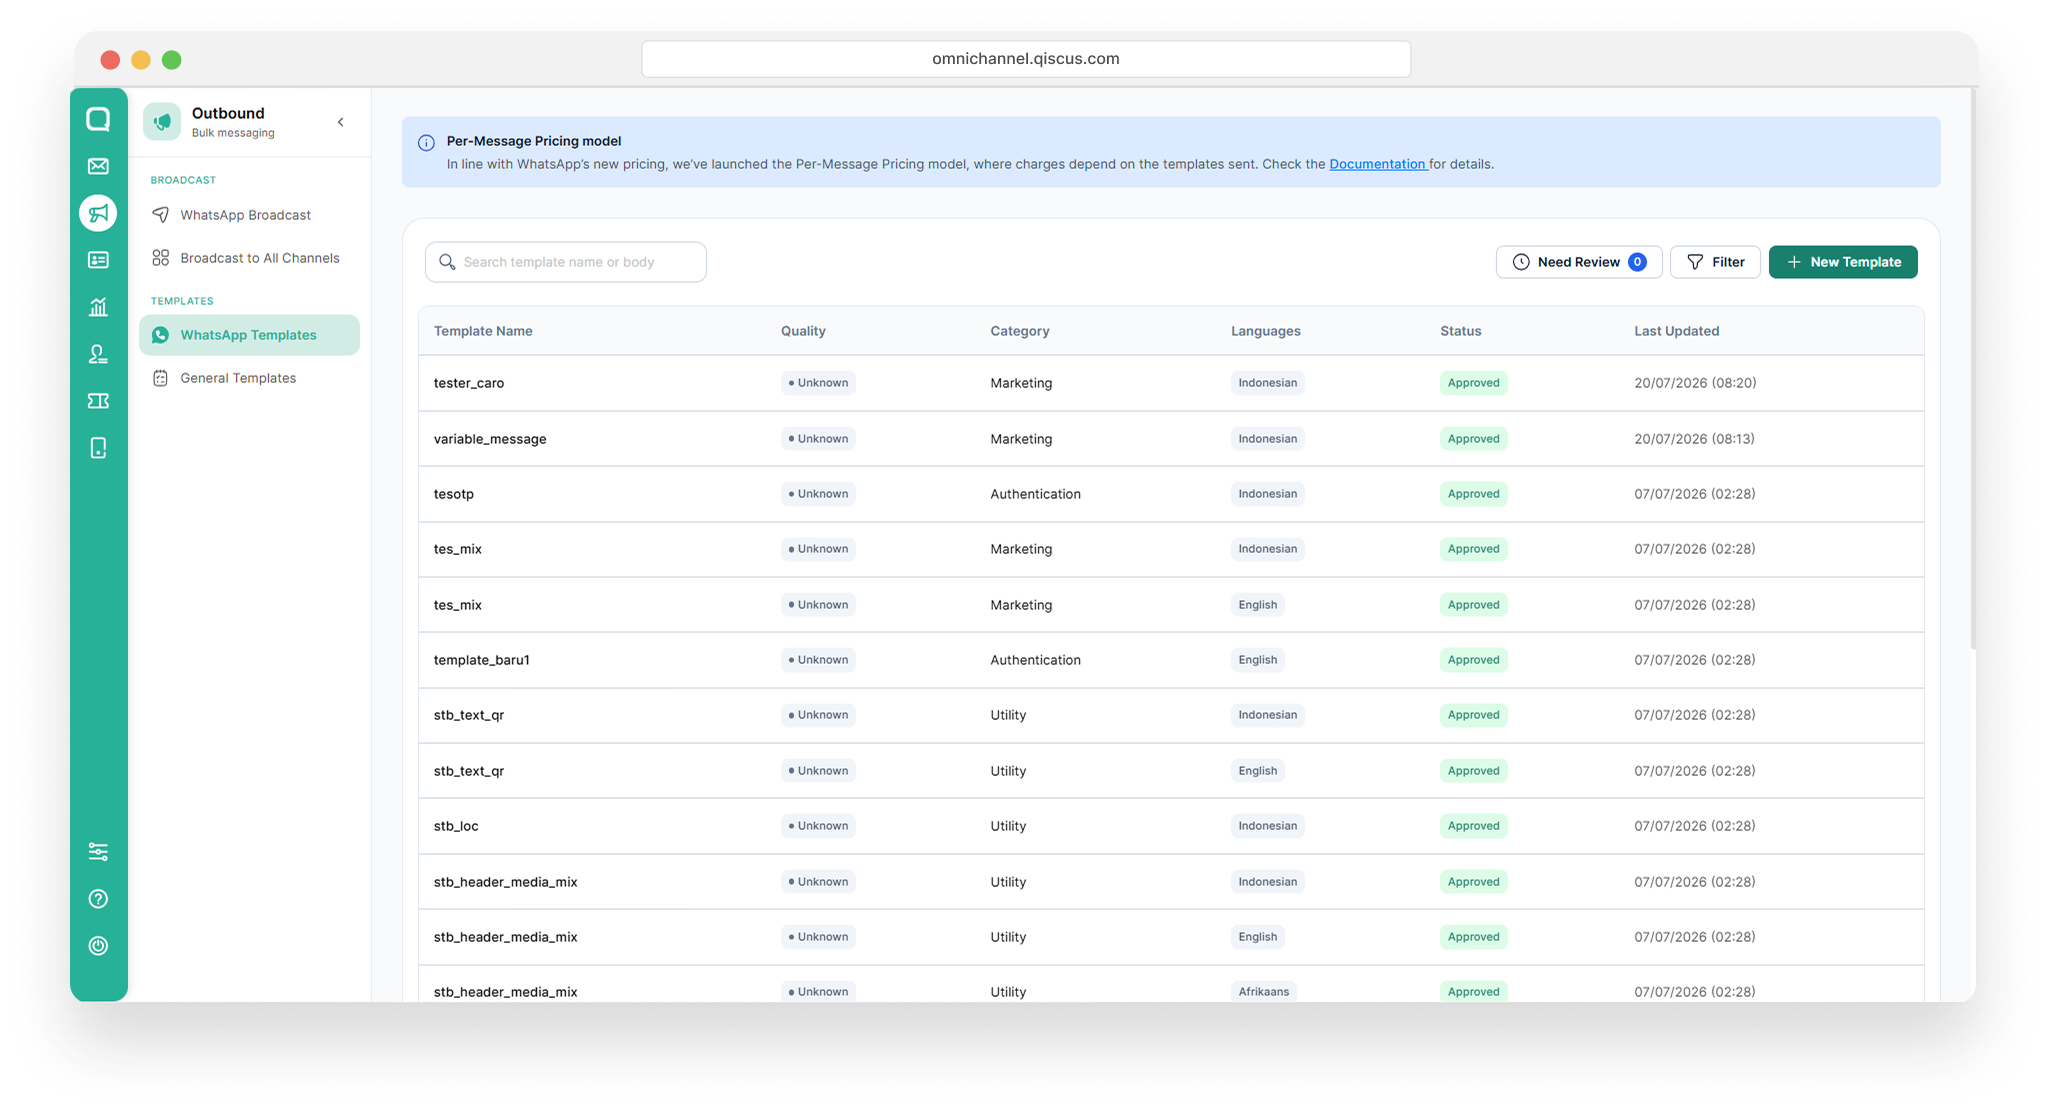
Create Broadcast Message
This guide applies to Agents, Supervisors, and Admins when creating broadcast message templates.
Follow the steps below to create a WhatsApp broadcast template for the Marketing and Utility categories:
On the Outbound page, select WhatsApp Message Templates. Fill in the fields correctly and select the category you need.
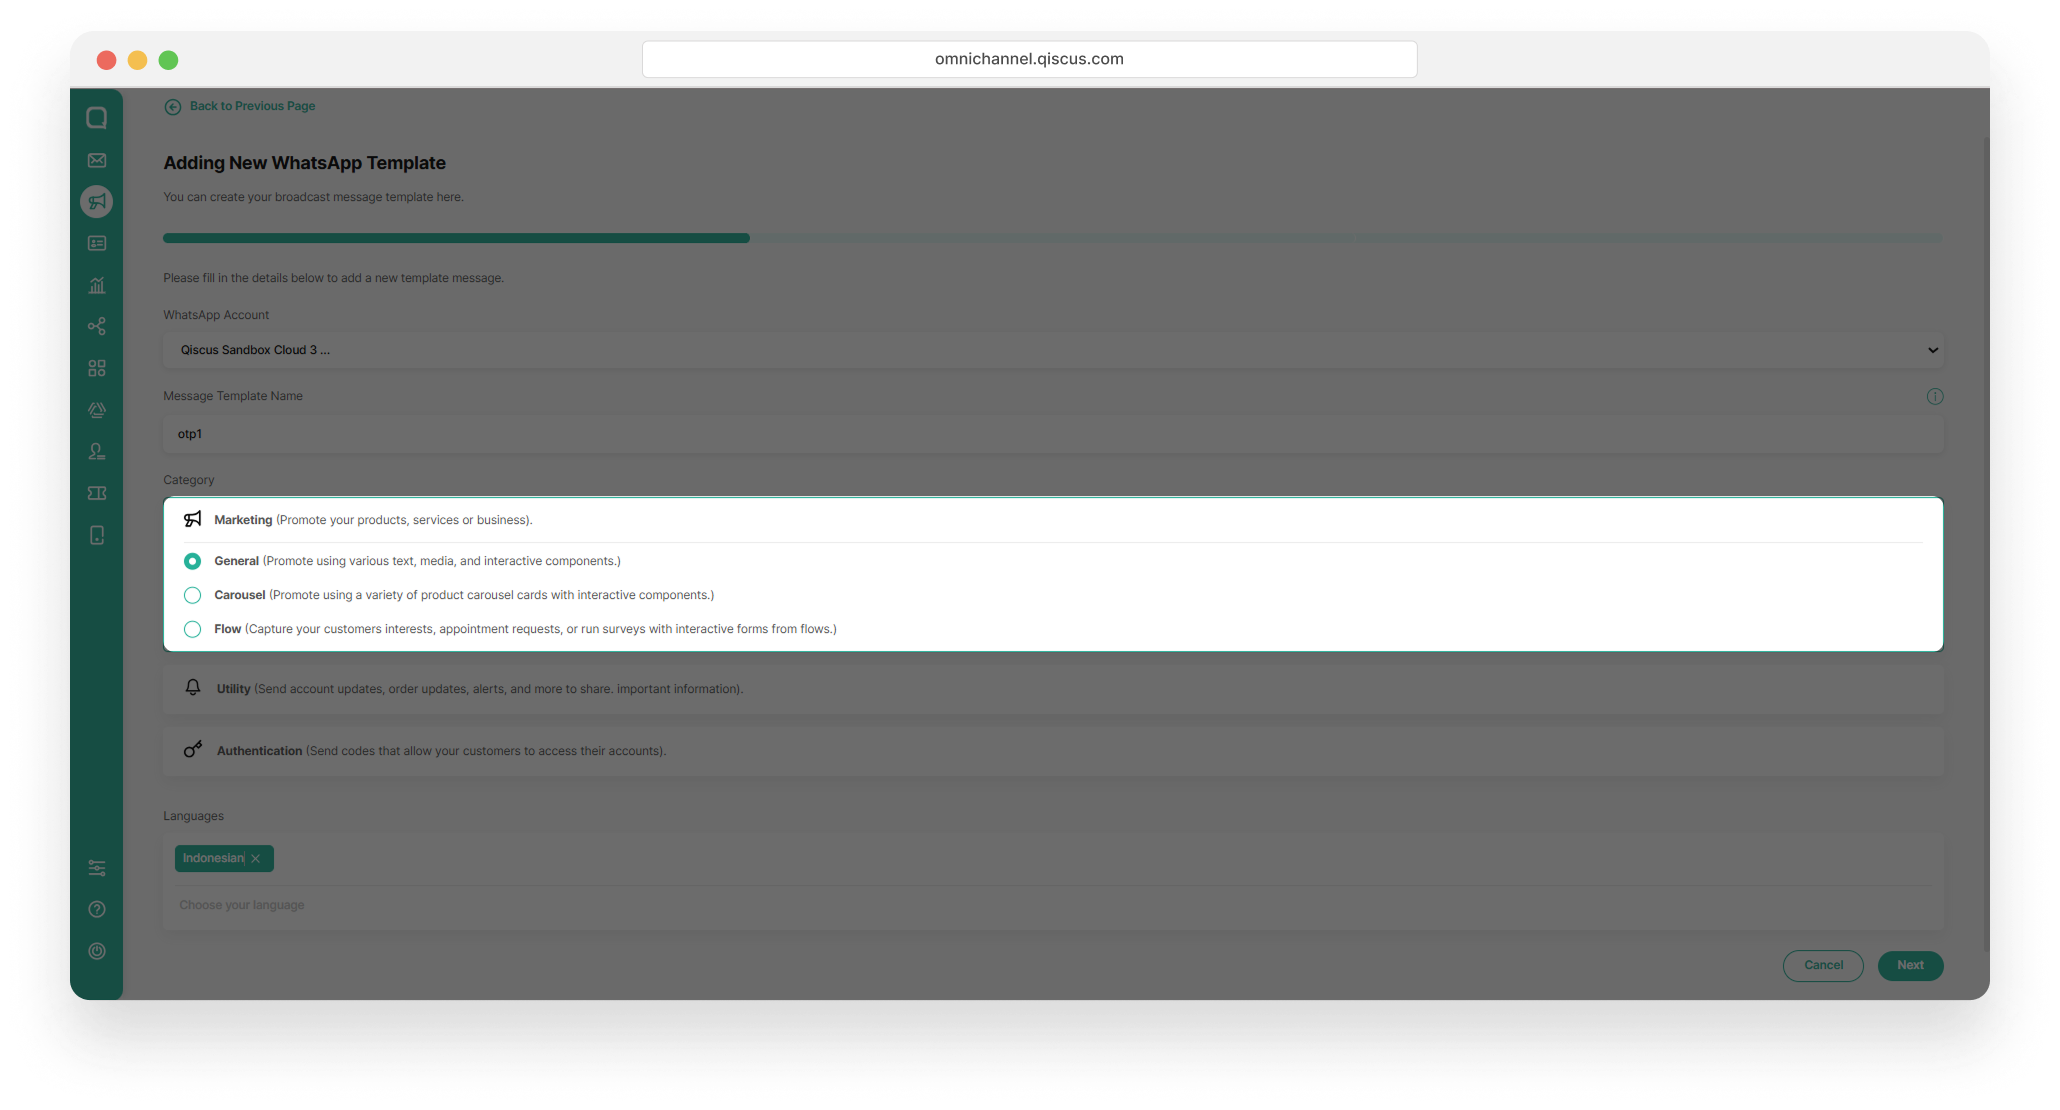
You can refer to the template category guidelines to understand the differences and learn more about each template category
we also provide languages for templates, You can check this Supported Languages,
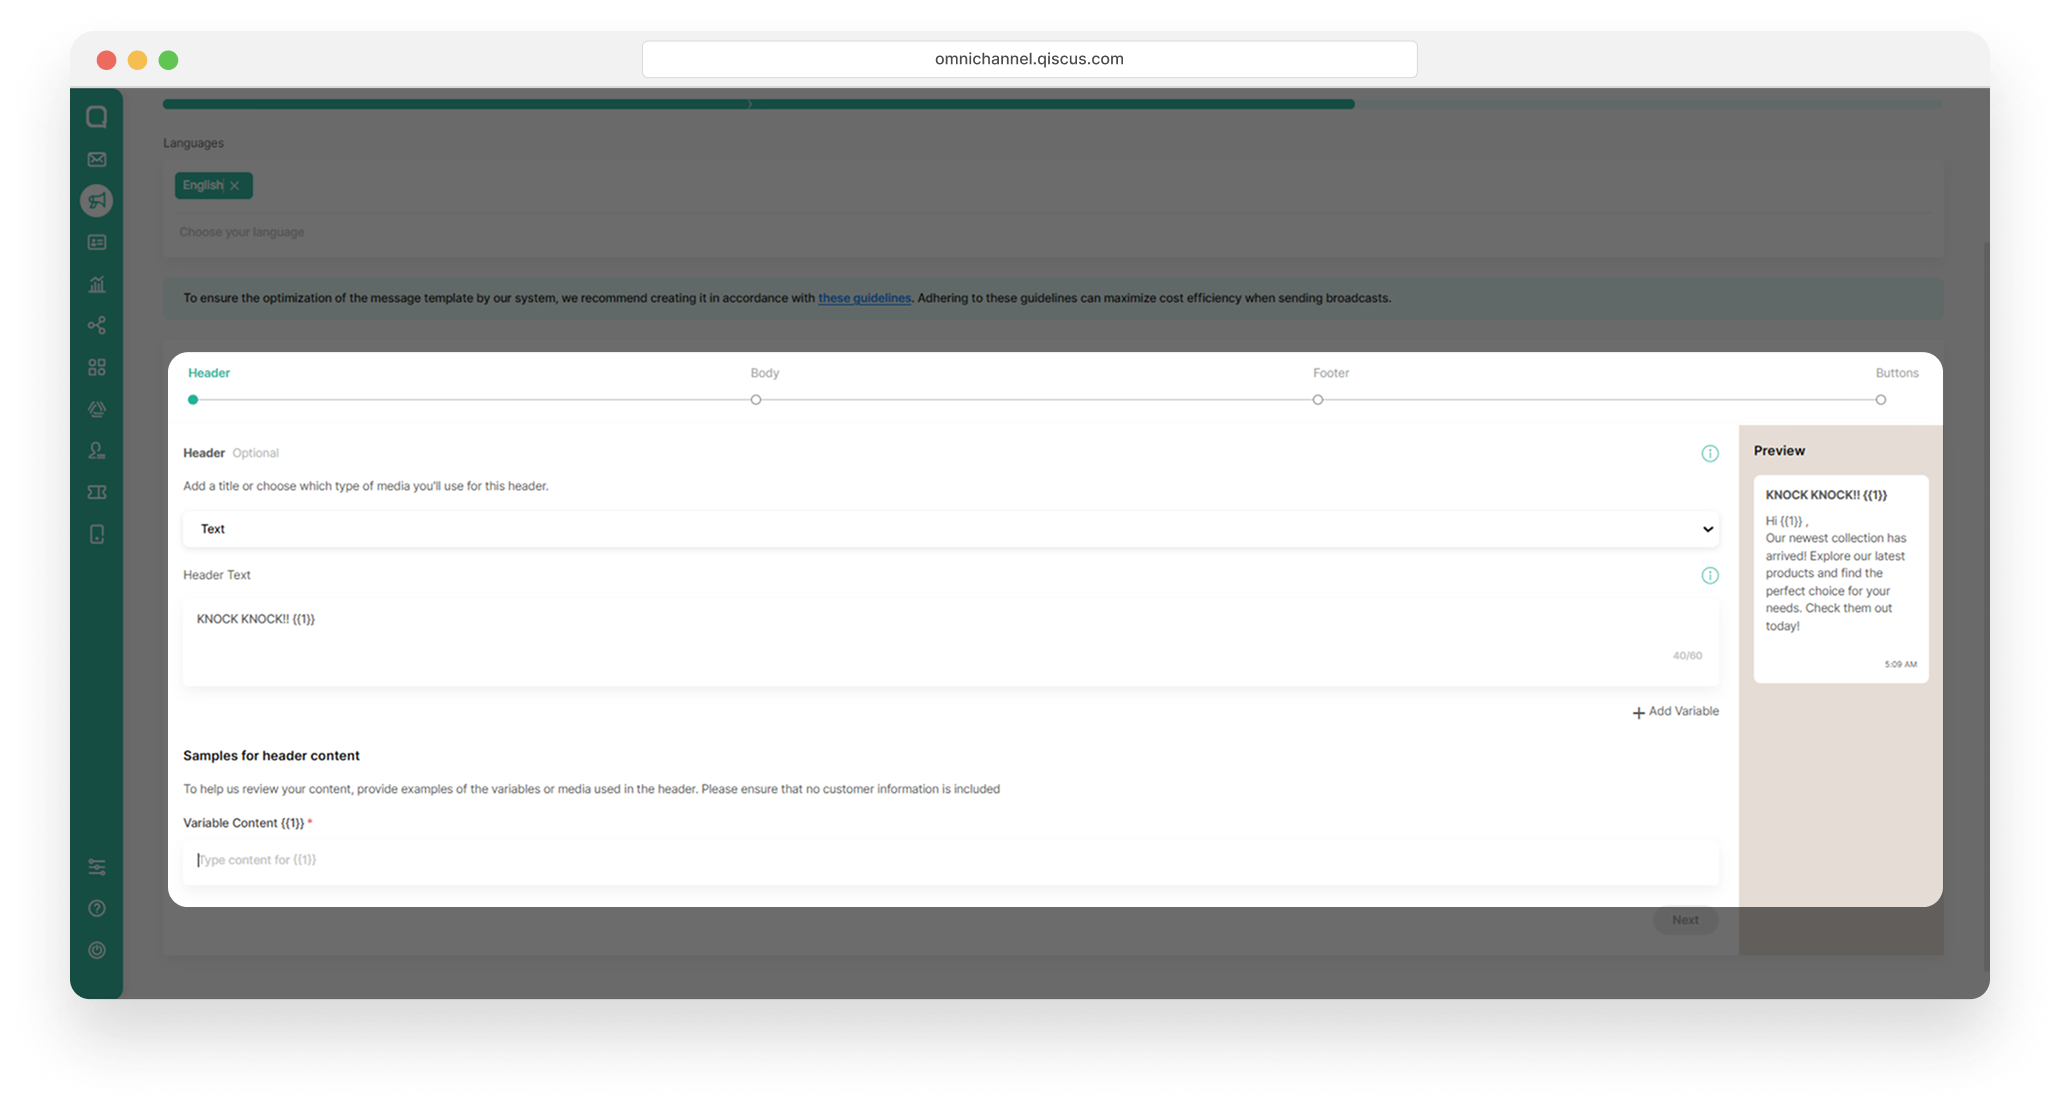
In the Header broadcast, there are two types of headers available for a broadcast template: Text and Media.
Text
Select Text if you want the header to contain only text. Fill in the template content; you can also add variables to the Header.
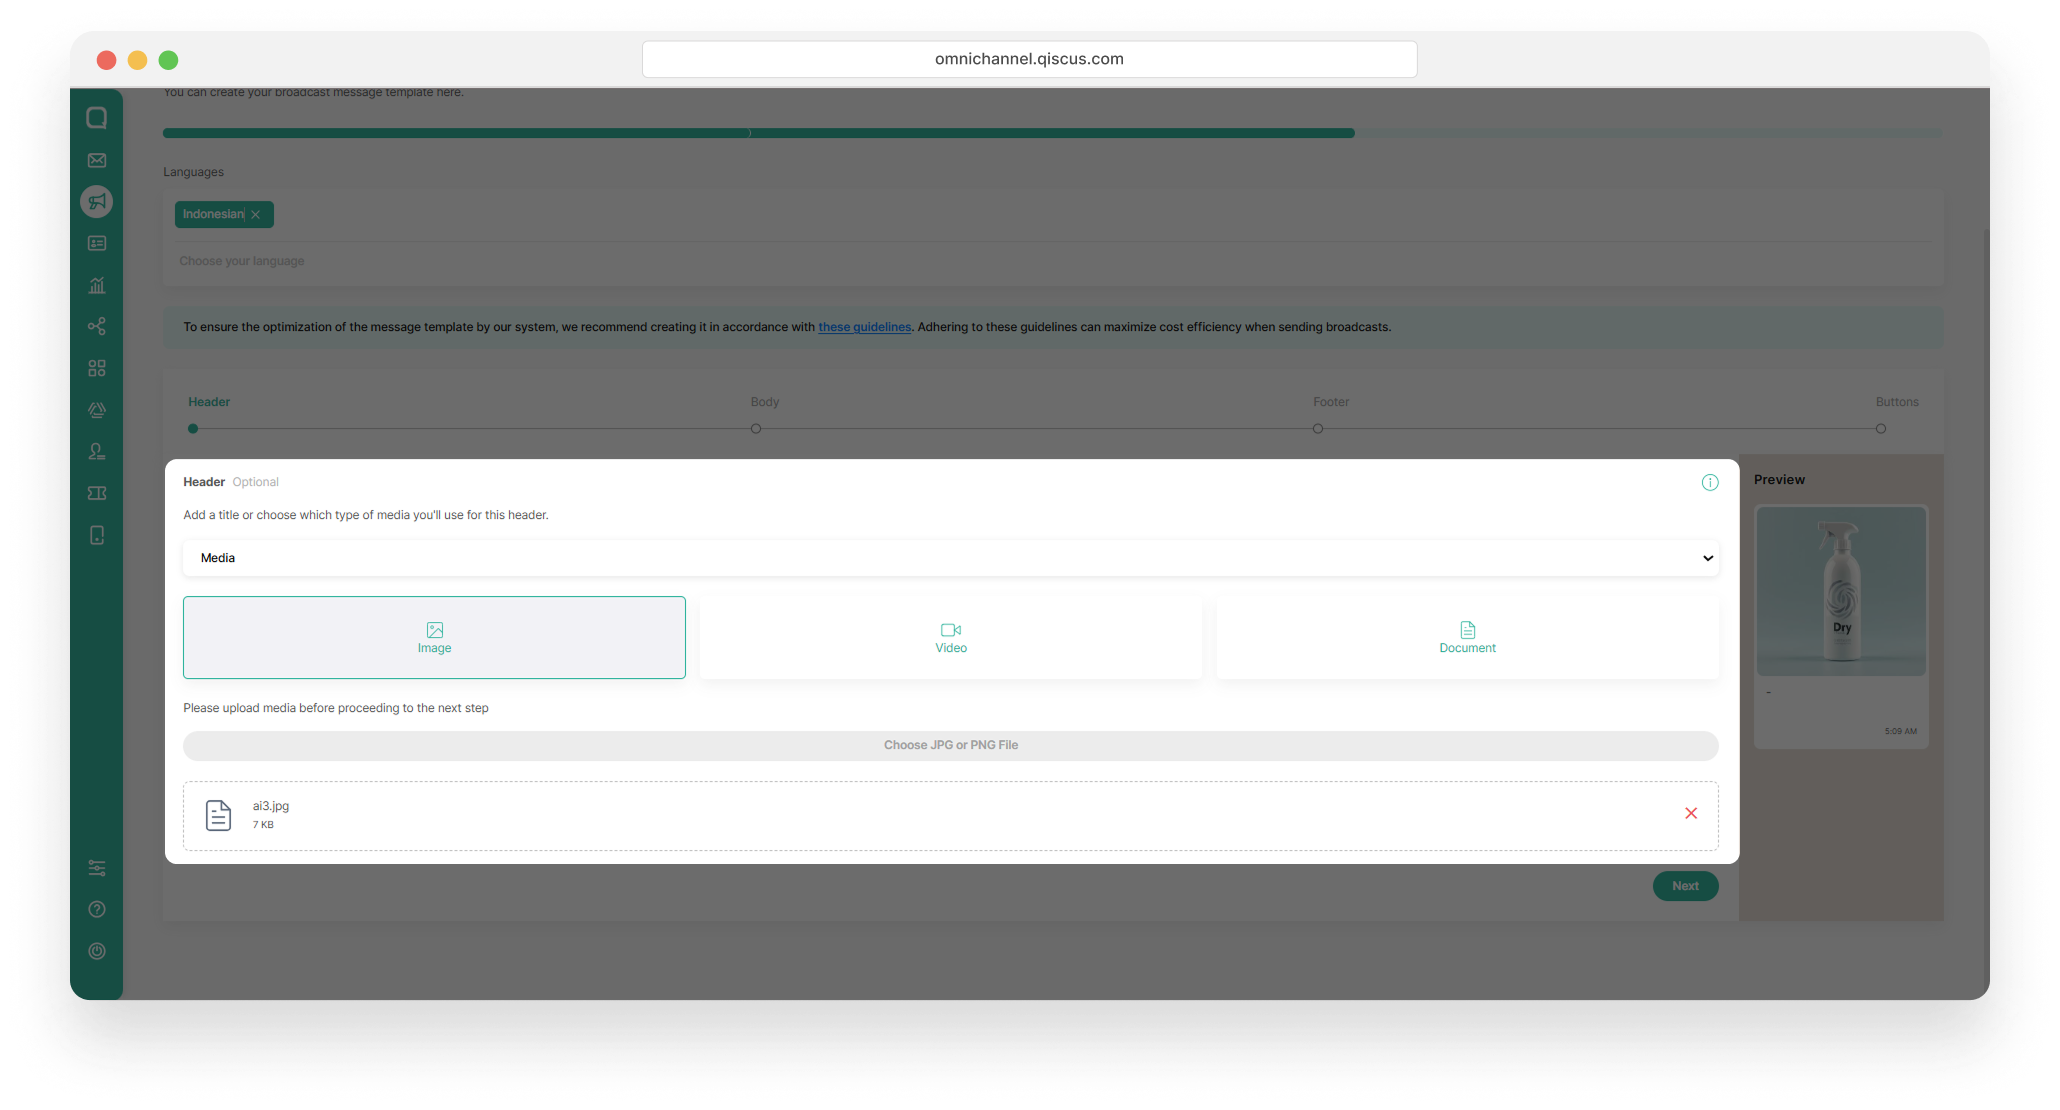
Media
Select Media if you want to include a media file as the header, such as an image, video, or document. Upload the media file in the provided field, then click Next to continue.
Write your broadcast message in the Body section. Add variables if you need to personalize the message.
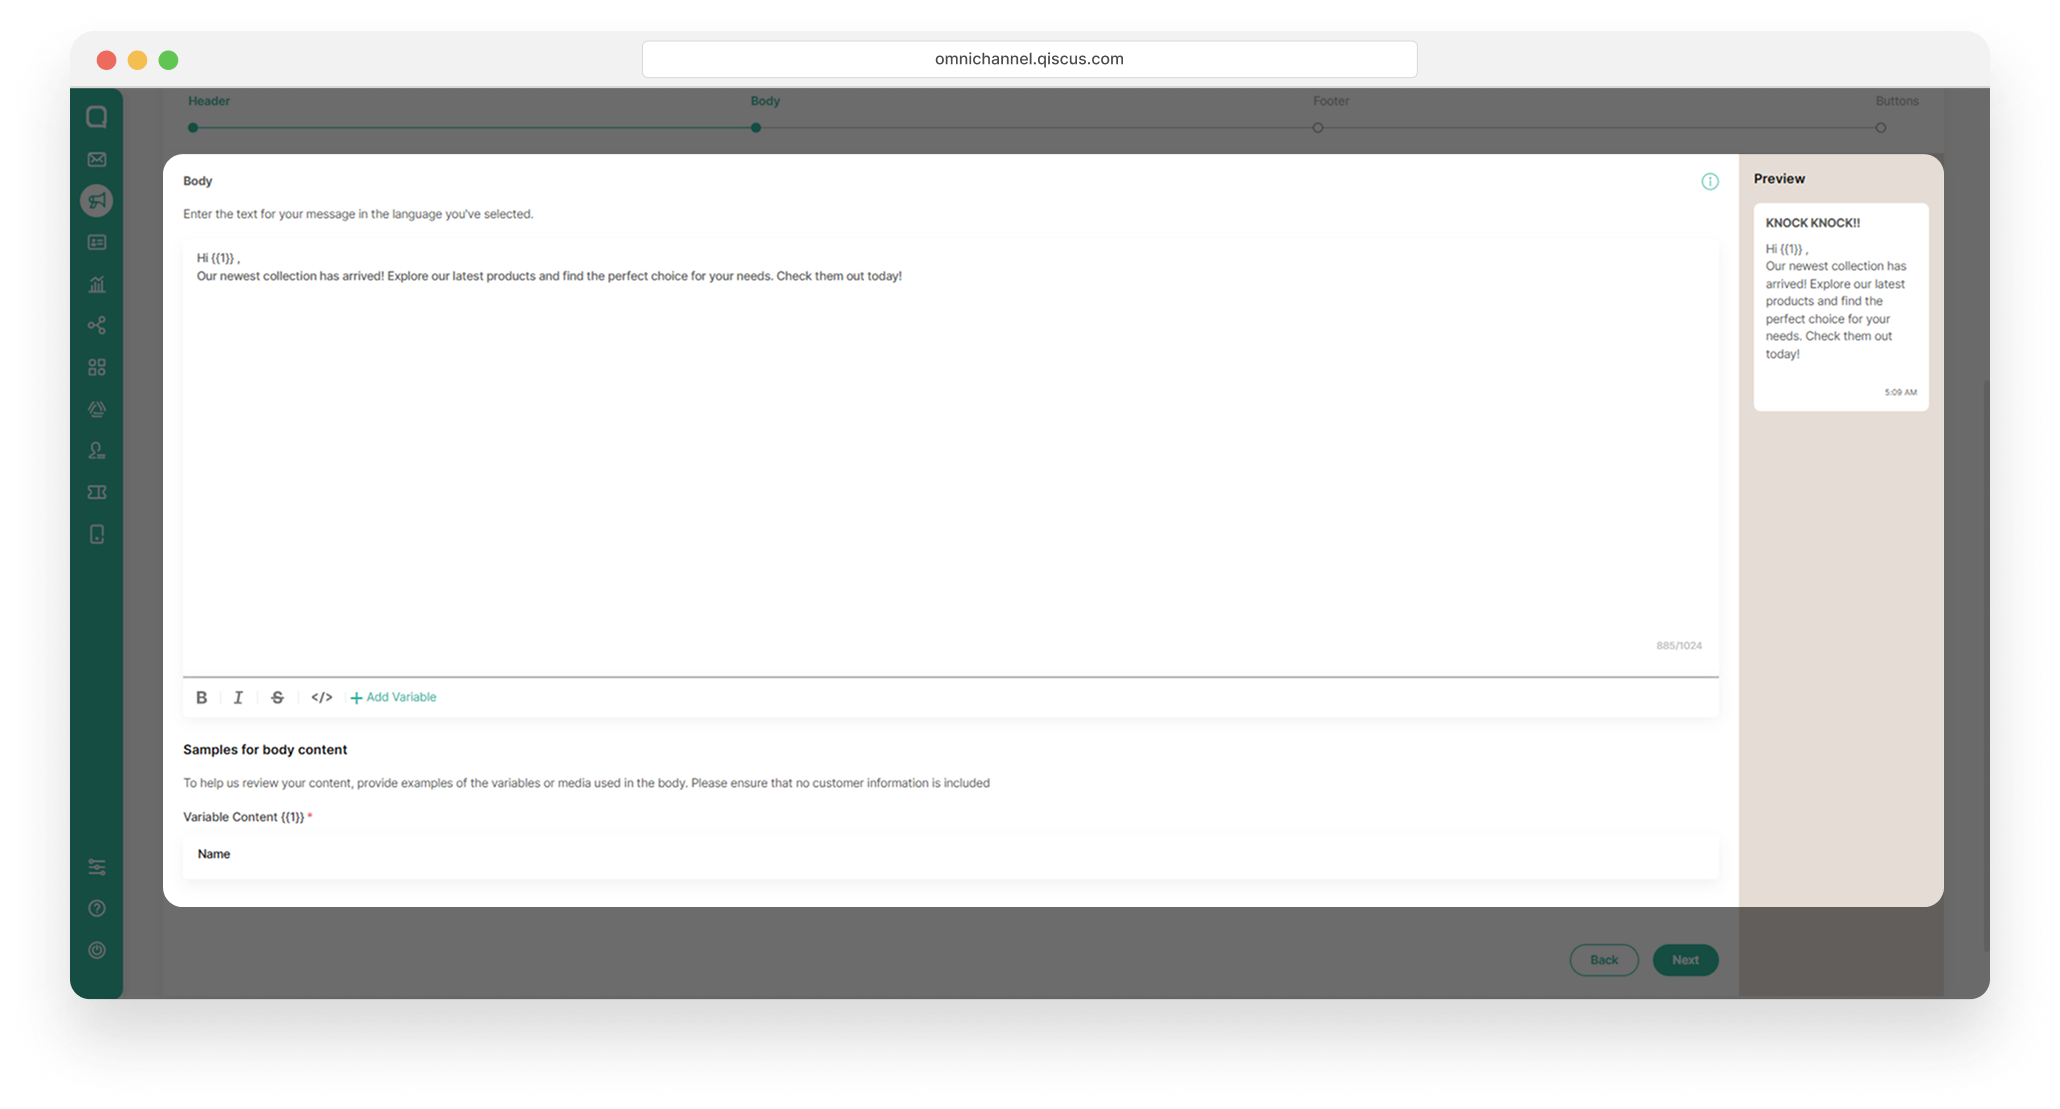
The Body can contain up to fifteen variables. To learn more about the Message Template, you can check this WhatsApp Message Template Guideline.
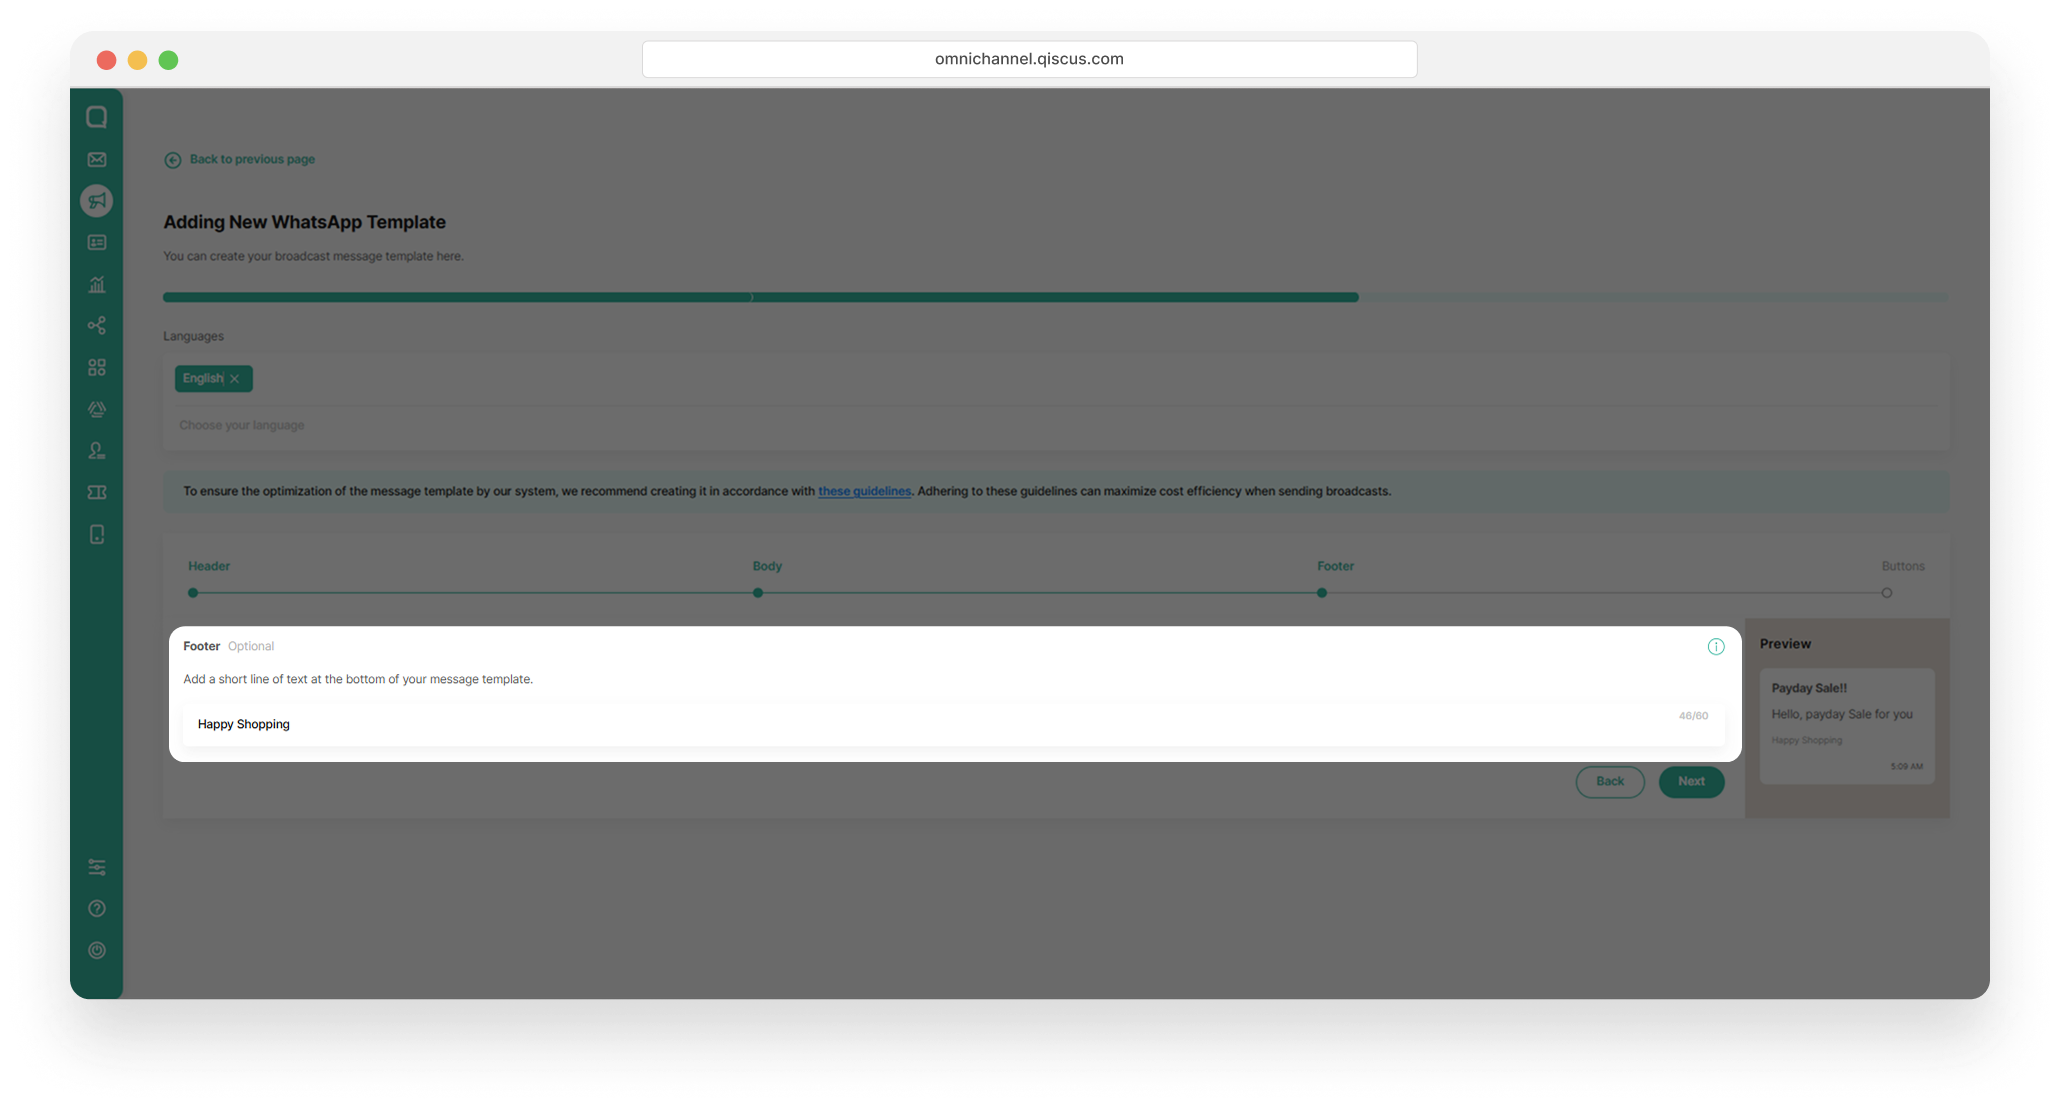
Add a closing greeting in the Footer section to end your broadcast message. Then click Next.
In the Buttons section, you can add interactive buttons to your broadcast message. Available options include Call to Action, Marketing Opt-out, and Custom buttons.
Call to Action
Add buttons that direct customers to take an action, such as visiting a website or making a phone call.
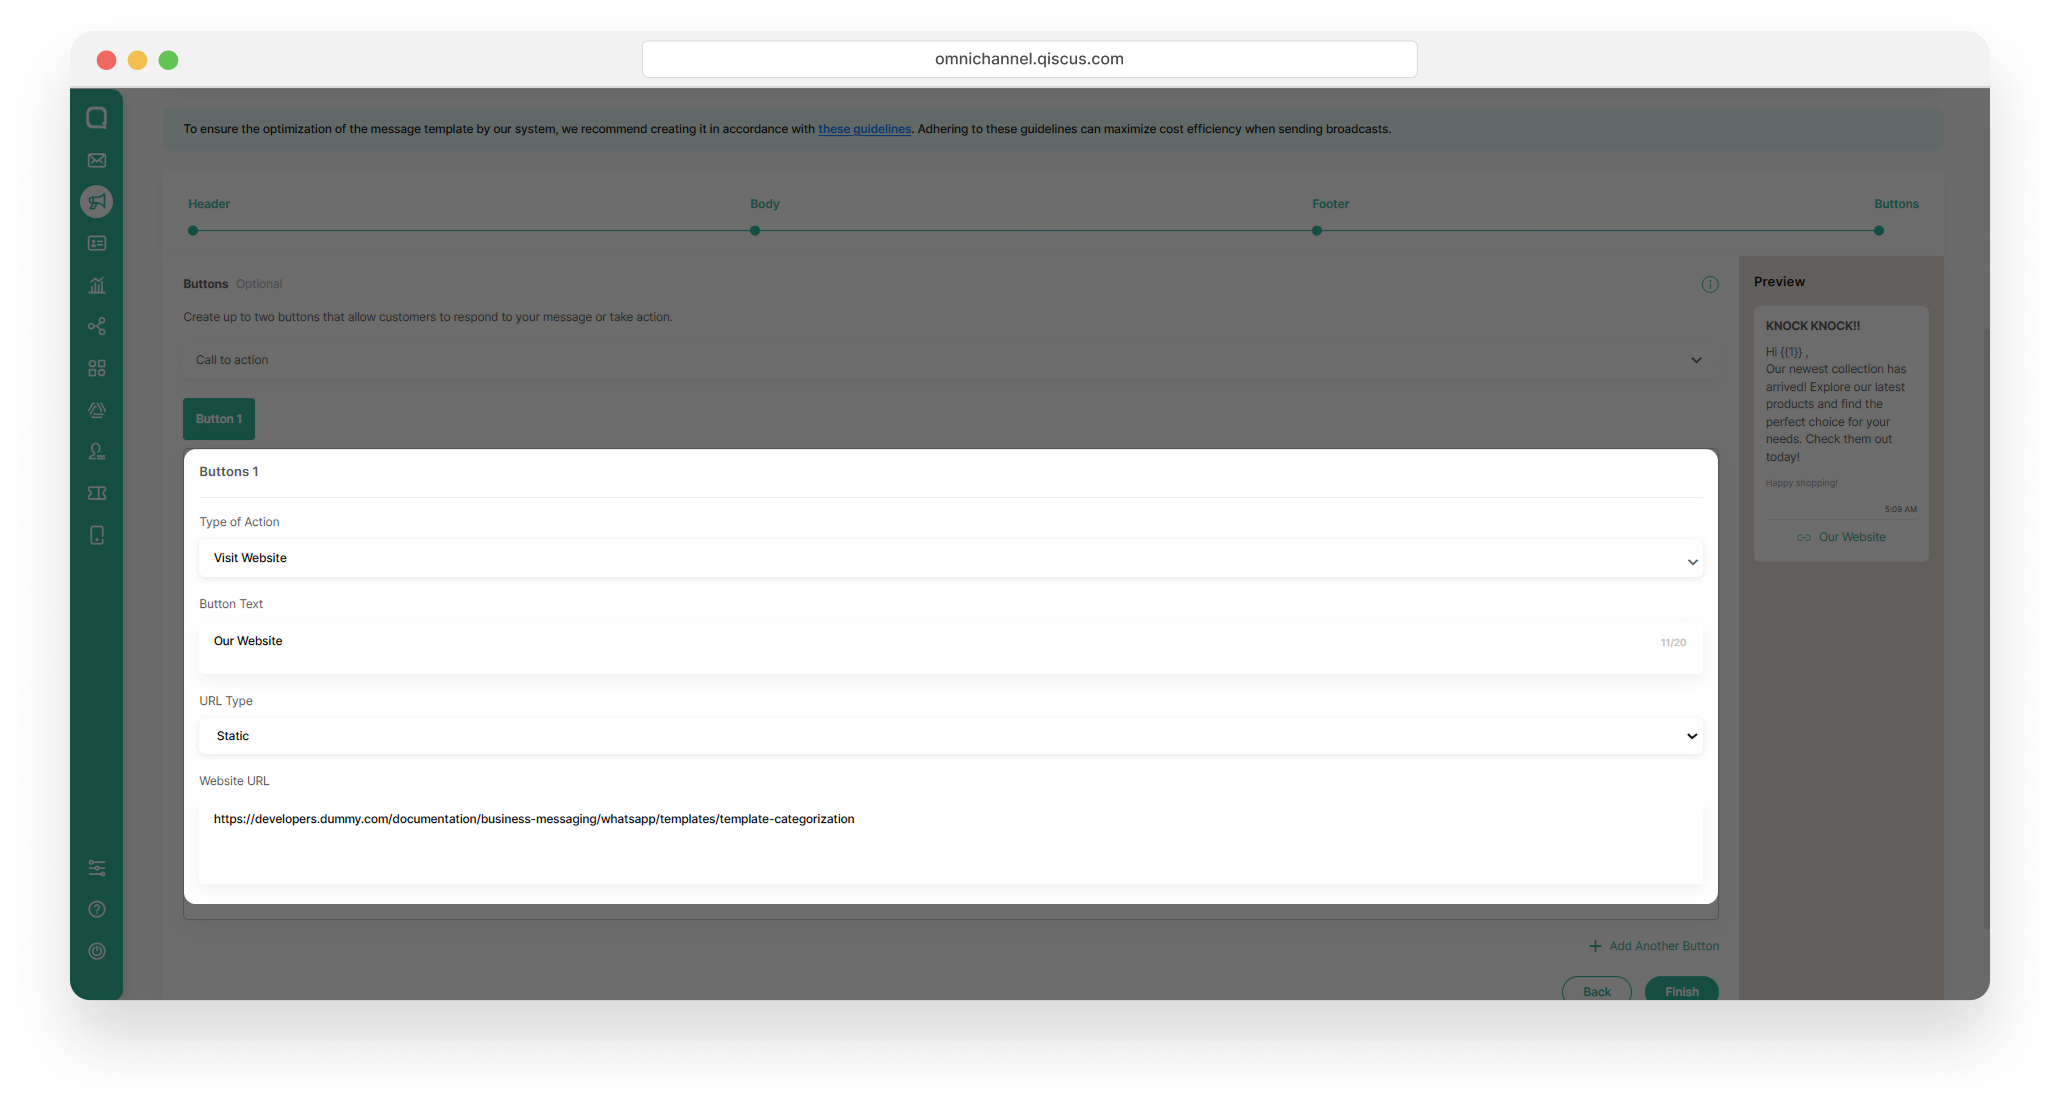
Visiting Website
Choose Visit Website to direct customers to your website. Complete the required fields, then click Finish.
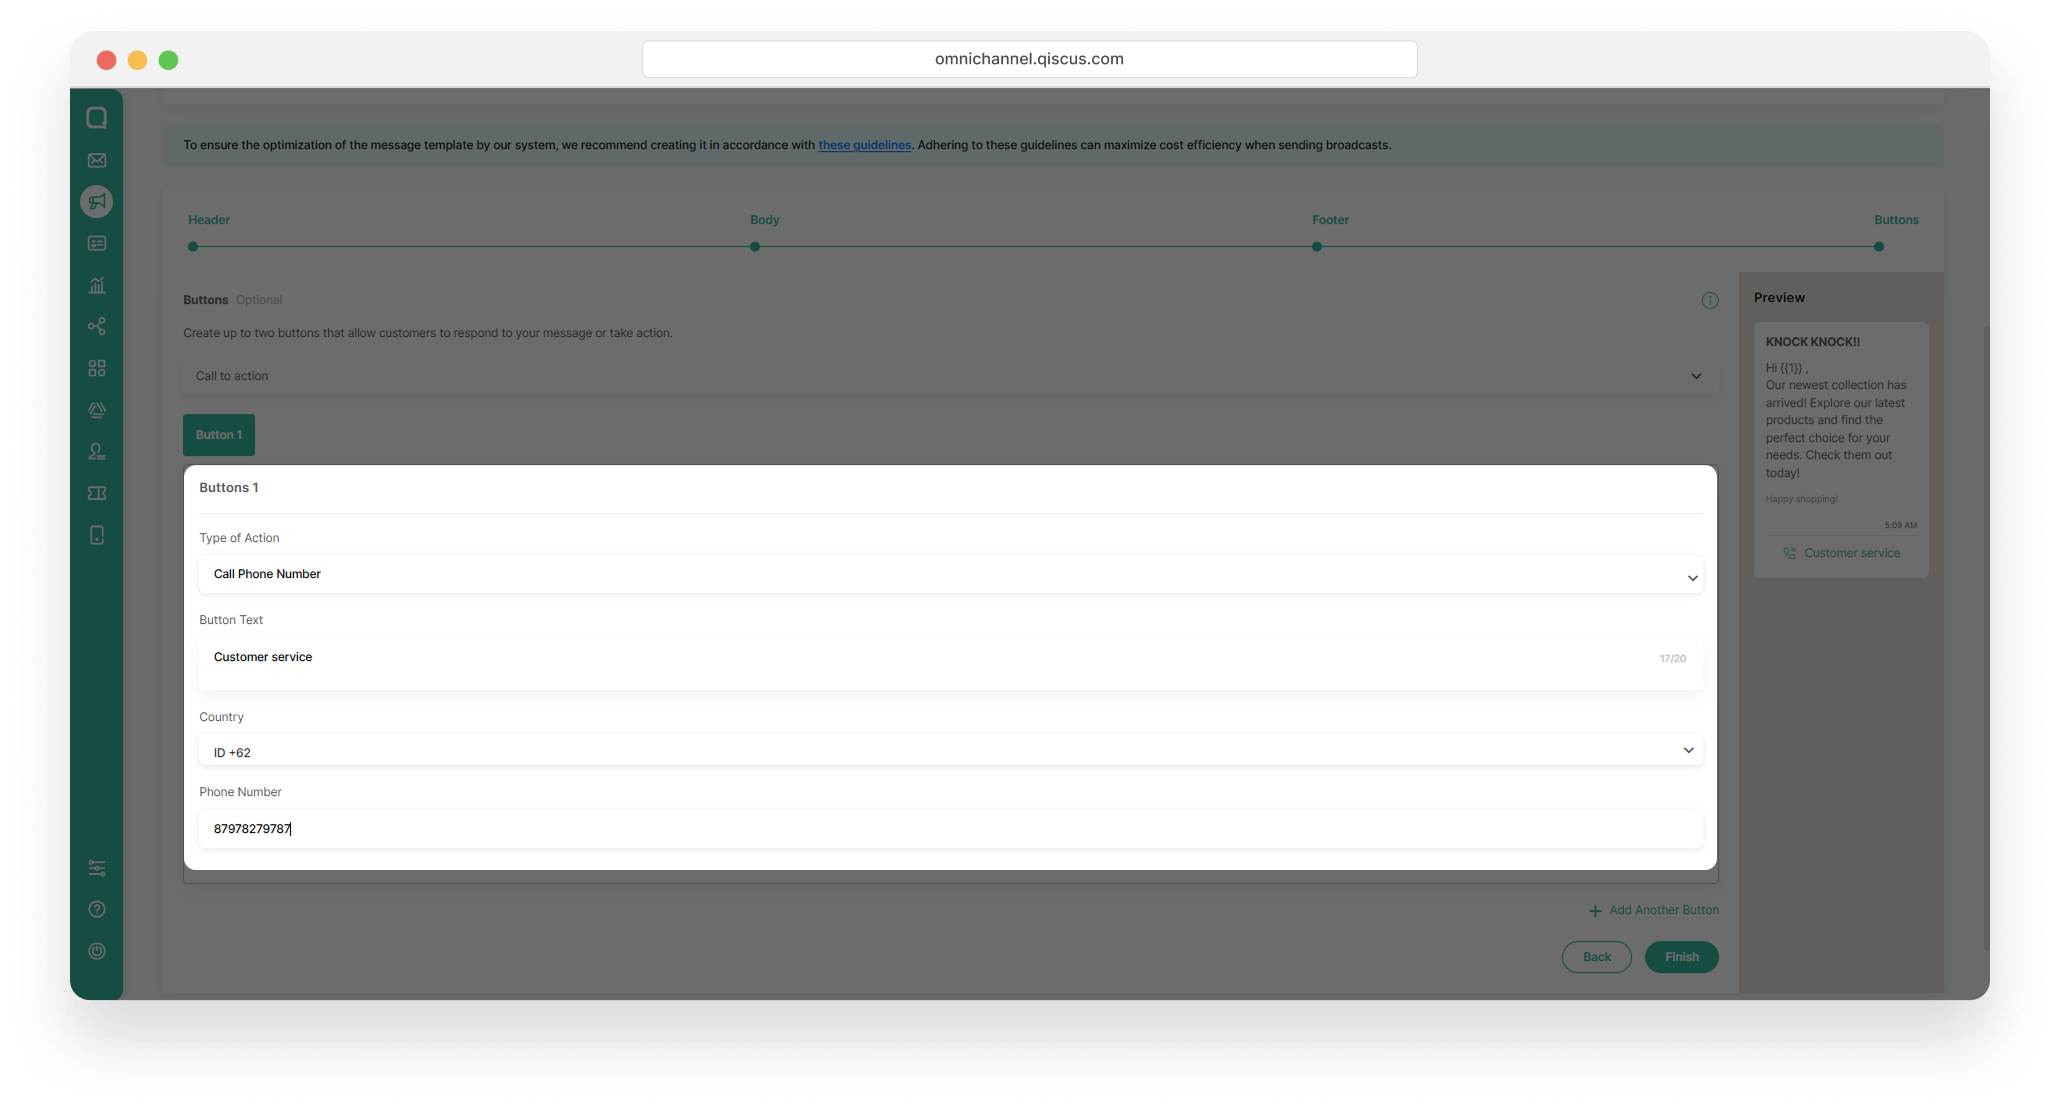
Call Phone Number
Choose Phone Number to let customers call you directly. Complete the required fields, then click Finish.
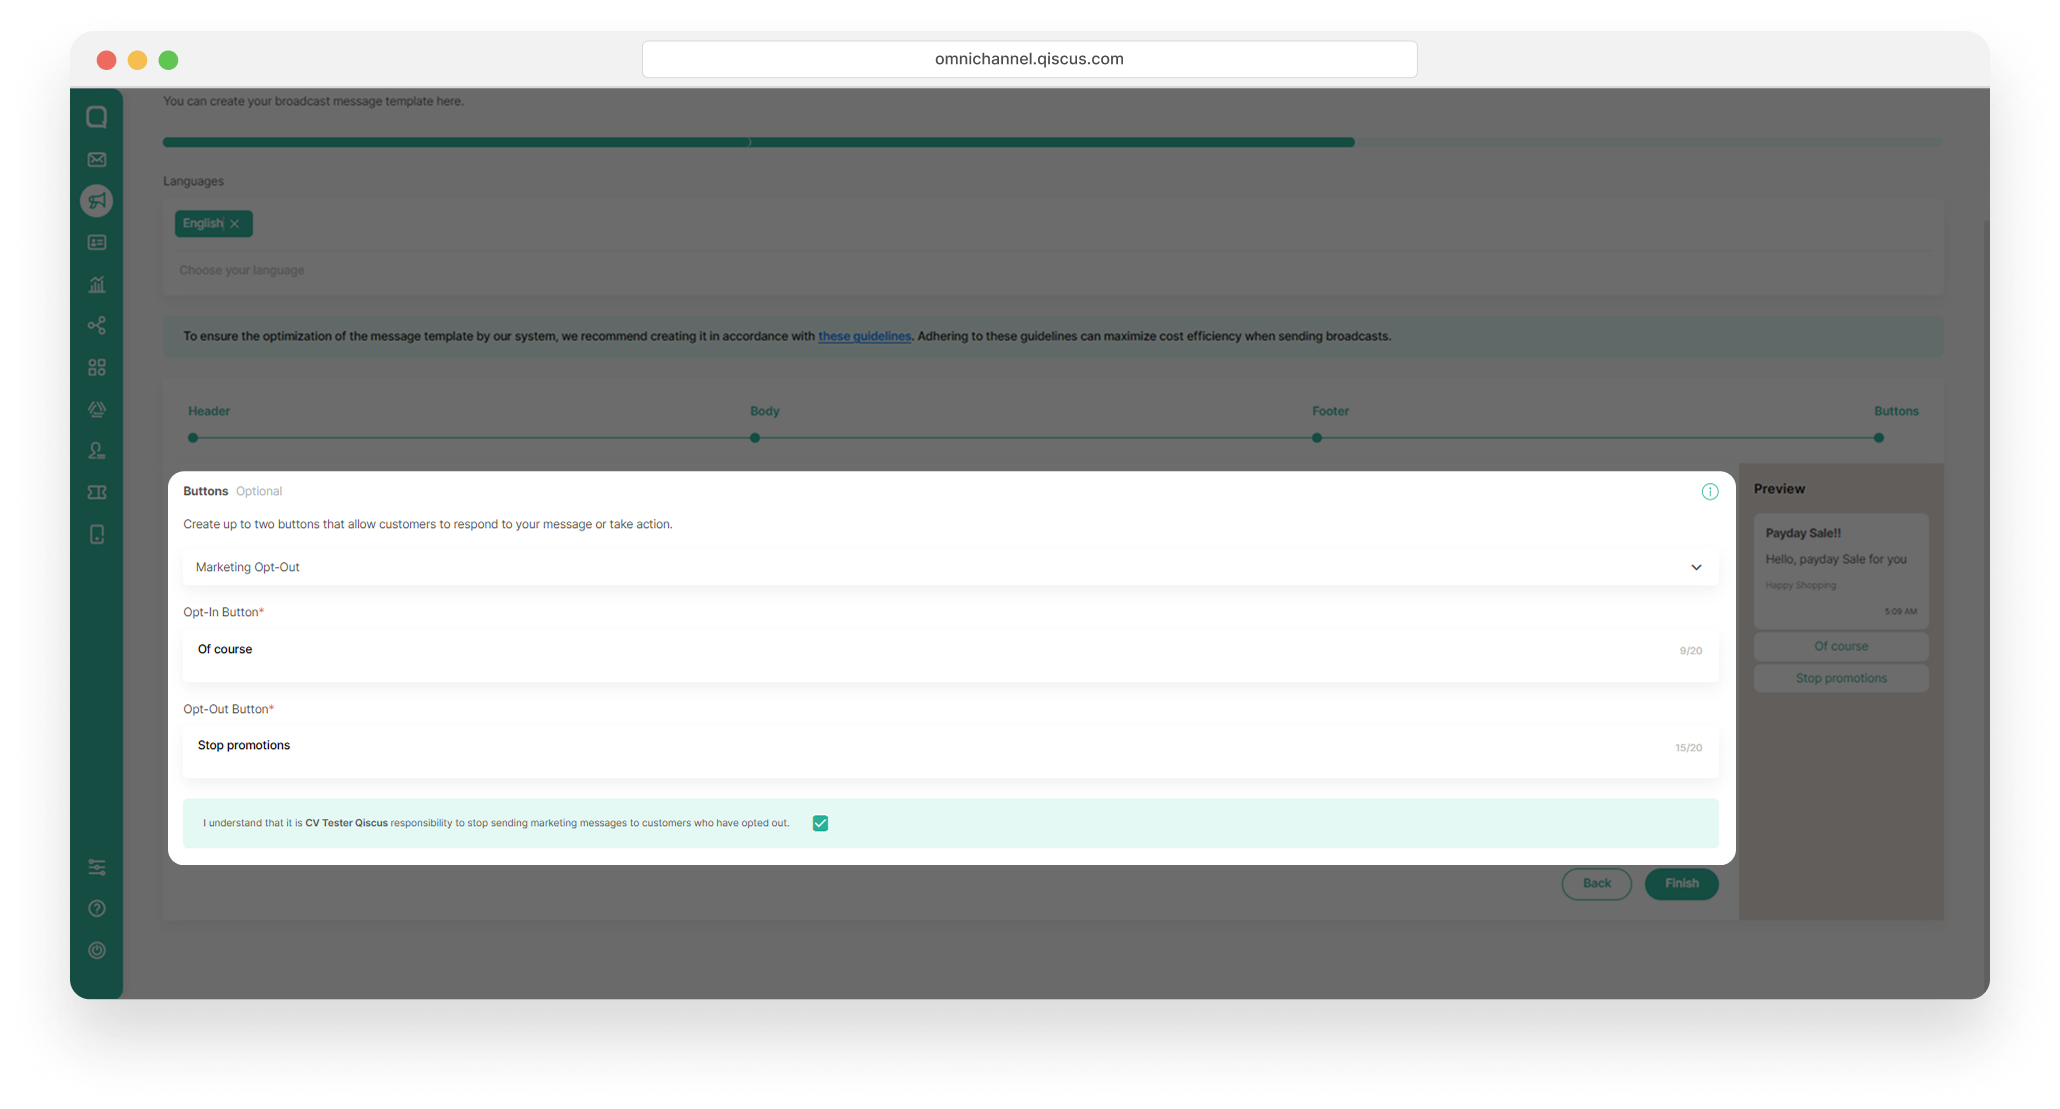
Marketing Opt-Out
Add an unsubscribe button that allows customers to opt out of receiving future marketing messages. Adding opt-in and opt-out buttons is required. The default text is Of course (opt-in) and Stop Promotion (opt-out), but you can change both. Remember to check the box confirming it is {Company}'s responsibility to stop sending marketing messages to customers who have opted out.
Enter a button label that matches your intended action.
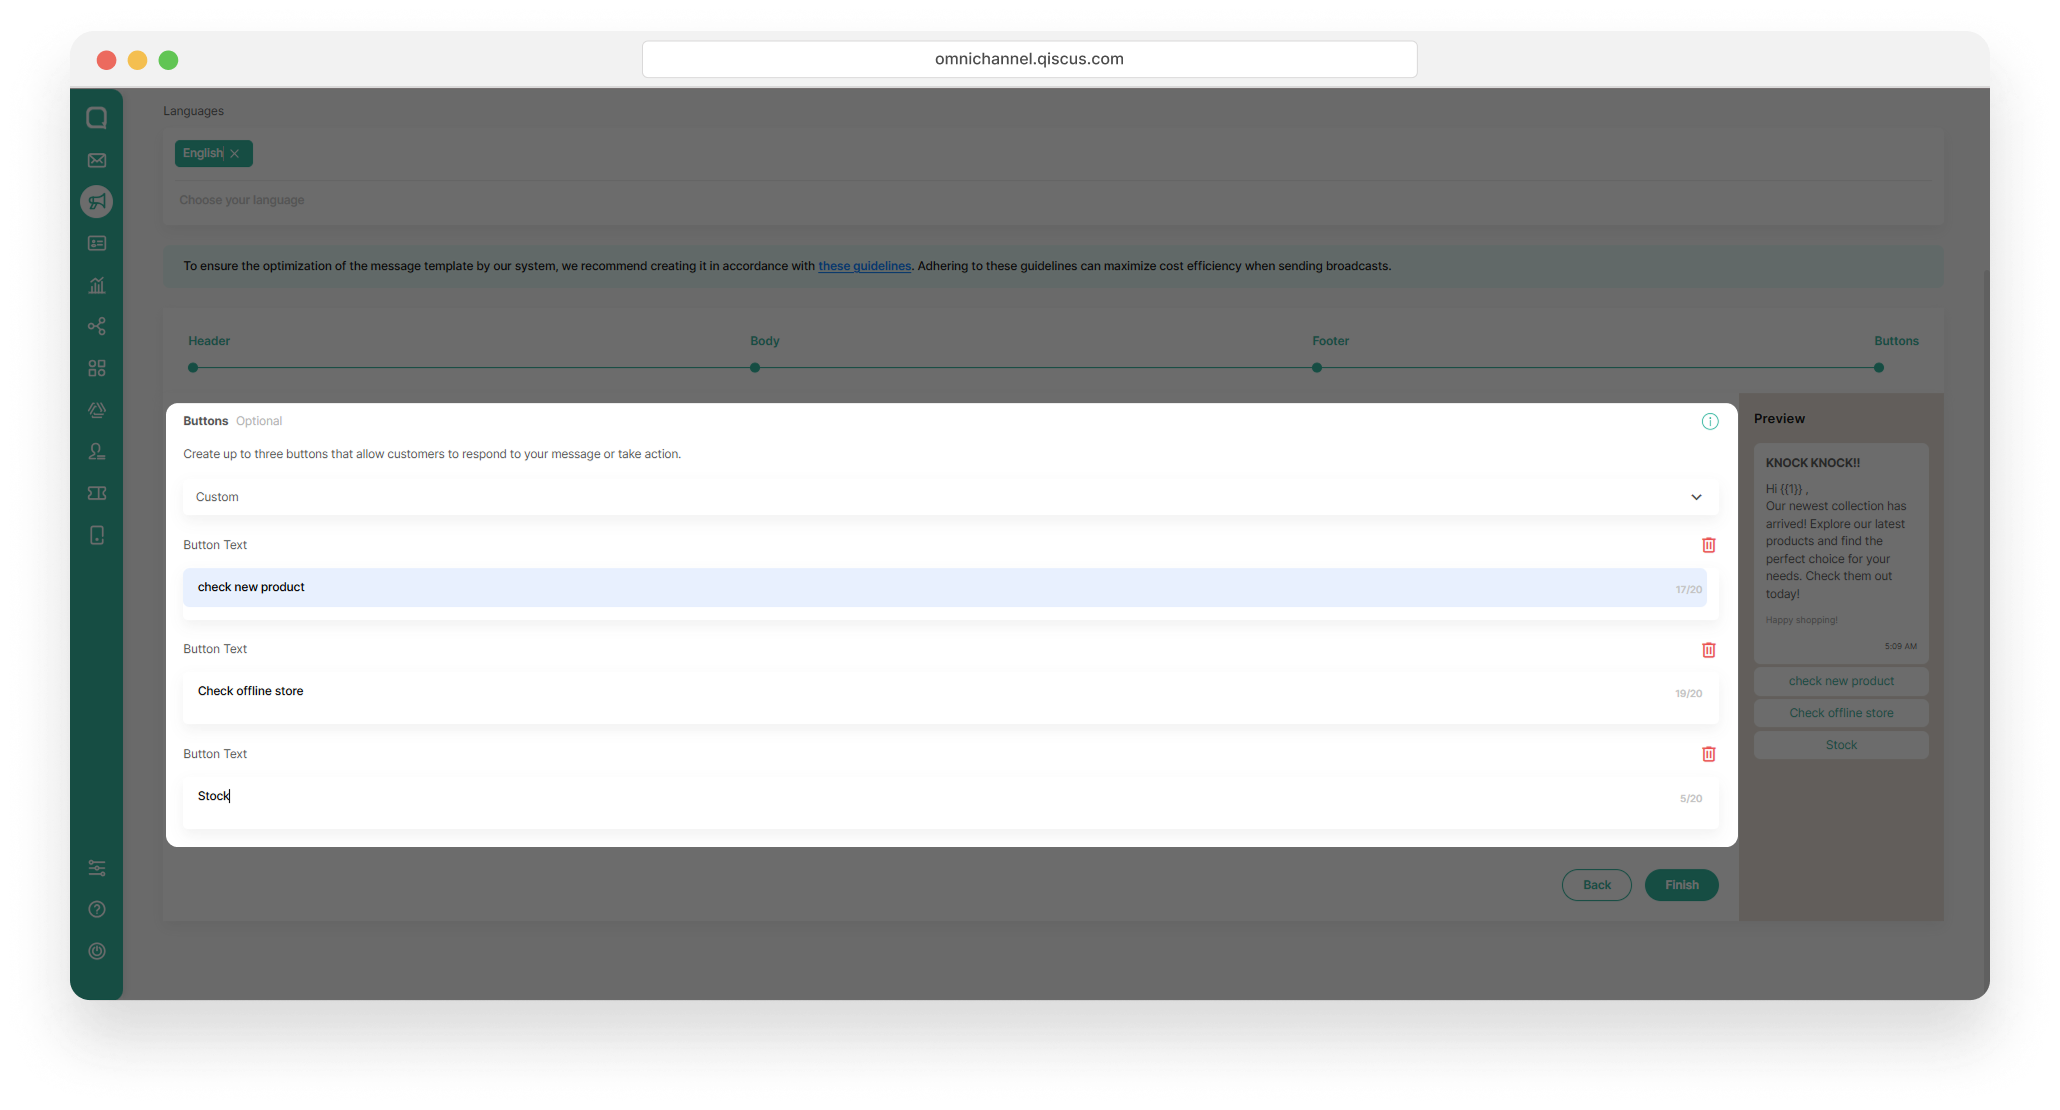
Custom
Add custom quick reply buttons to let customers respond with predefined options or continue the conversation.
Enter a button label that matches your intended action.
Submit the Broadcast Template you have created
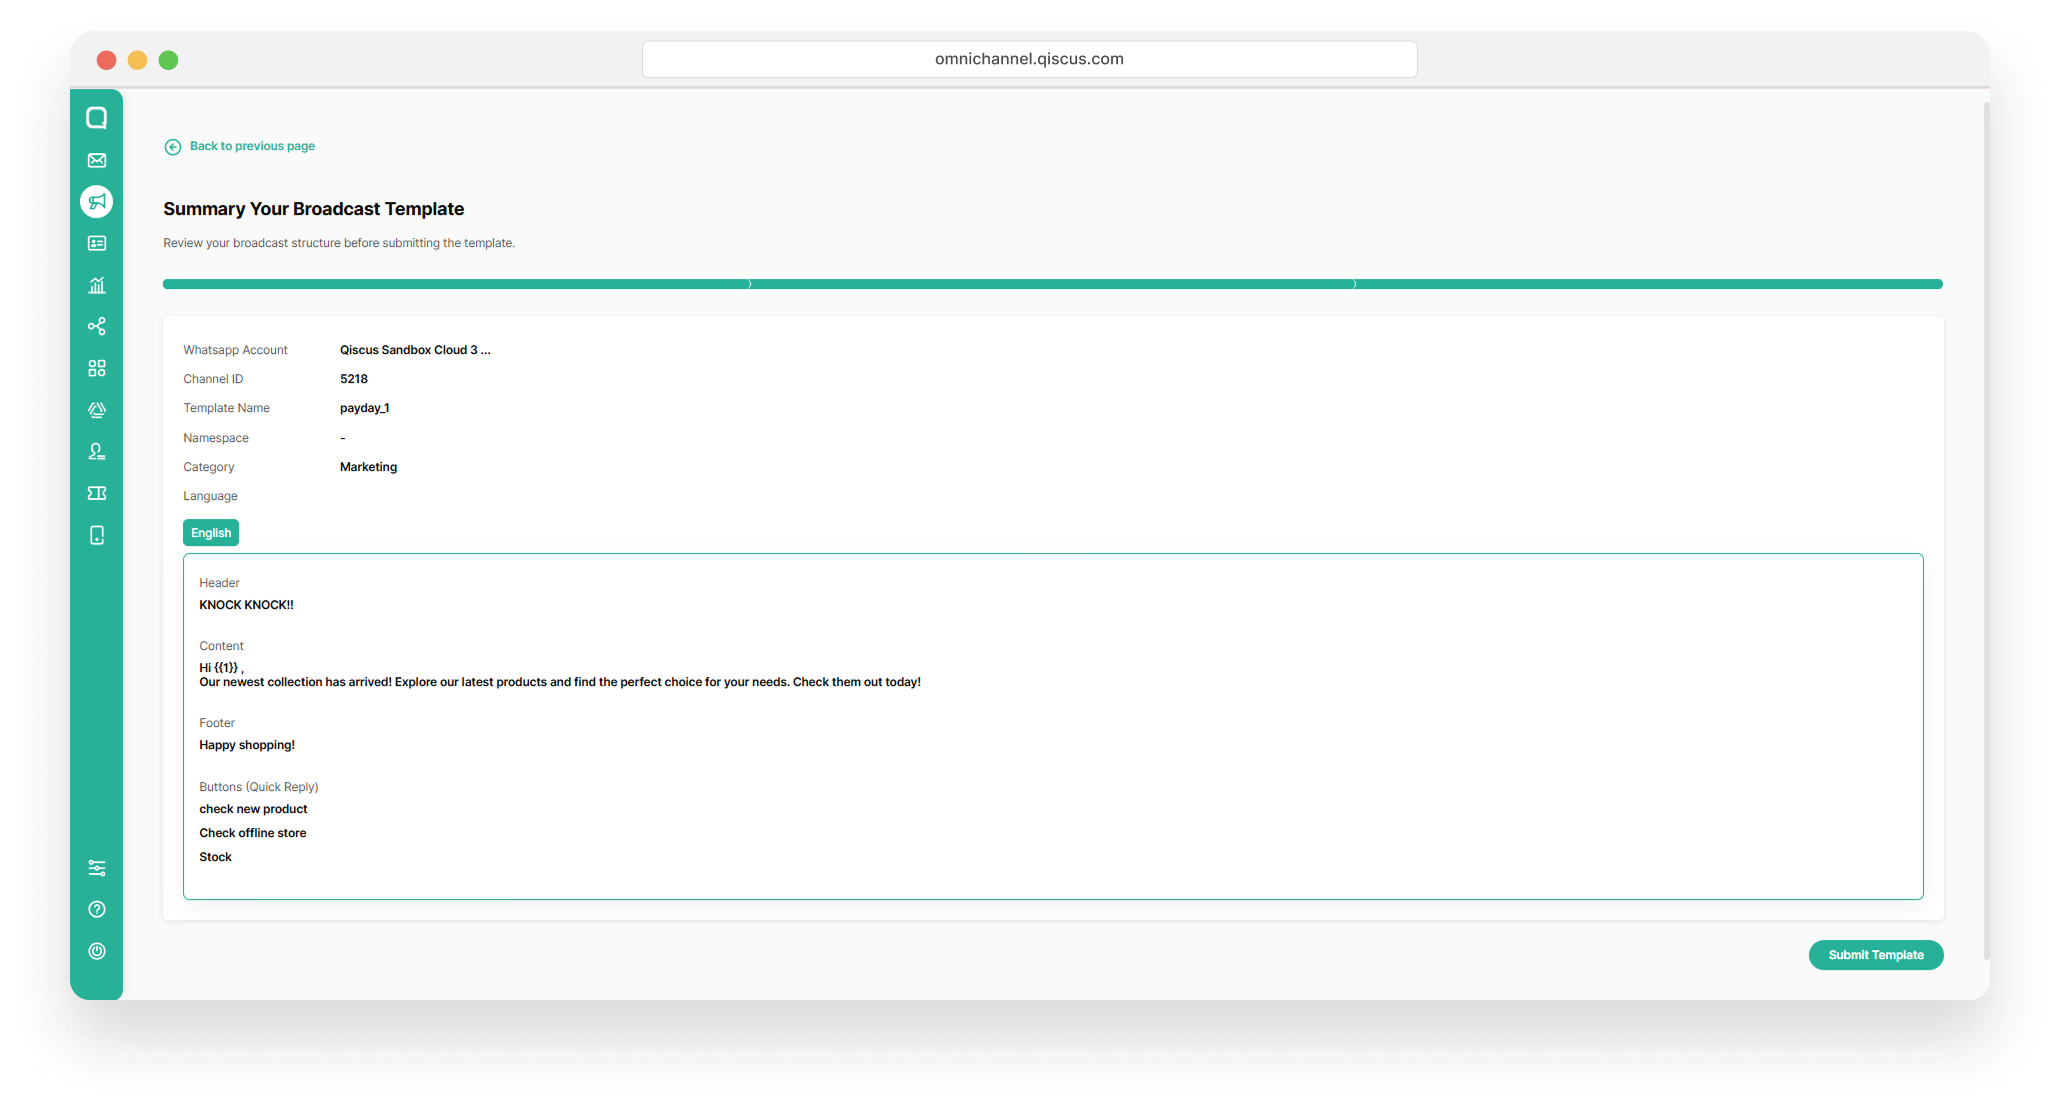
Your broadcast template will be reviewed to ensure it complies with WhatsApp policies. If approved, its status will change to Approved and it will be ready to use. If it does not meet the requirements, the status will change to Rejected. Once your template is Approved, you can start sending WhatsApp broadcast messages. To create another template, simply repeat the same steps.
WhatsApp Authentication Message Template
On June 1, 2023, WhatsApp officially announced its new prices and introduced a new feature called Authentication Templates with One-Time Password Buttons. Following the guidelines set by Meta, the new authentication template must not include links, media, or emojis. Additionally, parameters in the template are restricted to a maximum length of 15 characters, and the new template must include a Copy Code button.
After June 1, the existing authentication OTP templates will remain functional and effective. However, it is important to note that any templates that do not comply with the updated guidelines are at risk of being blocked by Meta. You can send Authentication Message Templates using the API by following this documentation.
In line with this change, Qiscus made several changes to the Omnichannel Chat dashboard.
Creating A New Authentication Message Template
When you choose the Authentication category while creating a new template, the display on the Adding New Broadcast Template page will automatically comply with the latest guidelines from Meta.
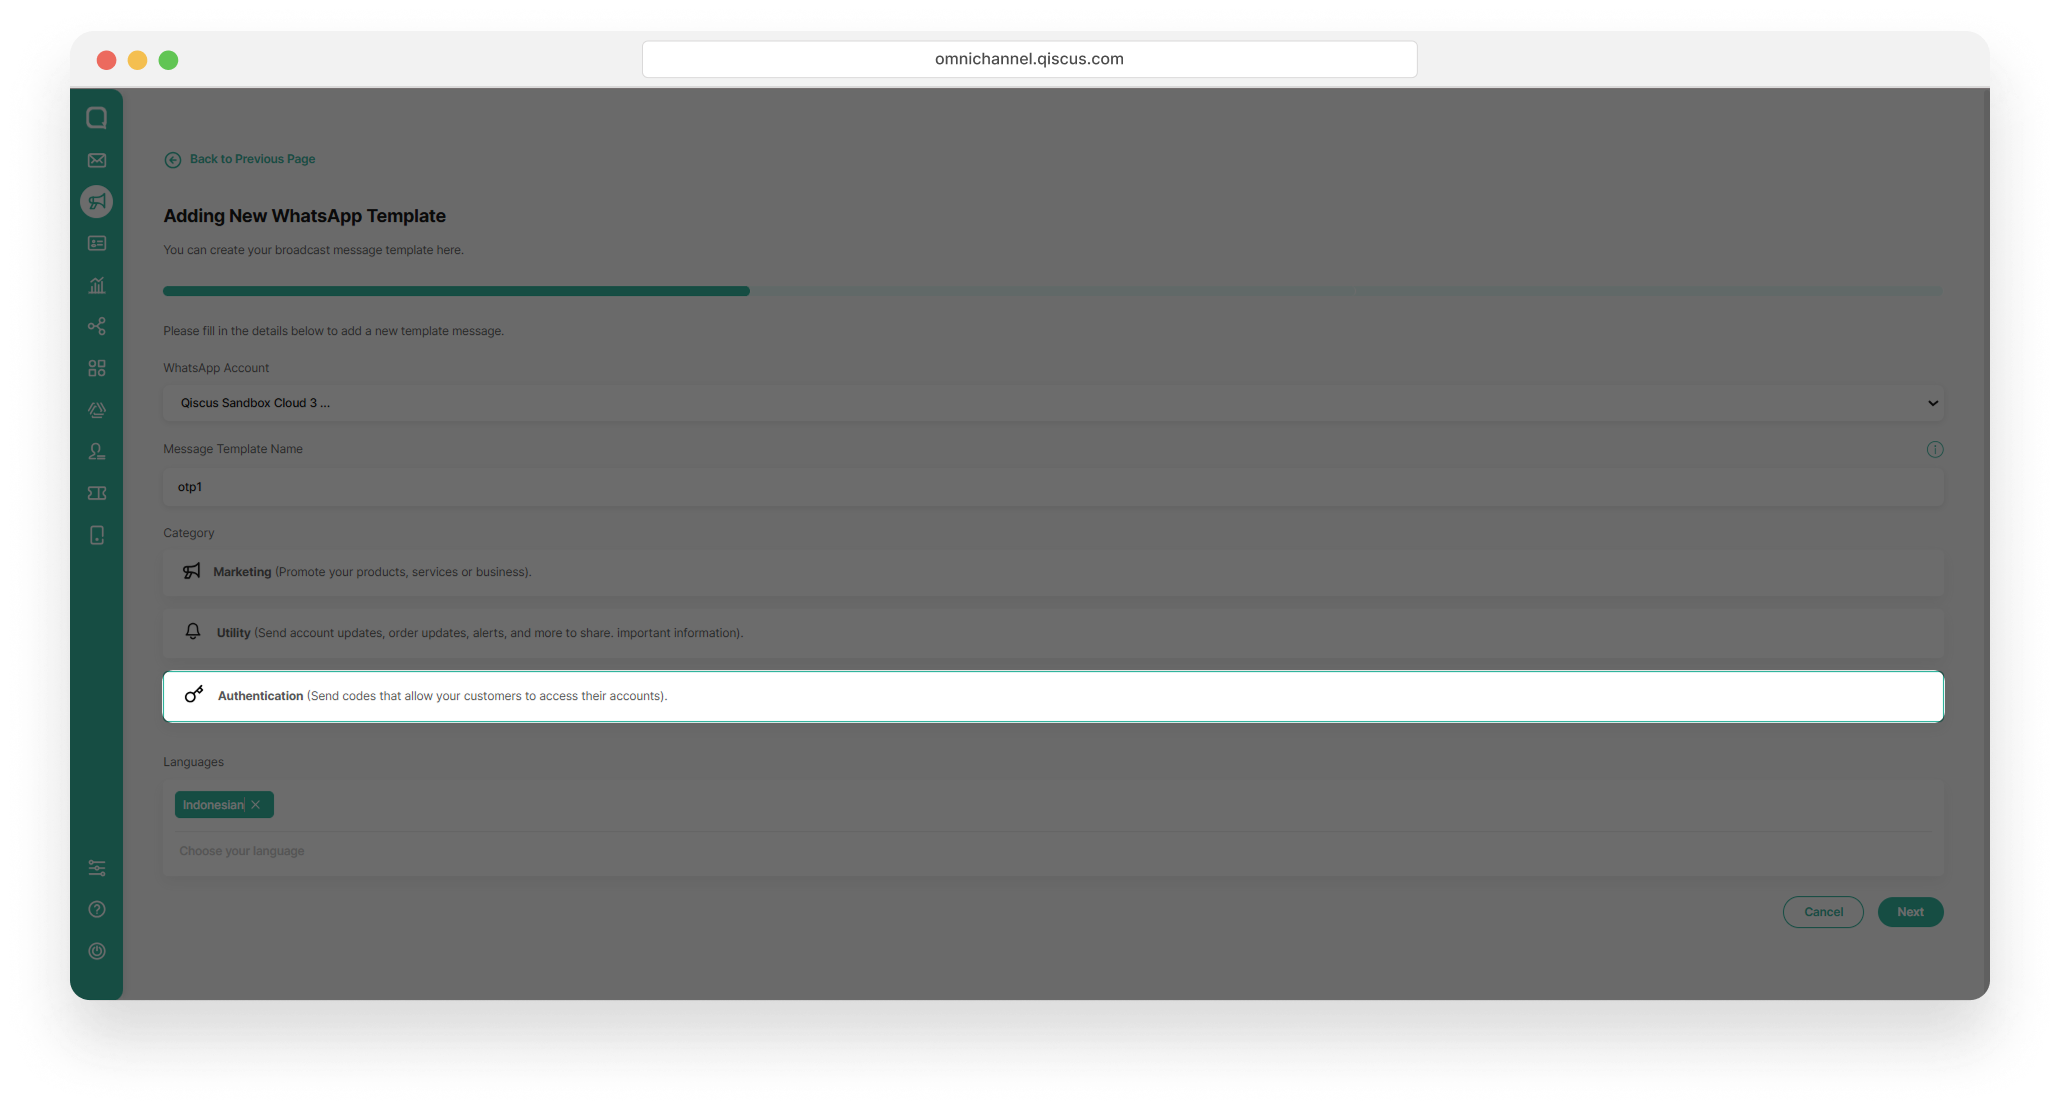
By default, you are required to add a Copy Code button. However, on the Qiscus Omnichannel Chat dashboard, you can change the button text as you wish.
Content for authentication message templates cannot be edited.
You have the option to include a security recommendation, an expiry time for the code, or both to the authentication message templates. If you add an expiry time, you can set how many minutes the OTP code can be used.
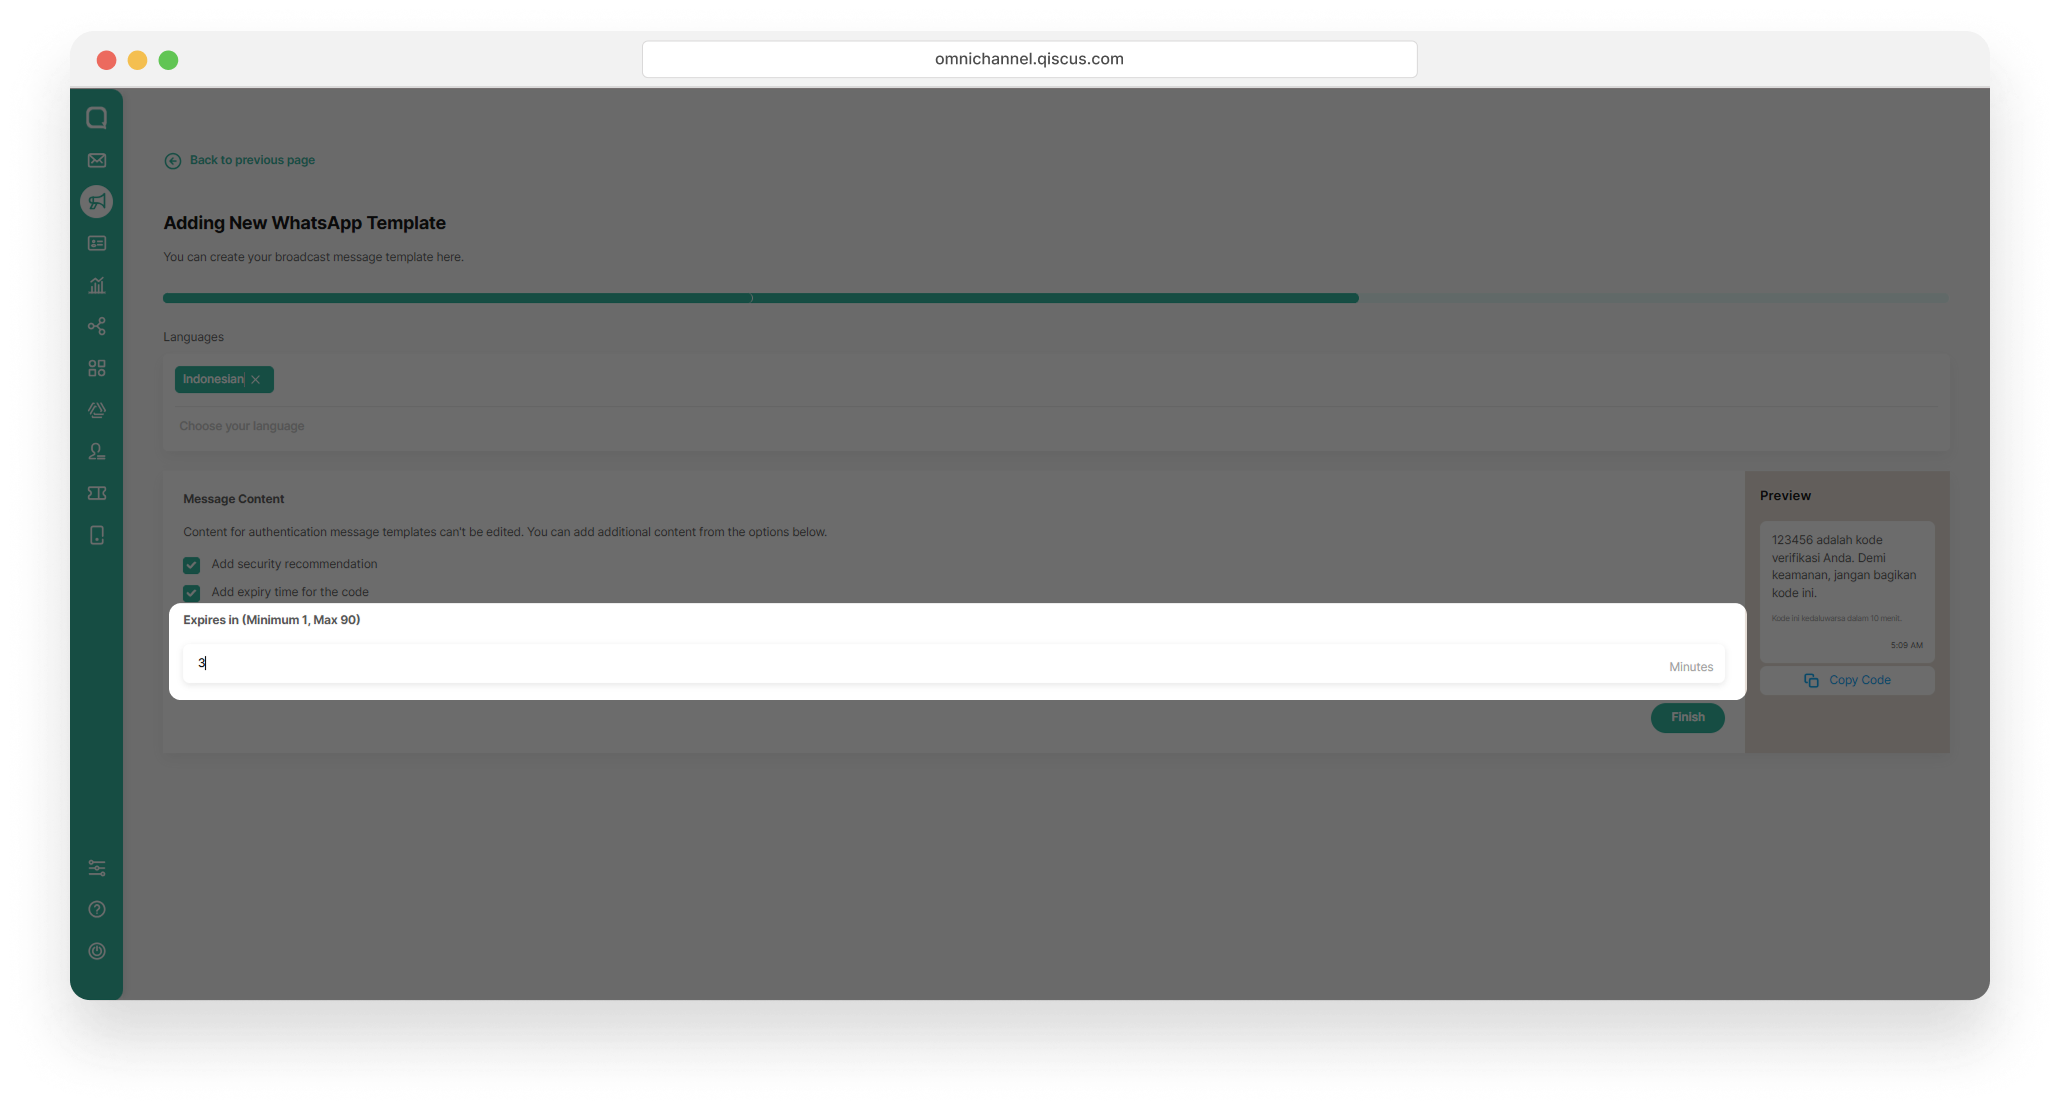
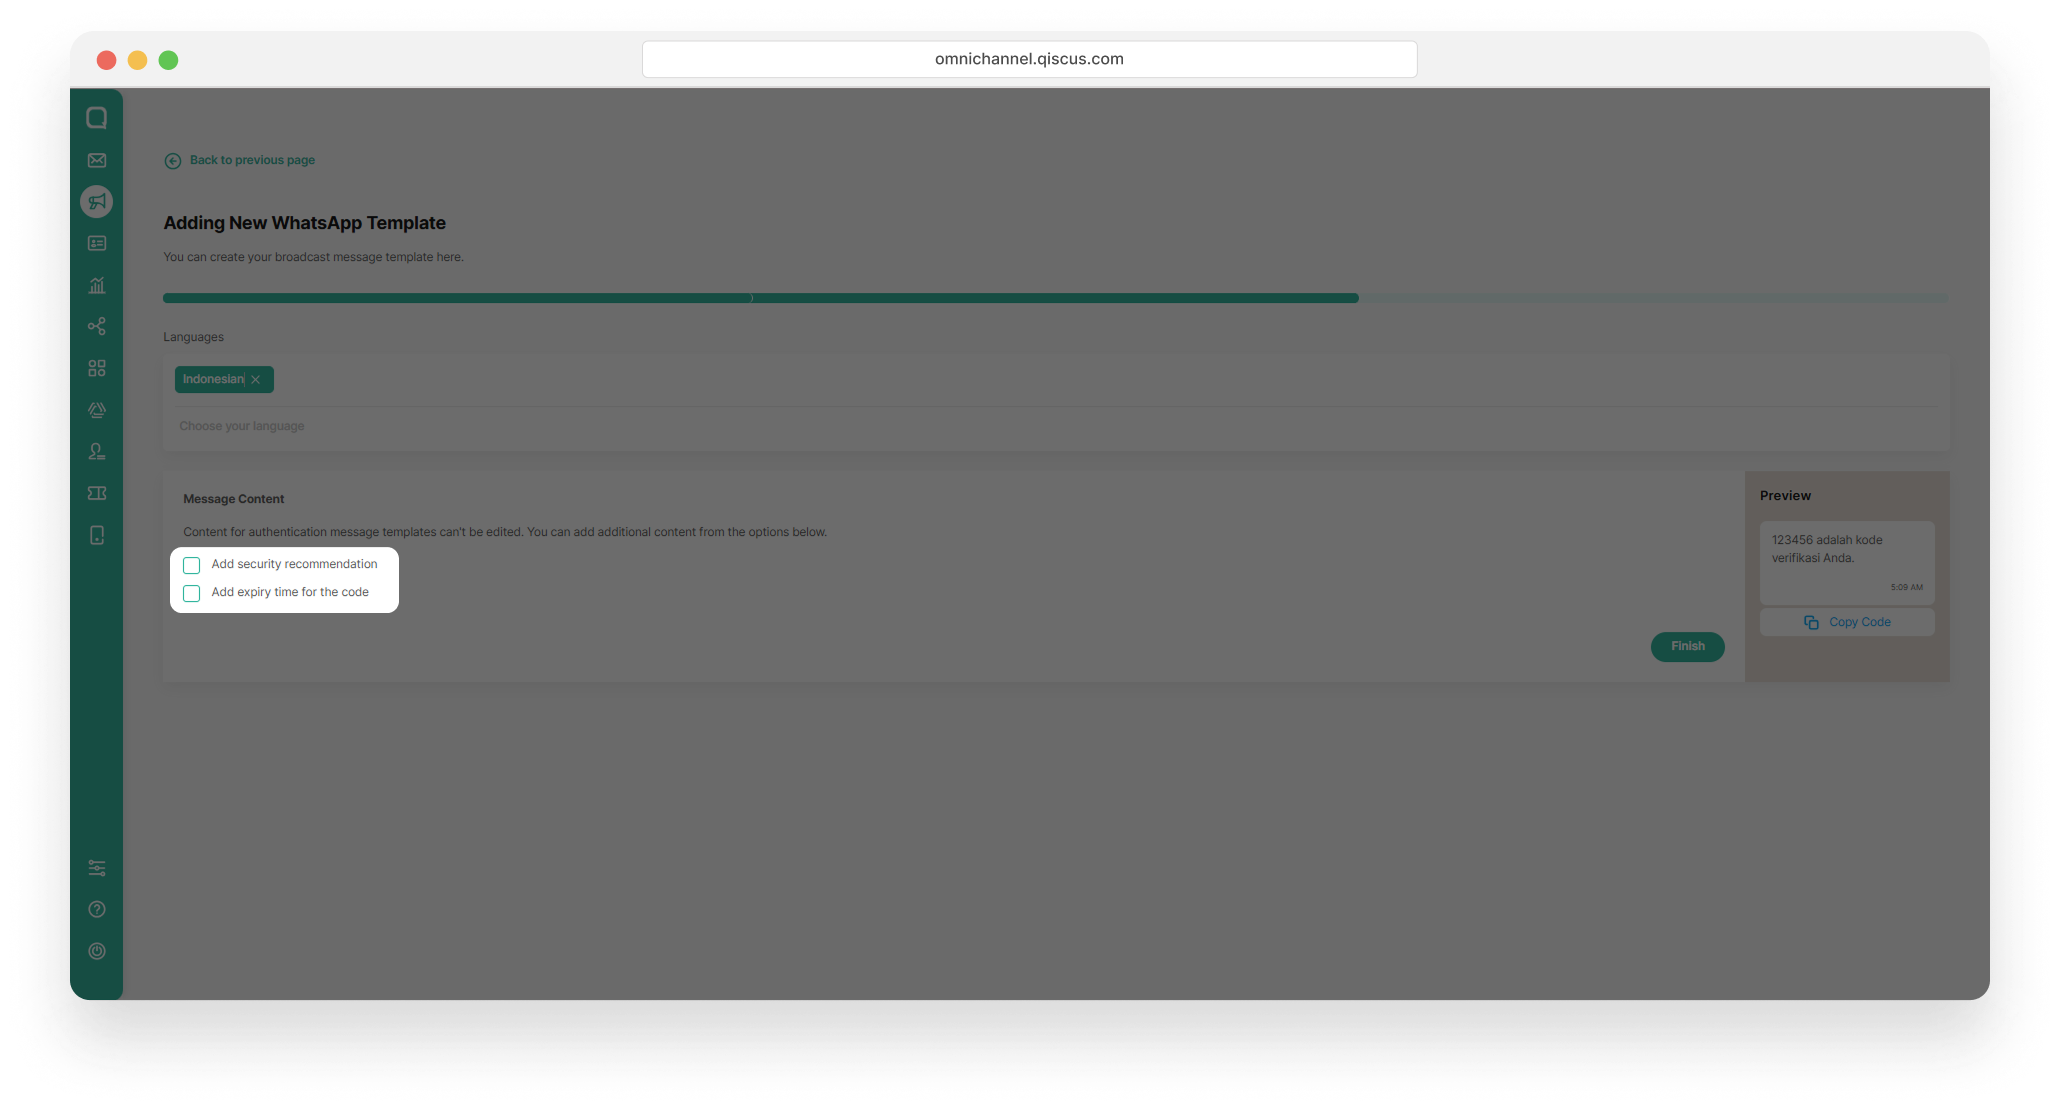
The language of the content depends on the language selected when creating the template.
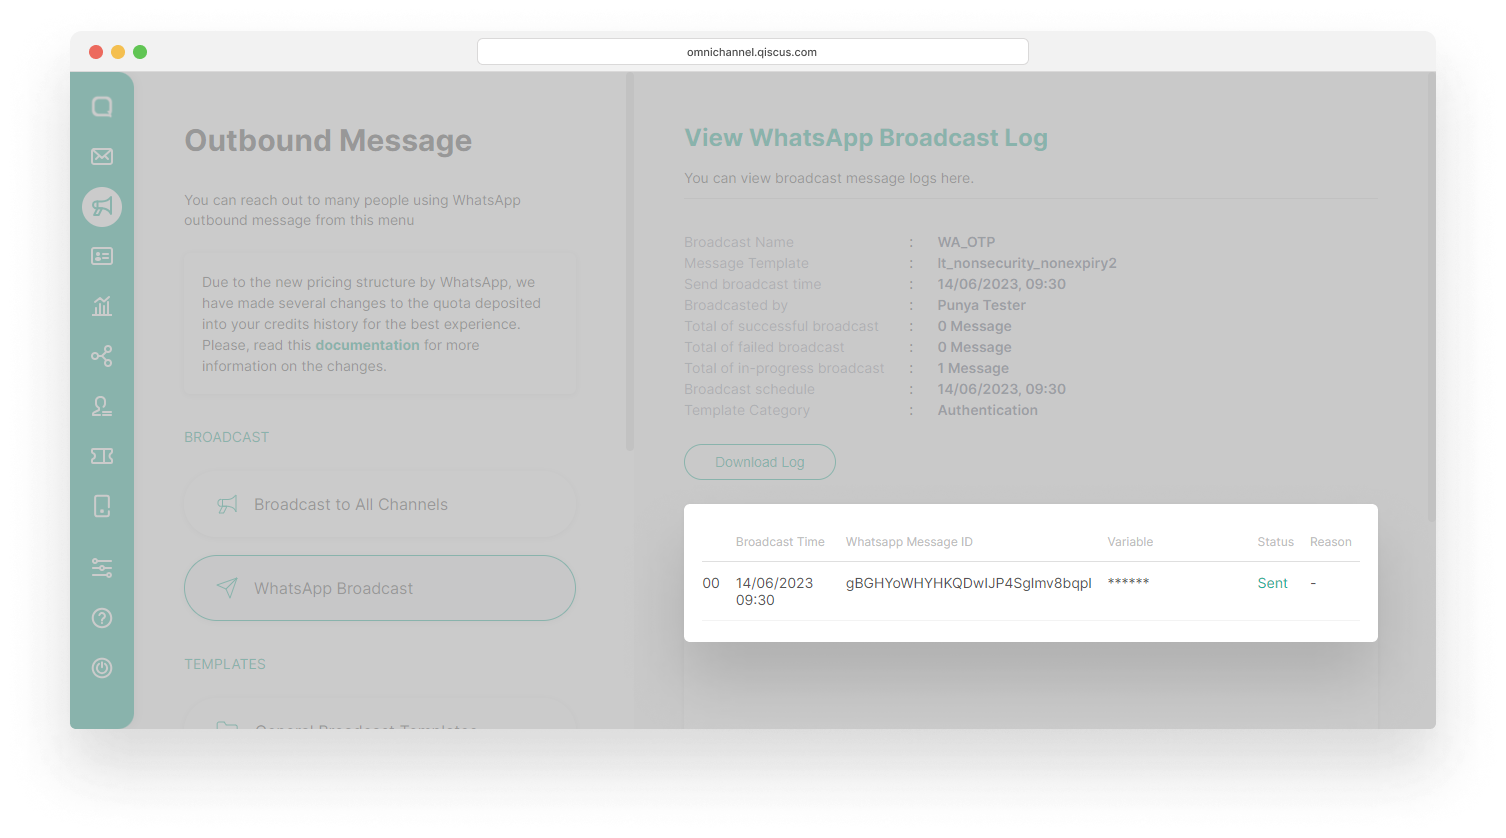
In order to maintain confidentiality, only your customers can see the OTP code. The OTP code will not appear in conversation on the Inbox menu and WhatsApp Broadcast Log.

Viewing Analytics Report
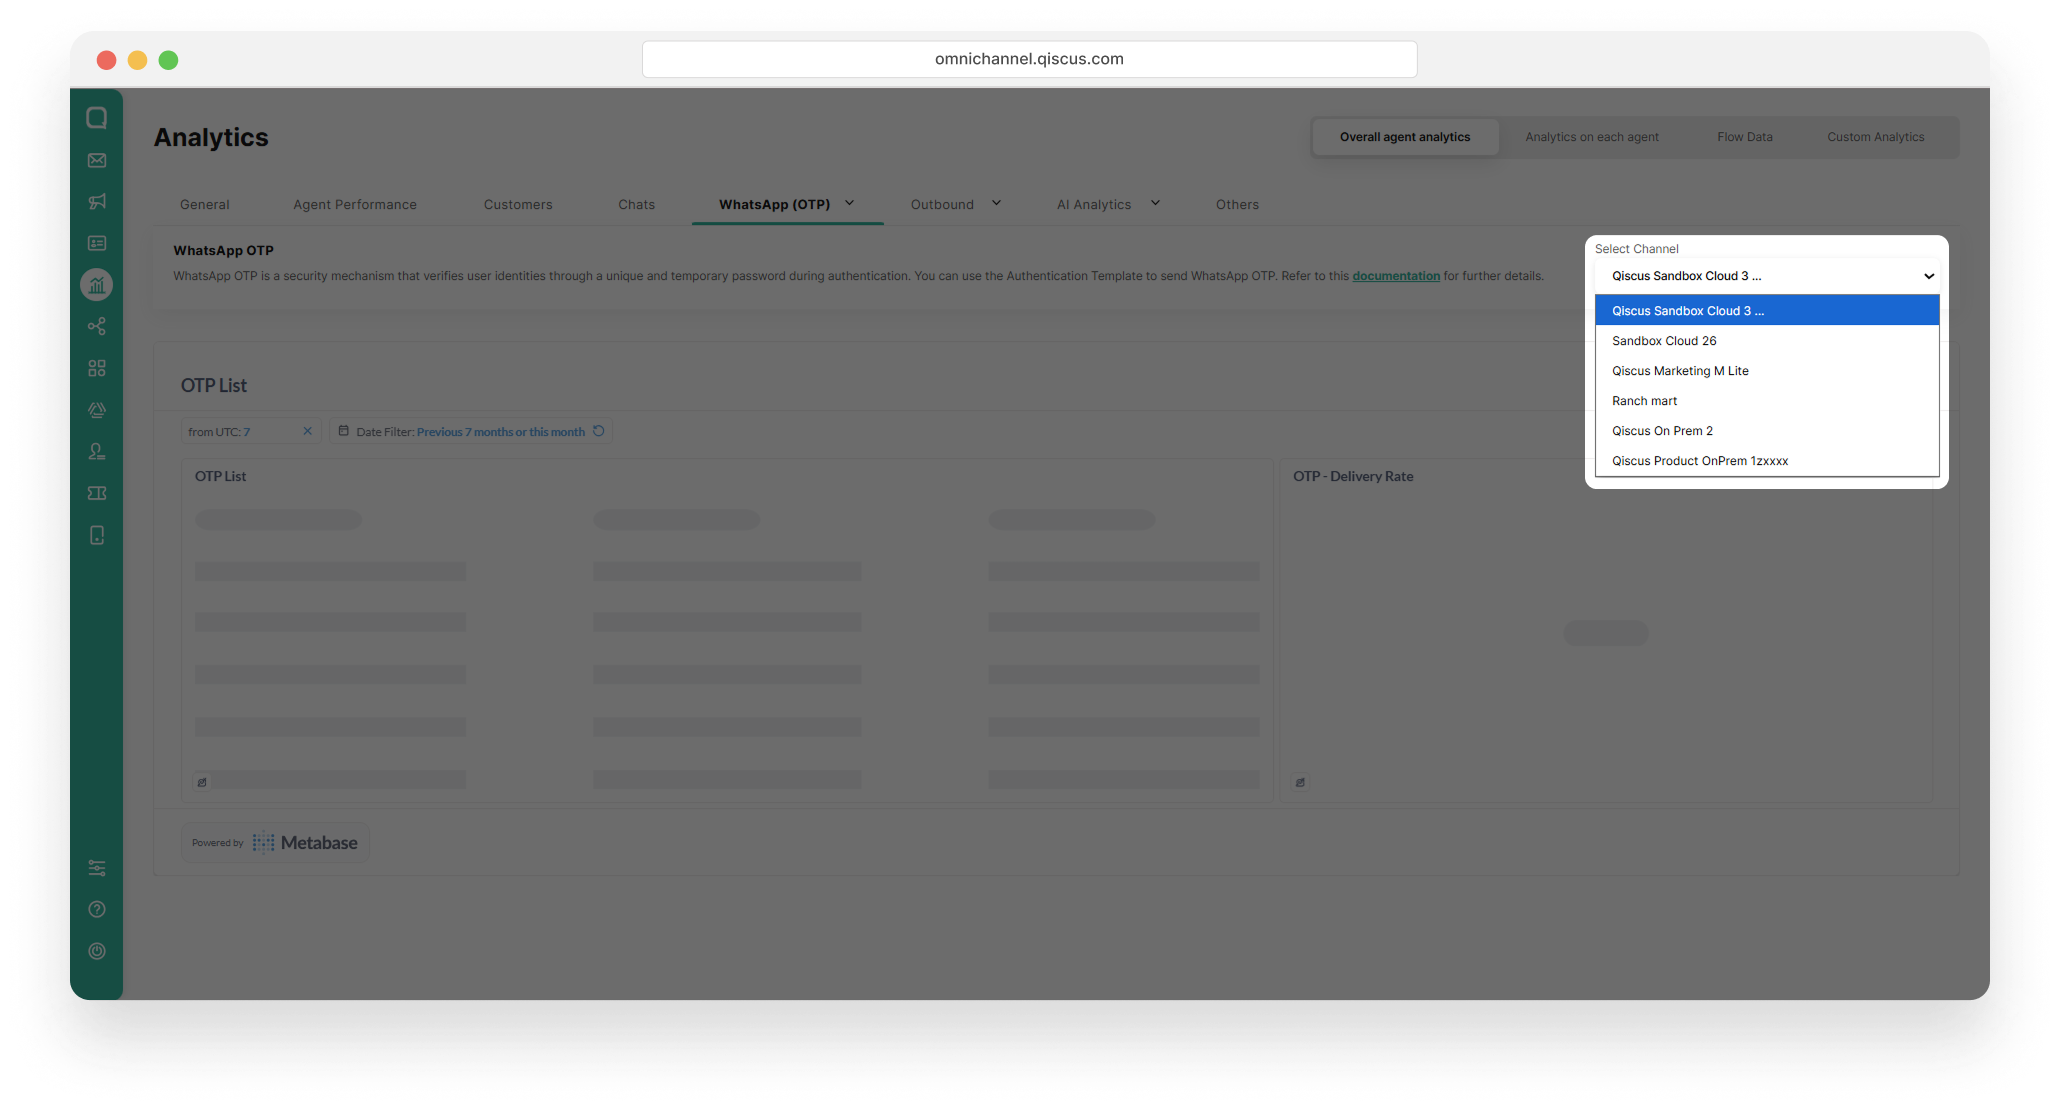
In addition to creating a new template, Qiscus has also added an analytical reporting feature for WhatsApp OTP. This feature allows you to access a comprehensive list of OTP deliveries and monitor the delivery rate. You can view this analytical report on the Analytics menu, then select WhatsApp and WhatsApp OTP.
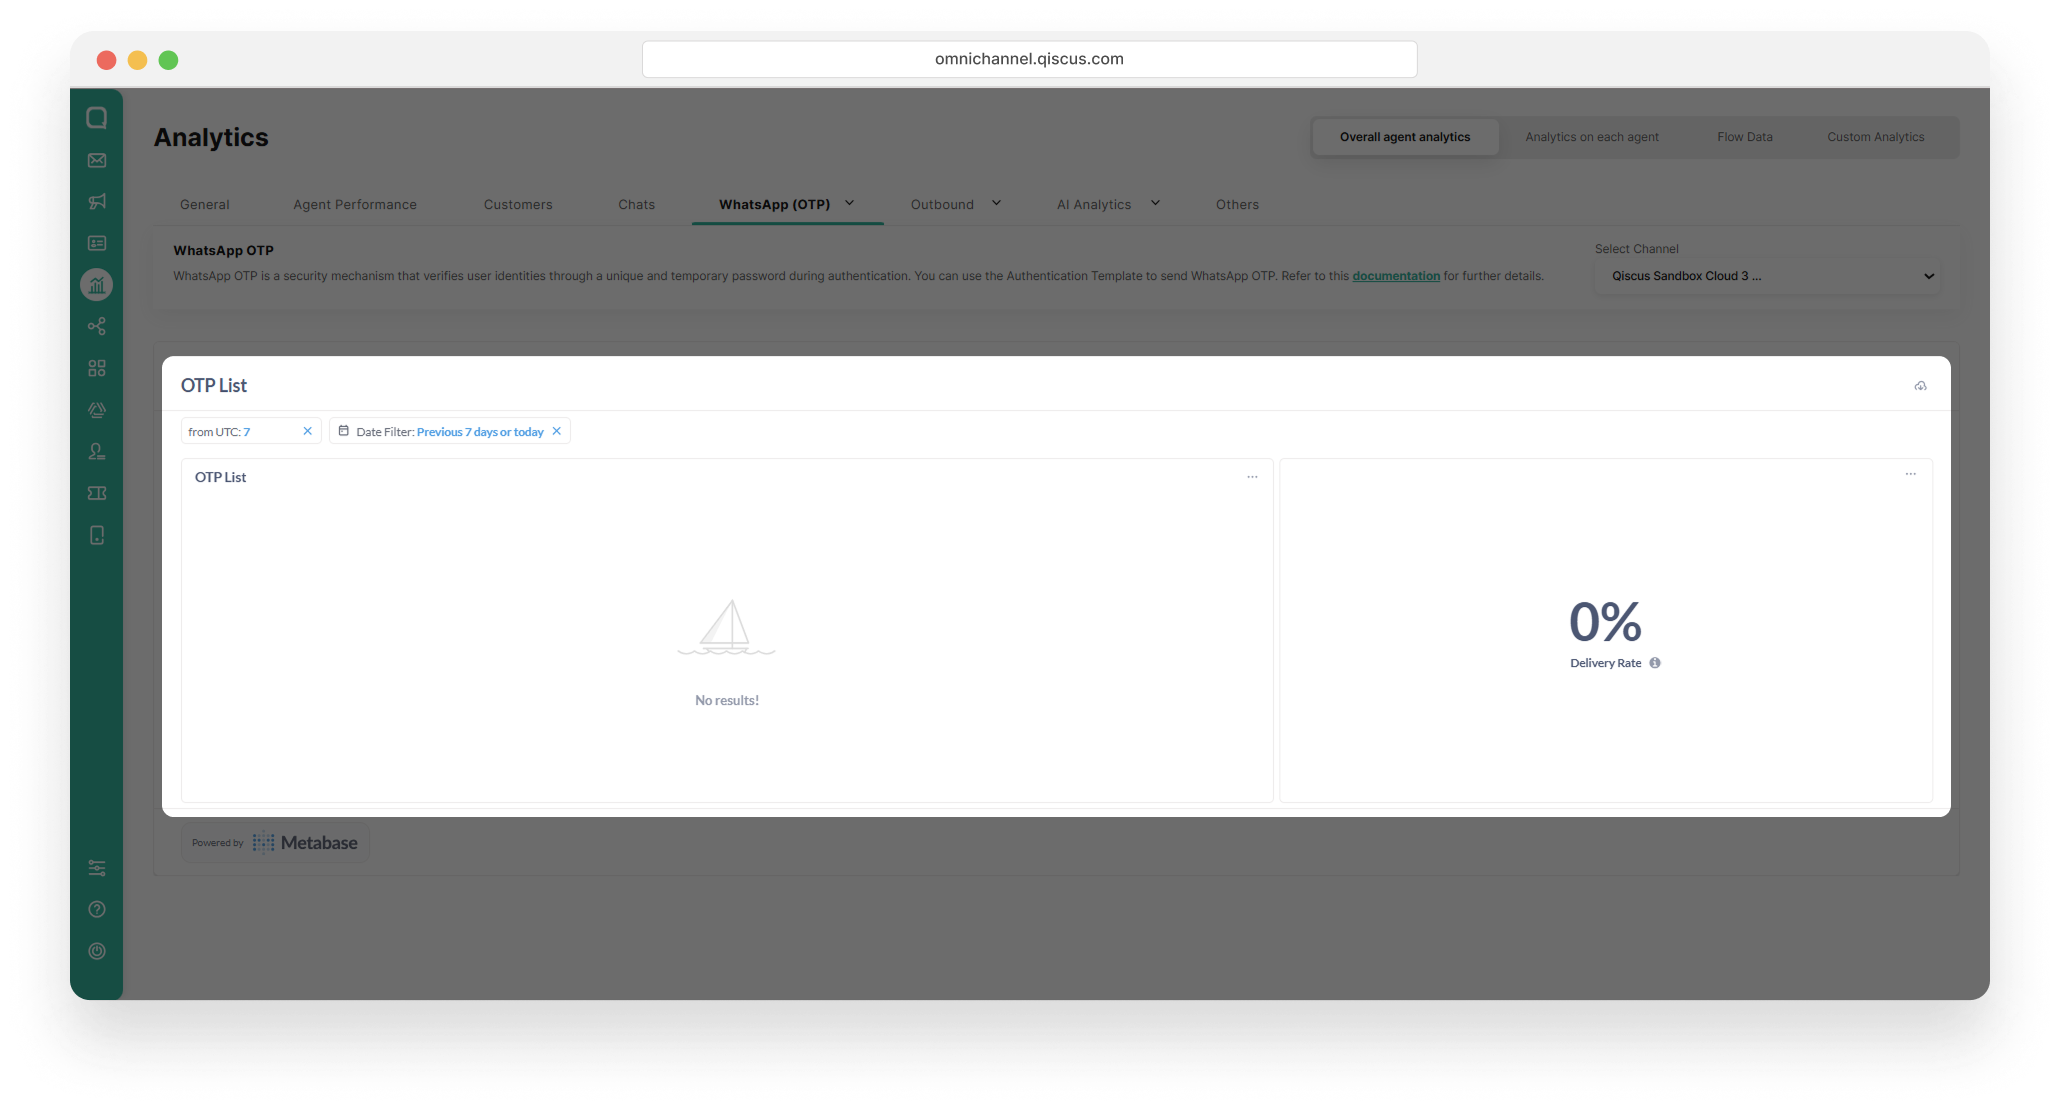
You can select the channel you want from the dropdown on the right.
Direct API Clients Only
Follow the steps in this section if you are using the WhatsApp Business API (Direct API) instead of the Qiscus Omnichannel Dashboard.
WhatsApp Send Messages API
WhatsApp Send Message API is used for access the document of WhatsApp Business API.
Auto Sync WhatsApp Template
Auto Sync WhatsApp Template is a feature that allows you to Sync approved WhatsApp message templates to Qiscus Omnichannel Chat dashboard. Additionally, you will automatically get the message template status from Facebook Business Manager on the dashboard.
Before getting started here are a few things to know:
You must have approved message templates in Facebook Business Manager
All templates in one WhatsApp Business API ID will be synced. So you have to manually delete an unwanted template on a certain WhatsApp channel
All message templates created in Qiscus Omnichannel Chat dashboard will be automatically generated in Facebook Business Manager
Auto Sync WhatsApp Template feature is only supported on WhatsApp channels under Qiscus
You can sync WhatsApp templates with the following steps:
Go to the Outbound Message, click menu WhatsApp Broadcast Templates and scroll down
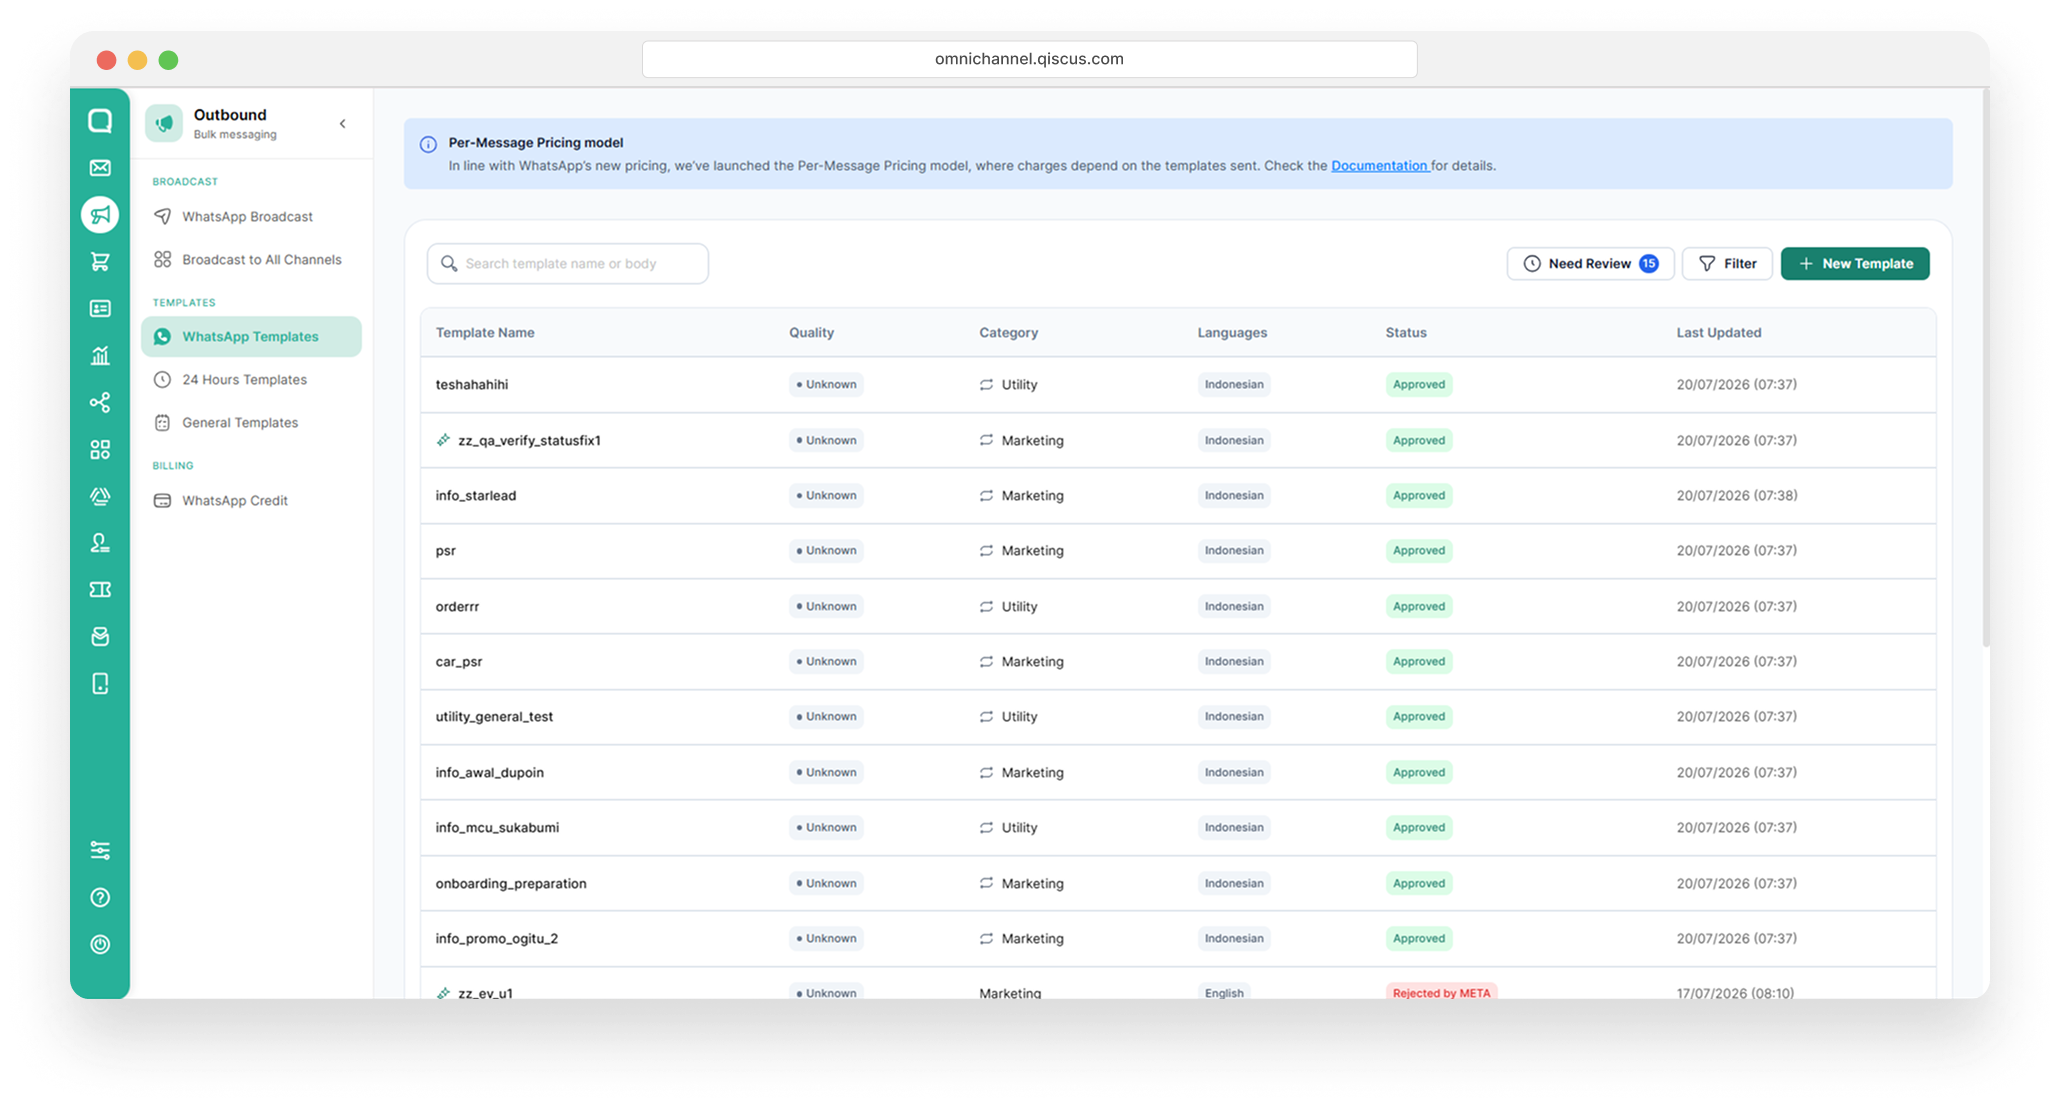
In the button list, click the Sync Template button.
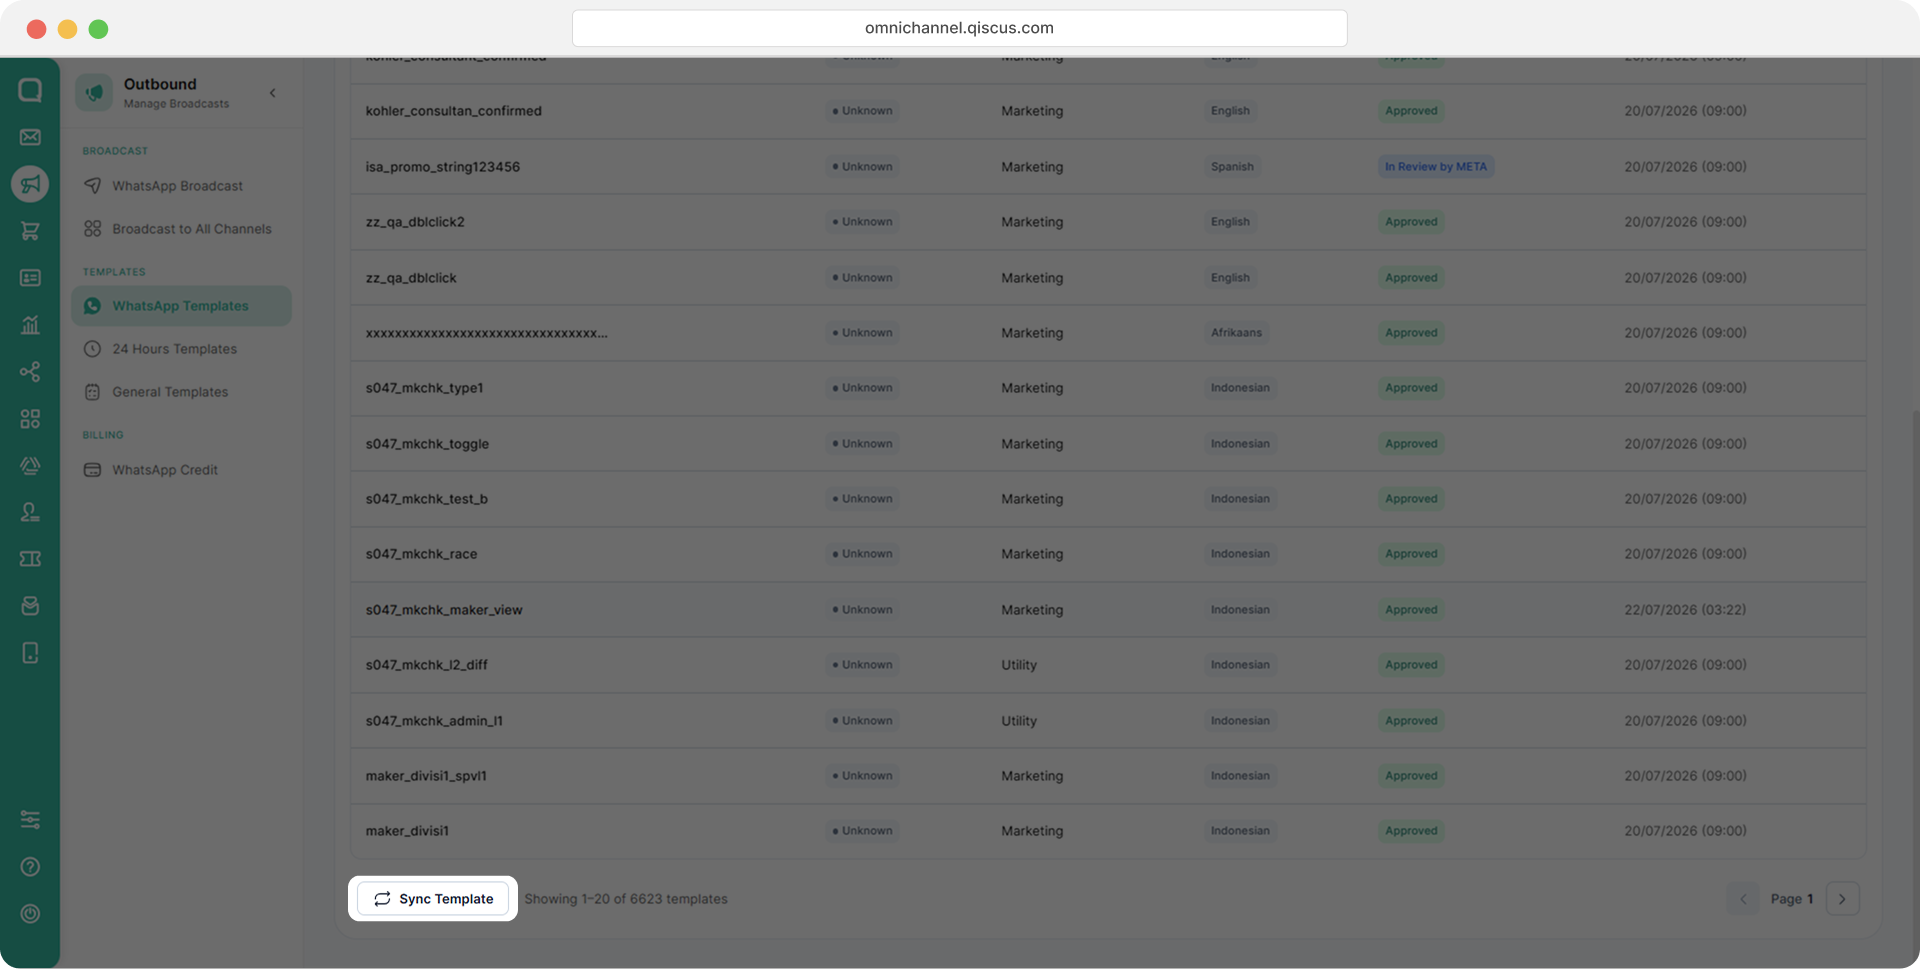
Choose the WhatsApp Account
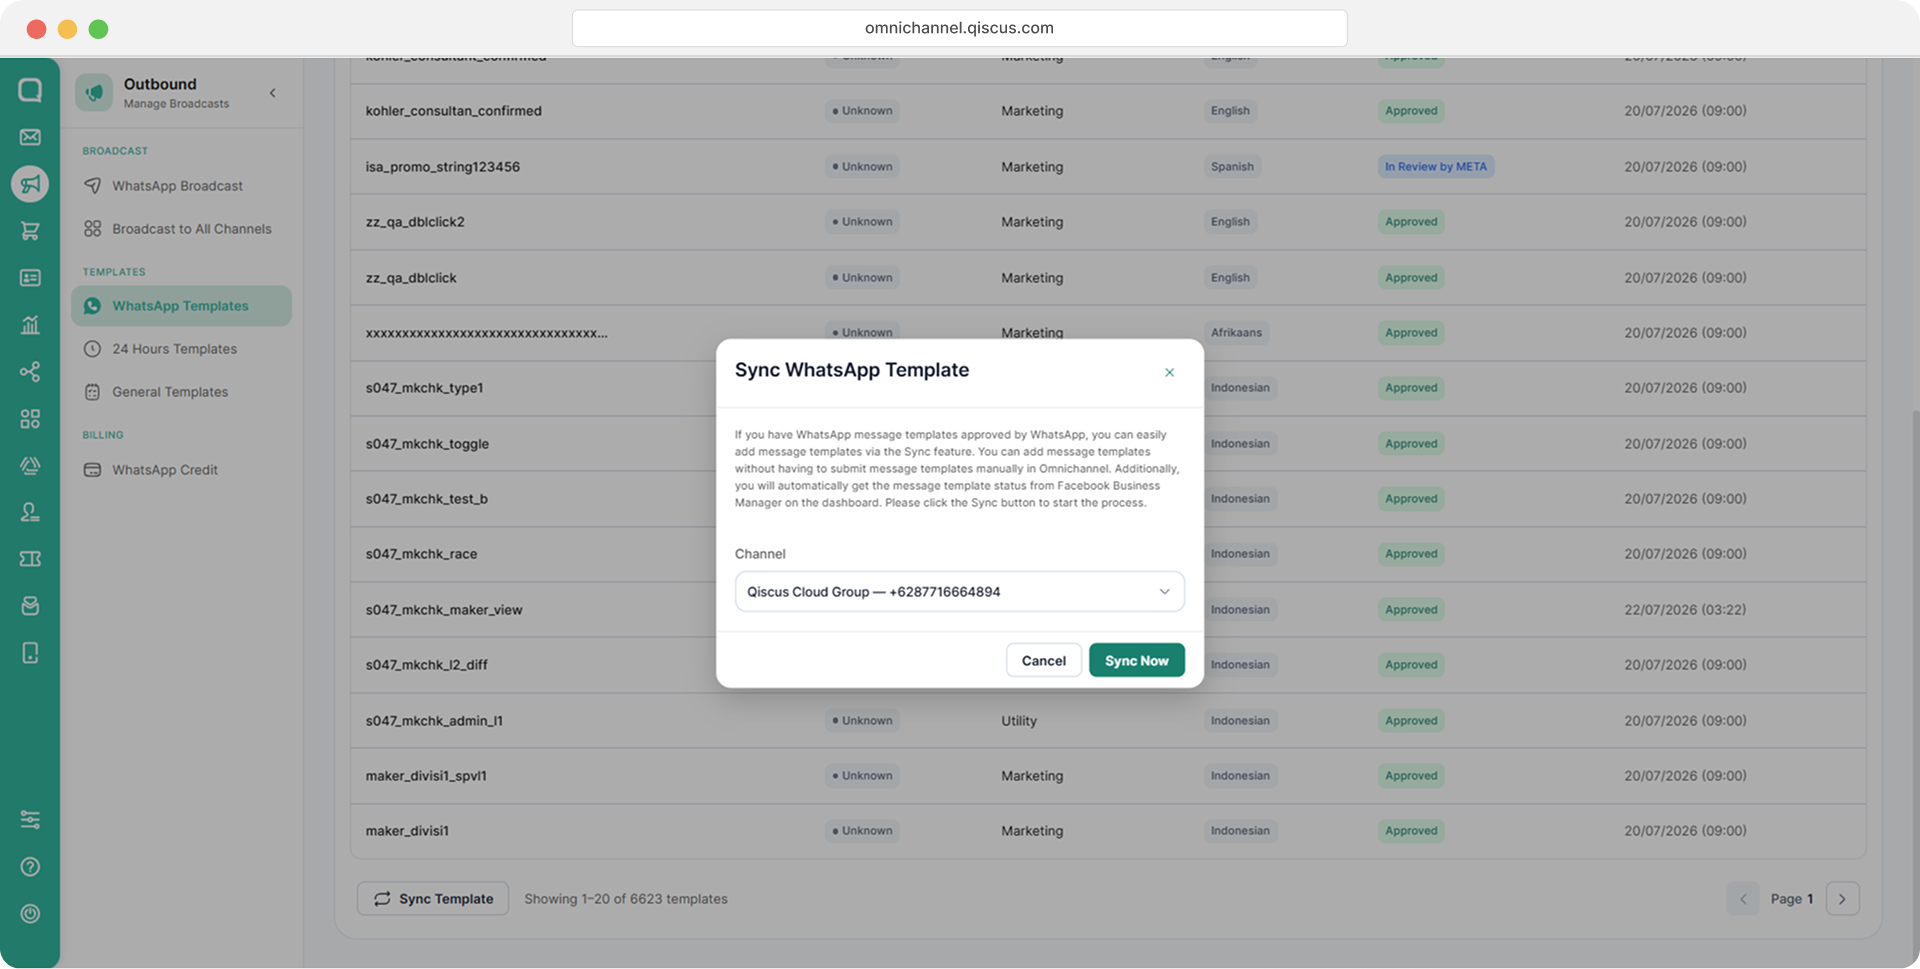
Auto Sync WhatsApp template feature is only works for WhatsApp Business On-Cloud API
Click Sync Now
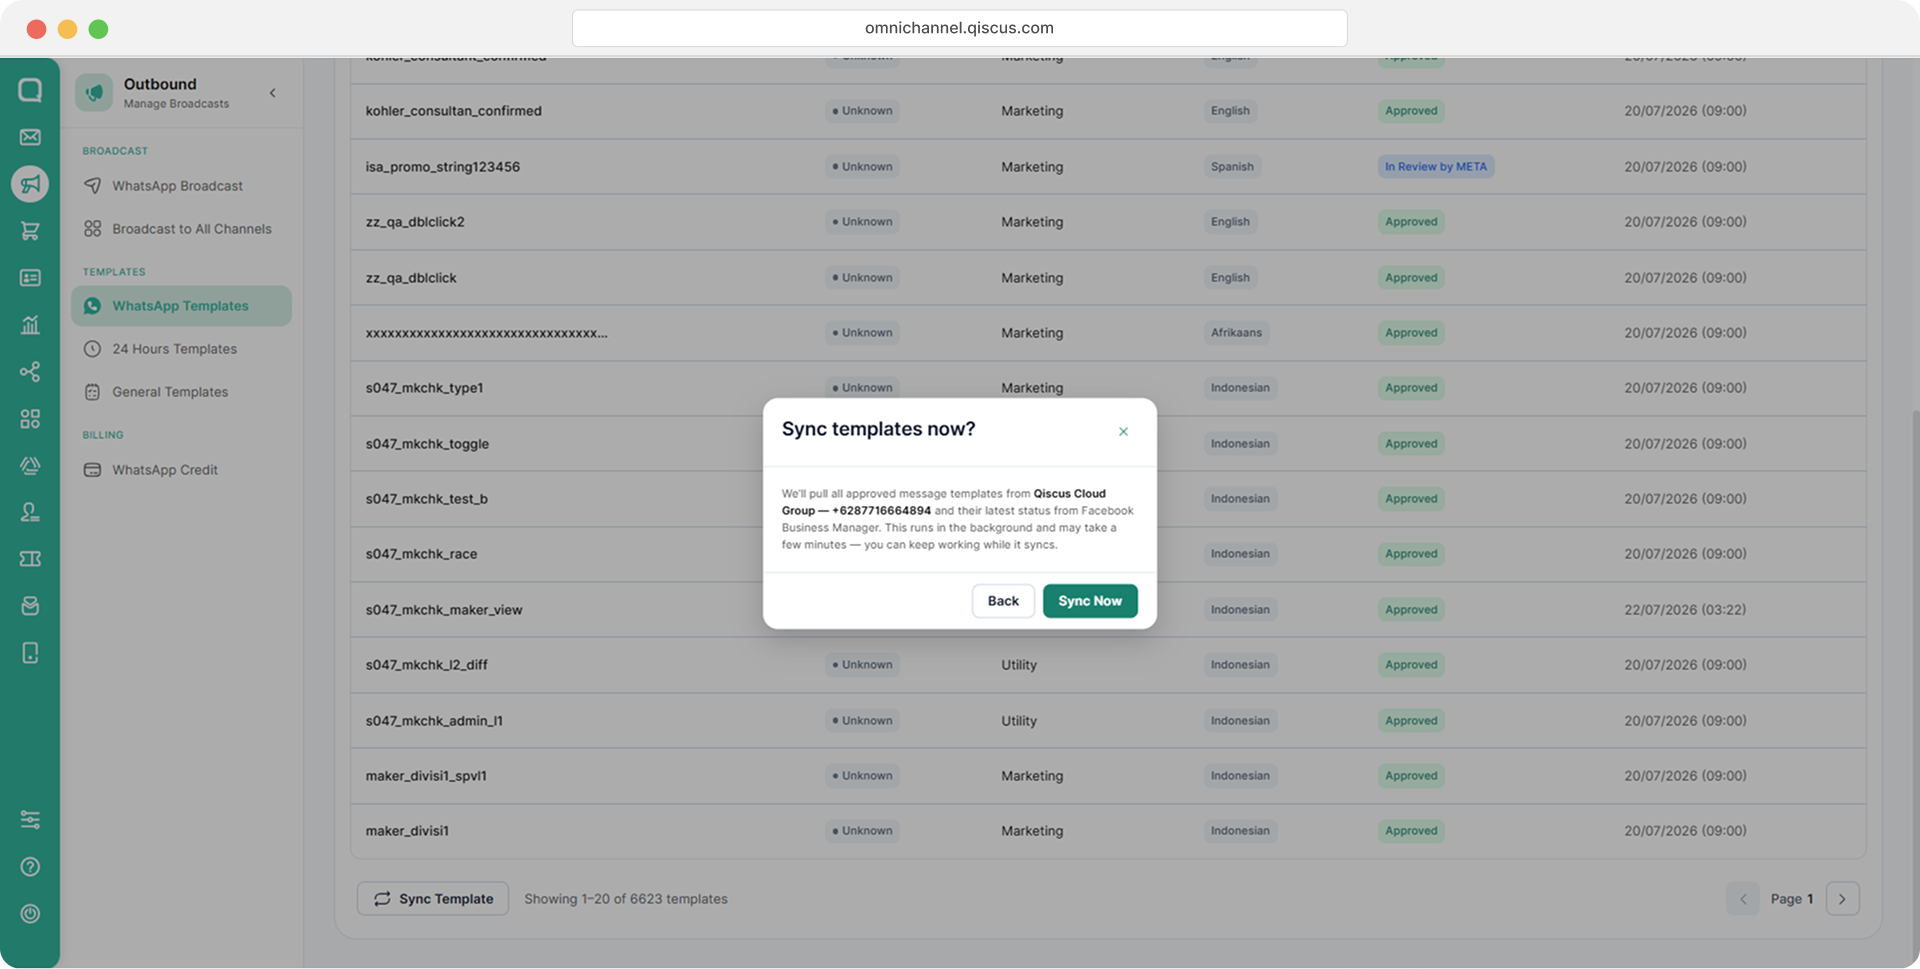
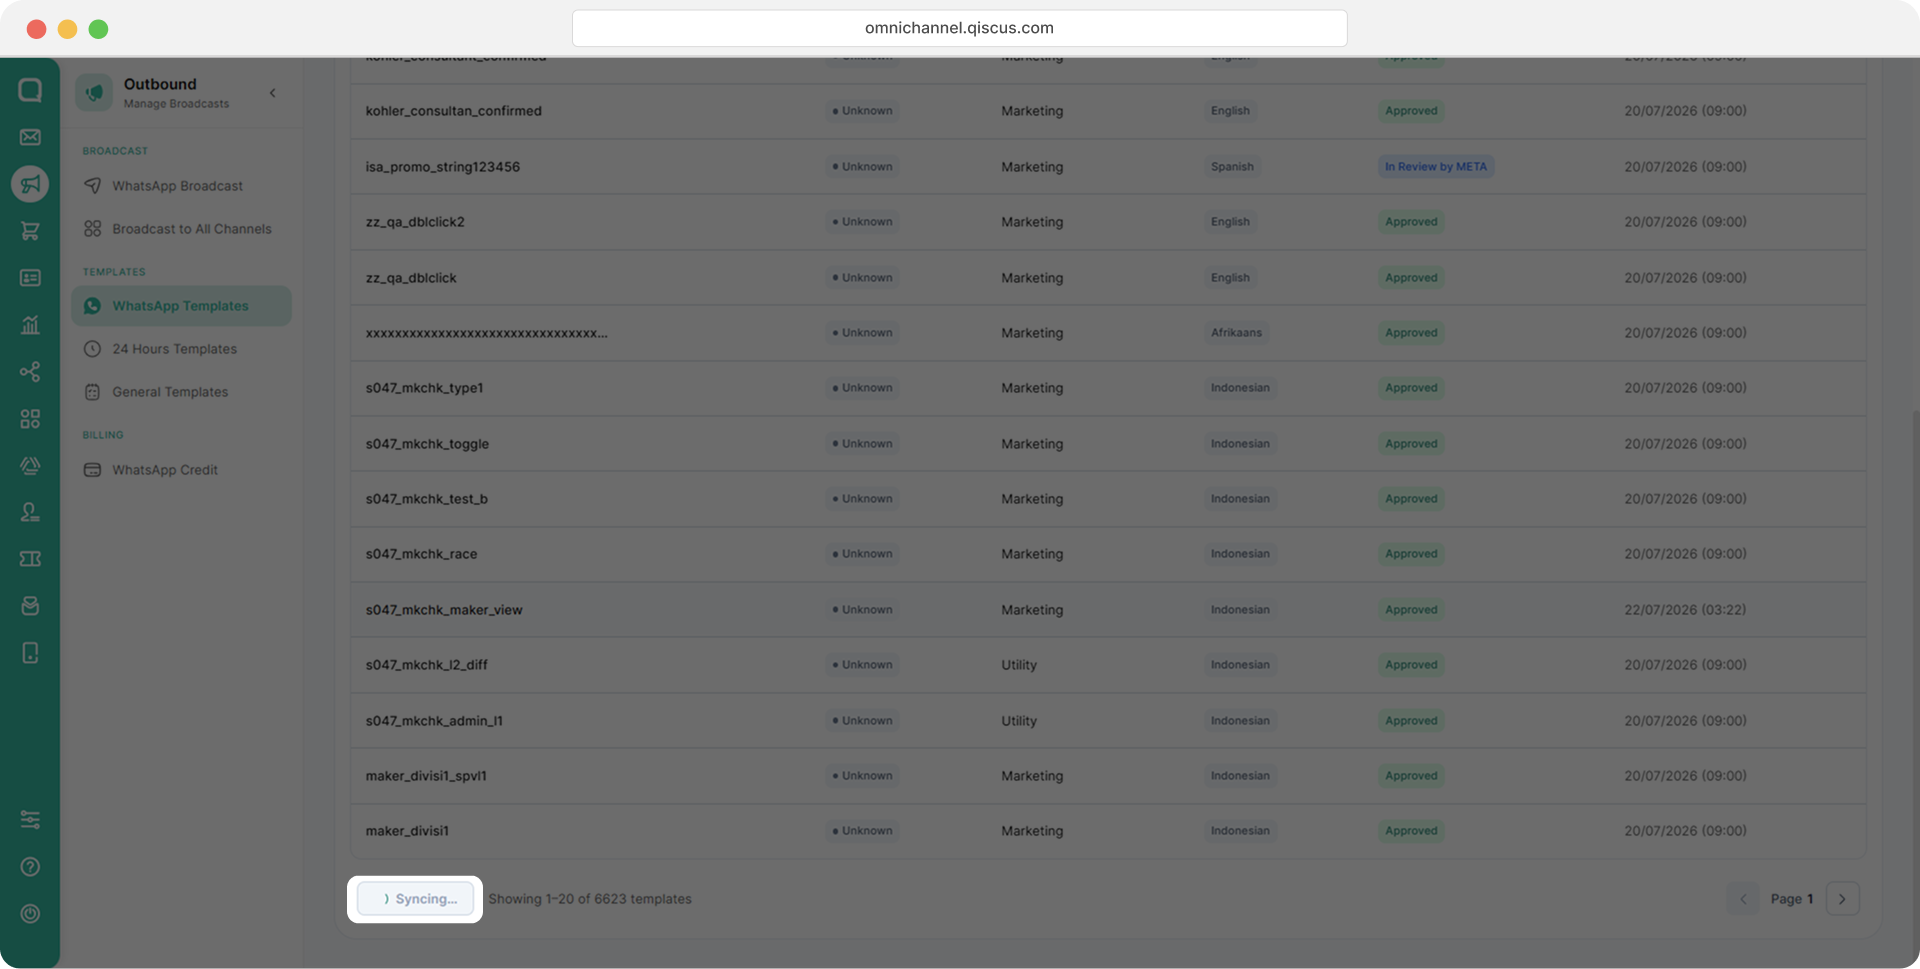
Wait until the Sync process is complete. Once complete, the button will be Sync Complete.
WhatsApp Message Template Category Validation
Meta will be validating message template categories from April 1st to May 15th. Message templates will be updated to the new categories: marketing, utility, or authentication. As a result, the message template category may be changed if it does not match Meta's preferences. This is in preparation for WhatsApp's new pricing system, which will be based on conversation categories starting June 1st. This means that when a business initiates a conversation, the category of the template message used will define the conversation category. However, you can submit an appeal through our support team if you do not agree with the changes to your template's category. Learn more about these changes here.
Customer-initiated conversations will be categorized as service conversations starting June 1st.
You can follow these steps to view category validation by Meta and submit an appeal:
You can refer to the template category guidelines to understand the differences and learn more about each template category,
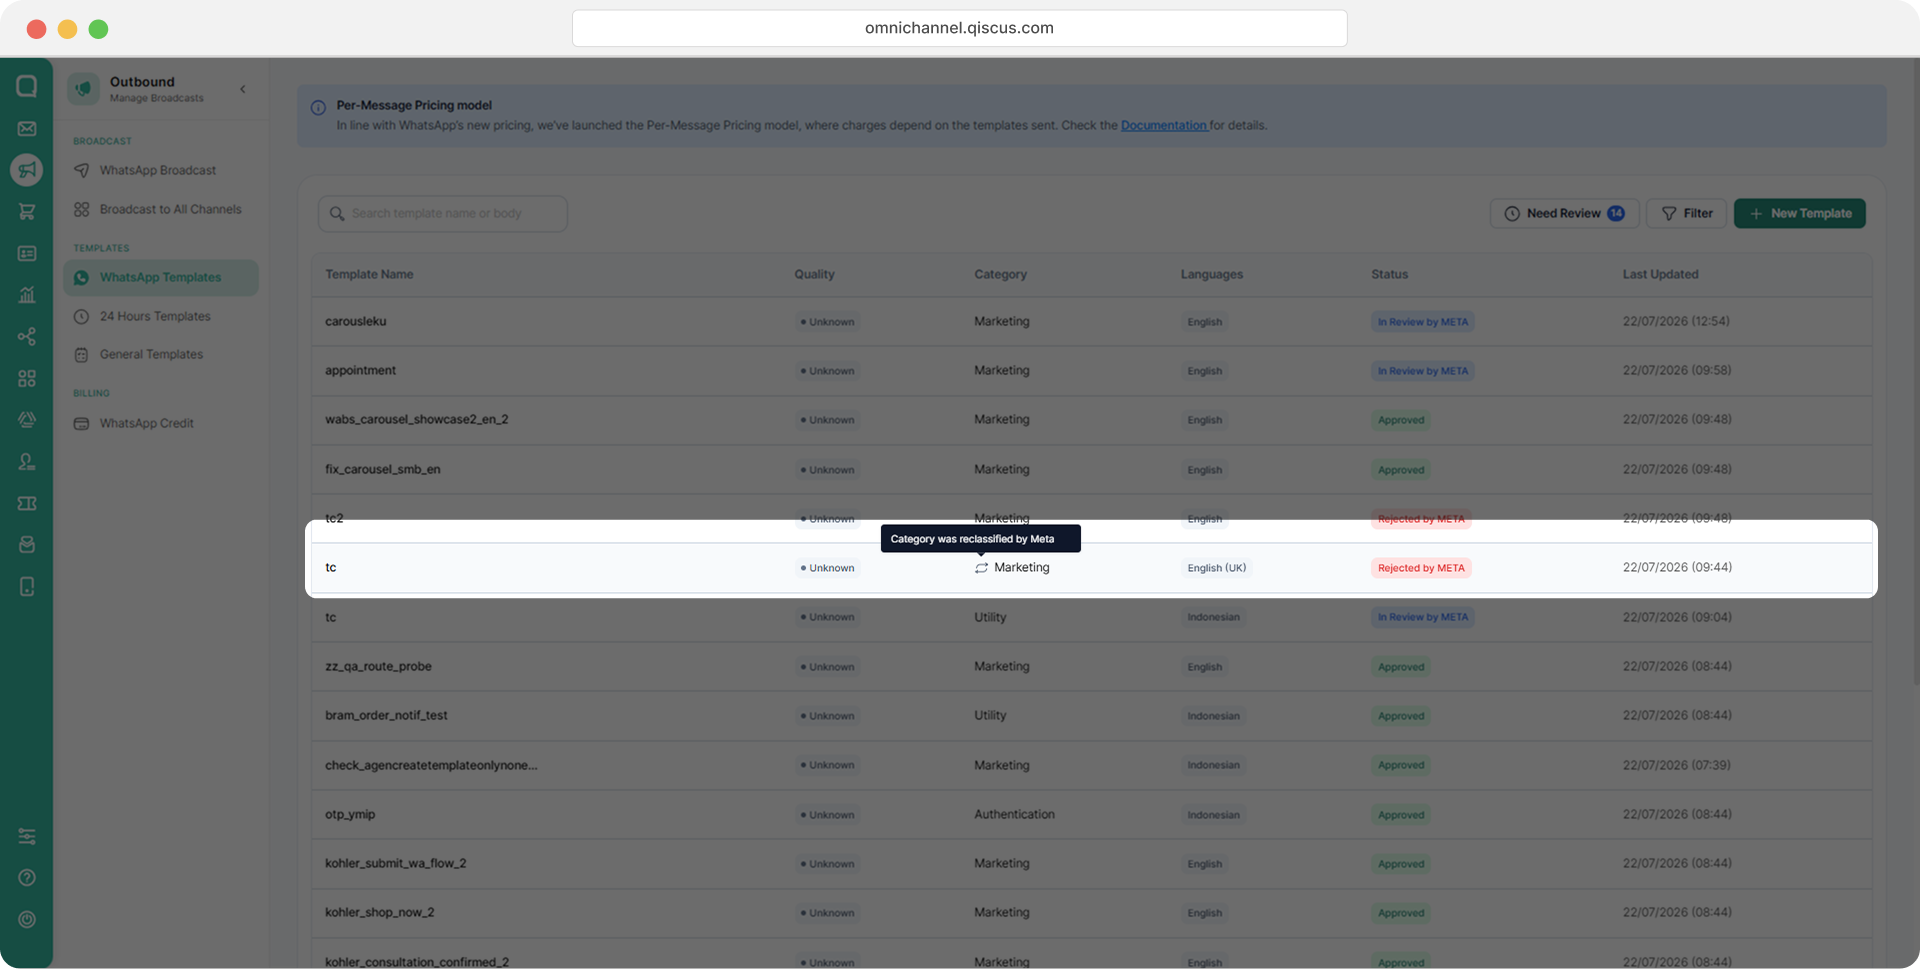
Click the template name to see more details about changes to the template category,
The following statuses may appear on the Template Details page.
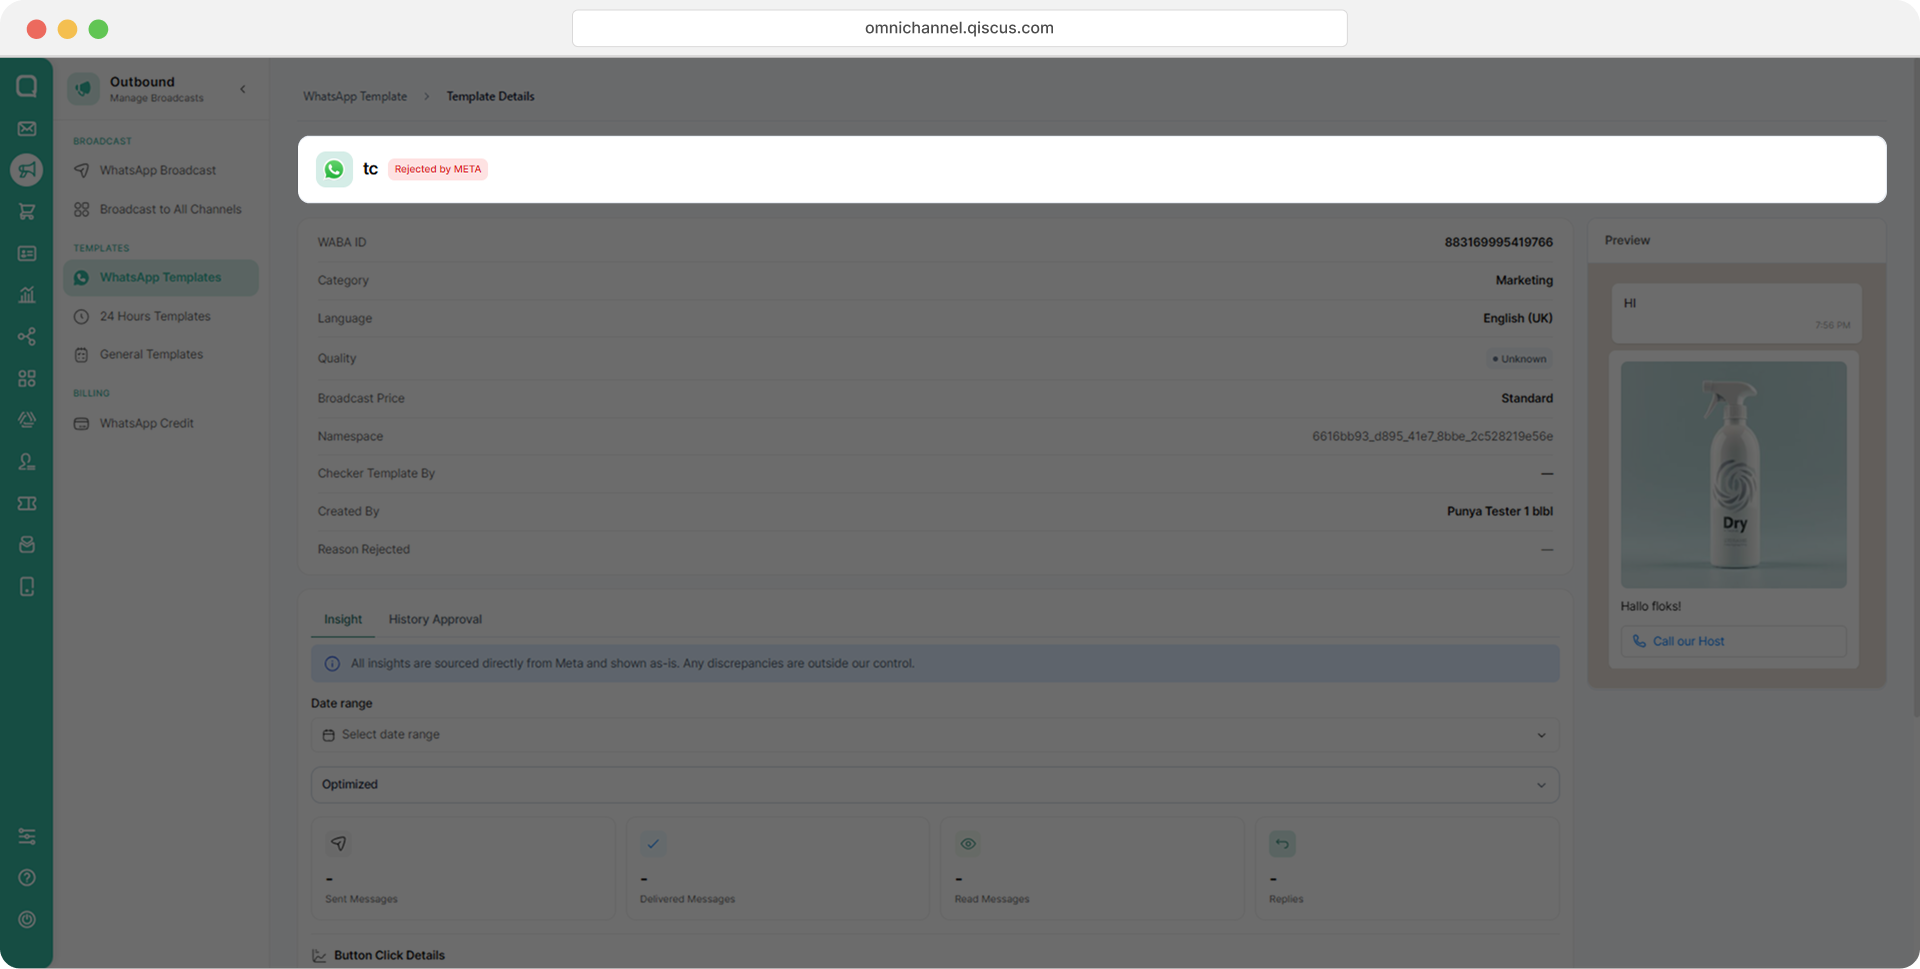
Note: During the review process, WhatsApp (Meta) may automatically update the template category based on its policies. As a result, the template may be approved with a different category than the one you selected, or it may be rejected if it does not meet Meta's requirements.
WhatsApp Carousel Template
The WhatsApp Carousel Template is a feature that allows you to send more interesting and interactive broadcast messages. With the WhatsApp Carousel Template, you can send a single text message accompanied by up to 10 cards containing images or videos that can be scrolled horizontally. Currently, Qiscus supports the WhatsApp Carousel Template feature, allowing it to be implemented in our system. The WhatsApp Carousel Template is very useful for meeting your business needs such as: Product Showcase, Promotion Offers, Event Promotion, Troubleshooting guide, News, and so on. By implementing the WhatsApp Carousel Template, it is hoped that you will be able to increase your business through user engagement.
Template Components
The WhatsApp Carousel Template has several components as follows:
Message Bubble:
A message bubble is required and text only with a maximum of 1,024 characters.
You can add variable to it.
Carousel Settings:
This carousel setting is used to set the format of the header and buttons. That will be used by all cards,
The header format can be a video or image.
There is only one header on one card.
There are 3 types of button formats that can be used: Quick Reply Button, Phone number Button, and URL Button.
You can add a maximum of 2 buttons, they can be of the same type or different types.
Carousel Card : You can create a minimum of 1 card and a maximum of 10 card in one template.
Header Card:
Upload files according to the header format in the carousel setting, whether video or image.
Body Card:
Text only with a maximum 160 characters.
You can add variables to it.
Button Card:
Only Supports a maximum of 1 variable for the URL button.
Preview: As an admin, you can view the template you created before submitting it in the preview section.
The WhatsApp Carousel Template is only used in Marketing and Utility Categories.
How to Create a WhatsApp Carousel Template
After you click on the template, you will then continue to fill in the preparation form for making the template, which will be divided into several steps:
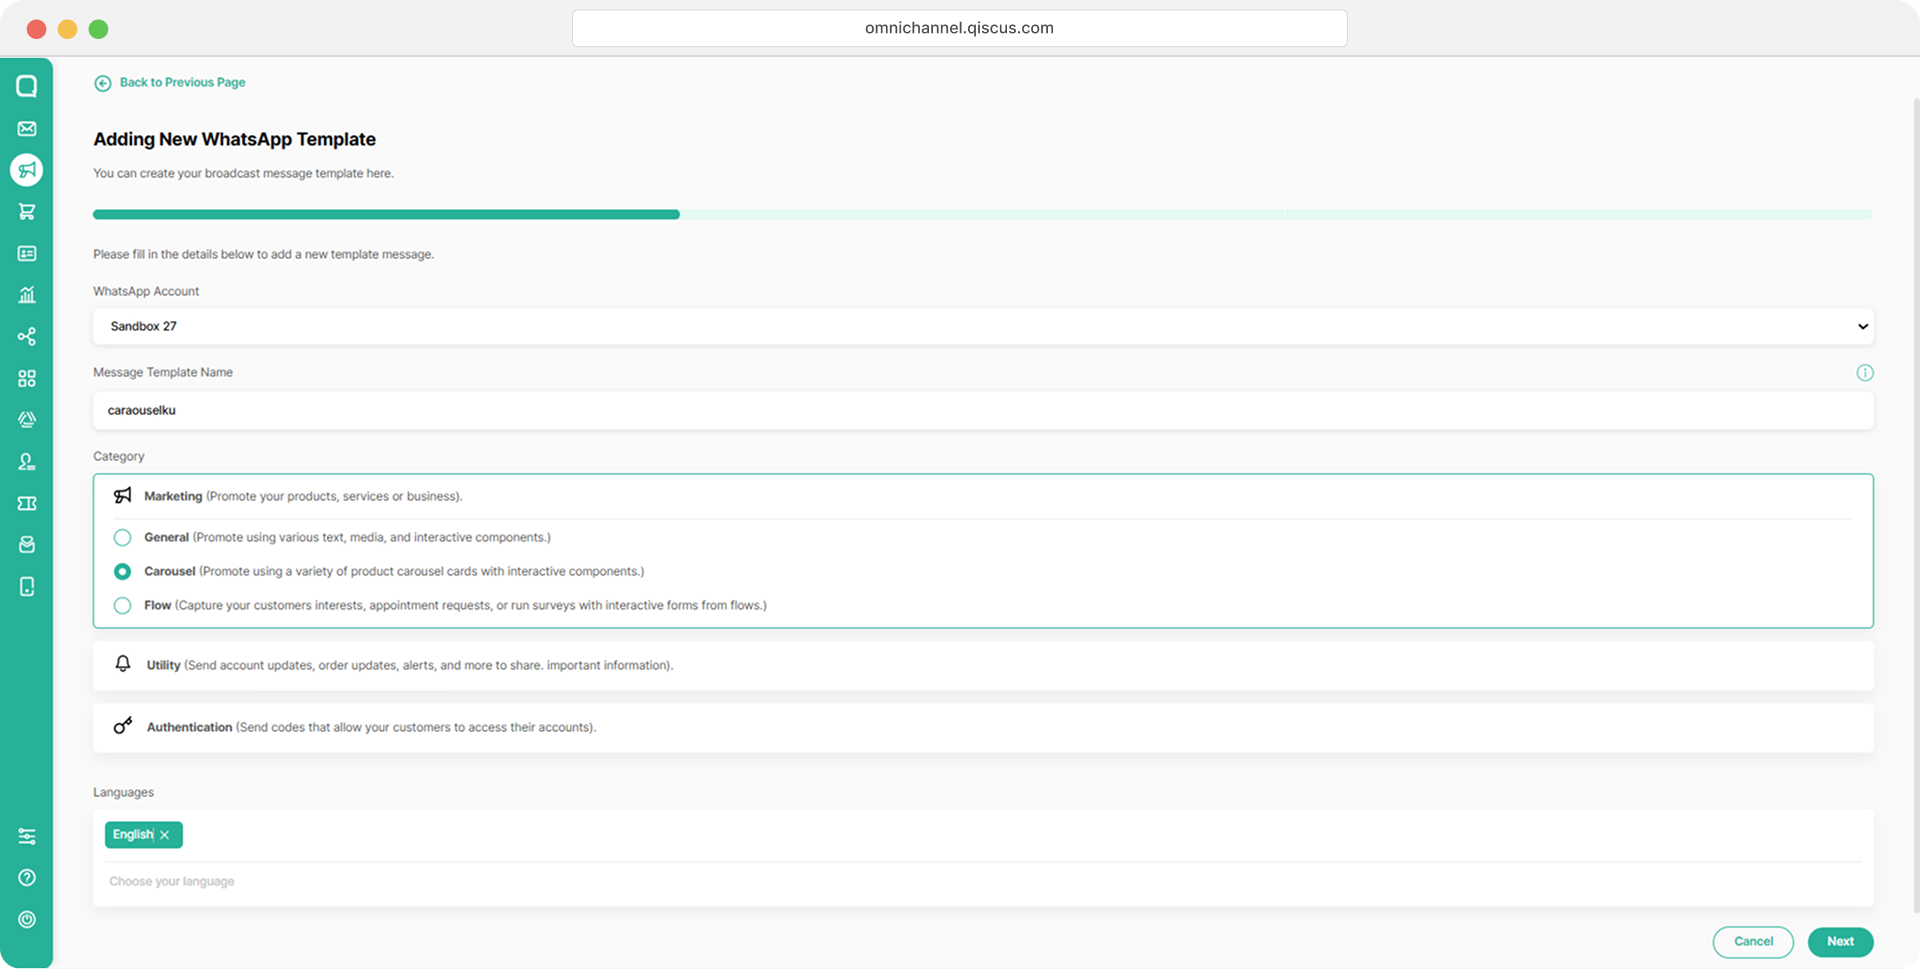
From the Broadcast Templates list, click New Template. Then, select an active WhatsApp Account and complete the Message Template Name, Category, and Language fields.
Fill in the Message Bubble, you can add variables by clicking Add Variable button, In the Carousel Card section, you can add more than one card by clicking Add Card.
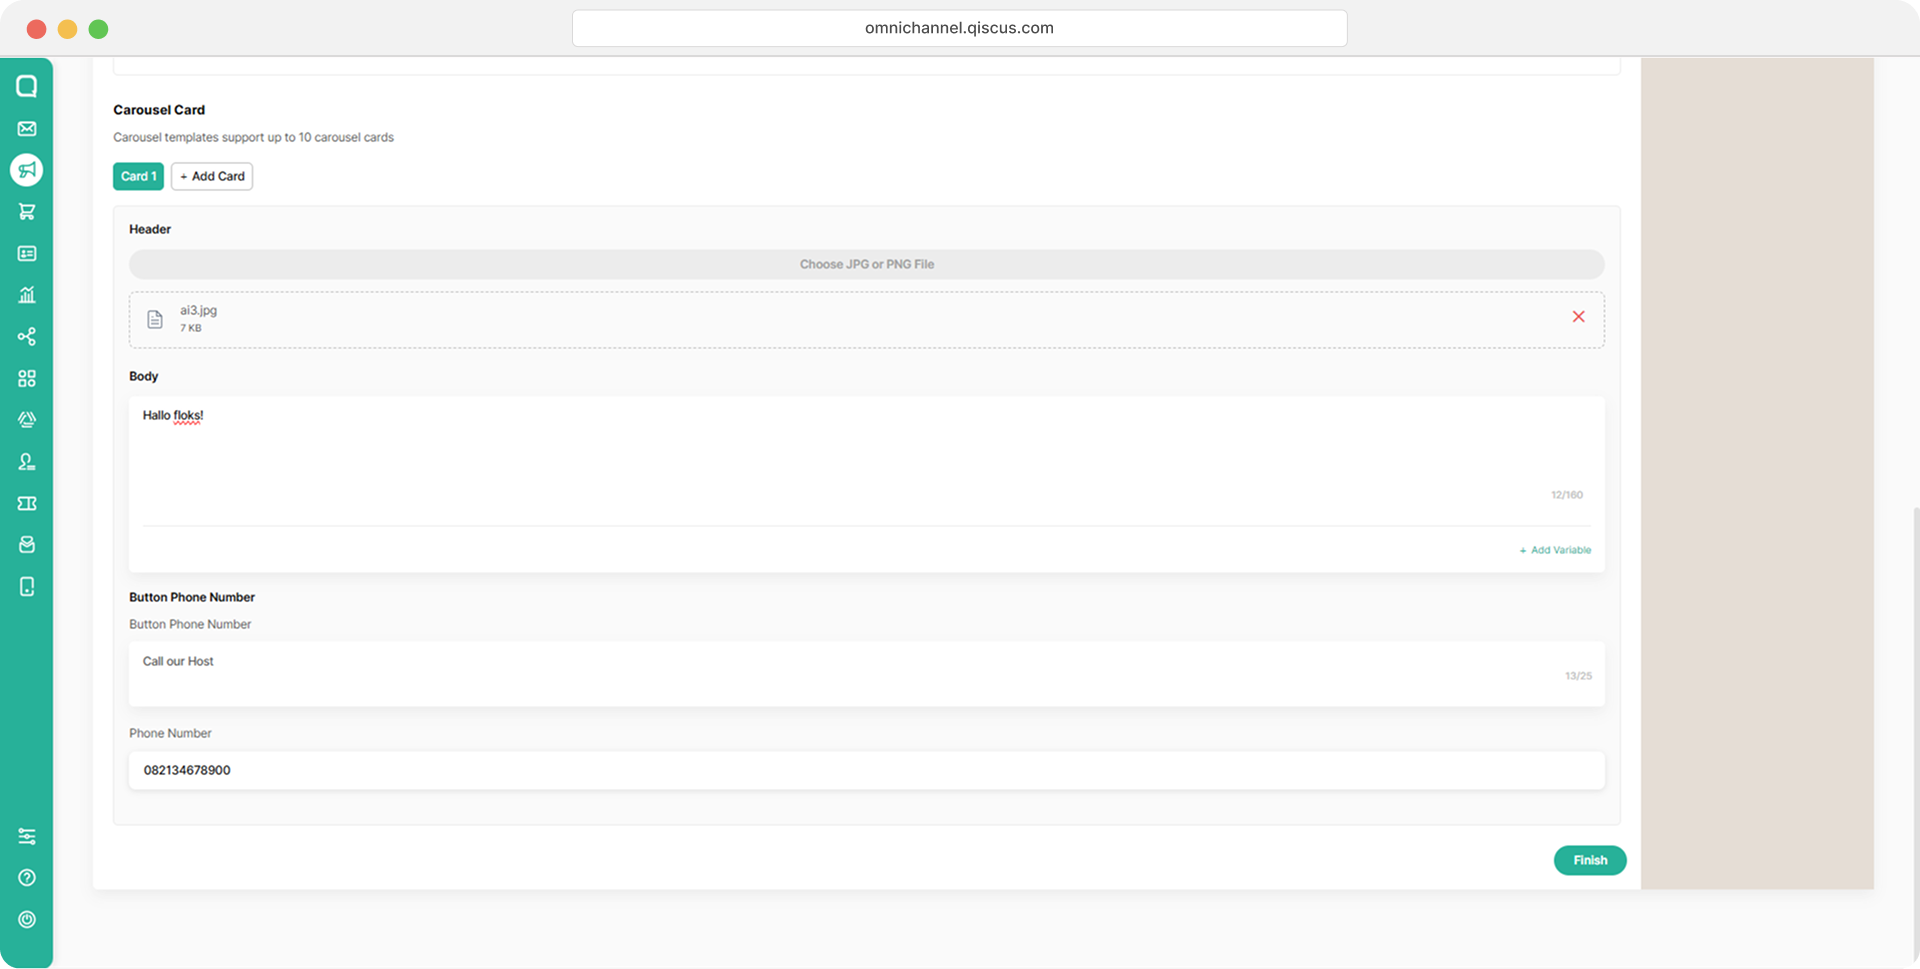
After completing all the required fields, click Finish.
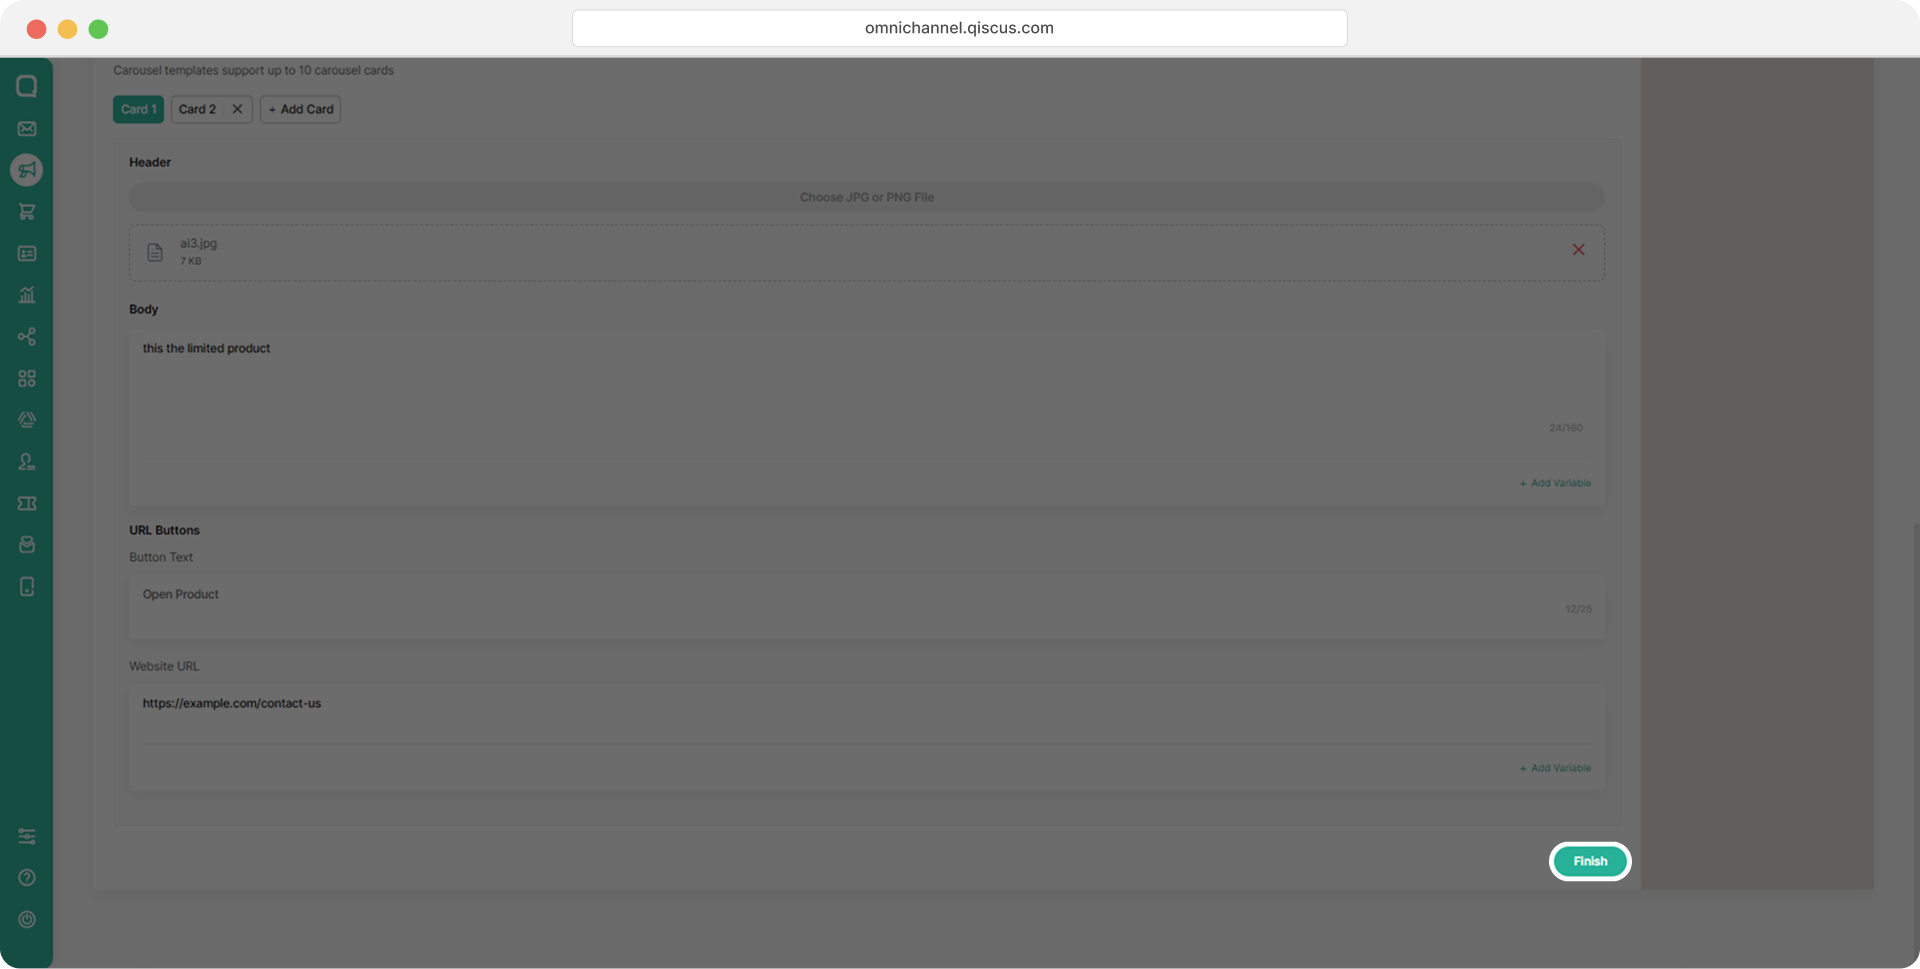
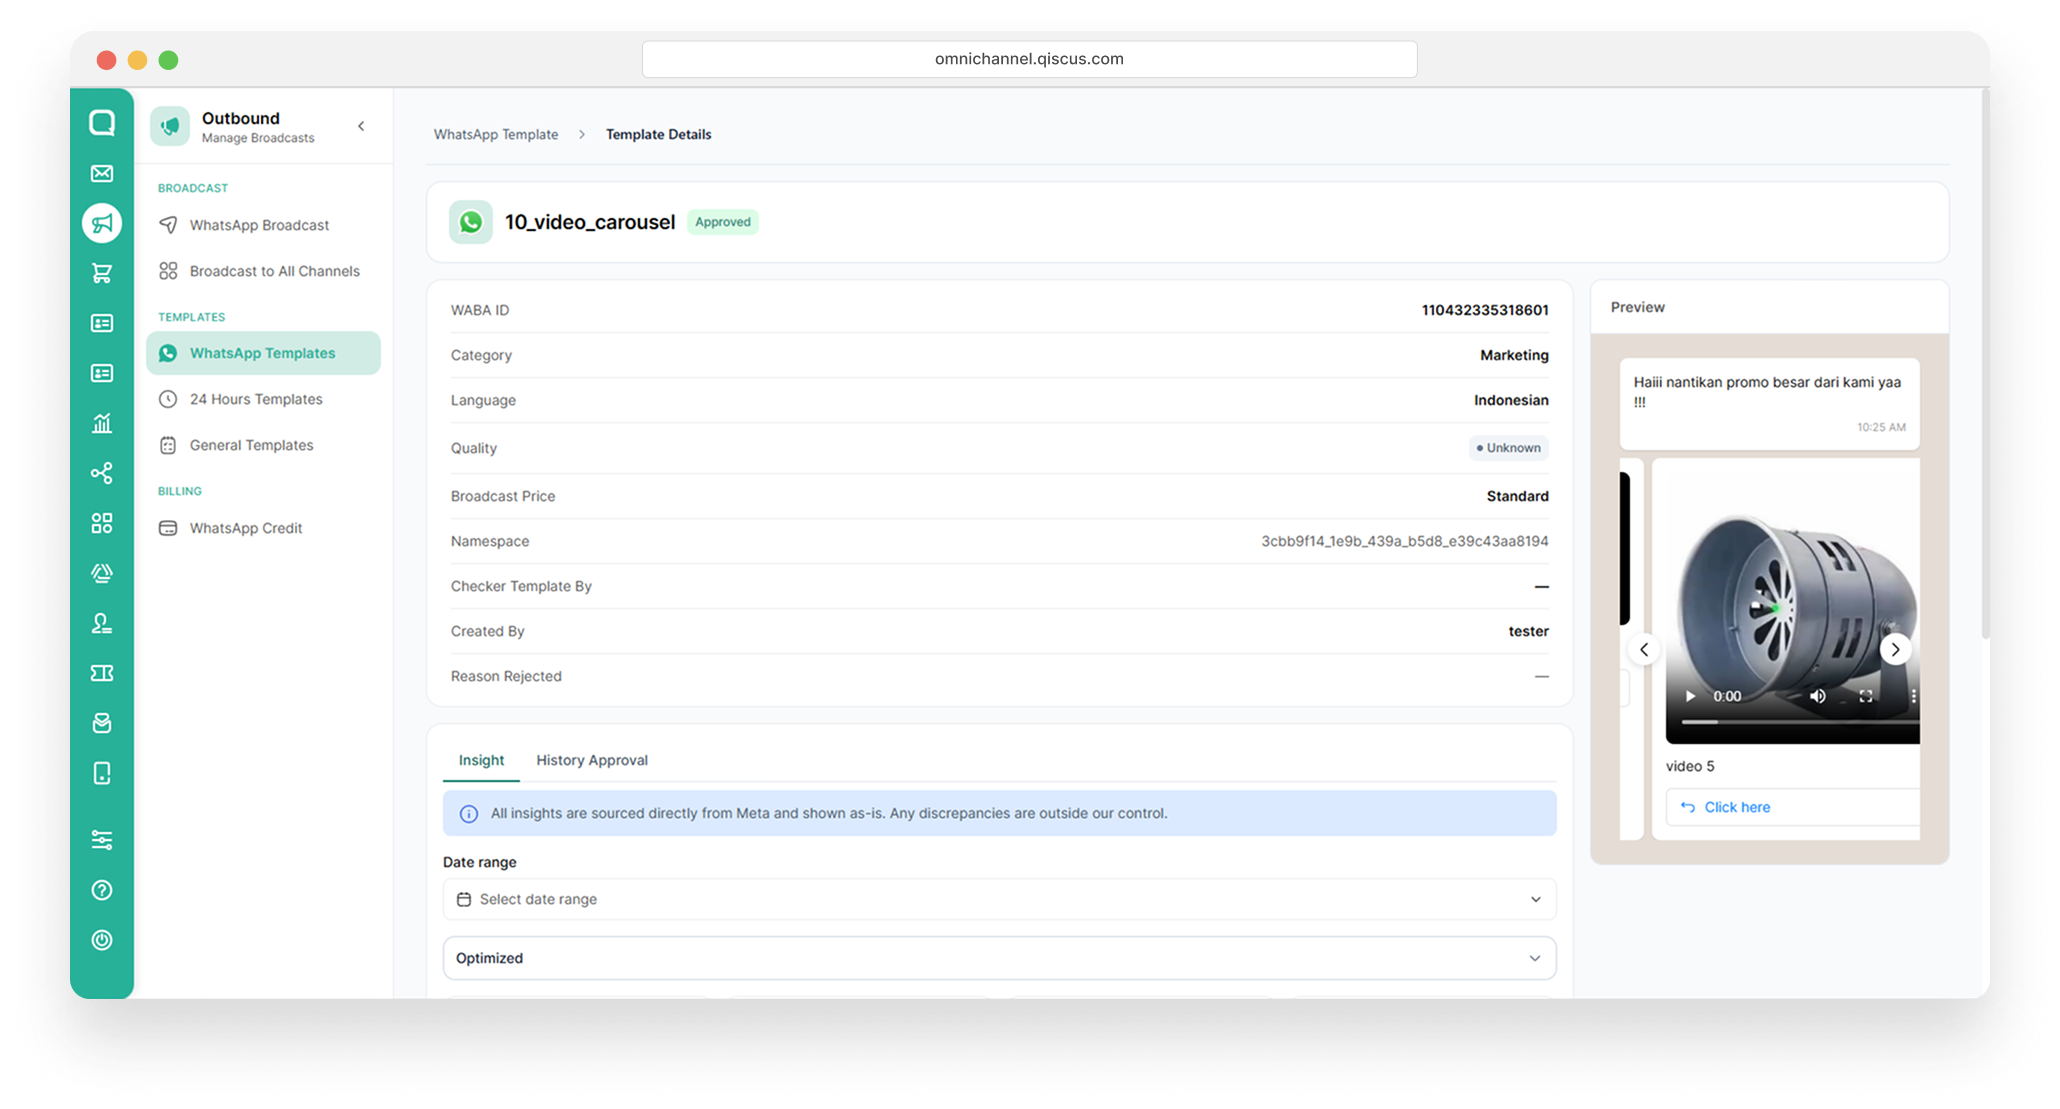
This is an example of when you have filled in the carousel card section. You can see the Preview of WhatsApp Carousel Template in the right side
WhatsApp Flow Message Template
Flow is used to create interactive message templates that guide customers through tasks such as appointment booking, service requests, surveys, or lead collection directly within WhatsApp. This provides a smoother and more engaging customer experience.
Please follow the steps below to create a WhatsApp broadcast template for Marketing - flow Categories:
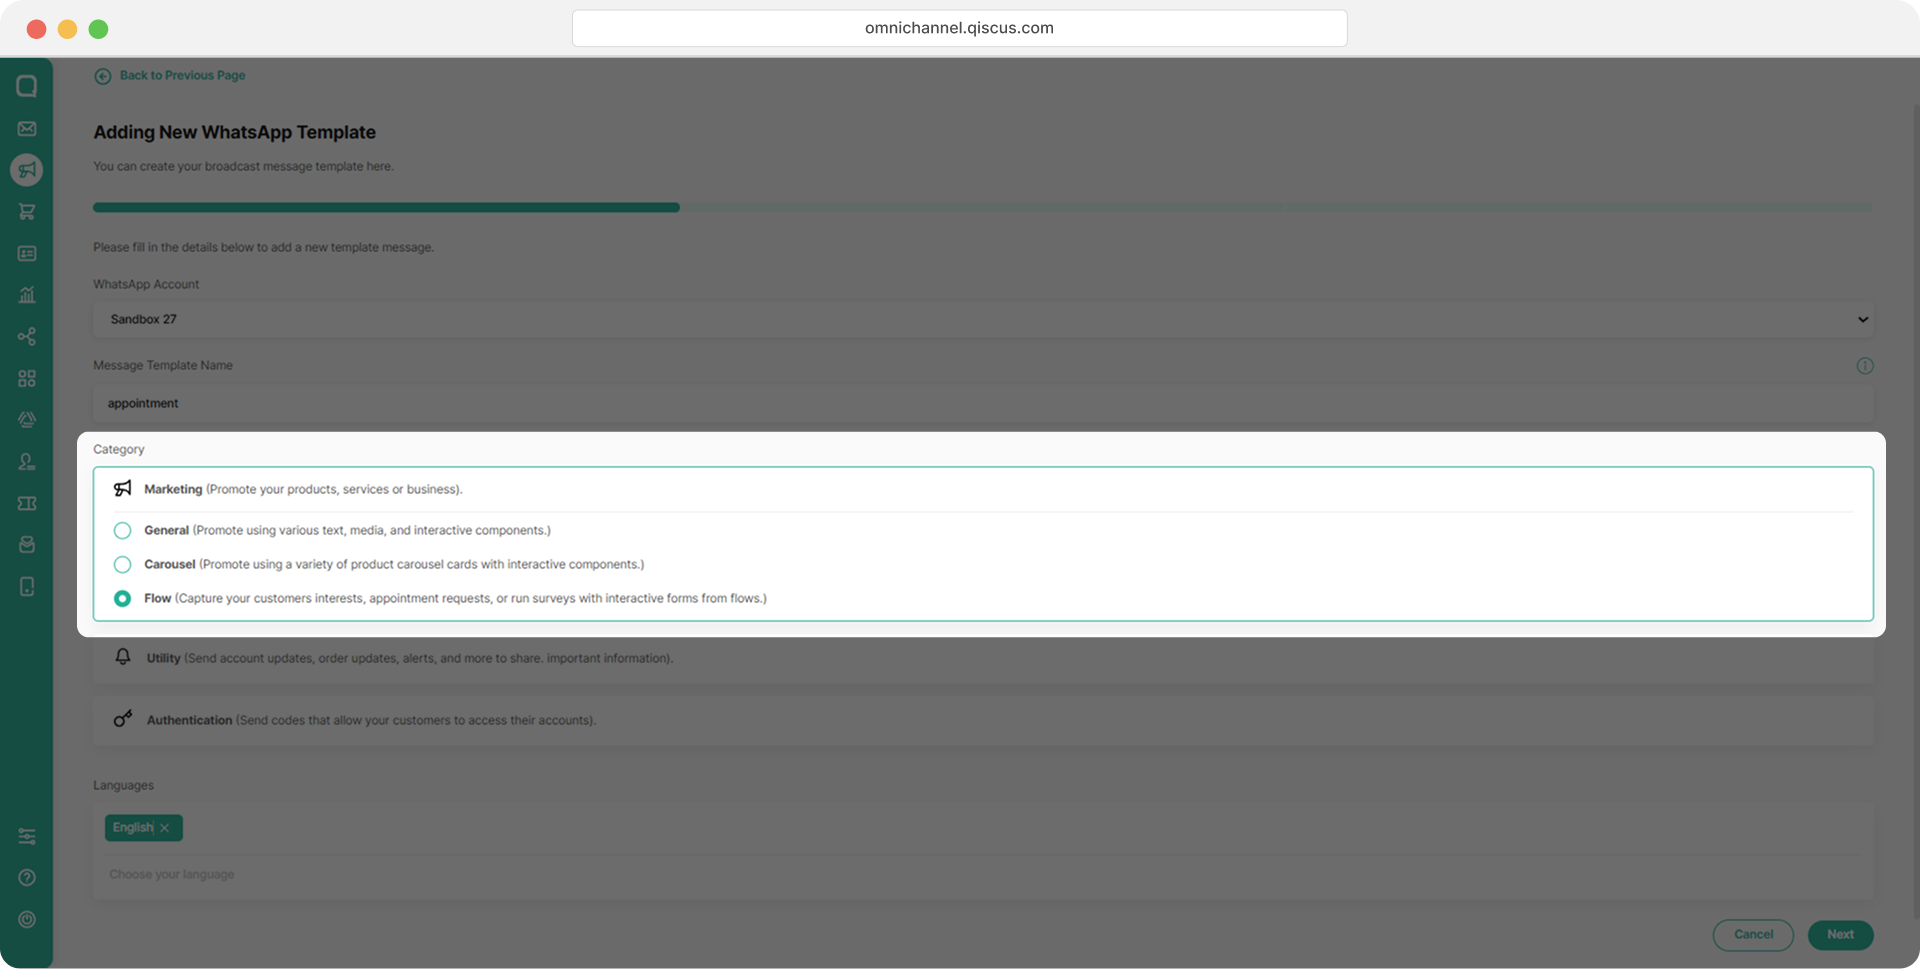
From the WhatsApp Broadcast Template menu. Click the button to add a new template and fill in all required fields, then select Flow under the Marketing category. after all Click Next to continue.
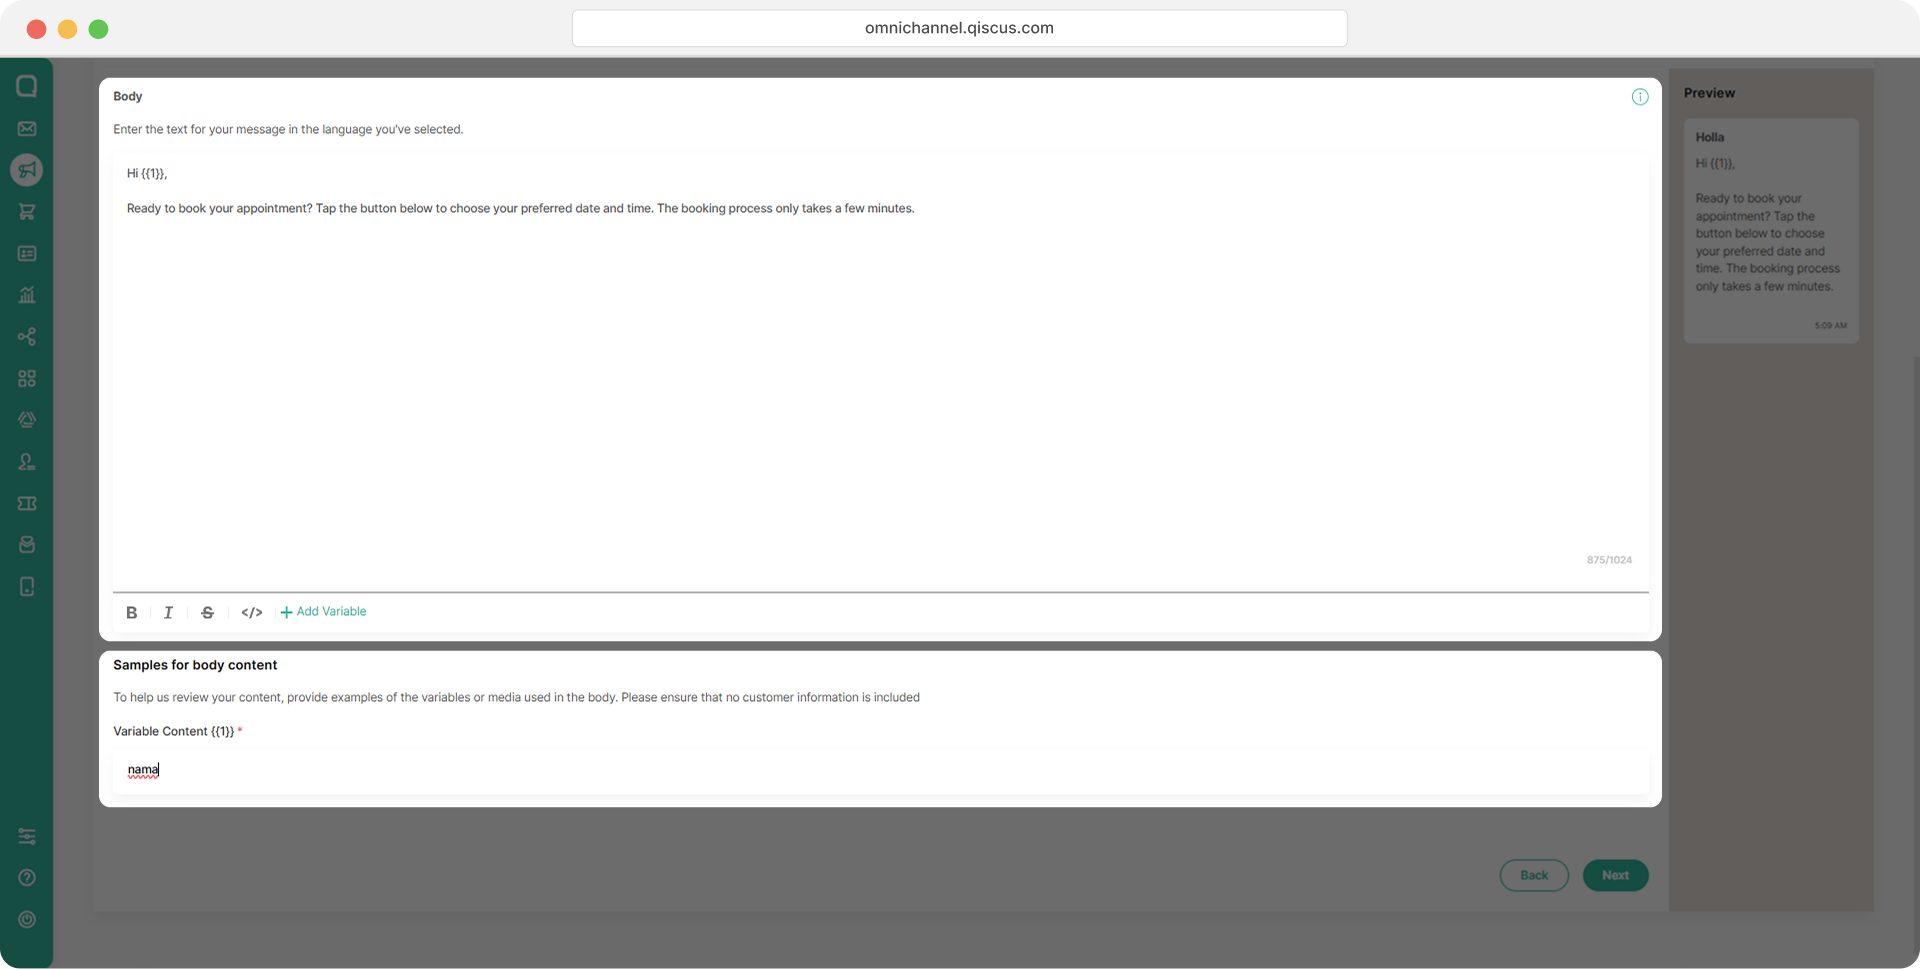
Enter your message in the Body field. If needed, add variables for dynamic content and provide sample values in Samples for Body Content. Then, click Next.
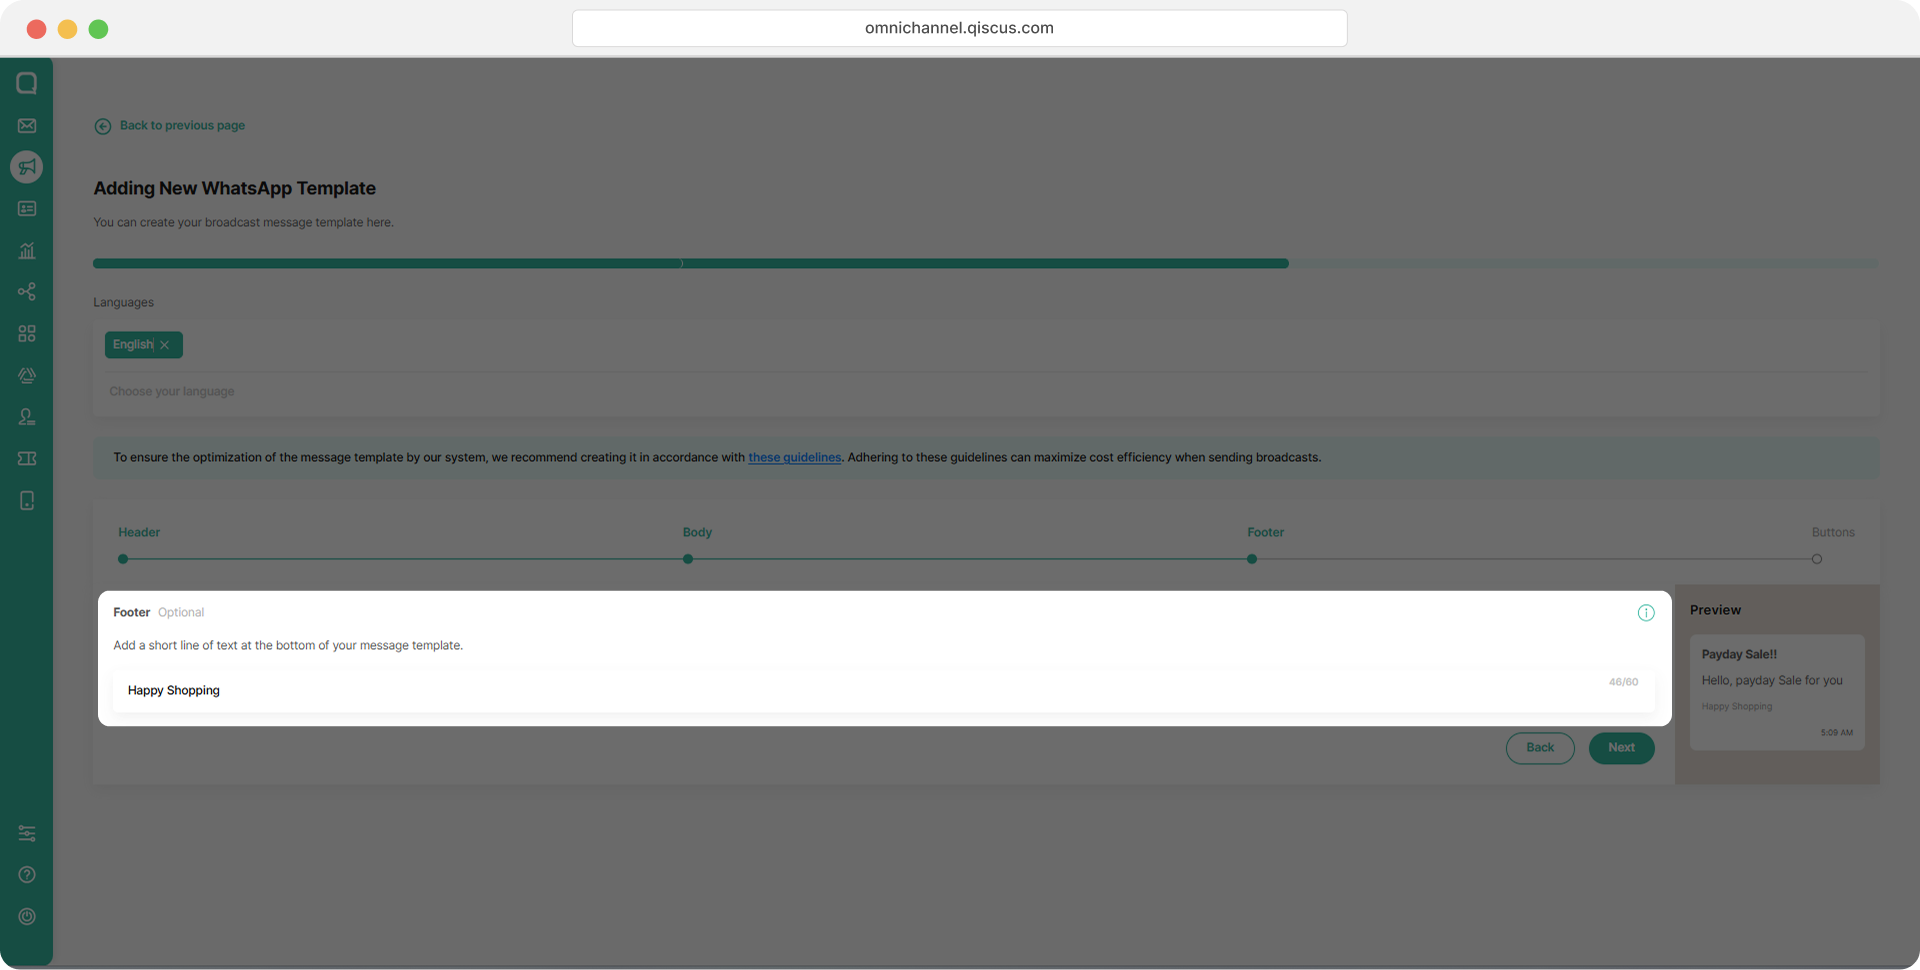
Add a footer message if needed, then click Next.
Enter the Button Text that customers will see, then select a published Flow ID from the list.
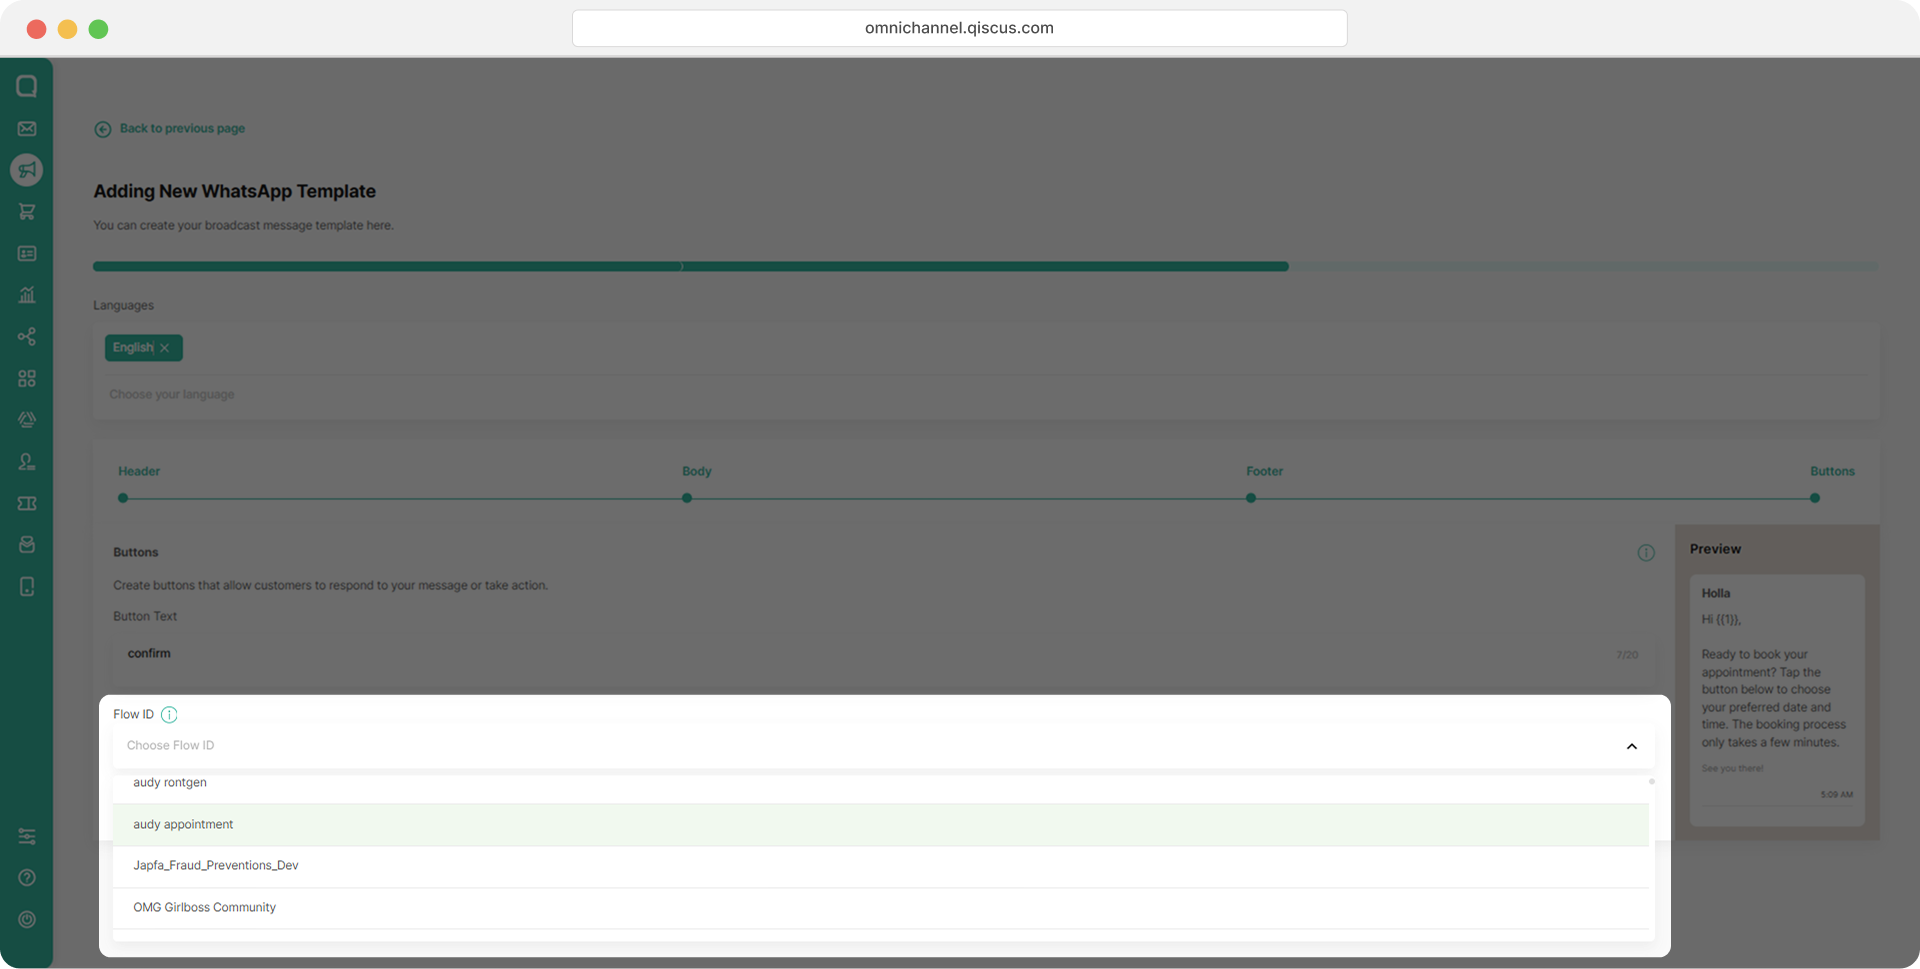
Note: This Flow must already have been created and published beforehand via Facebook Business Manager. This page only links the template to an existing Flow: it does not create a new Flow.
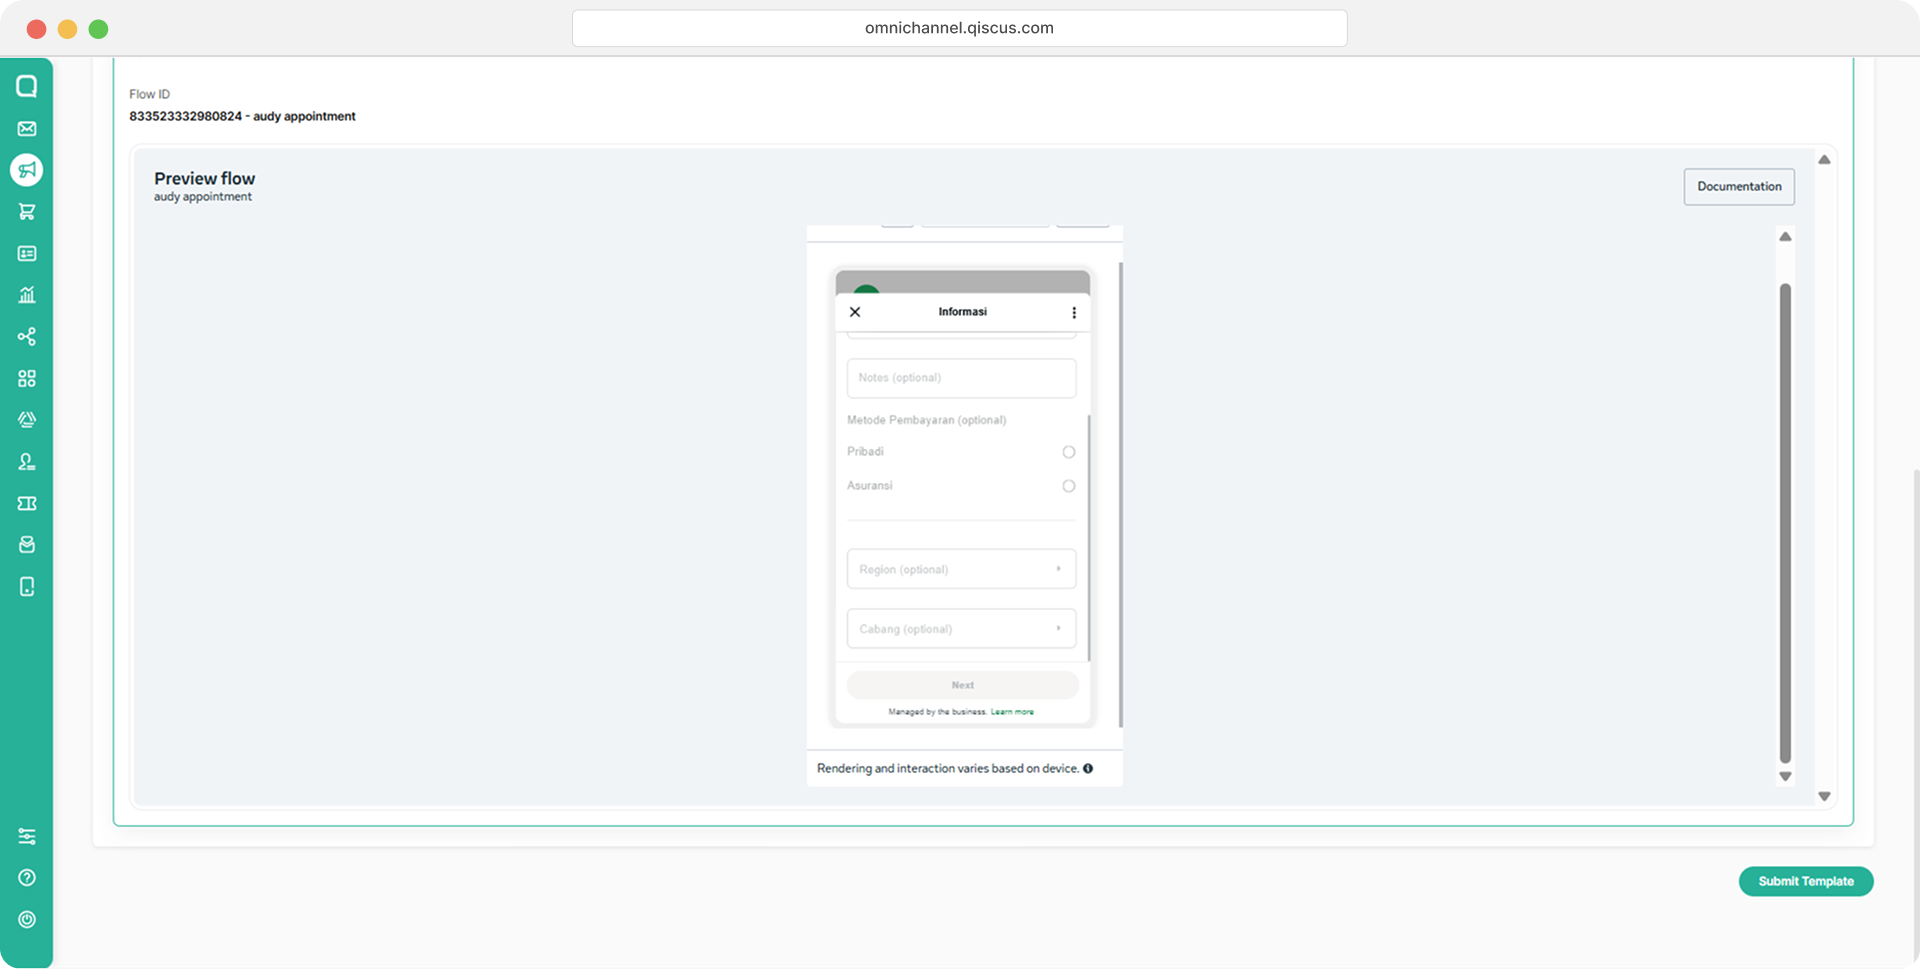
Review the live preview to ensure the selected Flow and its interactive form are displayed correctly. Then click Finish to submit the template. Once submitted, it will be reviewed by WhatsApp (Meta) before it can be used for broadcasting.
Maker–Checker
The Template Approval Workflow, also known as the Maker–Checker process, allows Agents to create WhatsApp message templates while ensuring that each template is reviewed internally before it is submitted to Meta for approval.
This feature adds an internal review stage between template creation and Meta submission. It helps organizations maintain brand consistency and comply with internal policies, while still allowing smaller teams to submit templates directly when a review stage is not required.
Roles and Responsibilities
The workflow involves three roles:
Agent (Maker) — Creates and submits templates for internal review.
Admin / SPV (Checker) — Reviews templates submitted by Agents and either approves or rejects them.
Admin — Manages the feature configuration and can act as a Checker.
An SPV can only review templates created by Agents within the same division. An Admin can review templates from all Agents, provided the template has not yet been approved by an SPV. Templates created directly by an Admin or SPV skip the internal review and move straight to Meta submission.
Admin Configuration
Admins control the workflow through a set of toggles on the Agent Management page. These settings determine whether Agents can create templates and how many review levels apply.
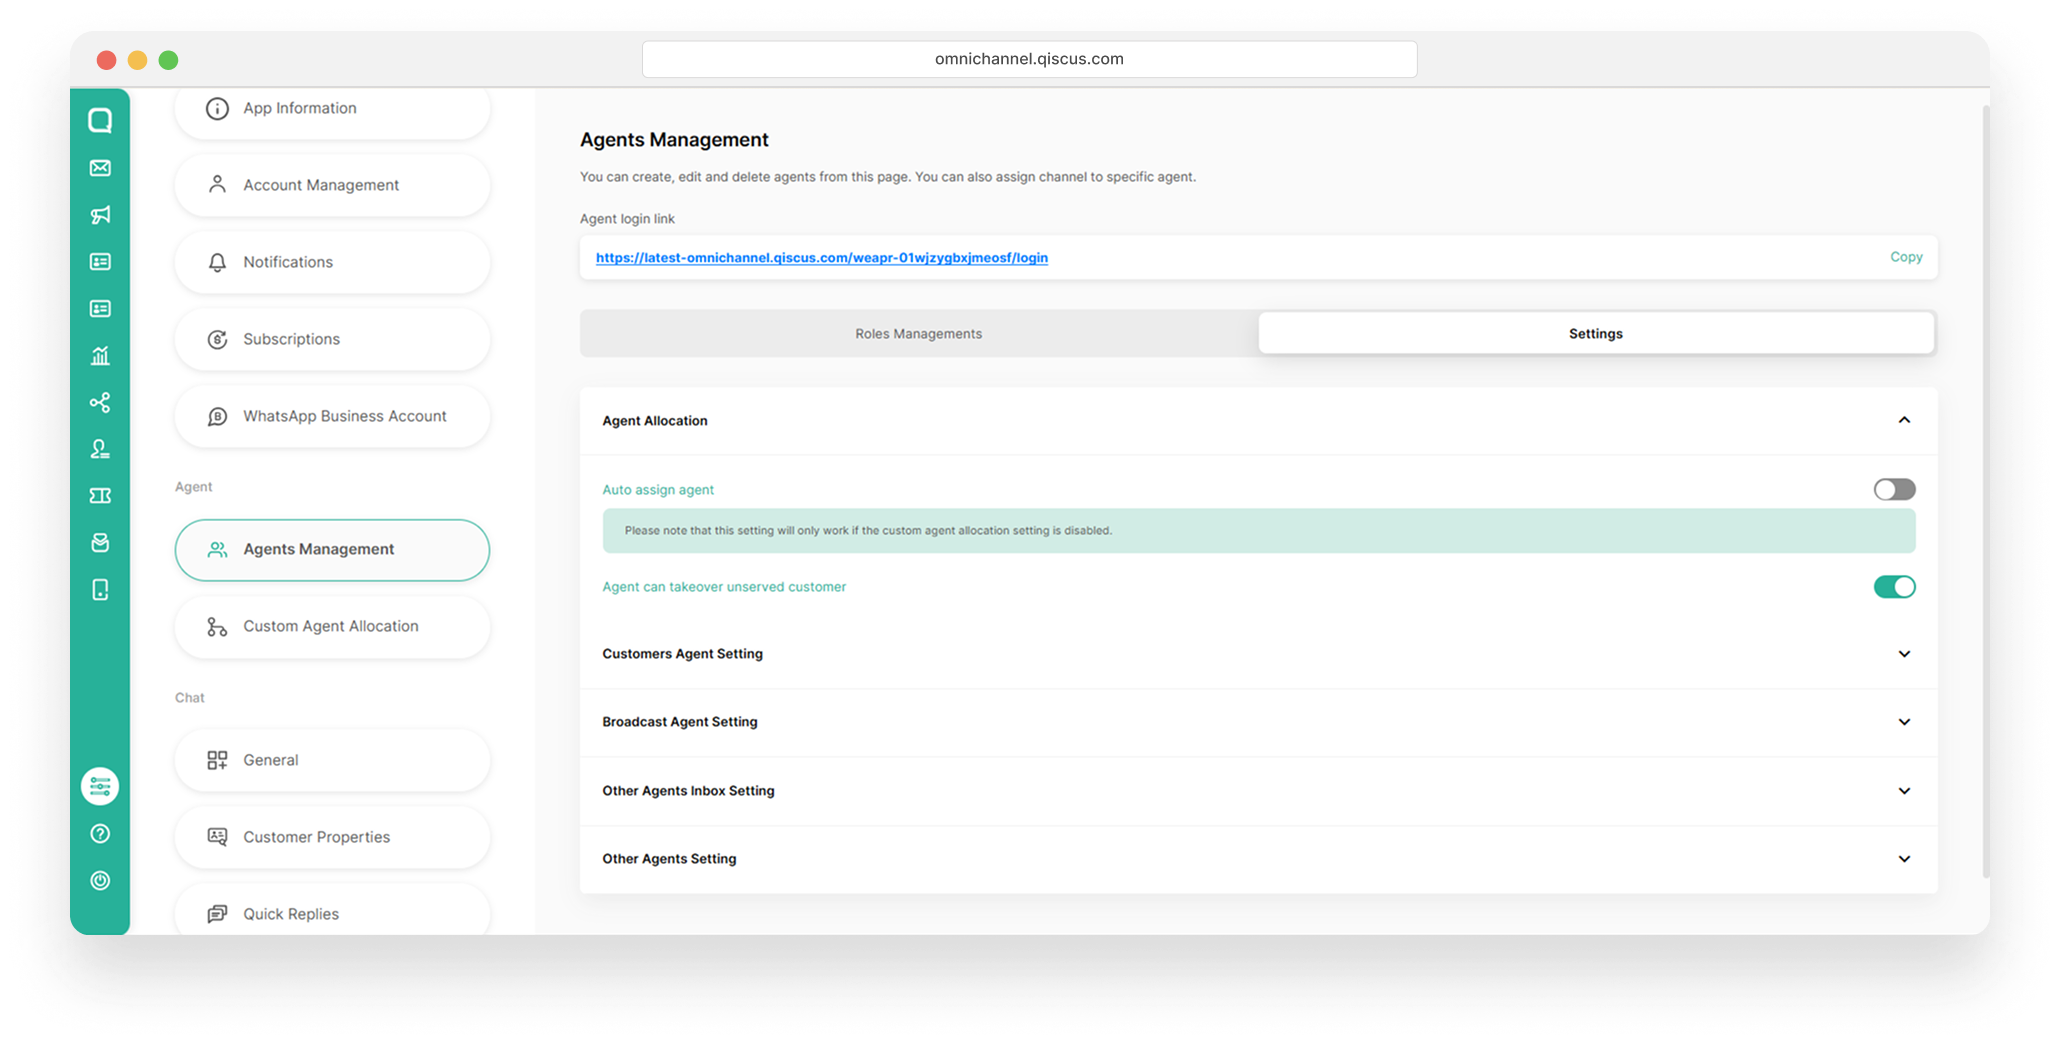
Agent Can Create Template
When enabled, Agents are allowed to create message templates. This setting is disabled by default. If this setting is turned off, the internal approval setting is automatically turned off as well.
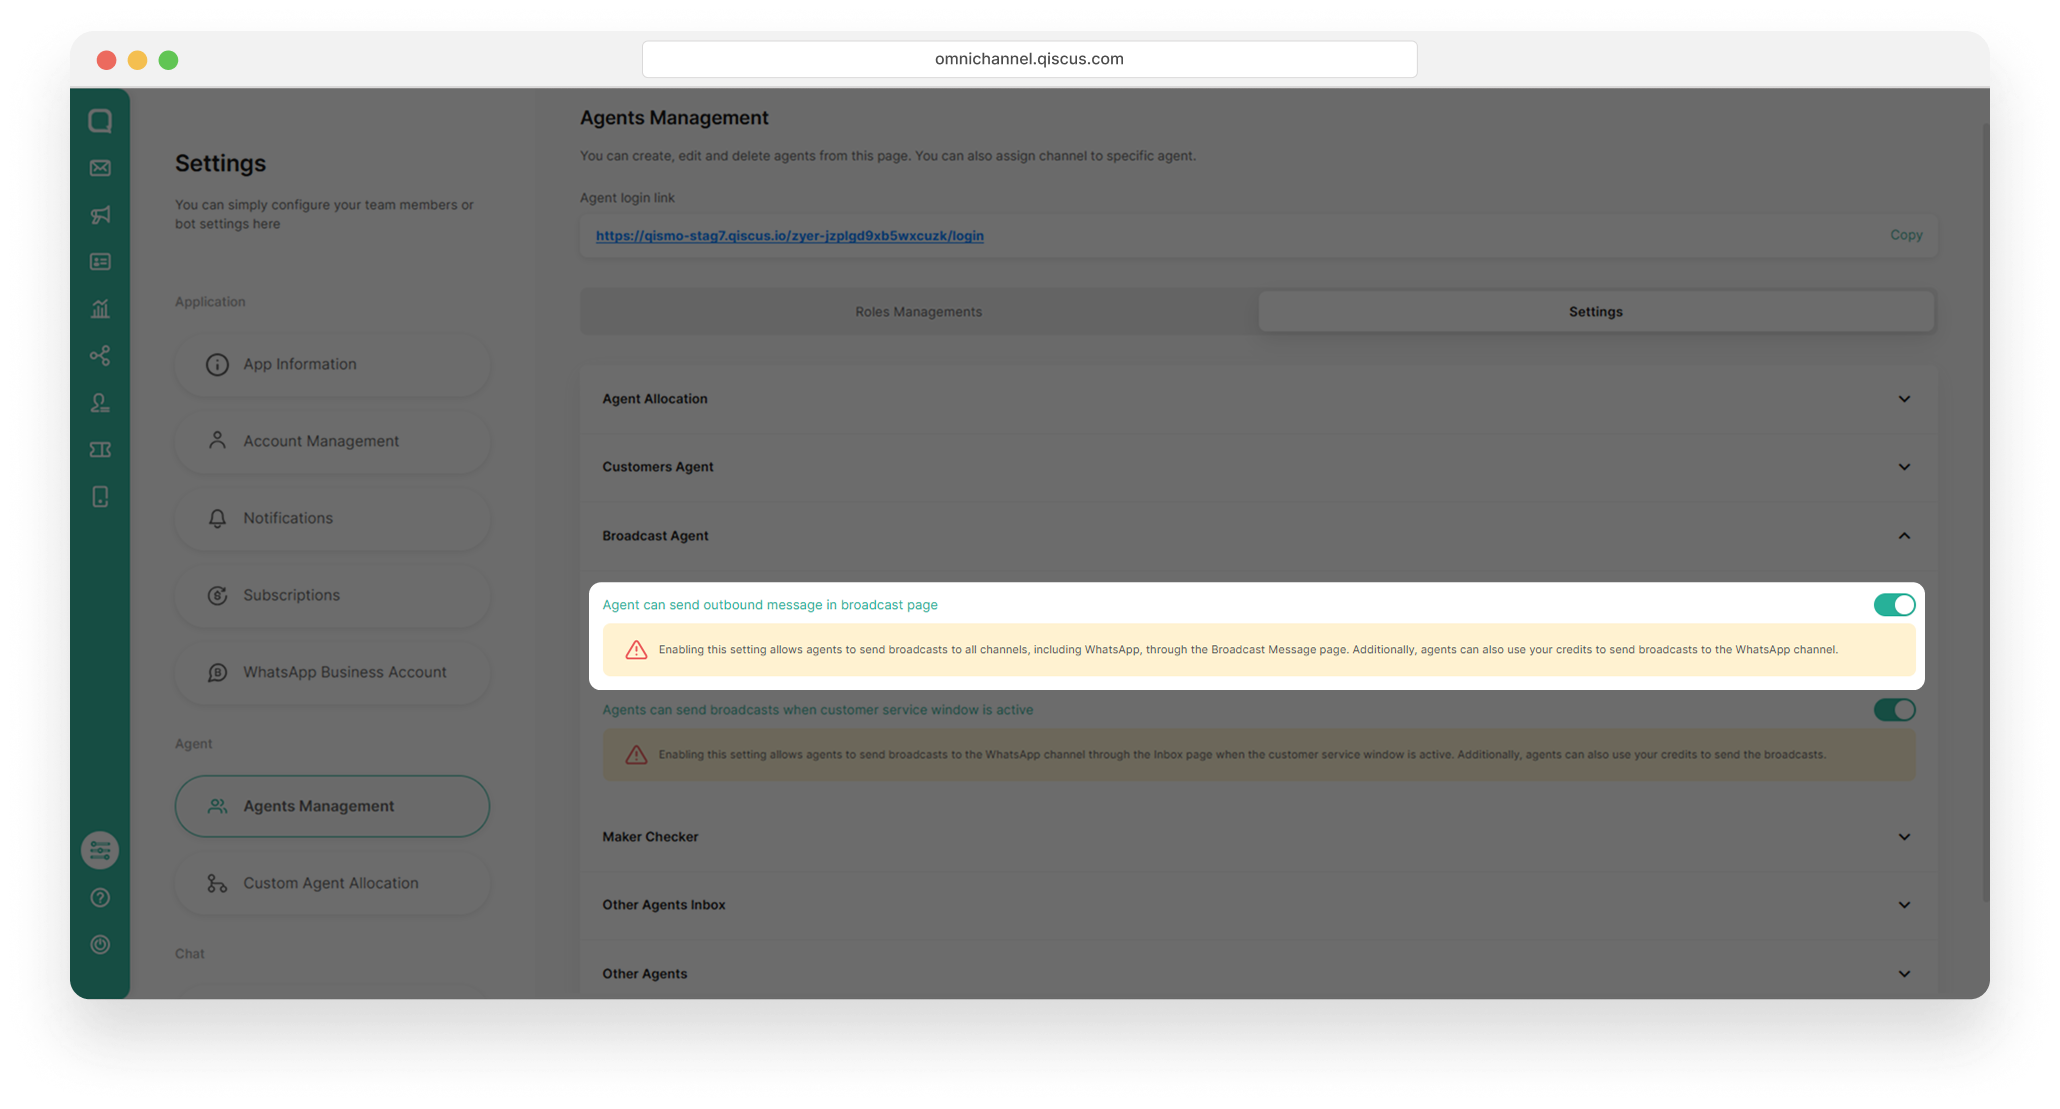
Approval Workflow
This setting adds an internal review stage. It becomes available only after Agent Can Create Template is enabled.
When enabled, every template created by an Agent must be approved by an SPV or Admin before it is submitted to Meta.
When disabled, templates created by Agents are submitted to Meta immediately, without internal review.
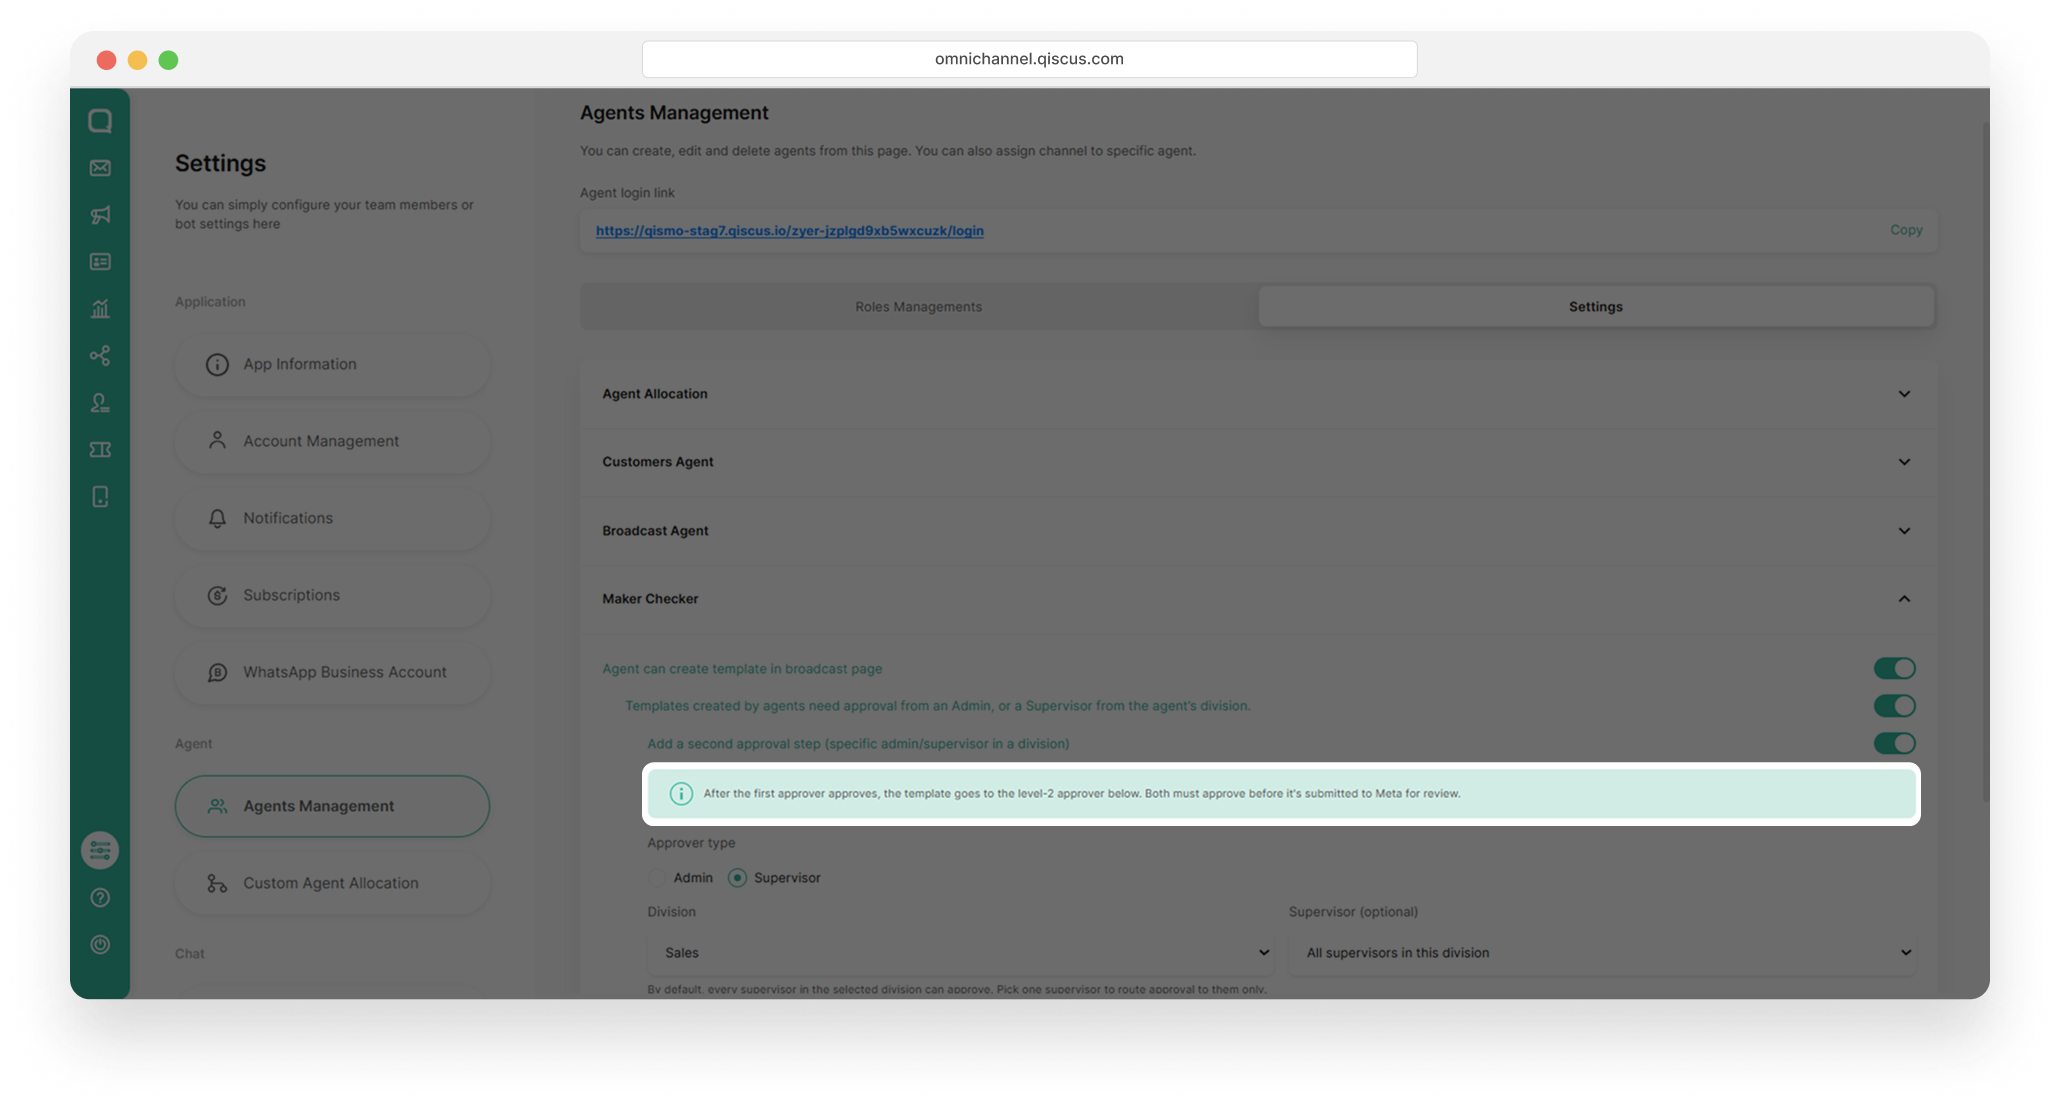
Enable Level 2 Approval
This is a sub-setting under Approval Workflow and is active only when that setting is on. It is disabled by default, so existing applications remain on a single review level unless changed.
When enabled, the Admin must select the Level 2 reviewer before the setting can be saved. The reviewer can be either an Admin or the SPV of a specific division, chosen at the time the setting is enabled.
Template Statuses
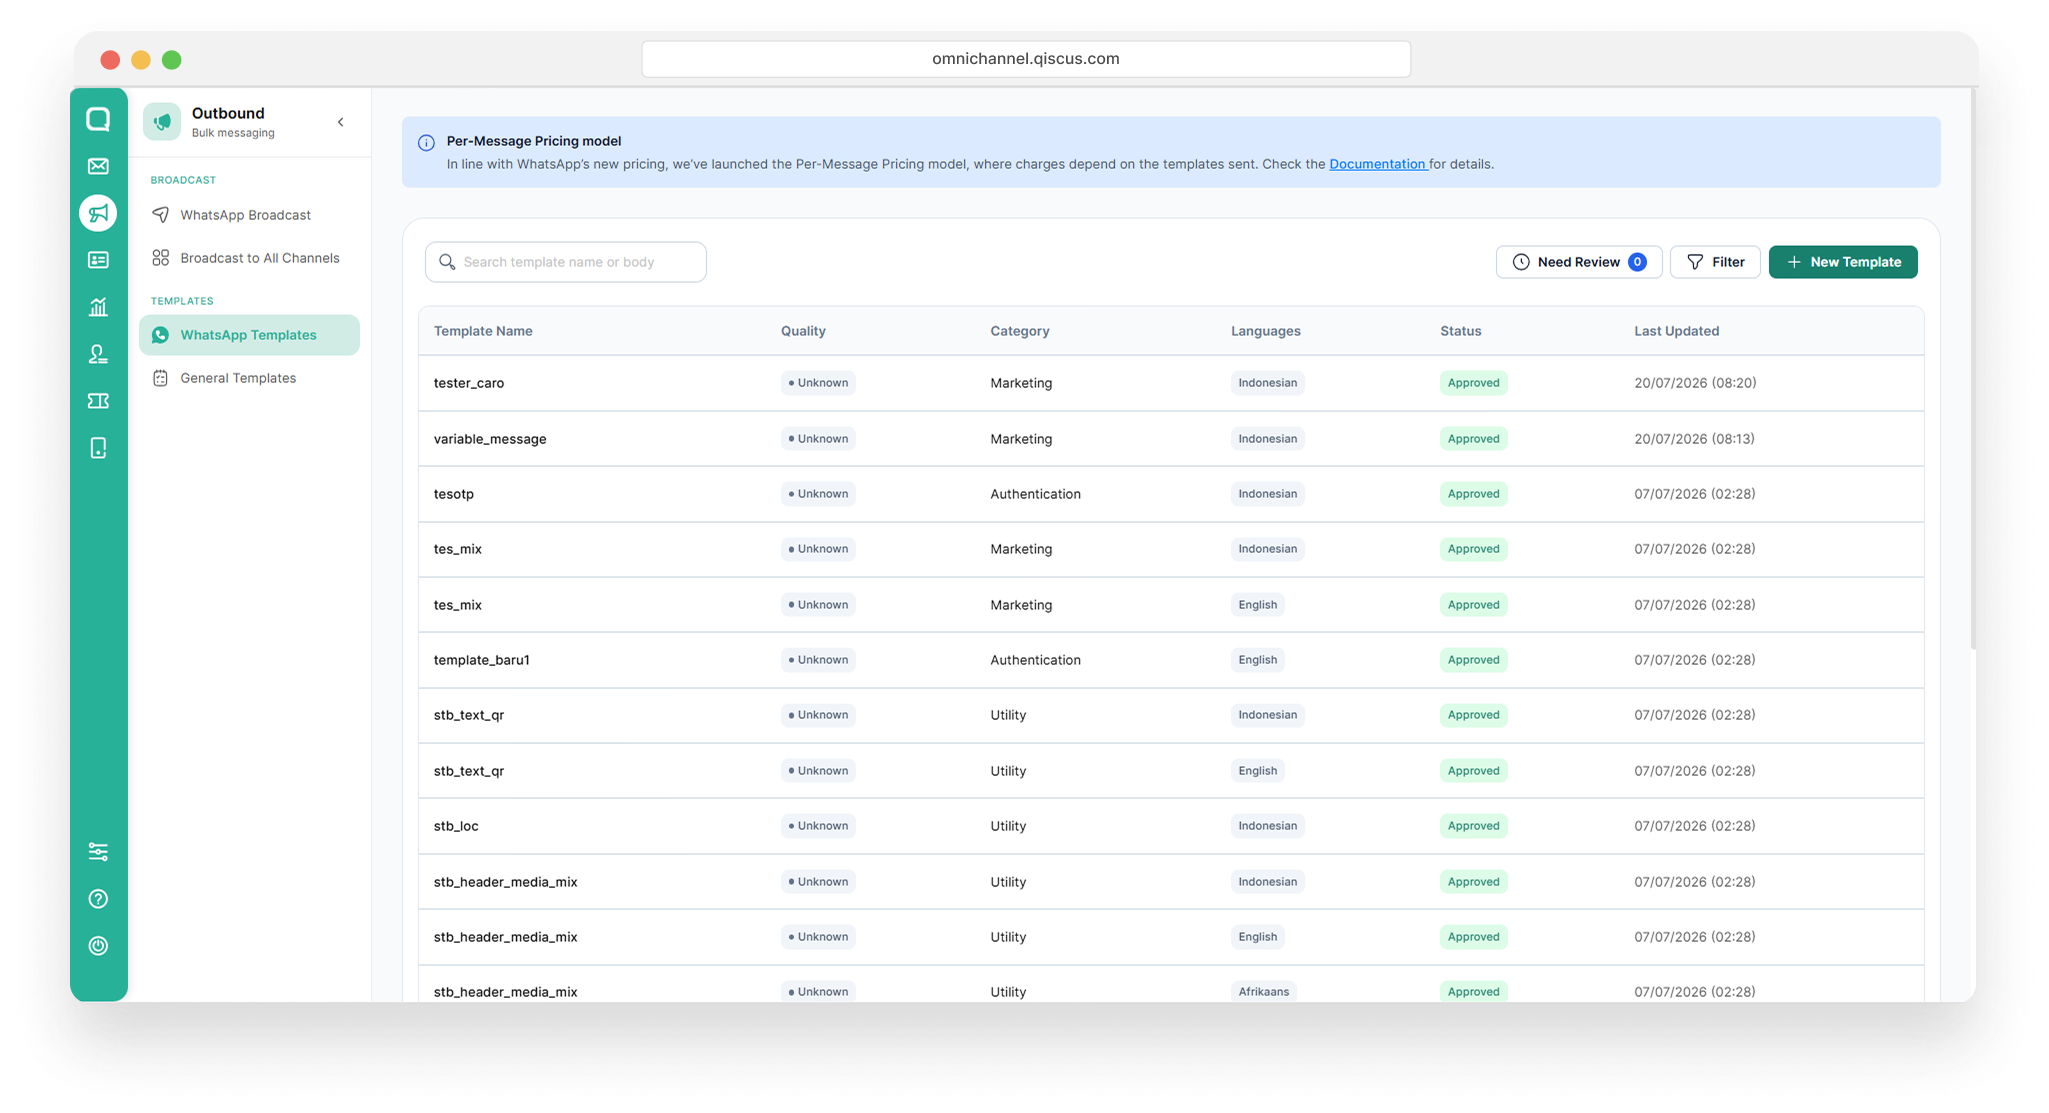
Each template moves through a defined set of statuses that reflect its position in the workflow:
In Review by Checker — The template has been submitted and is awaiting approval from an SPV or Admin. When Level 2 approval is active and Level 1 has been approved, the template remains in this status while it moves to the Level 2 reviewer.
In Review by Meta — The template has passed internal review (or was created by an Admin/SPV) and is awaiting Meta's approval.
Reject by Checker — The template was rejected by an SPV or Admin during internal review and is returned to the Agent.
Reject by Meta — The template was rejected by Meta.
Approved — The template has been approved by Meta and is ready to be used.
Reviewing a Template (Admin / SPV Guide)
This section applies to Admins and SPVs acting as Checkers.
Open the list of templates awaiting review, then select the template you want to review. Click the Action dropdown, review the template content, and choose Approve or Reject template
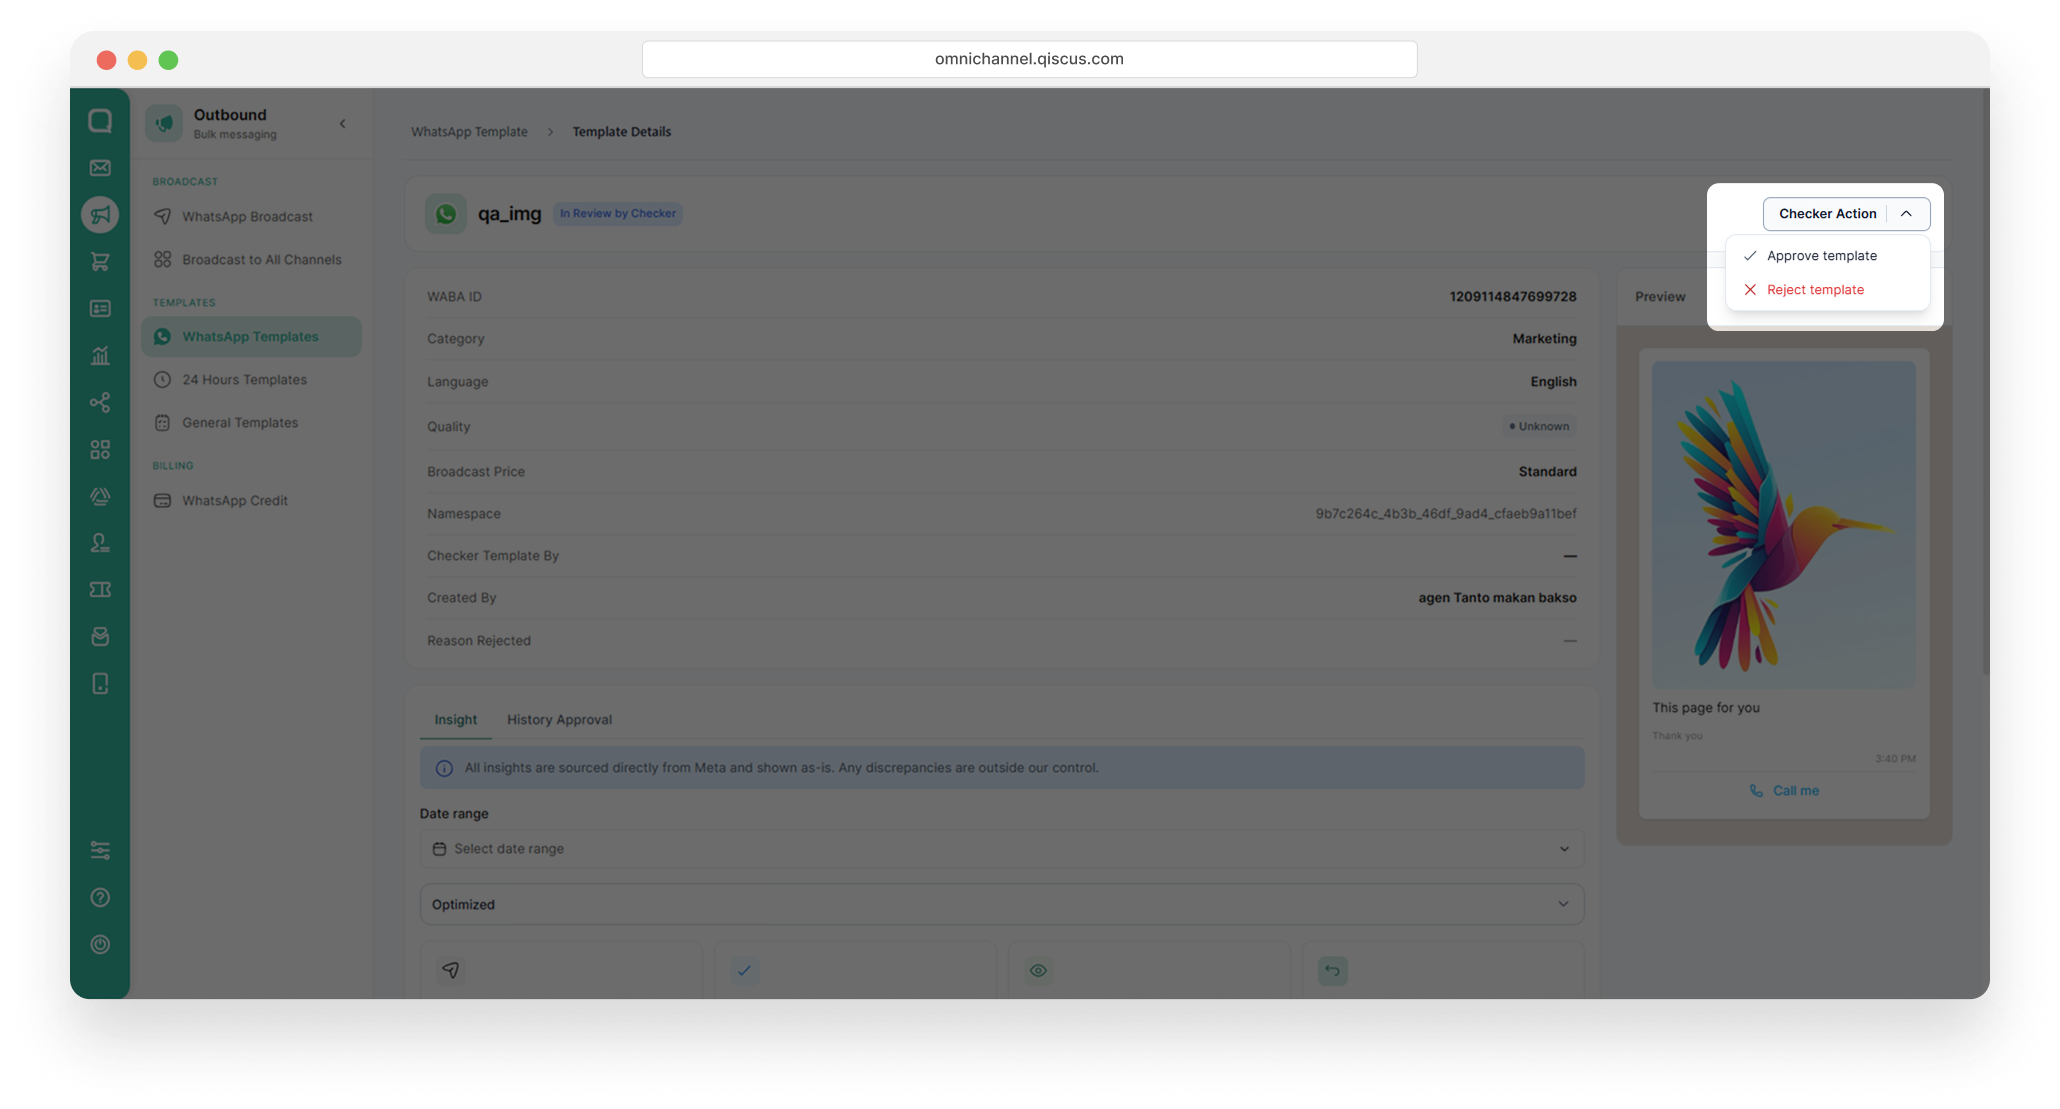
Choose one of the following actions:
Approve — The template proceeds to the next stage. If no further review level applies, the status changes to In Review by Meta, and the system automatically submits the template to Meta.
Reject — A rejection reason is required. The status changes to Reject by Checker, and the template is returned to the Agent.
You will receive a notification once you have reviewed the template.
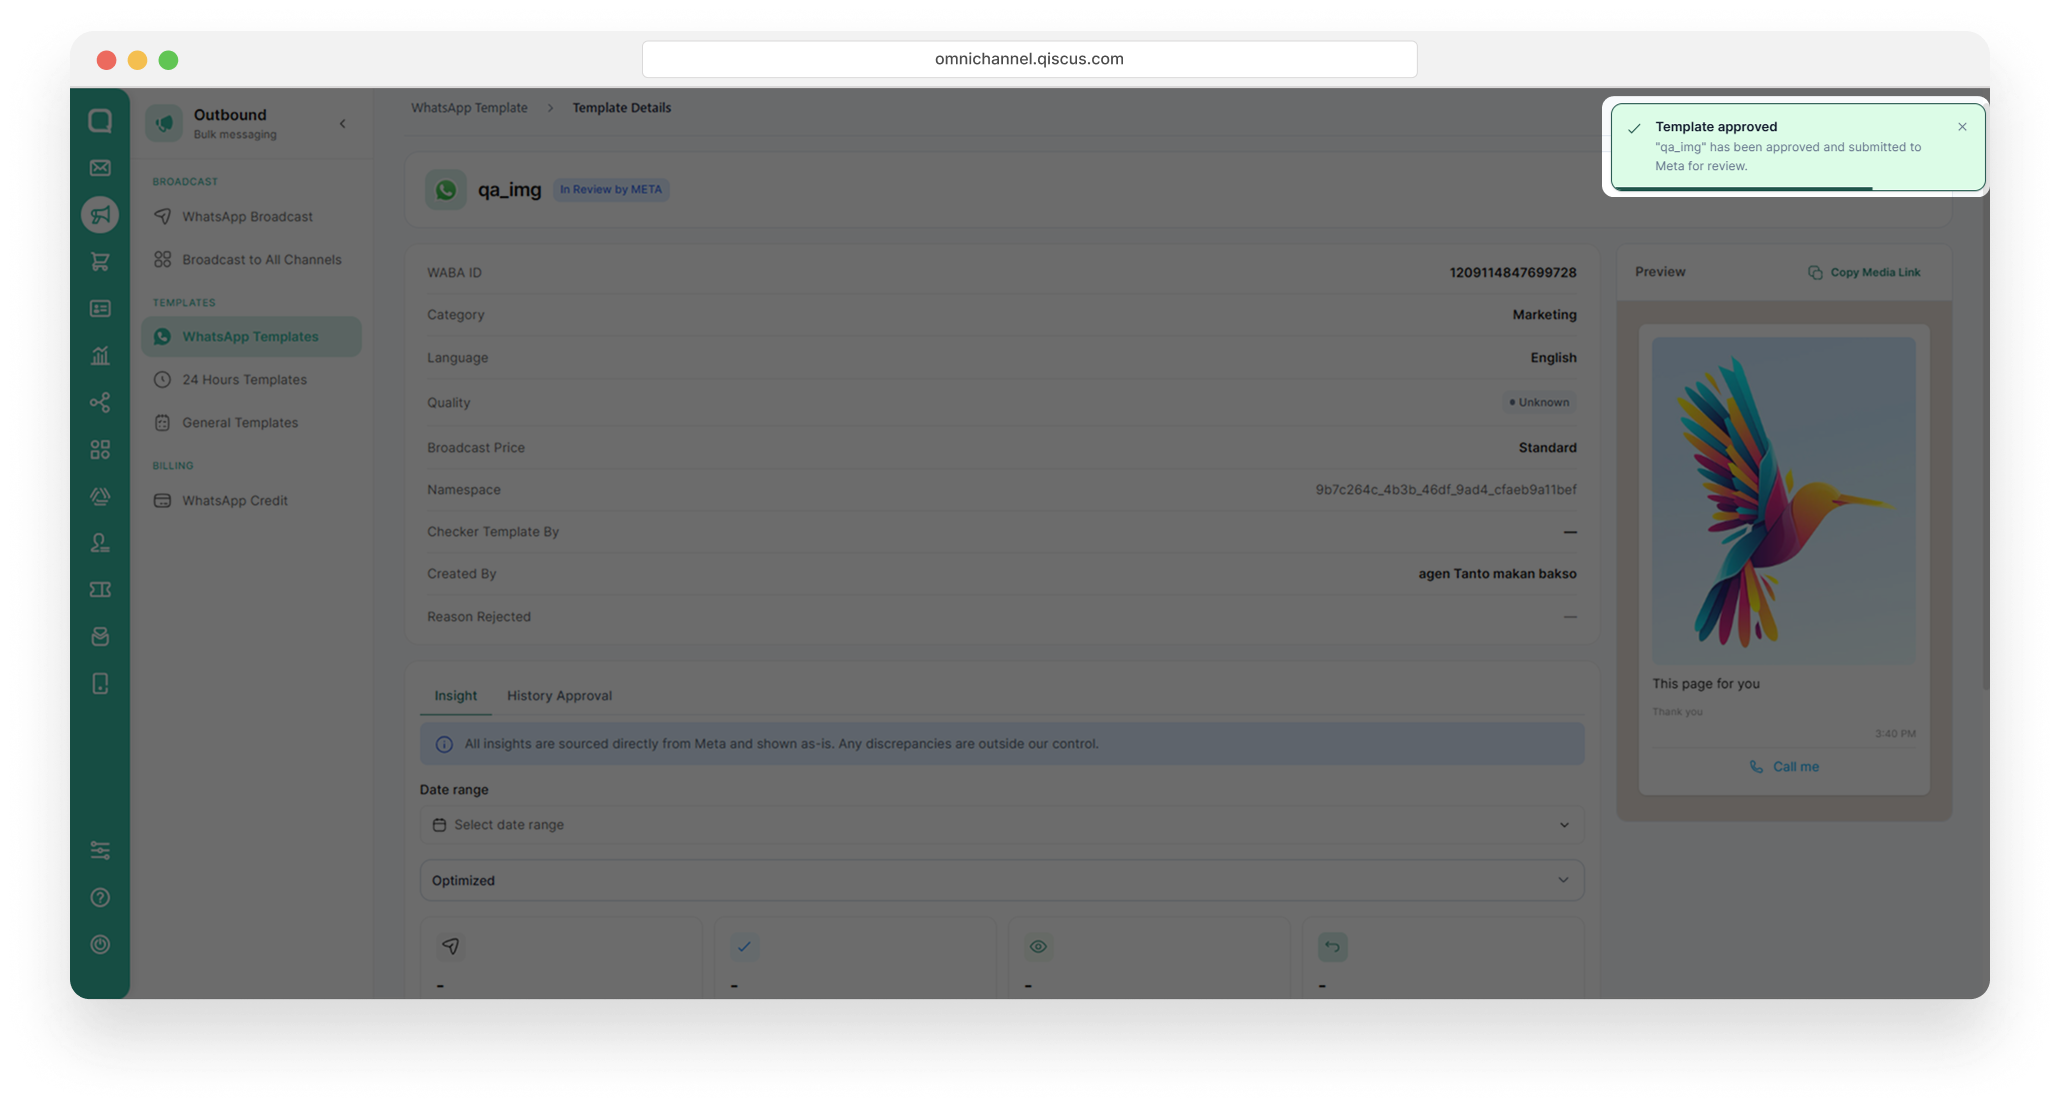
If an Admin or SPV creates a template themselves, they may skip the internal review, and the template moves directly to In Review by Meta.
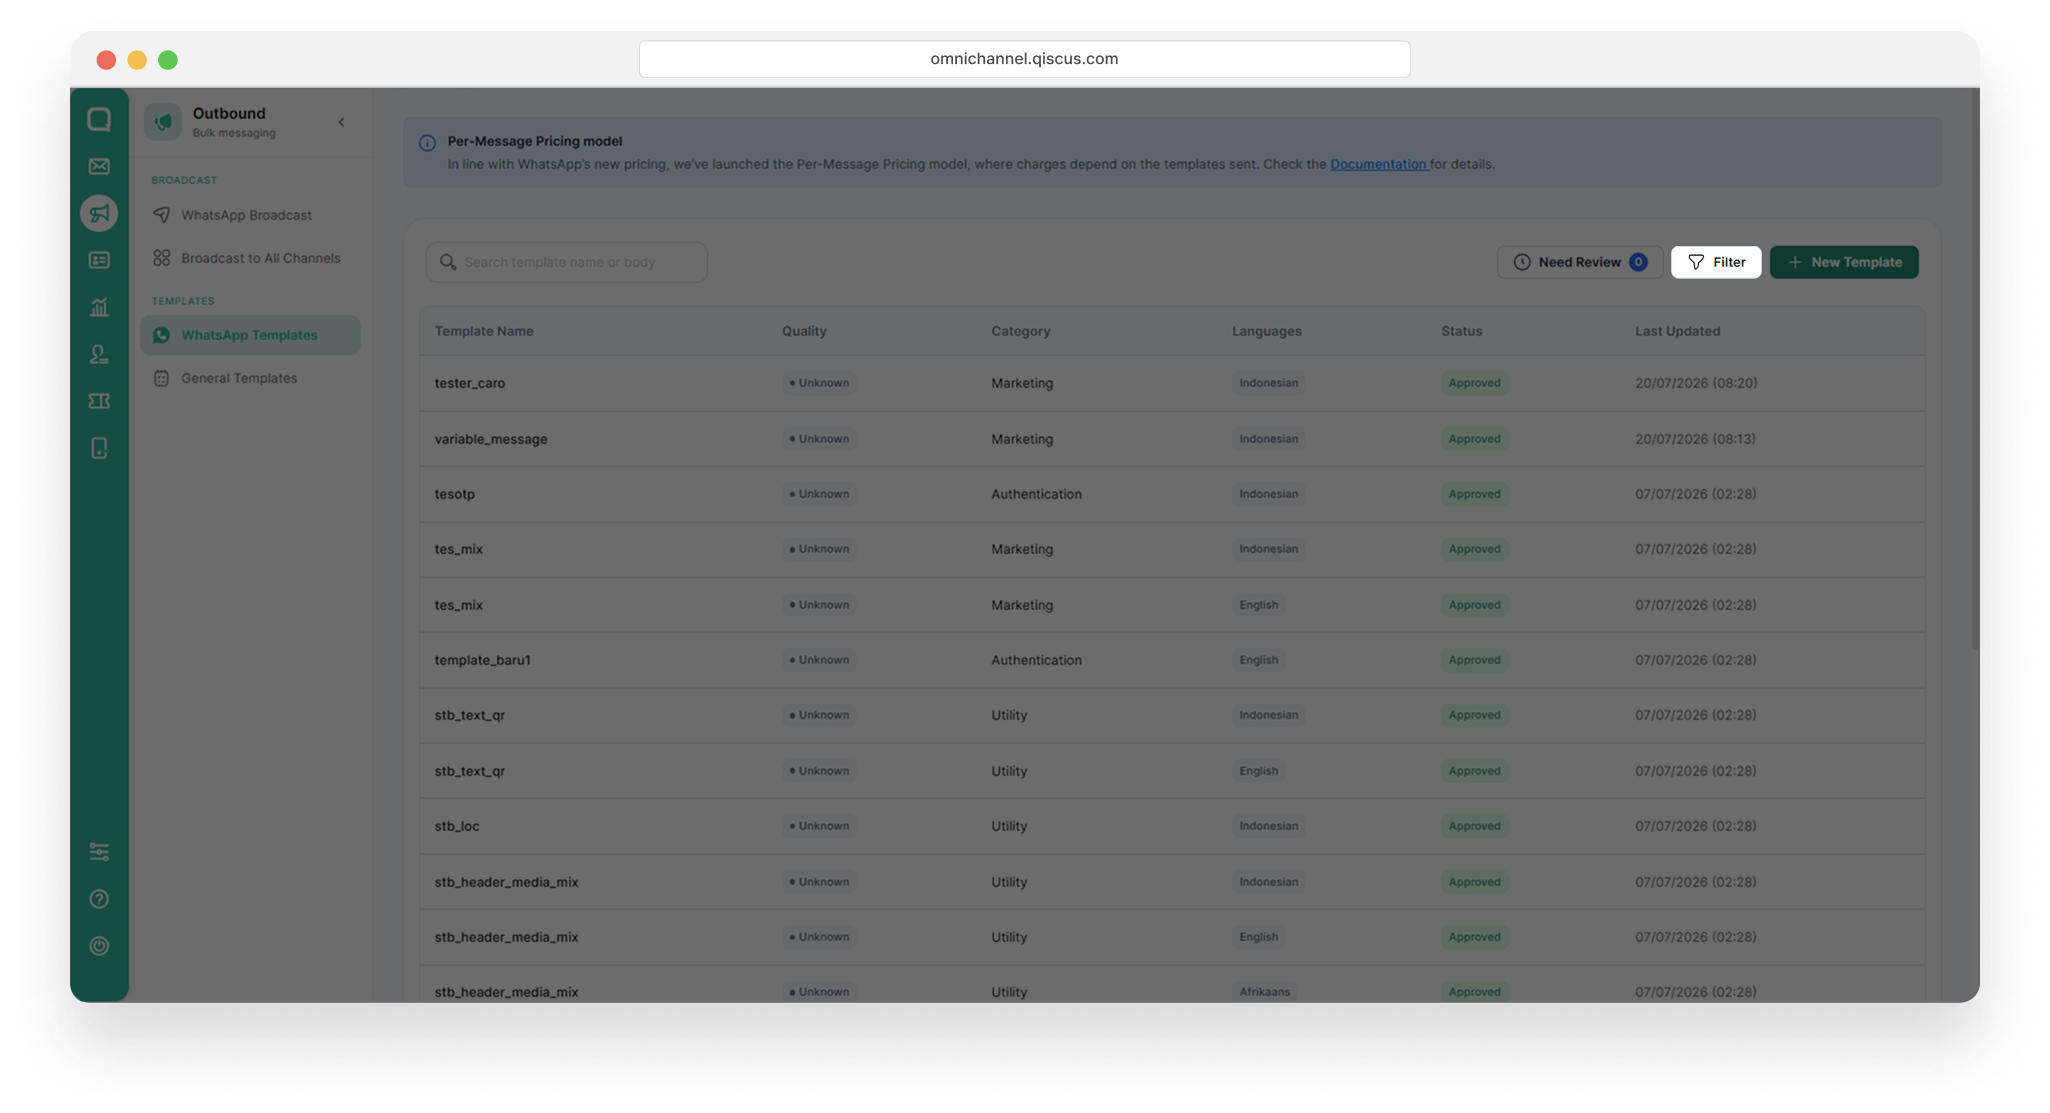
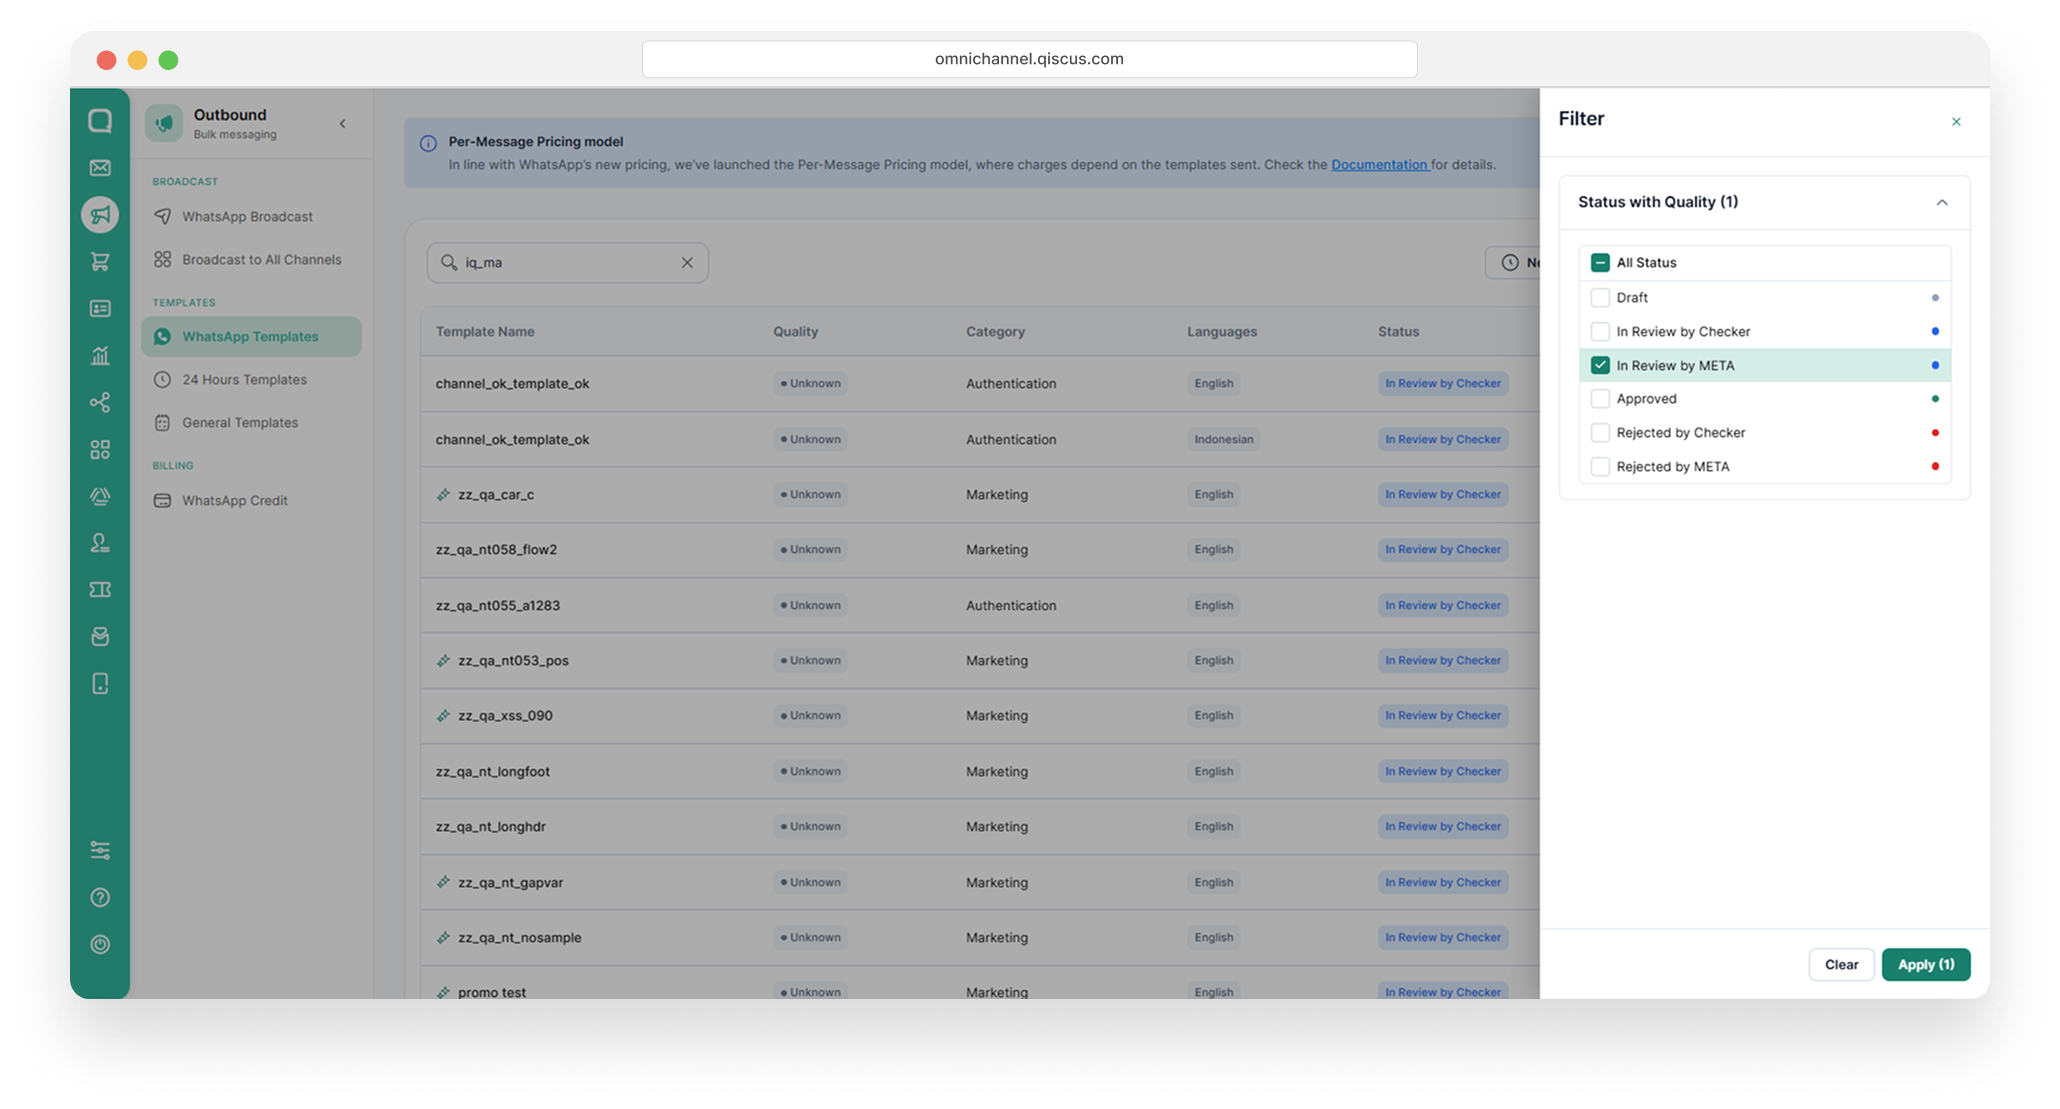
Action Filter
On the Template List page, you can use up to two filters to quickly find the template you need.
How to Send an Opt-Out Marketing Template via the Inbox
To send an opt-out marketing template via the Inbox menu, you can follow these steps:
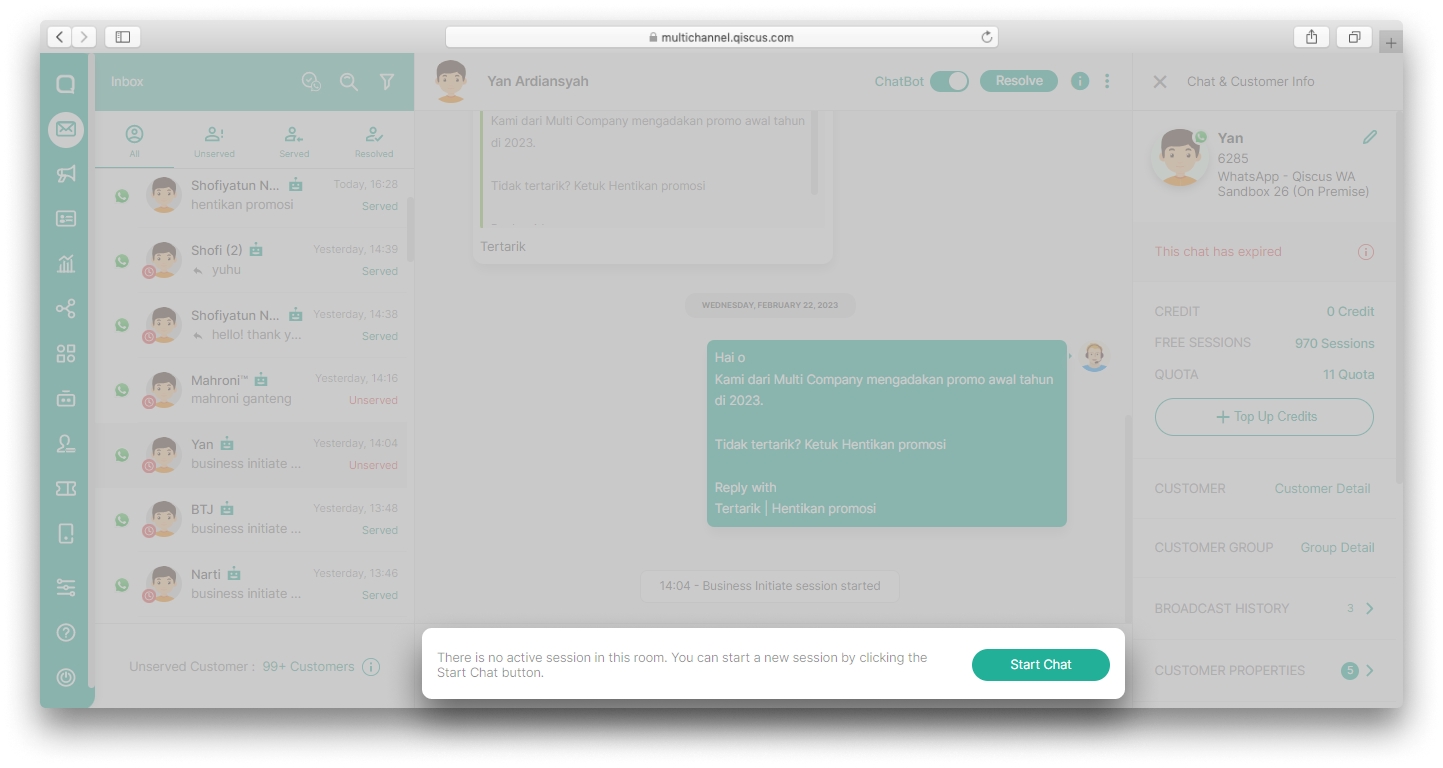
Go to the Inbox page and select an expired WhatsApp conversation,

Click the Start Chat/Follow Up Customer button,
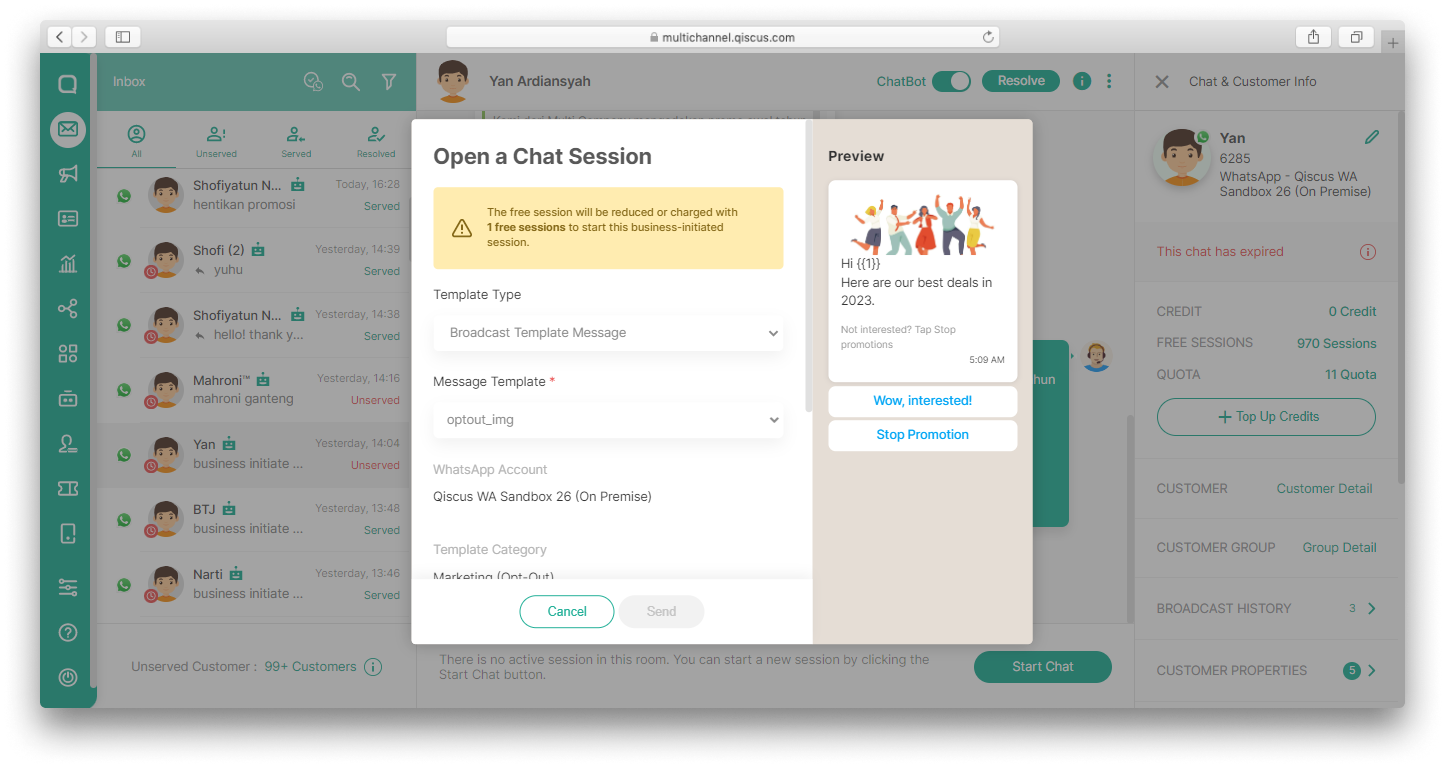
In the Open Session Chat section, select Template Type: Broadcast Message Template and select the Template Name according to the name of your marketing opt-out template. Fill in the required variables then click Send.
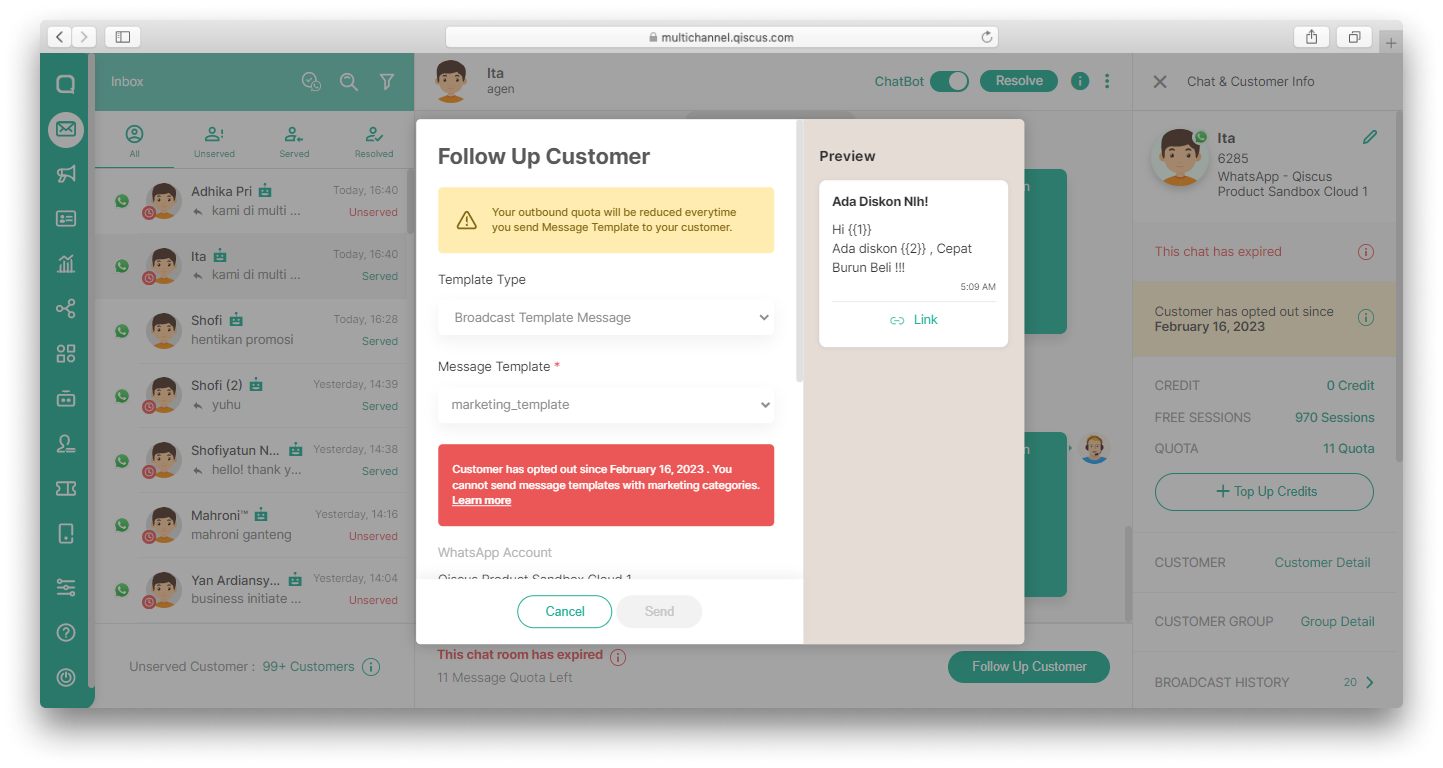
If a customer chooses to opt out of a marketing message, an opt-out date will appear in the Chat & Customer Info section.

When a customer has opted out, you can no longer send templates with marketing categories to that customers. As a result, you will get a message like this when you want to send templates with marketing categories.
Marketing Opt-Out analytics
Qiscus provides a Marketing Opt-Out analytics feature which provides insightful reports on customer preferences and feedback on the marketing messages you have sent. You will be able to see who has opted out of your marketing messages and improve the content of your message templates.
To access this analytics report, you can follow the steps below.
Go to Analytics menu and select WhatsApp,
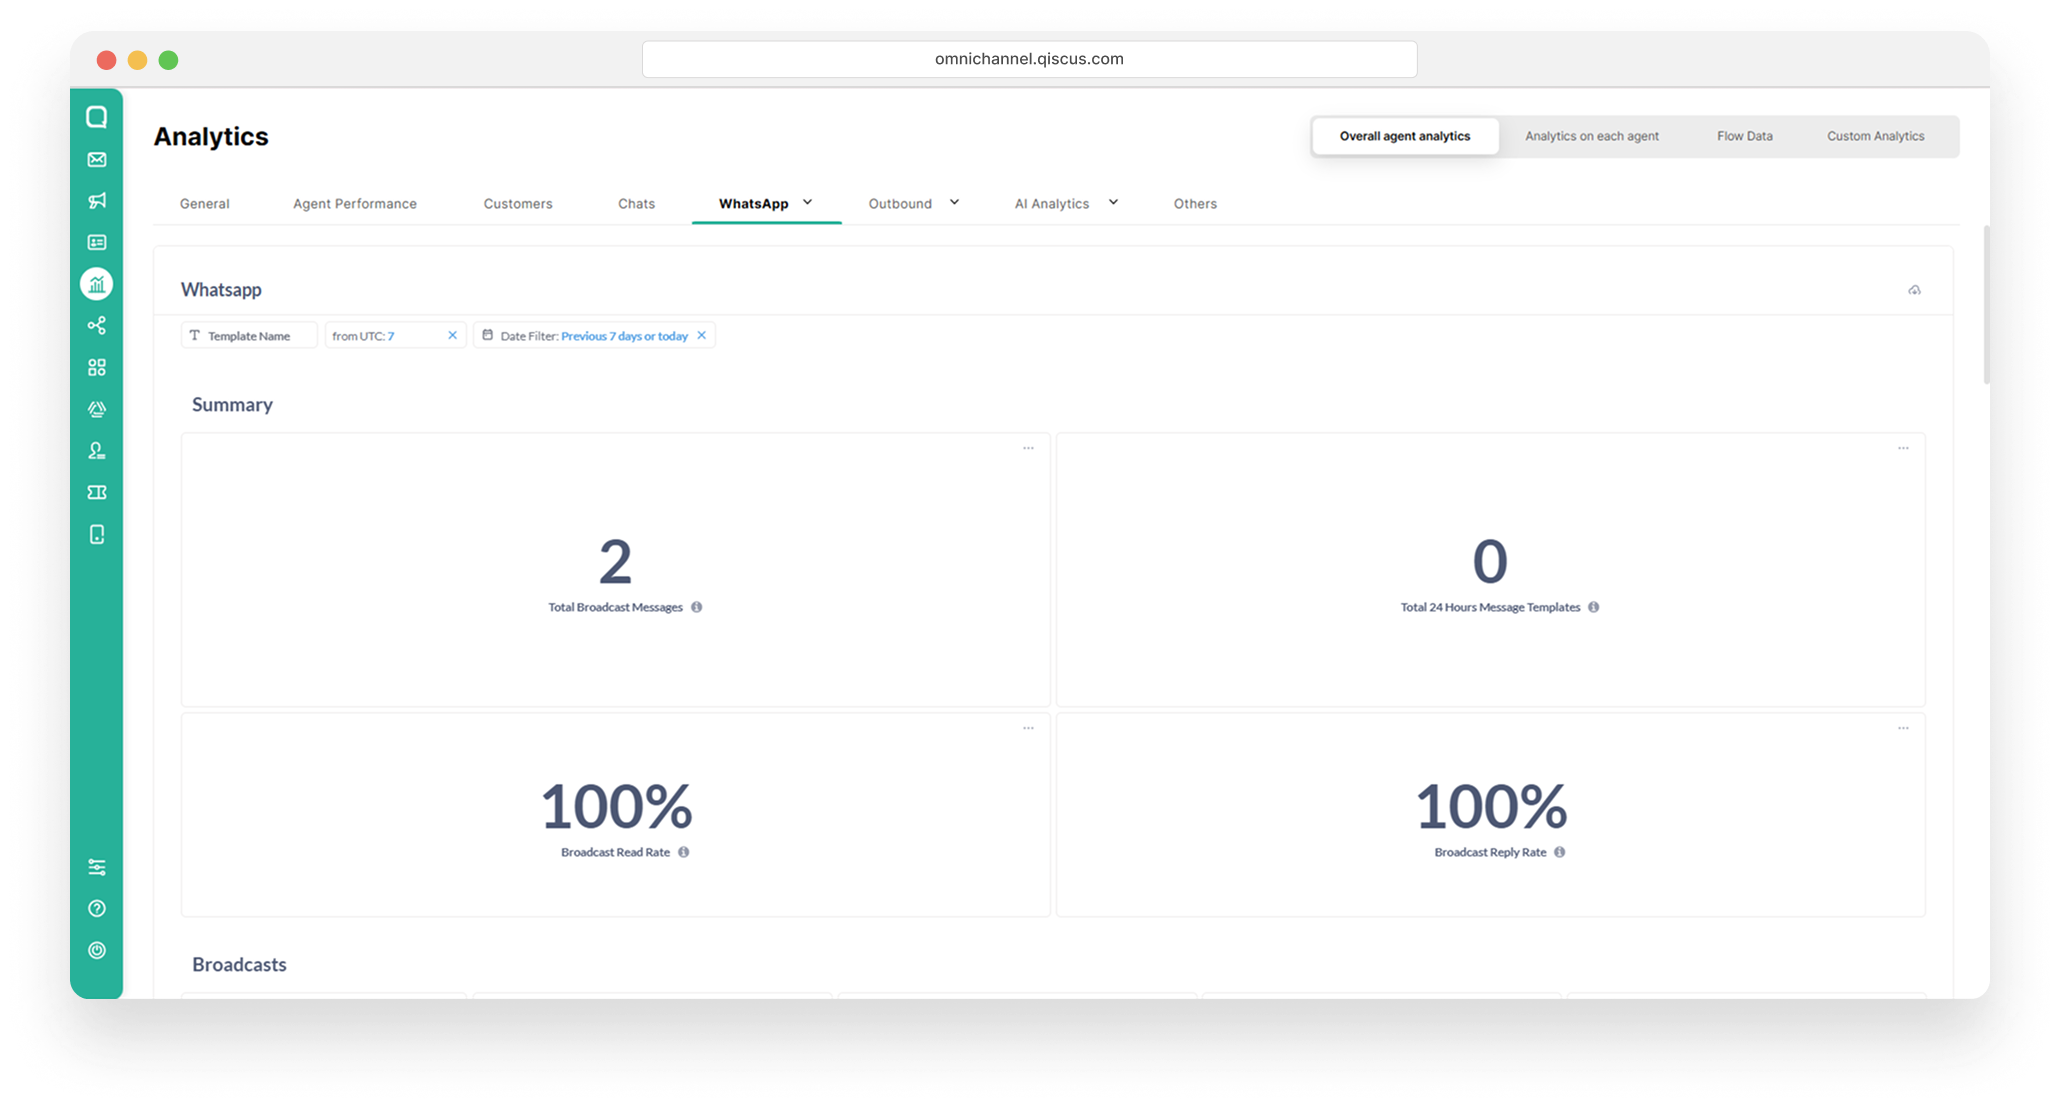
Click Marketing Opt-Out.
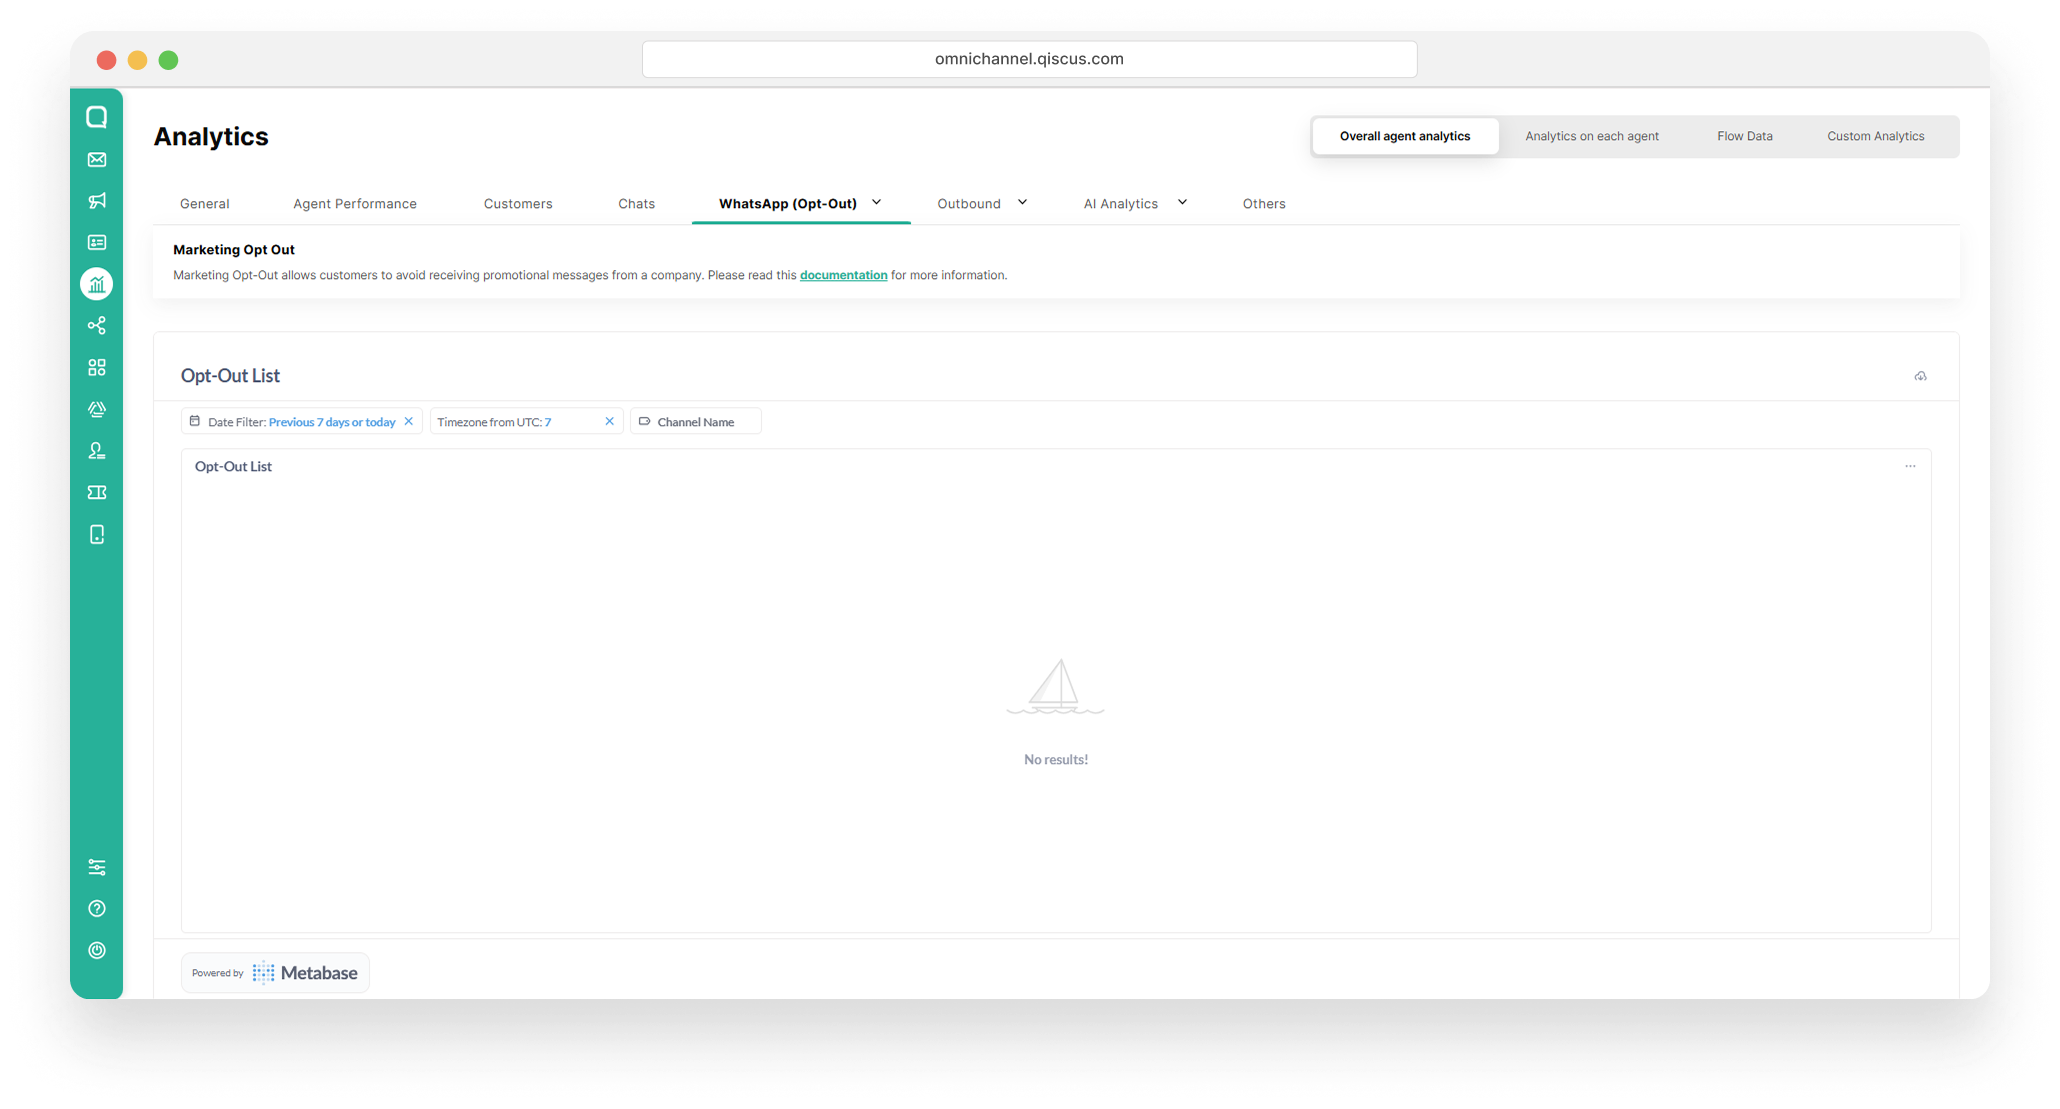
In the Template List section, you can see a list of customers names that have opted-out along with other information such as the channel from which they came, phone number, when the last opt-out template was sent and also when the customer opted out. You can also filter the opt-out list based on the template name or date.