
WhatsApp Broadcast allows you to send messages at scale to multiple customers simultaneously using approved message templates. This feature is ideal for sending notifications, promotions, or important updates to your audience in a personalized yet efficient way.
Types of WhatsApp Broadcast
There are four broadcast methods you can choose from:
Broadcast Template Message to a Single Number: Send a template message to one WhatsApp number quickly.
Broadcast Template Message with Customer Groups: Send a message to a group of customers you’ve previously segmented in the system.
Broadcast Template Message with Upload CSV: Send messages to multiple contacts at once by uploading a CSV file containing their WhatsApp numbers and relevant variables. A customer group can contain up to 10,000 members.
Broadcast Template Message with Condition: Send template messages only to recipients who match specific criteria or customer attributes, ensuring more targeted and relevant communication. A customer group can contain up to 10,000 members.
Pre-Broadcast
Before sending a broadcast, make sure the following are in place:
A WhatsApp channel has been integrated via the Integration menu.
You have an approved WhatsApp template.
You have sufficient credit
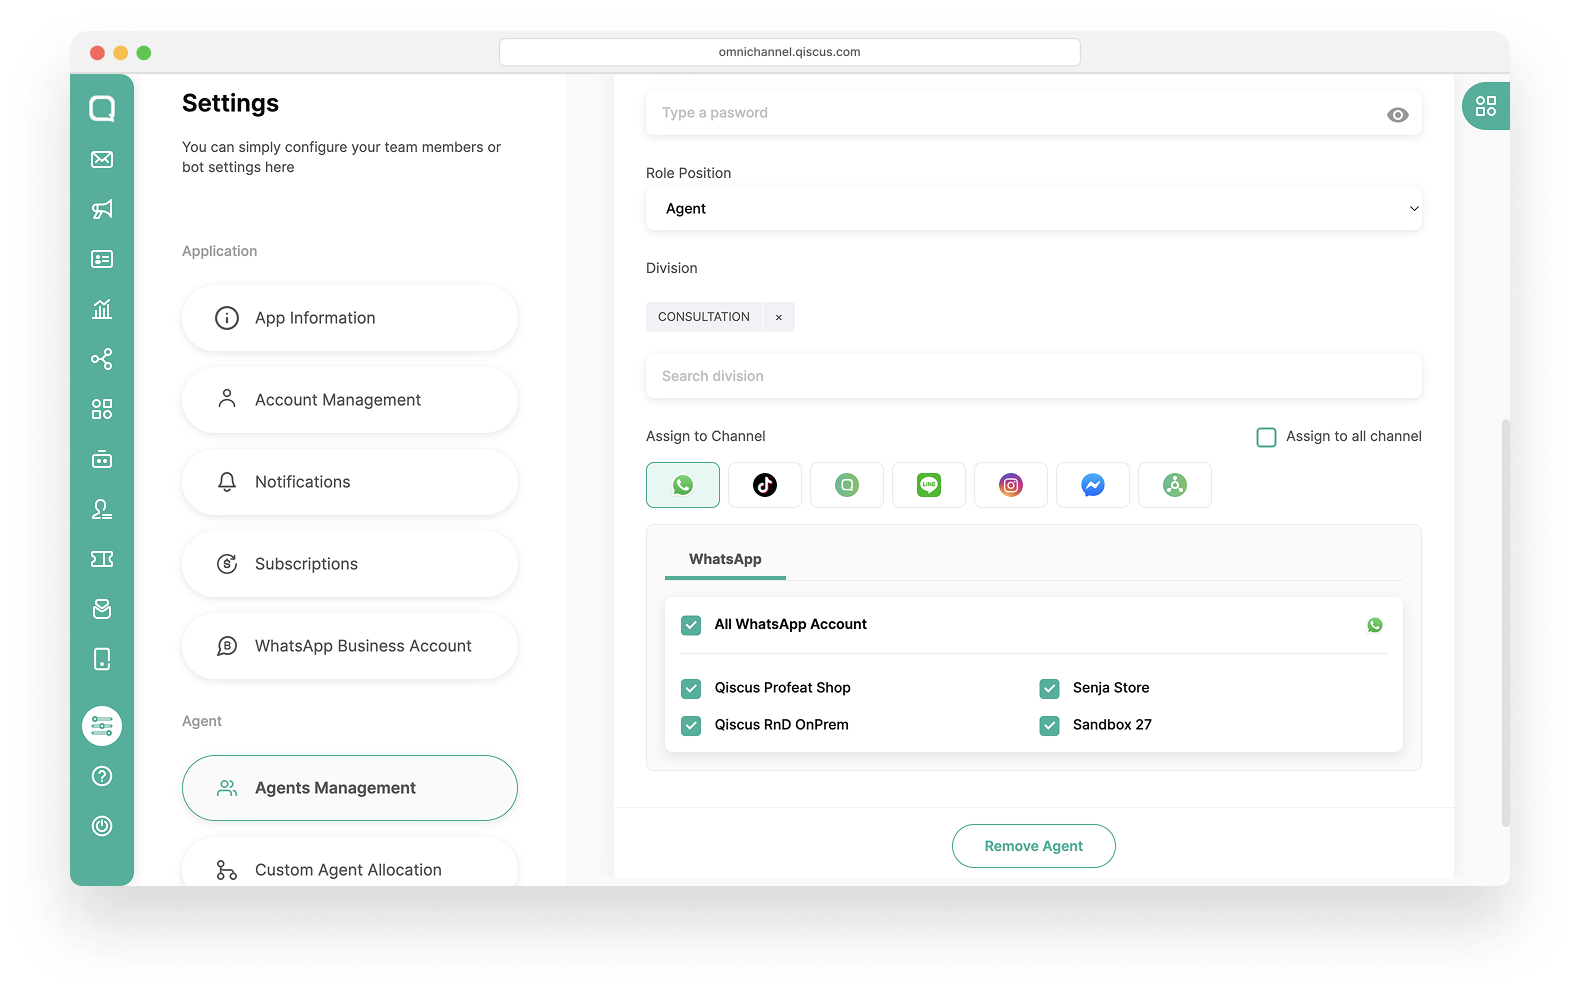
If your agents are the ones sending the broadcast, make sure to:
Assign the agent to a WhatsApp channel.
Grant the agent access to the Outbound Message menu.
Broadcast Creation Flow
The Broadcast Creation Flow consists of three steps:
Select Template
In this step, choose the sender and select the broadcast template that will be used to send your message. Make sure the selected template matches your communication needs and campaign objectives.
The following options are available:
Sender From – Displays the sender account that will be used to send the broadcast message.
Template Category – Defines the category of the template you want to use. Available categories include:
Utility – For transactional messages, updates, or customer service communications.
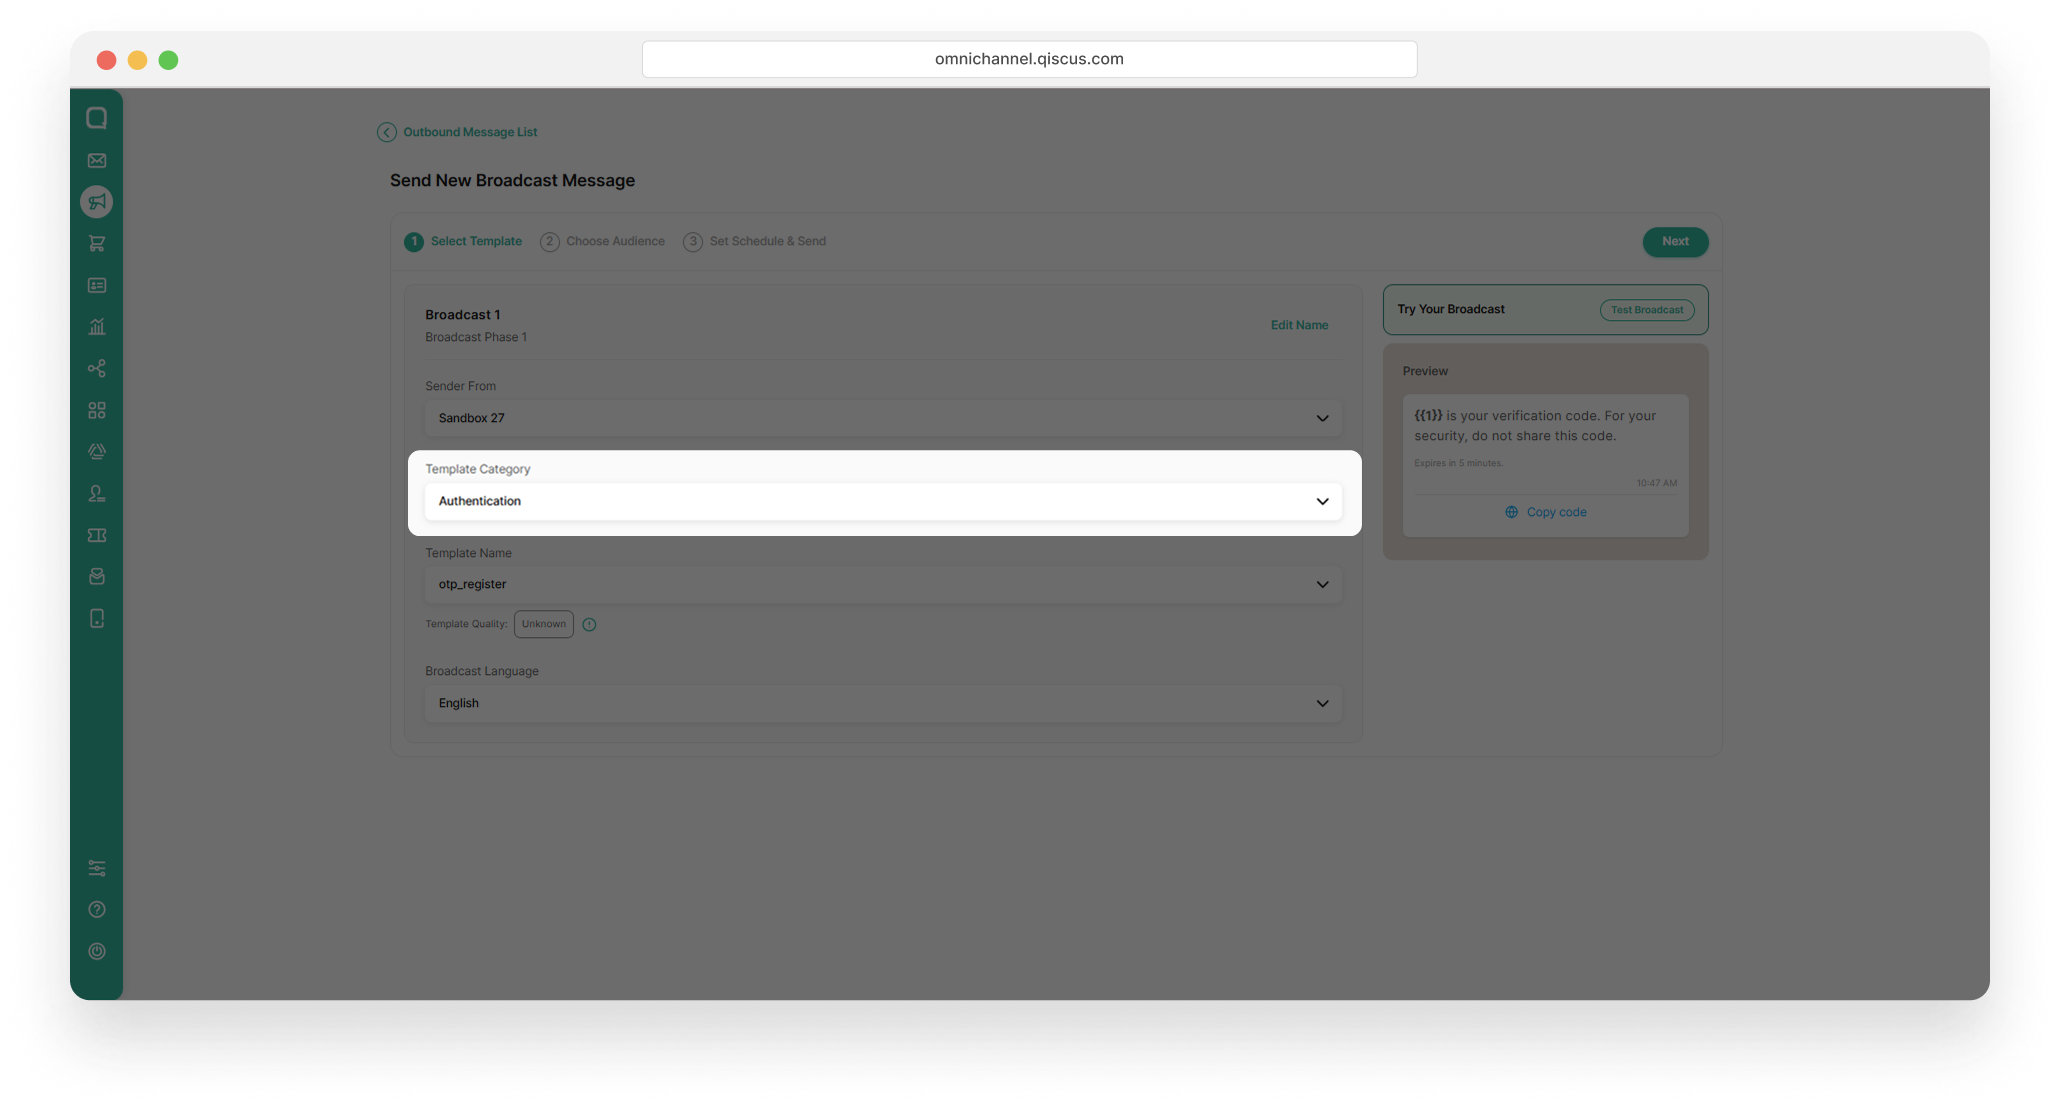
Authentication – For verification codes, login confirmations, and account security purposes.
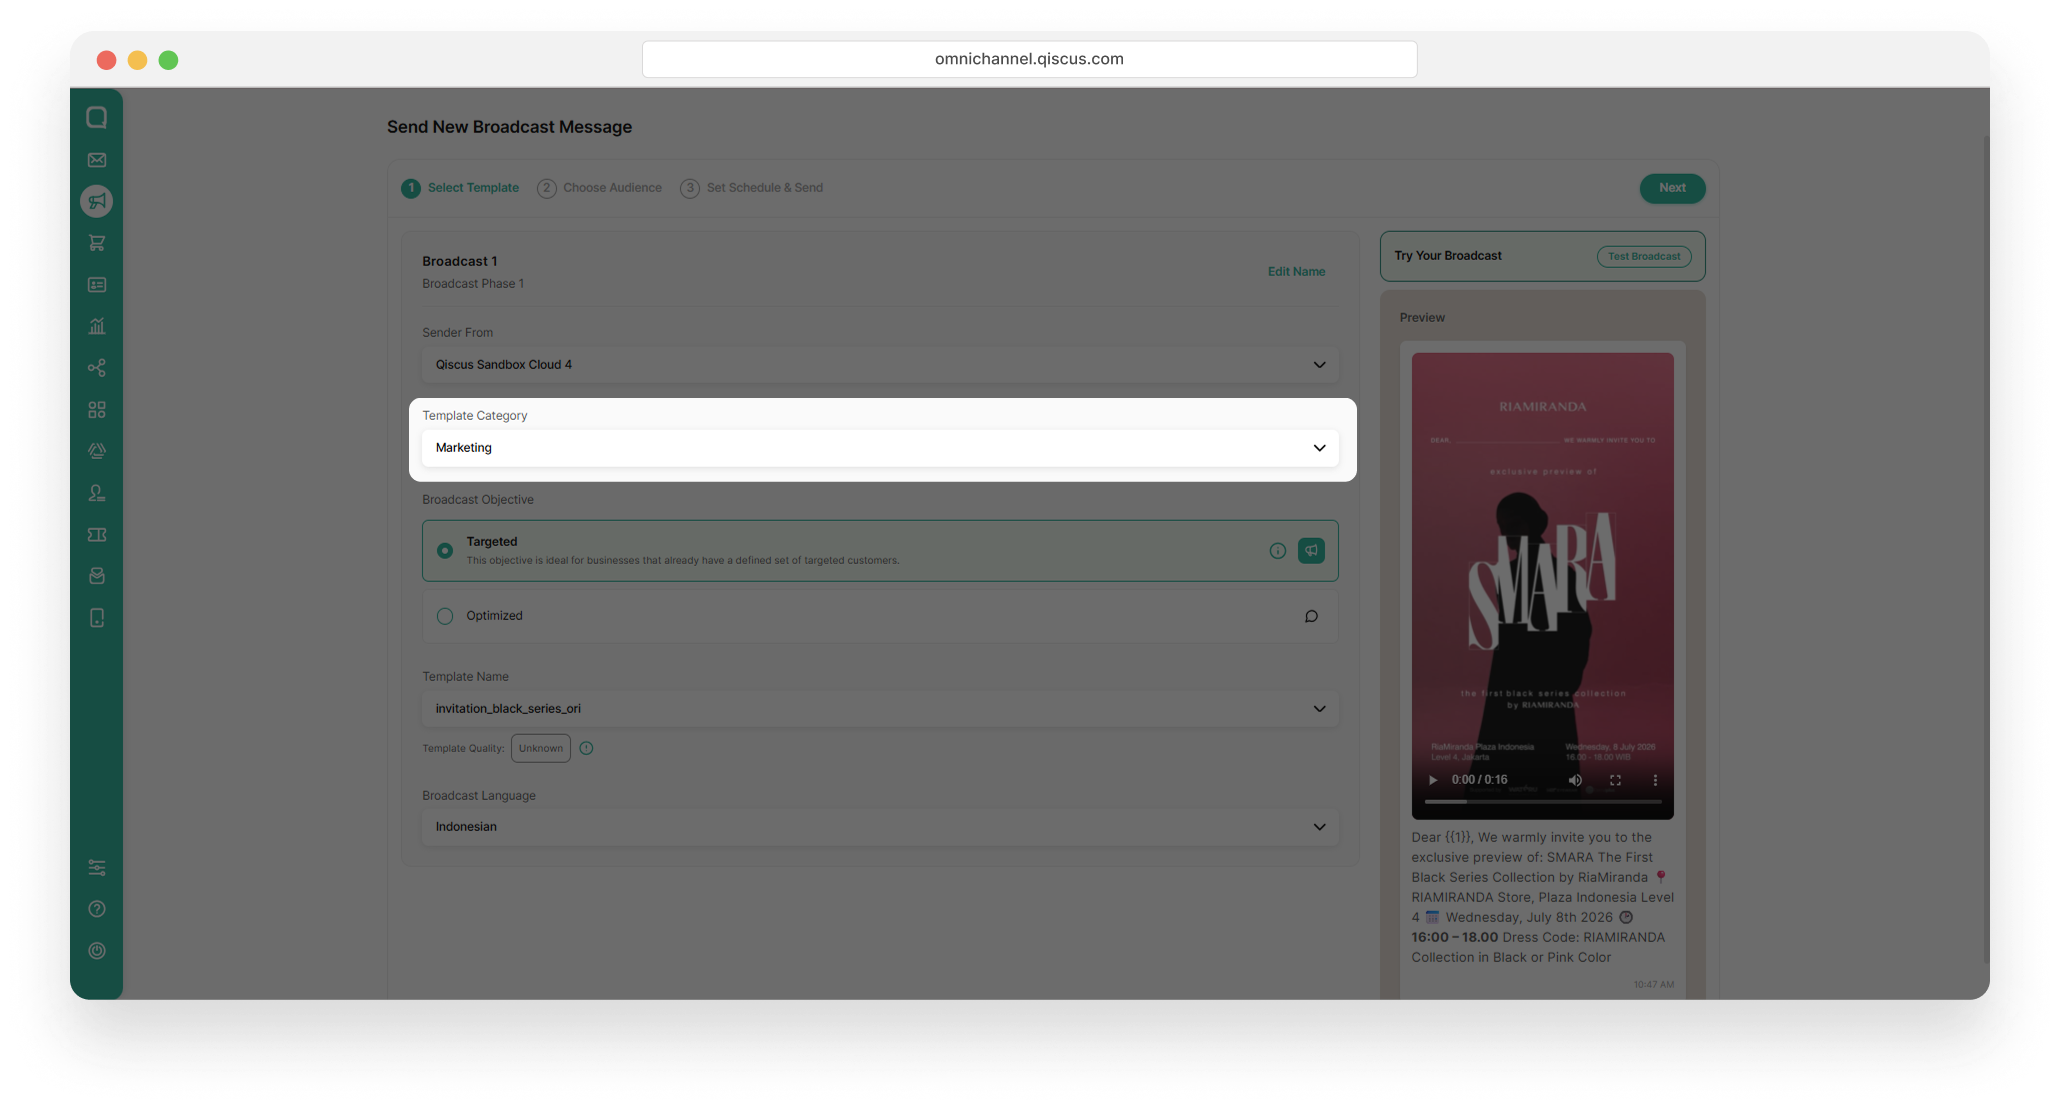
Marketing – For promotional messages, campaigns, offers, and customer engagement.
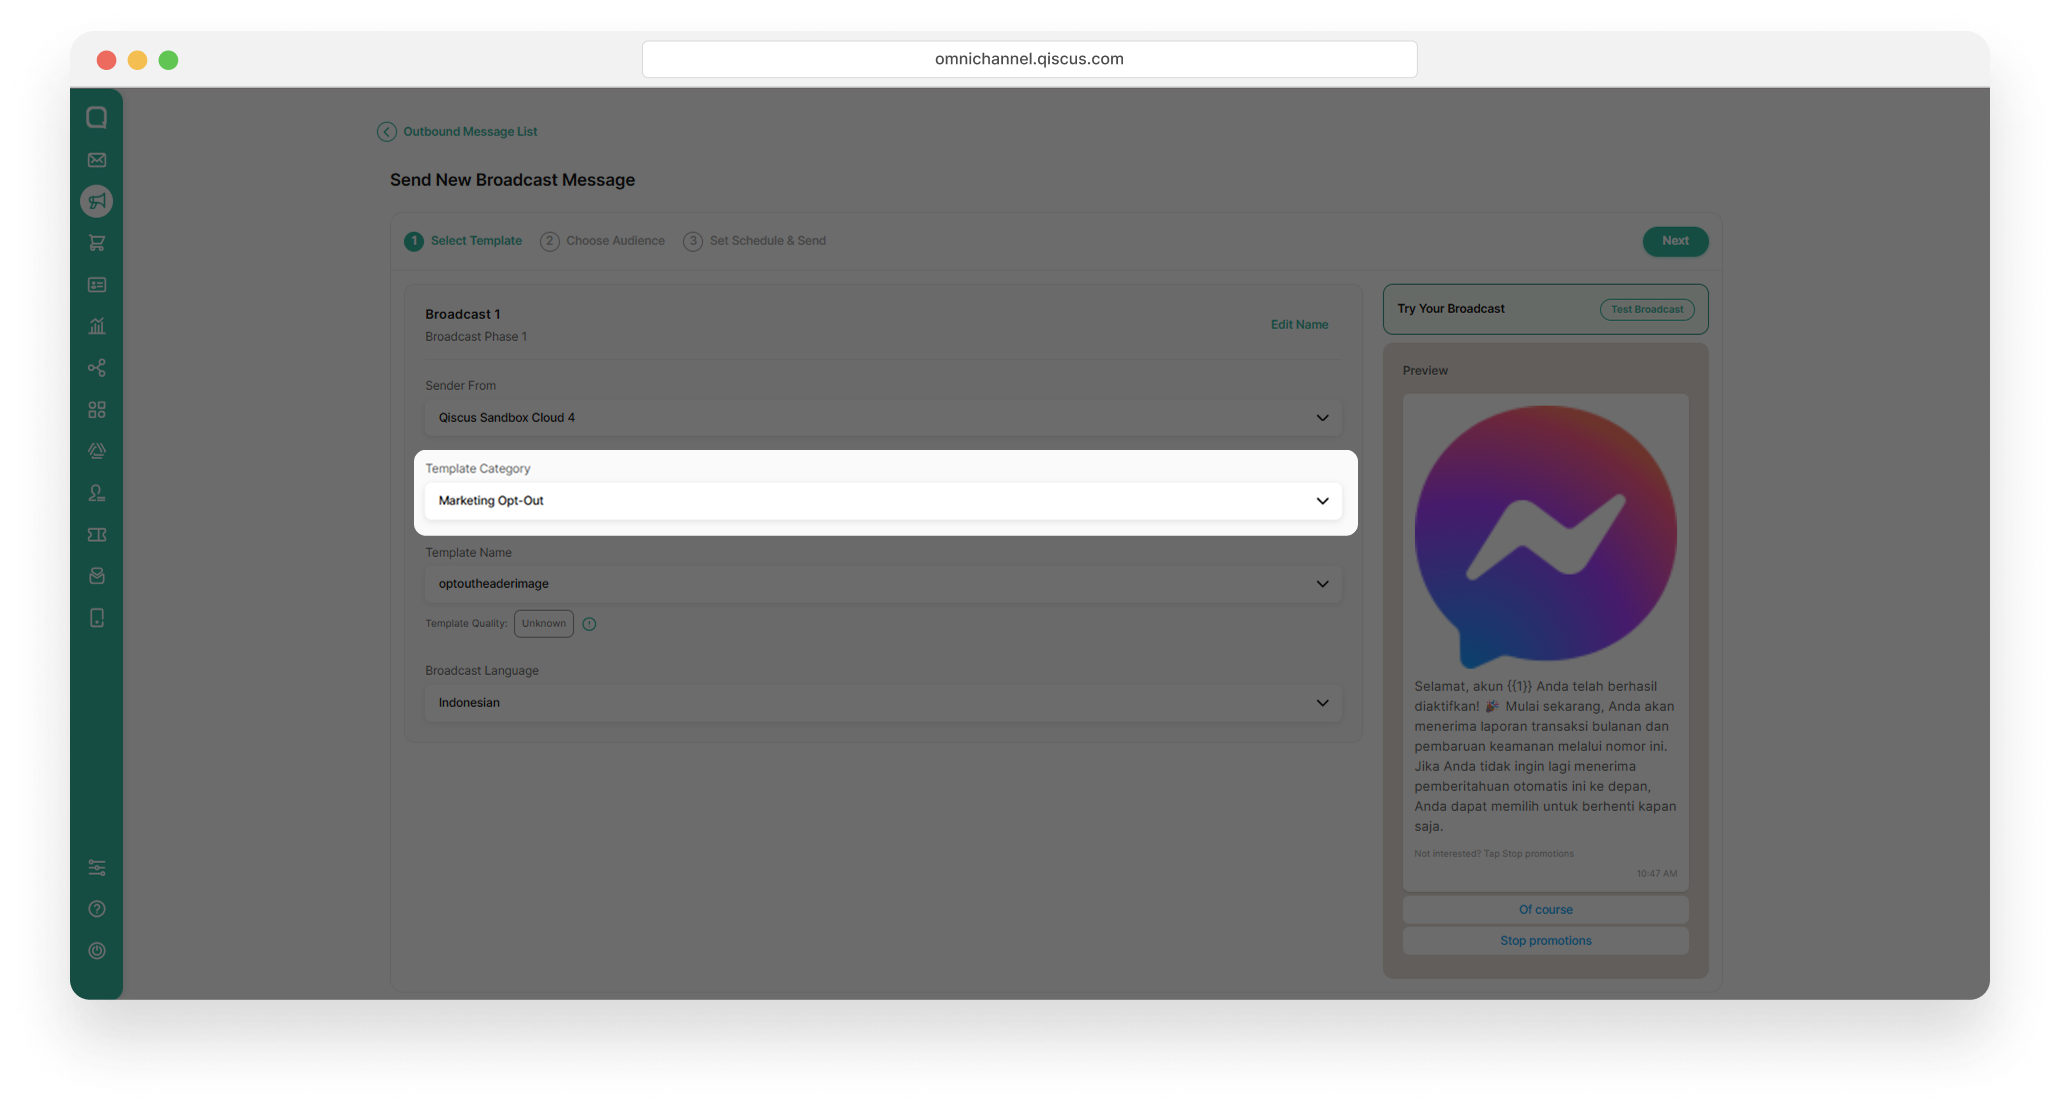
Marketing Opt-Out – For marketing messages that include opt-out or unsubscribe options.
Template Name – Allows you to select a pre-approved template that has been created previously.
Broadcast Language – Specifies the language used in the selected broadcast template.
Choose Audience
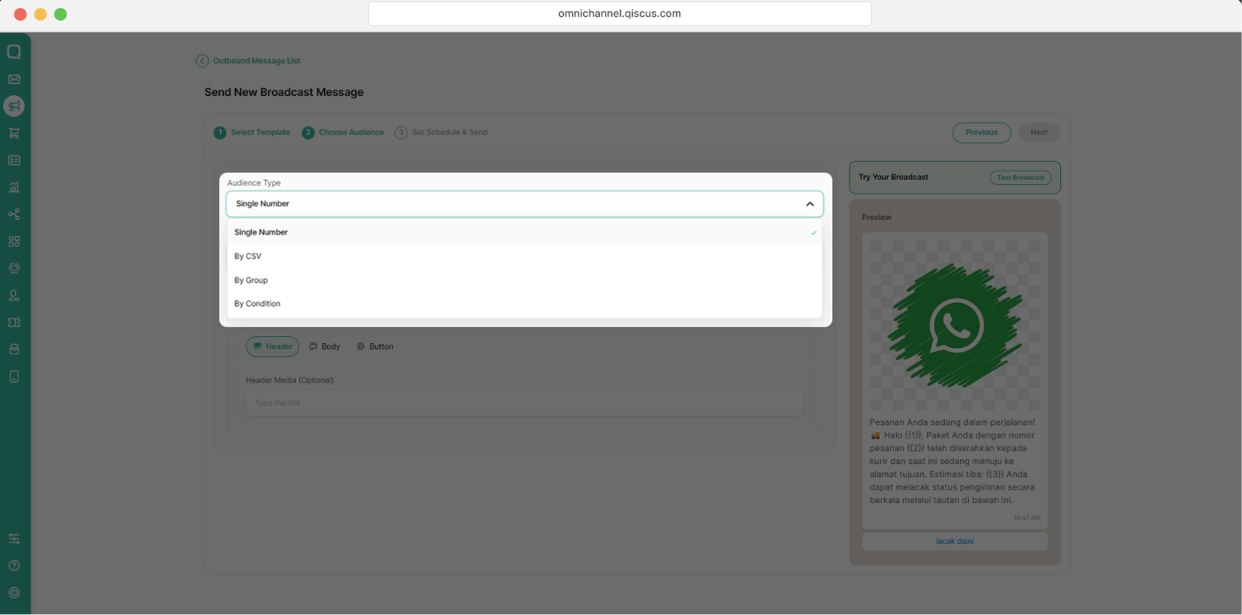
In this step, select the target audience for your broadcast message. The Audience Type determines how recipients are selected for the broadcast. Choose the option that best matches your broadcasting needs. The audience configuration will adjust based on the selected audience type. To learn more about each method and its setup process, refer to the How To Send WhatsApp Broadcast section.
Set Schedule and Send
This is the final stage of the broadcast creation process. You can choose to send the broadcast immediately or schedule it for a specific date and time, depending on your communication needs.
Broadcast Dashboard View
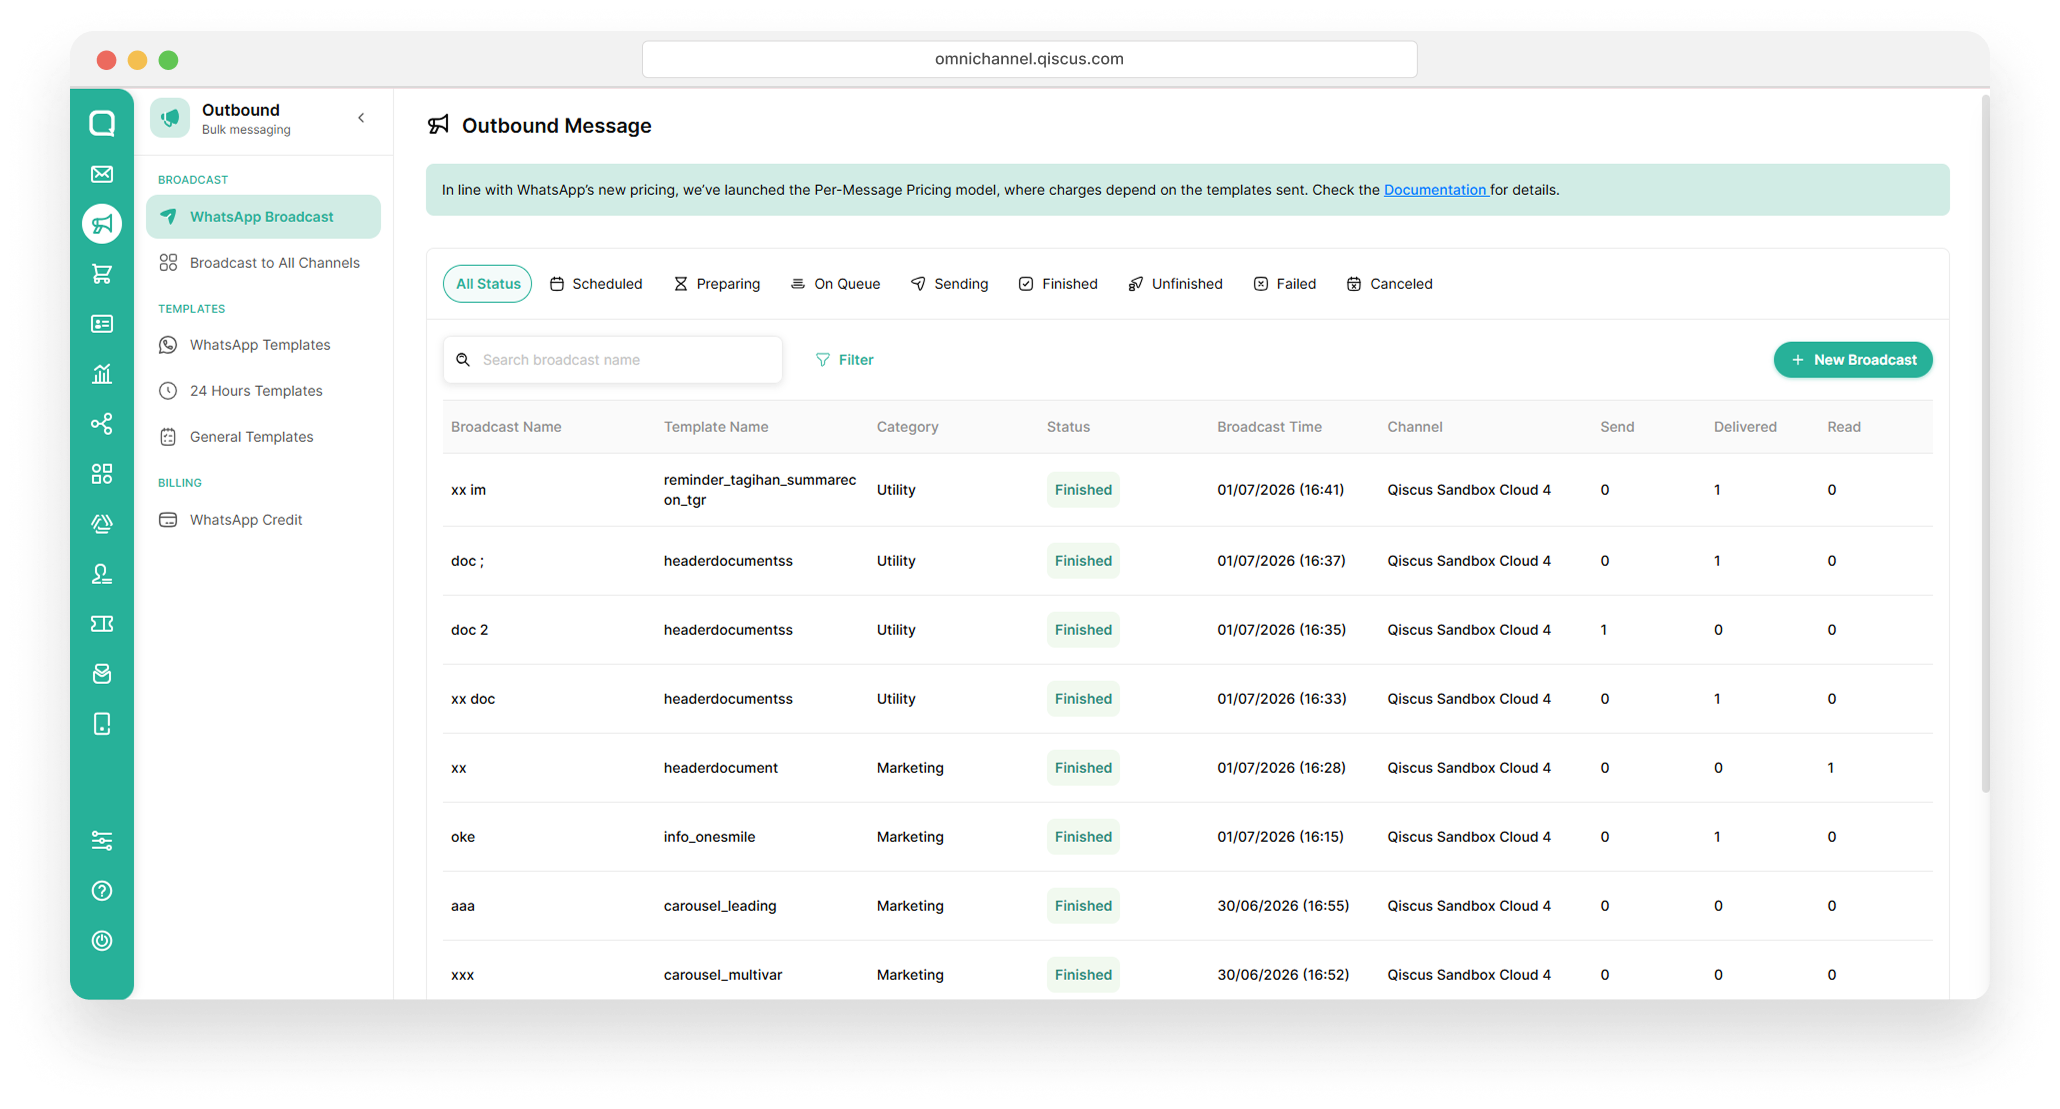
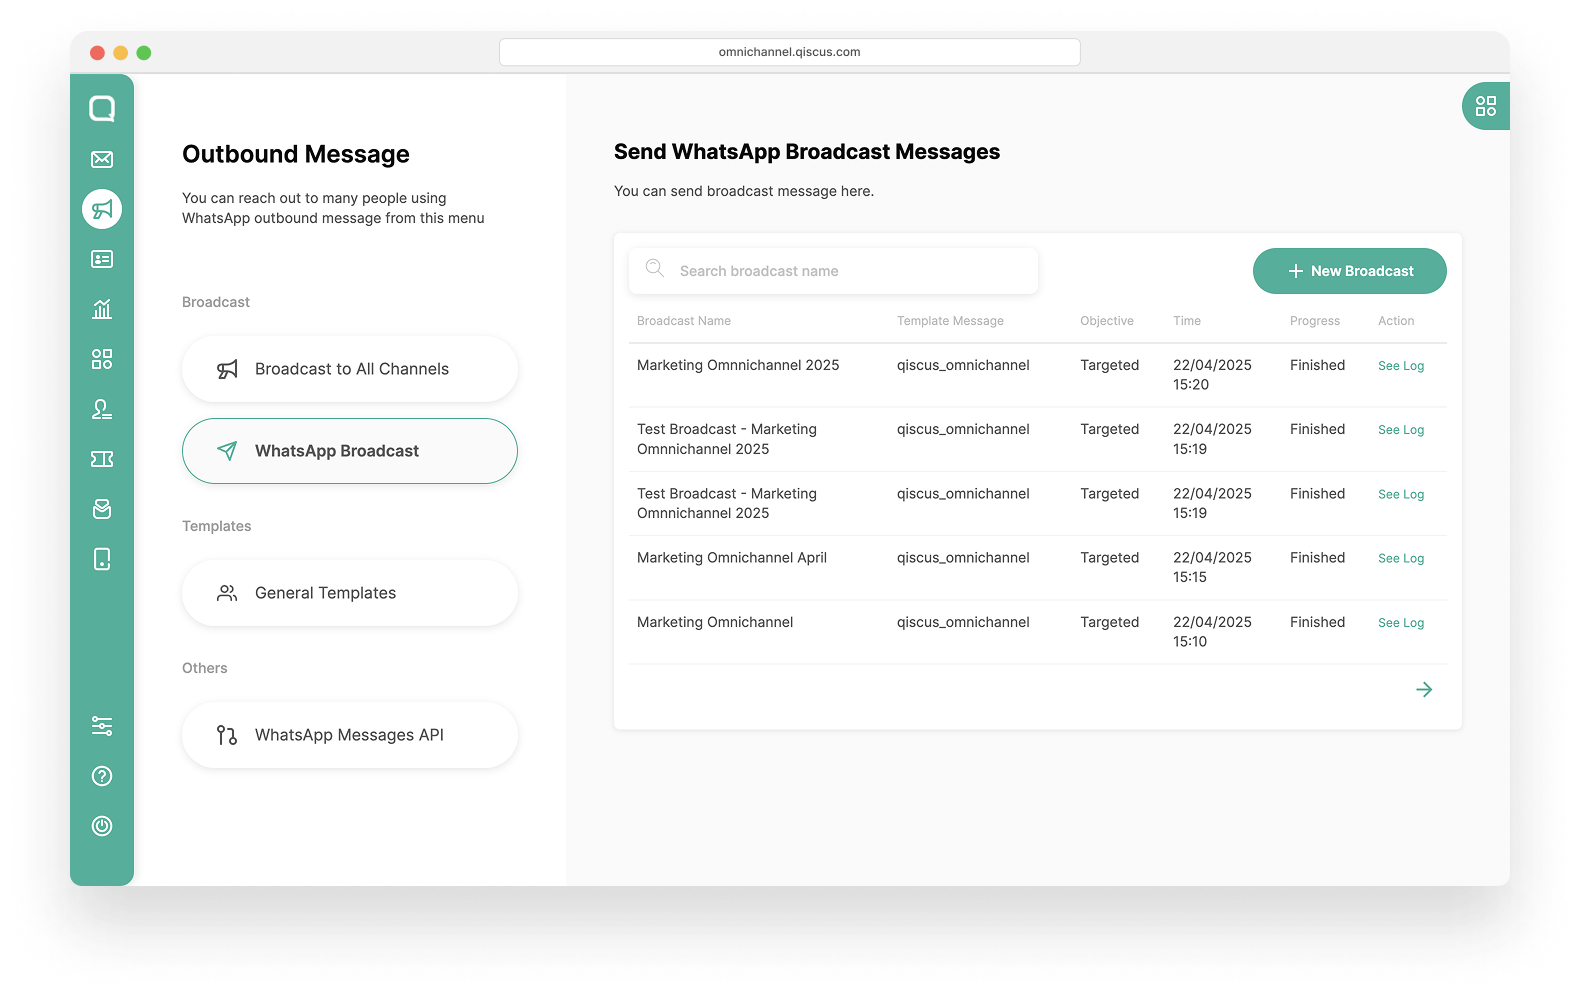
To improve your broadcasting experience, we have updated several areas of the Broadcast Message feature. The enhancements cover the broadcast creation and delivery flow, delivery status tracking, filtering capabilities broadcast details, and dashboard log information.
Explore the updates below to see what's new.
Broadcast Search & Filter
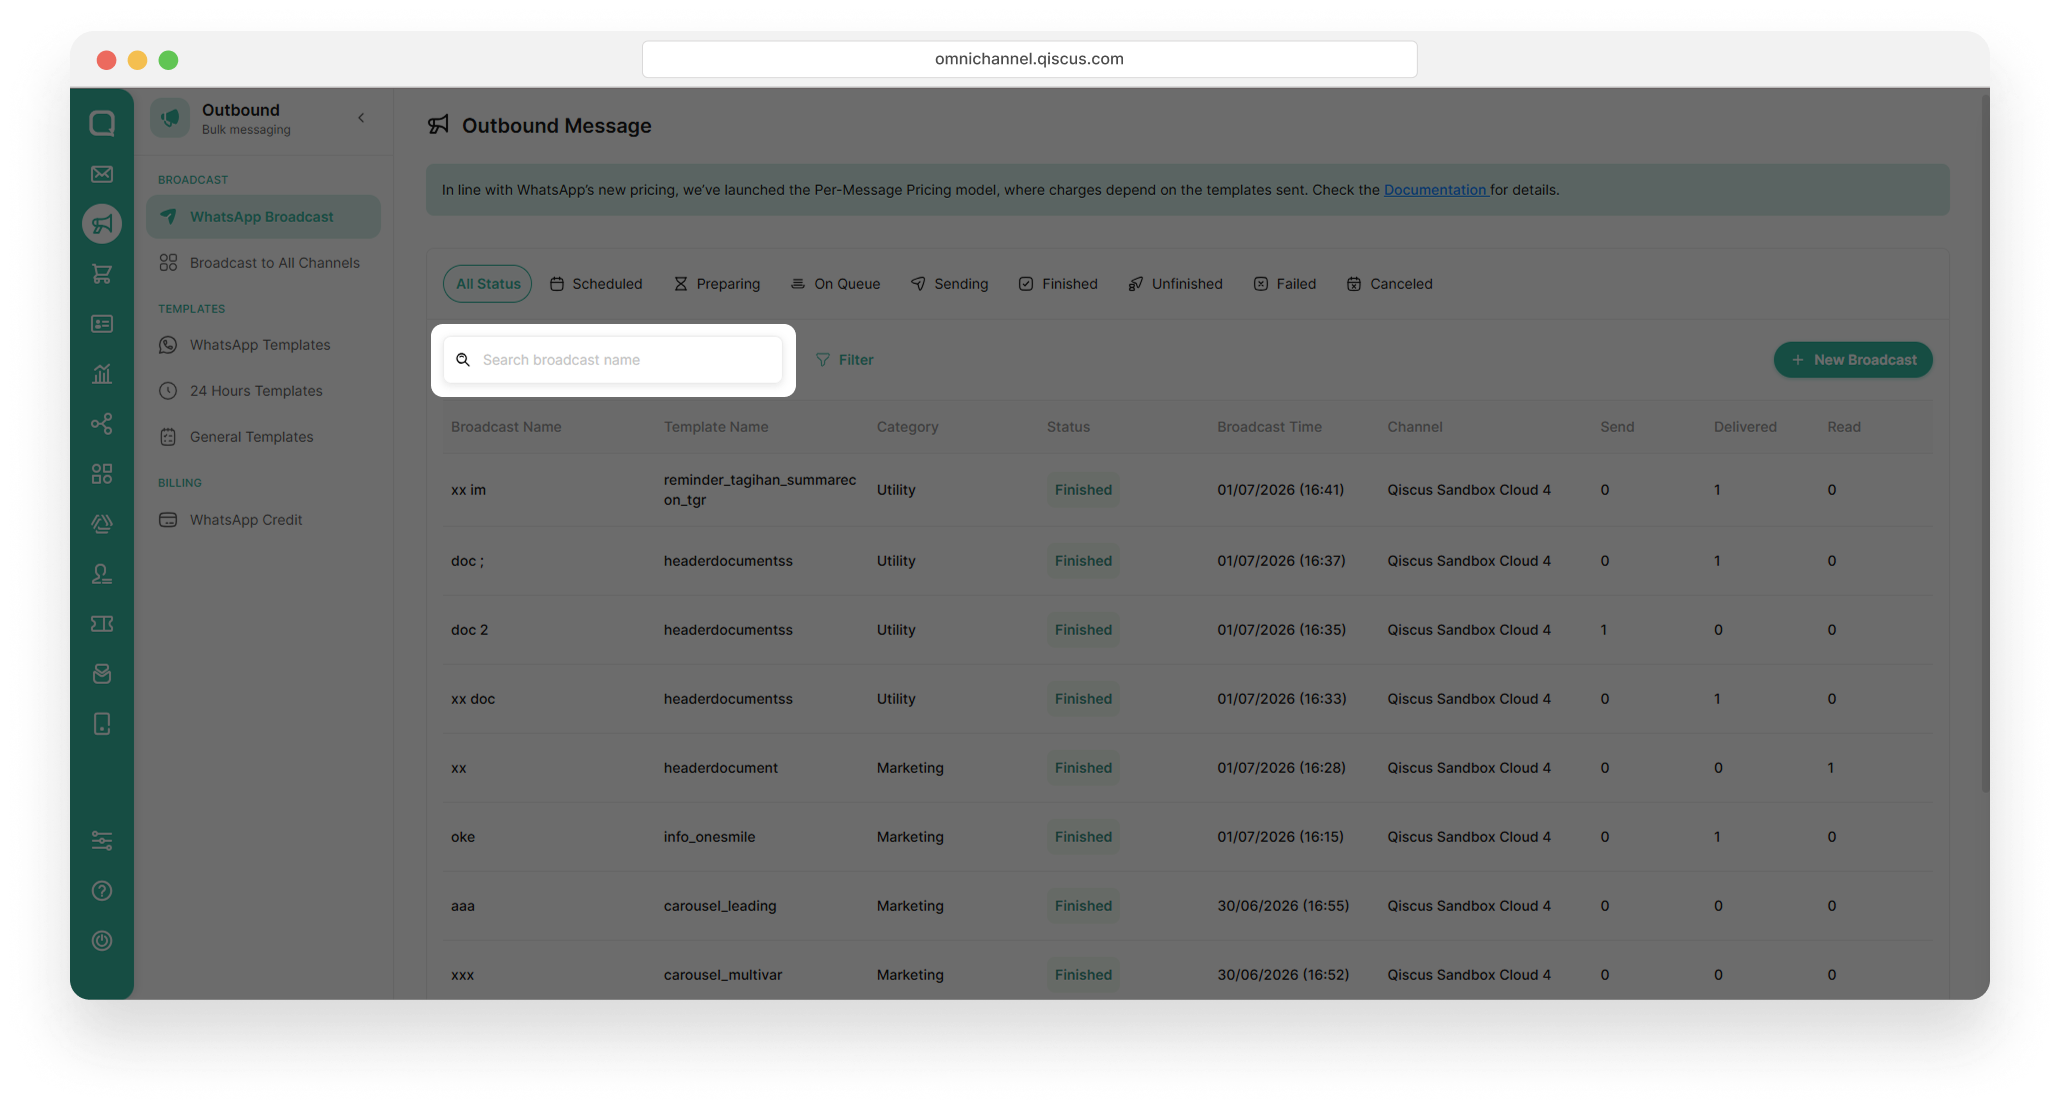
On the Dashboard page, two features are available to help you find specific broadcasts more easily: Search and Filter. Use these features to quickly locate broadcast records and narrow down results based on your selected criteria.
You can use the Search feature independently or combine it with the Filter feature to find specific broadcasts more efficiently and accurately.
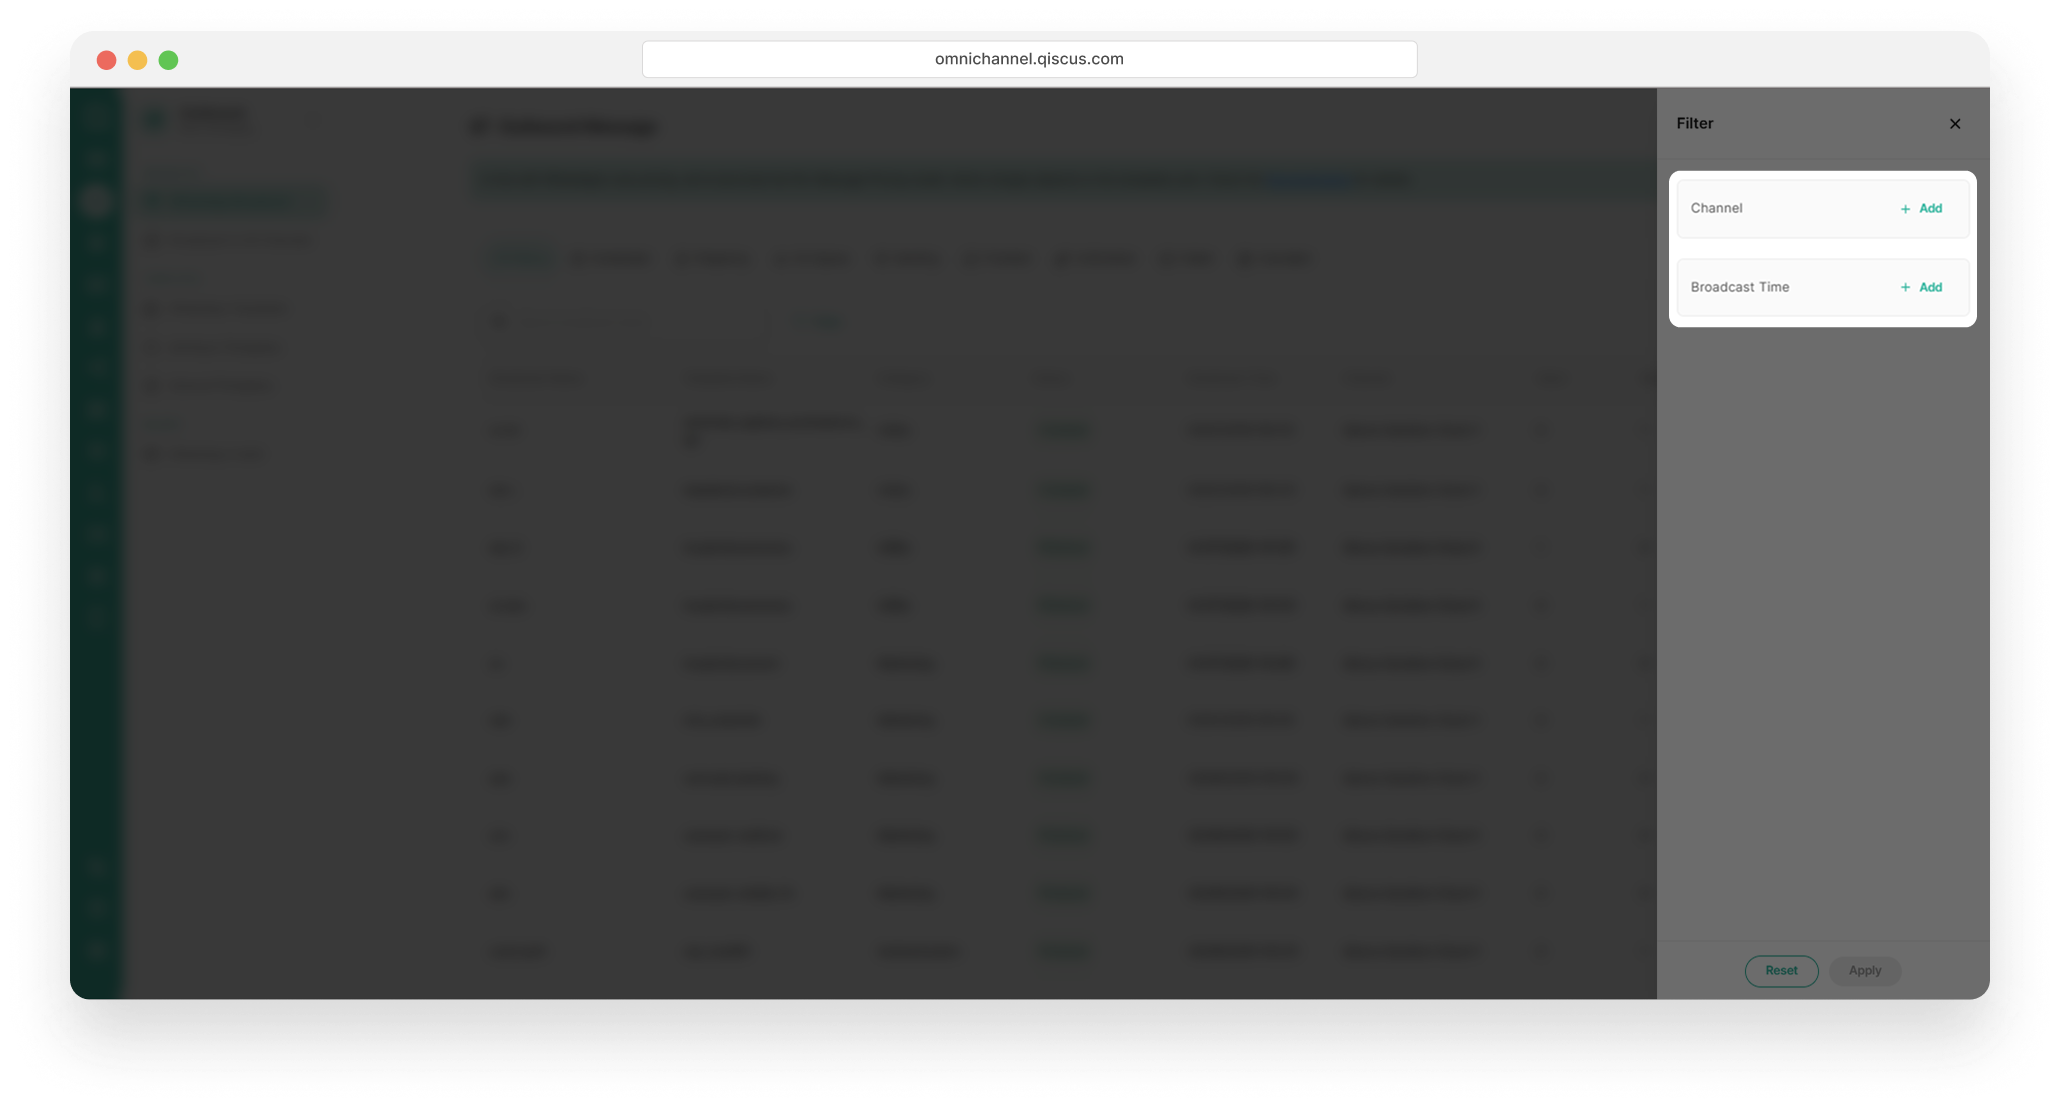
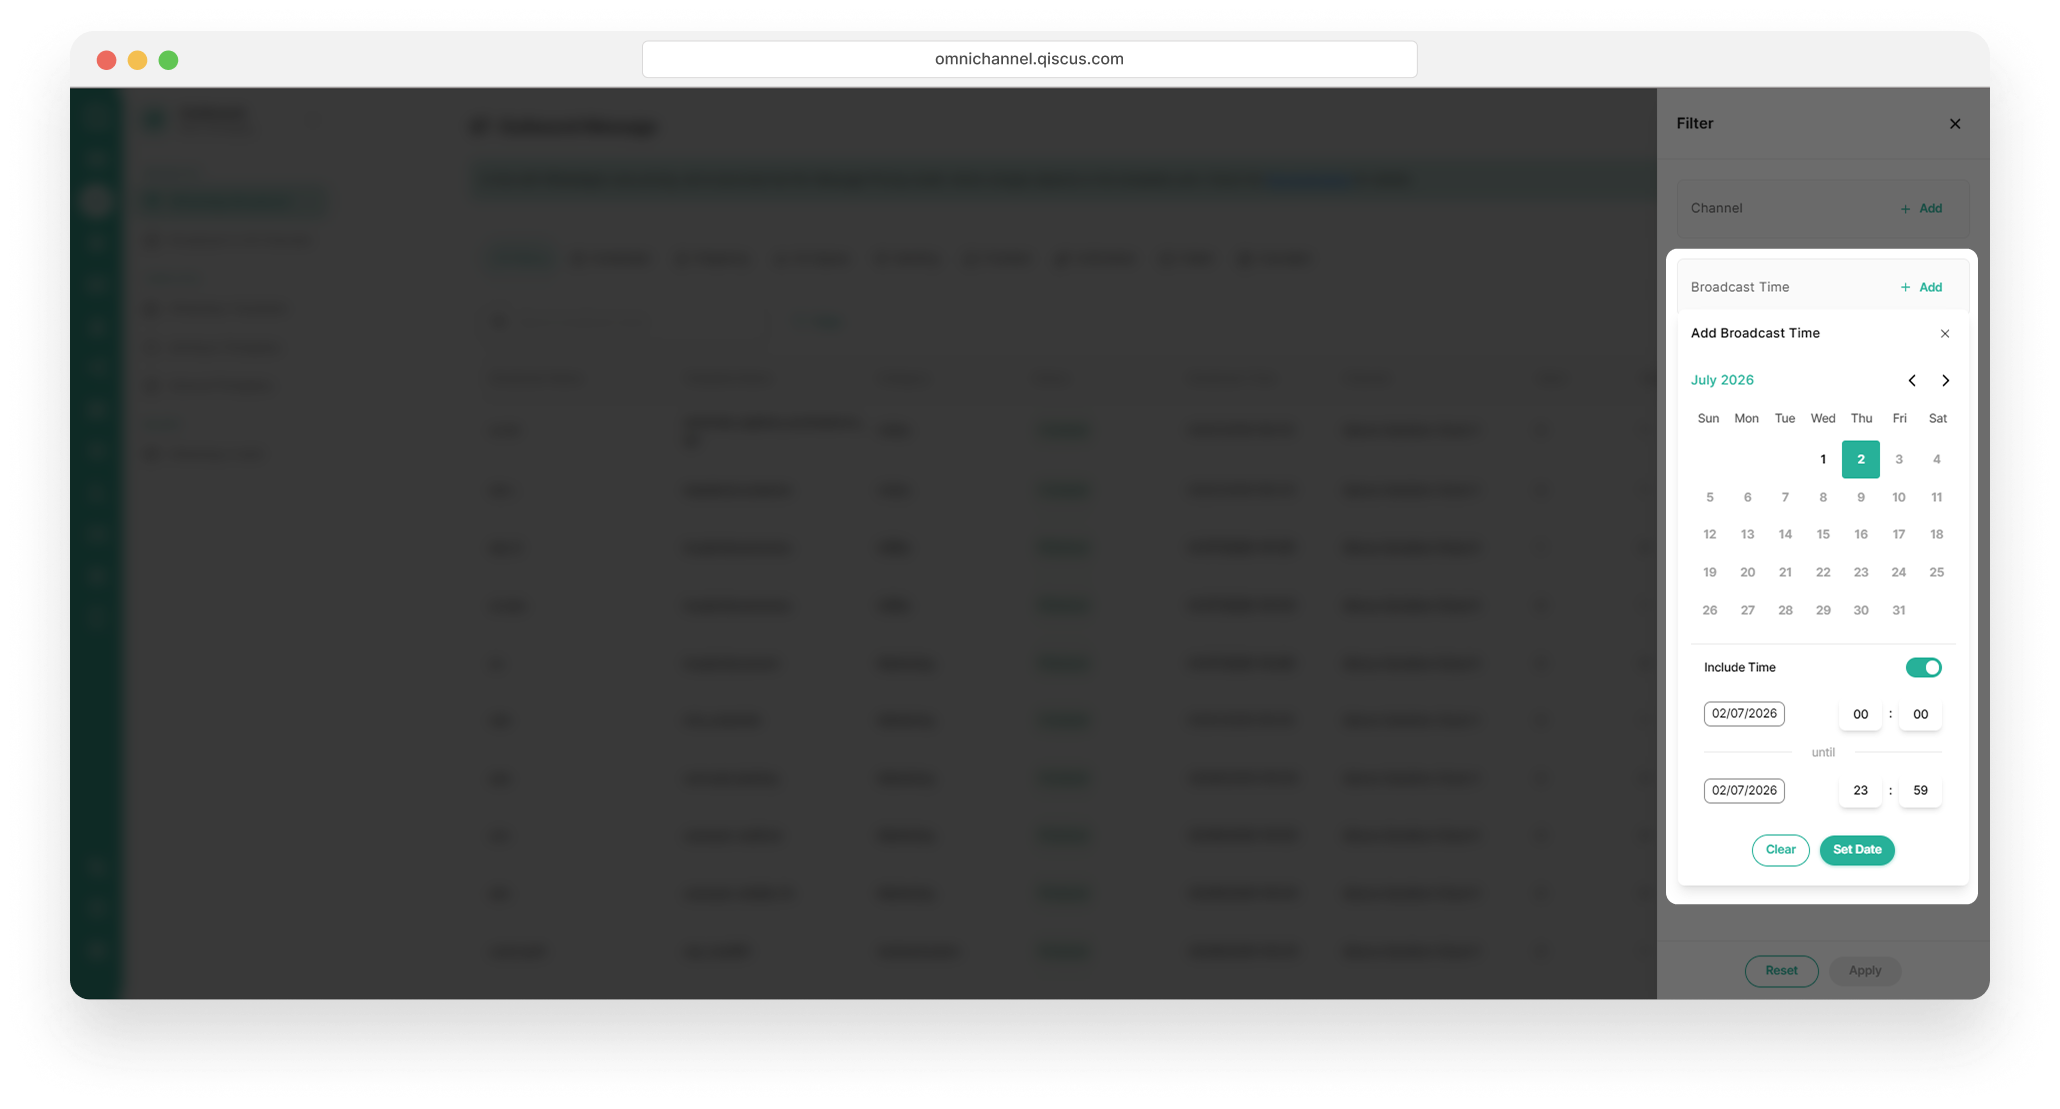
The Filter feature allows you to refine the broadcast list using Channel and Broadcast Time. This helps you quickly locate and review specific broadcast records without searching through the entire dashboard.
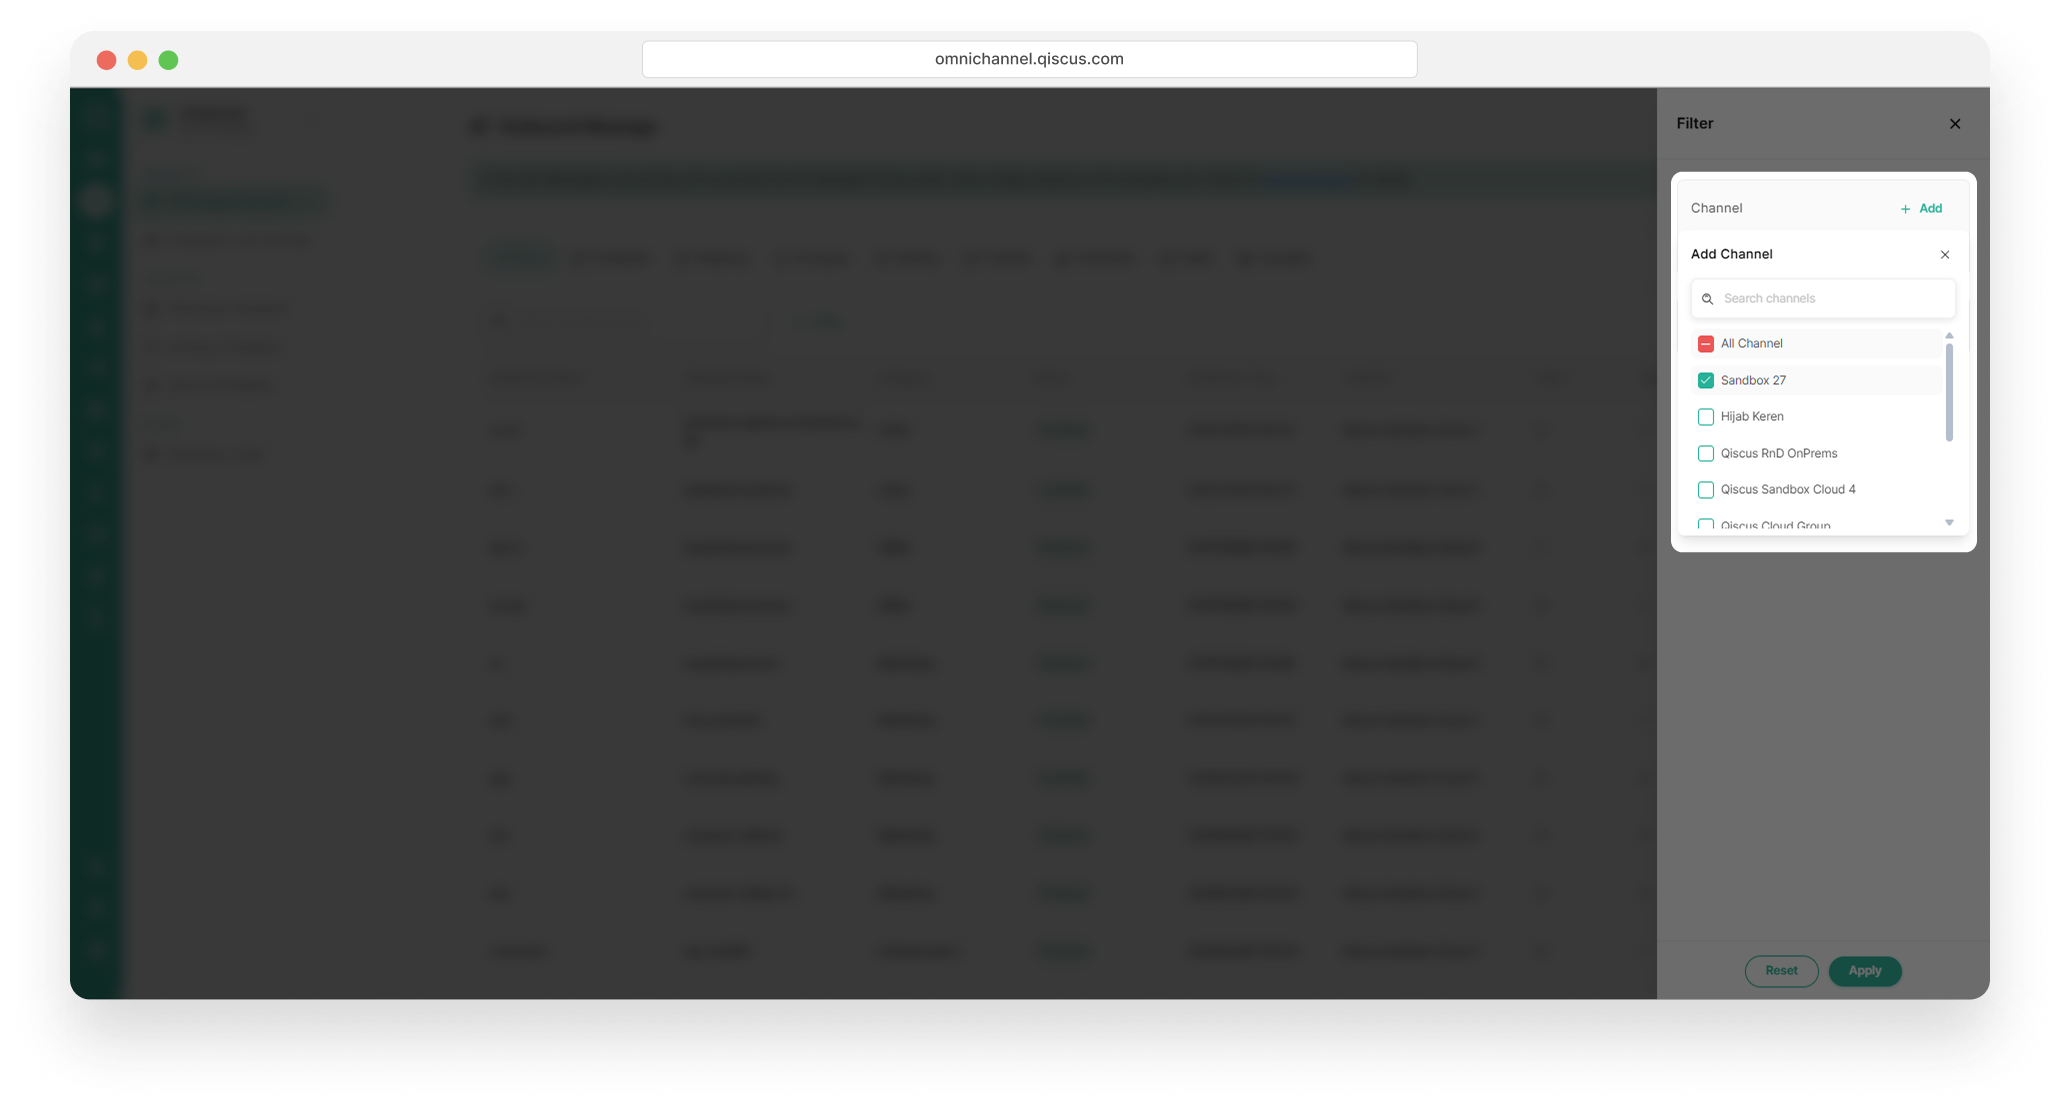
Use the Channel filter to search your broadcast from a specific communication channel. Once a channel is selected, the system will display only customers associated with that channel.
The Broadcast Time filter helps you find broadcasts within a selected date and time range. The search period is limited to the last 3 months. Only broadcasts that match the specified timeframe will be displayed.
Status
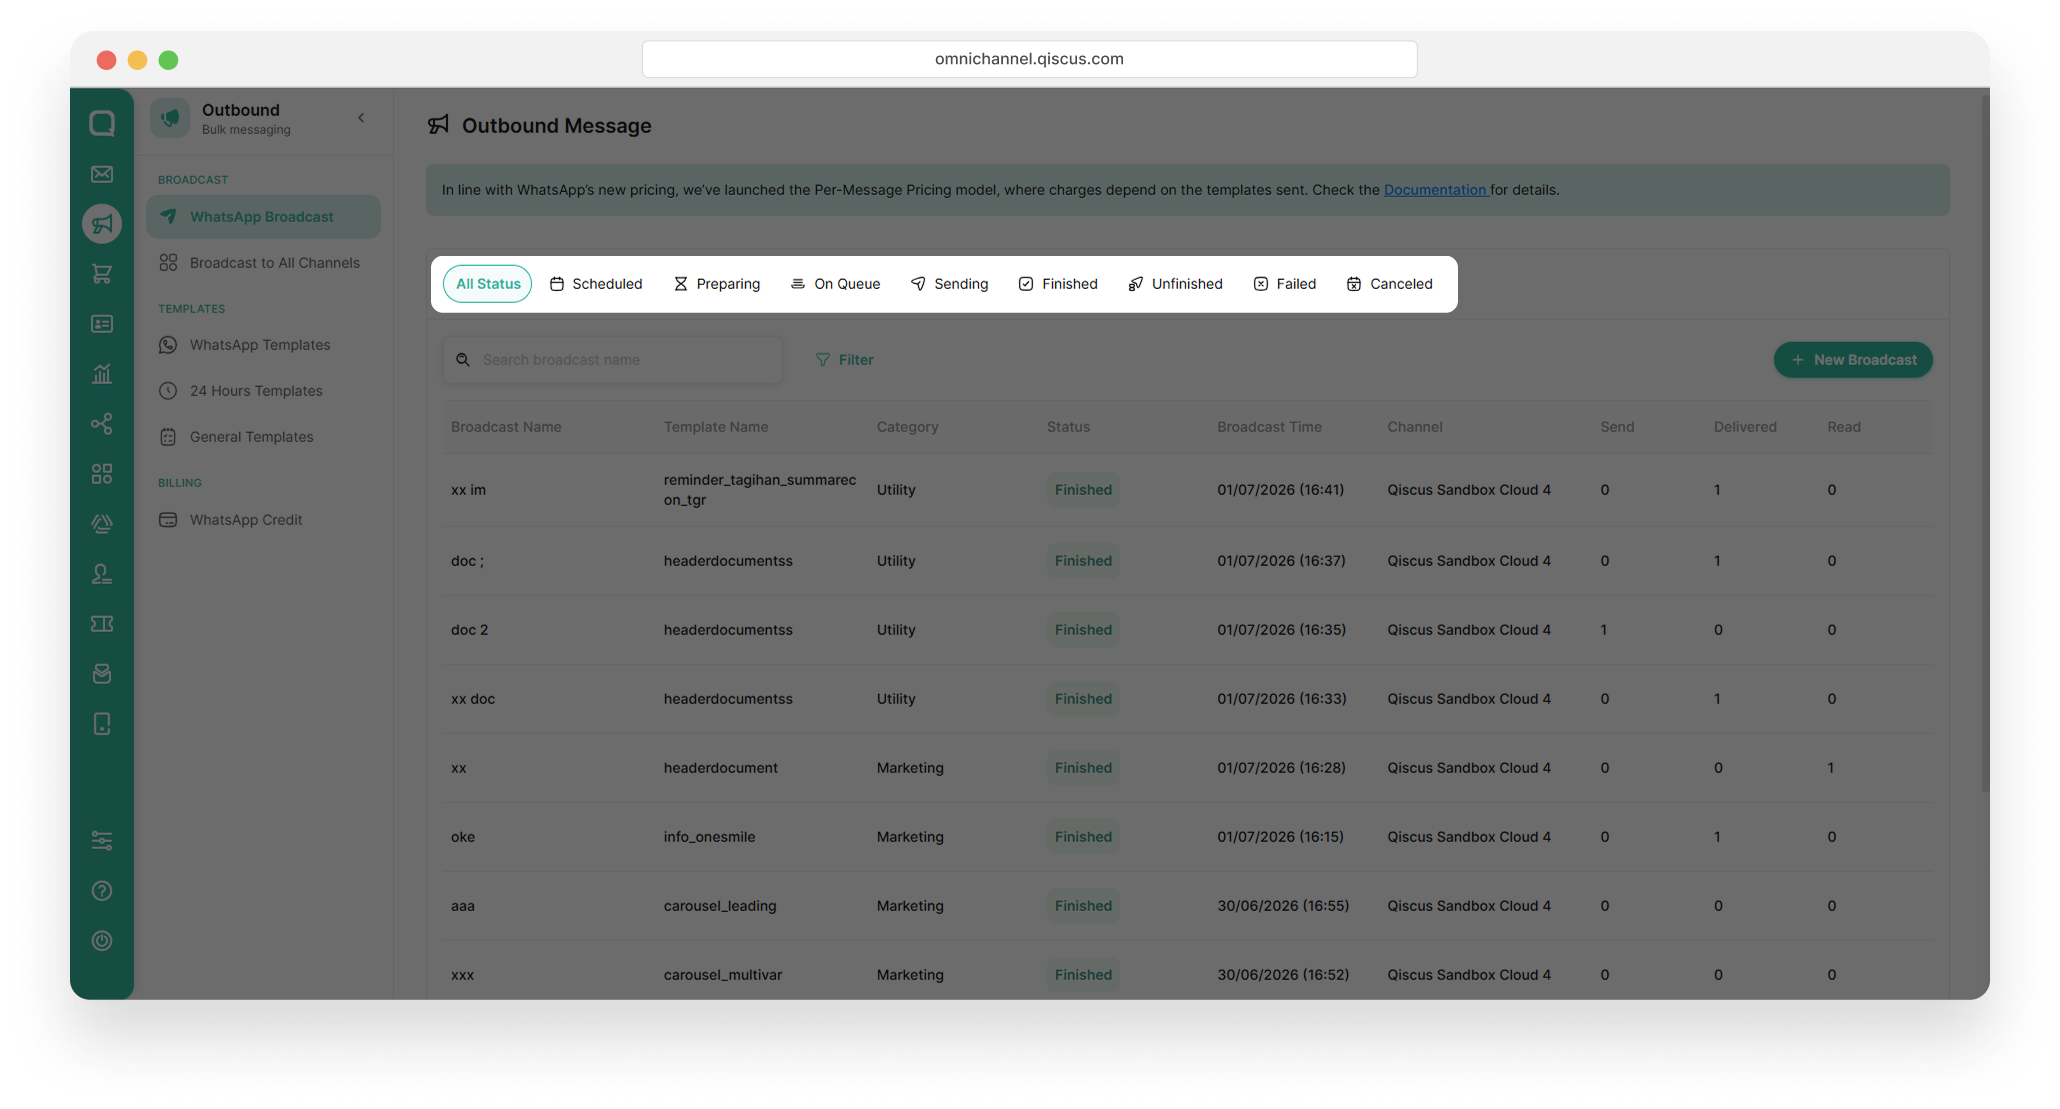
To help you monitor broadcast performance more efficiently, statuses are now categorized. You can quickly track the progress of your broadcast messages by viewing each status category.
The following statuses help you track the progress of your broadcast messages:
Scheduled – The broadcast is scheduled to be sent at a specific date and time.
Preparing – The system is preparing the broadcast recipient data before delivery. This status commonly appears when recipients are uploaded using a CSV file.
On Queue – The broadcast is waiting in the delivery queue. This may occur when the broadcast is sent to a large number of recipients, such as through a CSV file or a recipient group.
Sending – The broadcast is currently being processed and delivered to recipients.
Unfinished – The broadcast process was interrupted or only partially completed. As a result, the broadcast may have been sent to some recipients, while others did not receive the message.
Finished – The broadcast has been successfully processed and delivered to all intended recipients.
Failed – The broadcast could not be delivered to one or more recipients.
Canceled – This status indicates that a scheduled broadcast was canceled before its scheduled delivery time and will not be sent to recipients.
Detail Broadcast
The Broadcast Detail page consists of three information sections and a Preview section.
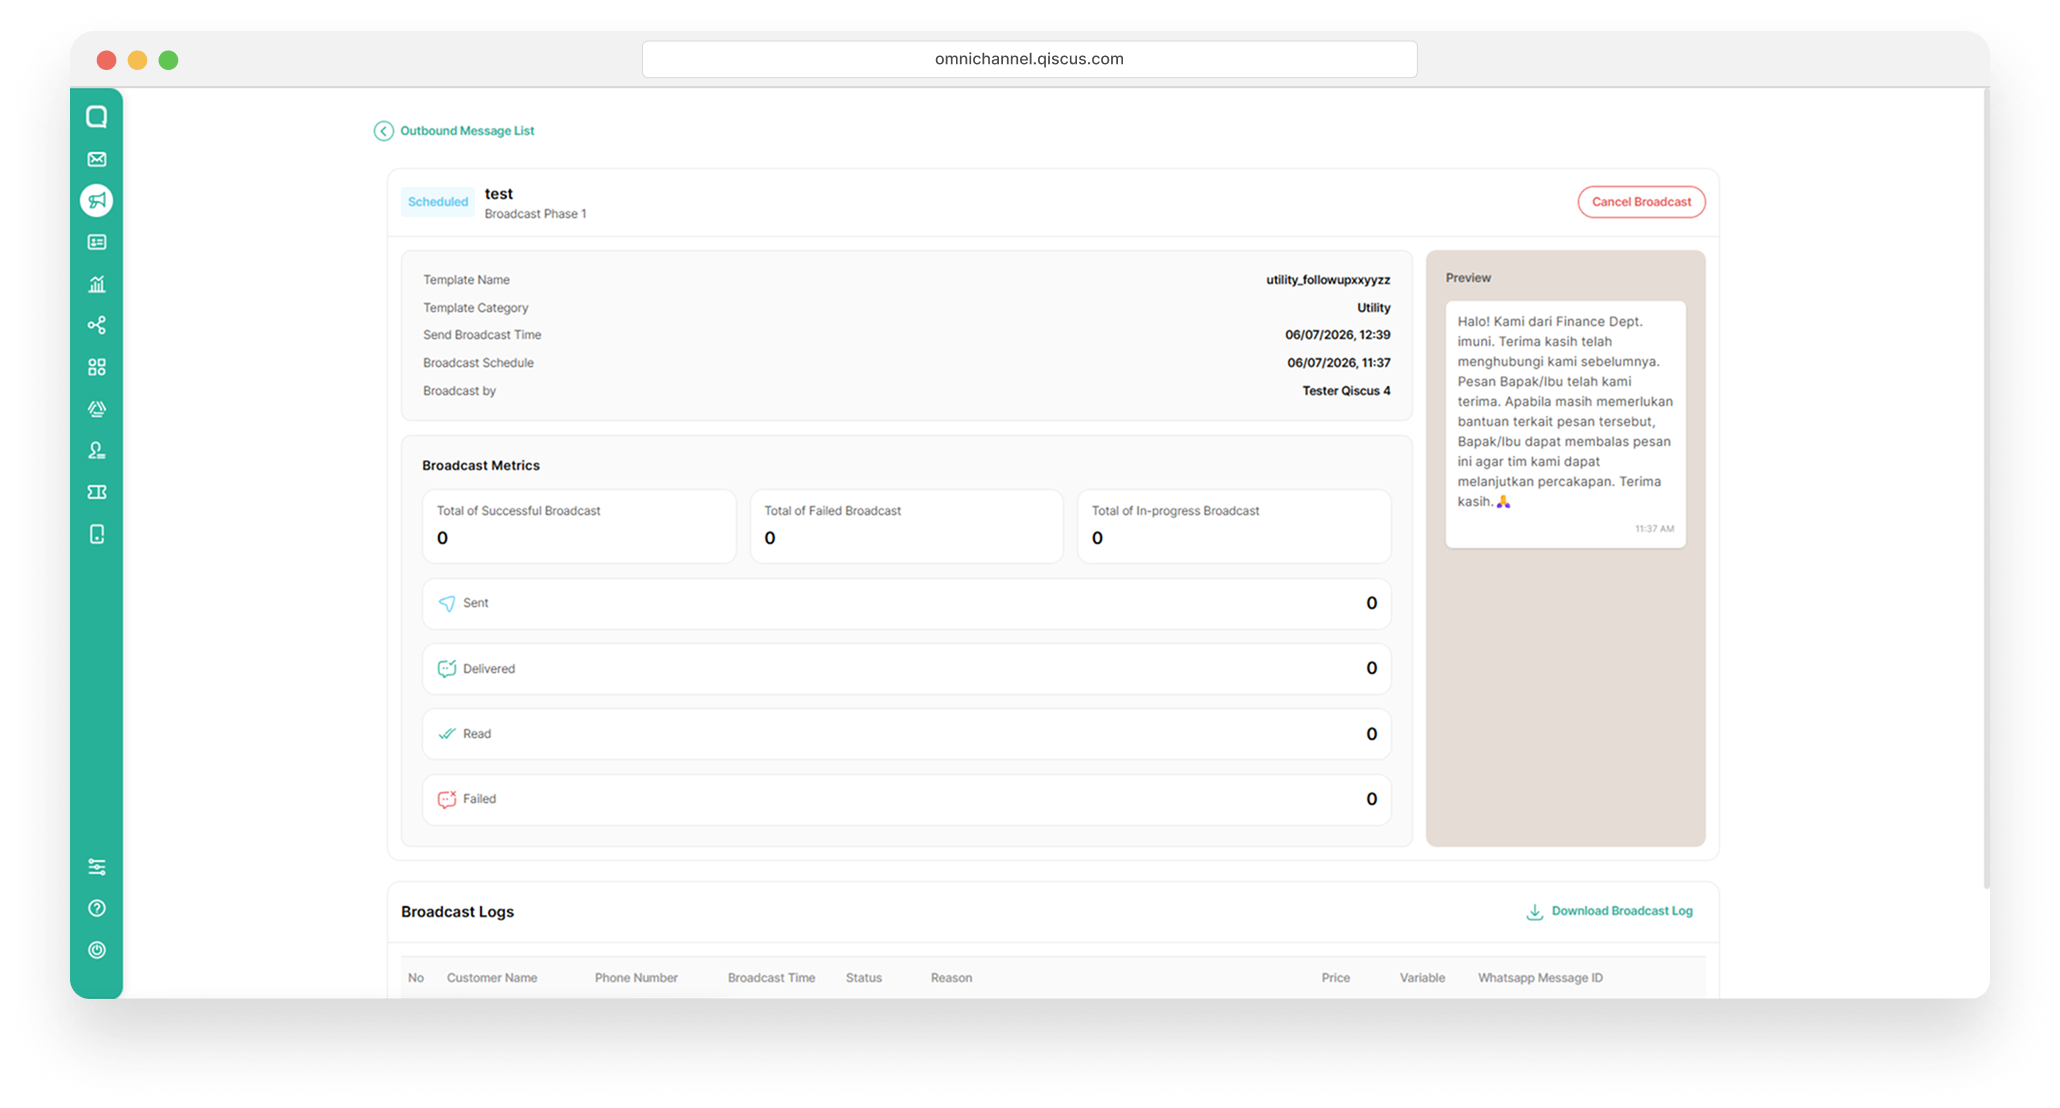
Title and Label
This section contains the following information:
Broadcast Title – Displays the name of the broadcast for easy identification.
Labels – Displays any labels assigned to the broadcast to help organize and categorize your broadcasts.
Cancel Broadcast (Scheduled broadcasts only) – Stops a scheduled broadcast before it is sent. This option is available only for broadcasts that are scheduled for a future date and time.
Header Section
This section provides an overview of the broadcast configuration, including:
Template Name – The name of the template used for the broadcast message.
Template Category – The category assigned to the selected template, such as Utility, Authentication, Marketing and Marketing Opt-Out .
Broadcast Send Time – The date and time when the broadcast was sent or is scheduled to be sent.
Broadcast Schedule – Indicates whether the broadcast is sent immediately or scheduled for a specific date and time.
Broadcast By – The user who created or initiated the broadcast.
The Cancel button is only available for scheduled broadcasts. Use this option to cancel the broadcast before the scheduled send time. Once canceled, the broadcast status will change to Cancel and the message will not be sent to recipients.
Preview
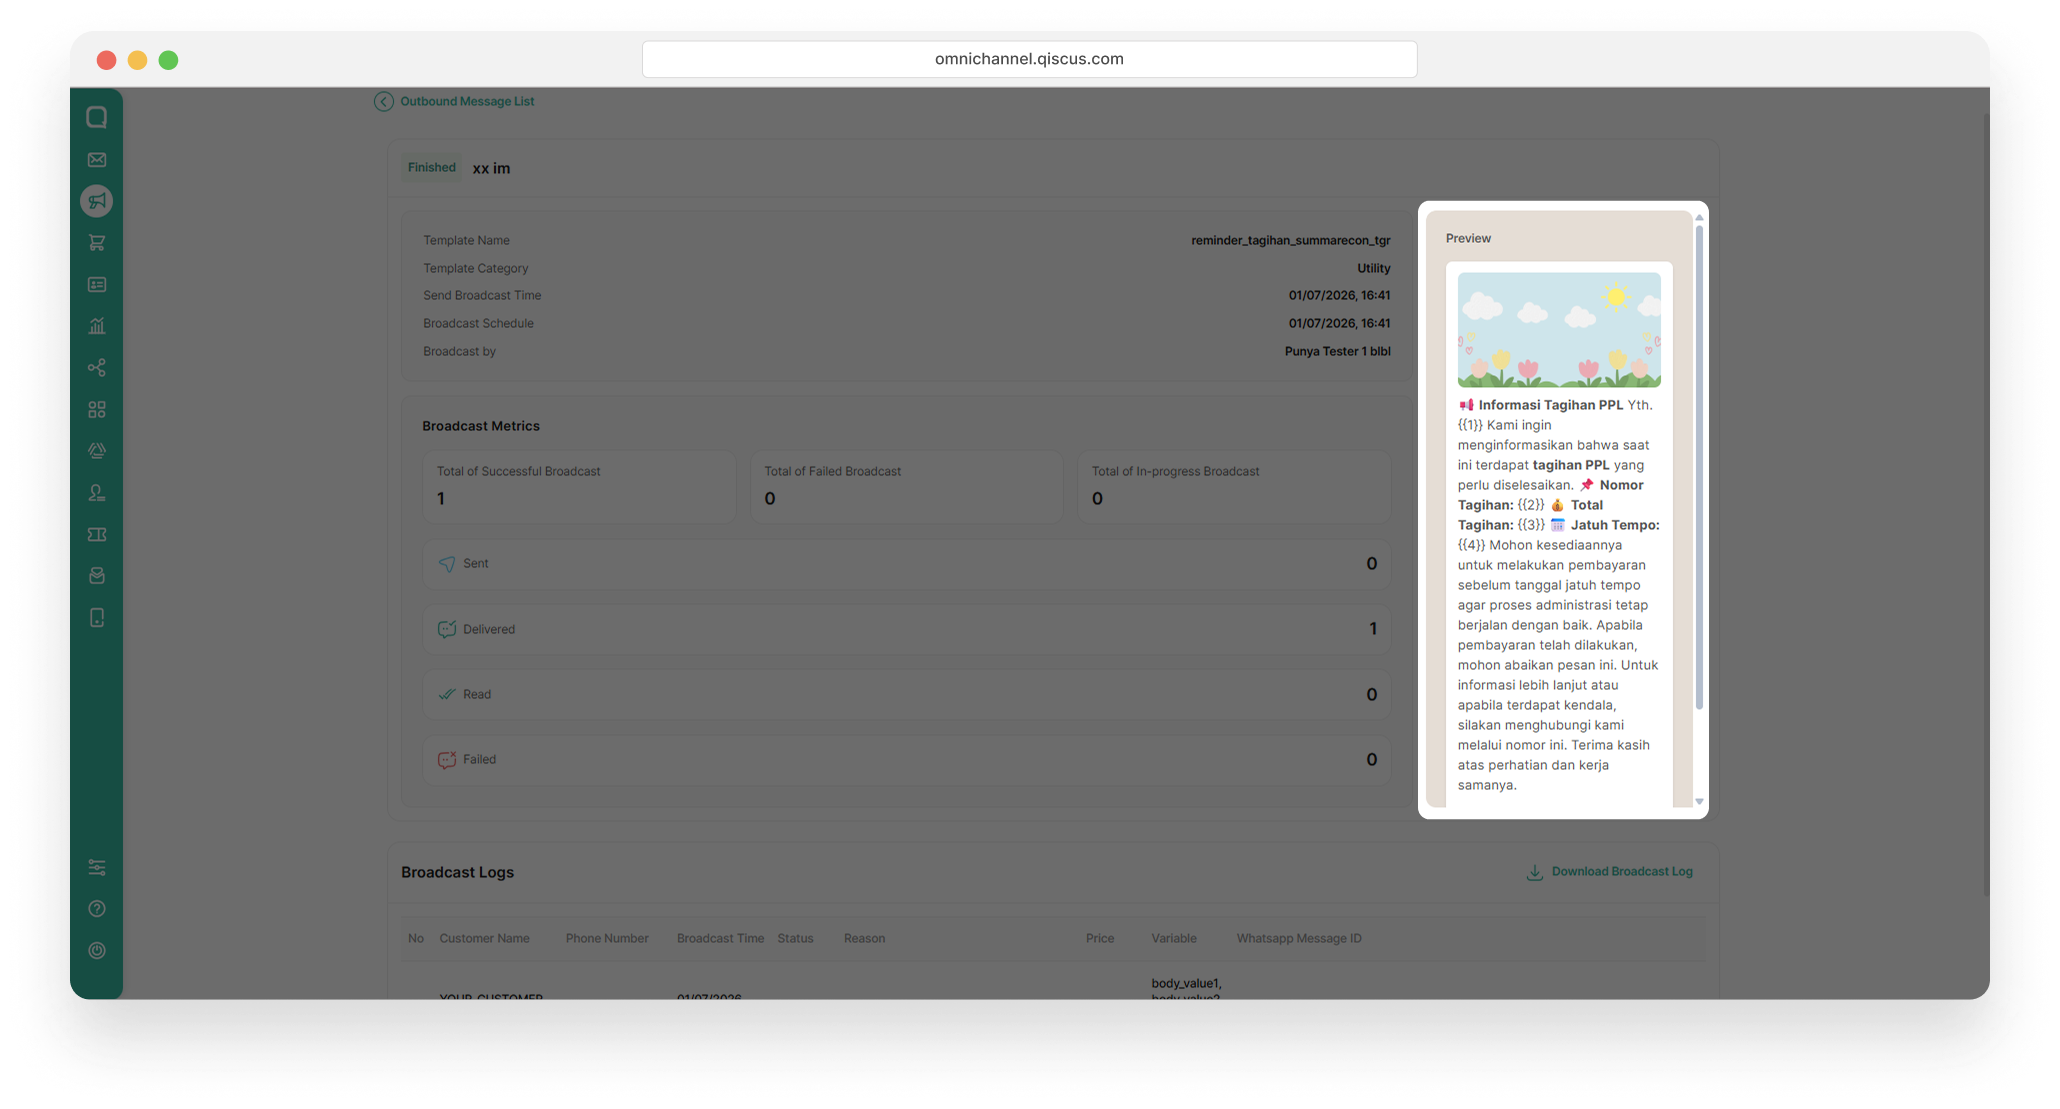
Preview Section displays a preview of the broadcast message as it will appear to recipients. This section allows you to review the message content, media, buttons, and variable values used in the selected template before or after the broadcast is sent.
Broadcast Metrics Section
Broadcast Metrics Section displays quantitative data and delivery status information for the broadcast message. This section helps you monitor the broadcast performance and delivery progress.
The following information is available:
Total Successful Broadcast – The total number of broadcast messages that were successfully sent.
Total Failed Broadcast – The total number of broadcast messages that could not be sent.
Total In-Progress Broadcast – The total number of broadcast messages that are still being processed or sent.
Sent – The number of messages successfully sent from Qiscus Omnichannel to WhatsApp (Meta).
Delivered – The number of messages that have been successfully received on recipients' devices.
Read – Delivered messages that have been read by recipients.
Failed – The number of messages that failed during the sending process.
Broadcast Log Section
Broadcast Log Section displays detailed information for each broadcast recipient. This section helps you track the delivery status and recipient-specific details of the broadcast.
The following information is available:
Customer Name – The name of the recipient.
Phone Number – The recipient's phone number.
Broadcast Time – The date and time the broadcast was sent to the recipient.
Status – The current delivery status of the broadcast message.
Reason – Additional information explaining the status, especially in cases where delivery failed.
Price – The credit or cost associated with sending the broadcast message.
Variable – The variable values used for the recipient in the message template.
WhatsApp Message ID – The unique WhatsApp identifier associated with the recipient.
If needed, you can download the broadcast log using the Download Broadcast Log feature for further review and reporting.
How to Send WhatsApp Broadcast
Step 1: Select Template
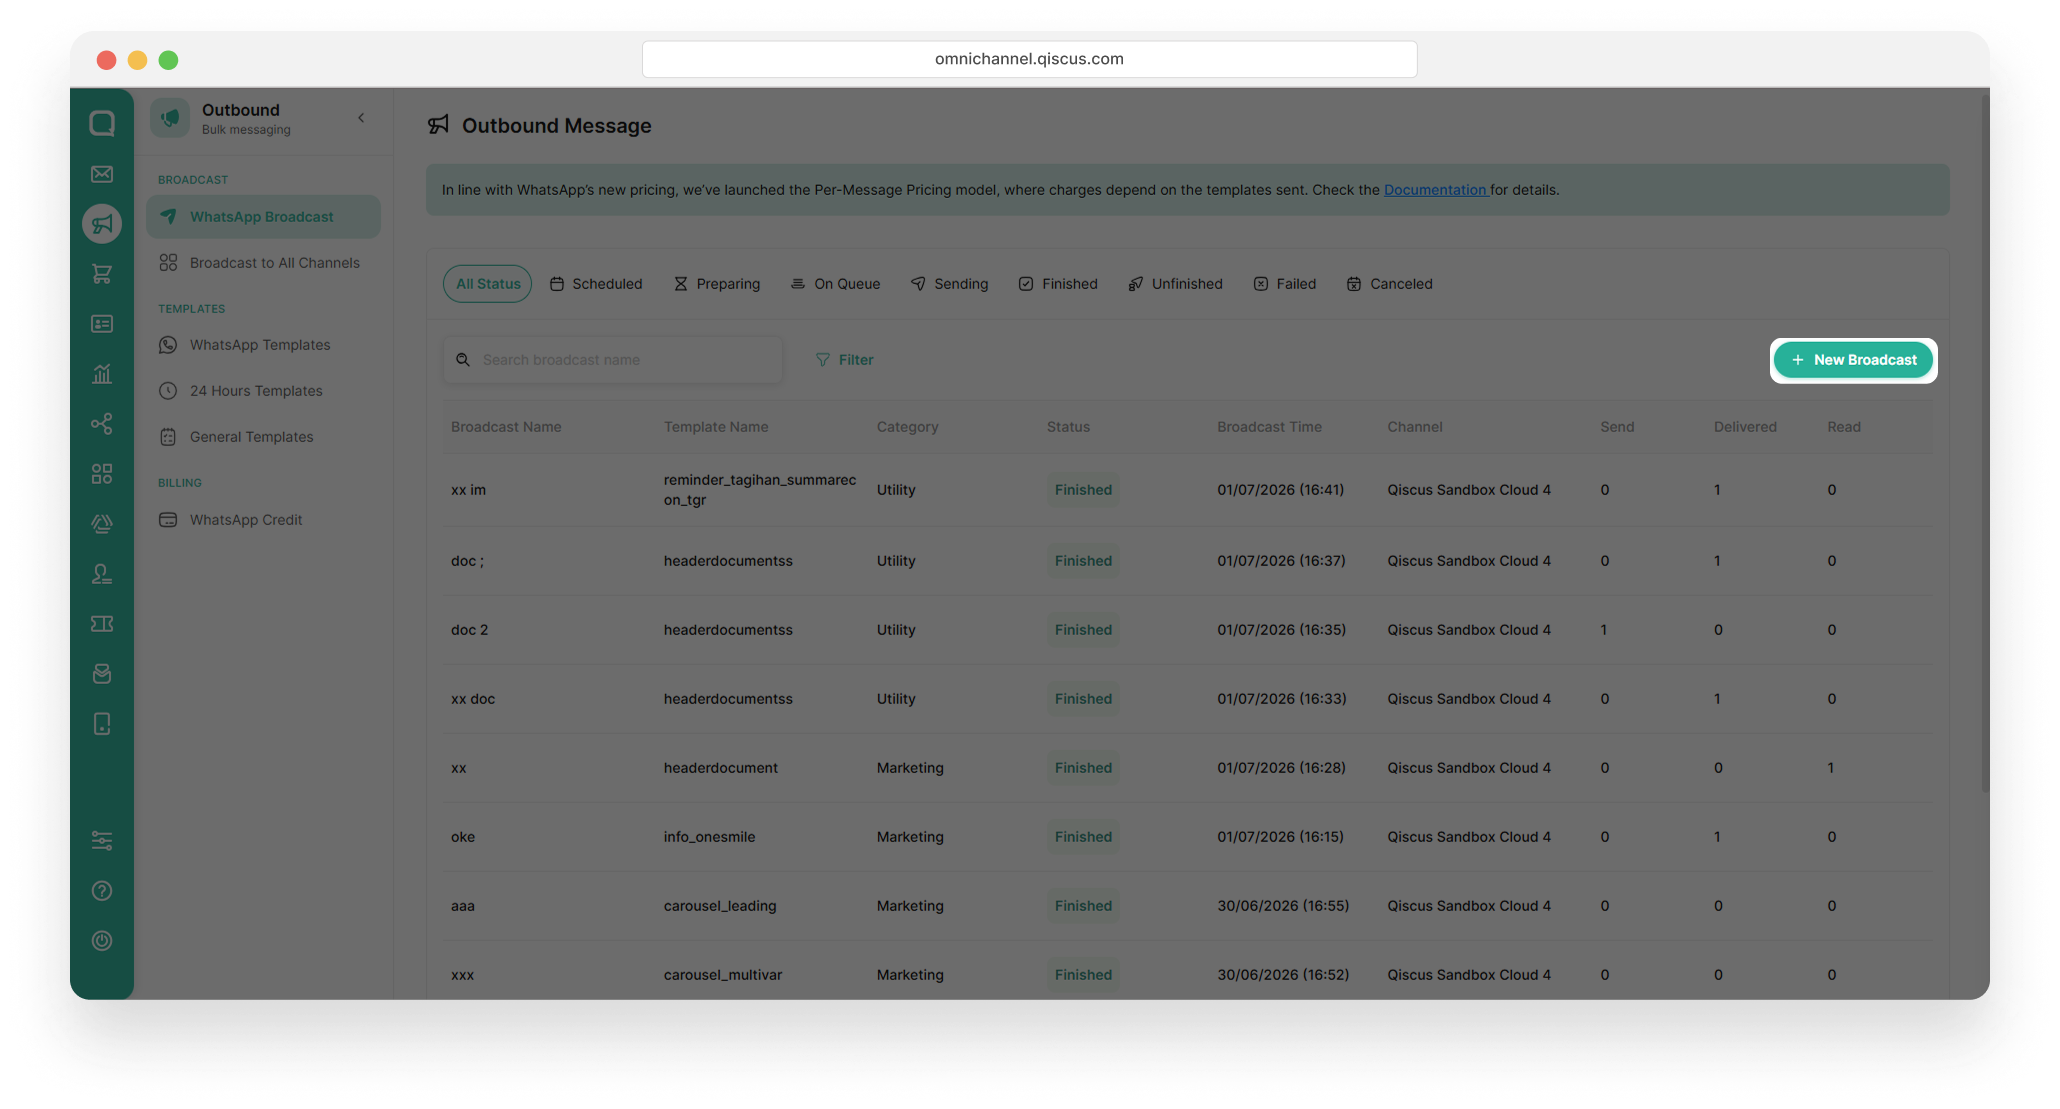
1. Click the New Broadcast button and ensure you have enough credit to send the message.
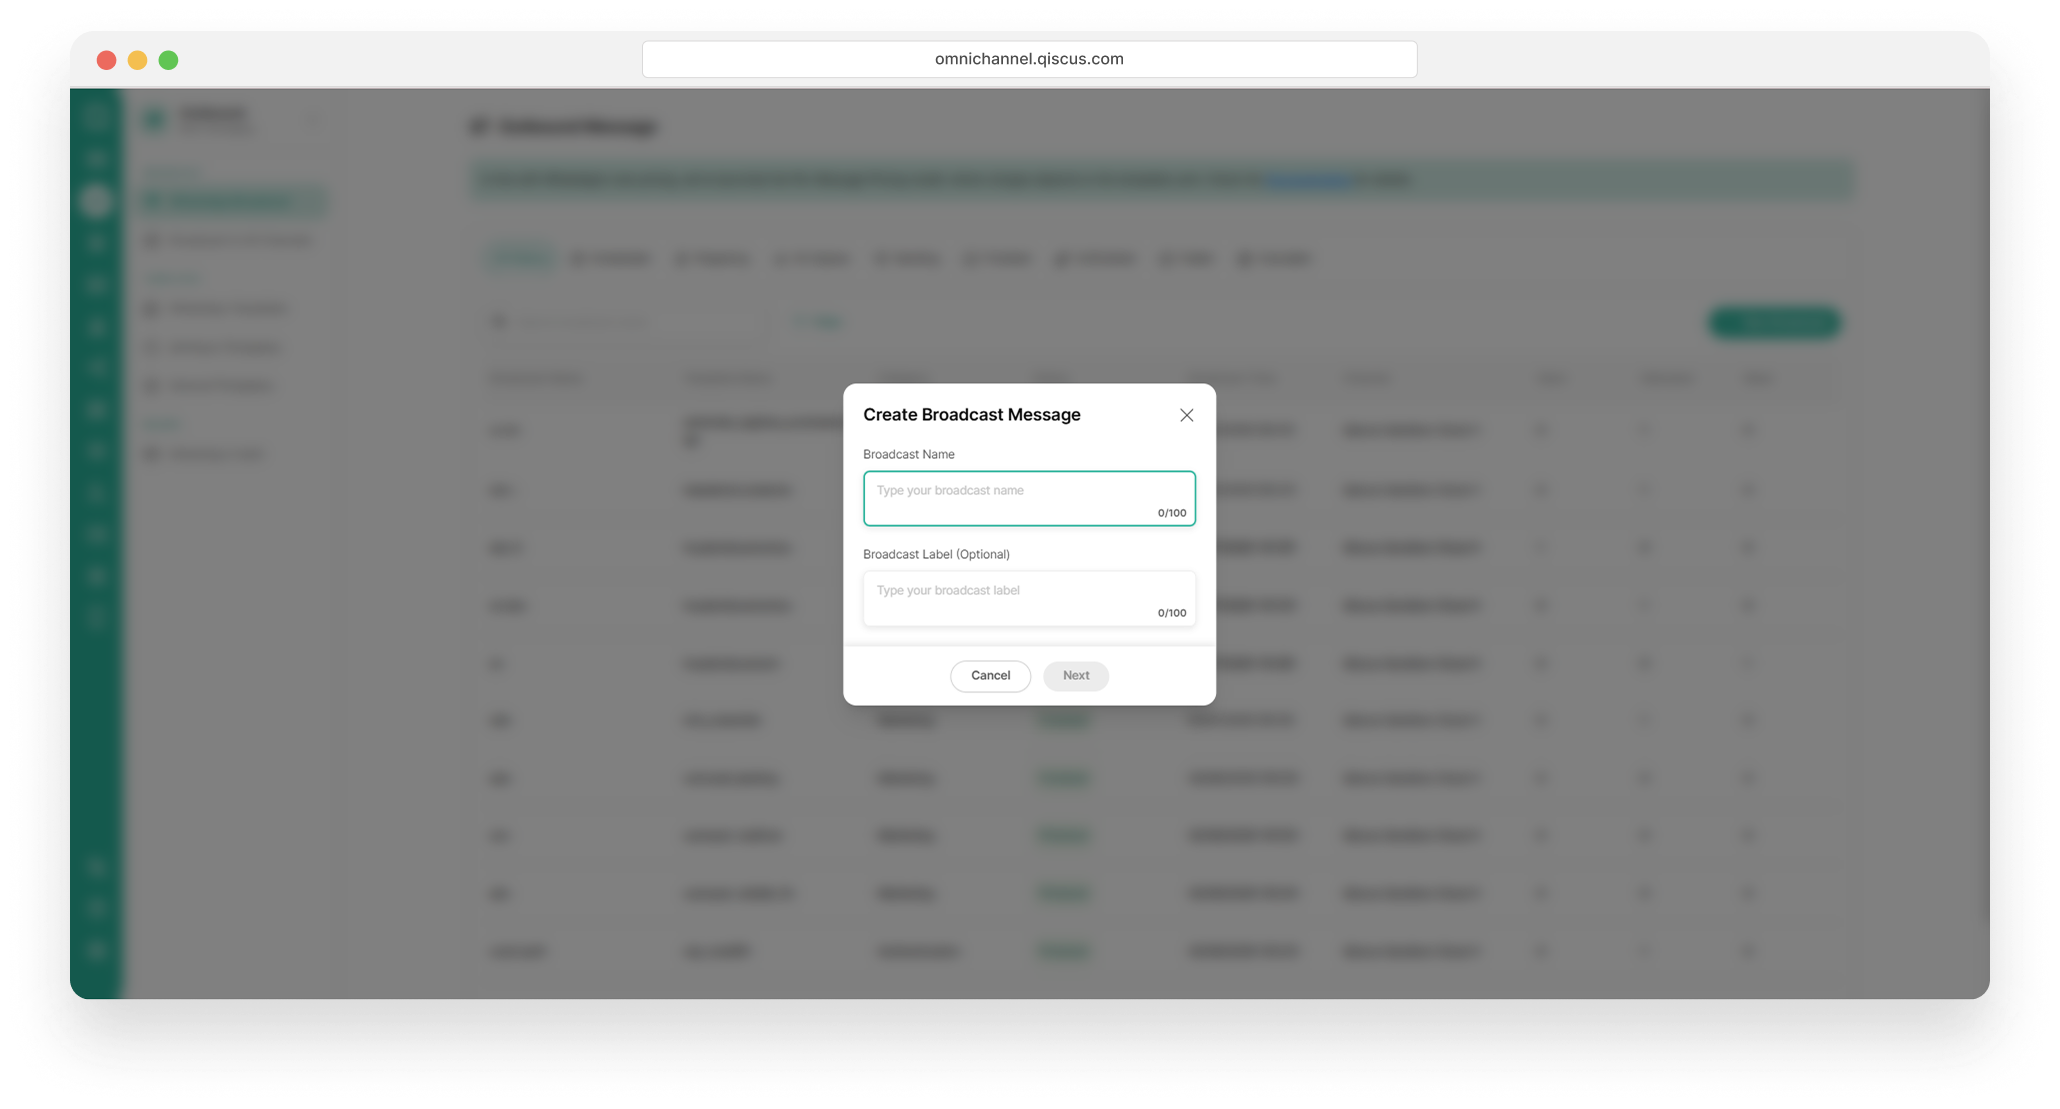
A pop-up window will appear. Enter the Broadcast Name and optionally add a Broadcast Label (optional).
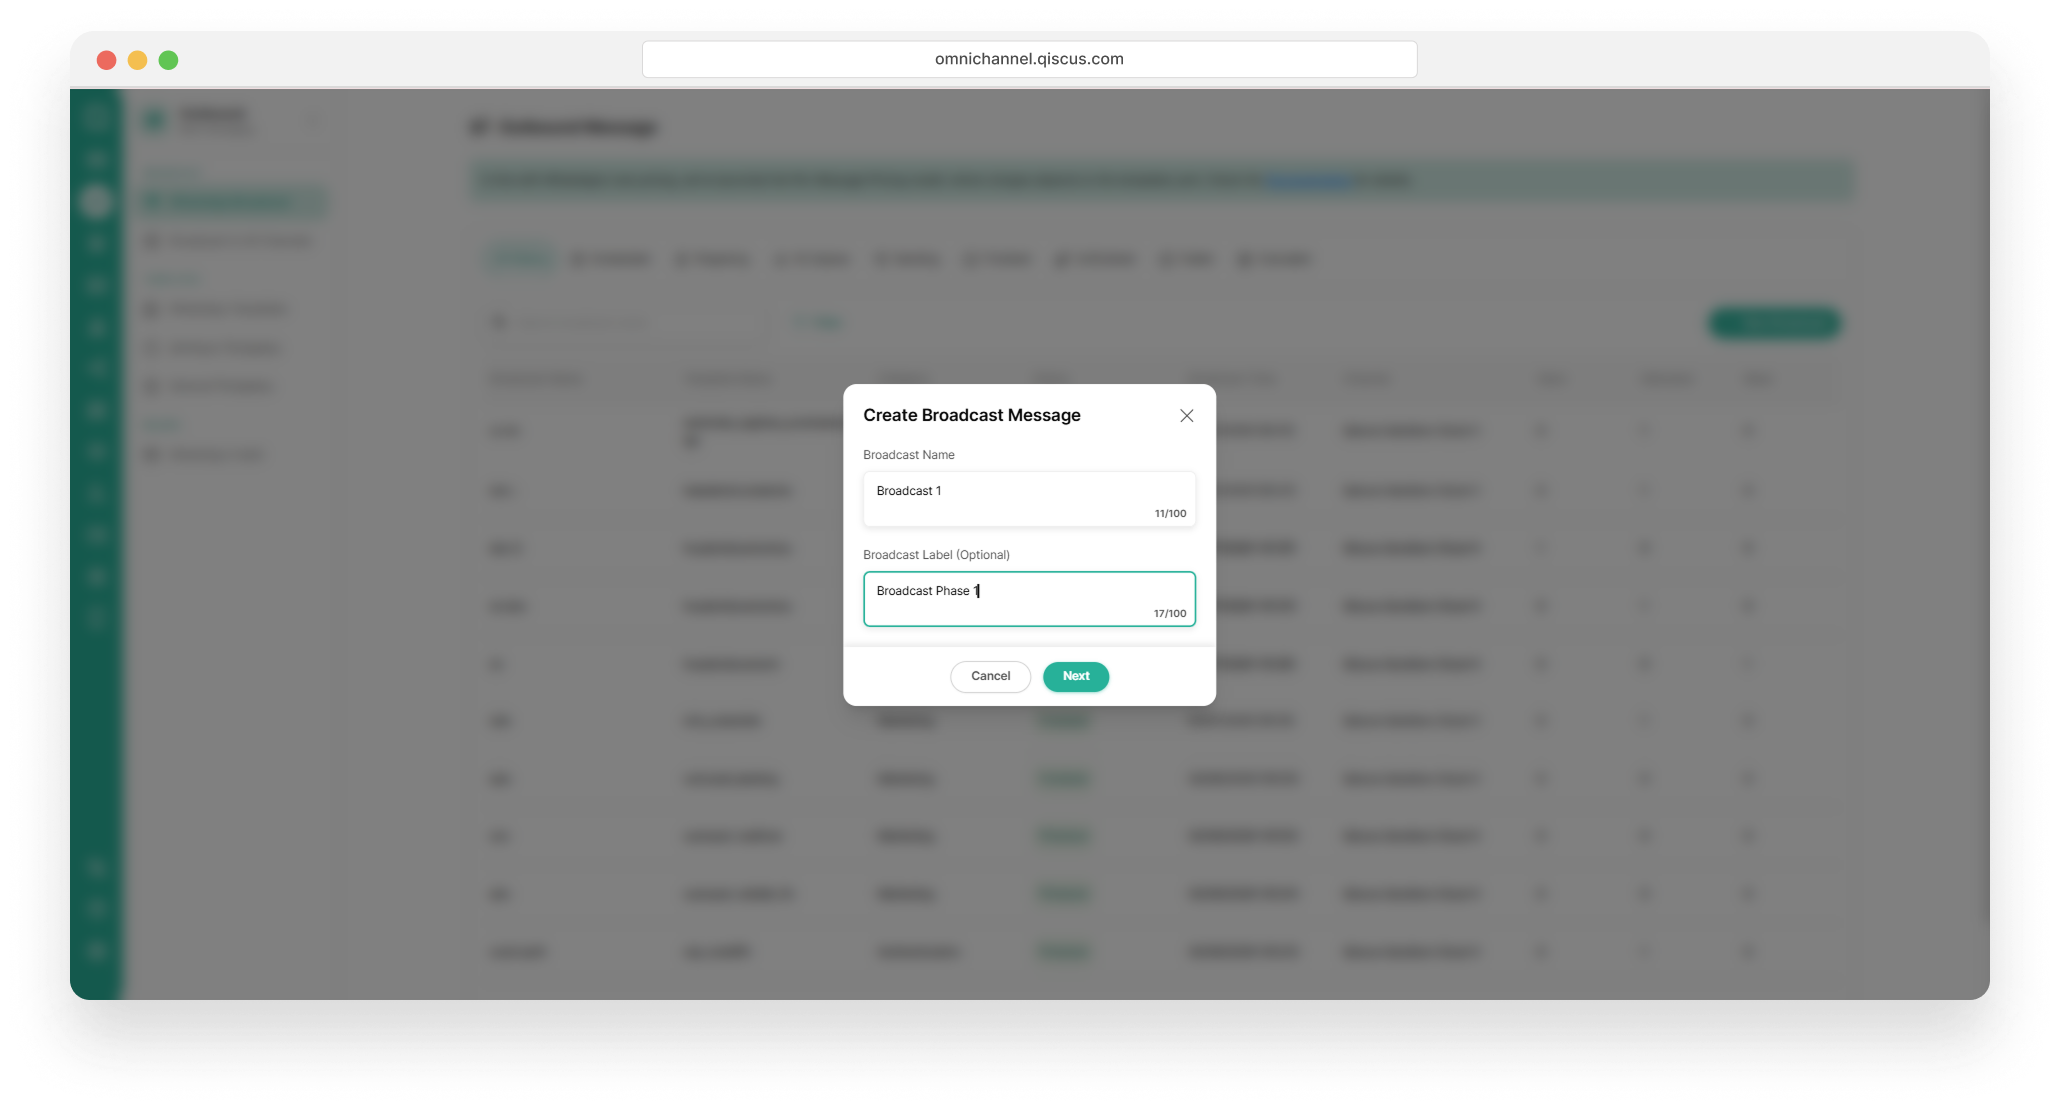
Click Next to continue creating the broadcast.
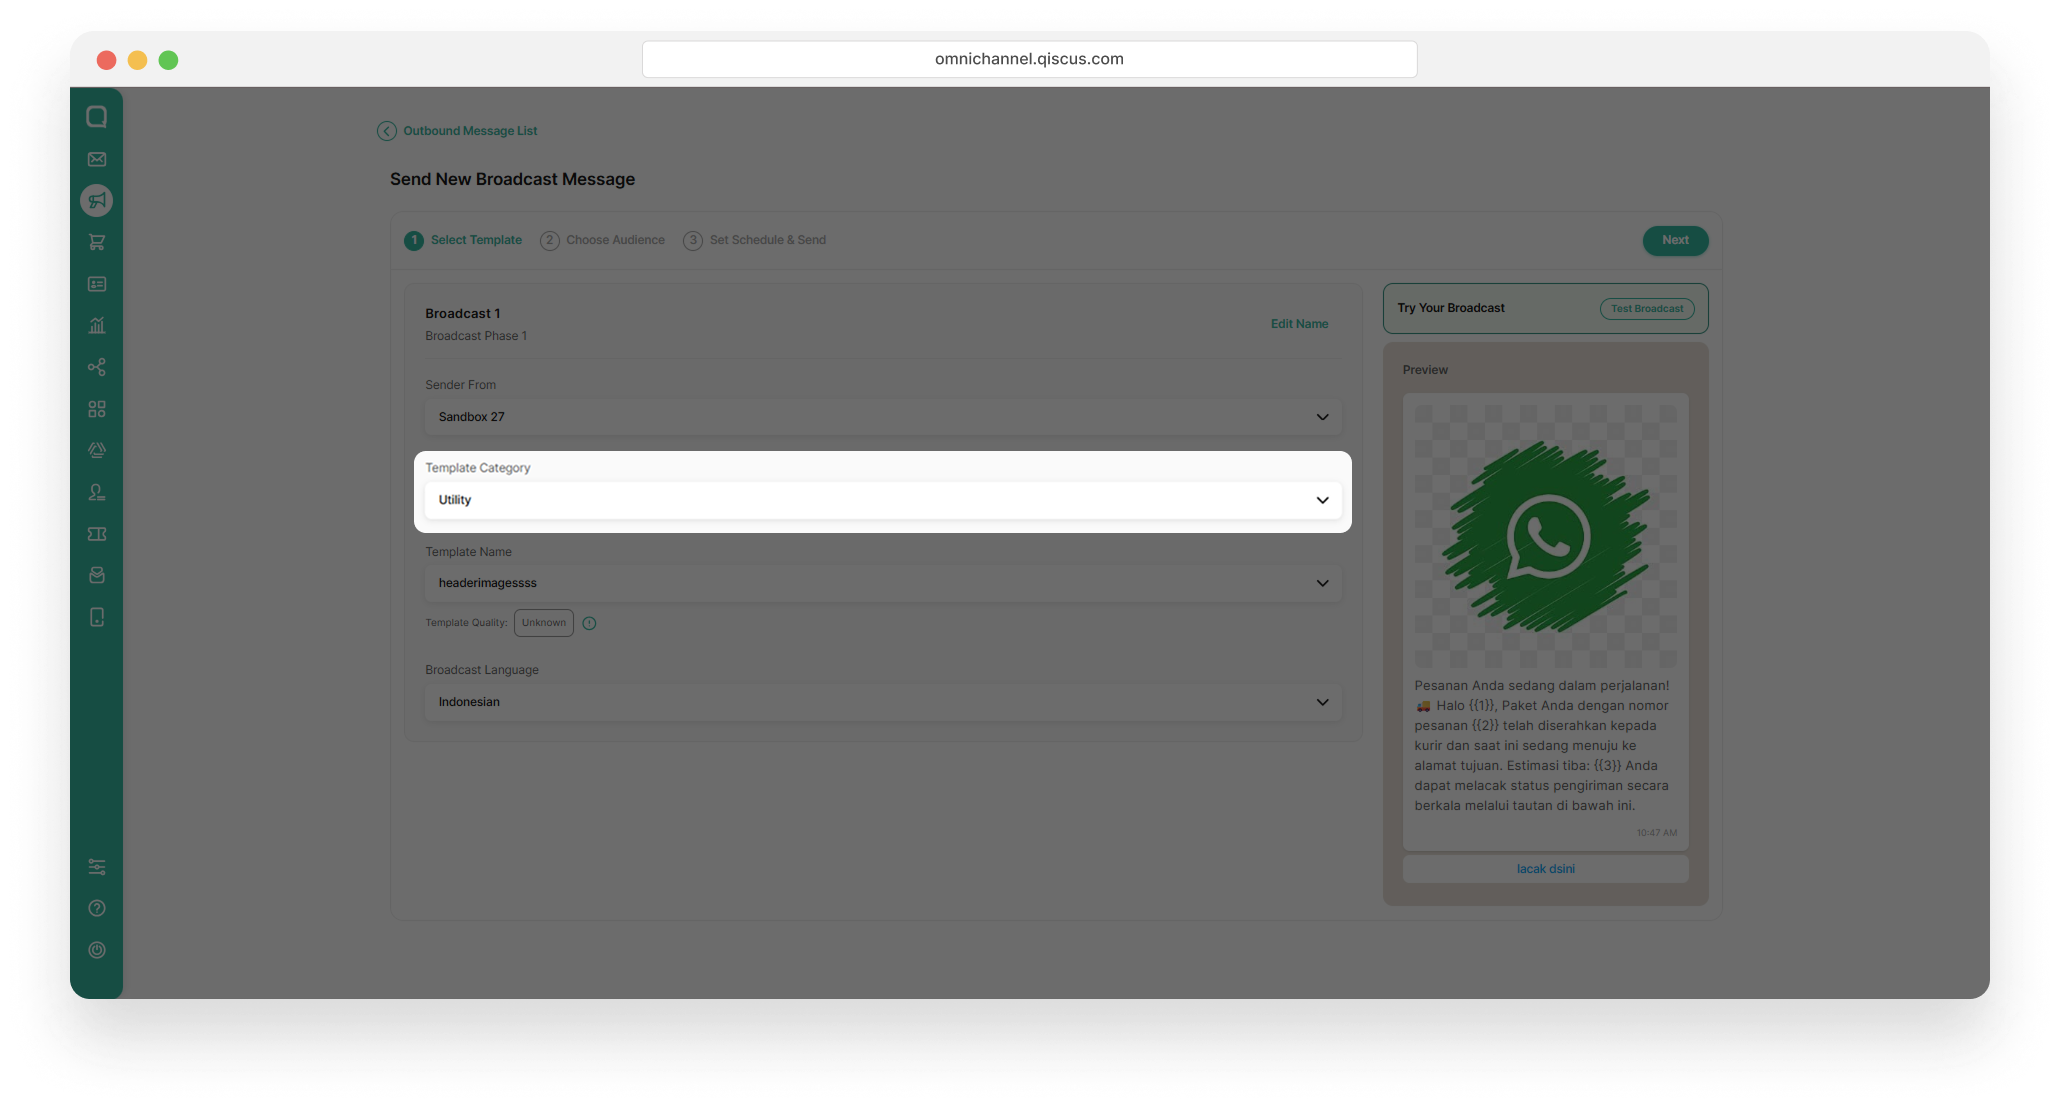
In Step 1, choose the template category that suits your communication needs. You can then select a template from the available options within that category.
Utility
Use this template category if you want to send transactional messages, service updates, reminders, confirmations, or other information requested by the customer.
Authentication
Use this template category if you want to send verification codes, login confirmations, password recovery messages, or other account security notifications.
Marketing
Use this template category if you want to promote products, services, campaigns, special offers, or engage customers with promotional content.
Marketing Opt-Out
Use this template category if you want to send marketing messages that provide customers with the option to opt out of future promotional communications.
Step 2: Choose Audience
In this step, select the target audience for your broadcast message. The Audience Type determines how recipients are selected for the broadcast. Choose the option that best matches your broadcasting needs.
Use the dropdown to select the audience type for your broadcast.
Single Number
Use this option when you want to send a broadcast message to a single customer.
Enter the phone number that will receive the broadcast message.
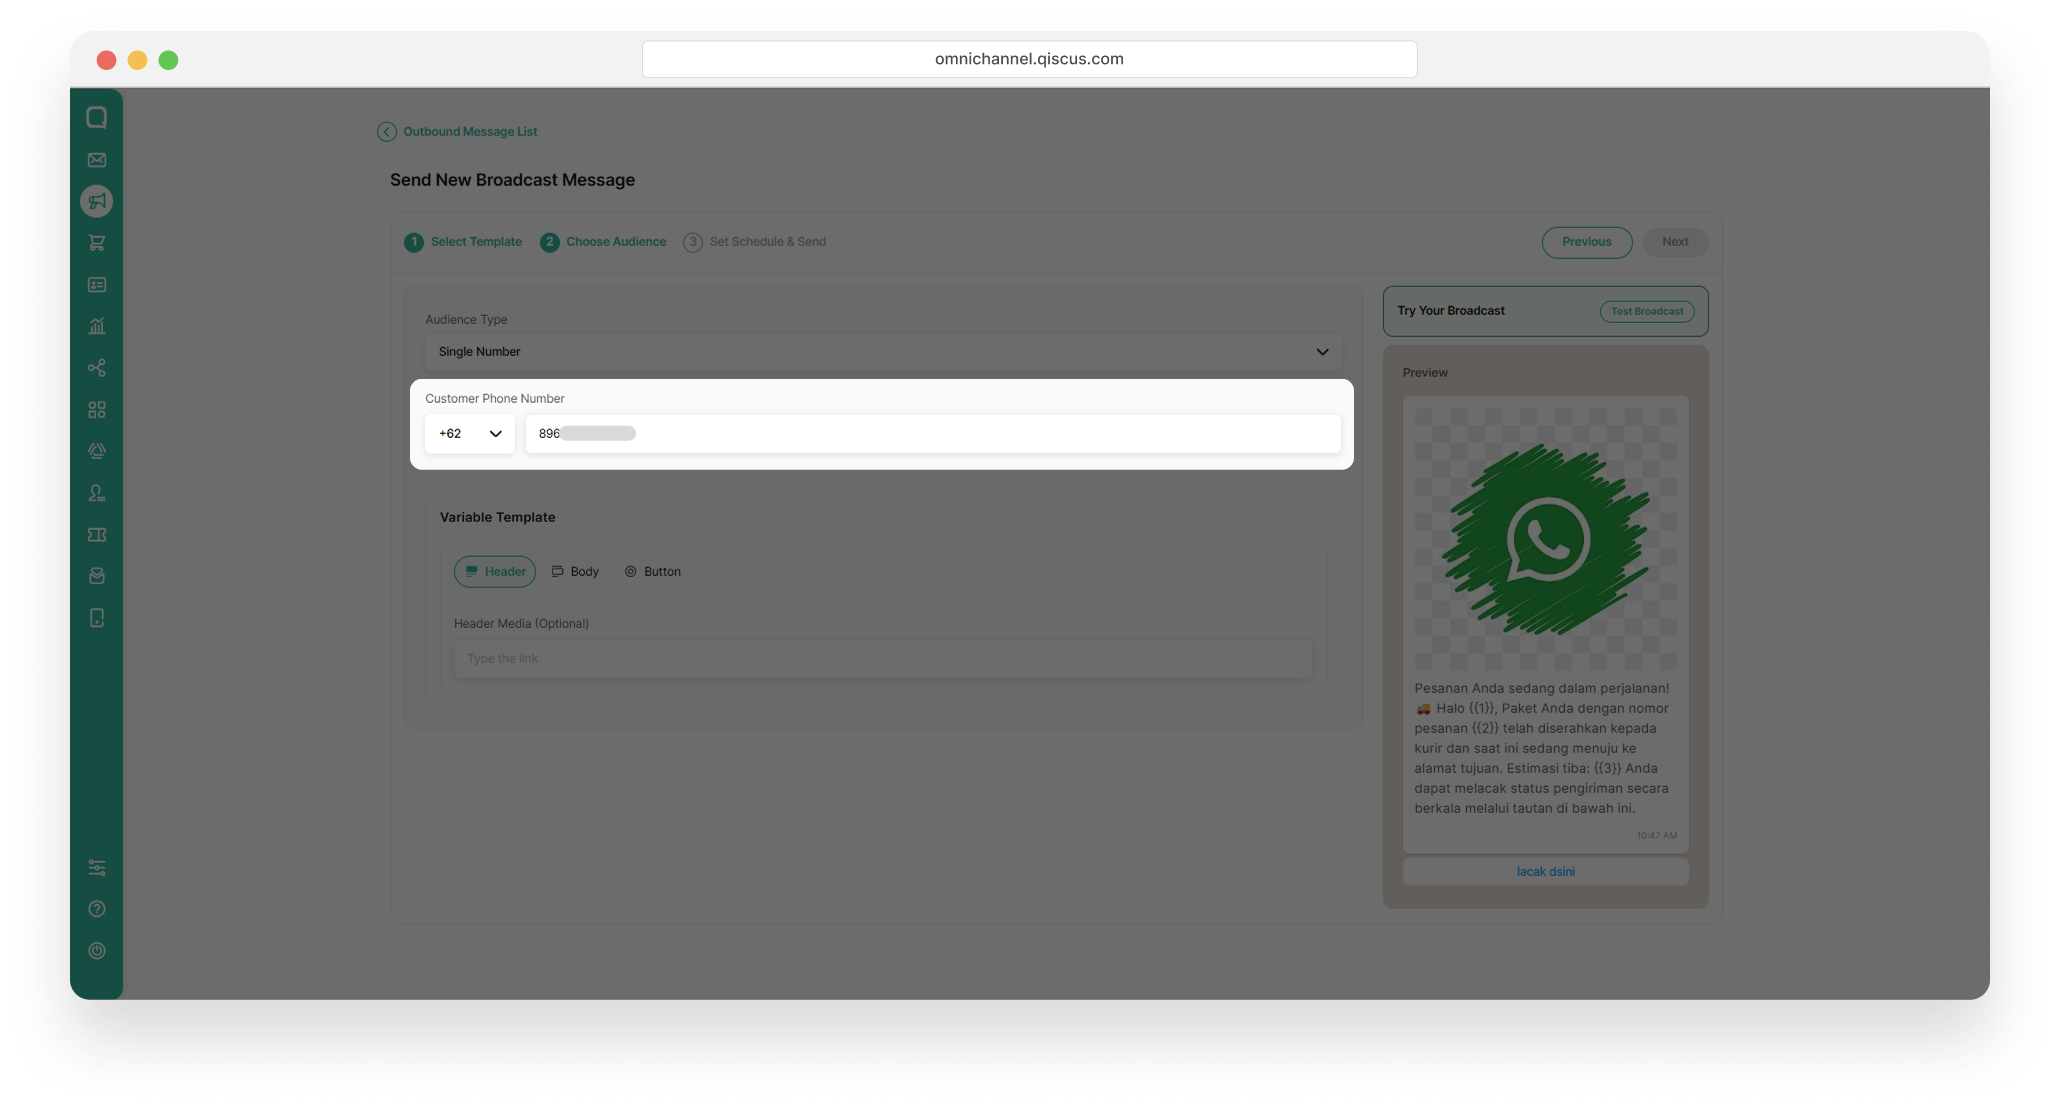
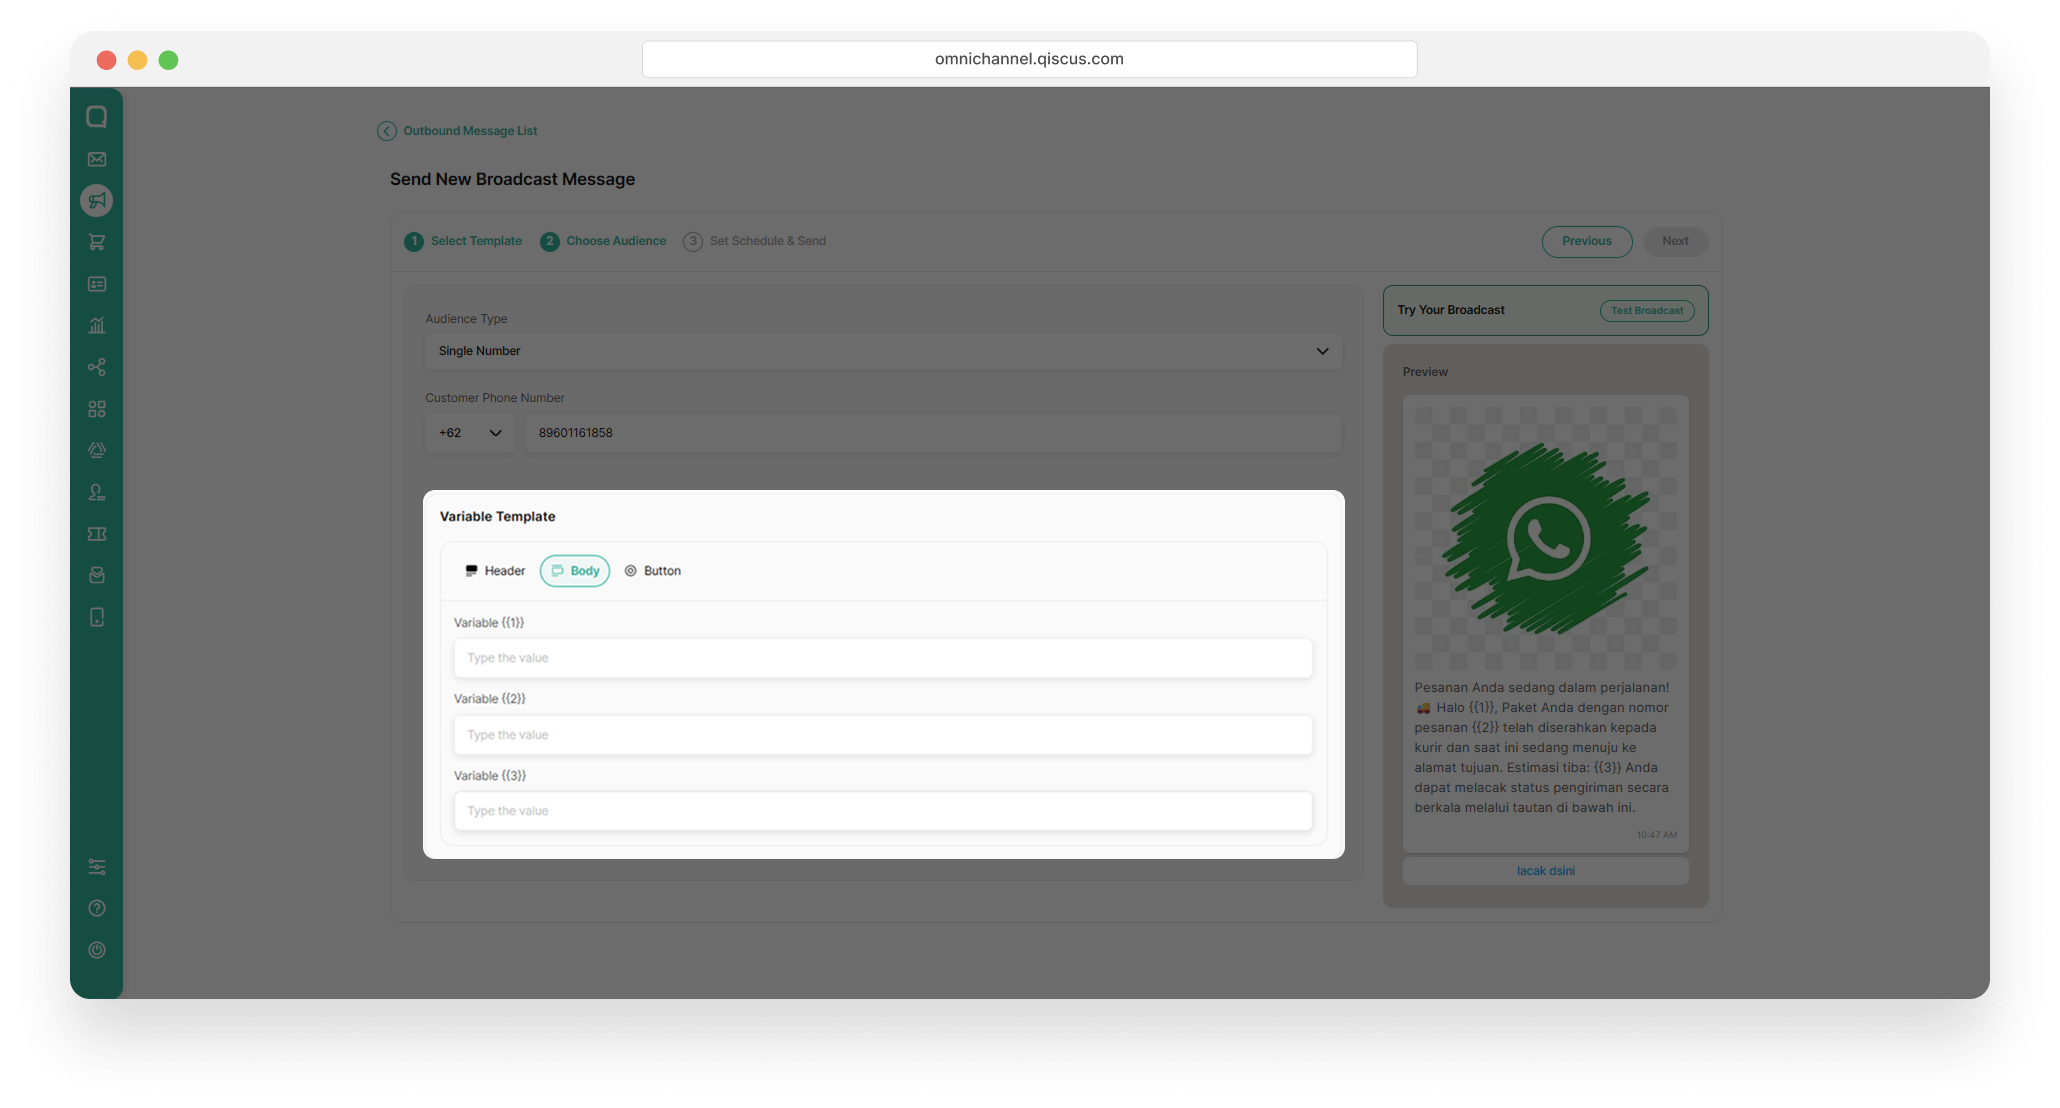
If your template includes an image or video header, enter the media URL in the Header field to display the media in the broadcast message.
Complete all template variables with the relevant information. Then click Next.
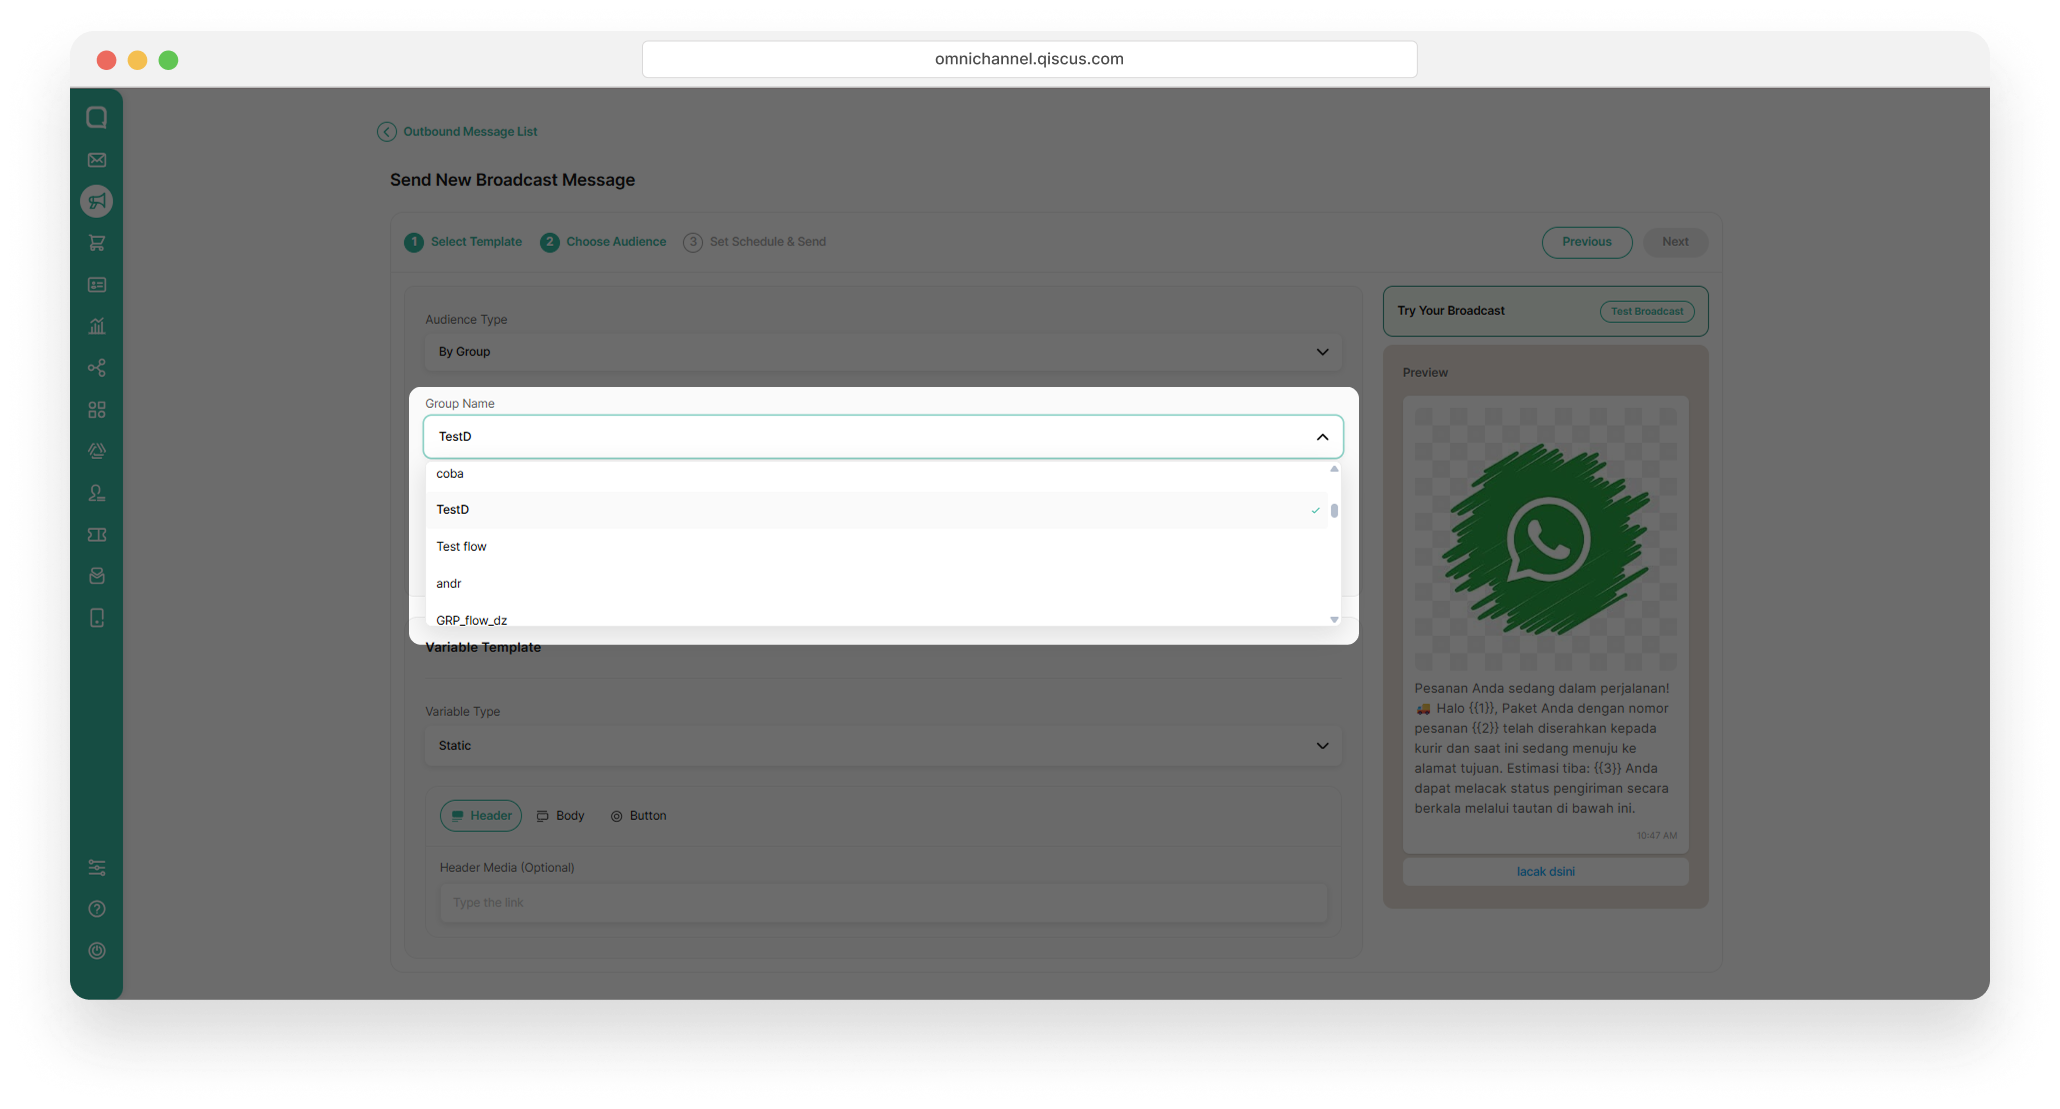
Customer Group
Use this option when you want to send a broadcast to customers who belong to a predefined group. Broadcast template message with customer groups is only available for Enterprise users
Select By Group as the broadcast audience type, then enter the name of the broadcast group.
Static Variable: Use a static variable when all recipients should receive the same value.
Fill in the template variables based on the placeholders available in the selected template.
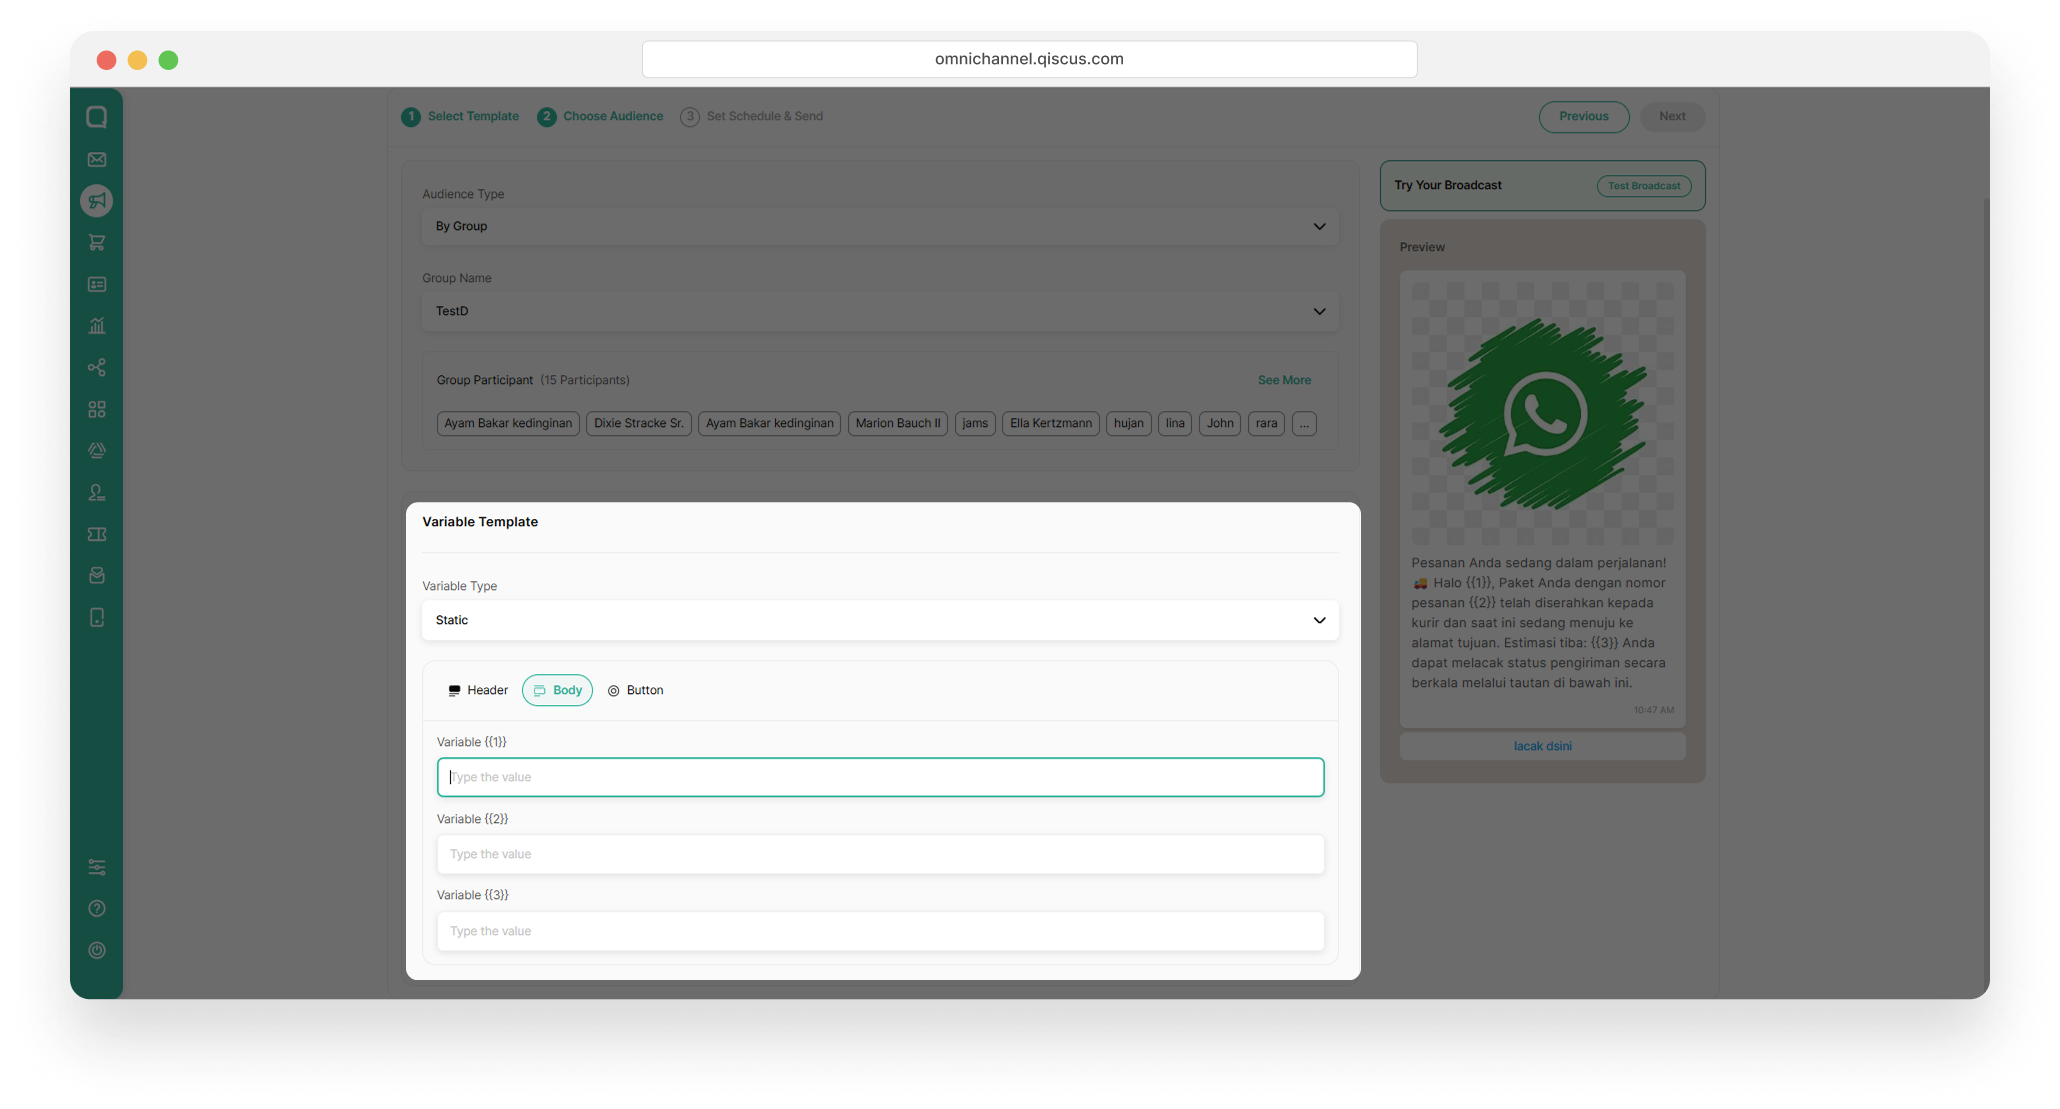
Dynamic Variable: Use a dynamic variable to personalize your broadcast message with different values for each recipient.
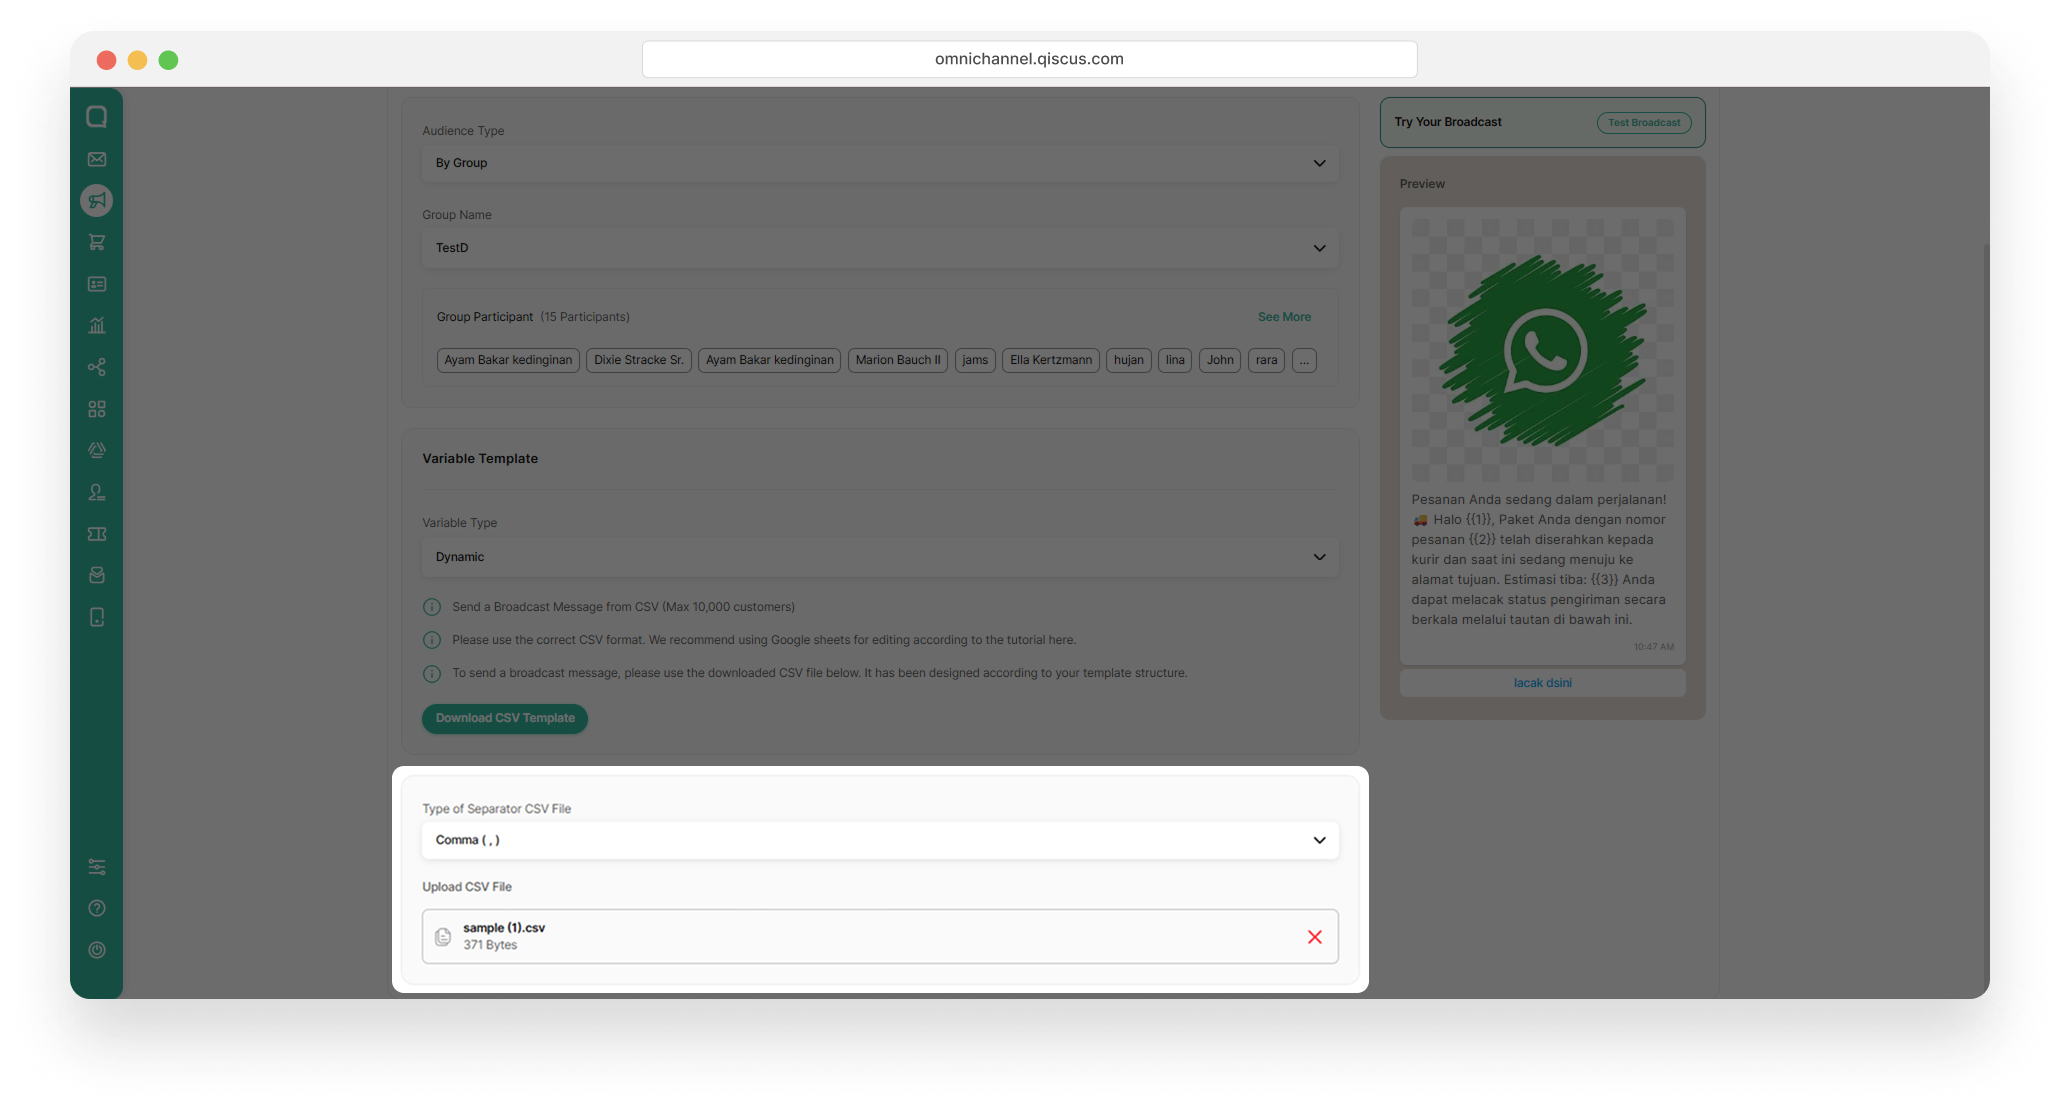
Download CSV Template, then choose the type of separator you want to use. Fill in the required customer data
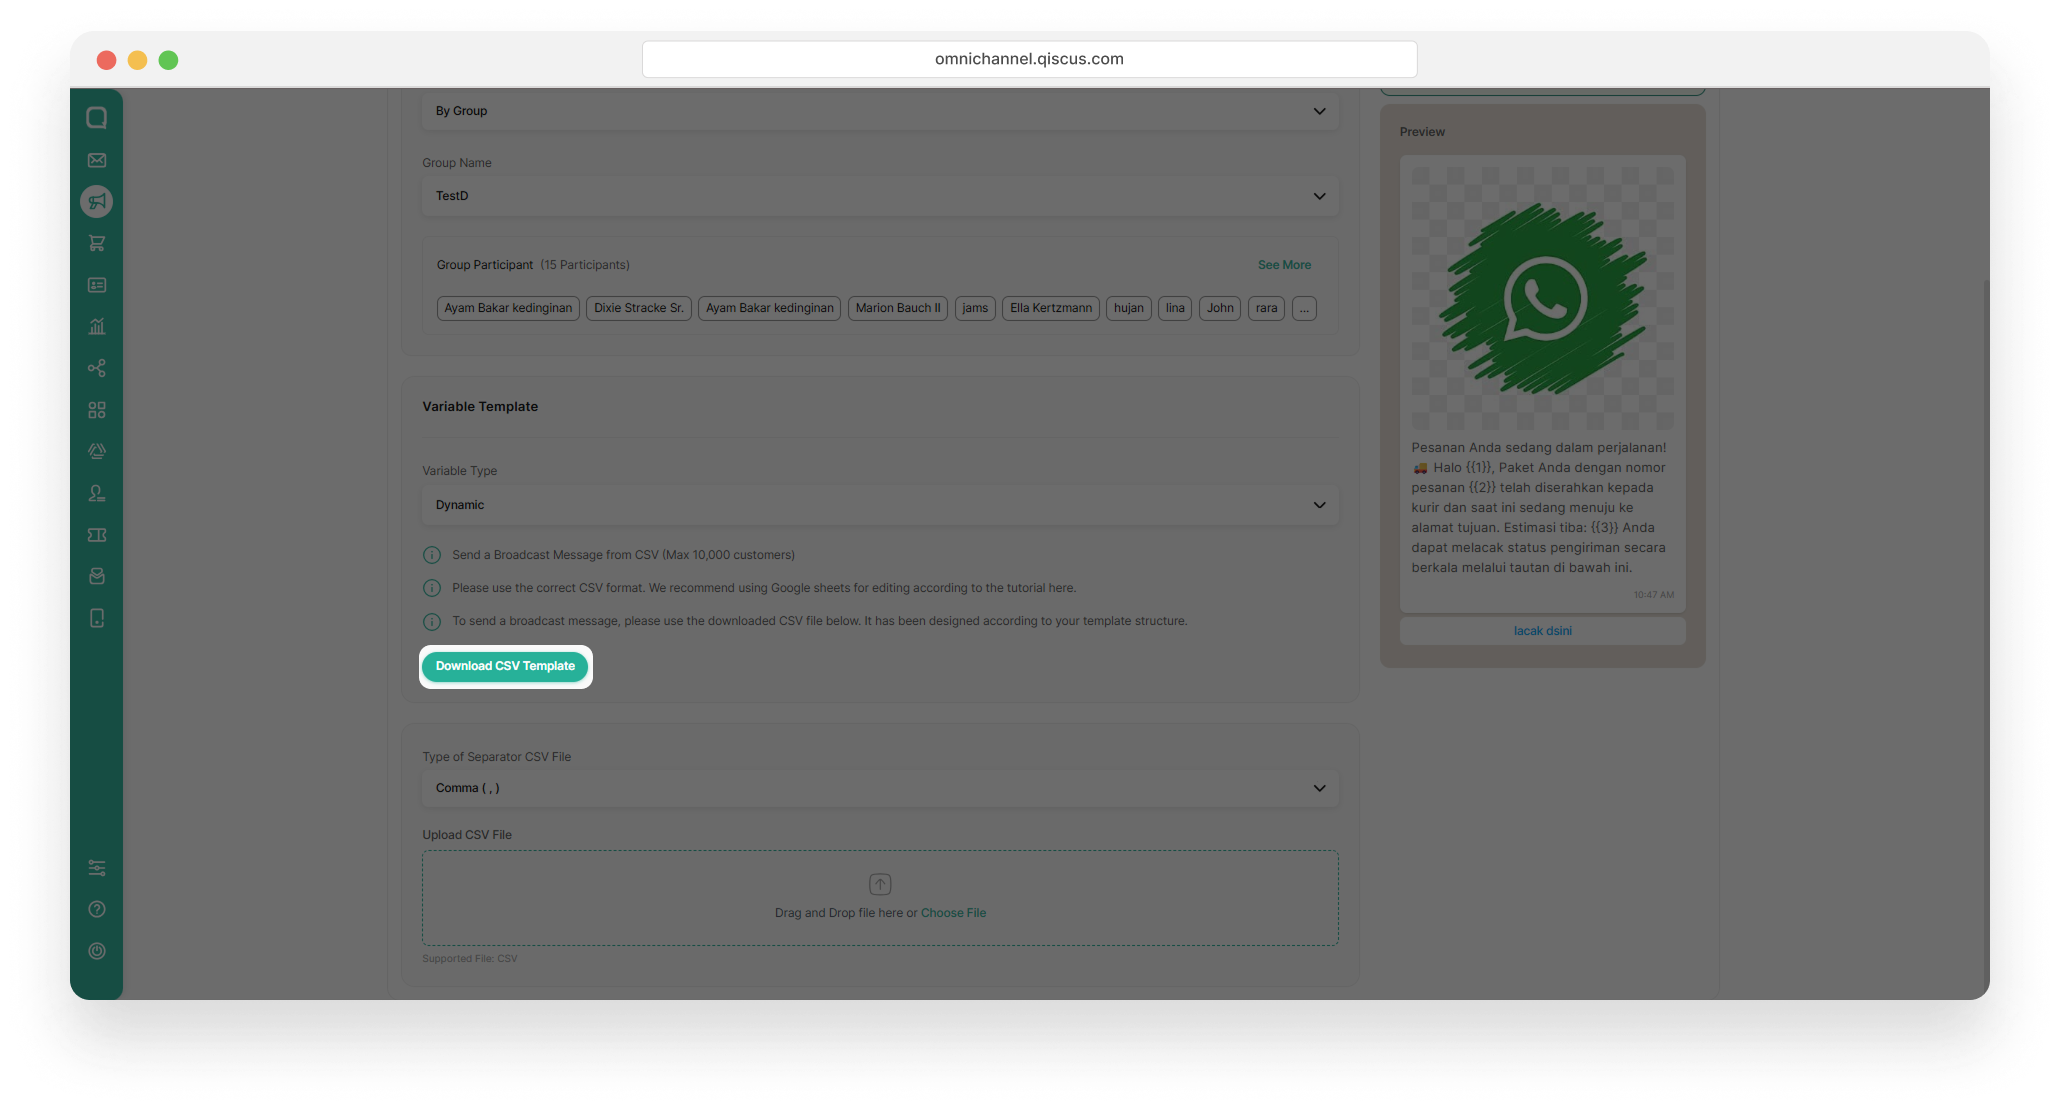
Upload the completed file in the upload field provided.
CSV
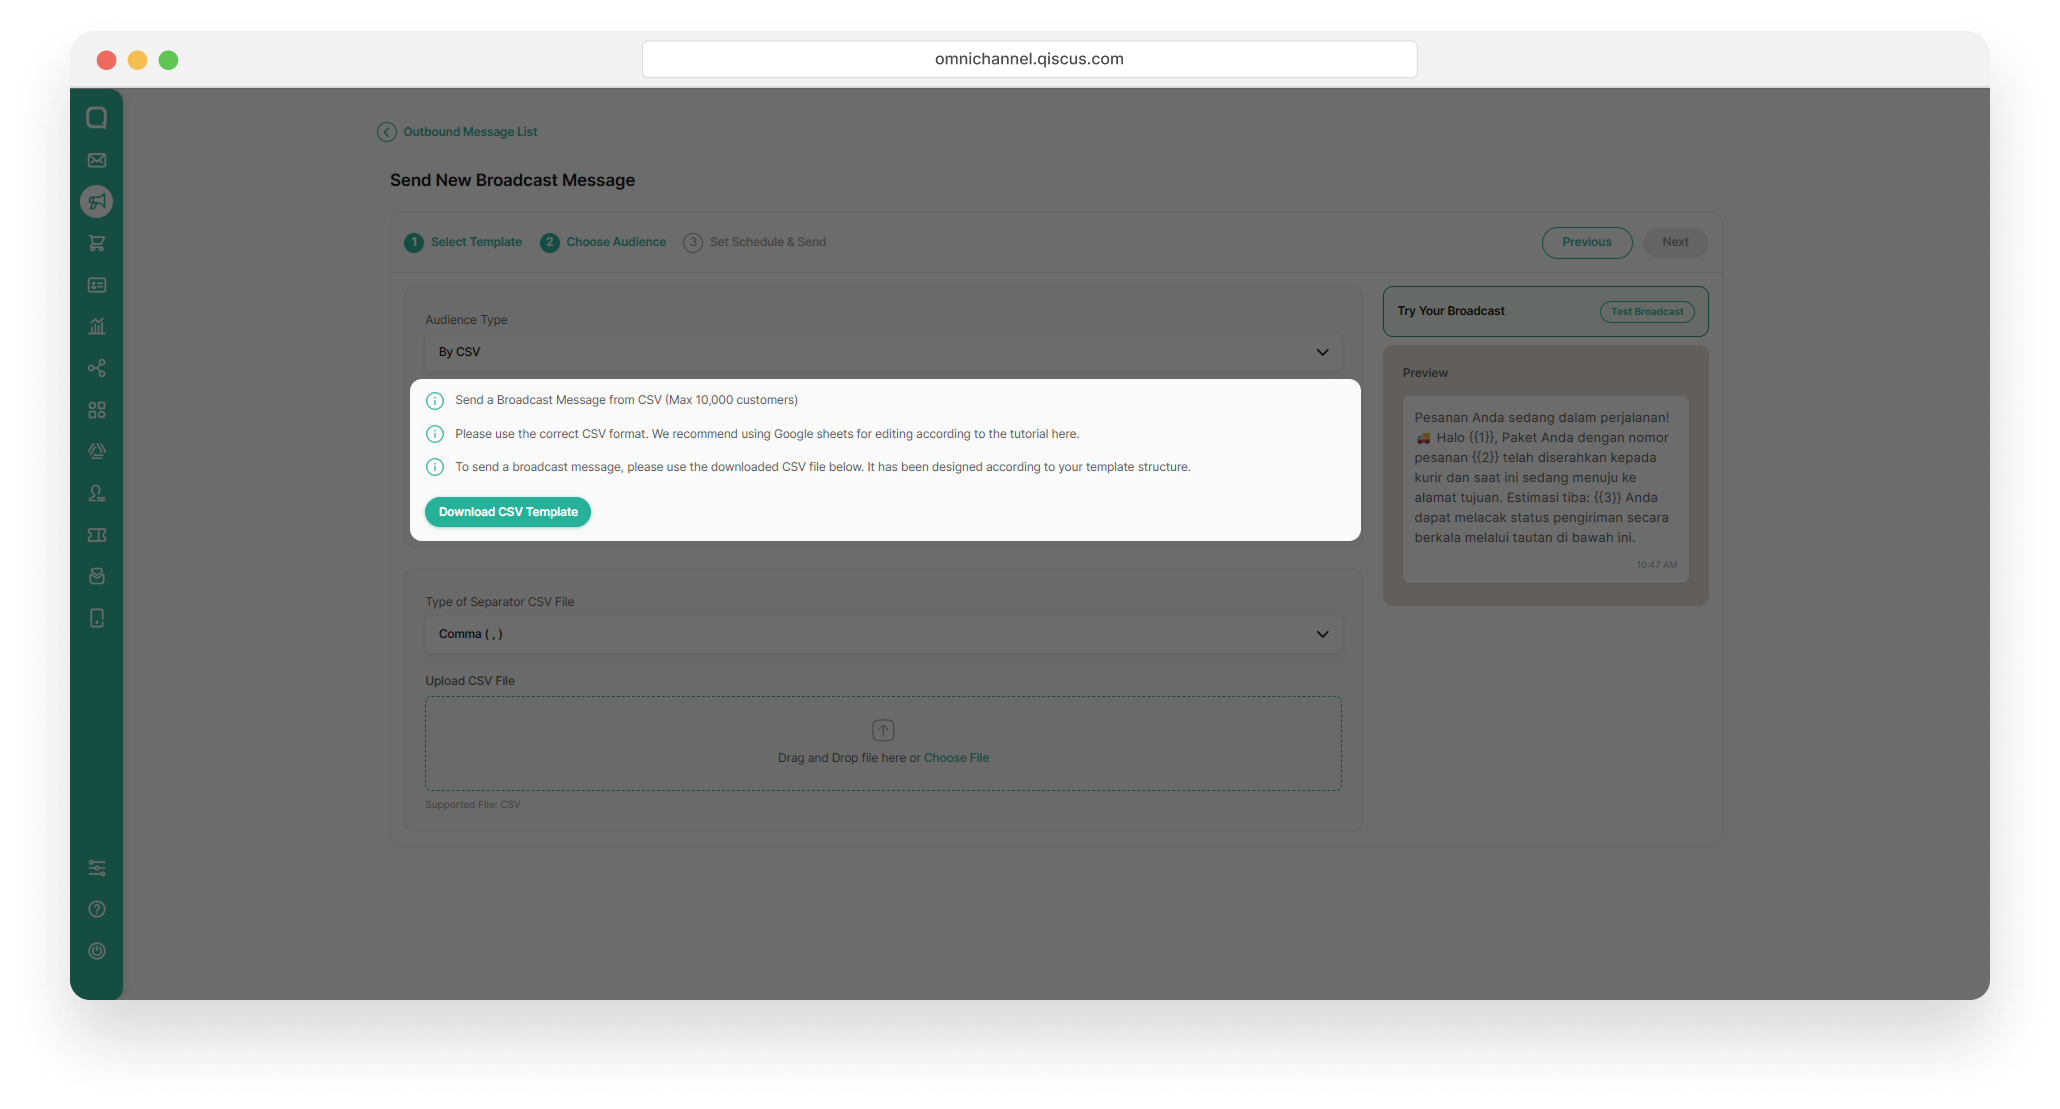
when you want to send a broadcast to multiple recipients using a CSV/XLSX file containing customer data and personalized variable values.
Select By CSV as the broadcast audience type, then download the CSV template to input your customer data.
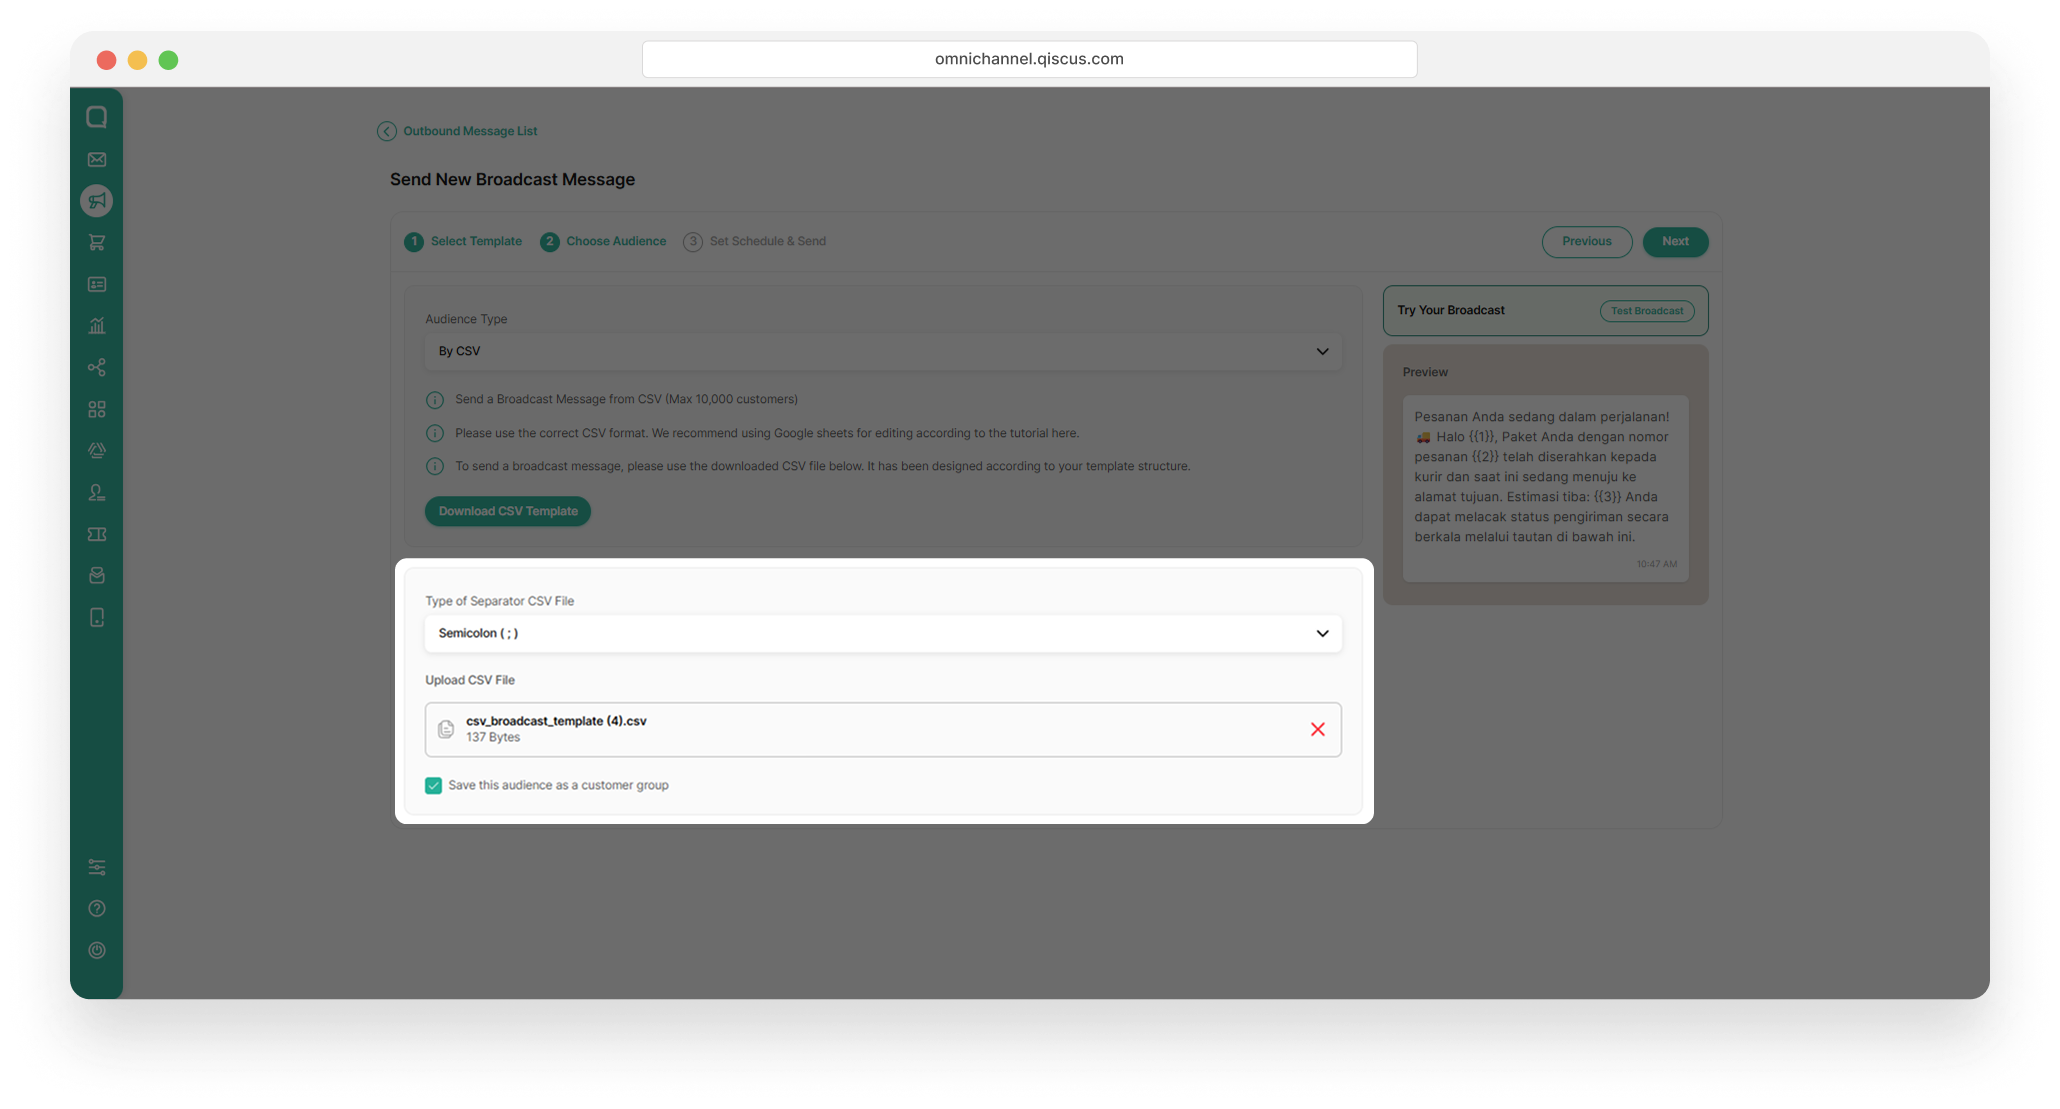
Upload the CSV file containing your customer data. Then click Next
Condition
Use this option when you want to target customers based on specific criteria.
Select By Condition as the broadcast audience type, then click + Apply Condition to input your customer data.
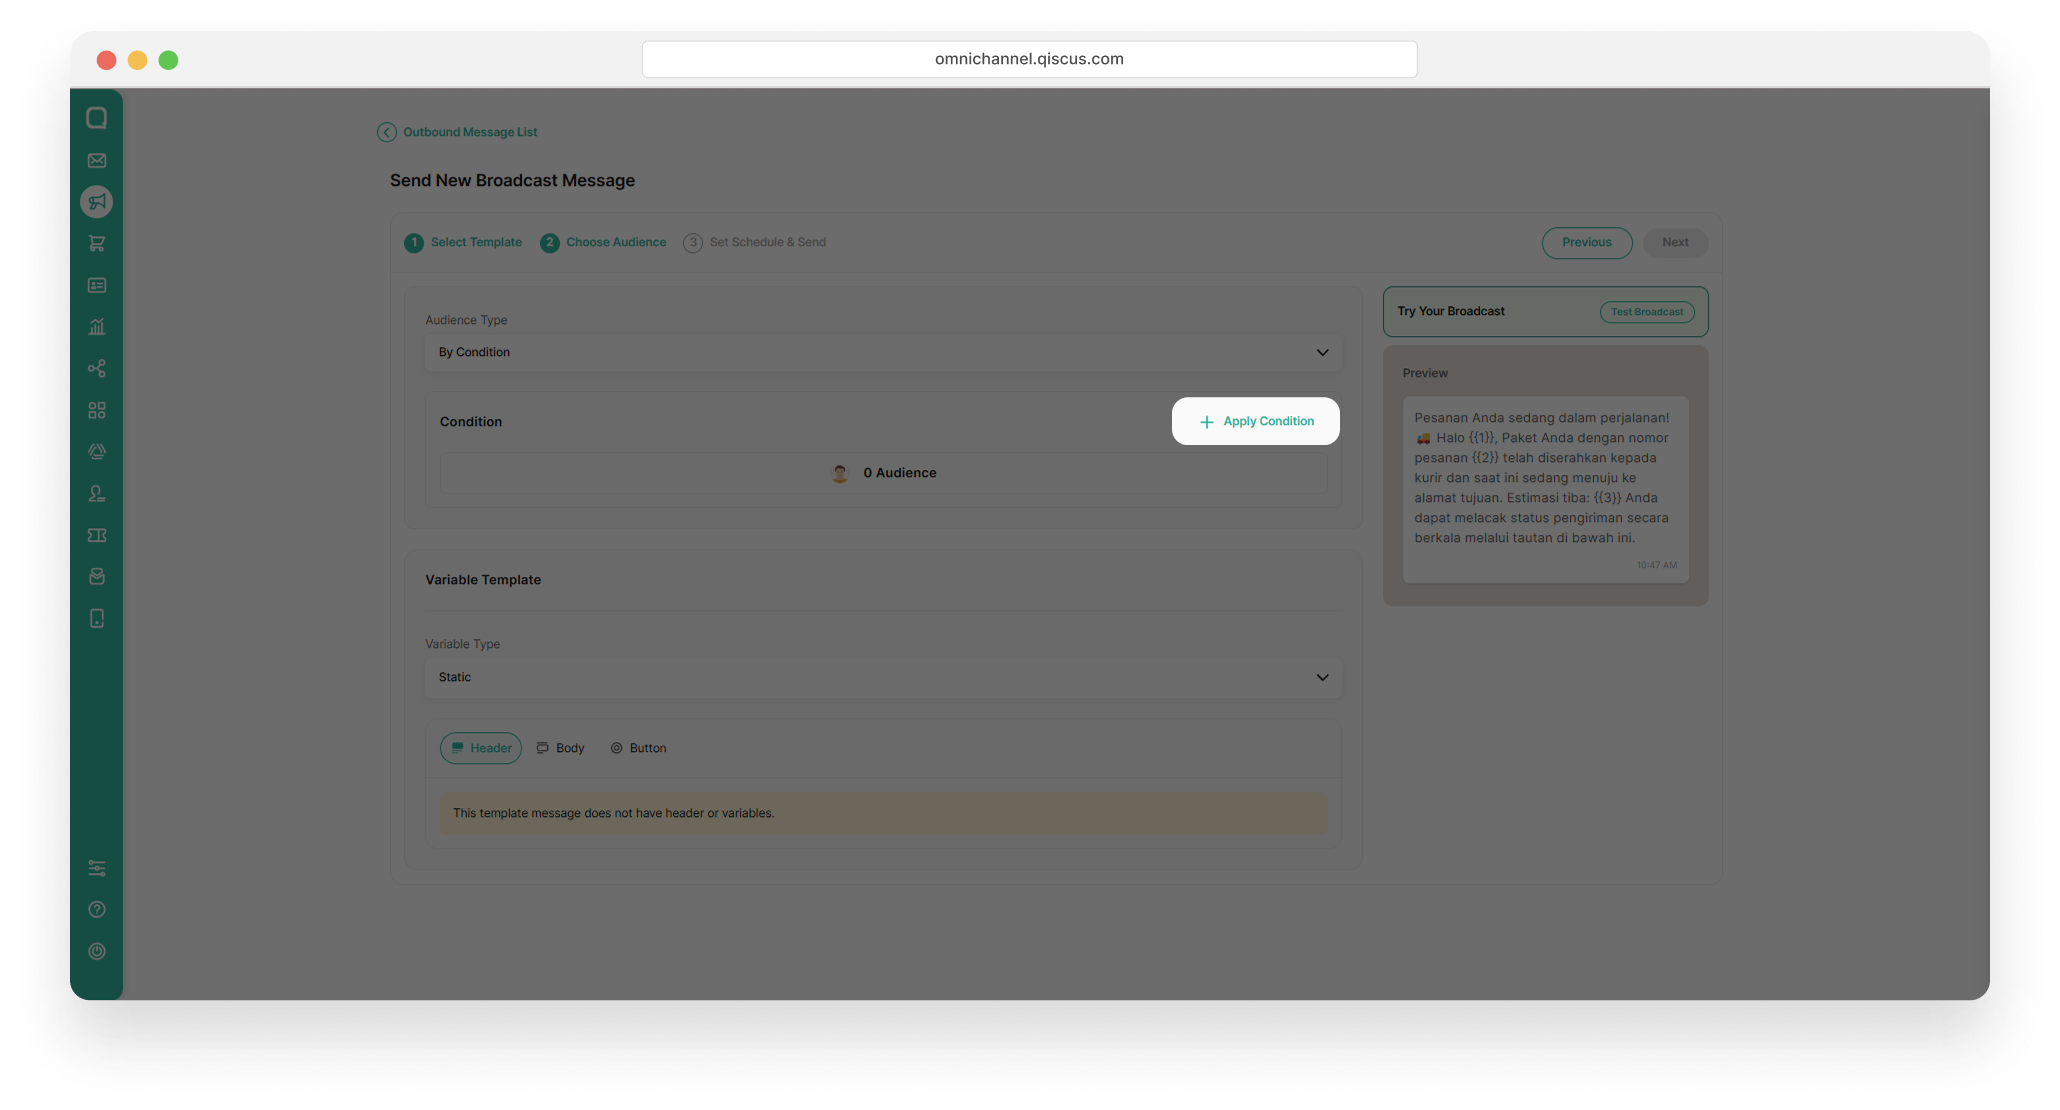
Filter customers using Customer Properties, Activity Properties, and Source to ensure your broadcast reaches the right recipients. You can use one or all of the filters within the condition method.
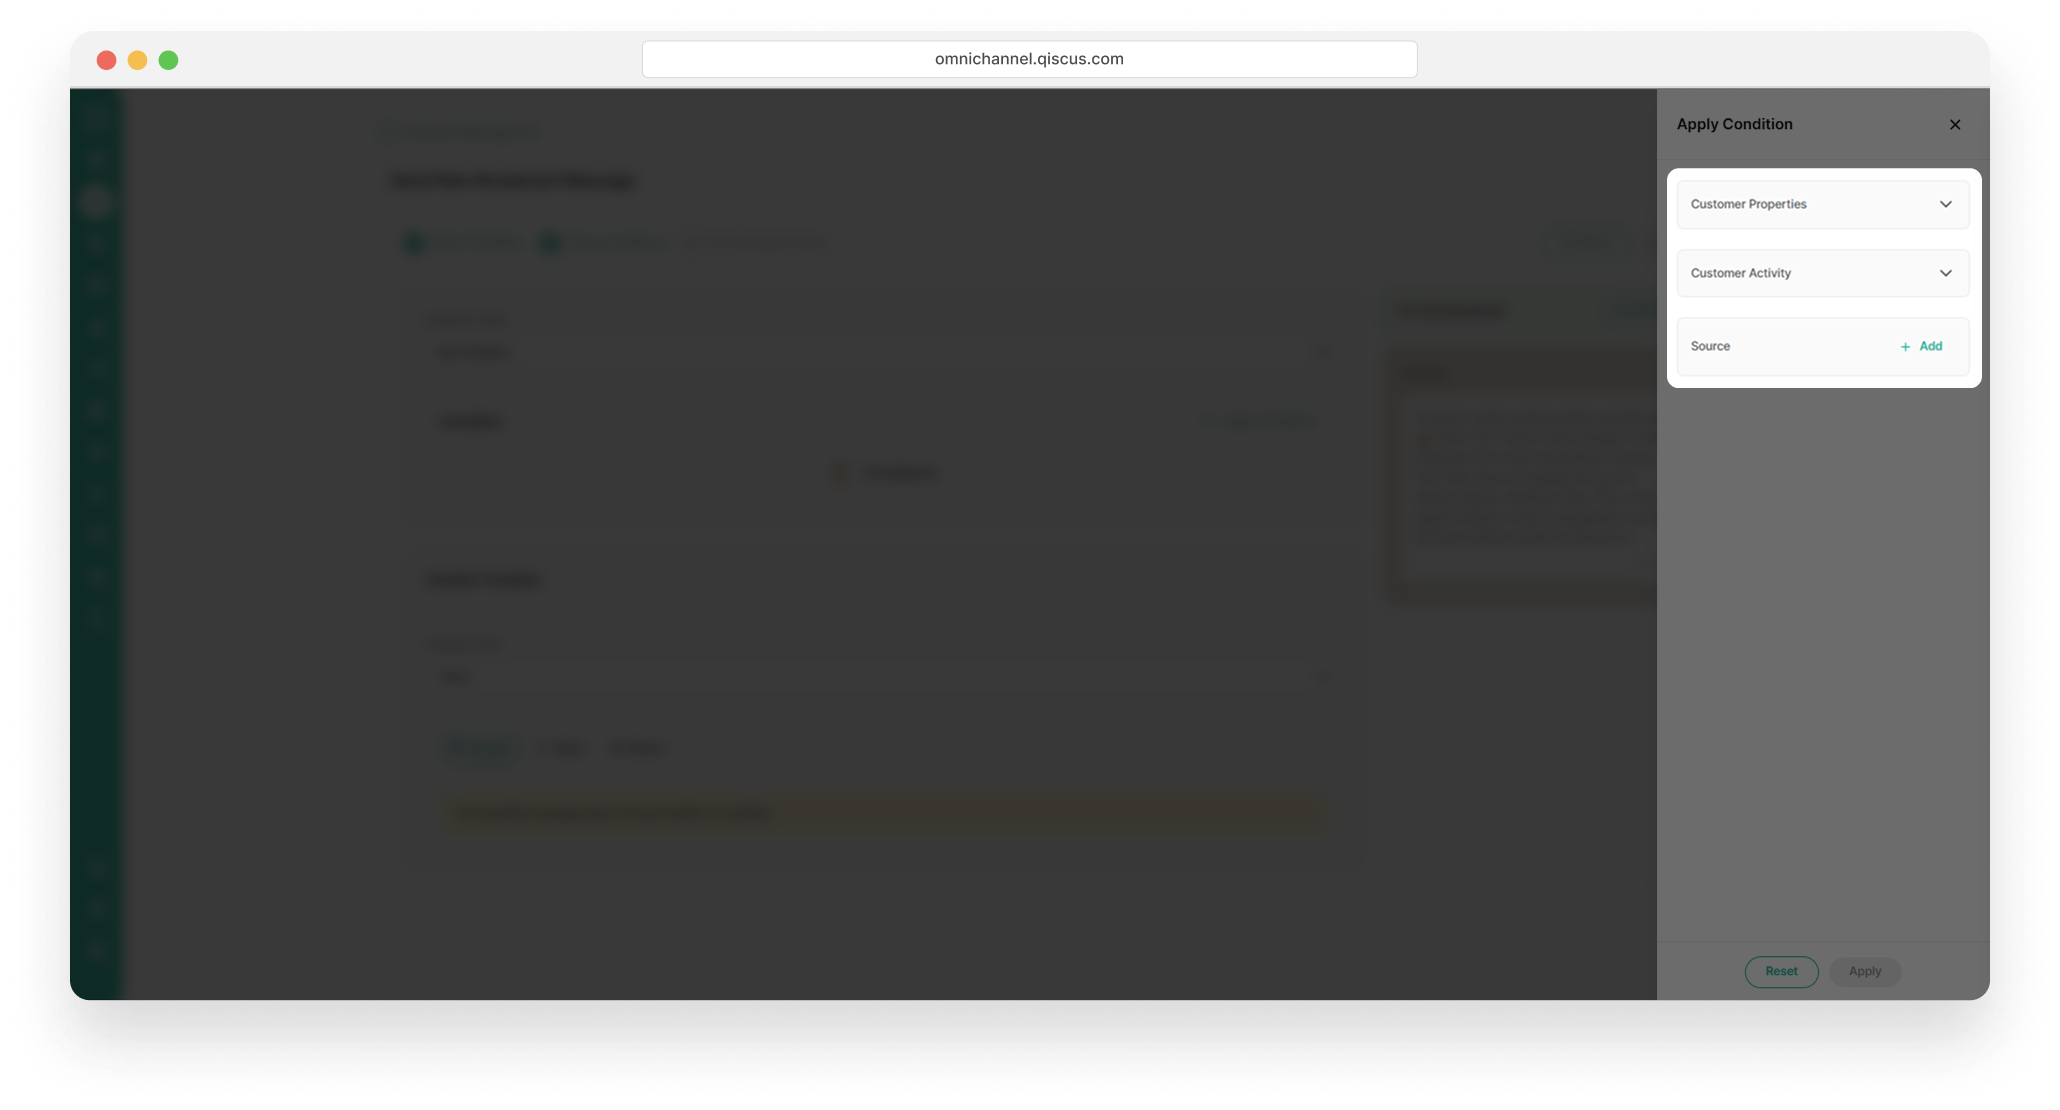
Customer Properties
Use this if you want to target customers based on their profile information and attributes stored in the system.
Select the customer criteria that match your targeting needs
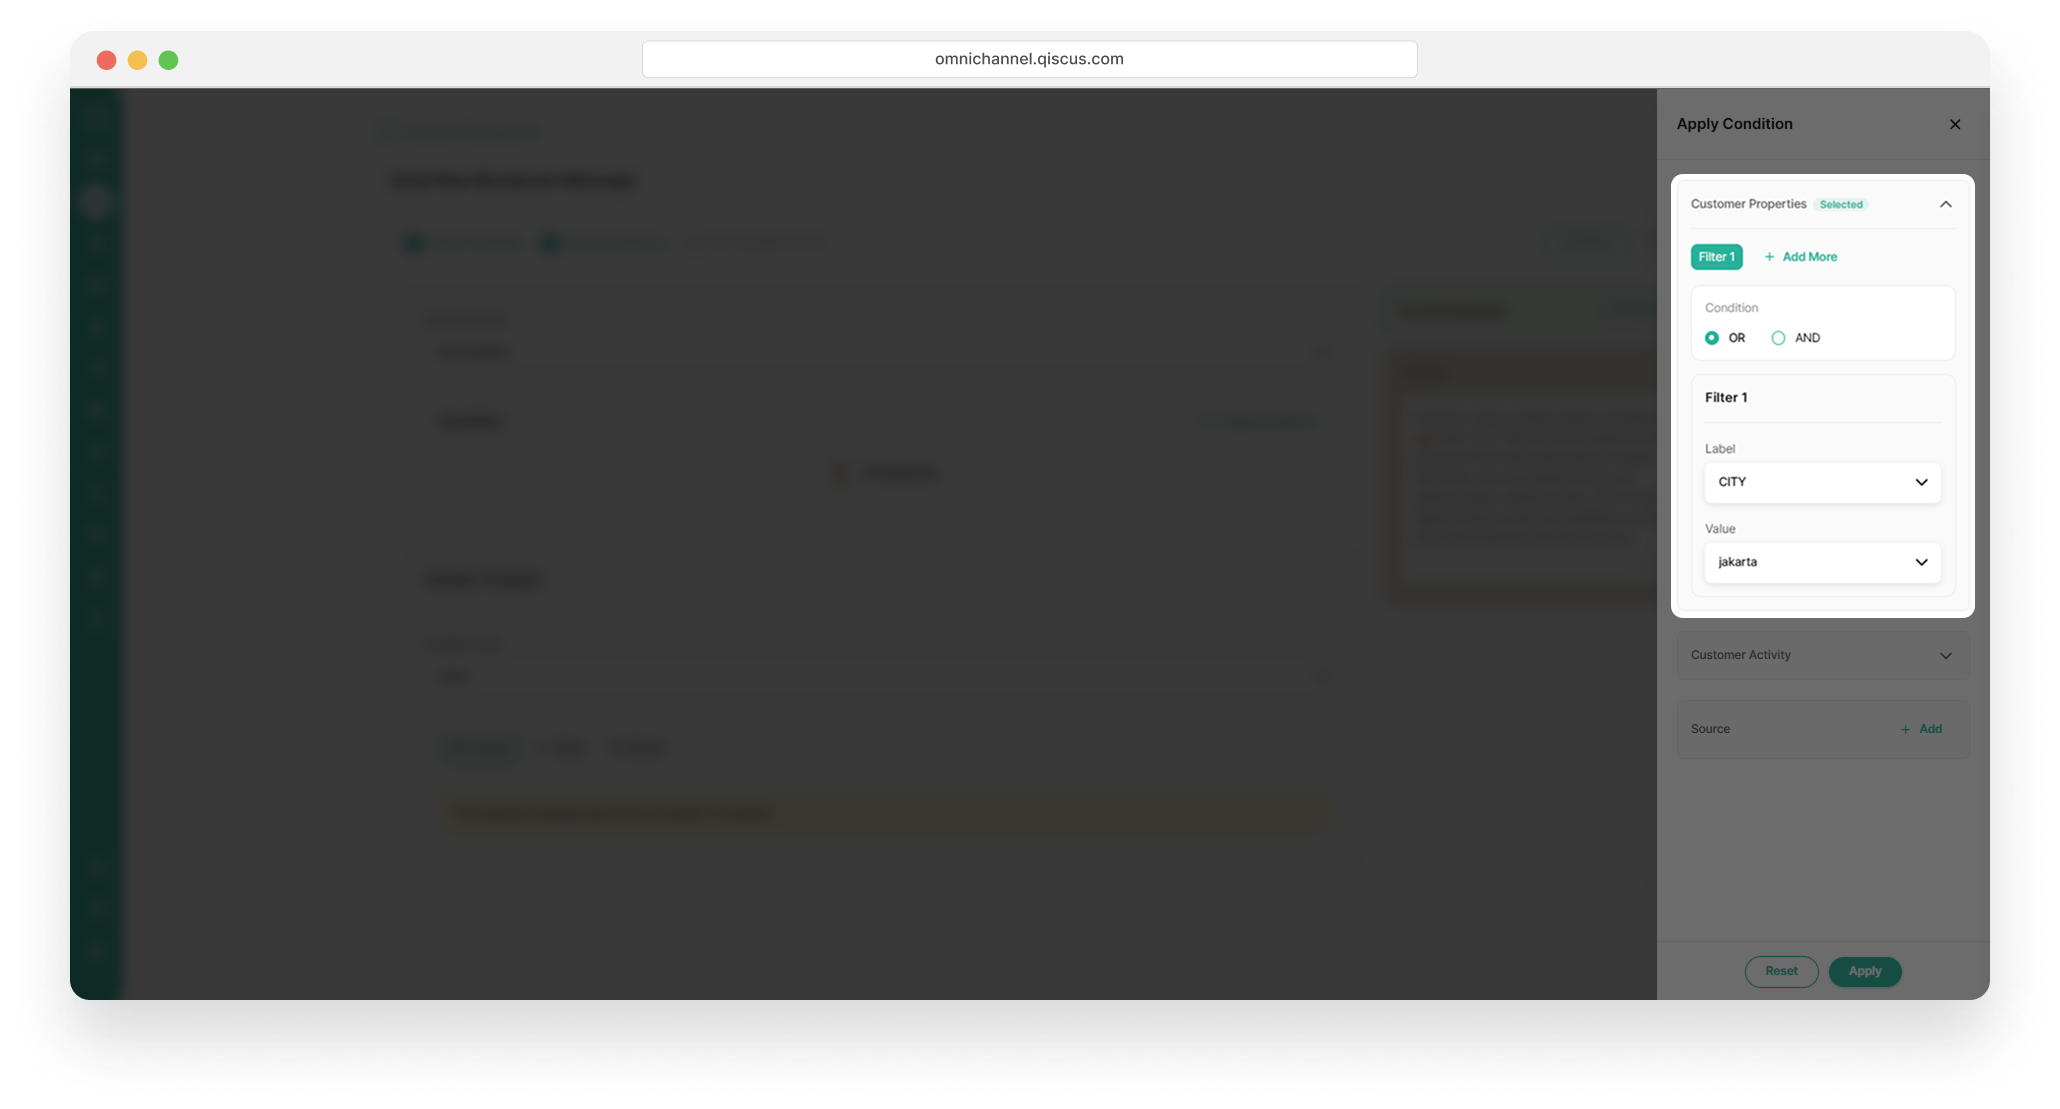
OR__: City = Yogyakarta OR Gender = Female → Customers who live in Yogyakarta or are female will be included.
AND__: City = Yogyakarta AND Gender = Female → Only customers who live in Yogyakarta and are female will be included.
Activity Properties
Use this if you want to target customers based on their activities and interaction history.
Select the customer based on their activity that matches your targeting needs.
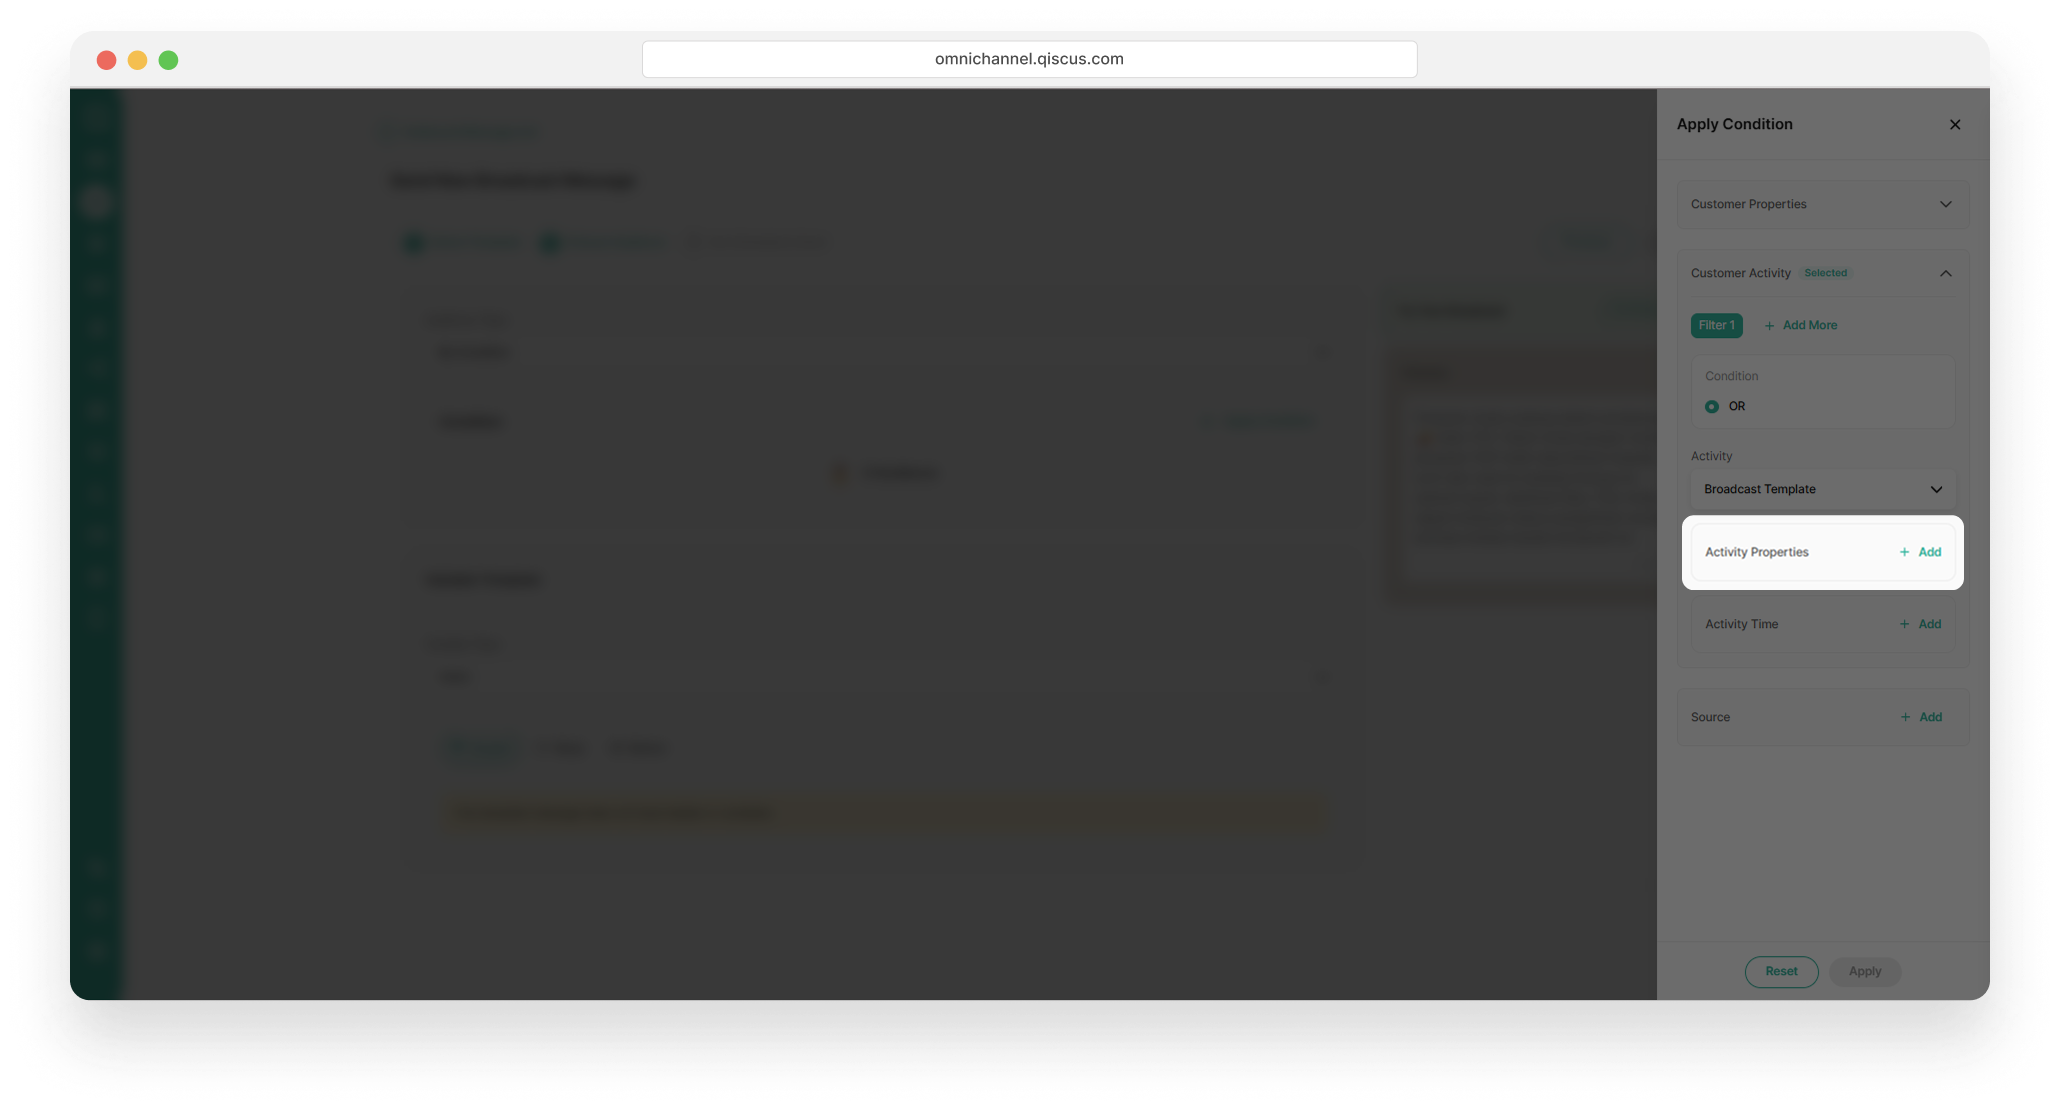
You can access information regarding this property activity in the activity details within your inbox, or find it in the Customer Data Platform details.
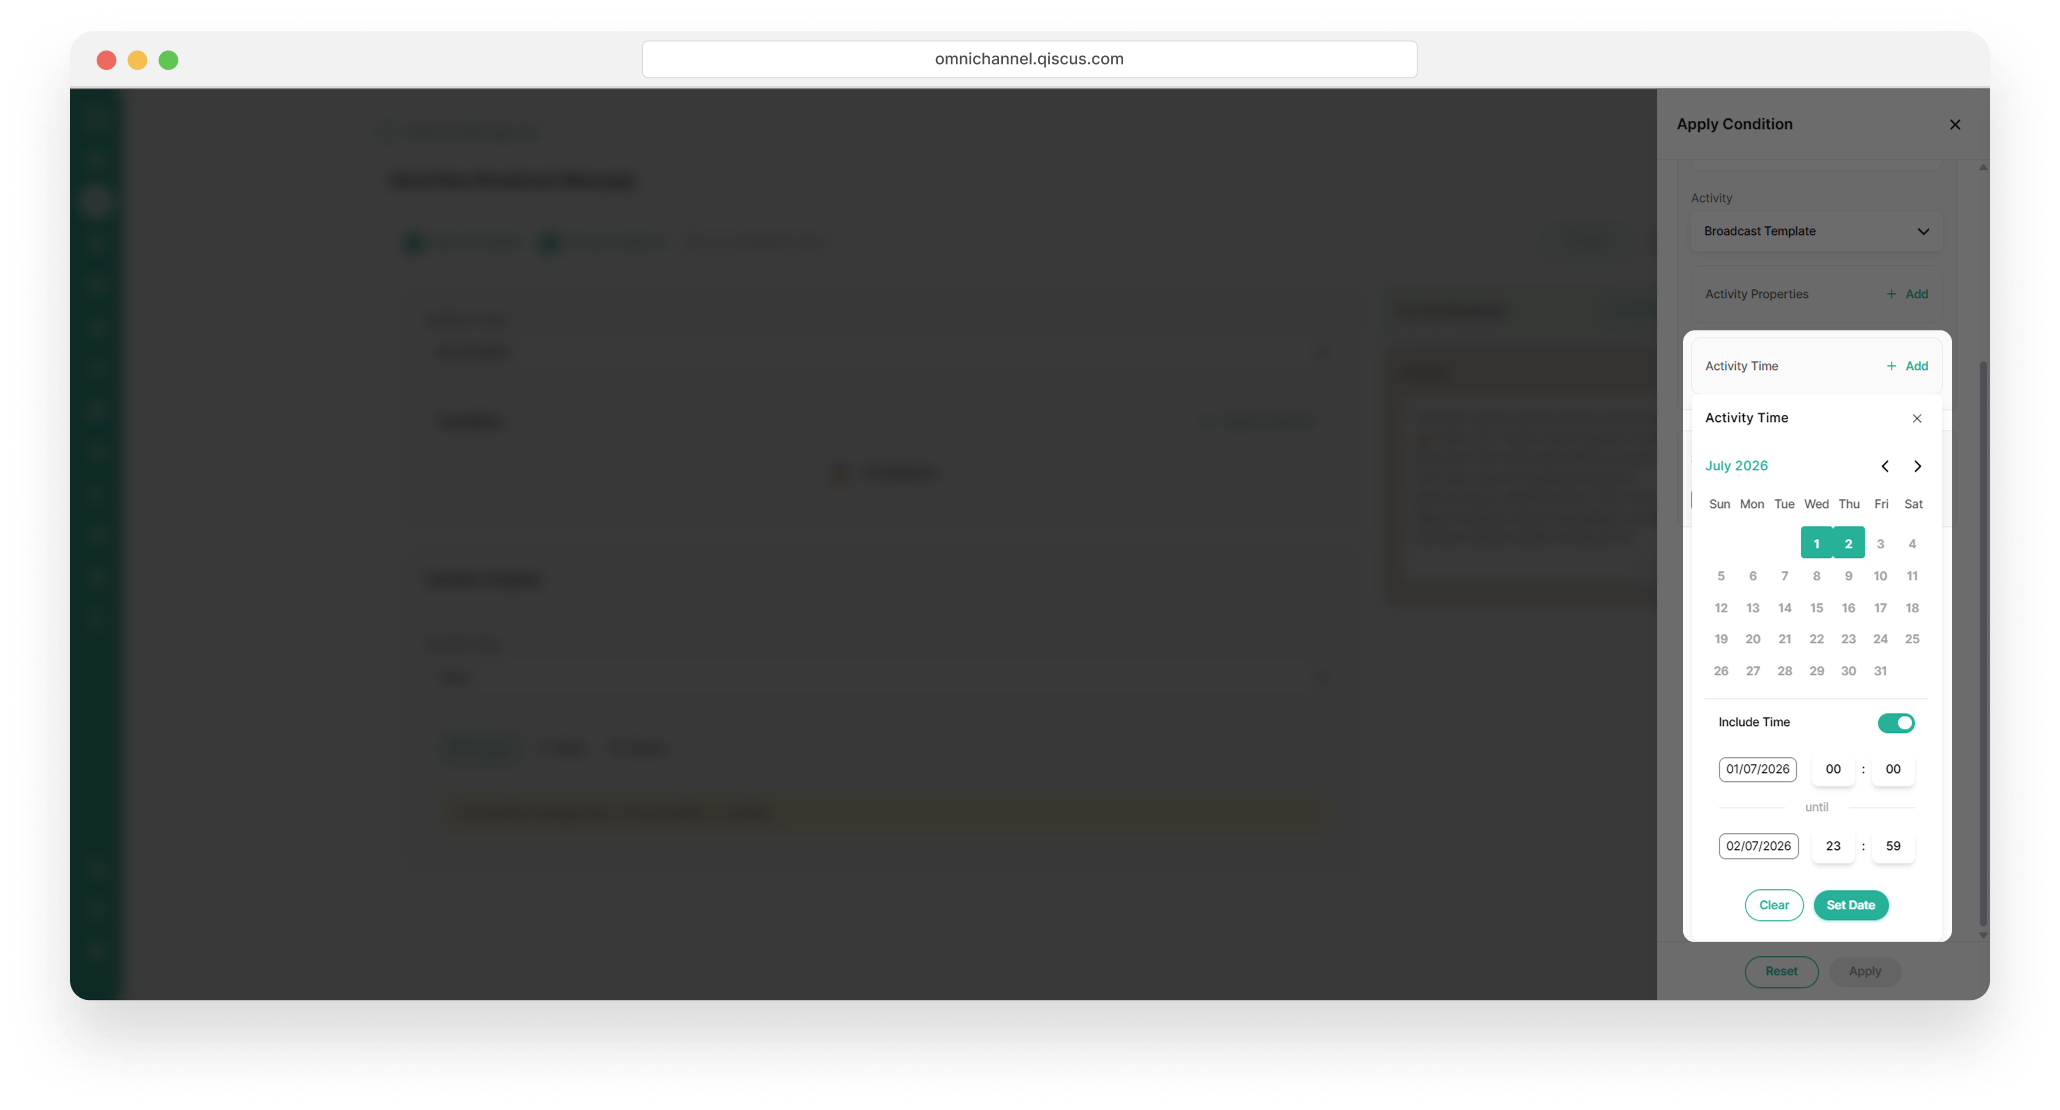
Select a date range and time activity. Then click Apply.
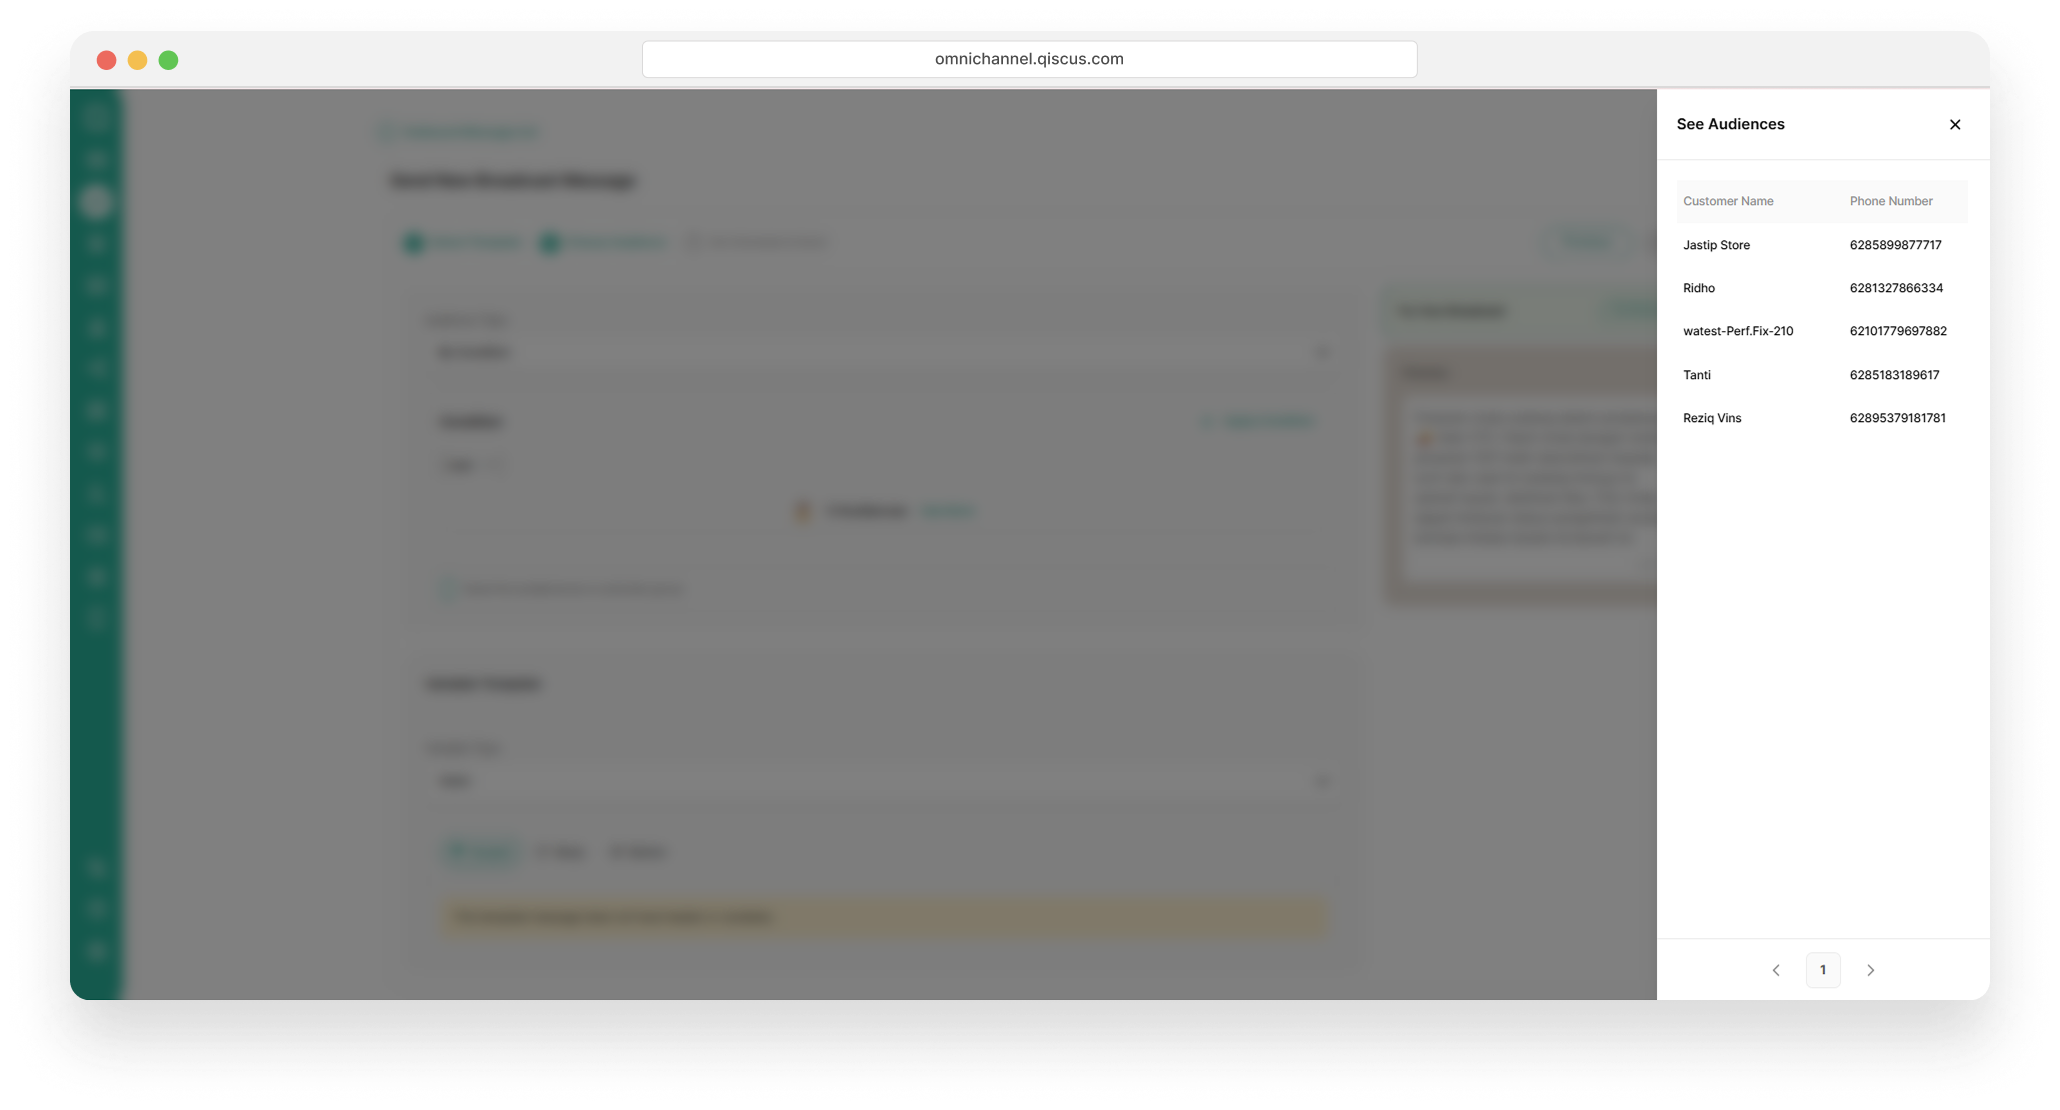
After the audience is selected, the total number of audiences matching your selected criteria will be displayed. If needed, click See More to view the selected audience details. Click X icon to close the tab
Step 3: Set Schedule & Send
Send Now
Send the broadcast immediately after confirmation.
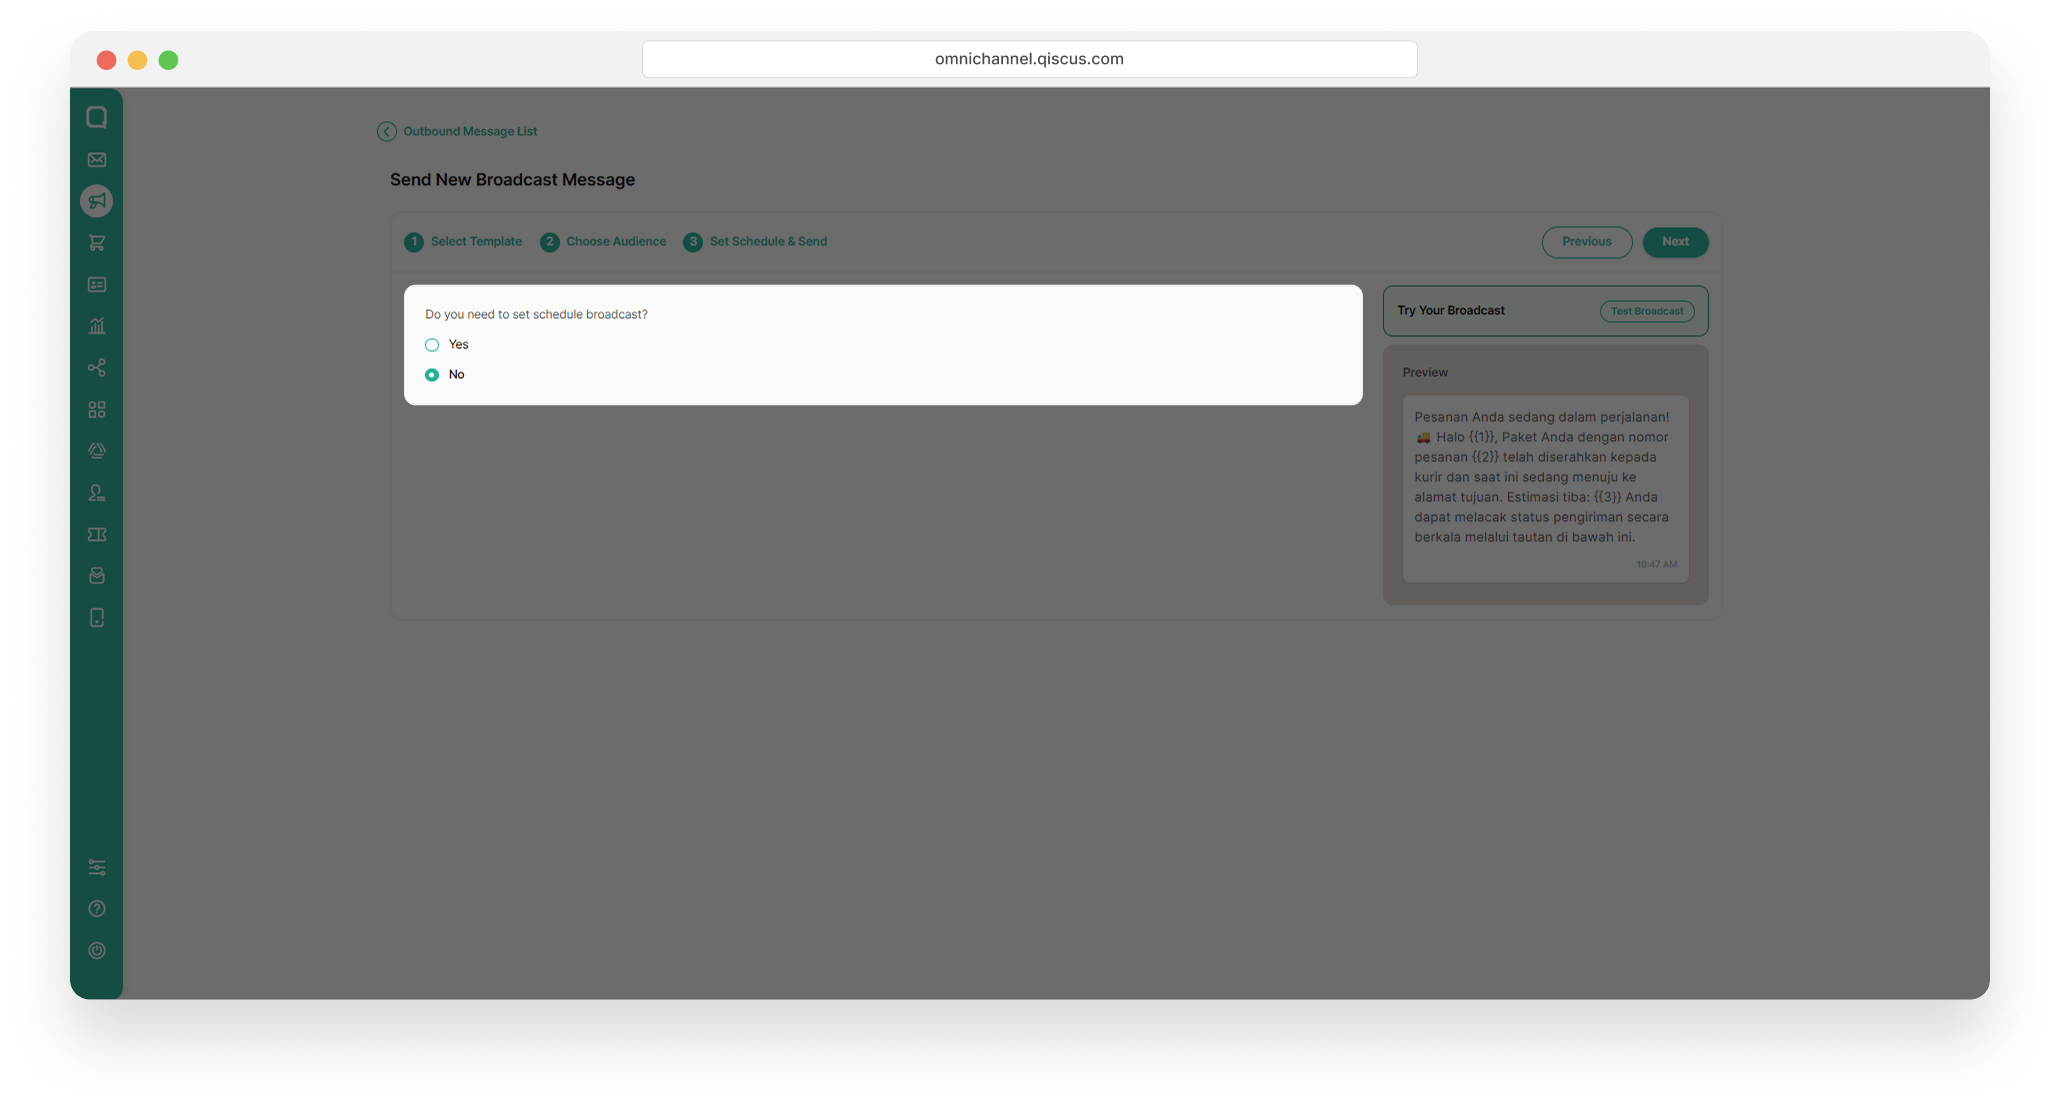
Select No if you want to send the broadcast immediately without setting a delivery schedule.
Schedule Send
Set a specific date and time for the broadcast to be sent automatically.
Select Yes to schedule the broadcast delivery date and time, then click Set Date
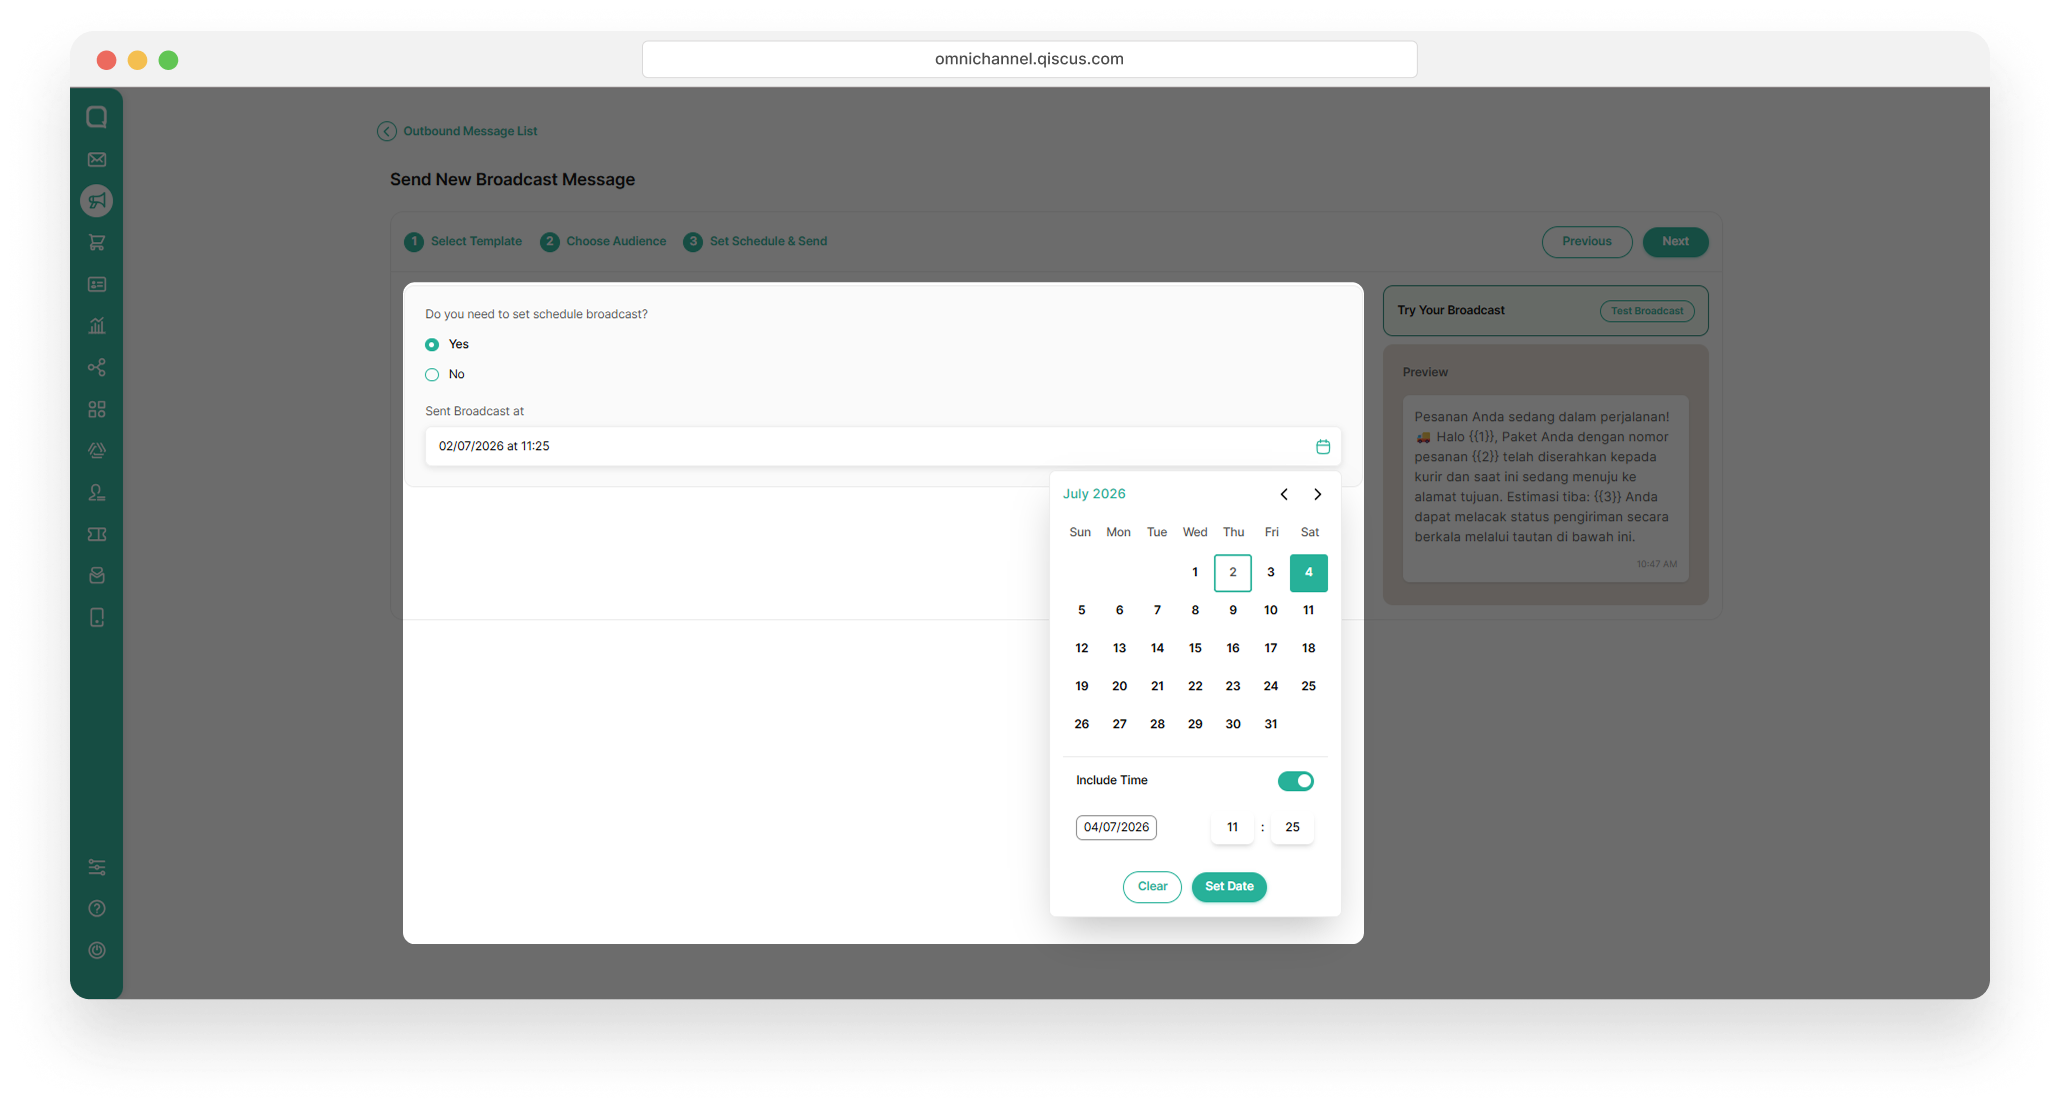
The scheduled delivery time will be displayed, and you can change it if needed before the broadcast is sent.
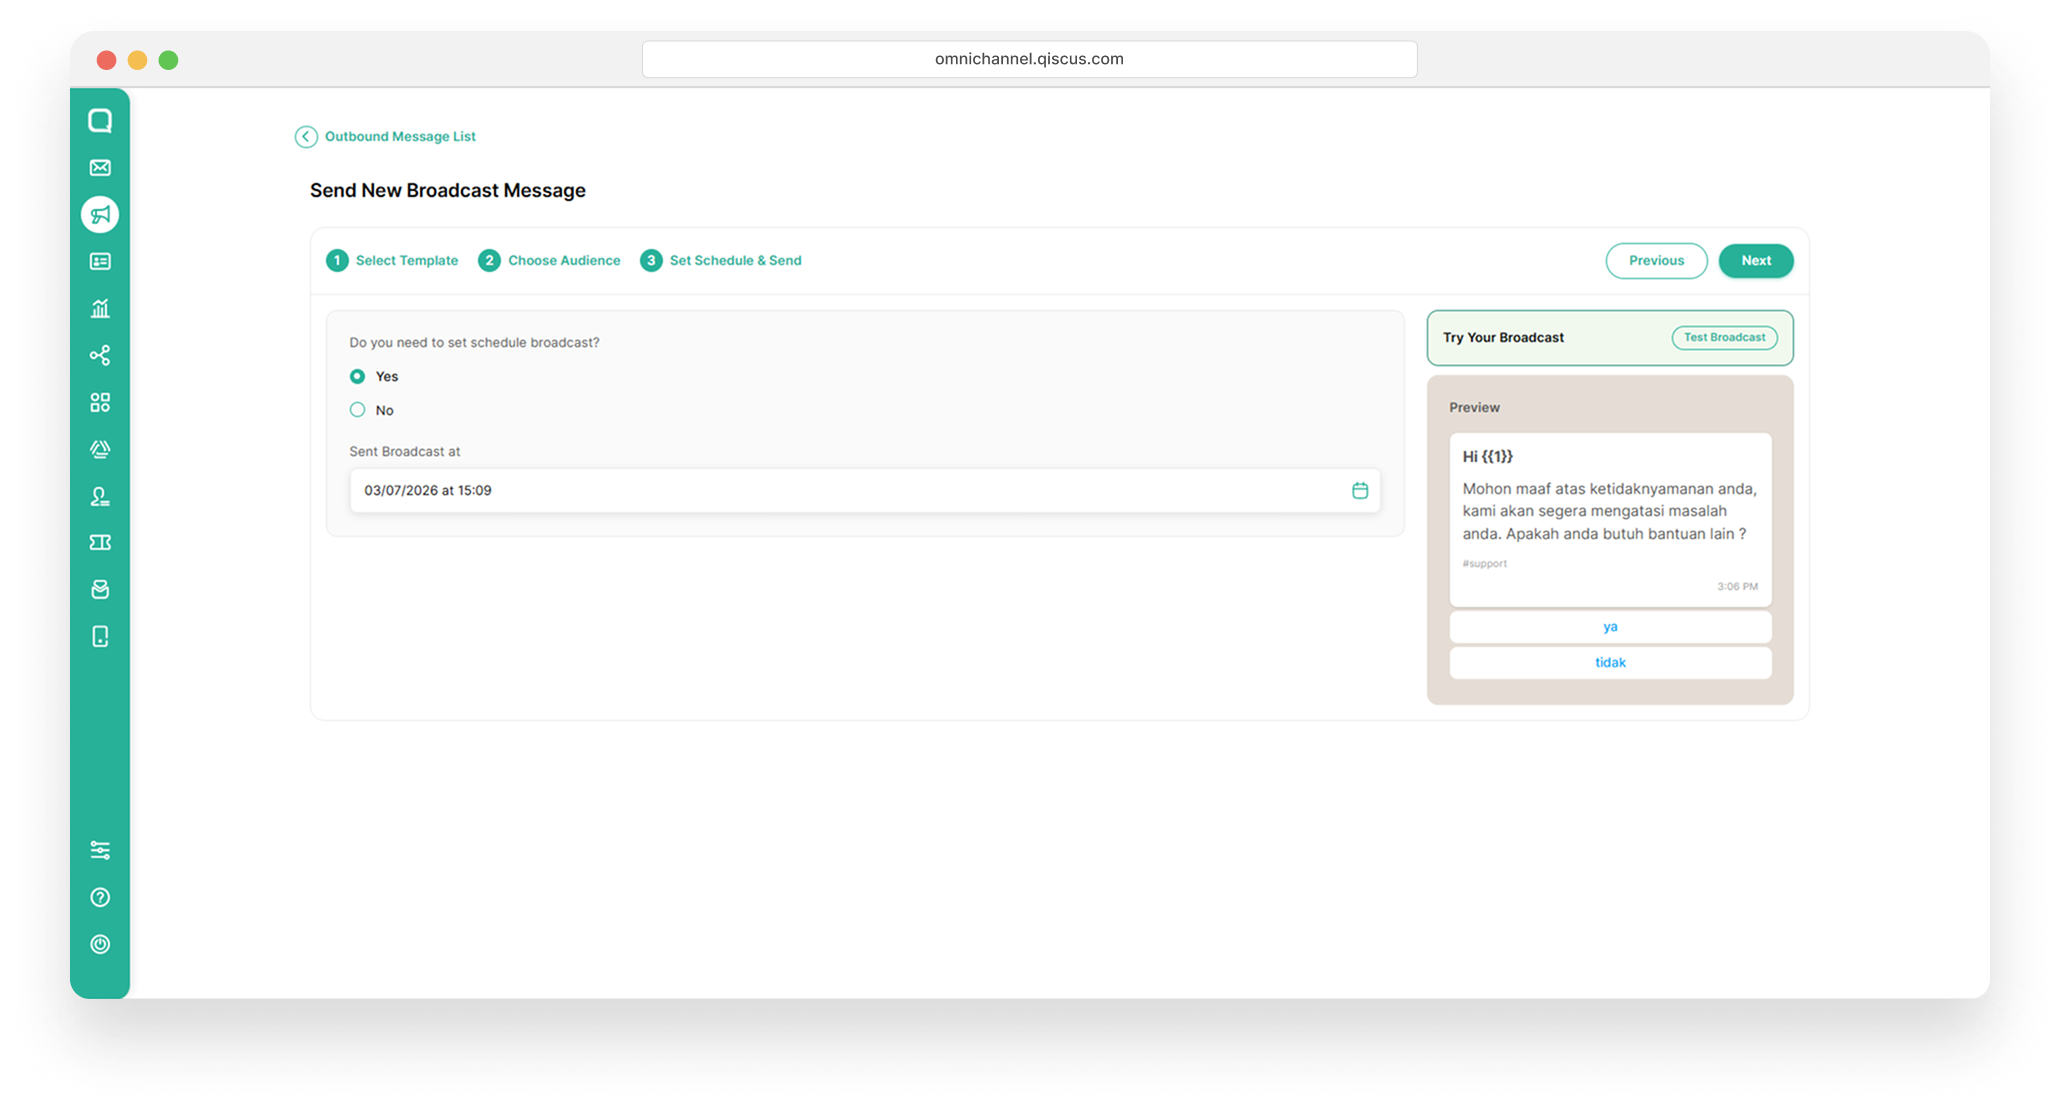
Test Broadcast (Optional)
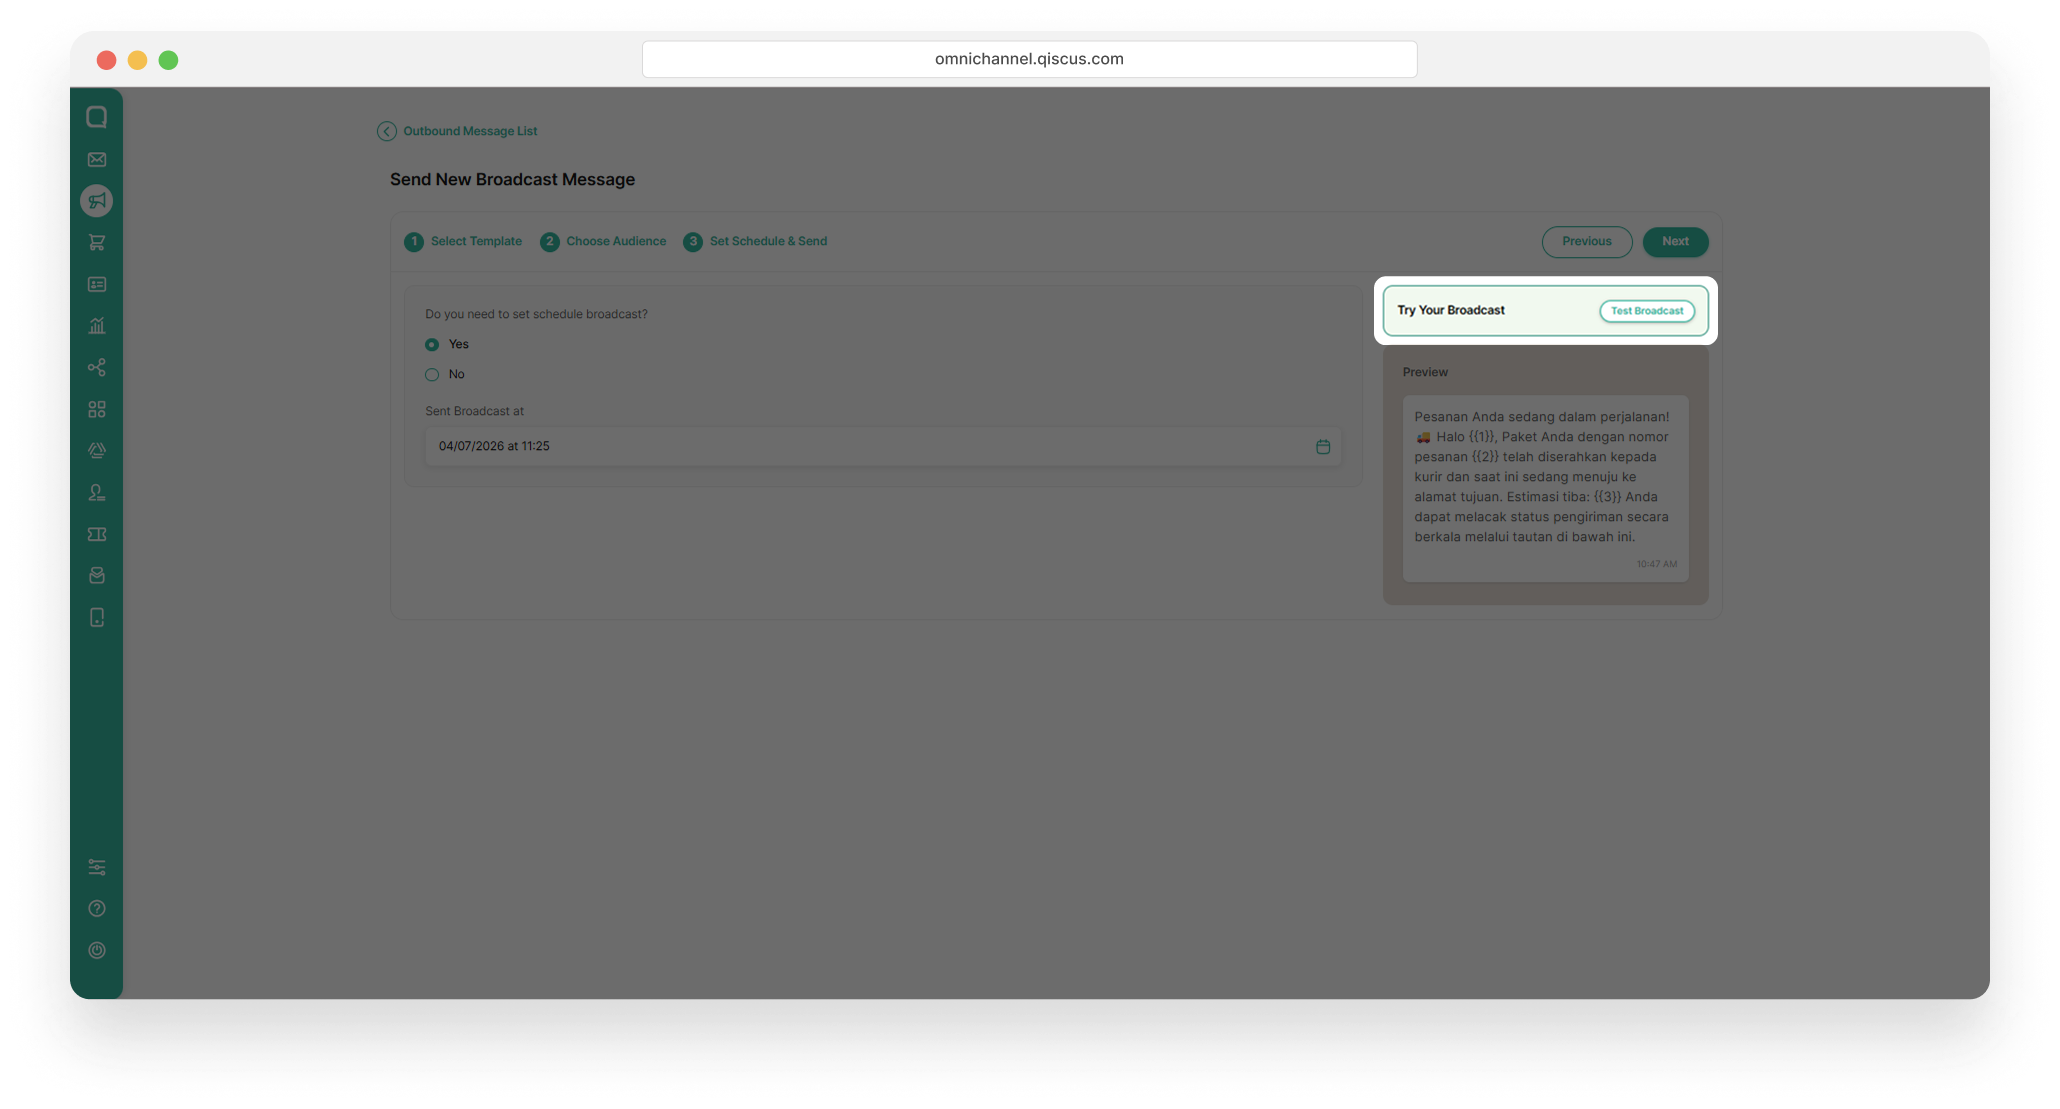
Before sending your broadcast, you can use the Test Broadcast button in the first step to send a test message and preview how it will appear to recipients.
Click Test Broadcast to preview your broadcast message before sending it to recipients.
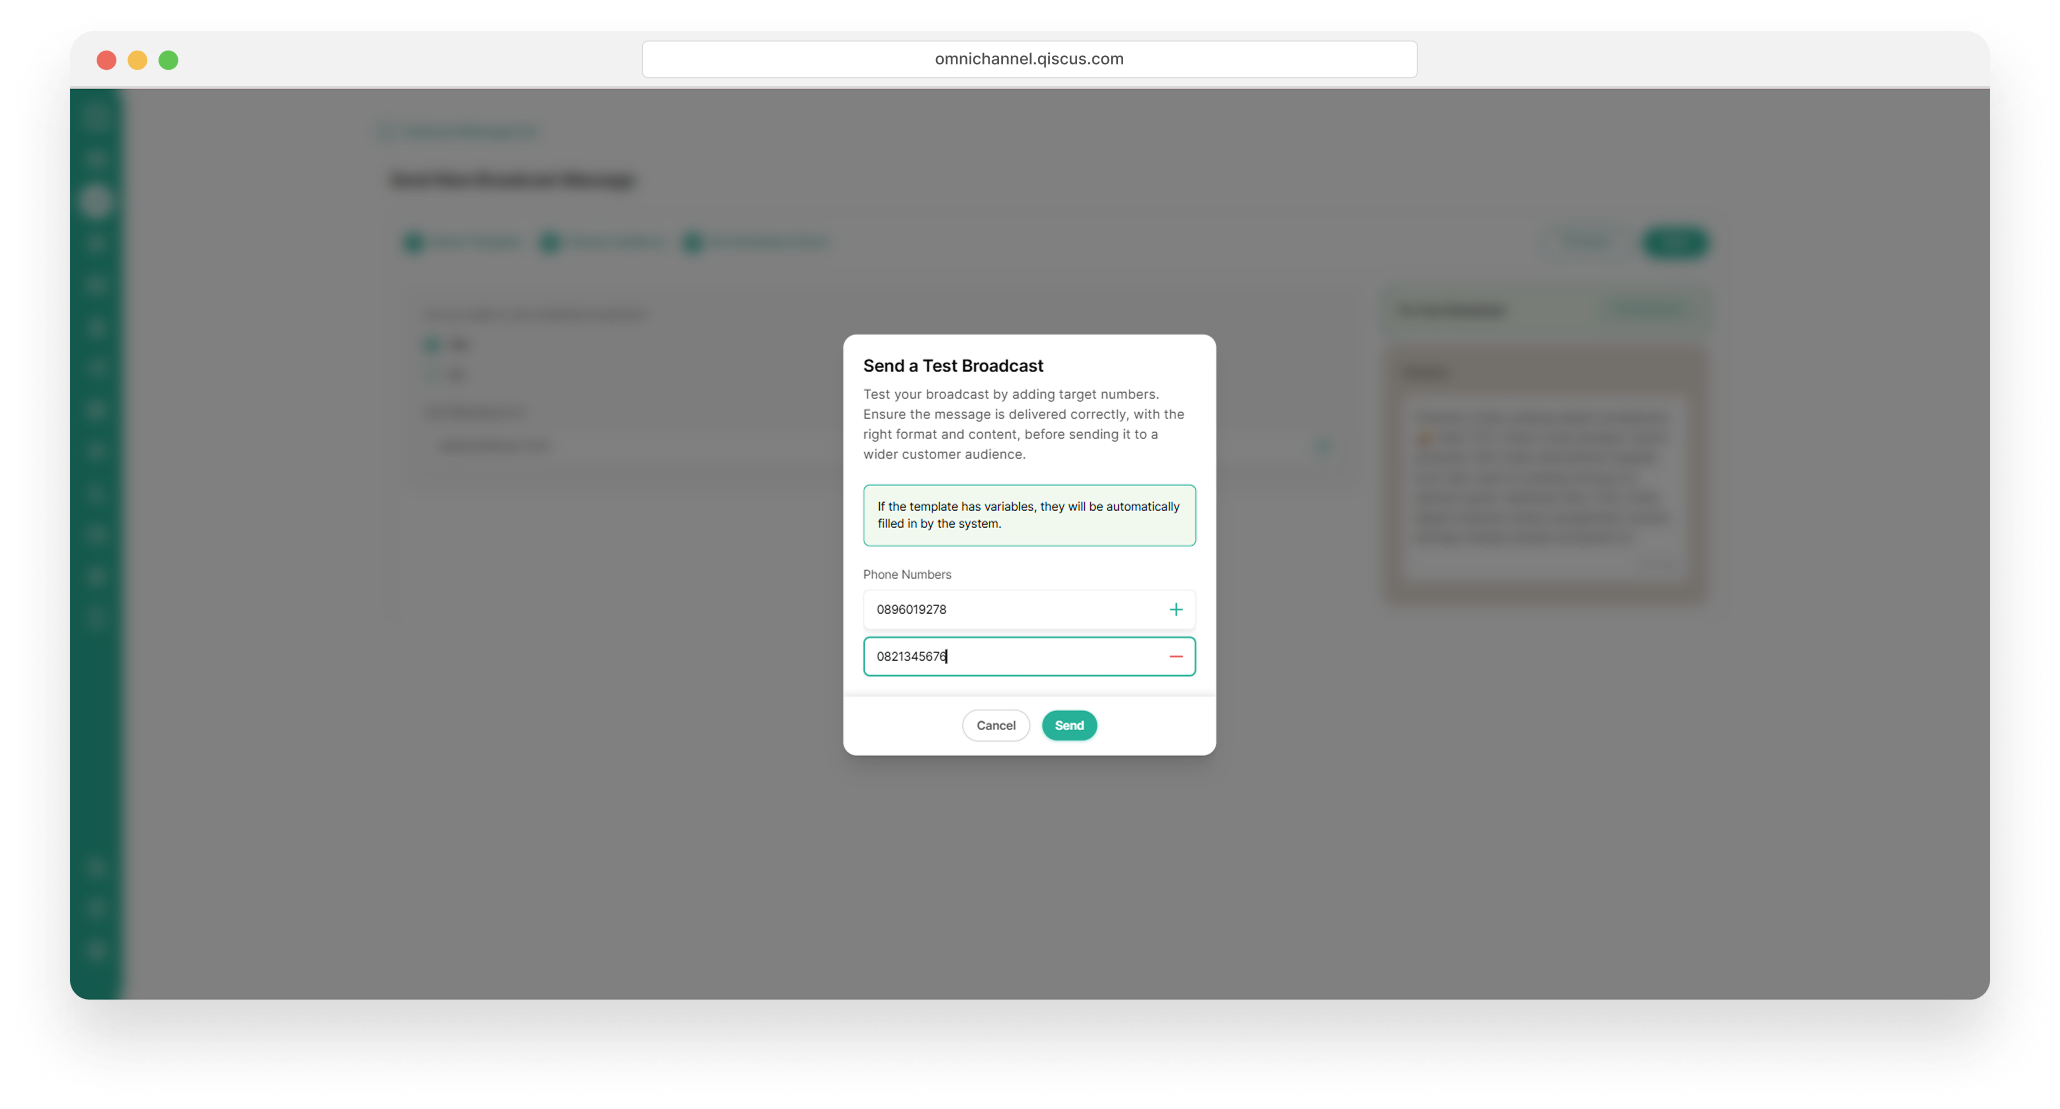
A Send Test Broadcast modal will appear. Enter a phone number to receive and review the test broadcast message. Then click Send
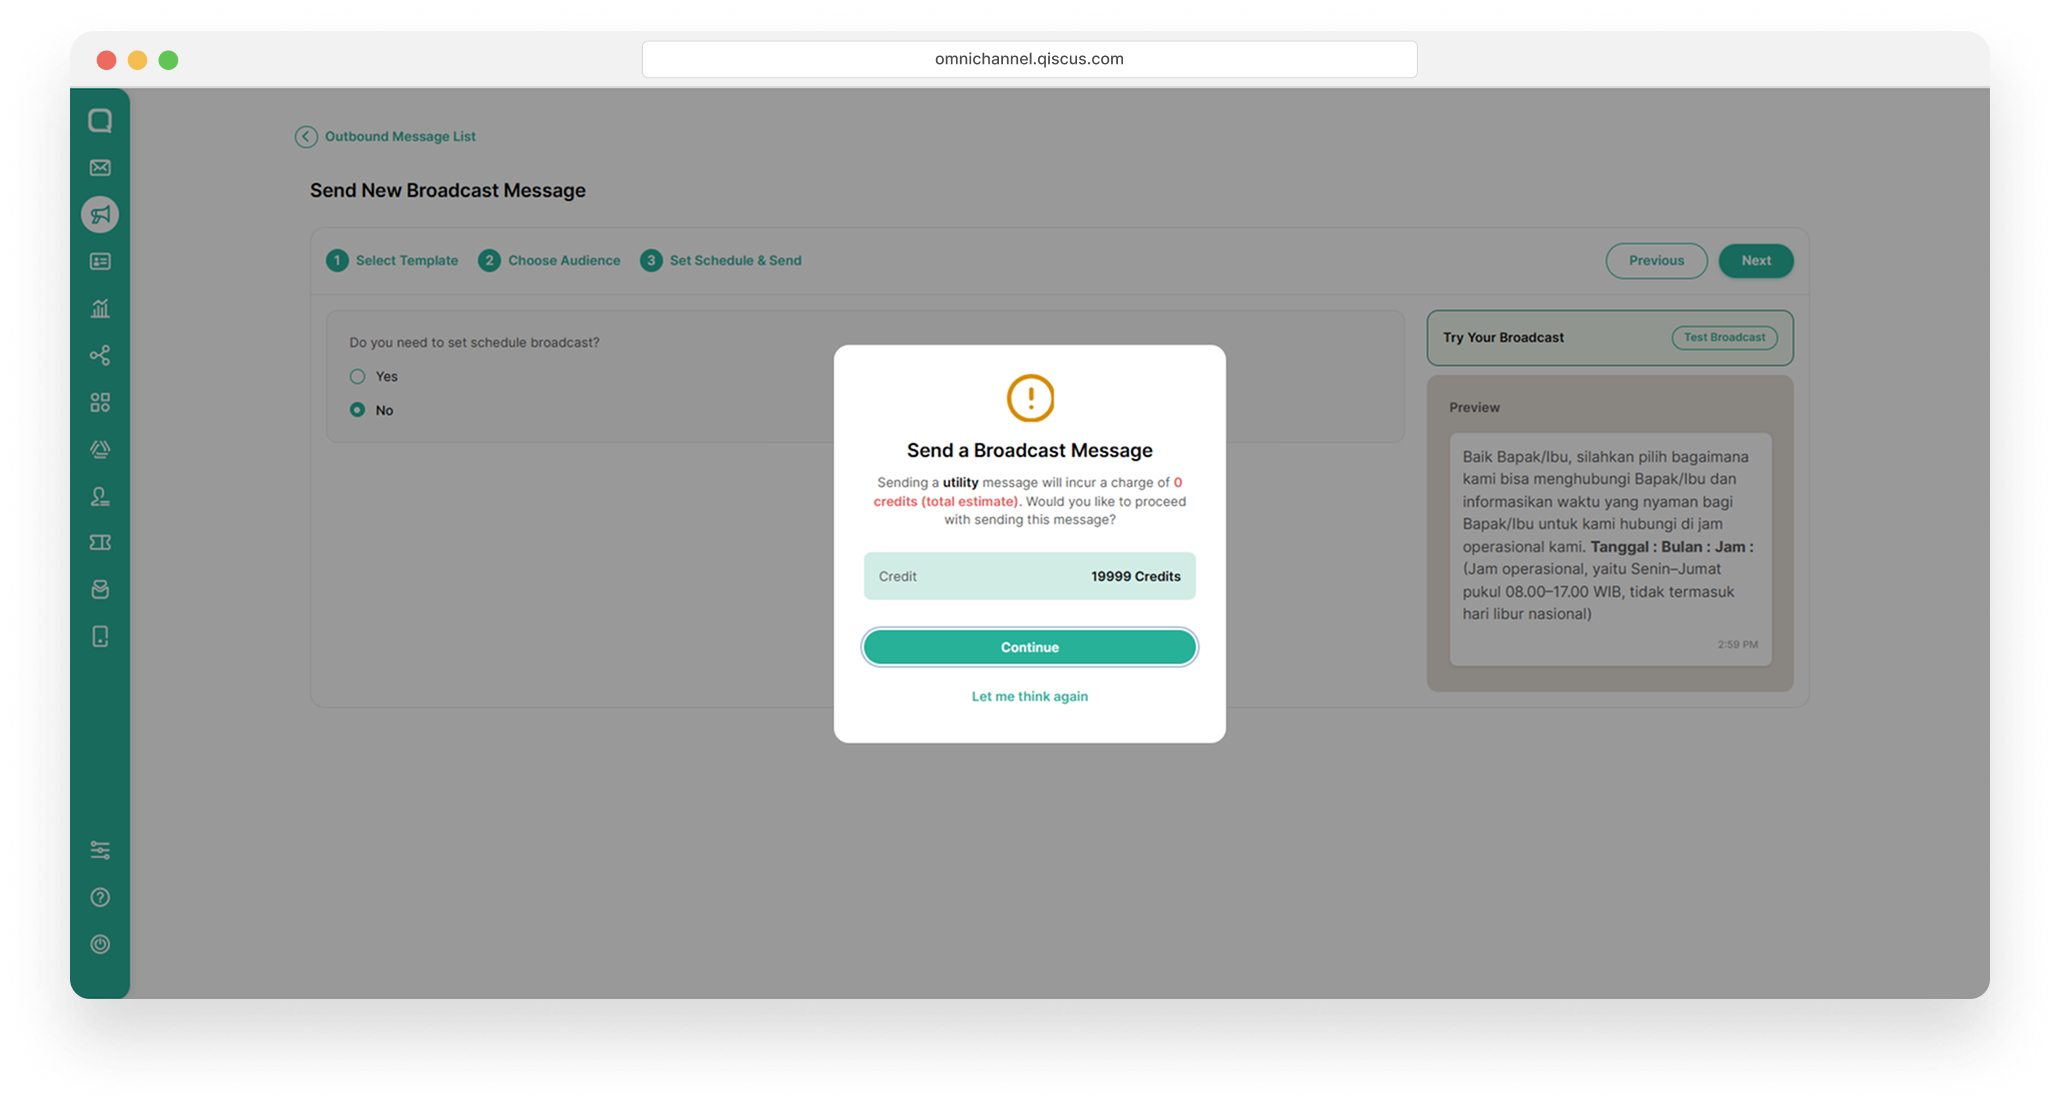
Your available credits will be displayed. Click Continue to proceed, or Let Me Think Again to review your settings
After the test broadcast is sent, you will remain on Step 3. Once you have confirmed that the test message is correct.
Sending a test broadcast will incur the standard messaging fee. If you send both a test and a live broadcast, you'll be charged for each.
Click Next to send your final broadcast.
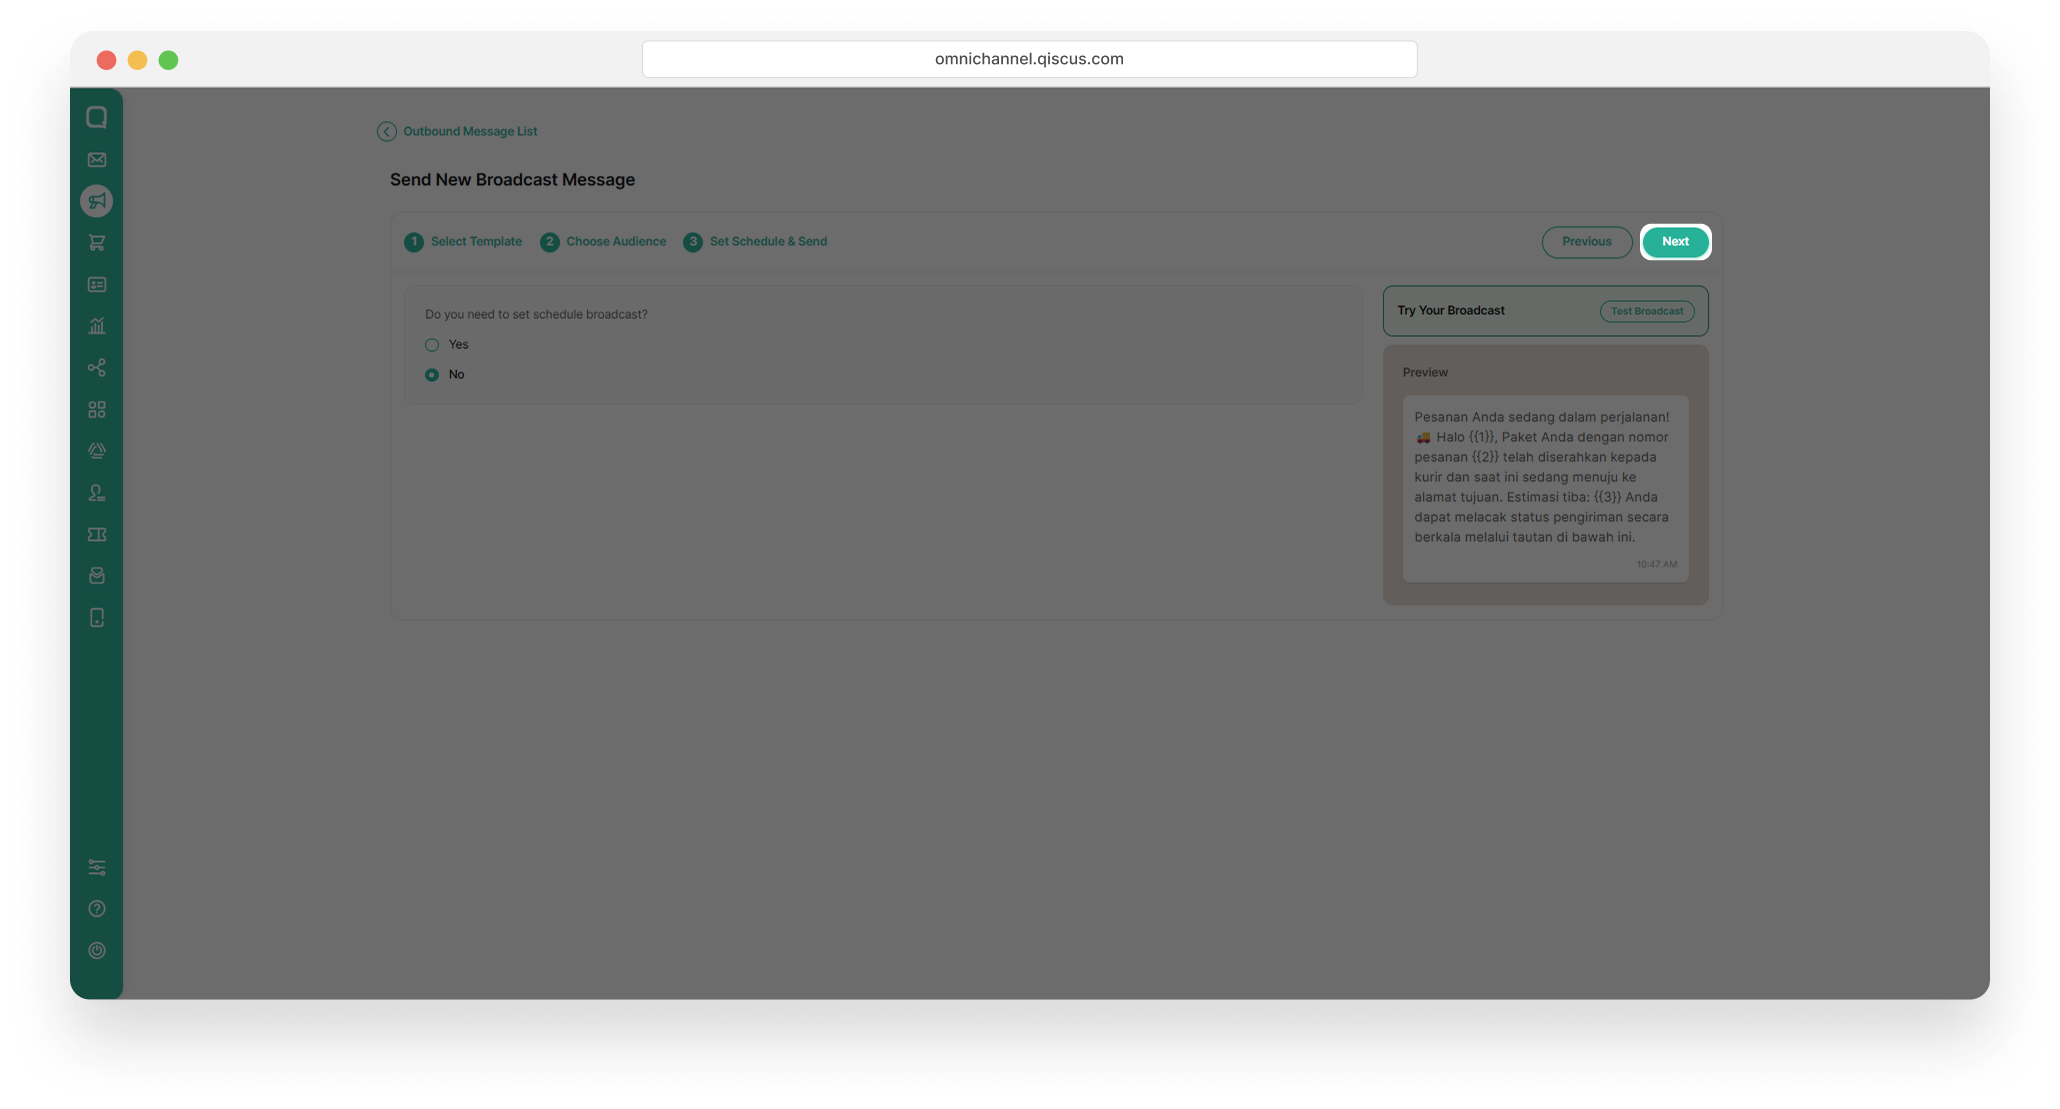
Your available credits will be displayed. Click Continue to proceed, or Let Me Think Again to review your settings.
Your broadcast has been successfully created and recorded in the All Status log on the dashboard.
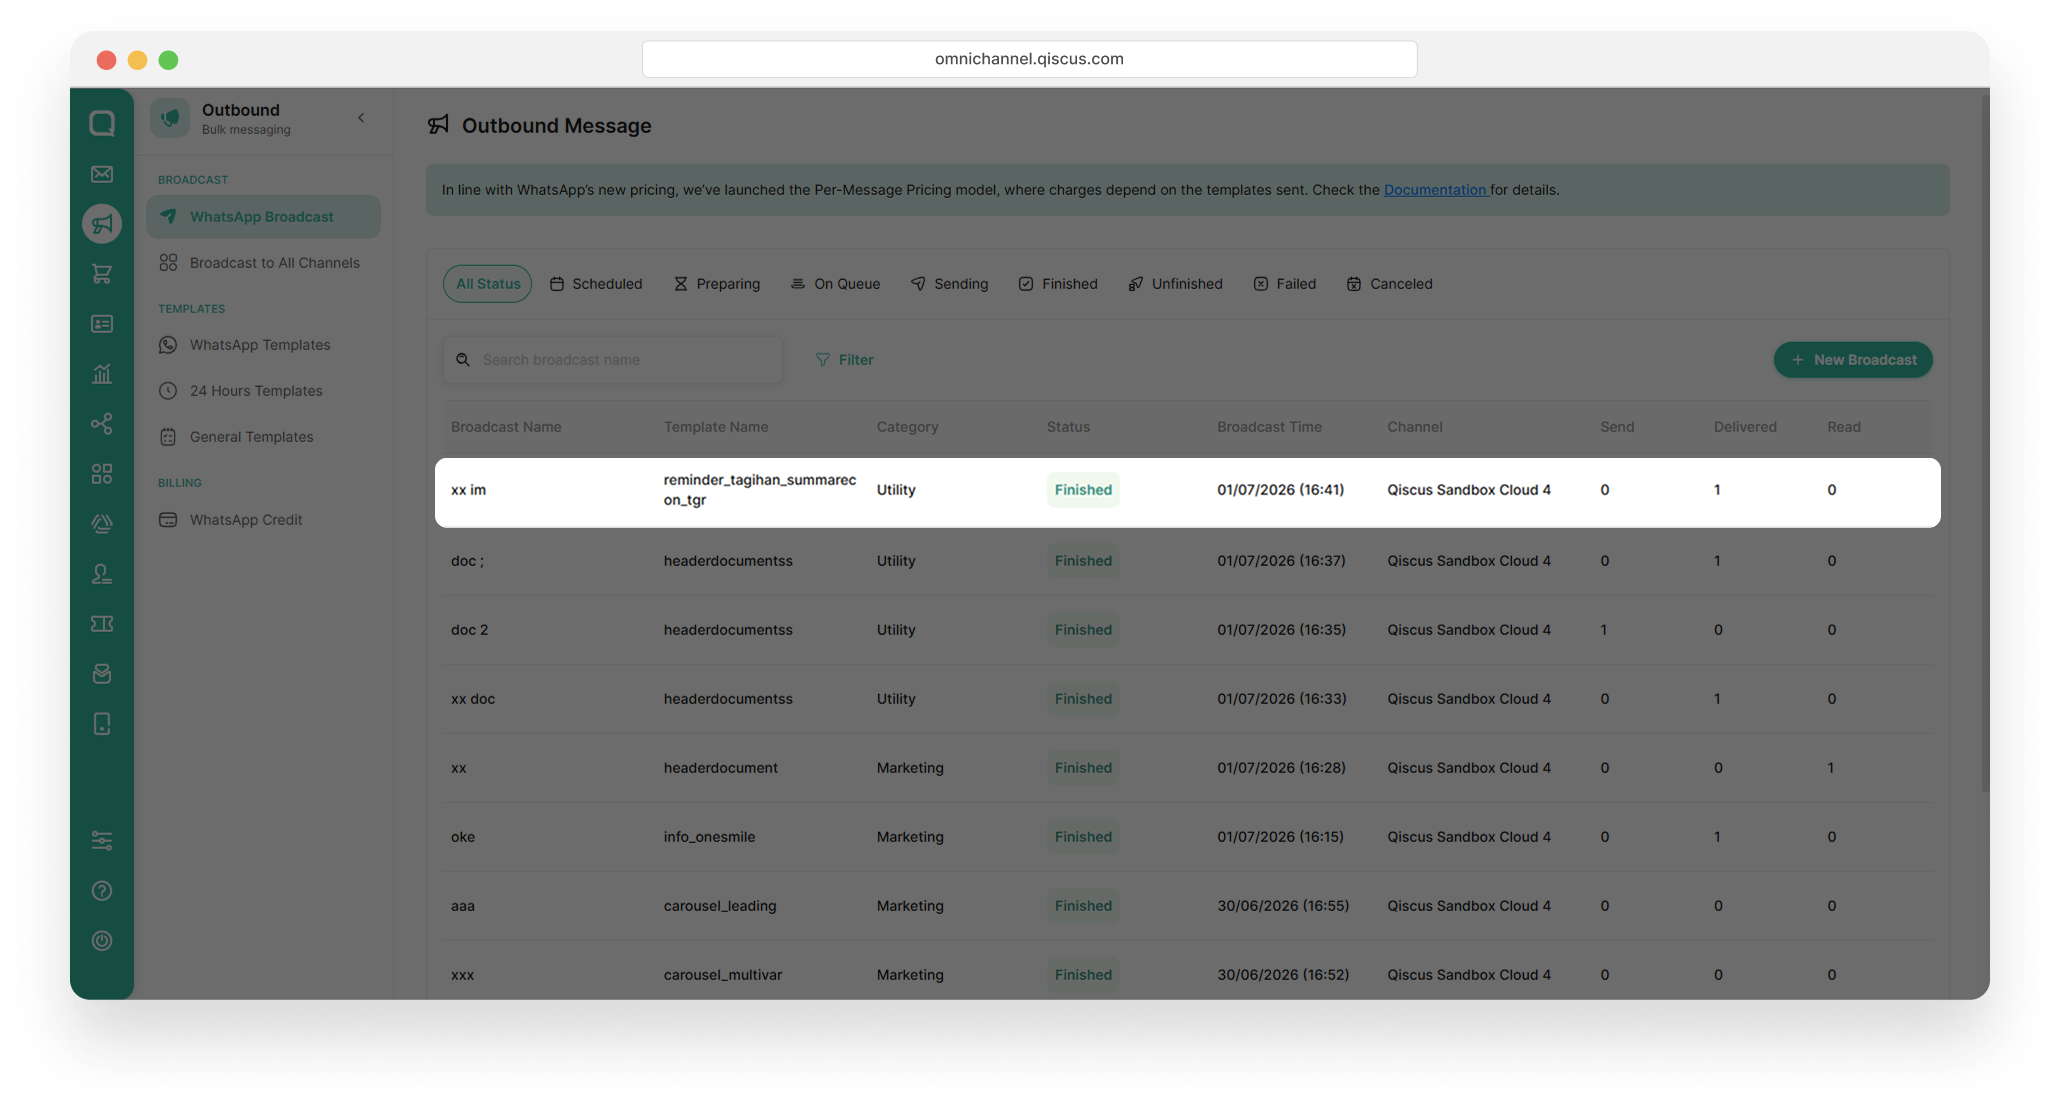
Agent Send via Outbound Message
As admin, assign your agent to any WhatsApp Channel, please follow steps in Agent Management.
Set access permission to Outbound Message page to the agent.
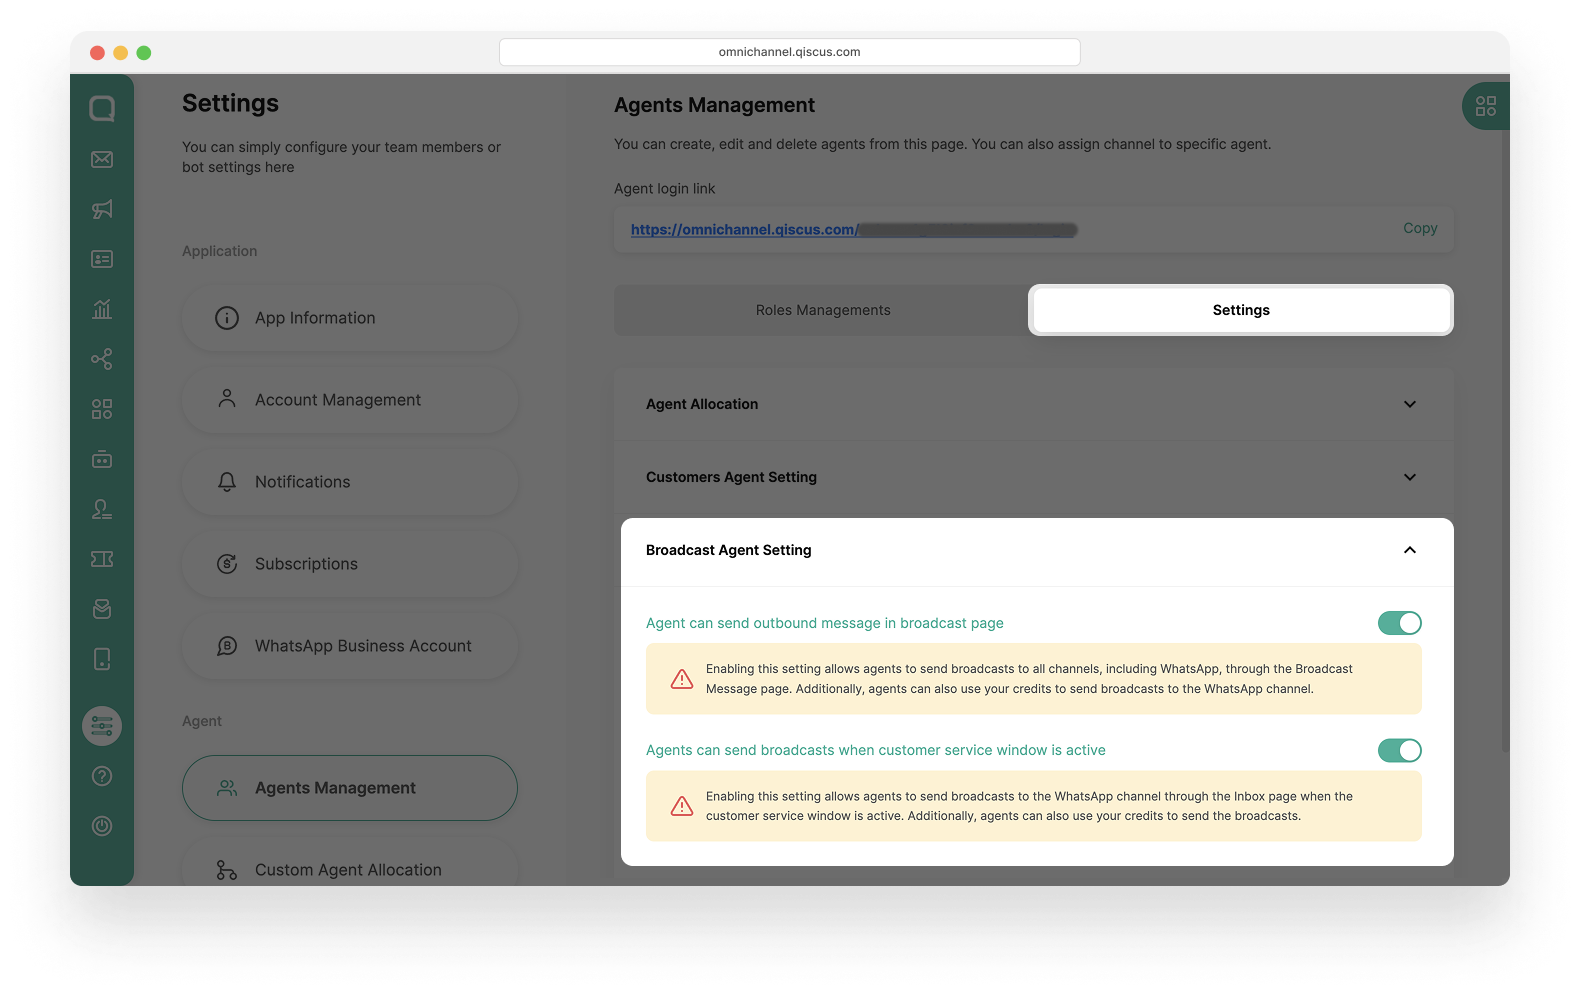
Now, your agent can access and send a WhatsApp Broadcast Template Message via Outbound Message page.
Agent can't create a template message