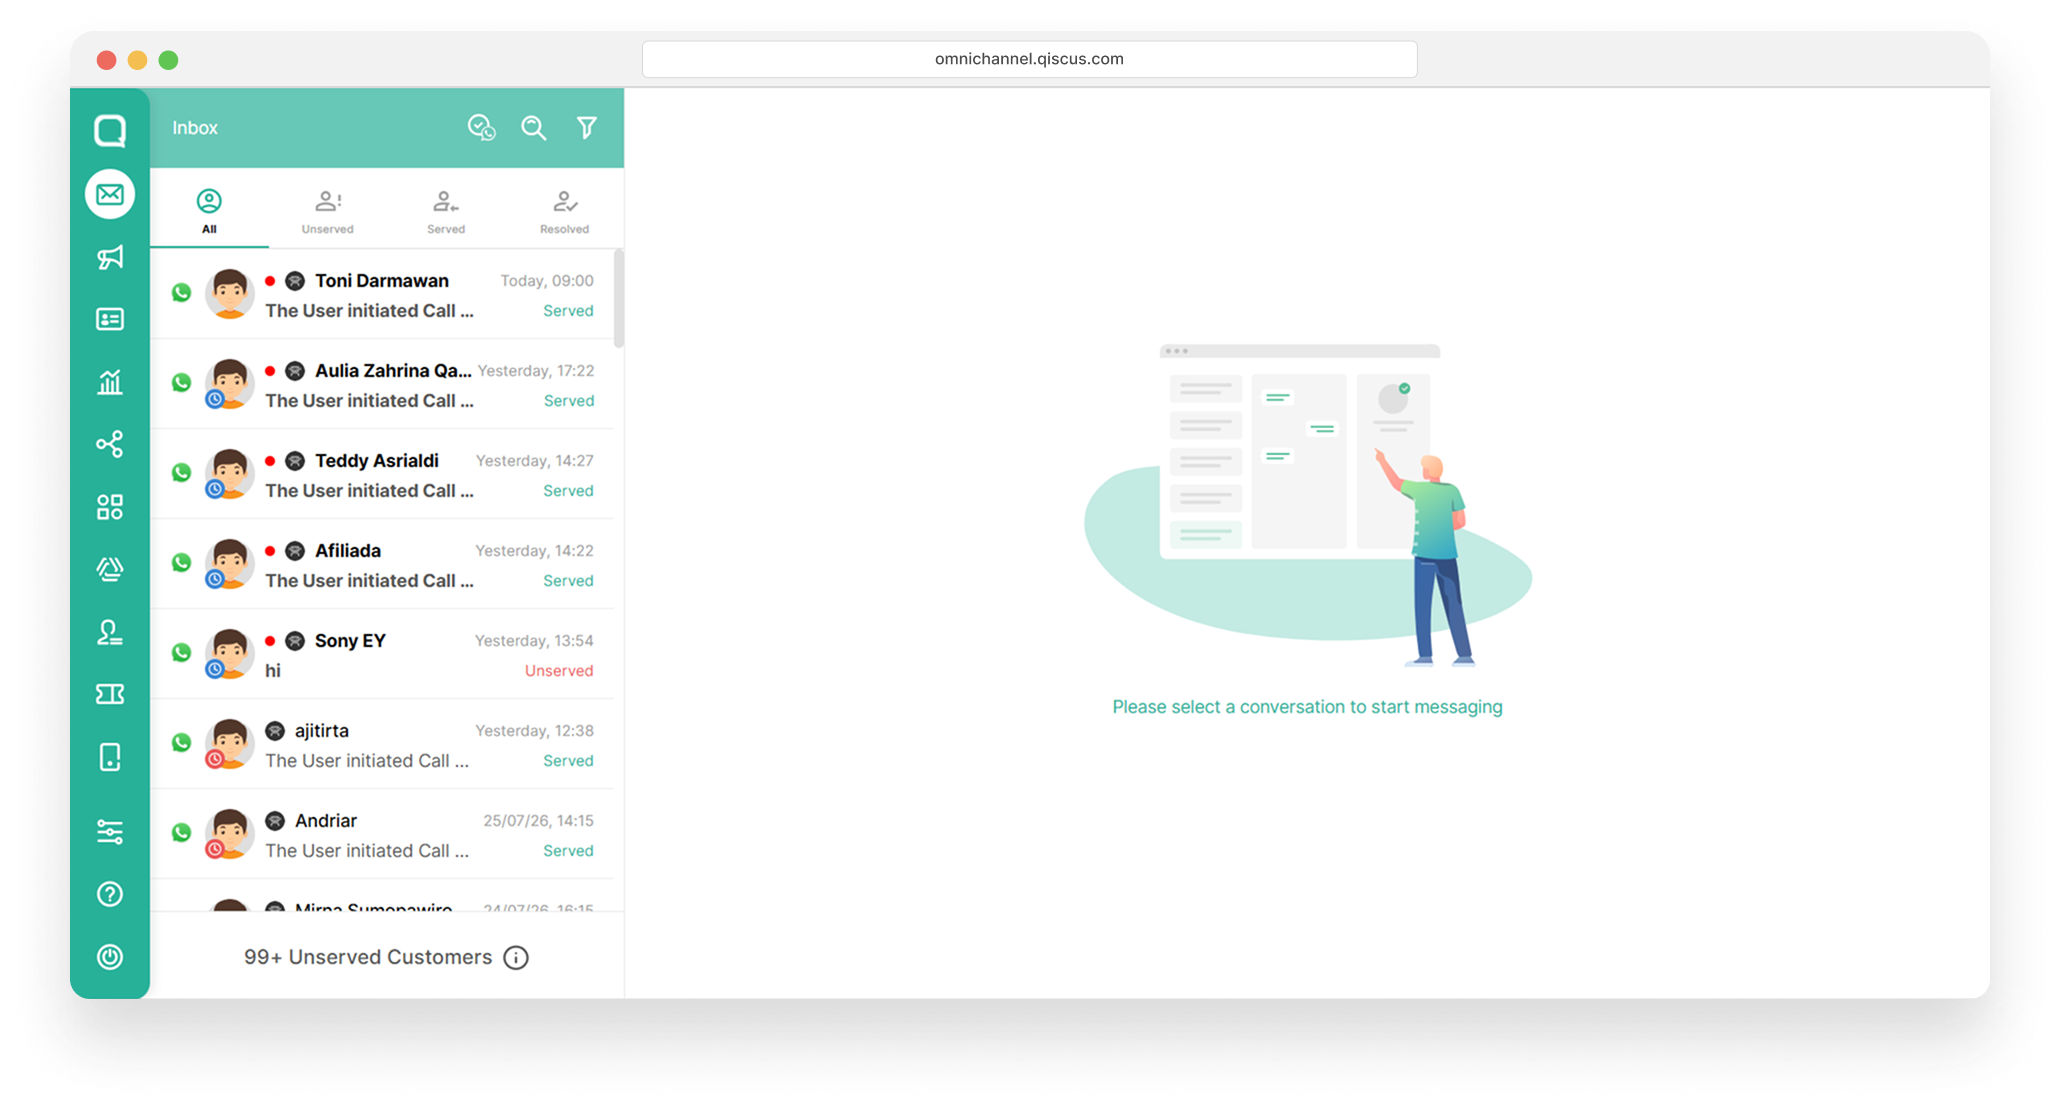
To use the Qiscus Omnichannel API, you must authenticate yourself. Only users with valid authentication tokens can access the service.
Login
You must authenticate yourself using basic authentication (email, password) when you log in. The following are the login API you can use:
Base URL:
Sample Request Body:
CURL Sample:
Sample Response:
Field | Type | Description |
|---|---|---|
data.user.authentication_token | string | This field is equal to Short lived token. Token will expired in 30 days and every login usage will produce new token that doesnt make the old valid token expired |
data.long__lived__token | string | This token will be used in token management api, such as : refresh_token, revoke_ token, active_token_list |
Authentication Type
There are two types of authentication used by Qiscus Omnichannel Chat, REST Token and Short lived Token.
REST Token
The REST Token is used to authenticate server to server using the app code and secret key. Here is the REST token implementation:
How to get app id and secret
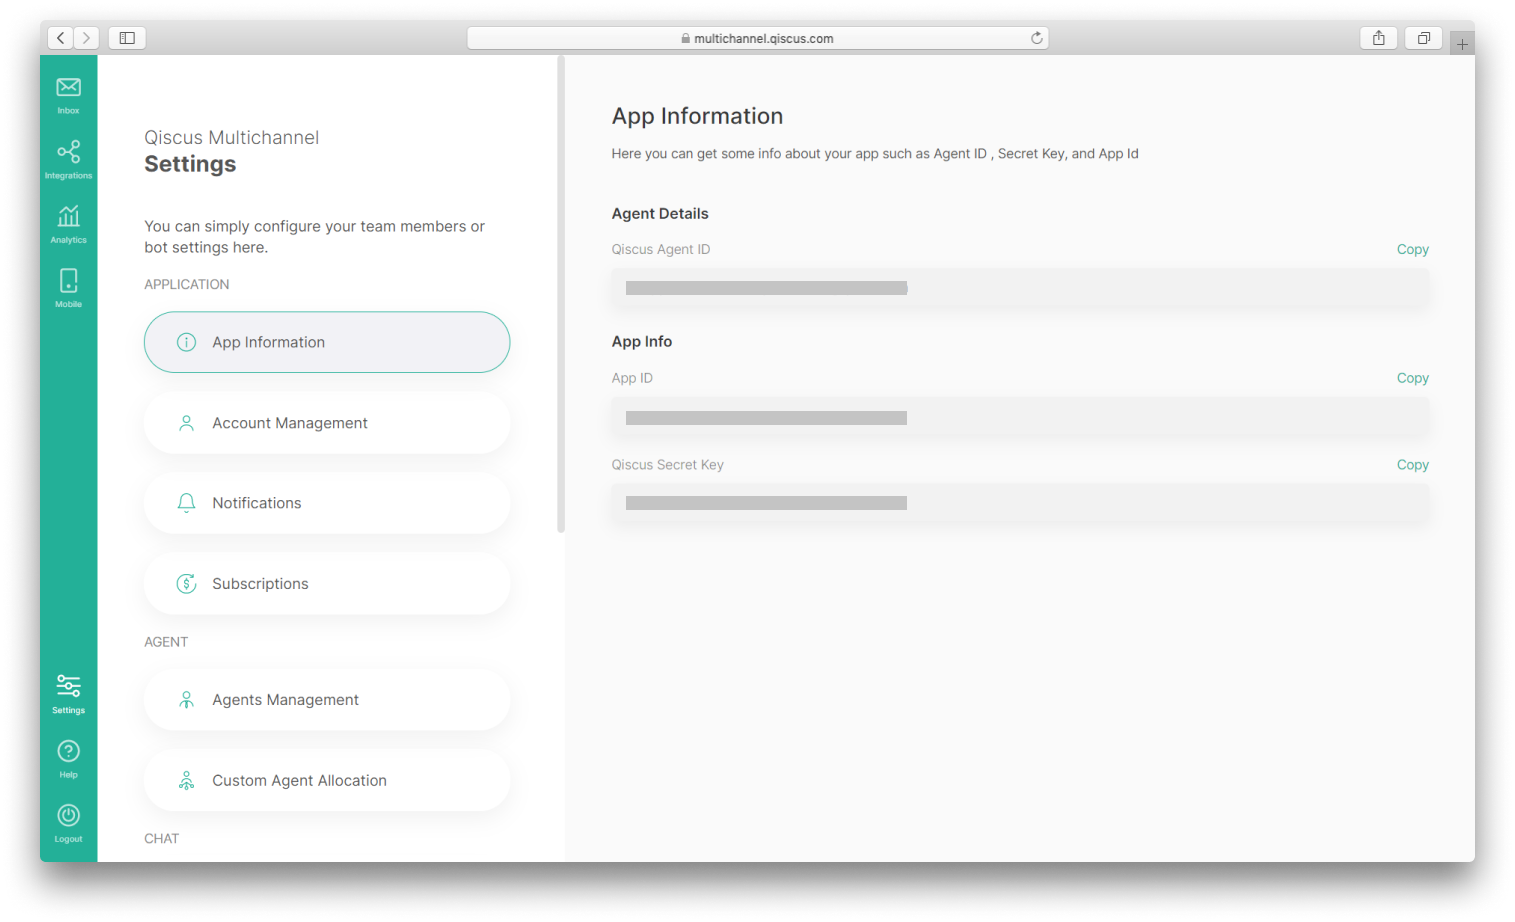
Usage Sample:
You can always call any API using this method without worrying about token expiration.
Short Lived Token
To keep your information safe, you can choose to use a short lived token for authentication. Starting 4th November 2020, Qiscus Omnichannel Chat will enforce a provision whereby the short lived token validity period is 30 days after the token was generated. However, the validity period of short lived token will change under certain circumstances:
When a user log in to Qiscus Omnichannel Chat, a short lived token will be generated and by default will expire in 30 days.
If a user log out before the expiration date, the short lived token will become invalid. Hence, user must log back in.
Once user log back in, a new short lived token will be generated. The new token will expire in the next 30 days from the last log in date.
You can see the image below to understand short lived token period clearly.

The following is a list of APIs that will be impacted if you implement a short live token:
1. Refresh Token
If the short lived token is expired. You can use the following API.
Base URL:
Headers:
Sample Response:
When to refresh your token?
If you got response error.detail = ‘token_expired’ like below payload when calling any API, you should revoke your token
2. Revoke Token
Revoke token you want to be revoked.
Base URL:
Headers:
Body:
Sample Response:
3. Revoke All Token
This token will revoke all your active token and give you a new one.
Base URL:
Headers:
Sample Response:
4. List of Active Sessions
See all of your active sessions.
Base URL:
Headers:
Sample Response:
Single Sign-On (SSO)
Single Sign-On (SSO) lets your team access Qiscus Omnichannel through your organization's existing identity provider, instead of maintaining separate Qiscus credentials.
For growing teams, SSO keeps access management centralized: your team signs in with the identity they already use, and you decide who can access Qiscus from a single place — your identity provider. Disable or remove someone there, and they can no longer sign in to Qiscus. SSO handles sign-in (authentication) only; creating and removing Qiscus accounts is still done in Qiscus, with automated provisioning and de-provisioning (SCIM) planned for a future release.
The result is enterprise-grade access control for your admins, and a familiar, password-free sign-in experience for your team.
How SSO Works
SSO follows the standard SAML 2.0 handshake. Understanding the flow helps you know what to expect at each stage:
A user starts login. On the Qiscus login page, the user selects "Login with SSO" and enters their workspace address.
Redirect to your IdP. Qiscus redirects the user to your identity provider's login page.
Your IdP authenticates the user. The user signs in with their corporate credentials, including any multi-factor authentication (MFA) your IdP enforces.
Return to Qiscus. Your IdP sends a signed SAML assertion back to Qiscus. Qiscus validates the signature, matches the user by email, and establishes a session.
Land on the dashboard. The user is taken straight into the Omnichannel dashboard, already signed in.
Before You Start
Make sure you have these ready:
Admin access to Qiscus — You'll need an administrator account to reach the setup page.
Access to your company's login system — The admin area of your login provider (like Okta, Microsoft, or Google), where you'll add Qiscus as a connected app.
Your login system's settings file — A small file (called SAML metadata) from your provider. You can bring it as a web link or as a downloaded file (up to 5 MB).
Your team already added in Qiscus — Everyone who will log in must already exist in Qiscus, using the same email they use in your login system.
Setting Up SSO
Setting up Single Sign-On (SSO) is a one-time configuration. Follow the steps below to set up SSO.
Navigate to Settings, select Single Sign-On
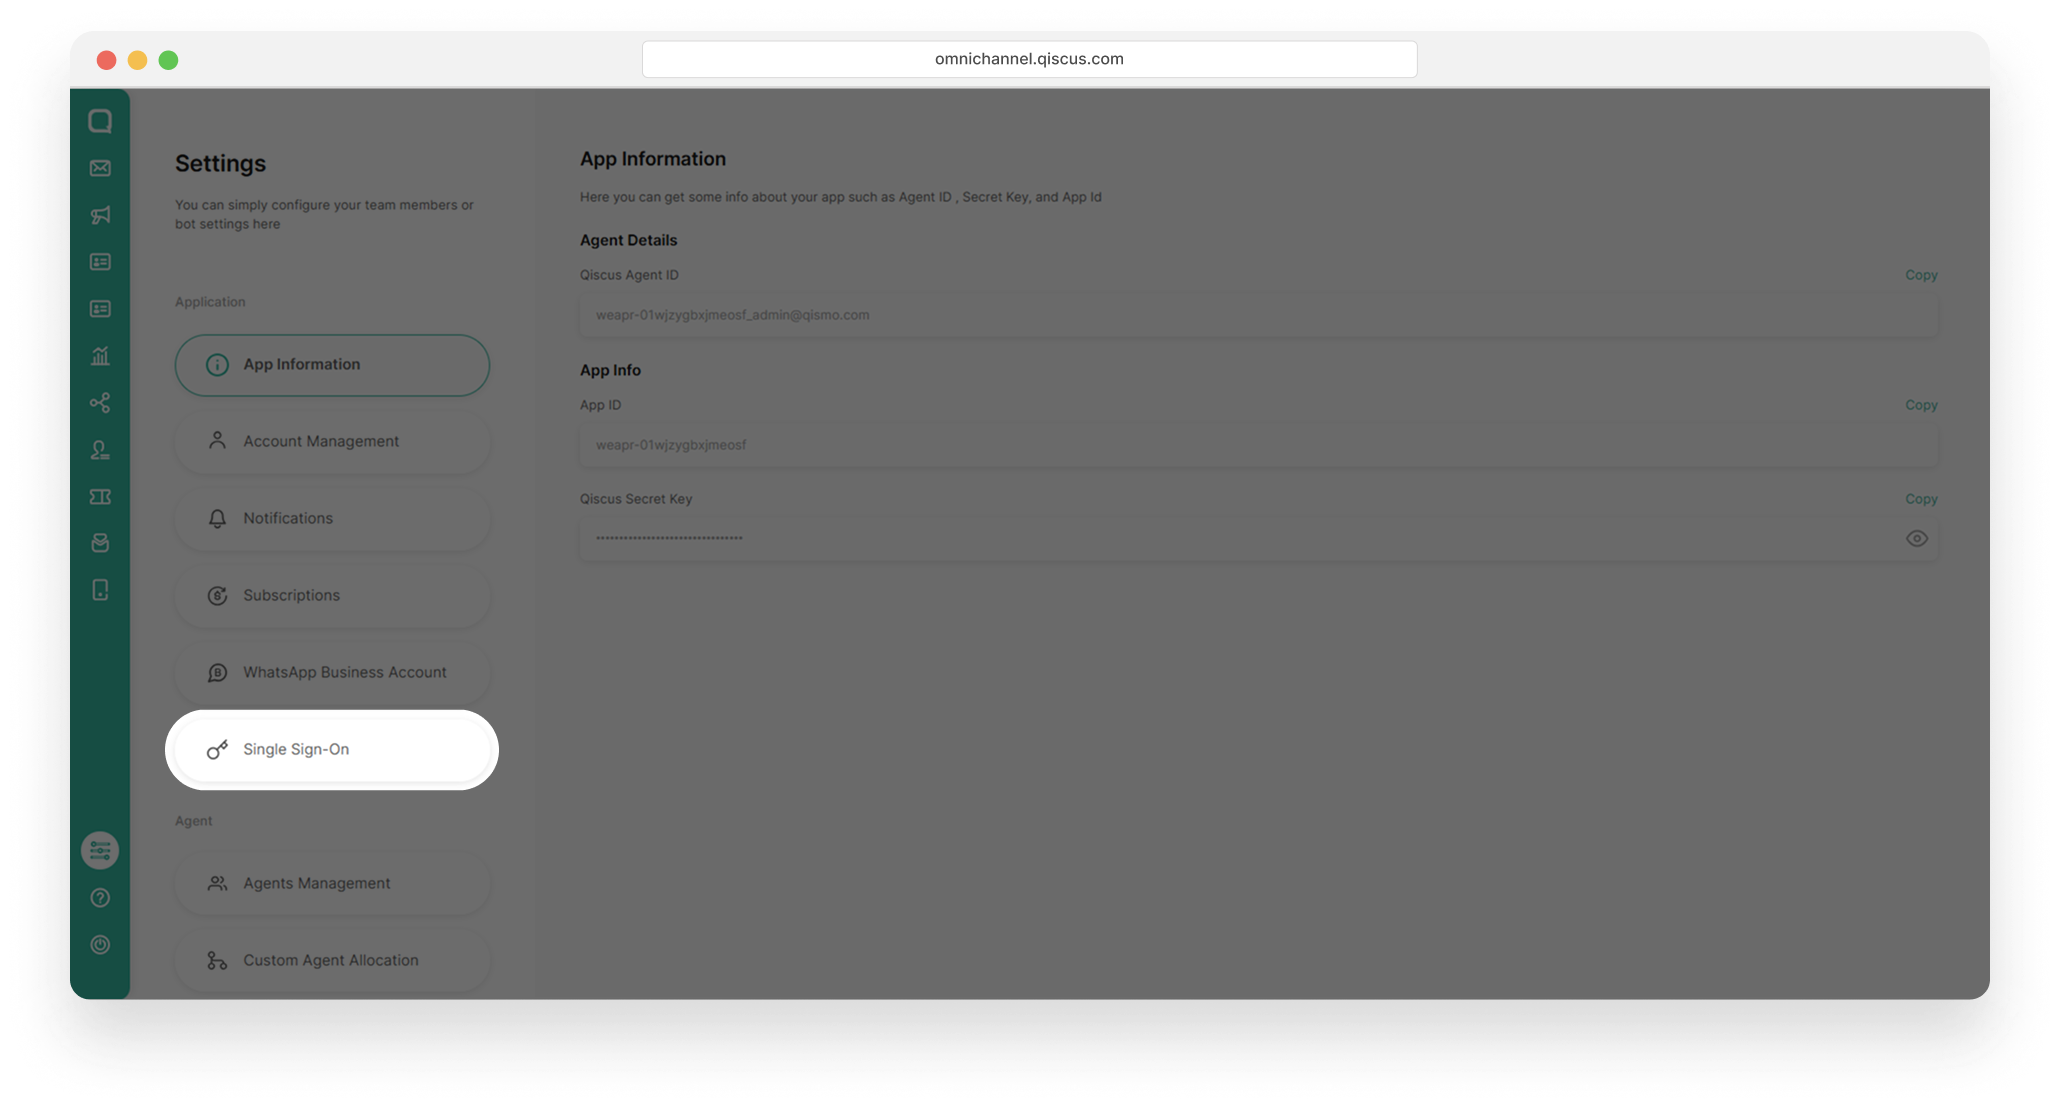
Complete the guided setup wizard. Each step is validated before you can proceed, ensuring your configuration is correct.
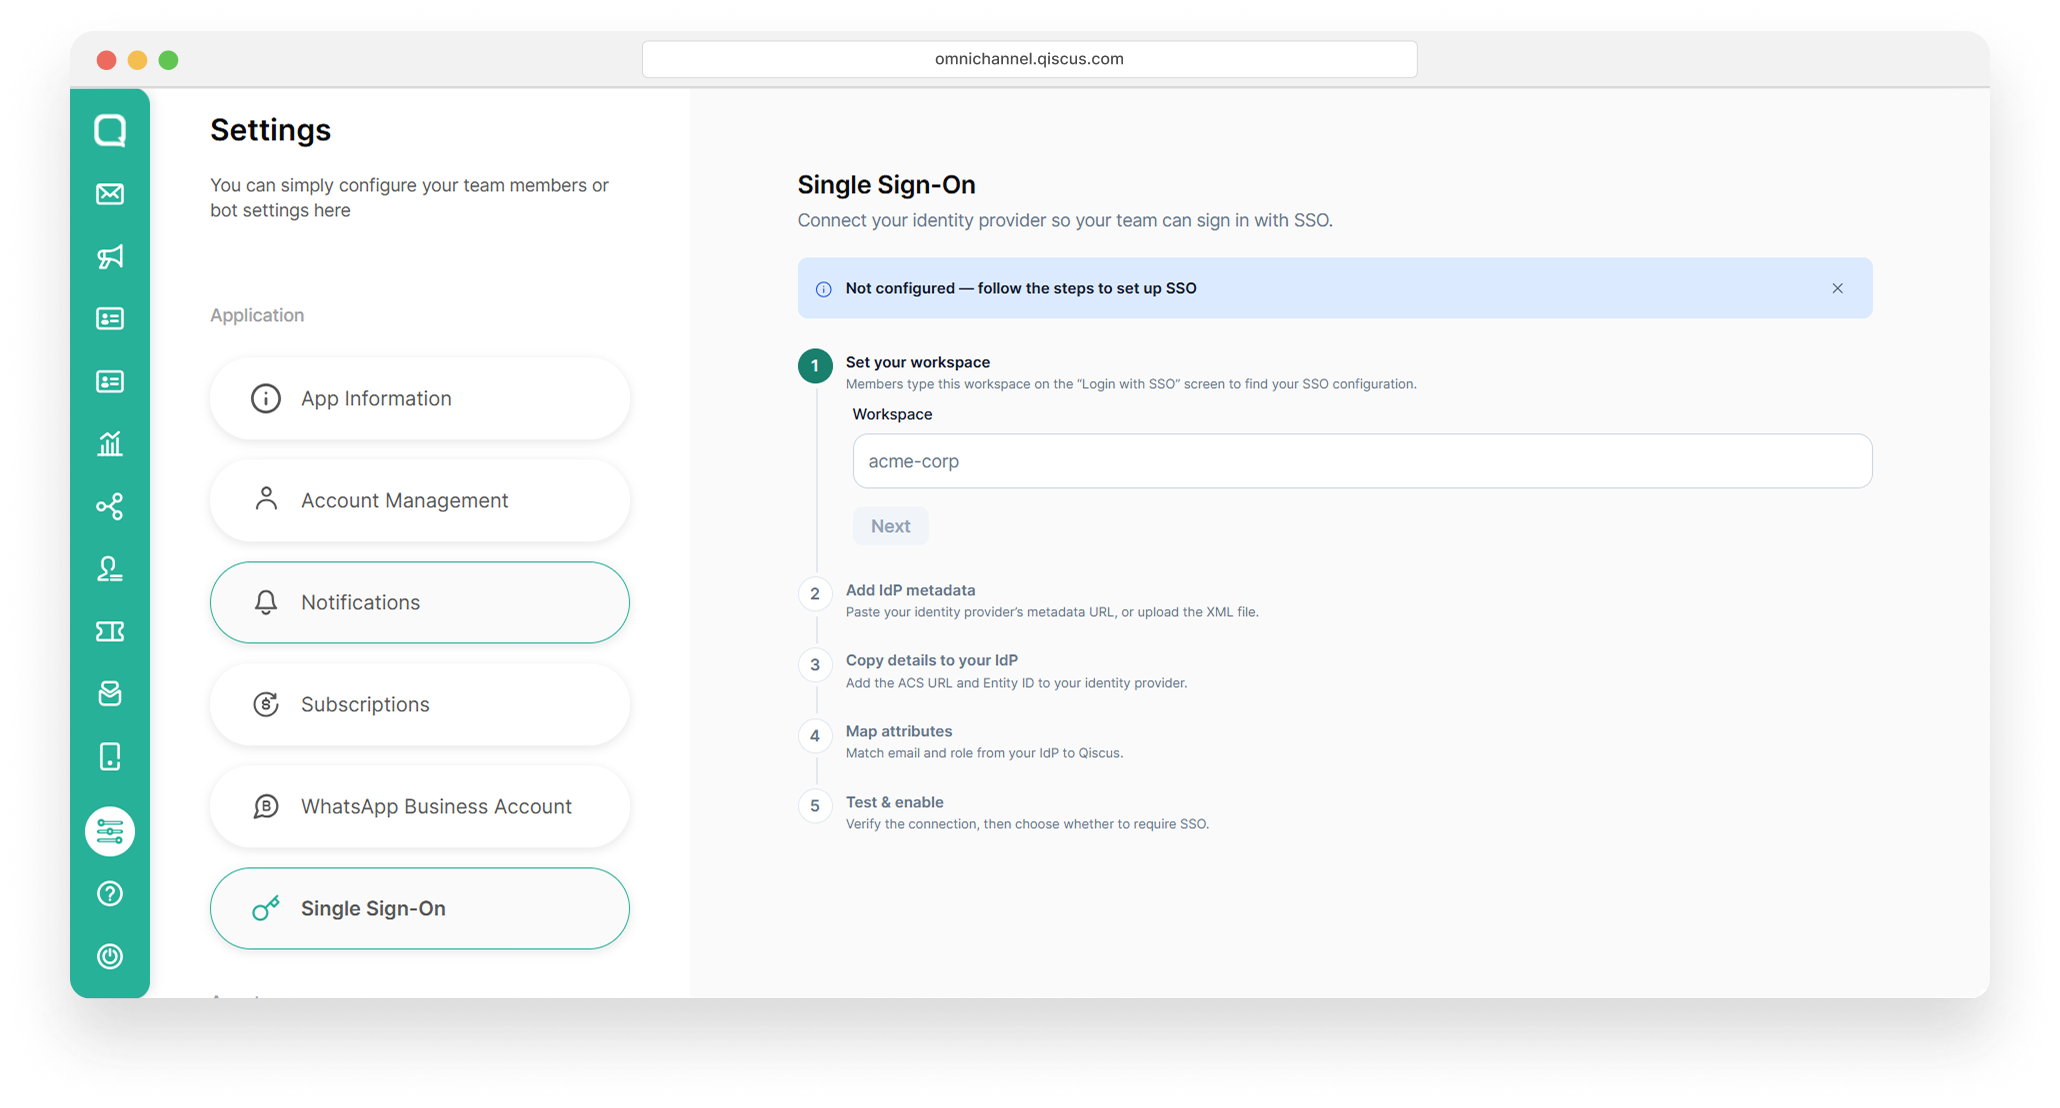
Enter a Workspace Address and click Next button
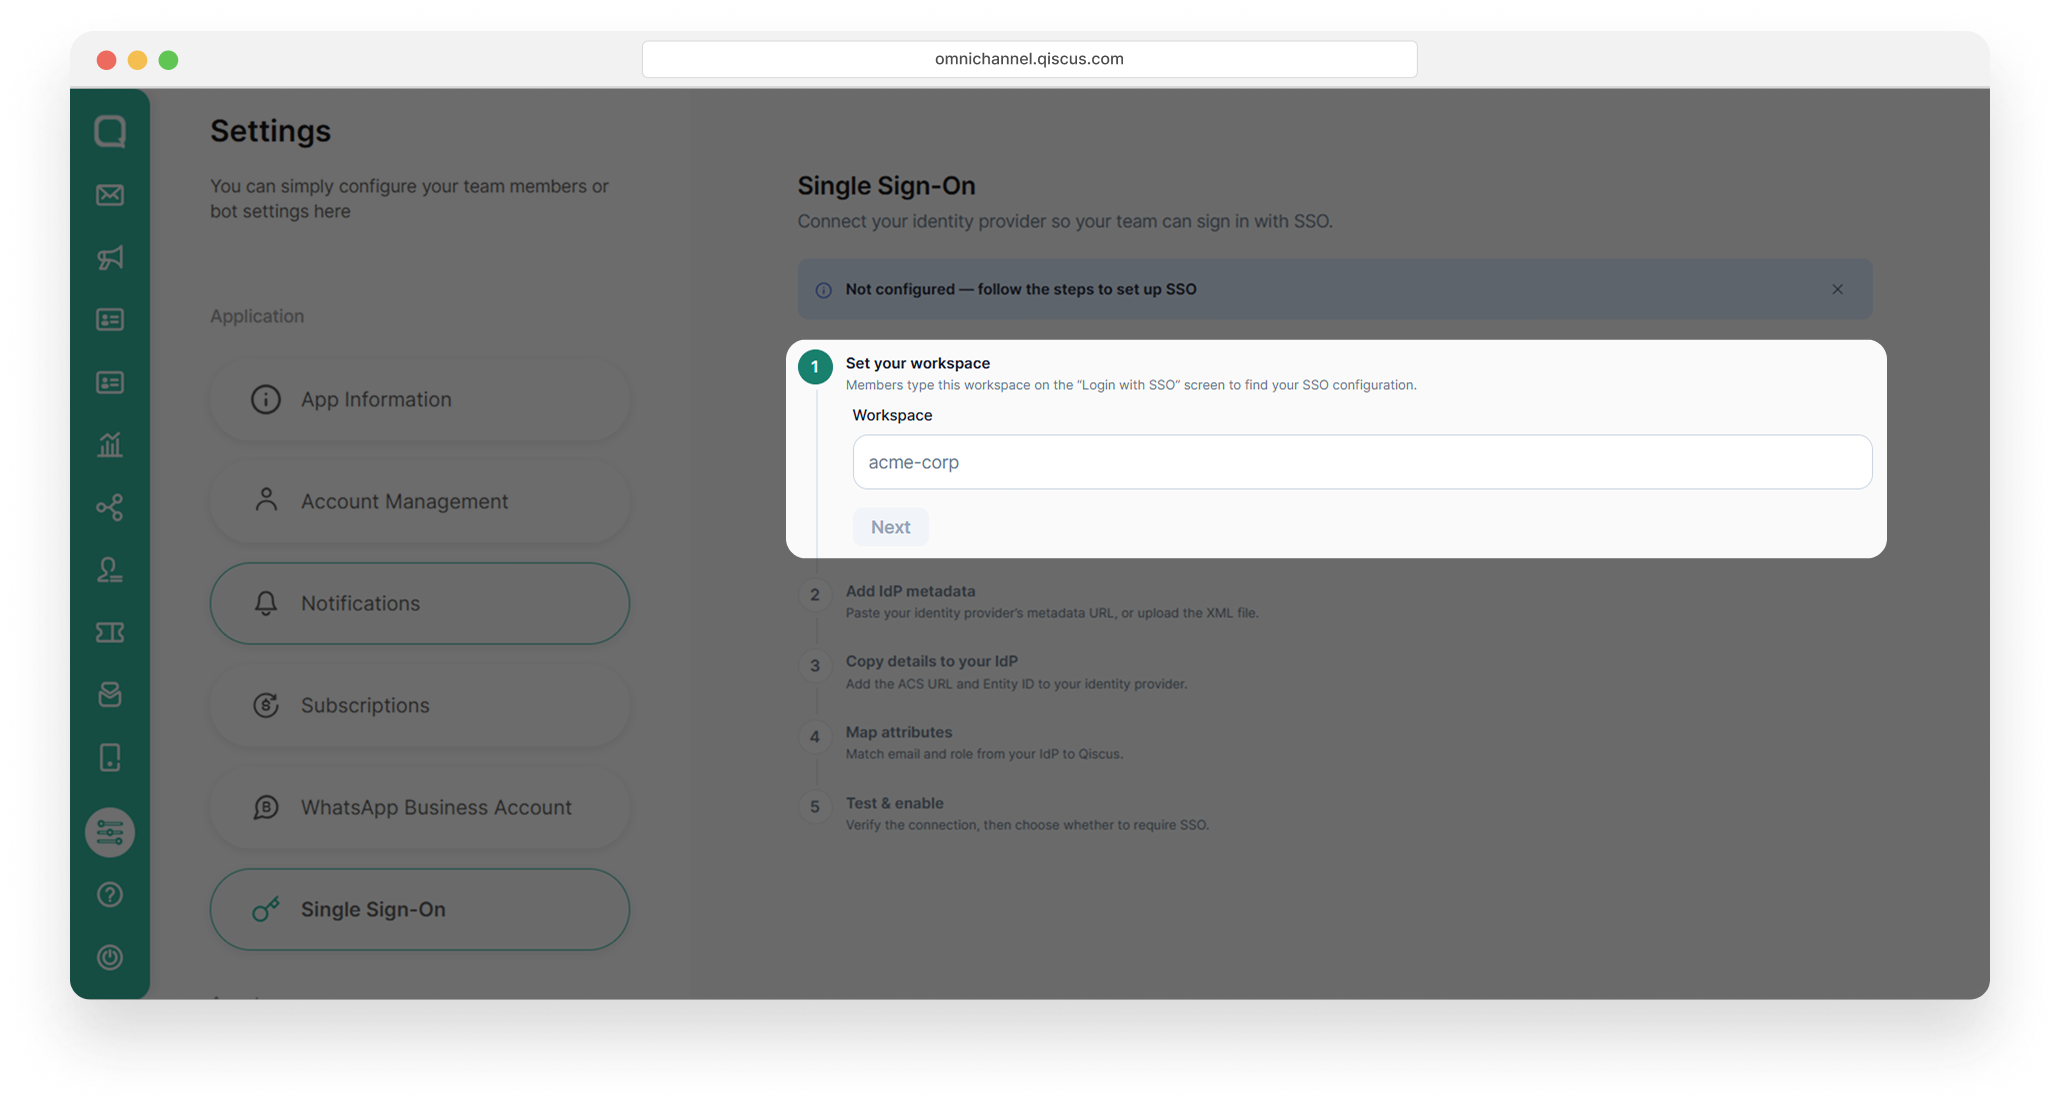
A short address your team types to sign in, like acme. Qiscus checks availability as you type. The address must:
Be 3–30 characters (lowercase letters, numbers, and hyphens only)
Not start or end with a hyphen, or use two hyphens in a row
Not match a name already taken by another workspace
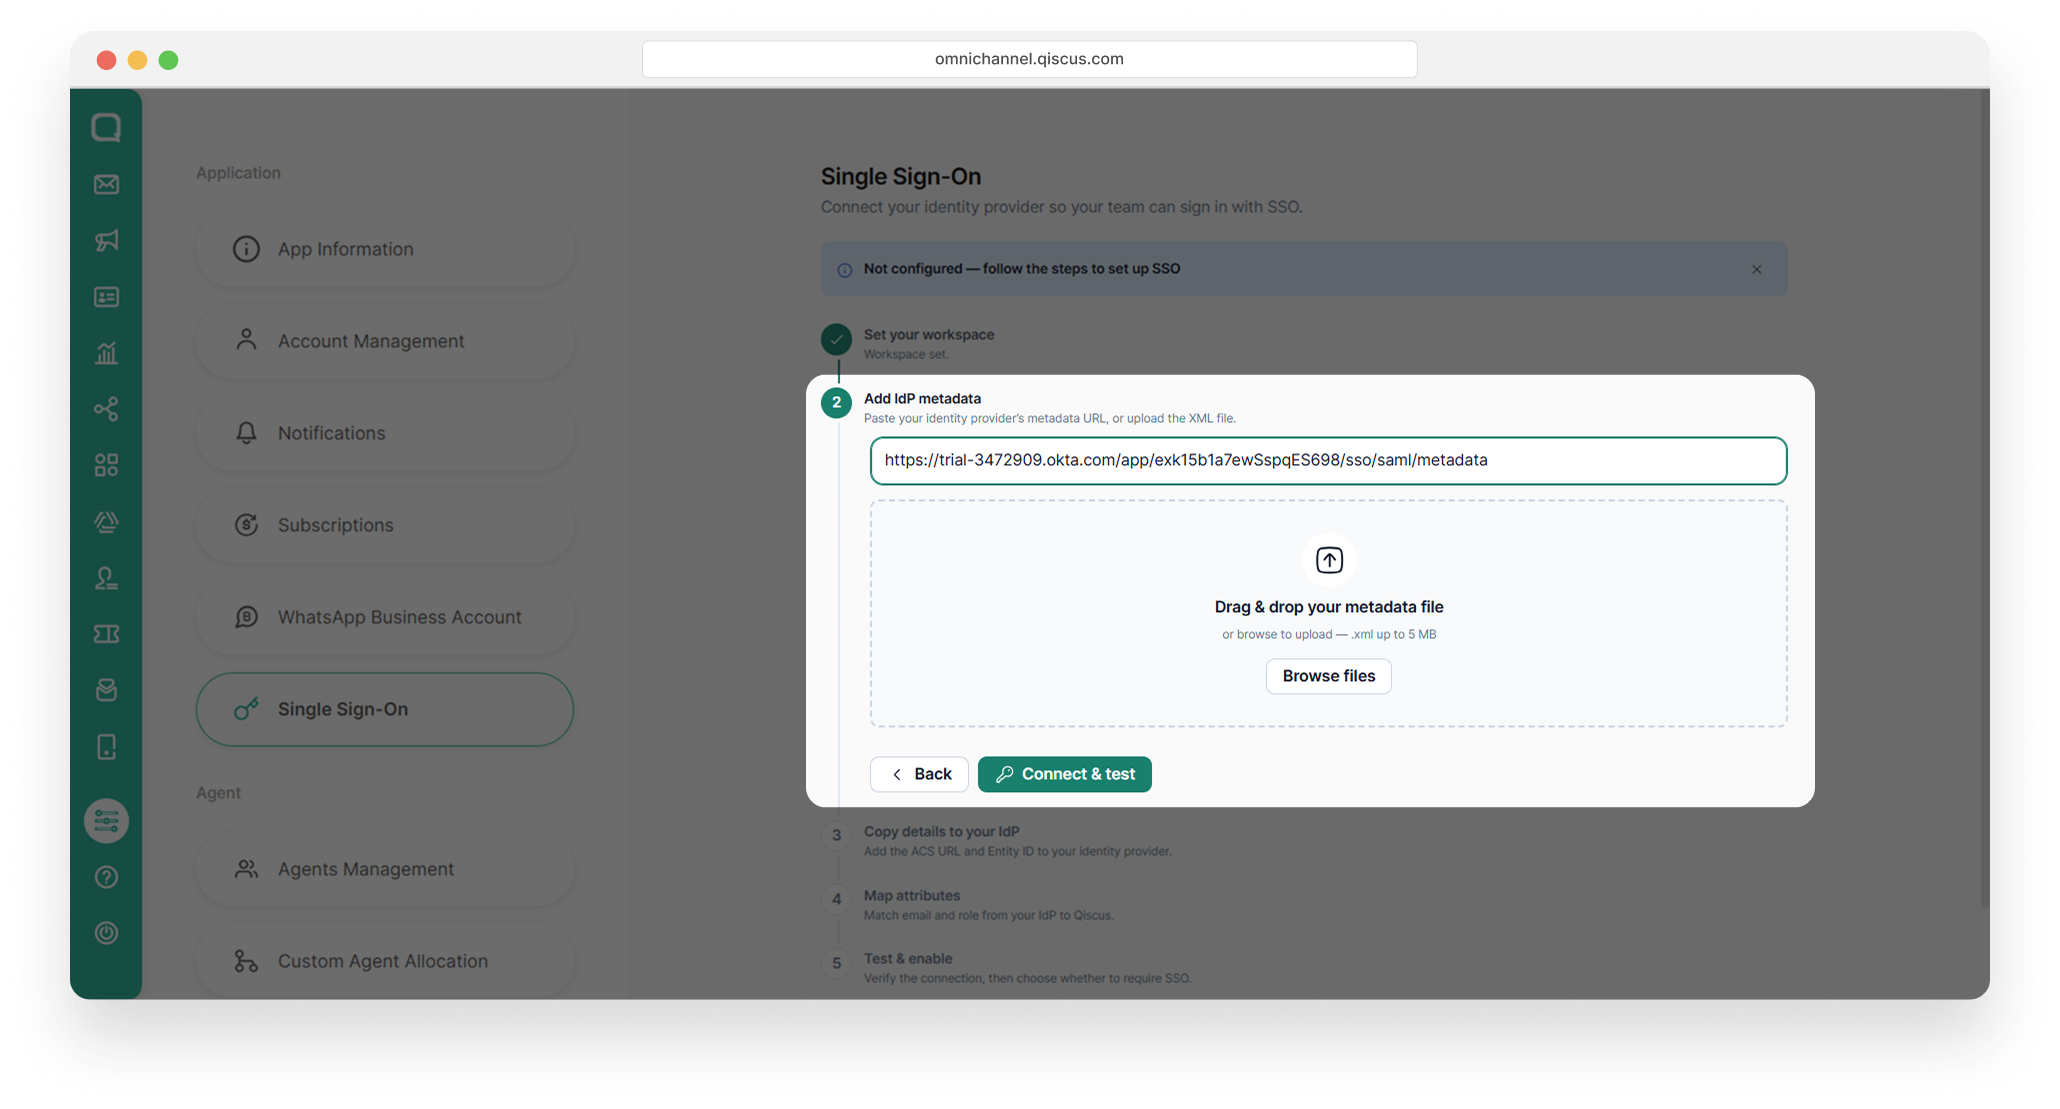
Copy Qiscus's details, its ACS URL and Entity ID into your login provider so the two can recognize each other.
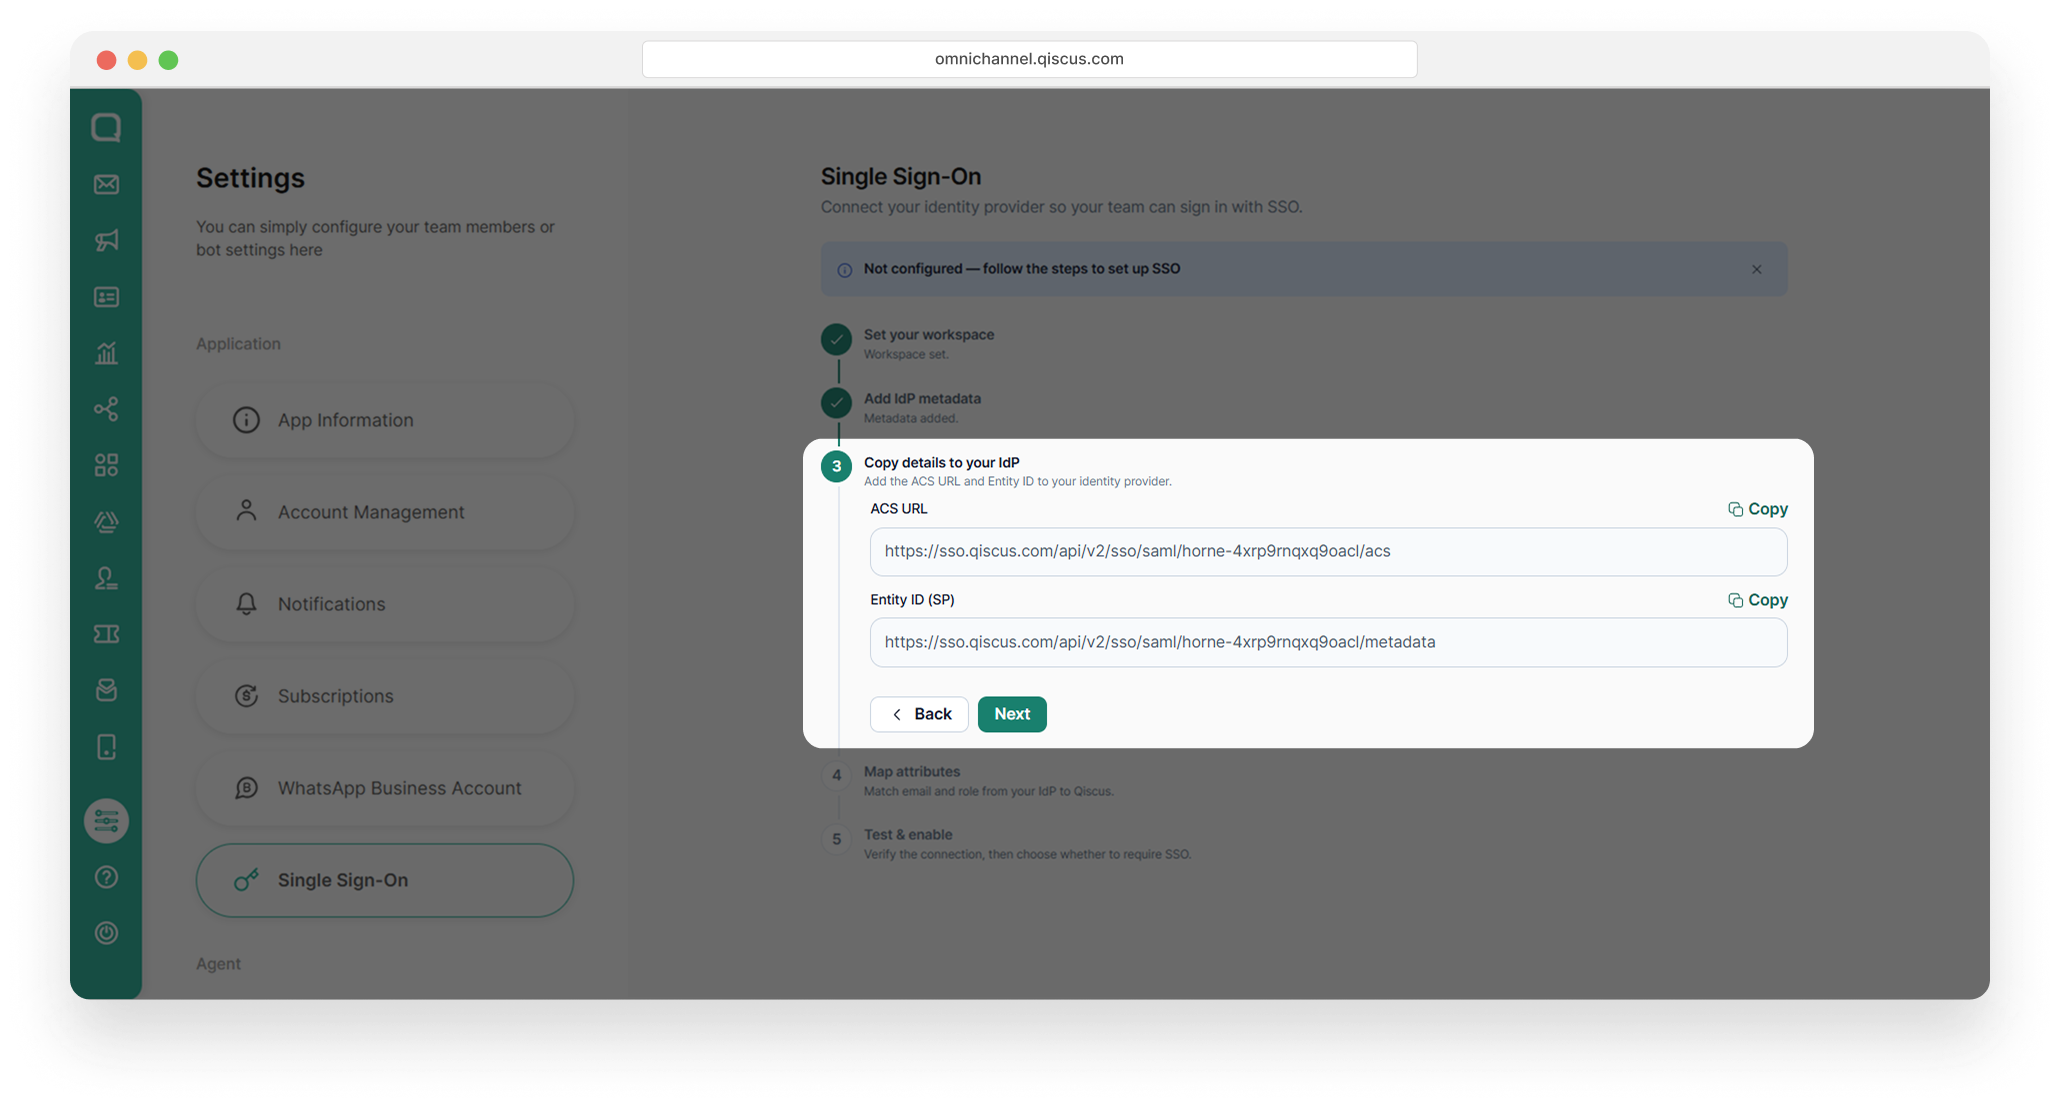
Enter the metadata URL or upload the metadata file (maximum 5 MB). Qiscus automatically populates the required configuration. Copy the Connection Details from Qiscus and add them to your Identity Provider configuration.
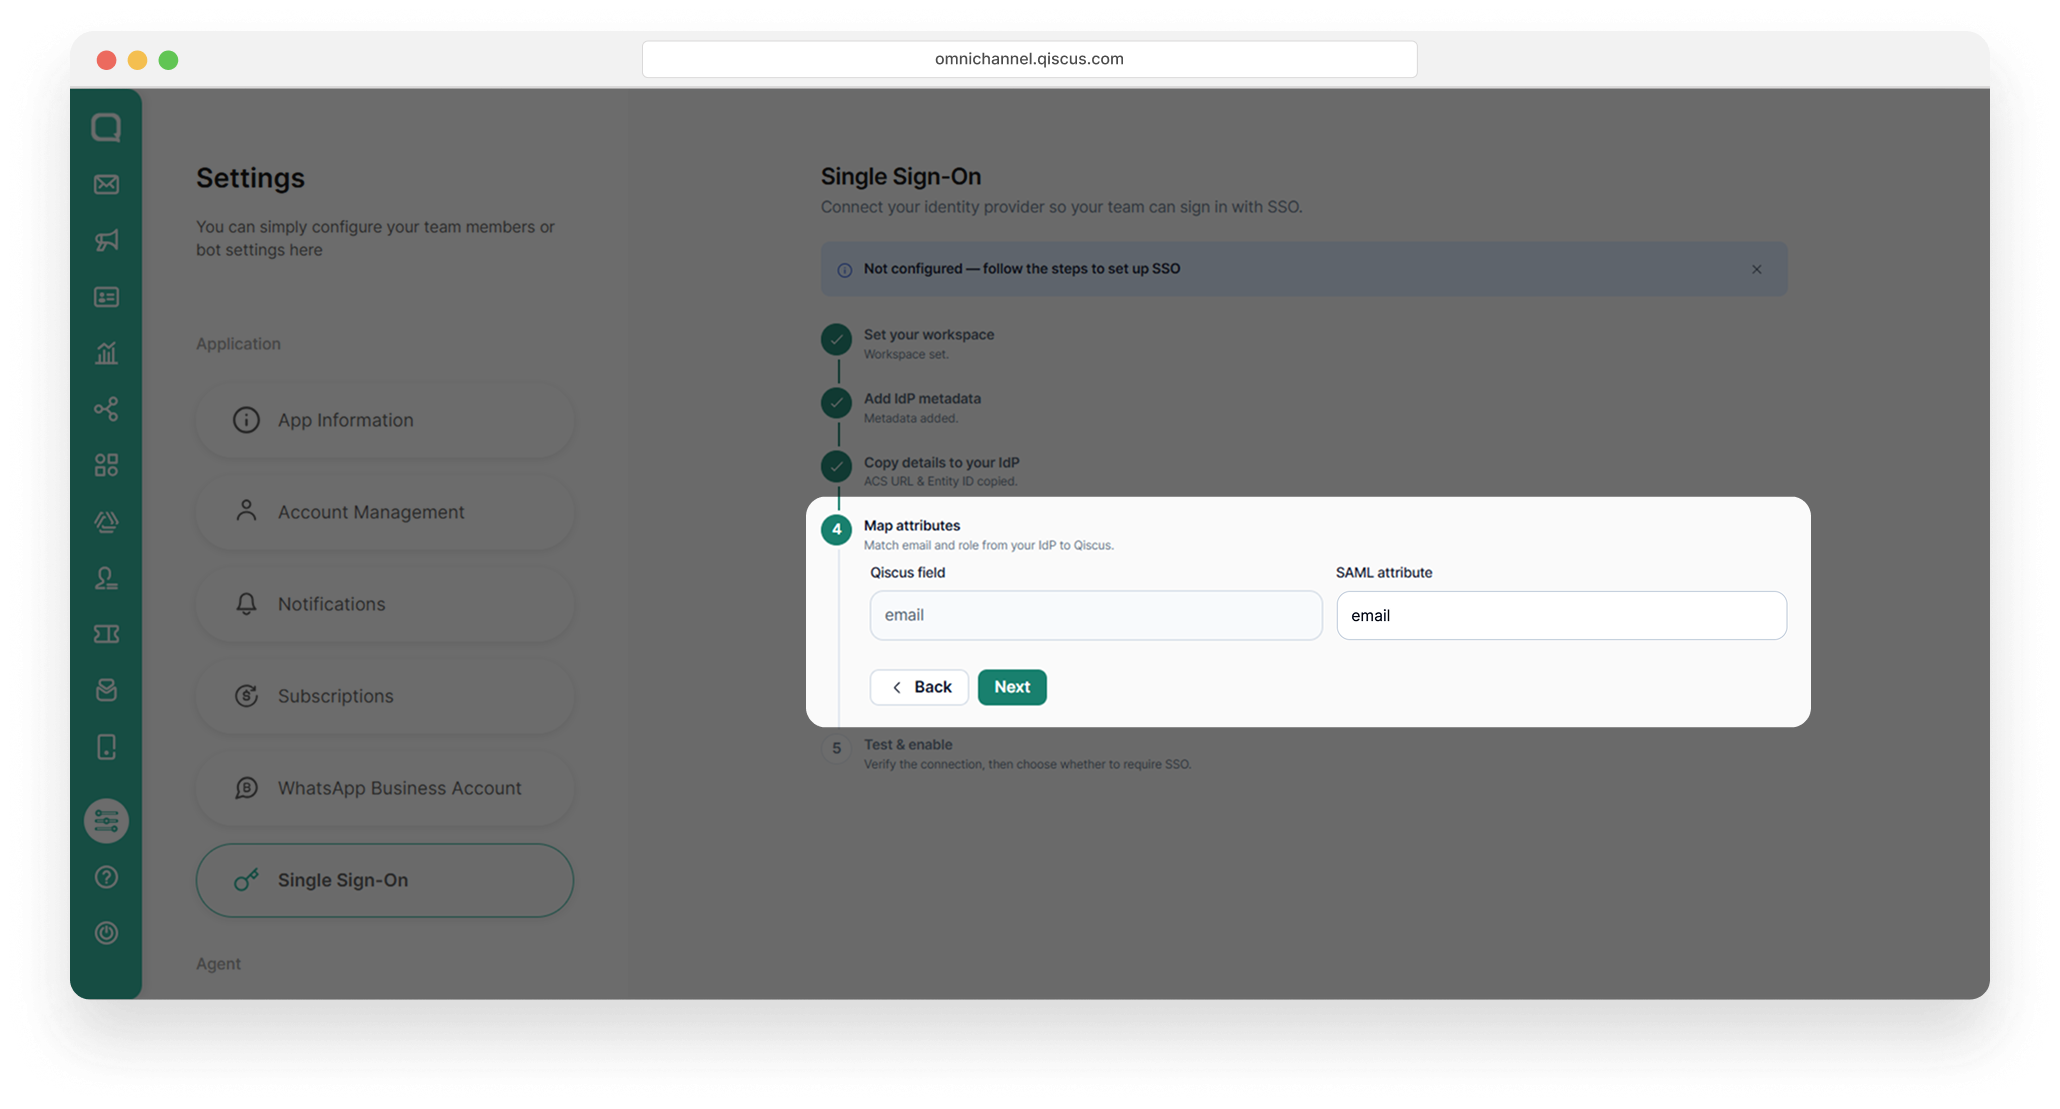
Configure the Email Attribute. Specify the email attribute from your Identity Provider and click Next
Test and Enable SSO. Run the configuration test. If it succeeds, click Finish Setup to enable Single Sign-On.
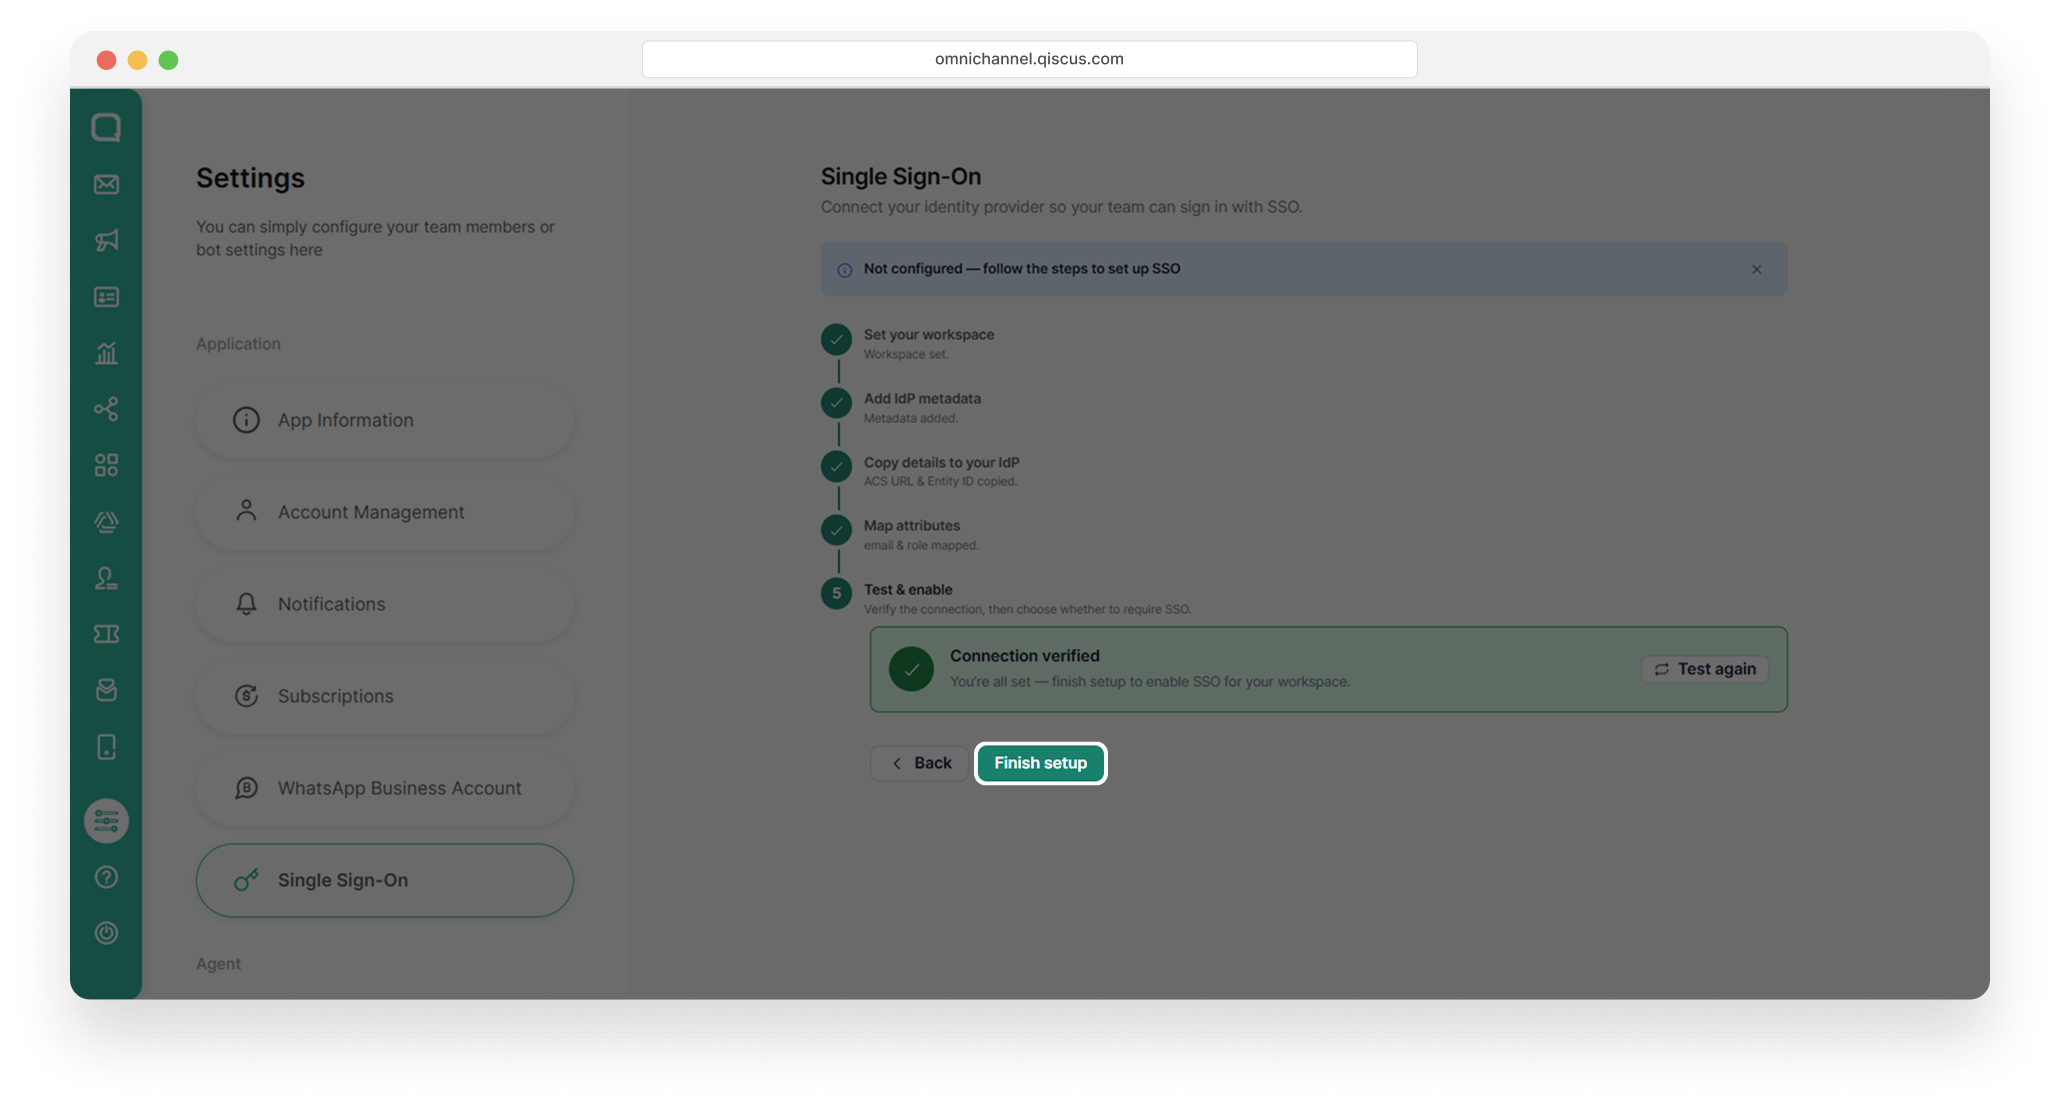
Tip: After setup is complete, perform a test login to verify that SSO is working correctly.
Single Sign-On is now active and ready to use.
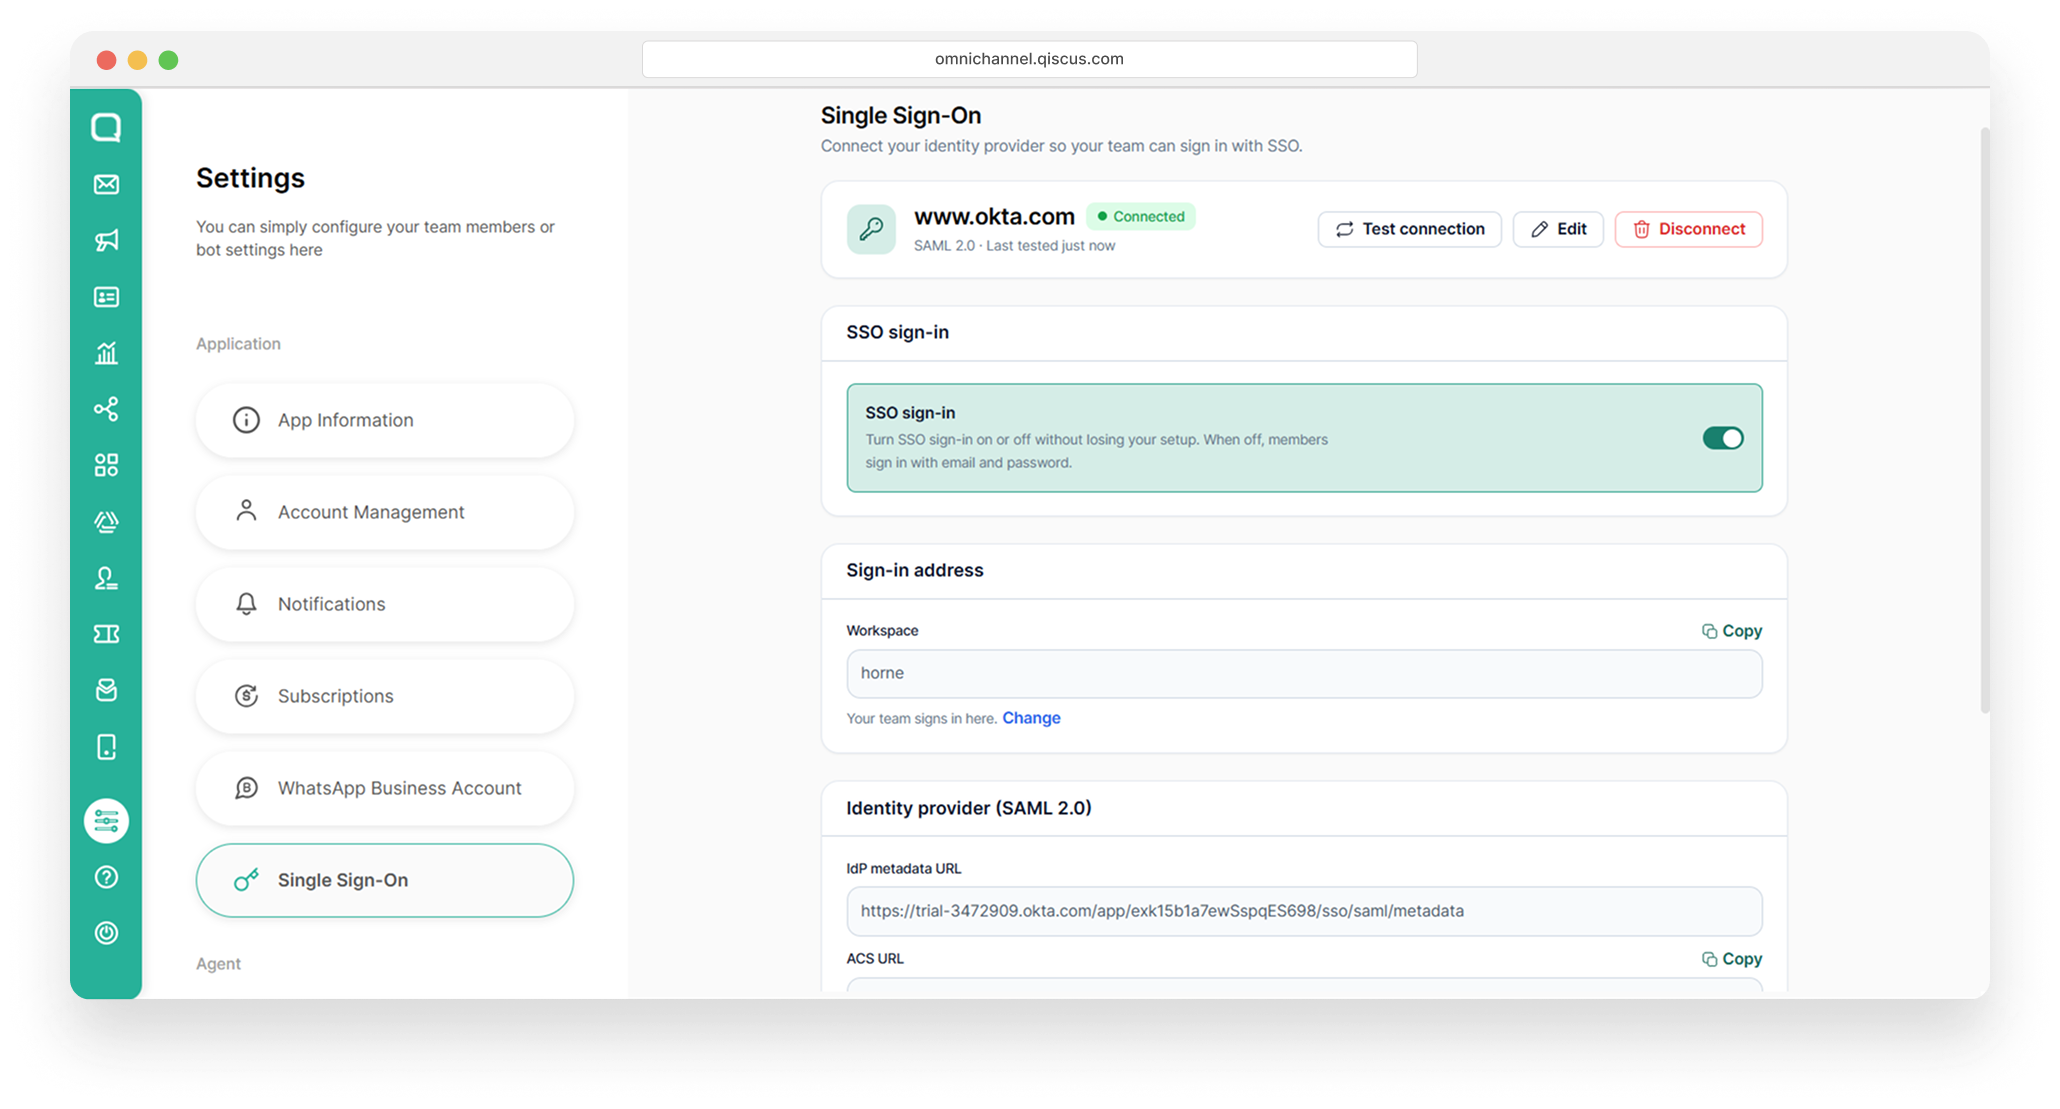
From the SSO header, you can manage your connection anytime:
Toggle — Turn SSO on or off without deleting your setup.
Test Connection — Check that everything is still working.
Edit — Update your login system or settings.
Disconnect — Remove SSO completely and start fresh.
Signing In With SSO (For Team Members)
Once SSO is active, signing in takes just a few steps:
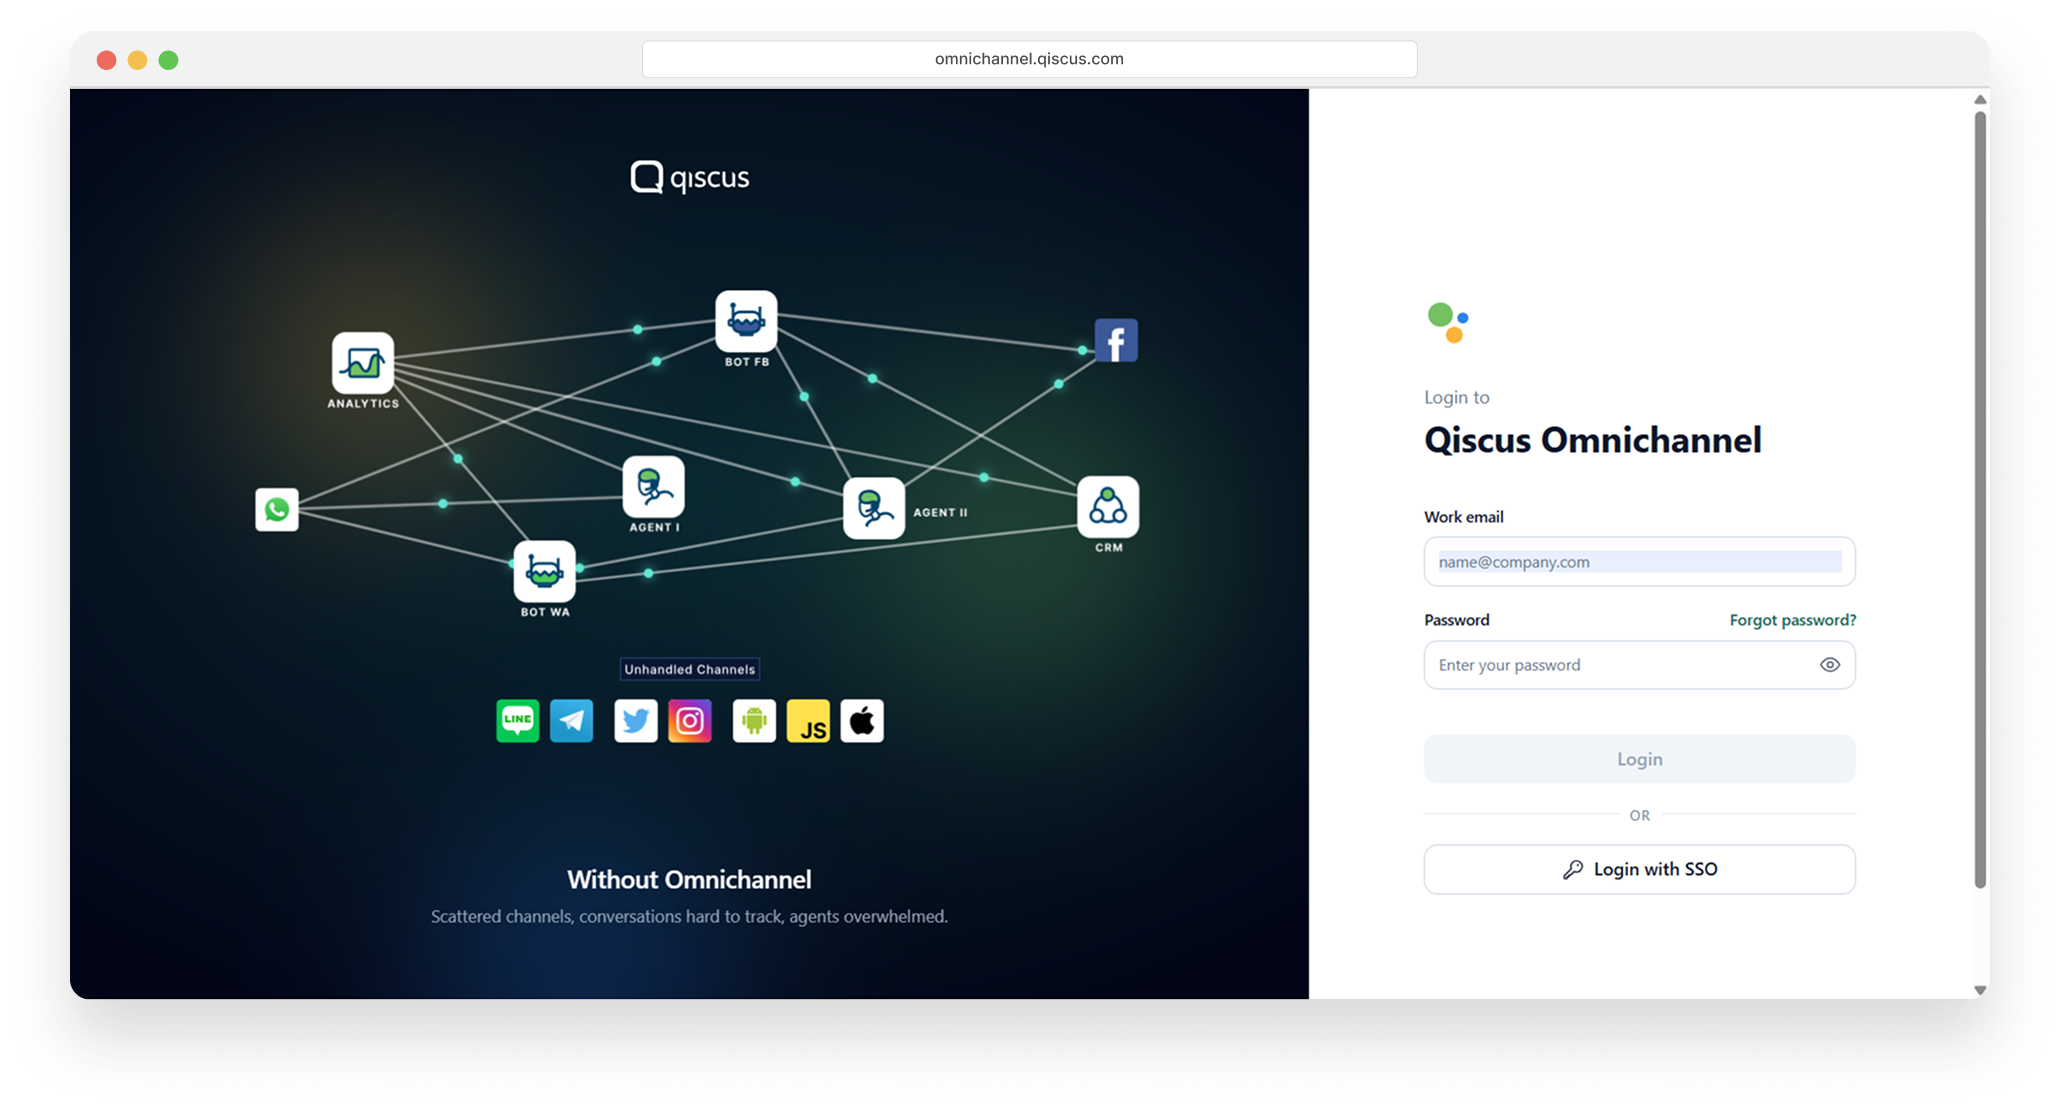
On the Qiscus login page, choose Login with SSO.
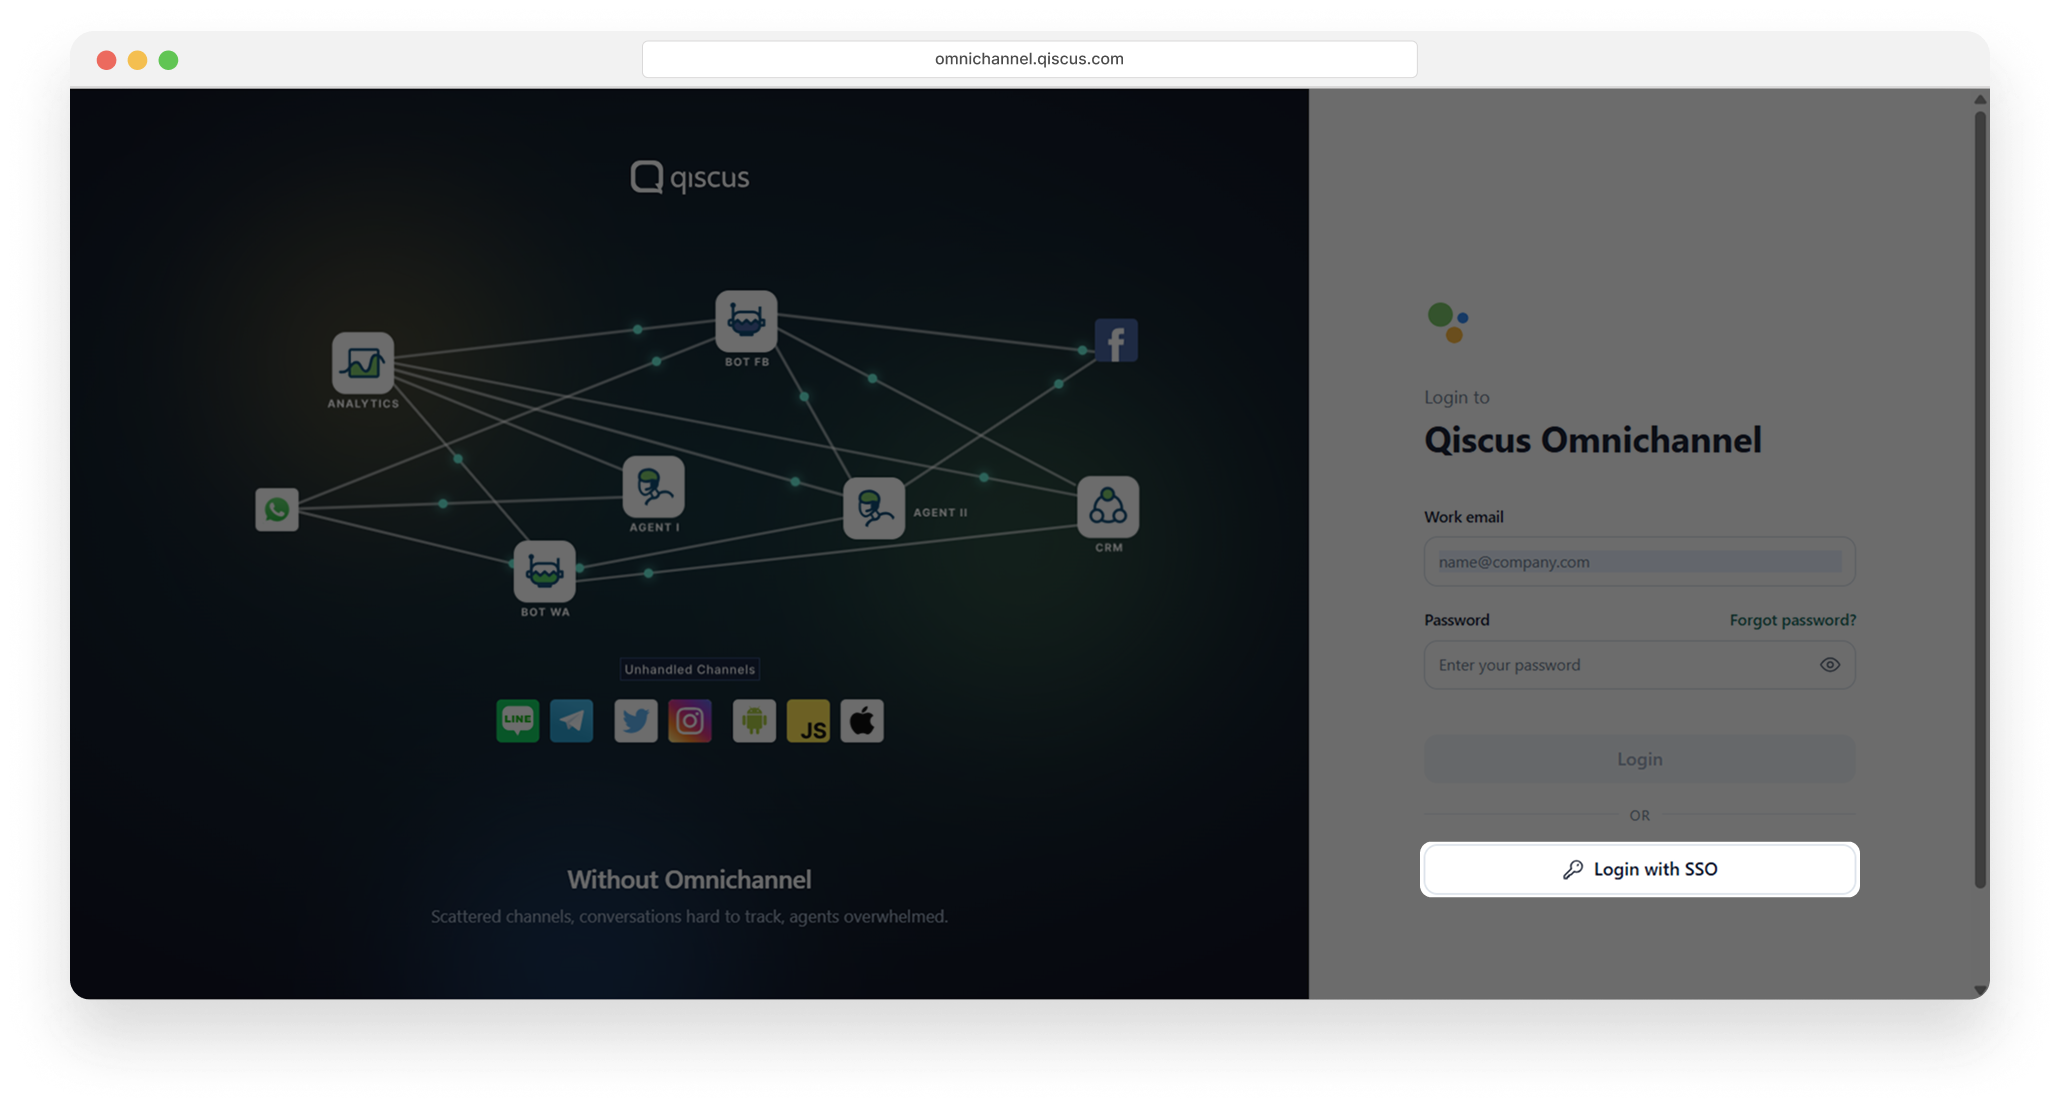
Enter your organization's workspace address. Our system will record the last workspace used on your device for up to 60 days, so returning users can continue in one click.
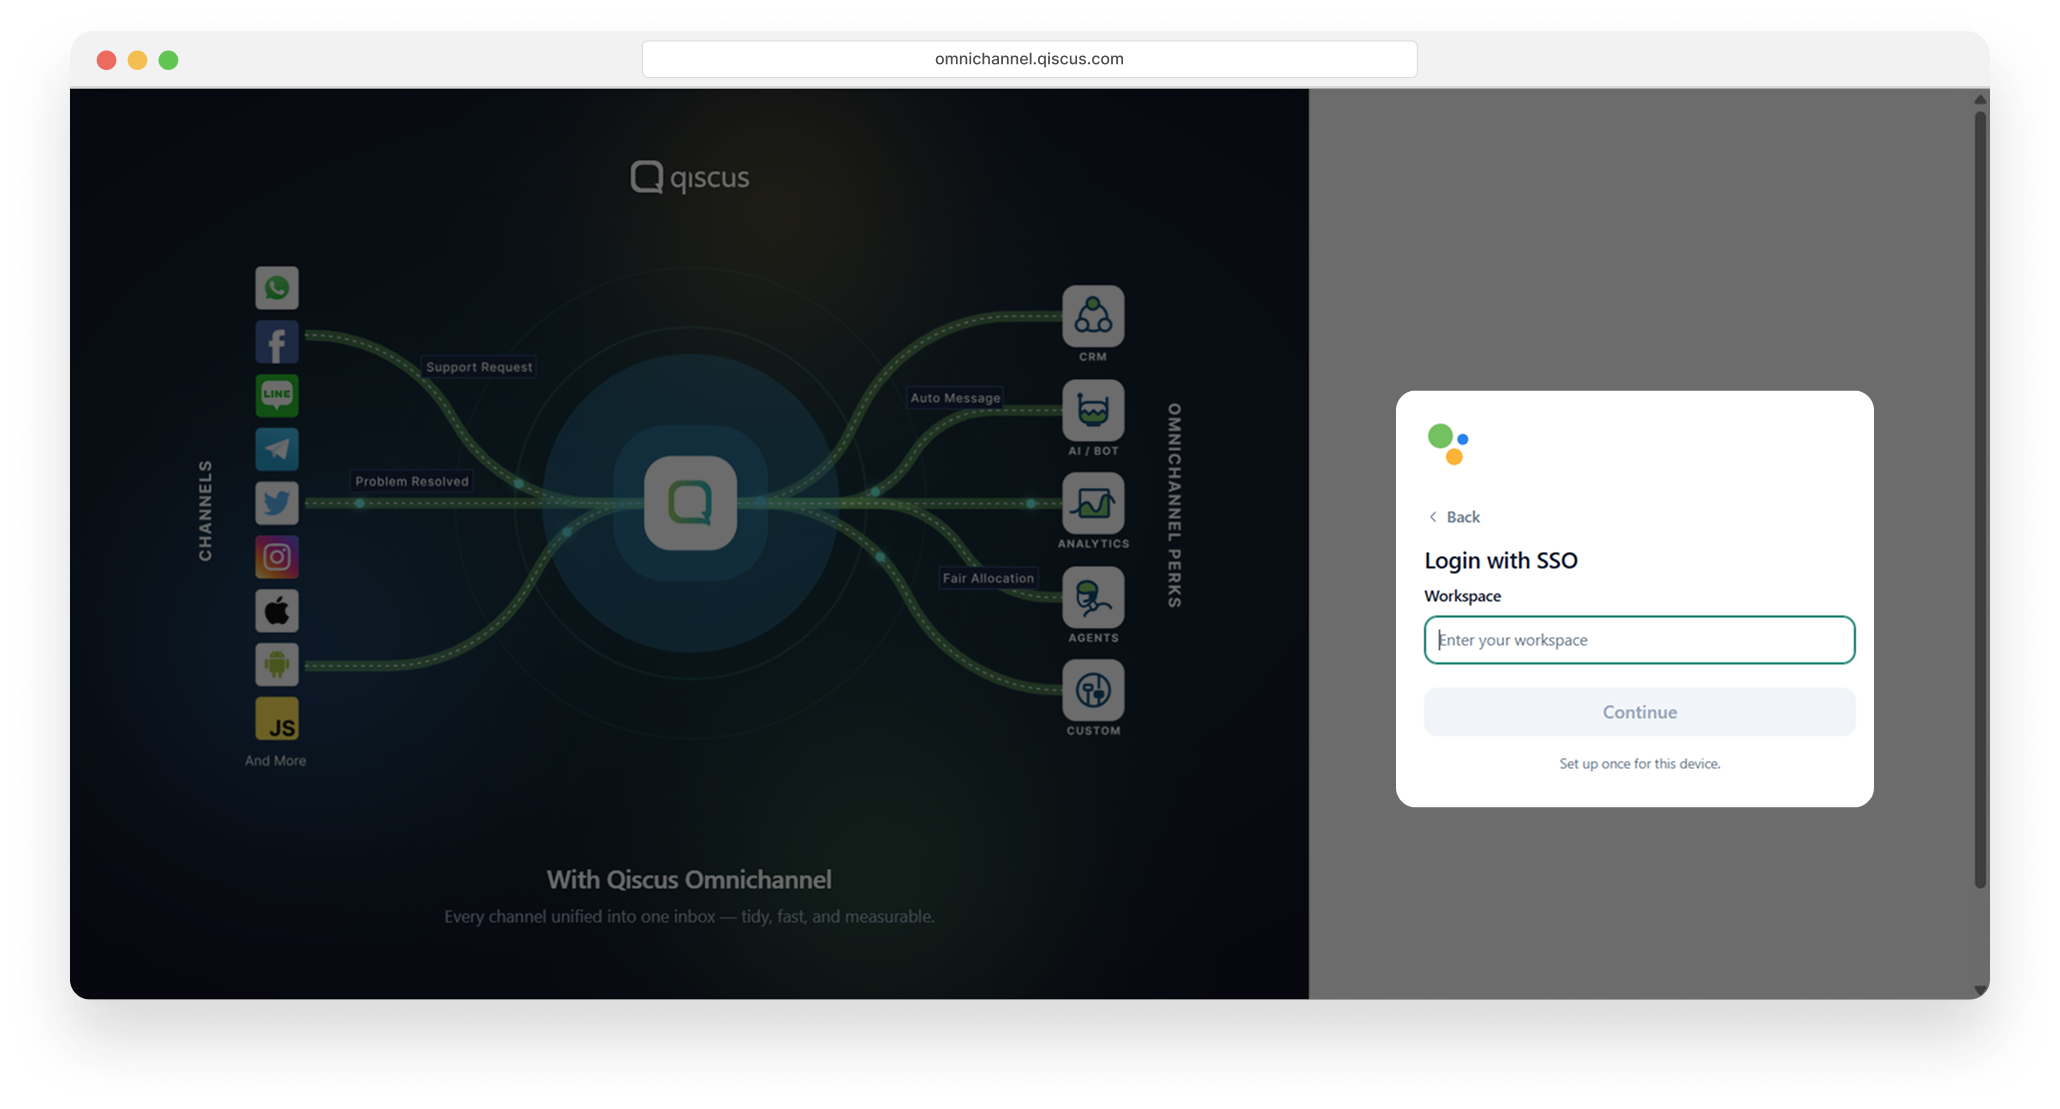
Qiscus sends you to your identity provider sign in there as usual.
After a successful sign-in, you're brought back to Qiscus and into the dashboard.