Title
Create new category
Edit page index title
Edit category
Edit link
Settings and Configuration
App Information
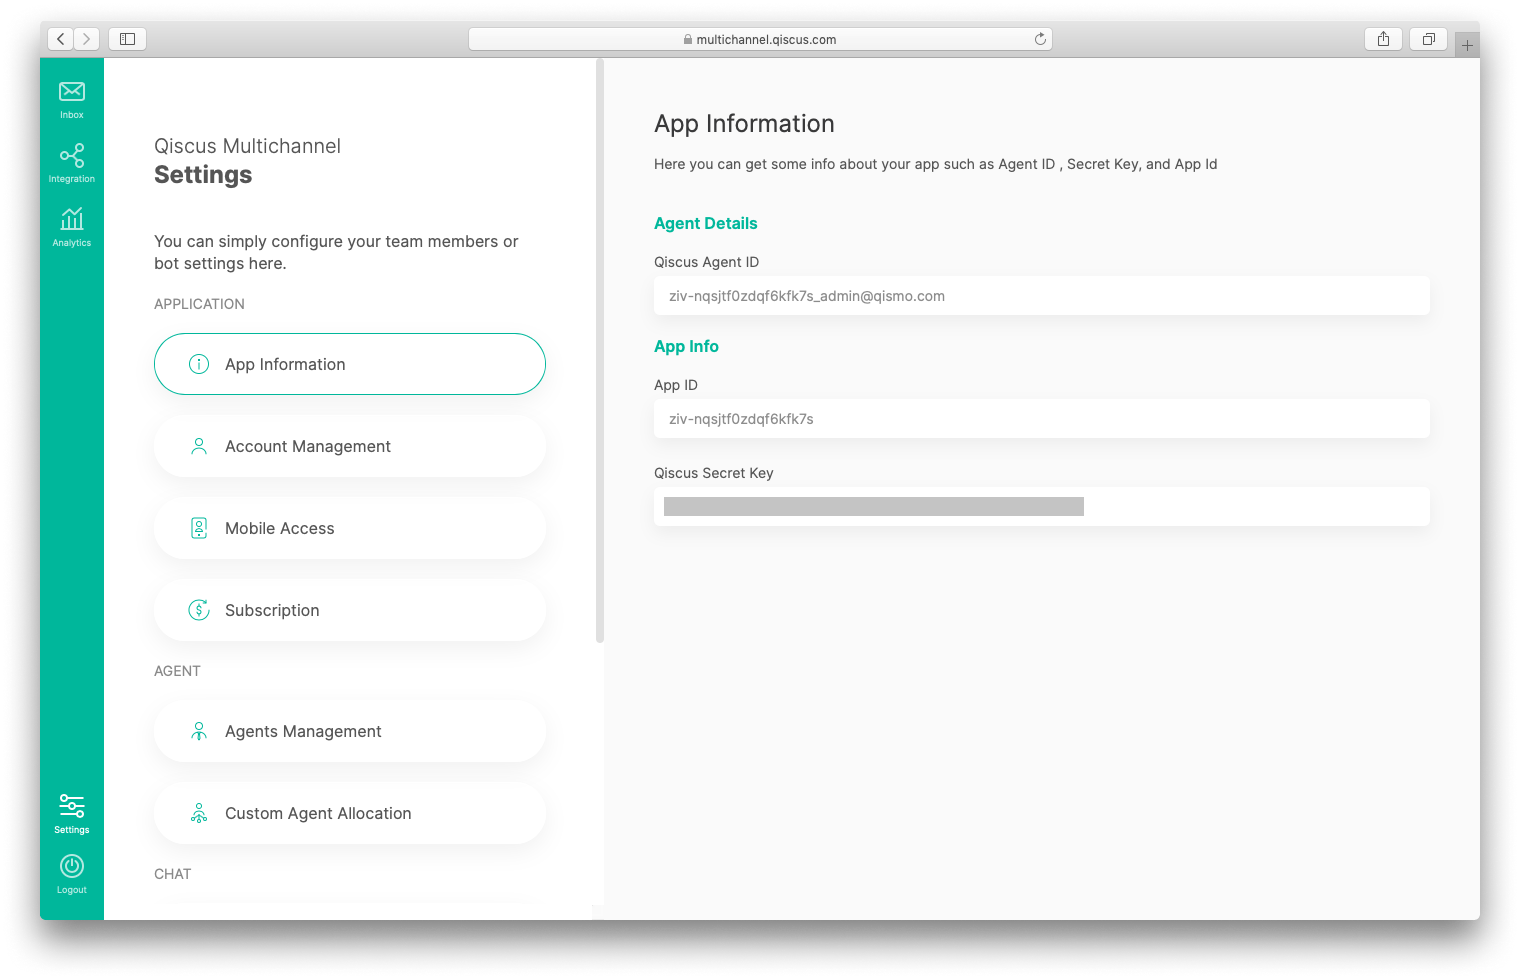
App information setting allows you to get some information regarding your Qiscus Omnichannel Chat app, such as: Qiscus Agent ID, Qiscus App ID, and Qiscus Secret Key. Those information may be needed in some circumstances, for example, when you are about to connect your bot to Qiscus Omnichannel Chat, and other else.
Account Management
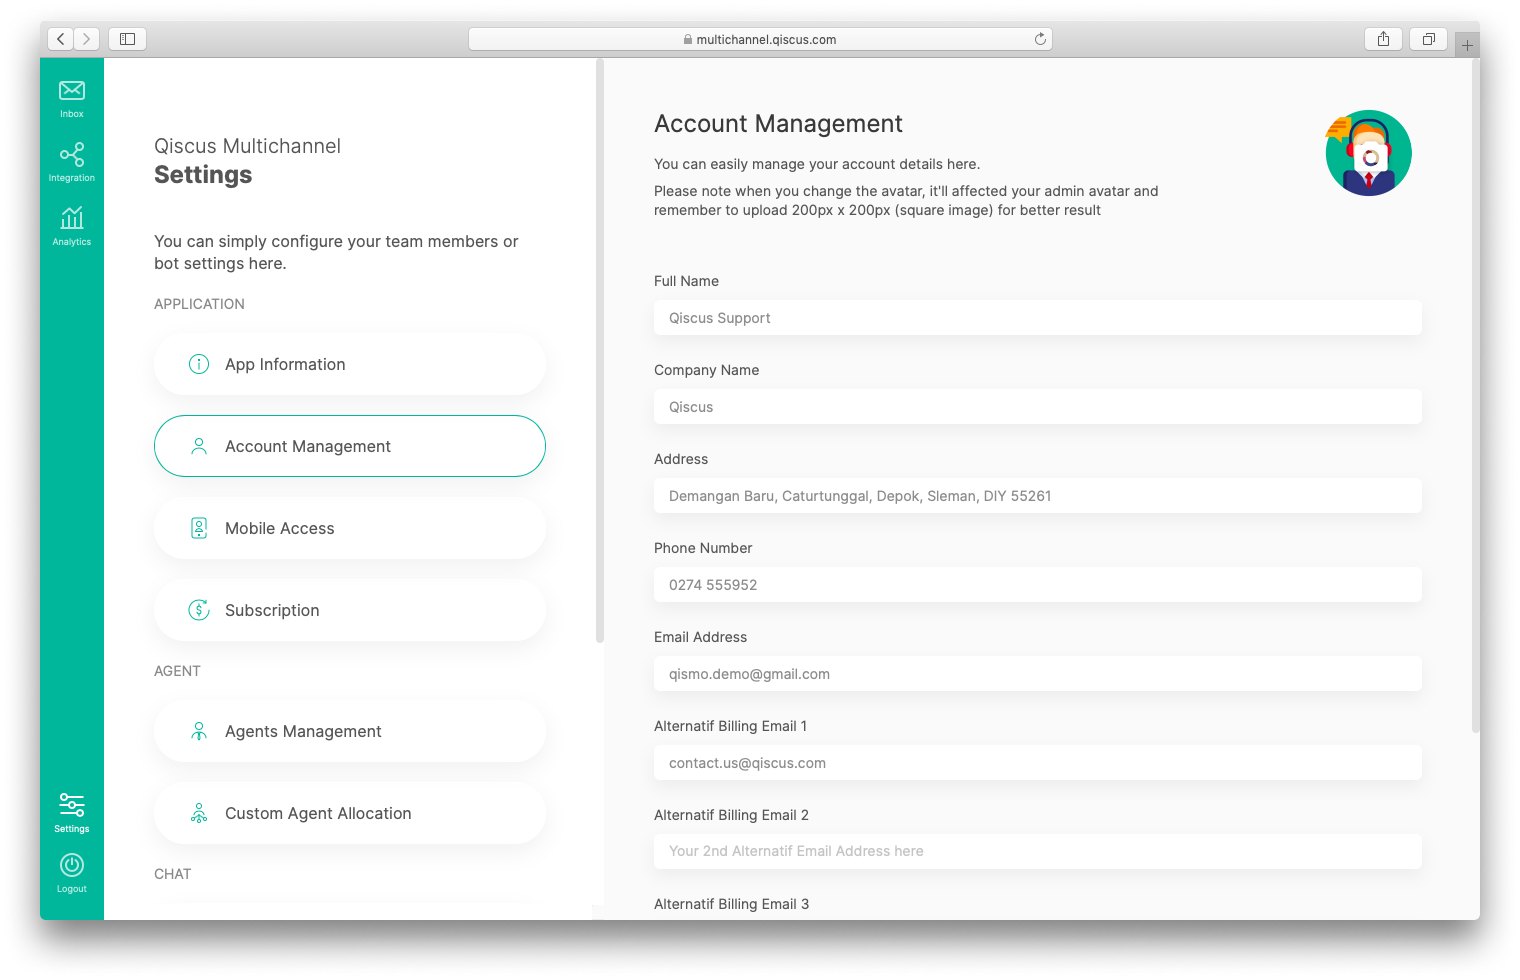
Account management setting allows you to update your basic profile setting, such as: Name, Company name, Address, Avatar and Phone Number. While those items could be updated, Email address is not be able to be changed.
Another thing to note is that, whenever you change the avatar and name, those will also change the avatar and name in Qiscus widget as well.
Notifications
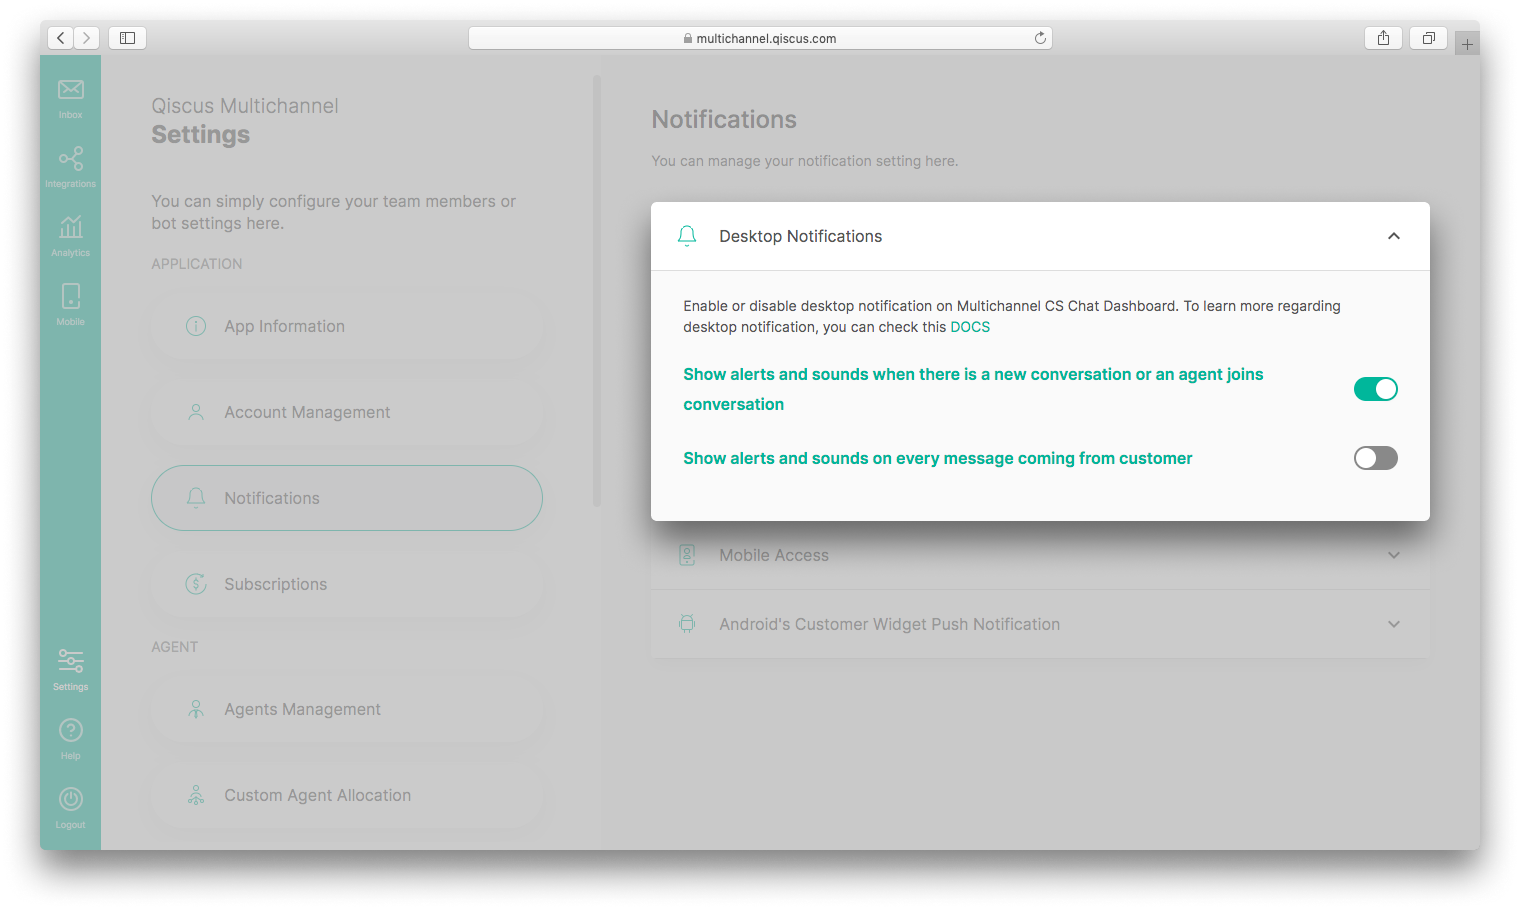
Desktop notifications are notifications in the form of alerts and sounds that always appear on your desktop when you have a new conversation, agent joining a conversation and every time there is a new message from the customer. The desktop notifications feature is only for Qiscus Omnichannel Chat via desktop only. This feature provides settings for when alerts and sound notifications are raised. There are two conditions to enable alert and sound notification, namely:
- Alert and sound notification will be active every time there is a new conversation or when an agent joins in
- Alert and sound notification will be active everytime there’s incoming message from customer
Desktop notification settings are found in all roles, namely admin, supervisor and agent. The following are the settings of desktop notification:
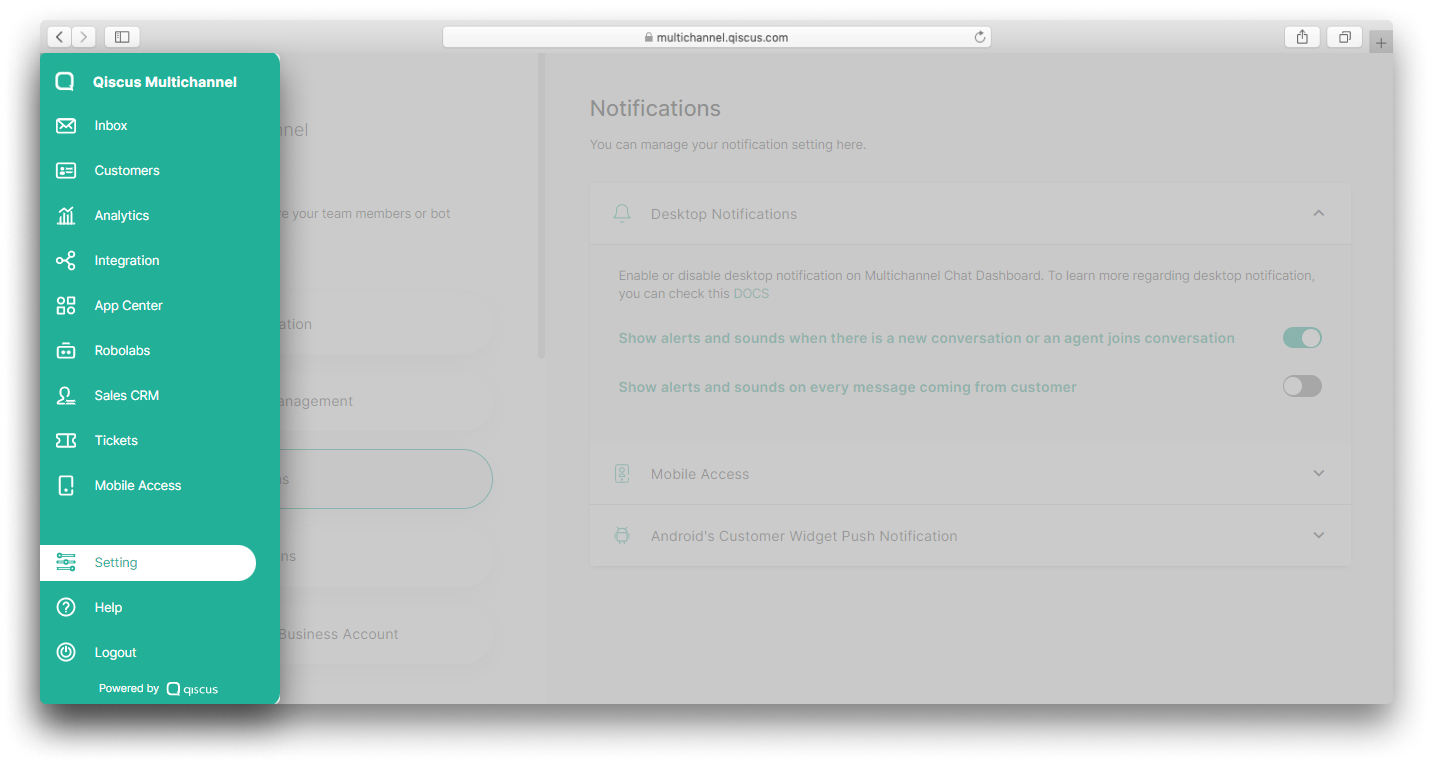
- Click the Setting menu,
- Click the Notifications menu,
- Click Desktop Notifications,
- Enable Show alerts and sounds when there is a new conversation or an agent joins conversation’s toggle if you want alerts and sound notifications to appear every time a new conversation or agent joins a conversation. The default setting is active,
- Enable Show alerts and sounds on every message coming from the customer’s toggle if you want alerts and sound notifications to appear every time there is a new message from the customer. The default setting is off.
FCM Migration for Mobile Widget Android
Starting June 20, 2024, Firebase will deprecate the FCM legacy API. To maintain uninterrupted push notification functionality, it is advised to migrate to the new API at your earliest convenience. If you have any questions or concerns, please reach out to us
Note: No additional code changes need to be made on the In App Widget.
Step 1: Generate a New Private Key on Firebase Console
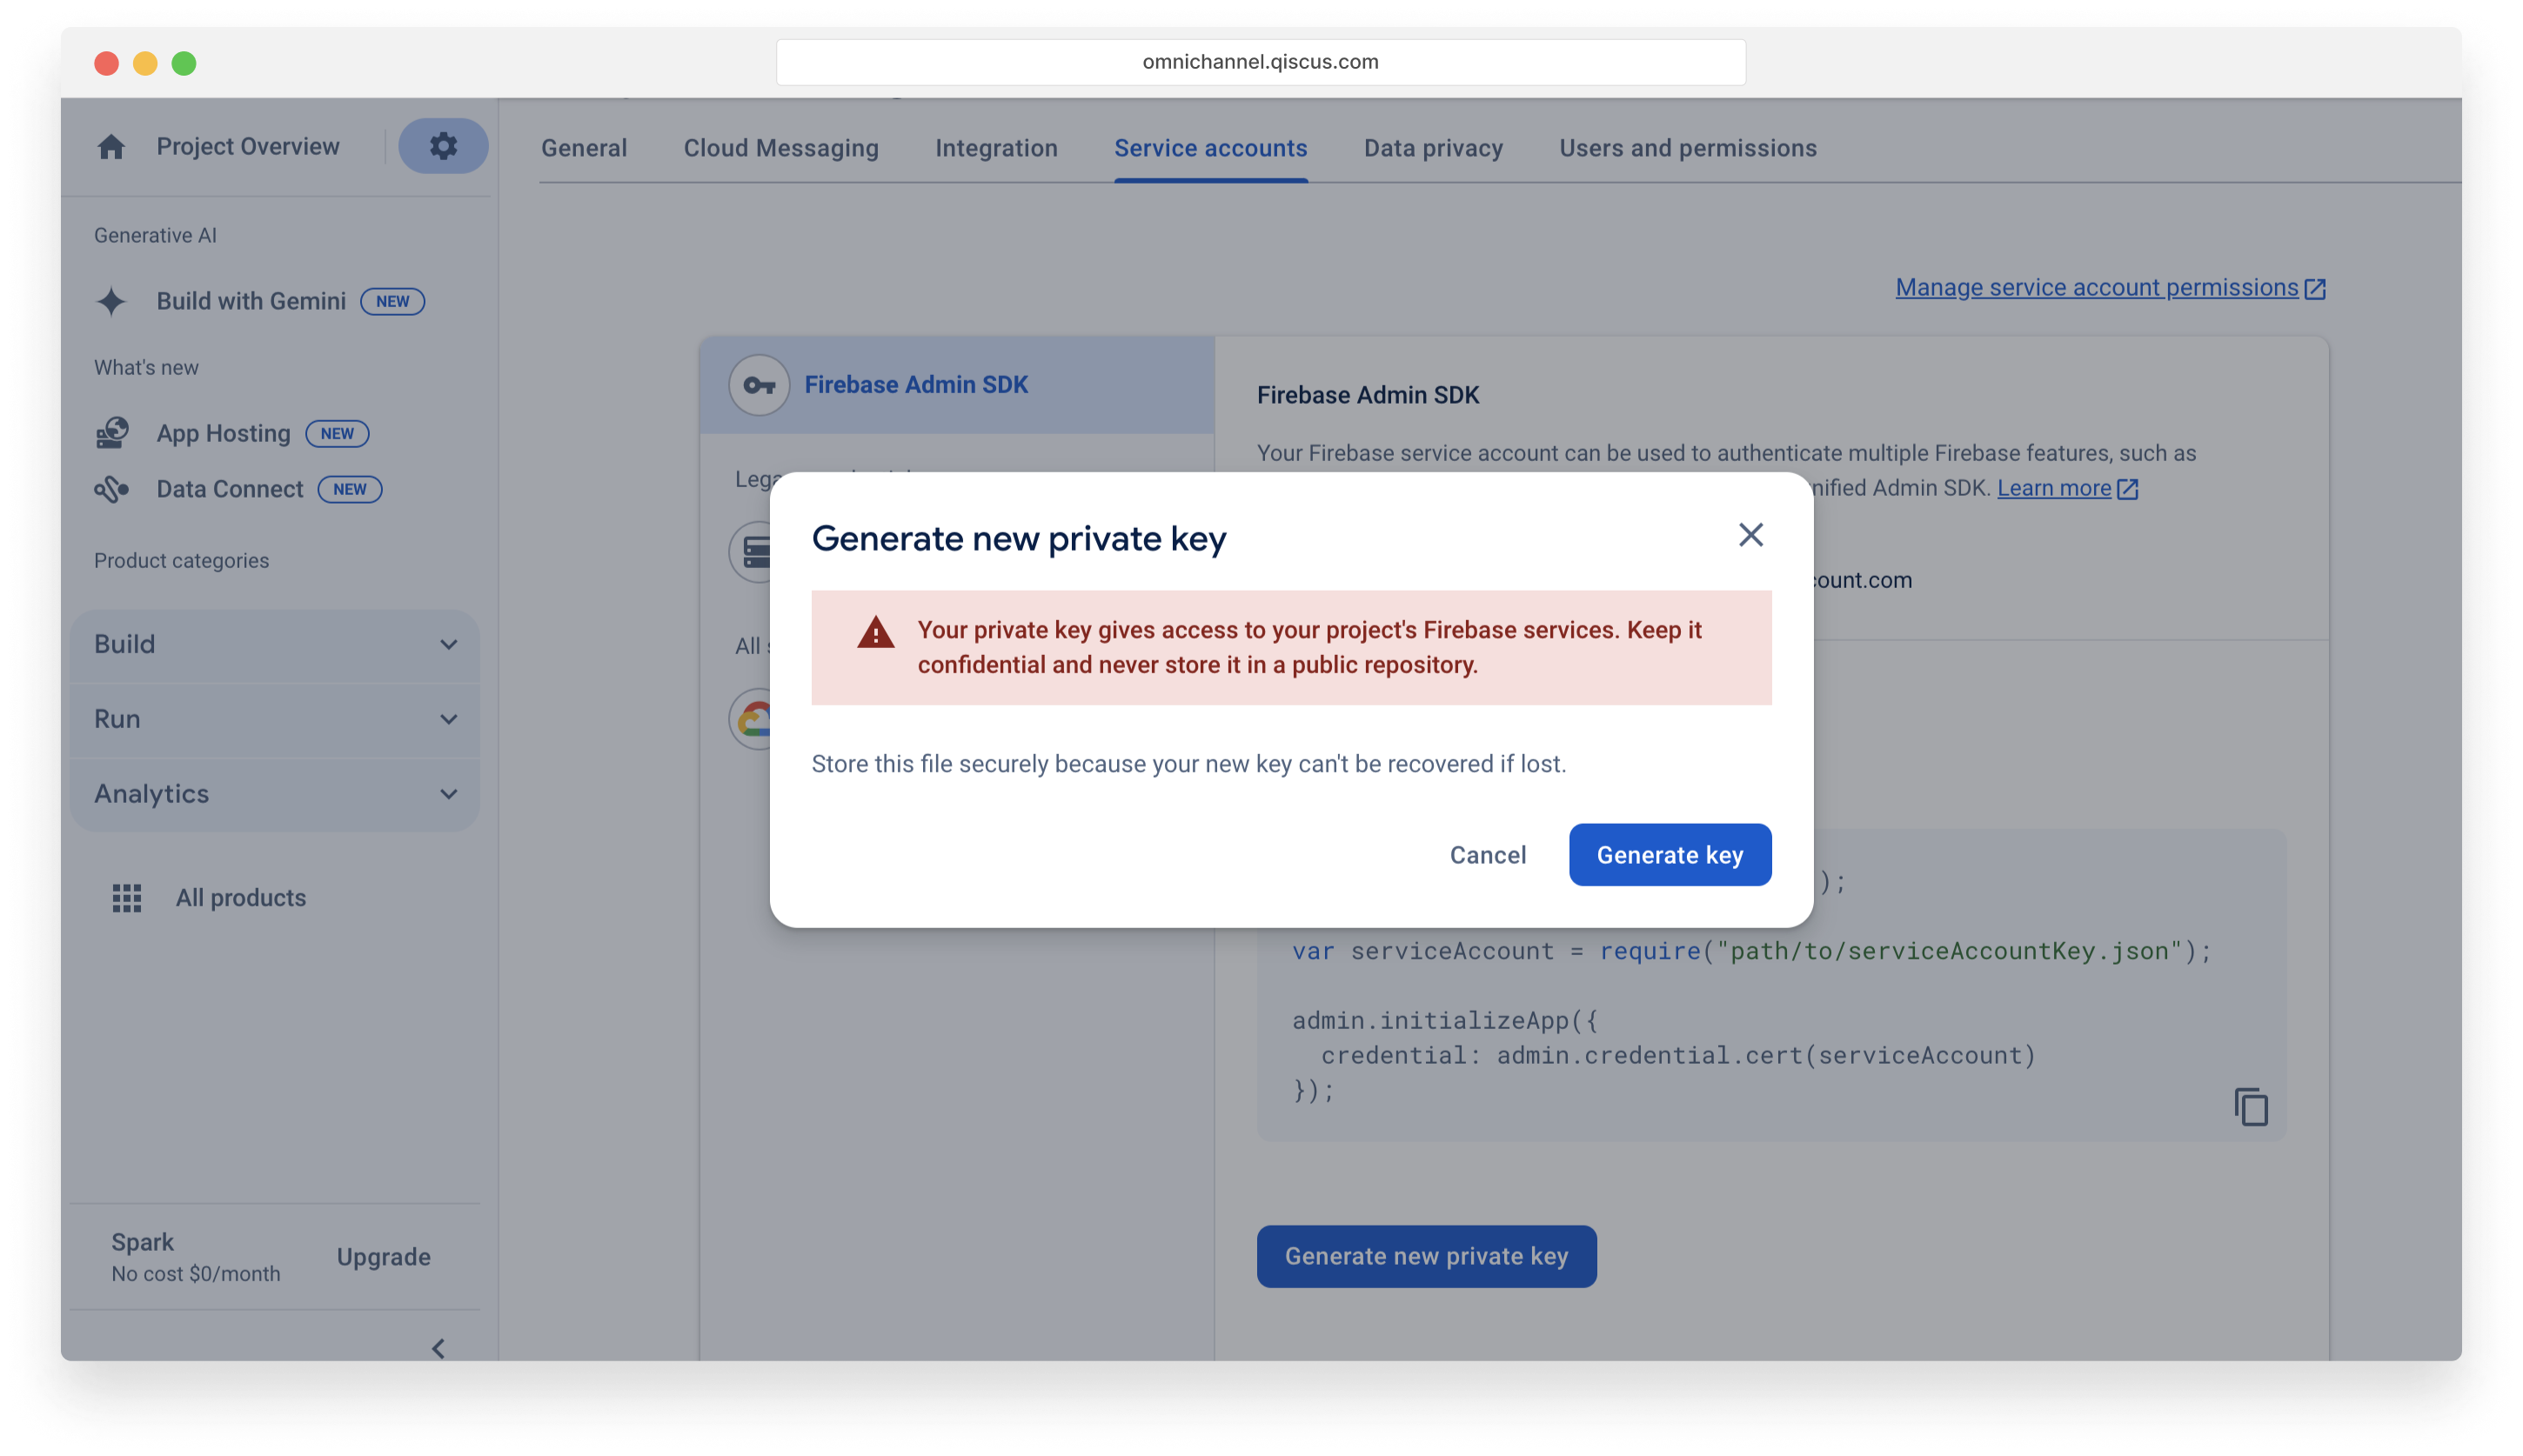
- Access the Firebase console and select your project.
- Navigate to Project settings > Service Accounts.
- Click on Generate new private key and confirm by selecting Generate key.
- Safely store the downloaded JSON file containing the private key.
Step 2: Upload Service Account
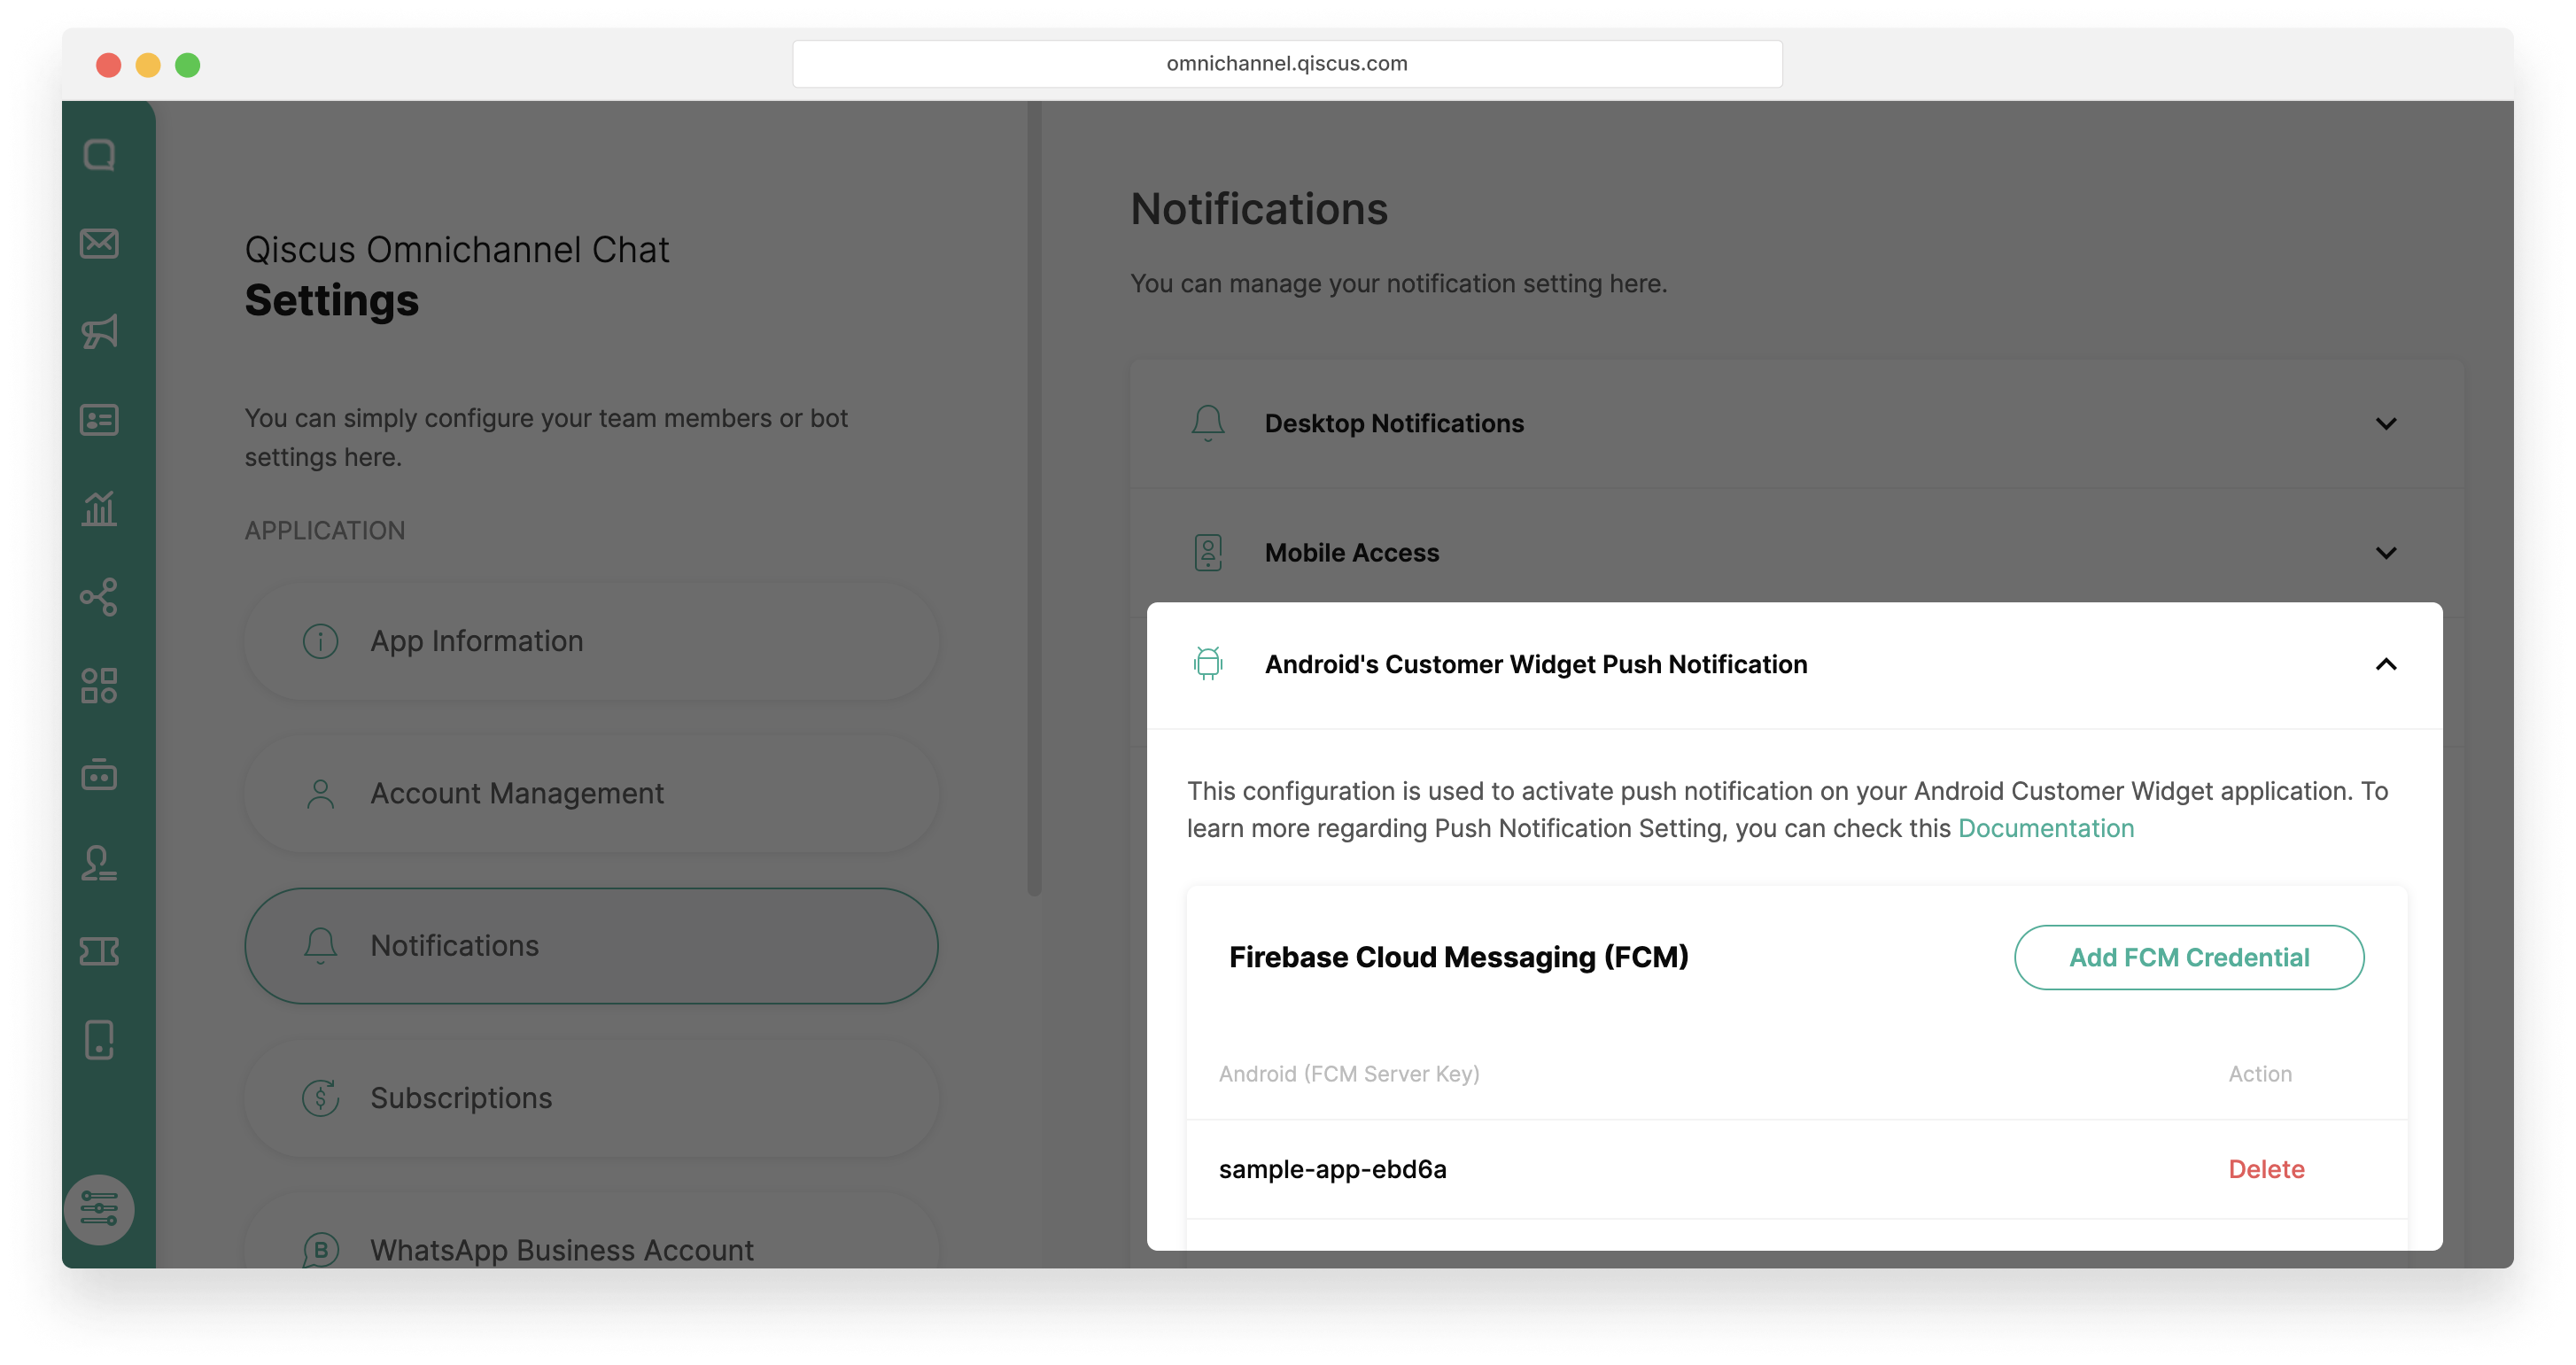
Upload the JSON file containing the key that was downloaded in previous to Omnichannel Dashboard
- Access your Omninchannel dashboard
- Navigate to Settings > Notifications > Android's Customer Widget Push Notification.
- Click on Add FCM Credential and upload the JSON file.
- Once the file is successfully uploaded, click Save to save the credential.
Starting June 20, 2024, Firebase will deprecate the FCM legacy API. To maintain uninterrupted push notification functionality, it is advised to migrate to the new API at your earliest convenience. If you have any questions or concerns, please reach out to us
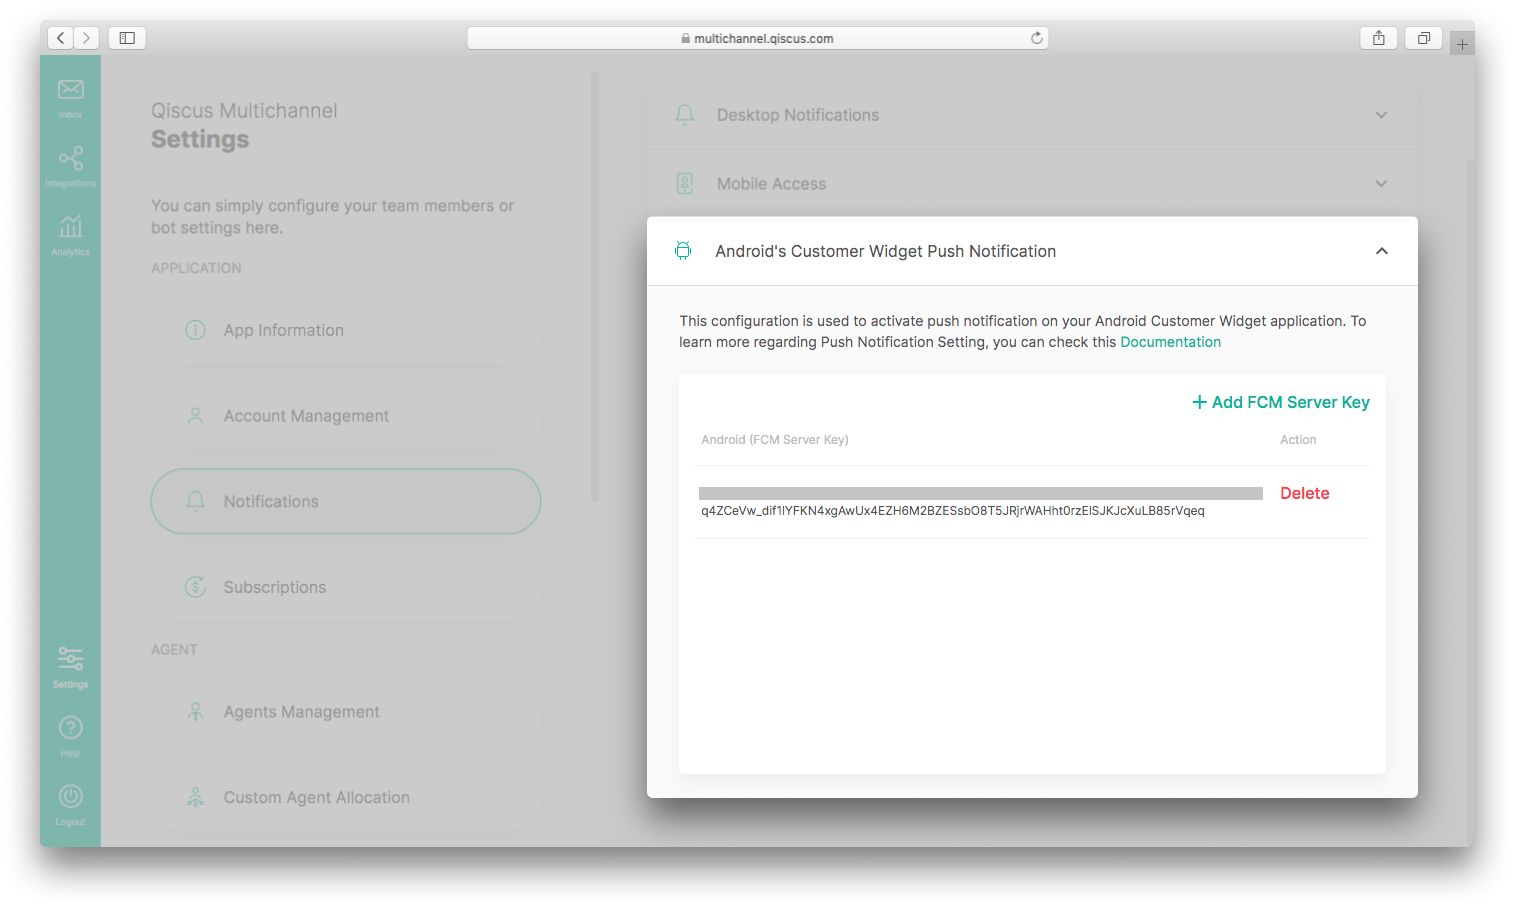
Android's Customer Widget Push Notification is a configuration to enable push notifications on your Android customer widget application. The following are the settings of Android’s Customer Push Notification Widget:
- Click the Setting menu,
- Click the Notifications menu,
- Click Android’s Customer Widget Push Notification,
- Add the FCM server key by clicking the Add FCM Server Key button,
- Delete the FCM server key by clicking the Delete button.
.
Agent Management
The agent management setting allows you to manage agents and their allocation. In agent allocation section, you can set the configuration of Auto assign agent and Agent can takeover an unserved customer. Agents management section allows you to create, edit, or delete agents. Only Admin can make this arrangement.
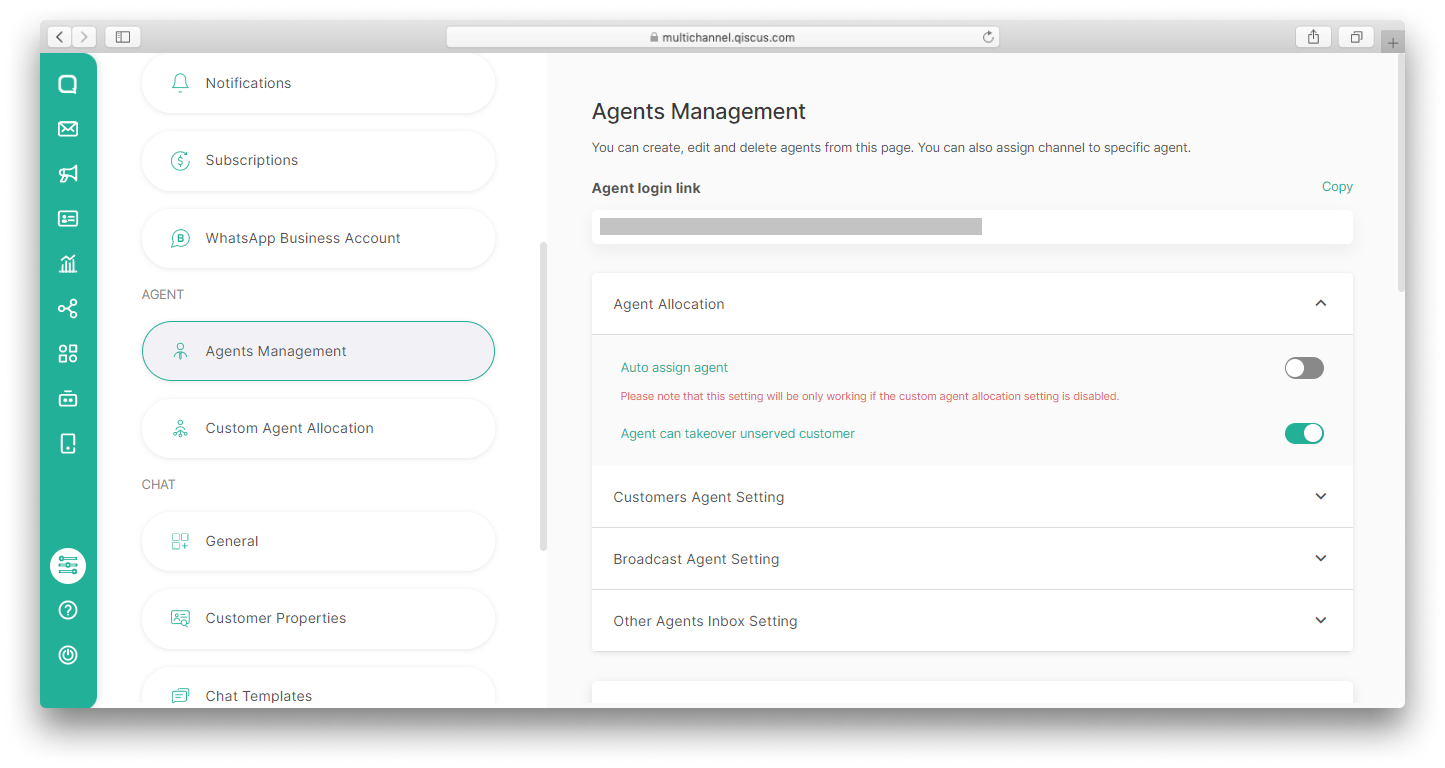
Only Admin can arrange the Agents Management setting.
Agent Allocation
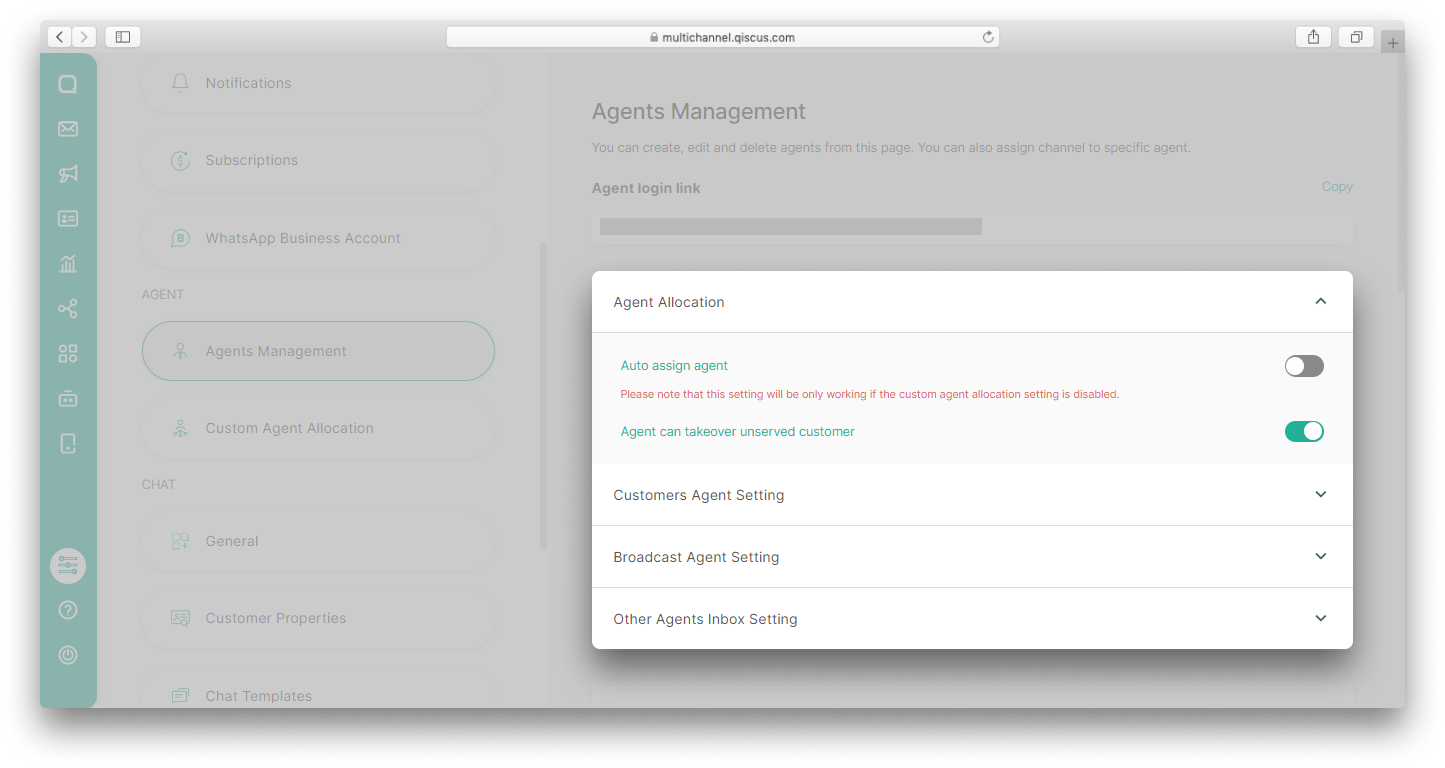
Auto assign agent configuration is used to manage the assignments of agents. If Auto Assign Agent is enabled, then agents will be assigned automatically whenever there’s incoming chat from customers inside your office hours based on agents’ assigned channels and divisions. If Auto assign agent is disabled, then agent auto allocation is also disabled. Agent needs to take over customer chat room manually. Office hours setting is needed because agents will be assigned only when they are online during office hours. Please note that this setting will only work if the custom agent allocation setting is disabled.
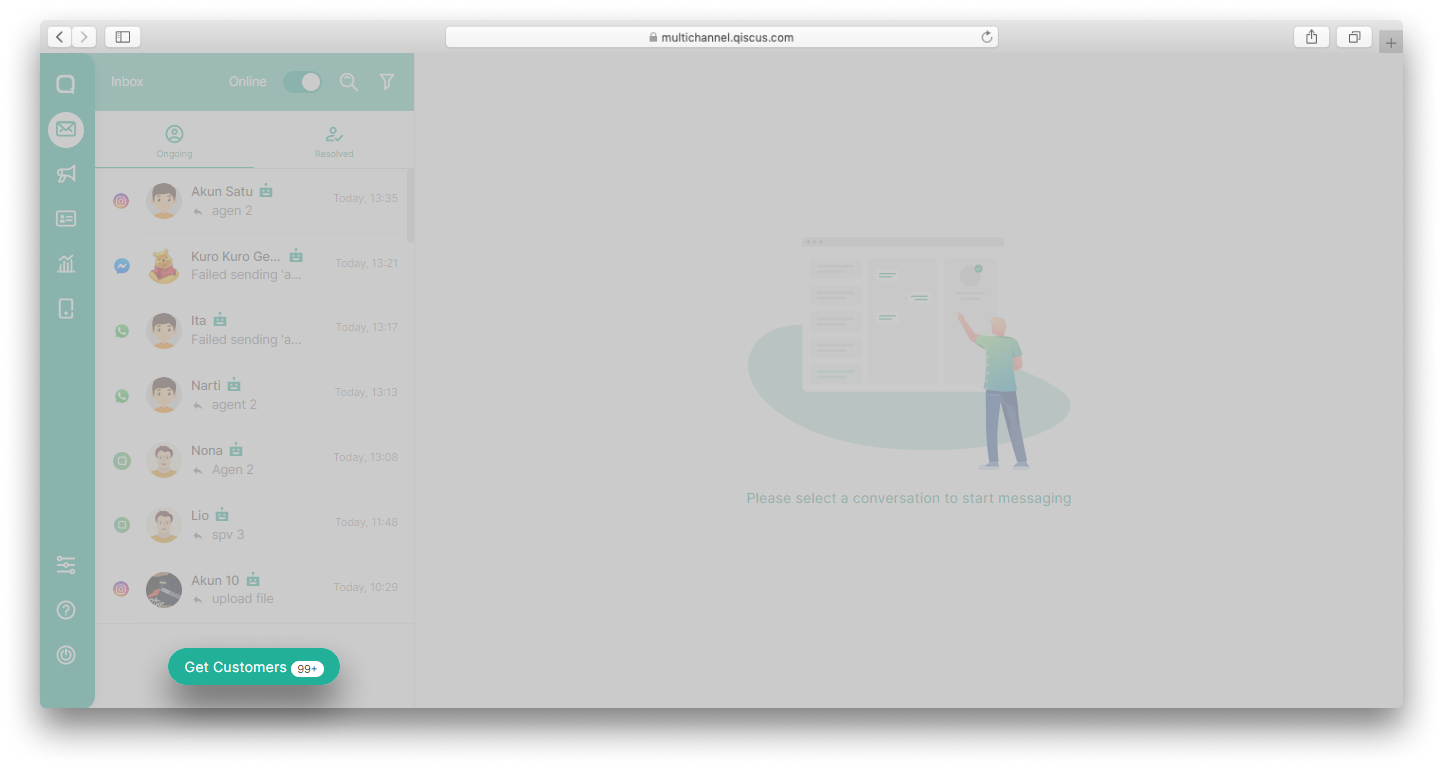
Agent can takeover unserved customer configuration is used to enable or disable the Get Customer button for Agent. It is enabled by default. If the configuration is enabled then the button will be displayed, and agent can take over unserved chat room. To update this configuration, Agent needs to logout and re-login.
Chats from customers which have not been served by an agent will enter a queue and can be taken by an Agent one by one by clicking the Get Customers button. Customers are taken by agent based on the order of the incoming queue (First in First Serve). On the Get customers button, there’s a bubble containing the number of unserved customers, and the number will be updated every minute. The Get Customers button only exists when logging in as Agent.
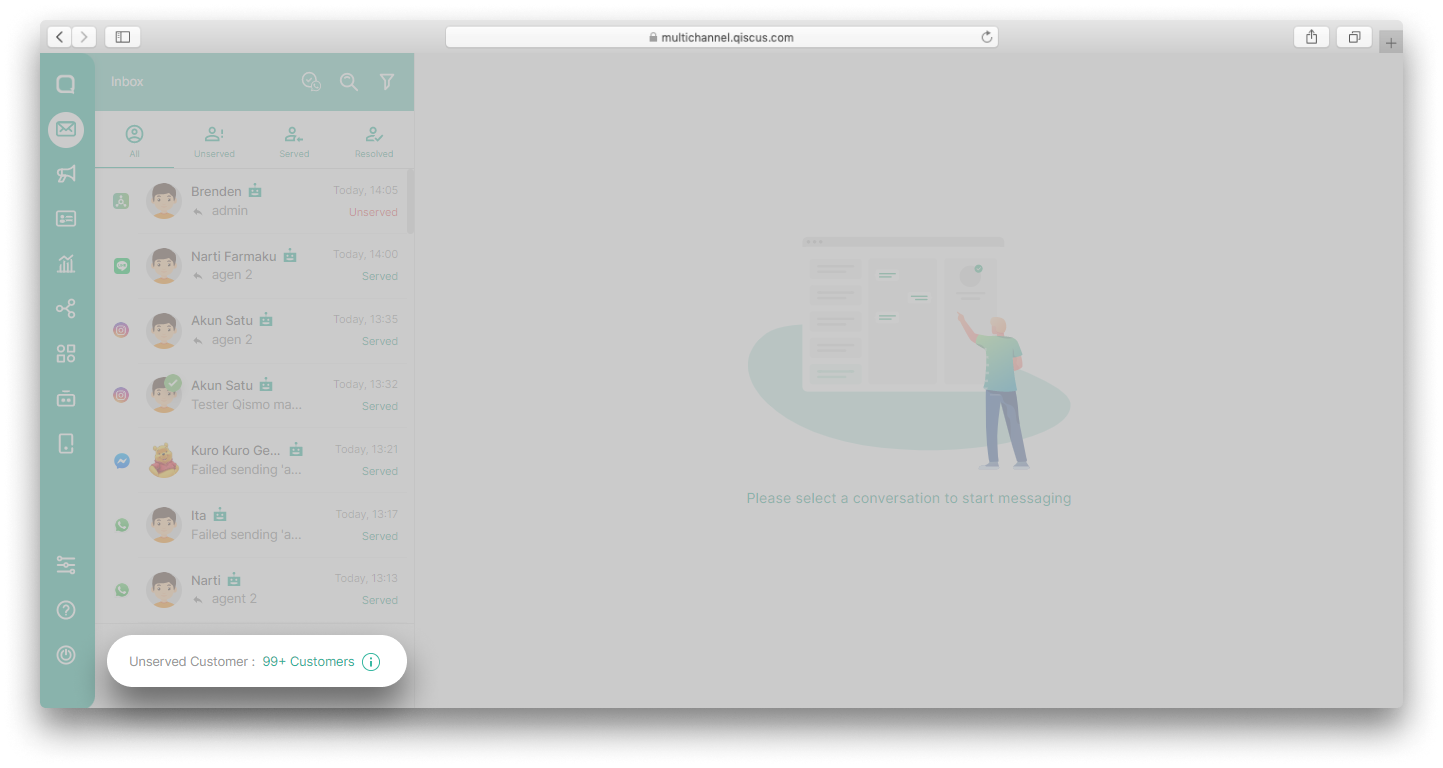
Admins and Supervisors don’t have Get Customers Button. Instead, Admins and Supervisors can get the number of unserved chat rooms from the Unserved Customer section on the bottom left section of the Inbox page. Admins or Supervisors are also able to assign a chat room to agents by clicking more (three dots) button and then select Add Agent.
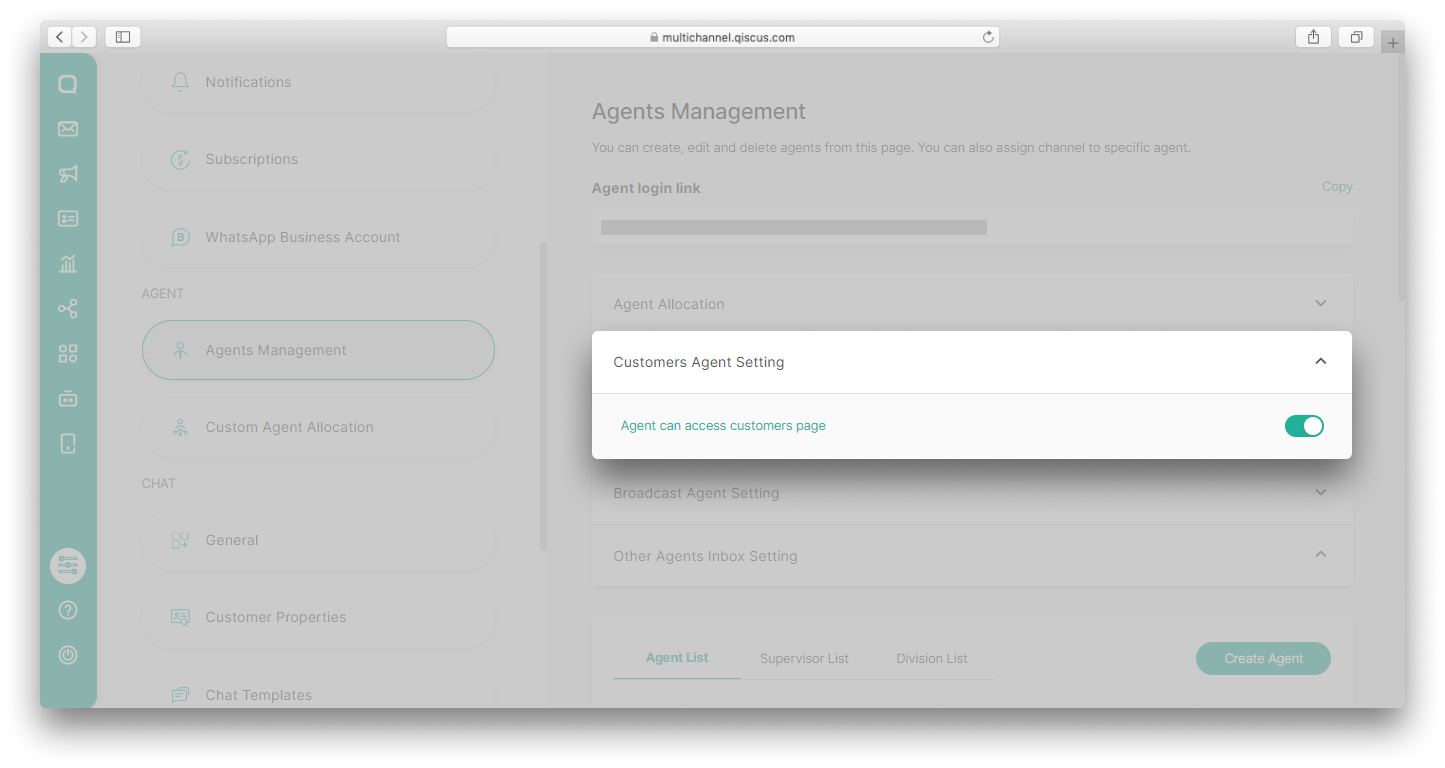
Customers Agent Setting
Customer Agent setting is used to determine whether the agent can access the Customers menu or not. Admins and supervisors have the power to change these settings. If you activate the toggle Agent can access customers page, agents can access the Customers menu and vice versa.
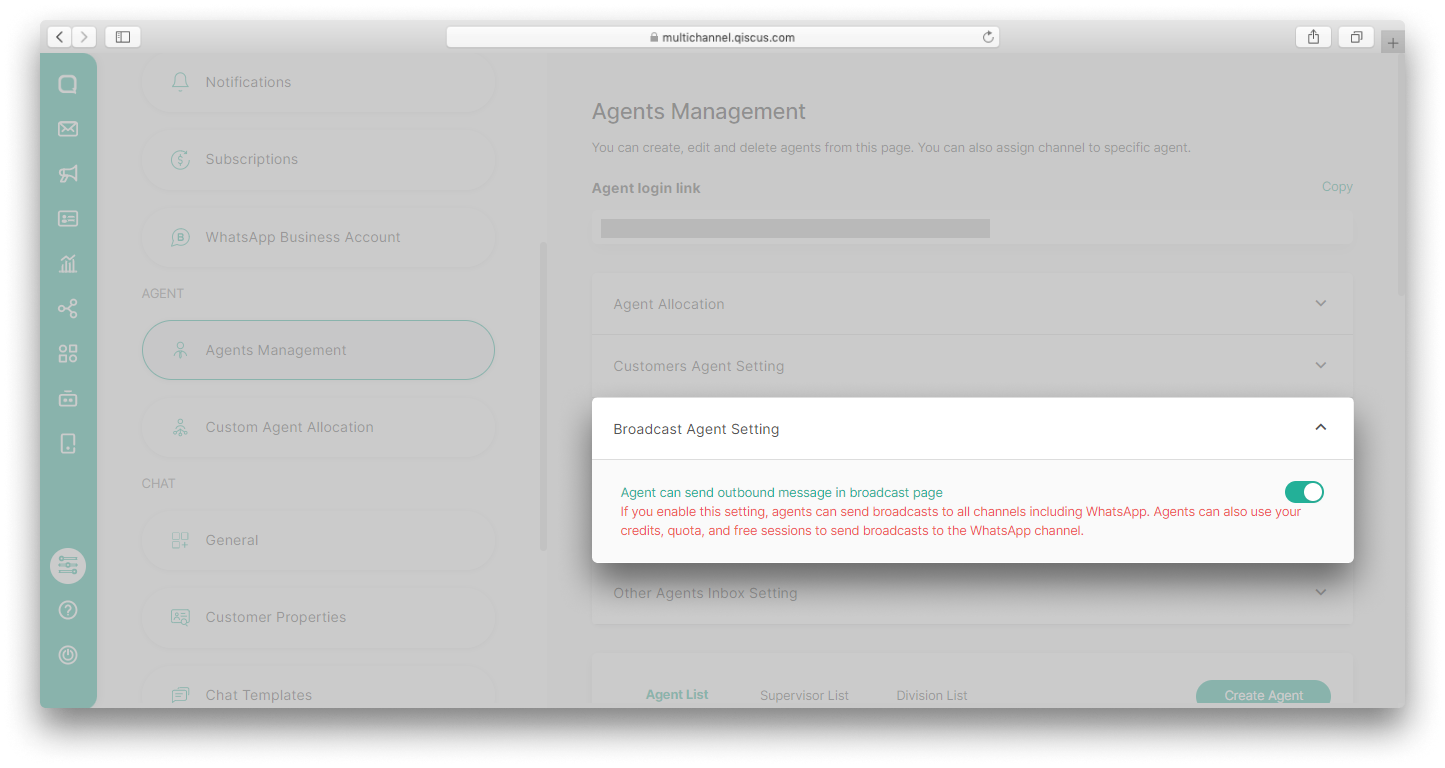
Broadcast Agent Setting
Broadcast Agent Setting is used to give permission to agents to send broadcasts on the Broadcast Message menu. If you enable this setting, agents can send broadcasts to all channels including WhatsApp. Agents can also use credits, quota, and free sessions to send broadcasts to the WhatsApp channel.
Other Agents Inbox Setting
Other Agents Inbox Setting contains other settings related to Agents management such as Hide agent status (online/offline) toggle, Hide customer ID on Chat & Customer Info, Agent can assign chat to other agents, Agent can add other agents to chat, Agent can leave chat room themselves, and Hide estimation cost dialogue on start chat.
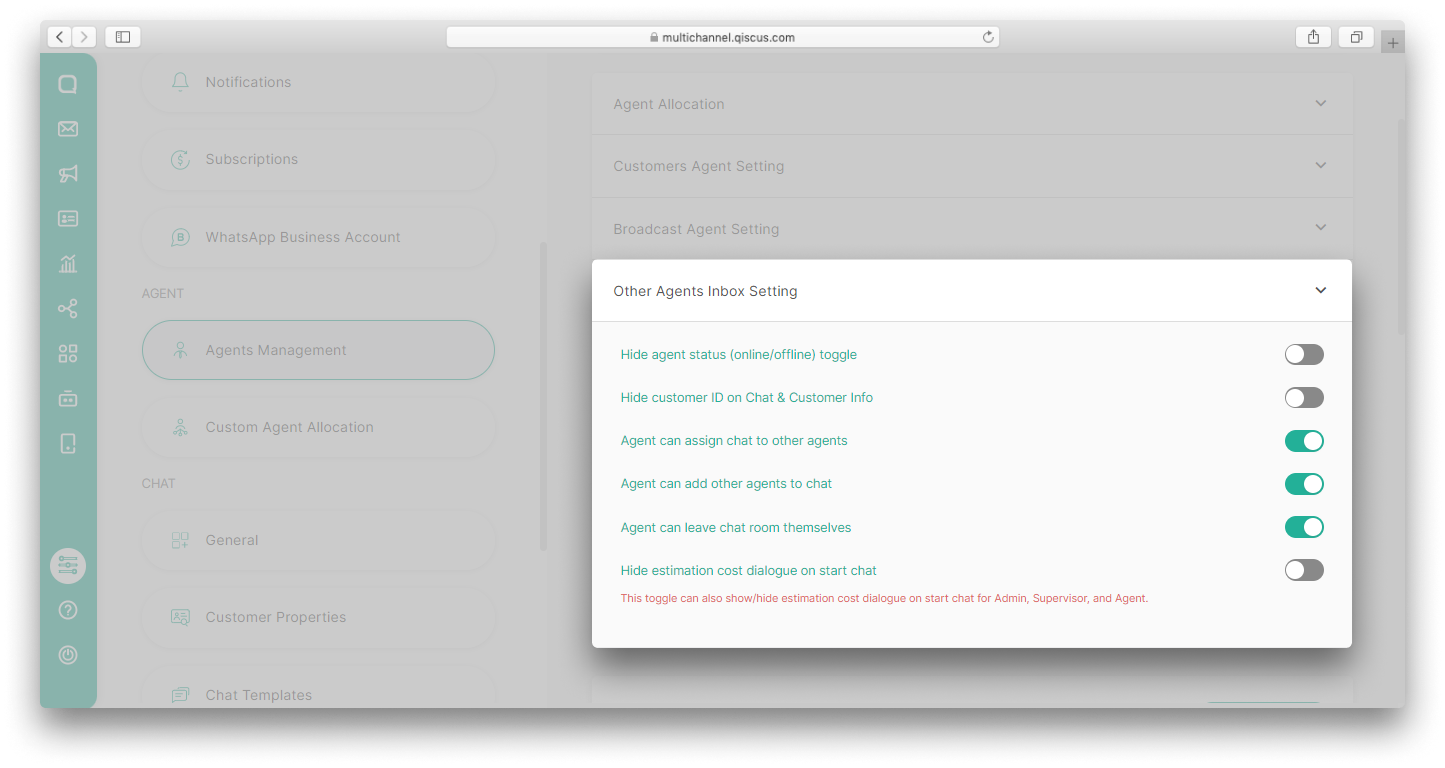
Hide agent status (online/offline) toggle is used to display a toggle for agent status being offline or online on the Inbox menu.
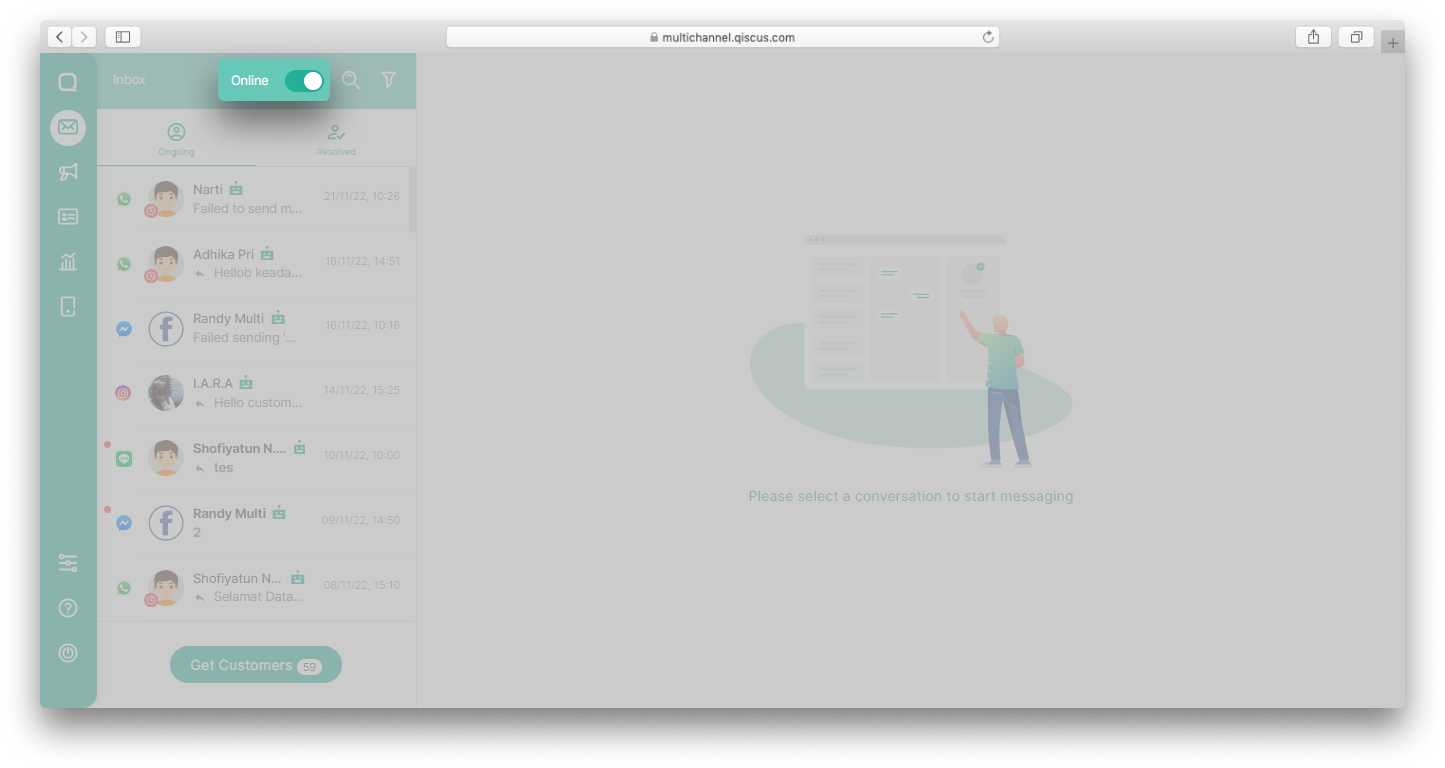
Hide customer ID on Chat & Customer Info is used to show or hide customer ID. If you activate this toggle, the customer ID will not appear on the agents' Inbox menu.
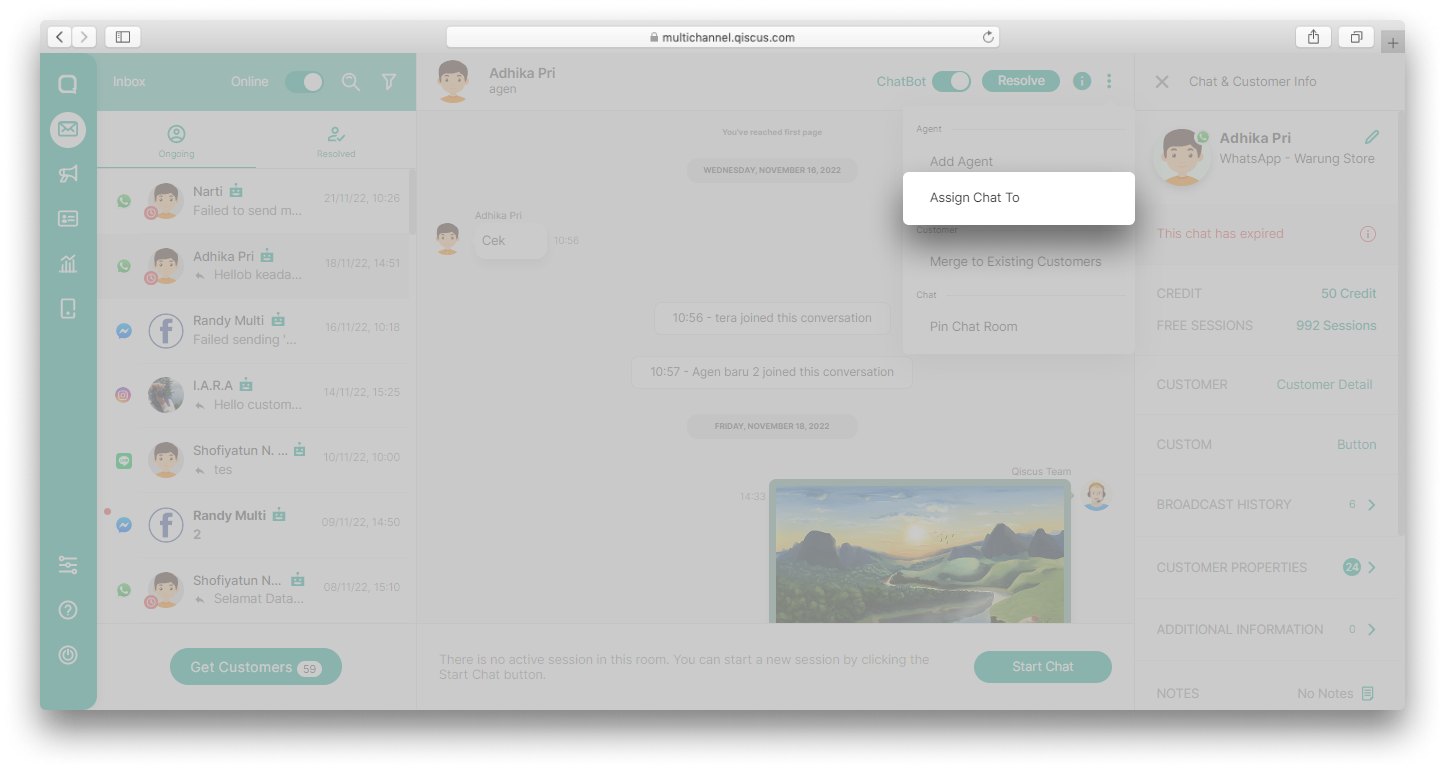
Agent can assign chat to other agents is used to allow agents to assign a chat room to other agents. This will help in customer handling if there is something that can only certain agents can handle. If you activate this toggle, an Assign Chat To button will appear on the agents' Inbox menu.
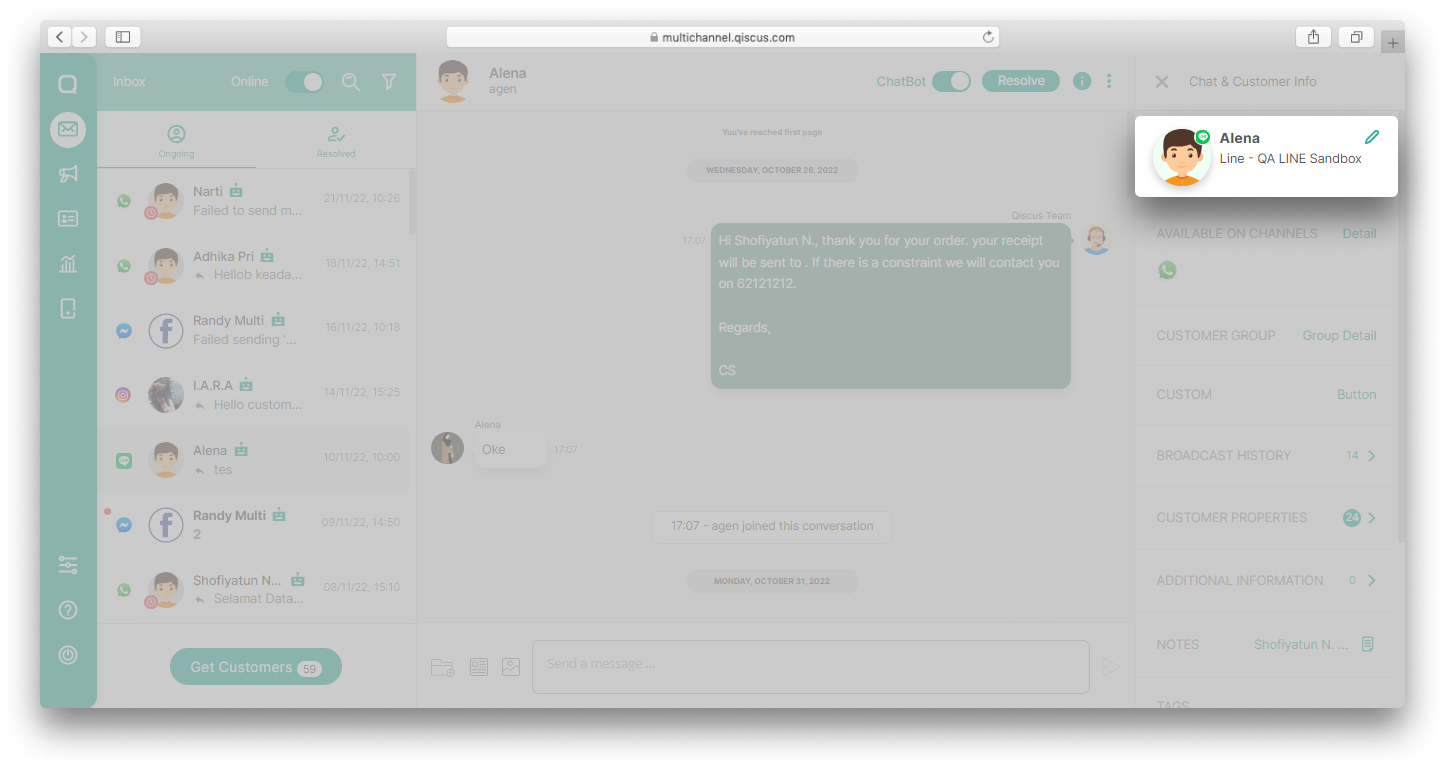
Agent can add other agents to chat is used to make it easier for agents to be able to ask for help from other agents in one of the chat rooms. If you activate this toggle, an Add Agent button will appear on the agents' Inbox menu.
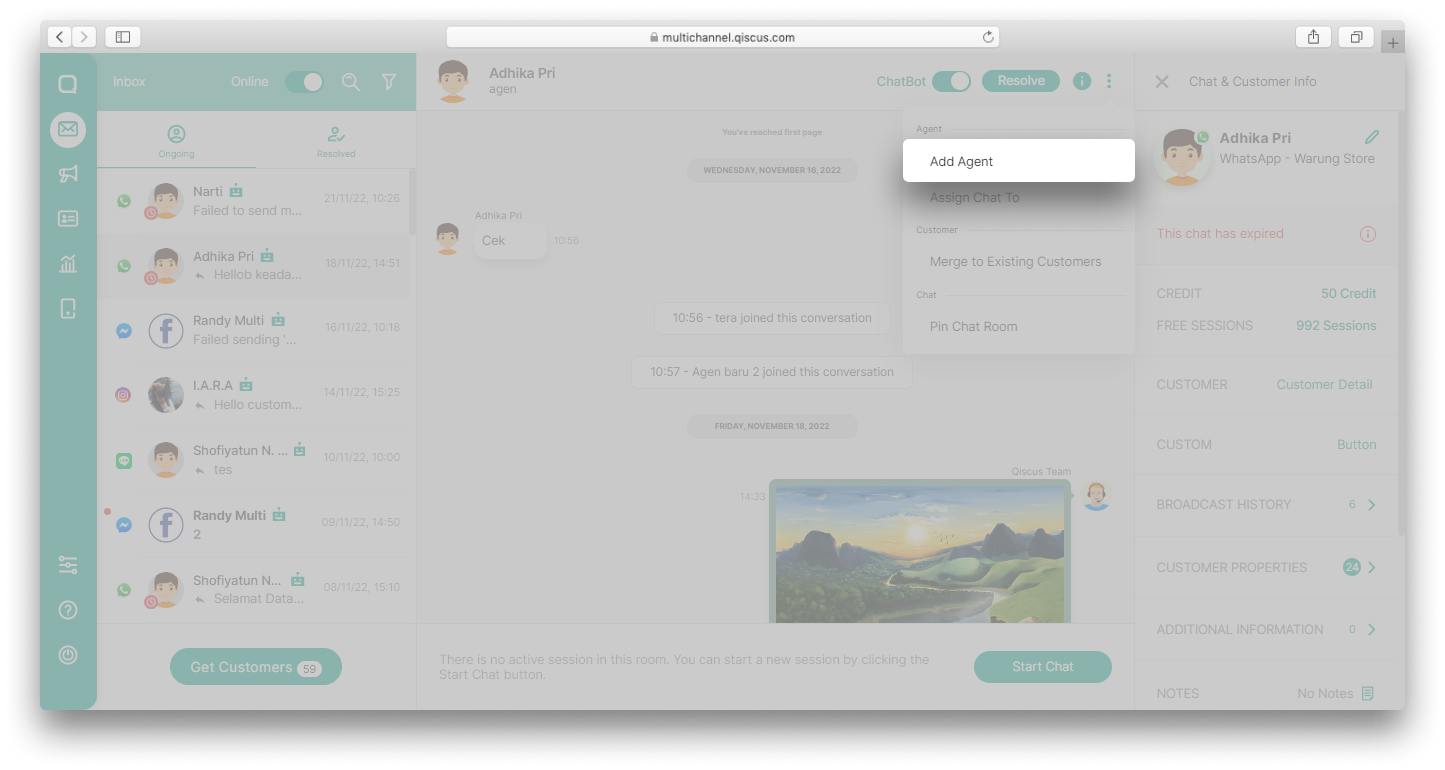
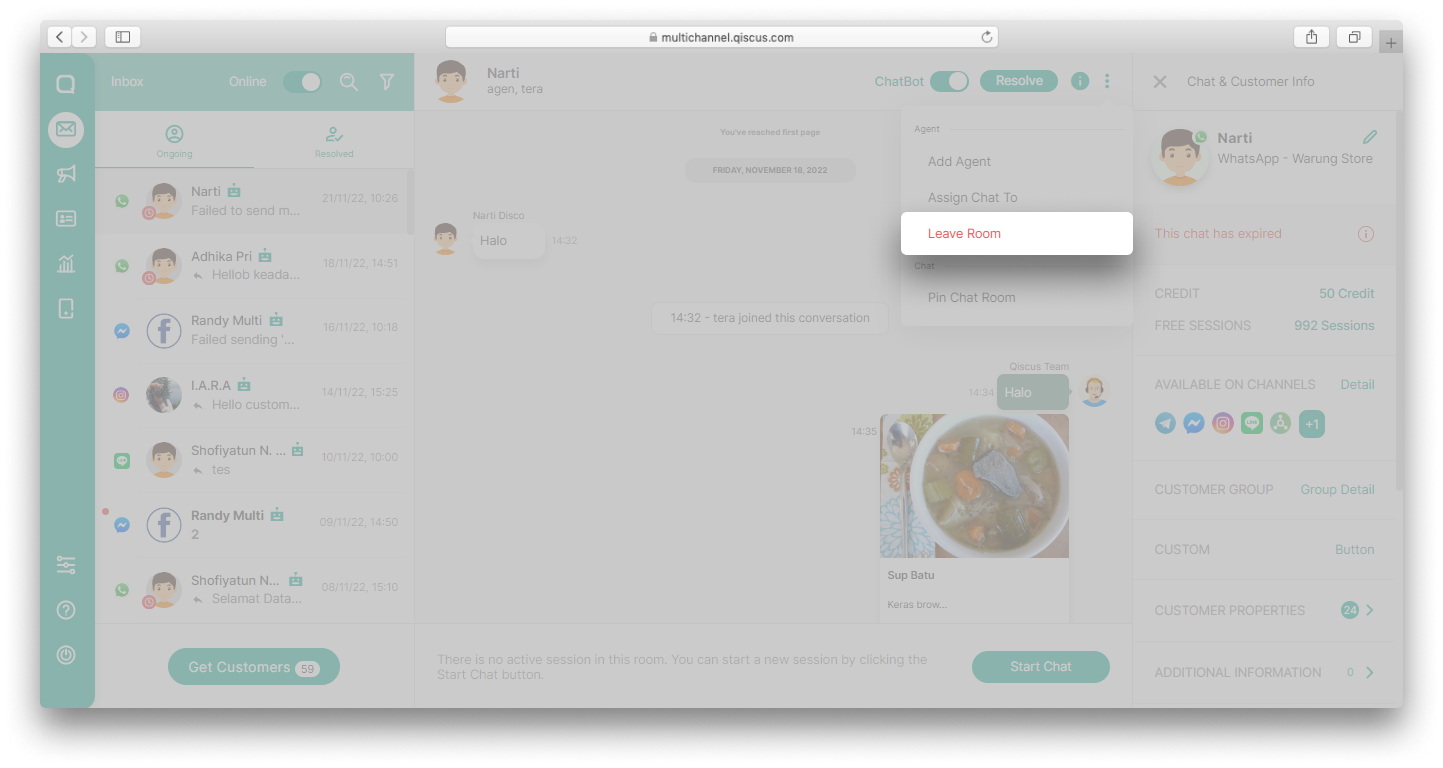
Agent can leave chat room themselves is used to giving access to agents to leave the chat room without Admin assistance. As a note, The Leave Room button will appear if there is more than 1 agent in a chat room.
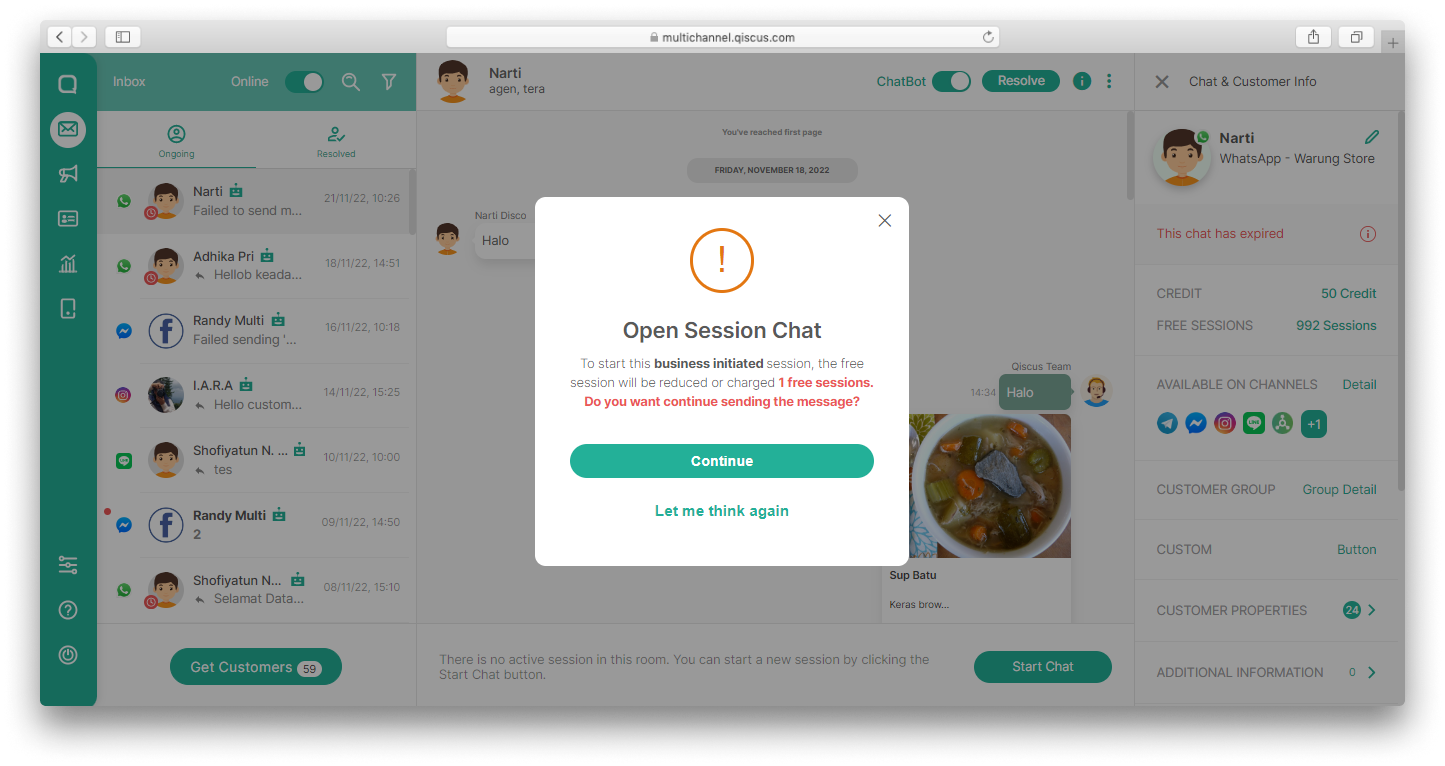
Hide estimation cost dialogue on start chat is used to show or hide estimation cost dialogue on start chat.
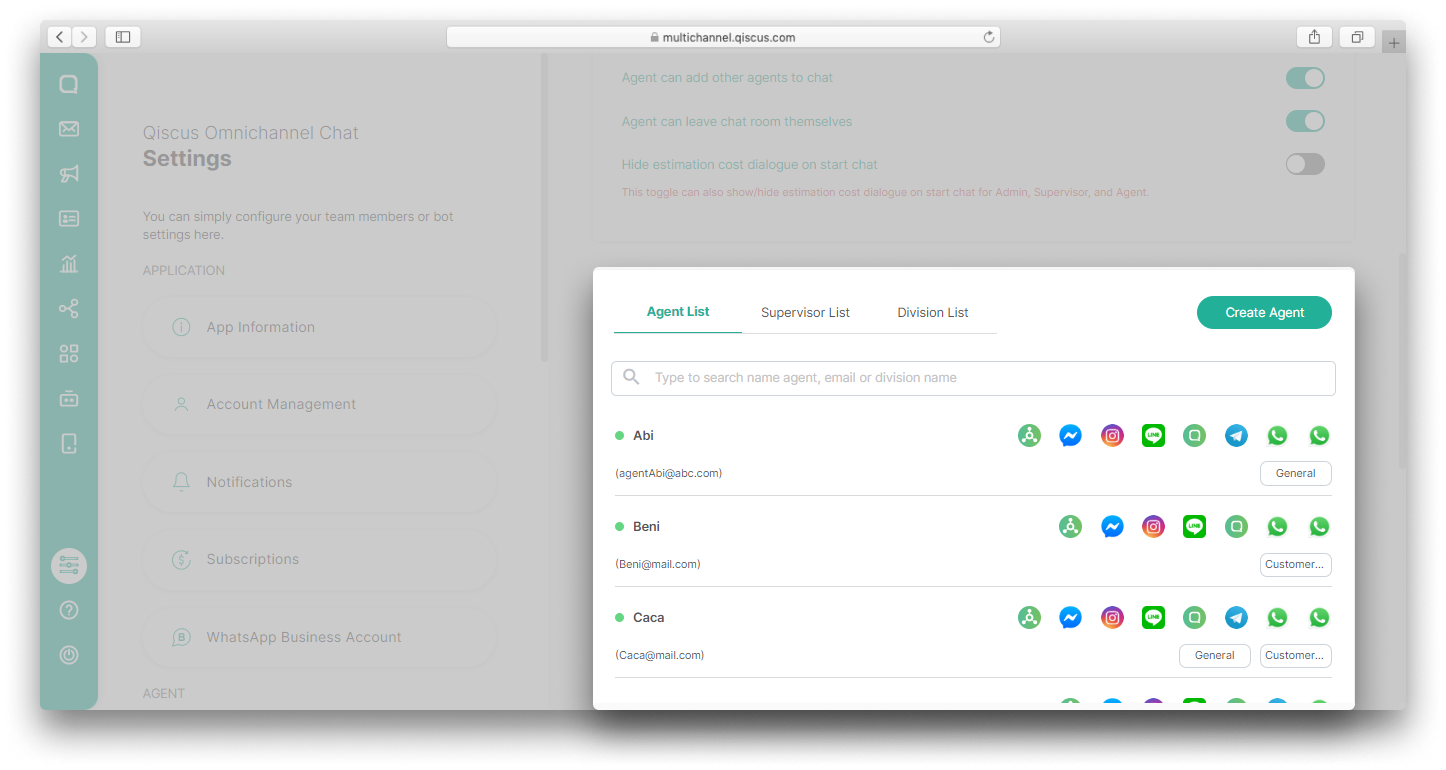
This toggle can also show/hide estimation cost dialogue on start chat for Admin and Supervisor.
Apart from the above features, you can also create, edit, or delete agents and supervisors on the Agents Management page. You can specify Agents for certain channels and for certain divisions. Agents can only be assign on integrated channels. Only Admin can create a Supervisor.
Supervisor by Division
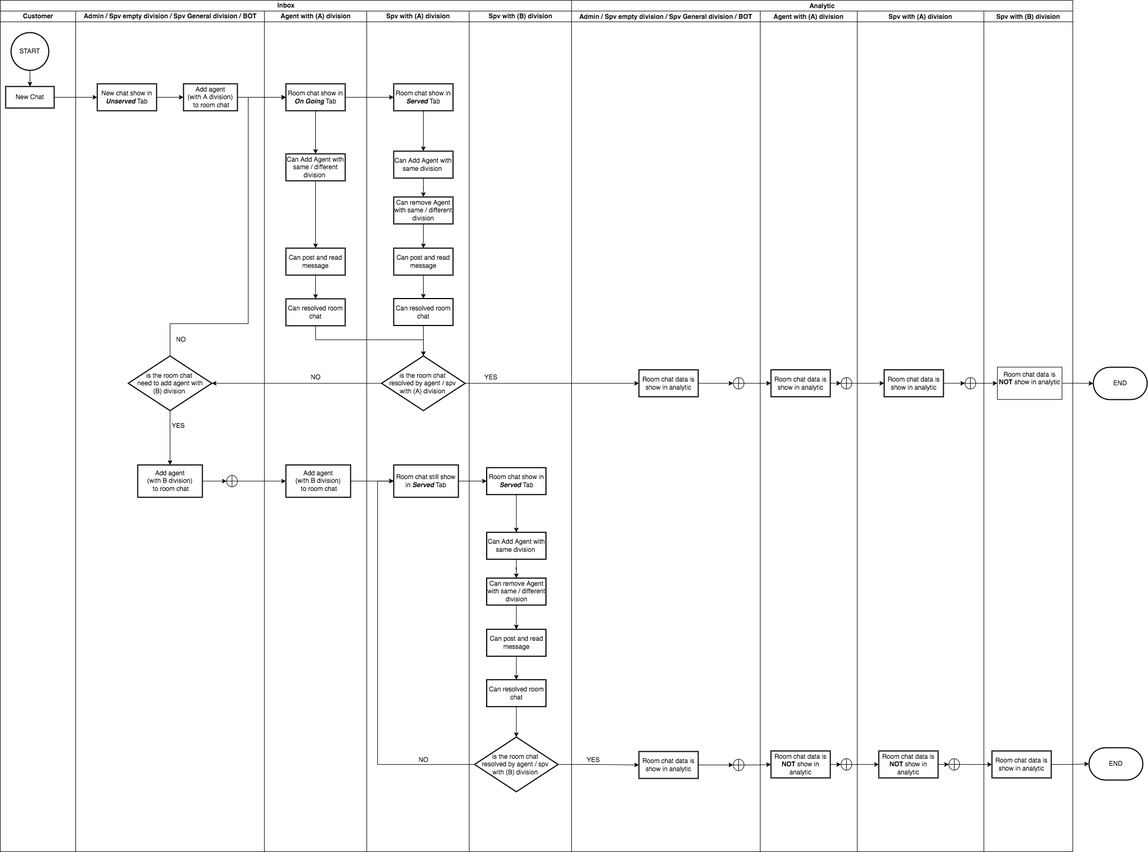
Supervisor by Division is a feature that will help you to divide supervisors according to the divisions owned by the company. With this feature, supervisor can easily manage agents and chat rooms according to their respective branches and channels for better customer handling.
Important notes:
- If a supervisor doesn't have a division, that supervisor will have access to all chat rooms according to the channel assigned
- If a supervisor has more than one division, the supervisor will have access to all chat rooms in the specified divisions and channels
- If you change the division or channel of a supervisor or agent, the supervisor and agent associated with it will be logged out
- If the supervisor has division(s), the analytics report on tabs General, Chats, Agent Performance, and Others will be based on the channels and division(s). For example, report on the Agent Performance will only includes agents in the same division
- Only Admin can make the arrangement for Supervisor by Division feature
Flowchart
You can see how this feature works in the following flowchart:
Create A New Division
By default there will be a General division where Supervisors who are members of this division will have access to all chat rooms according to the channel assigned. Follow these steps to create a new division:
- Go to Setting menu and select Agents Management,
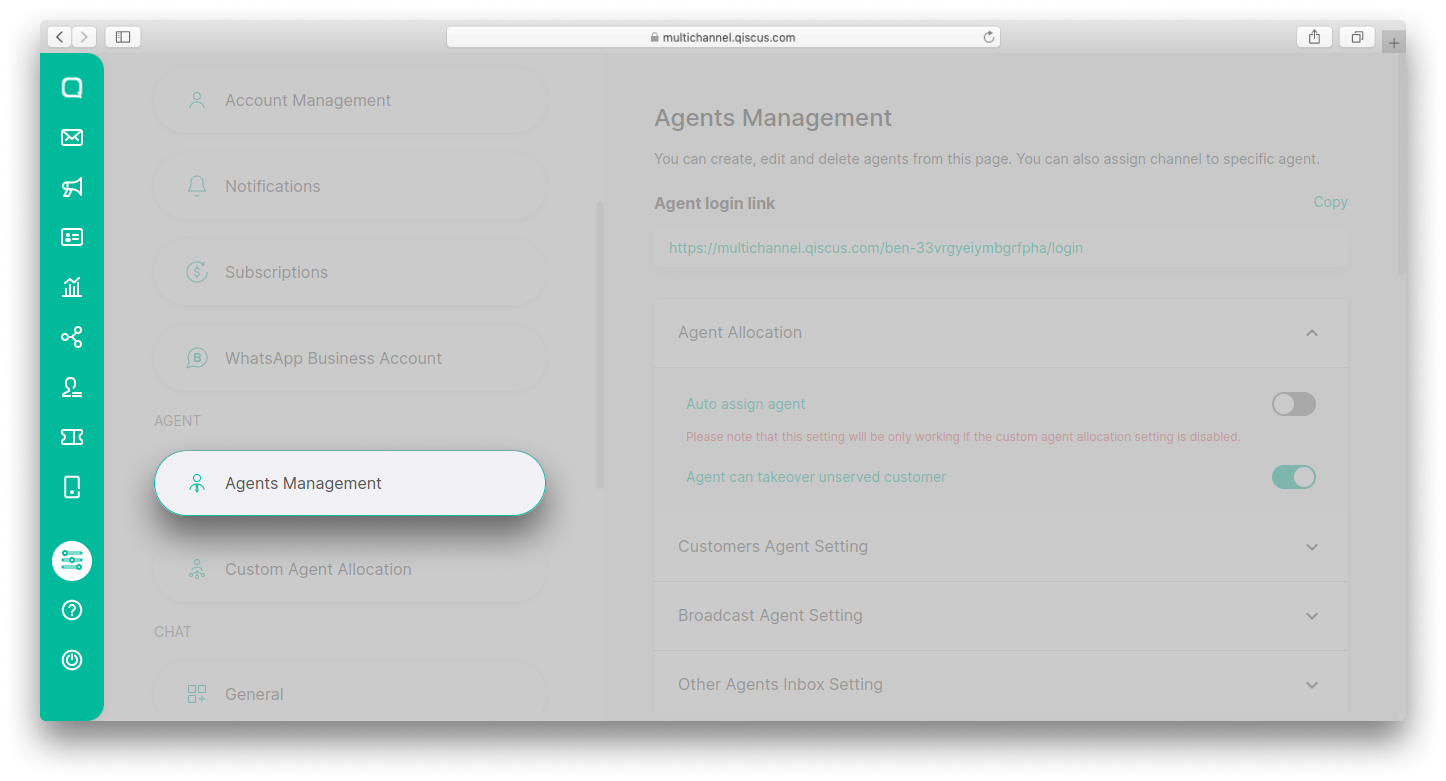
- Scroll down and click Division List,
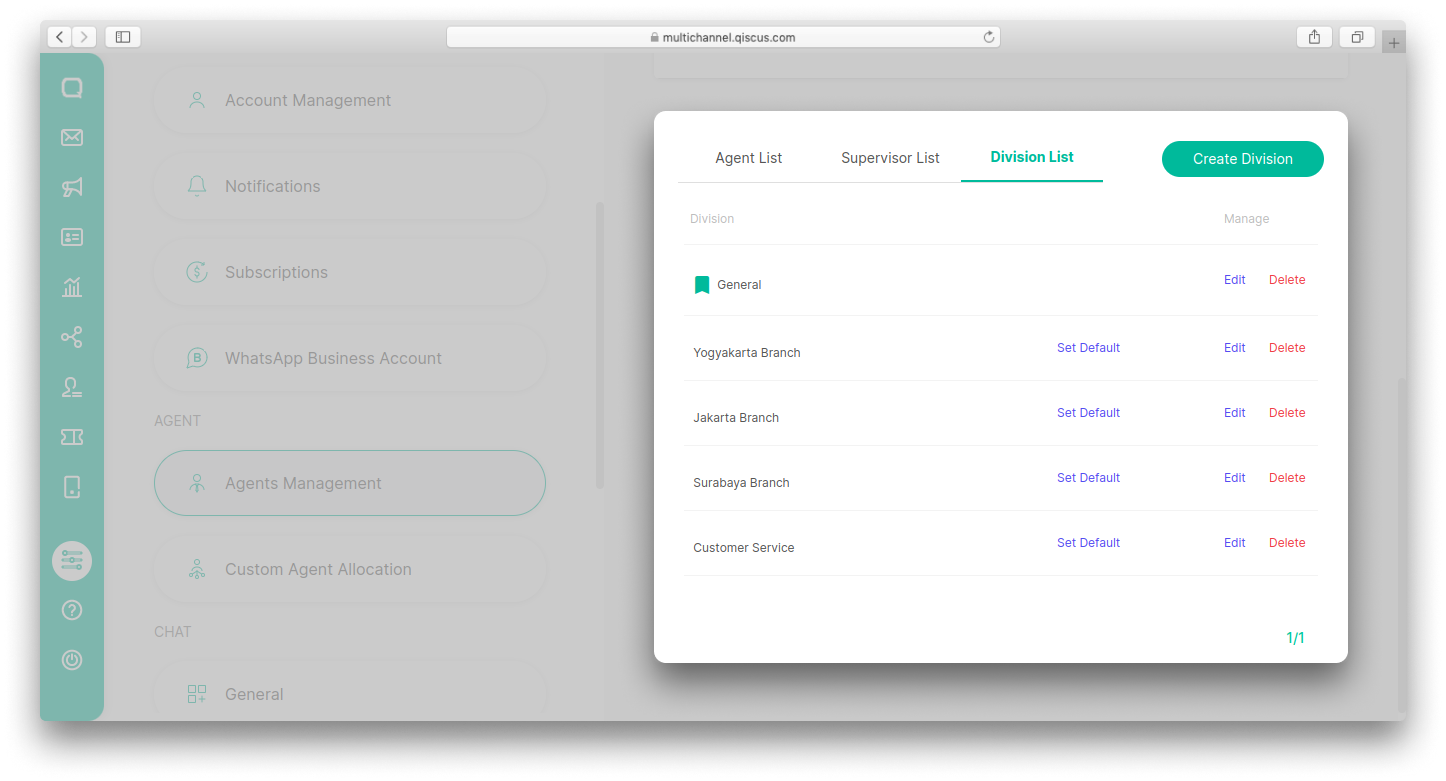
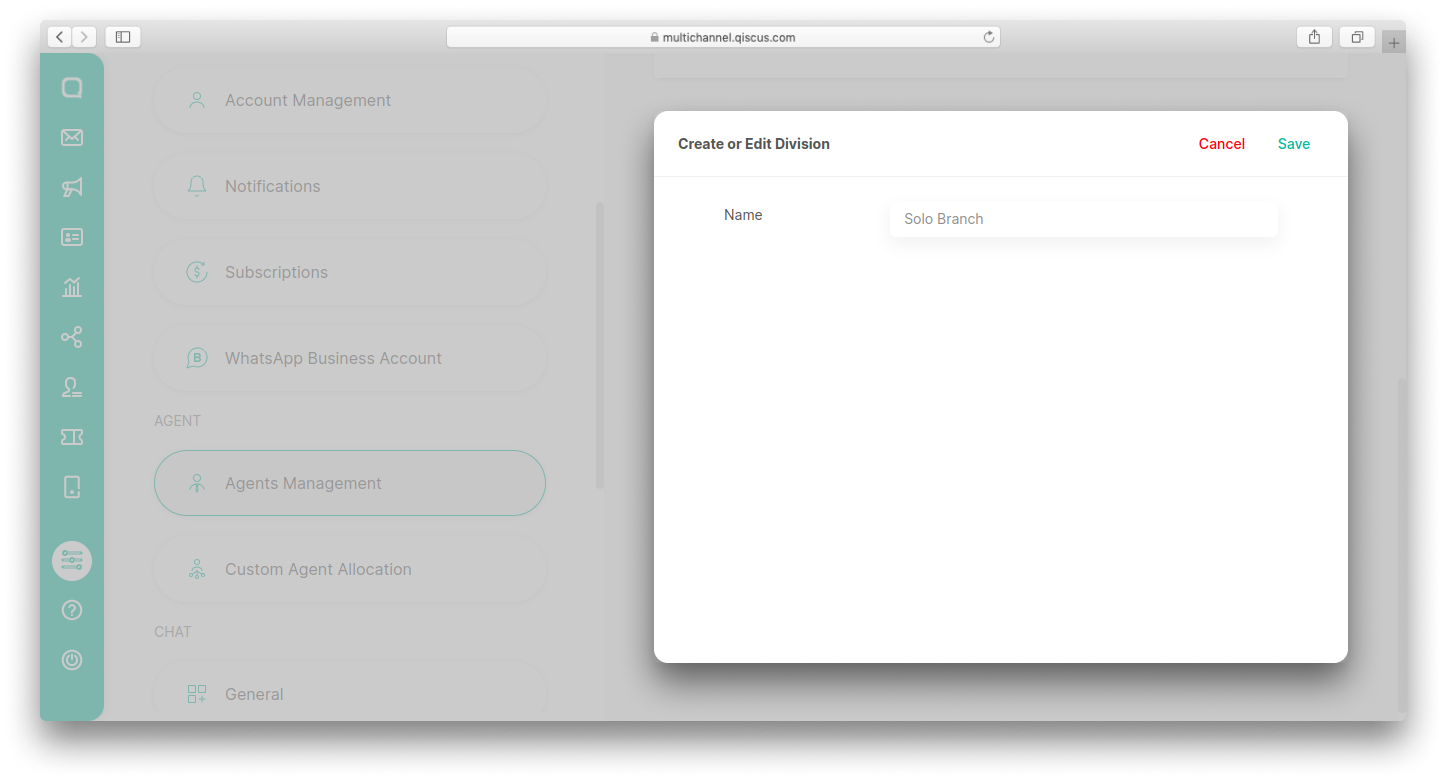
- Click Create Division button,
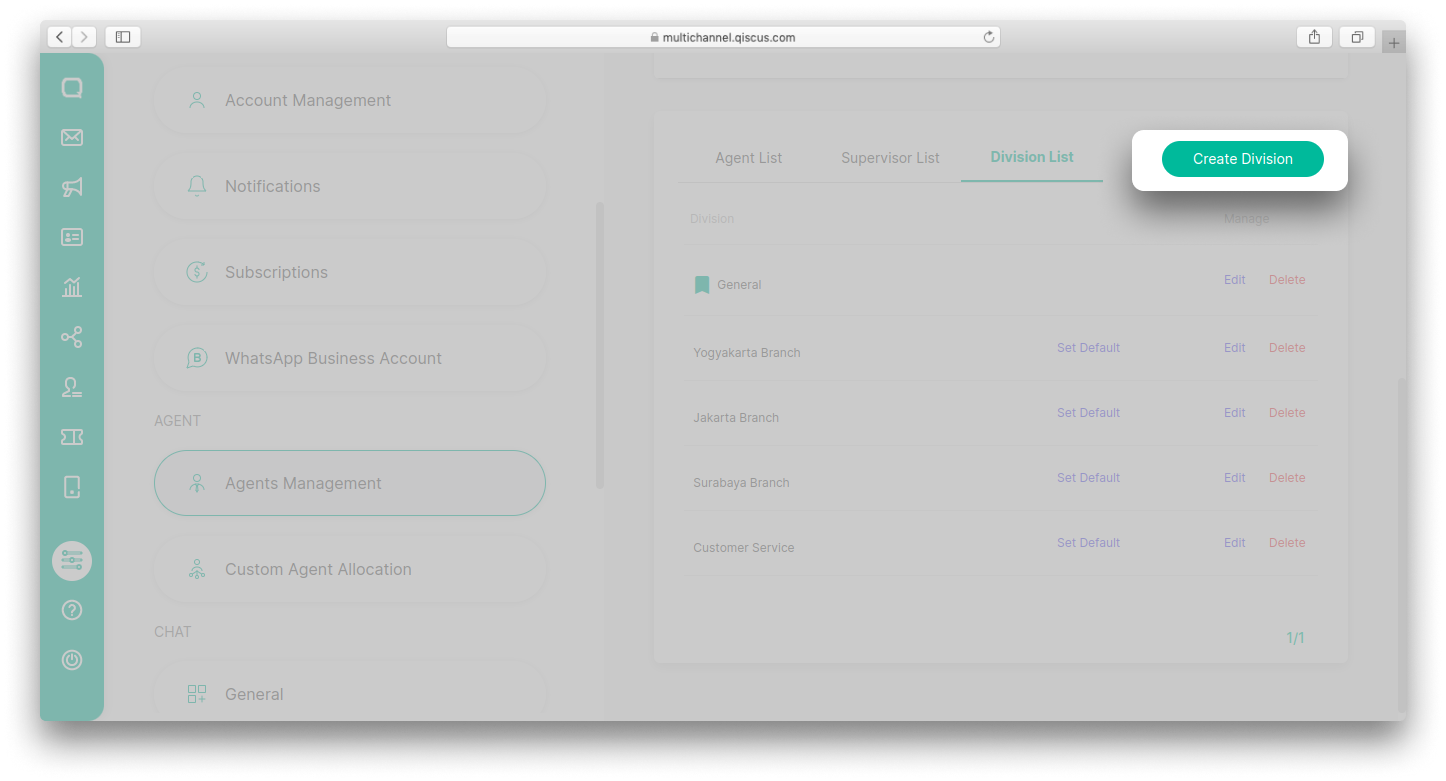
- Fill in the division name and then click Save.
Manage Existing Divisions
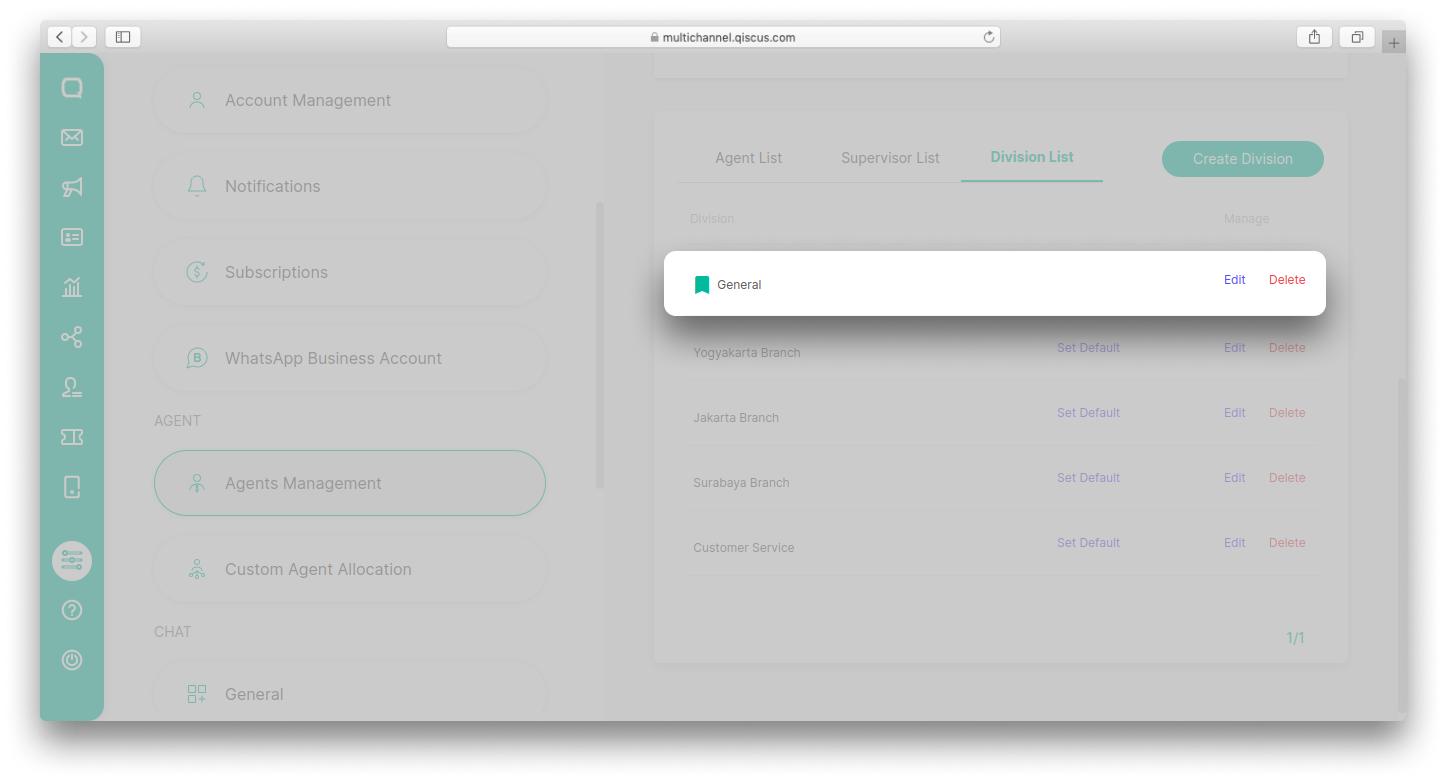
All divisions that have been created will appear in the Division List section. On the same page you can set the default division, change the name of the division, and also delete a division. If you delete a division, all chat rooms included in the division will not appear in the supervisor's Inbox.
Edit Supervisor Information
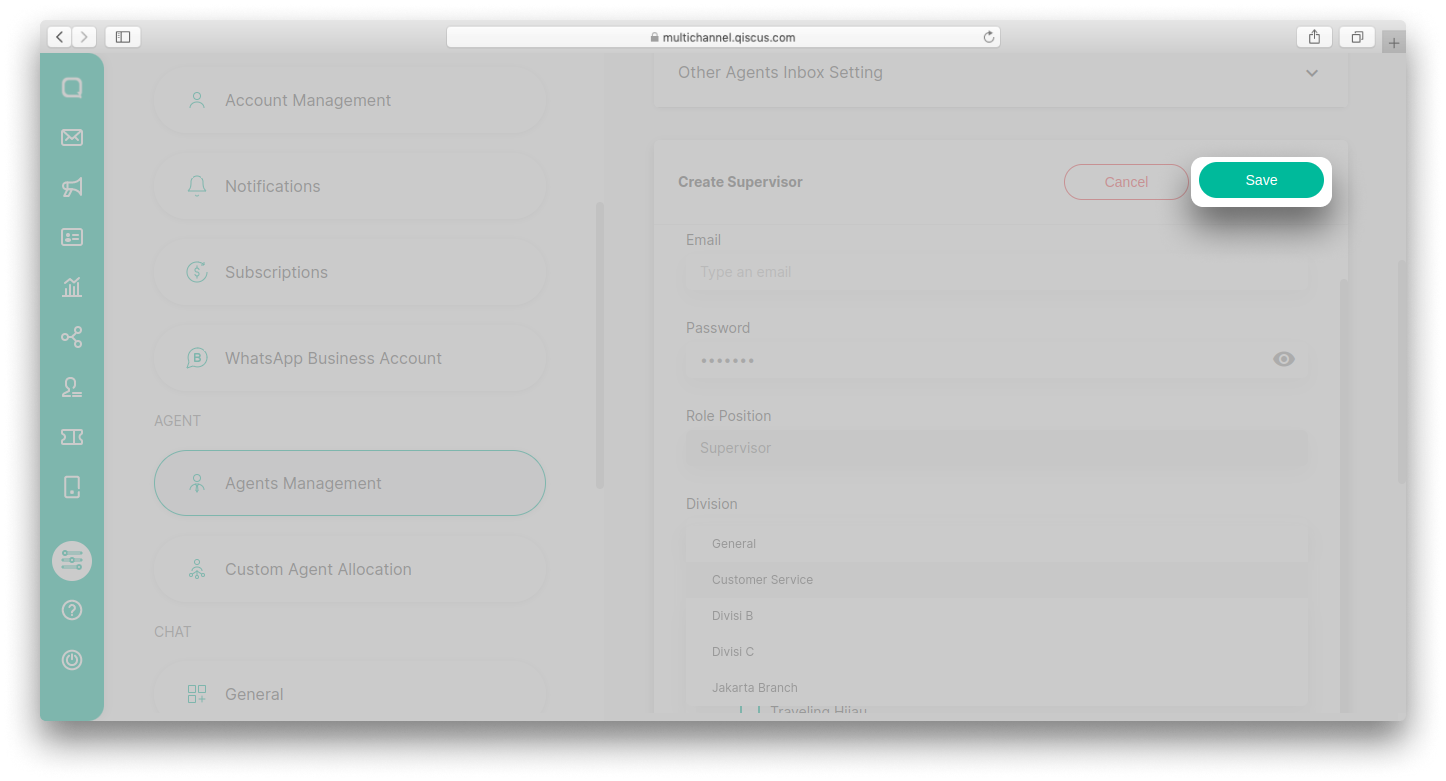
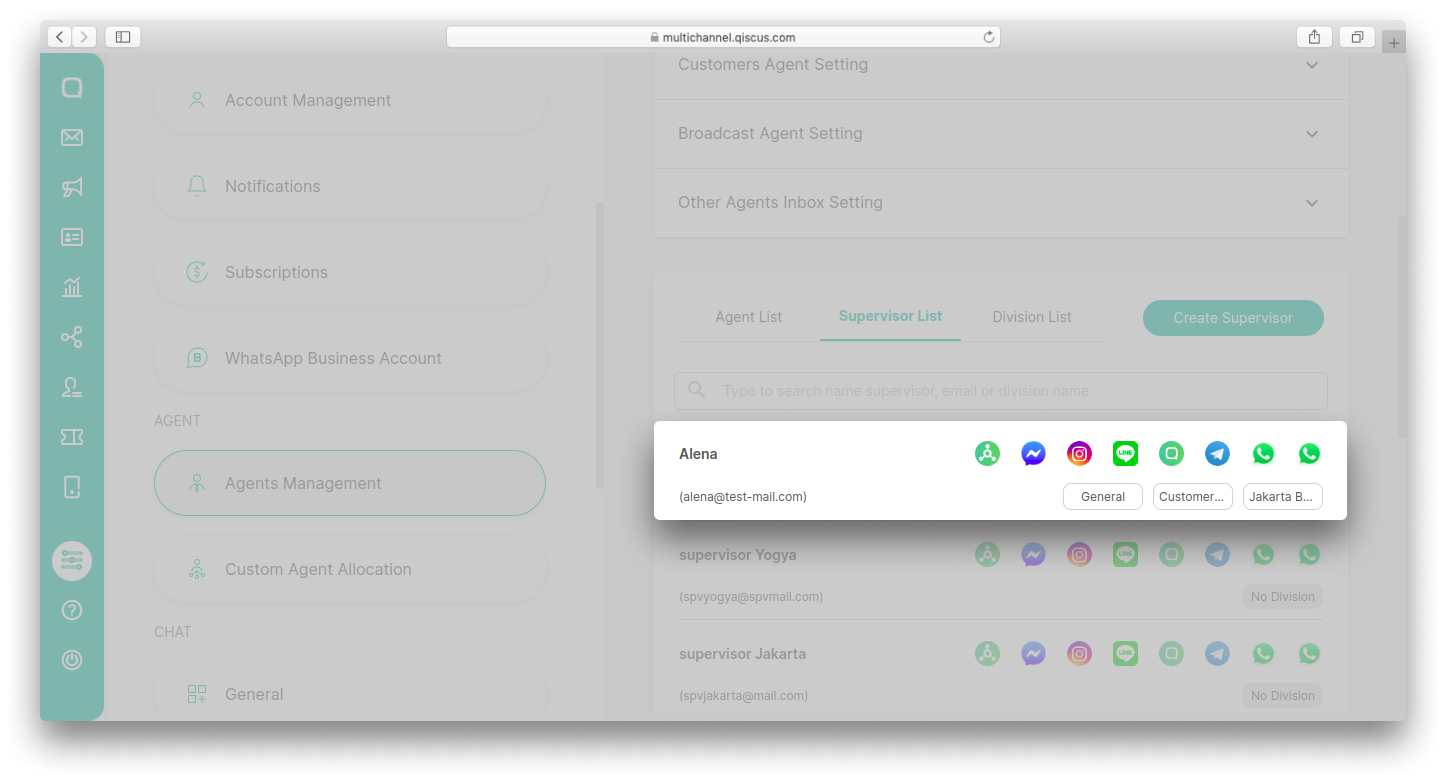
You can add division information when creating a new supervisor or by editing existing supervisor information.
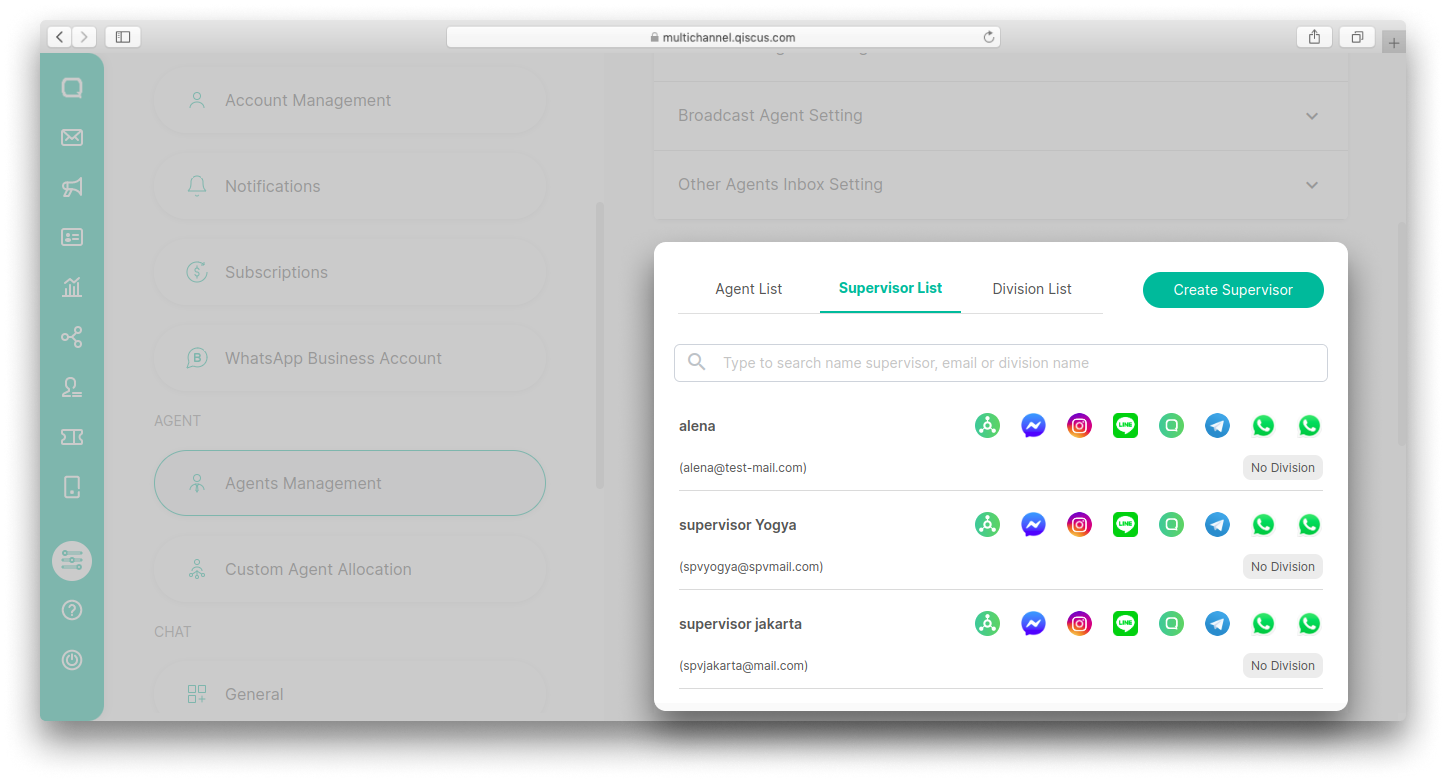
- To add division when creating a new supervisor account, you can go to the Supervisor List section then click the Create Supervisor button,
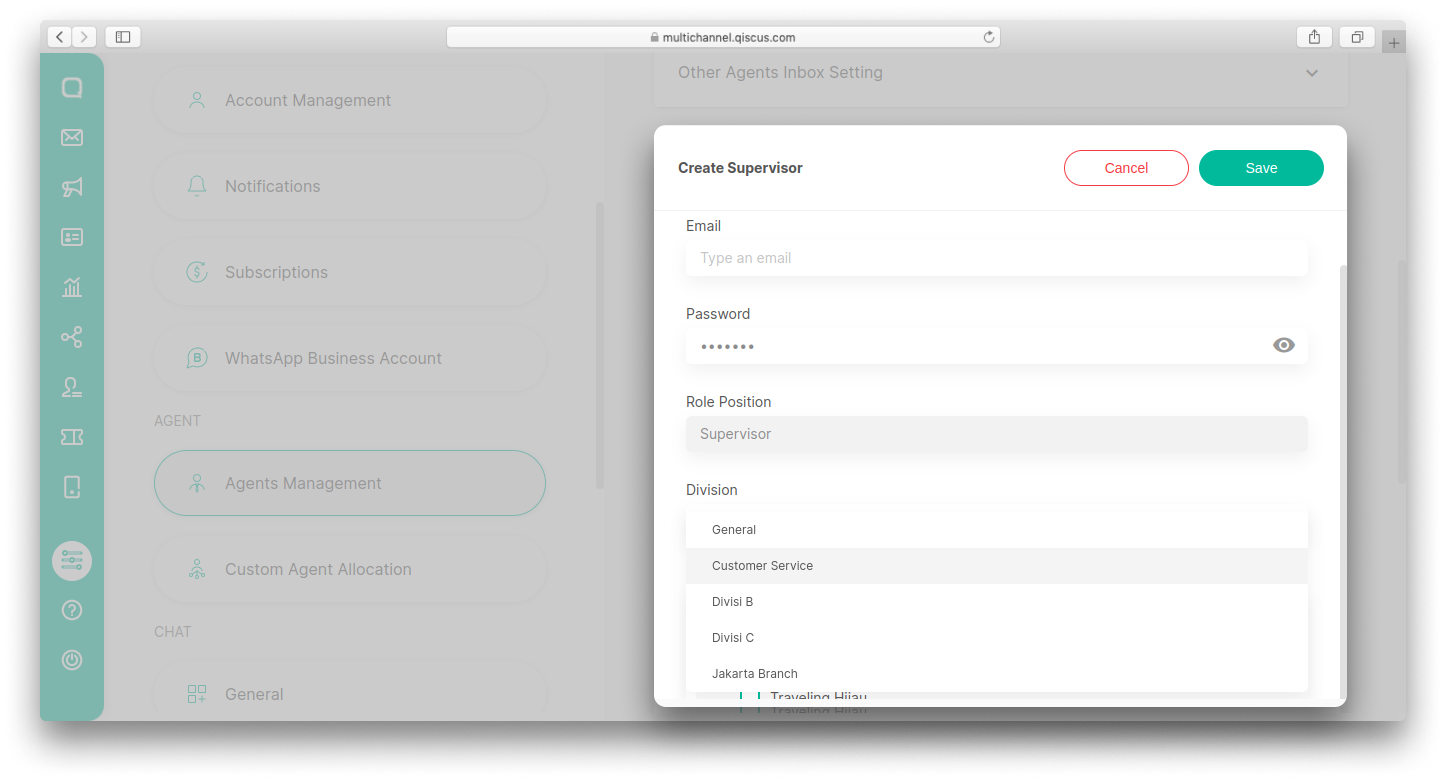
- Fill in the required data then select one or more divisions from the list provided,
- Click Save button,
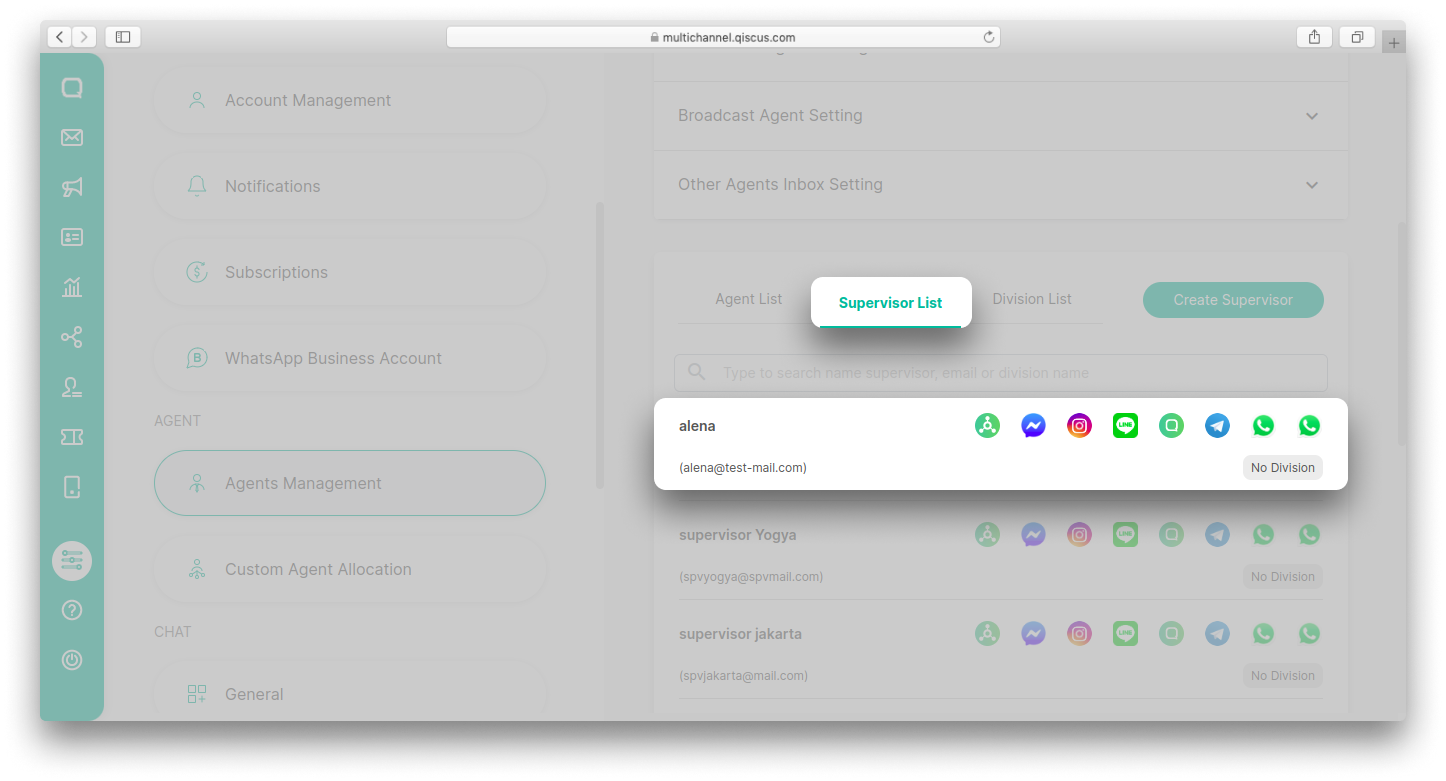
- To add division to an existing supervisor account, you can select a supervisors in the Supervisor List section,
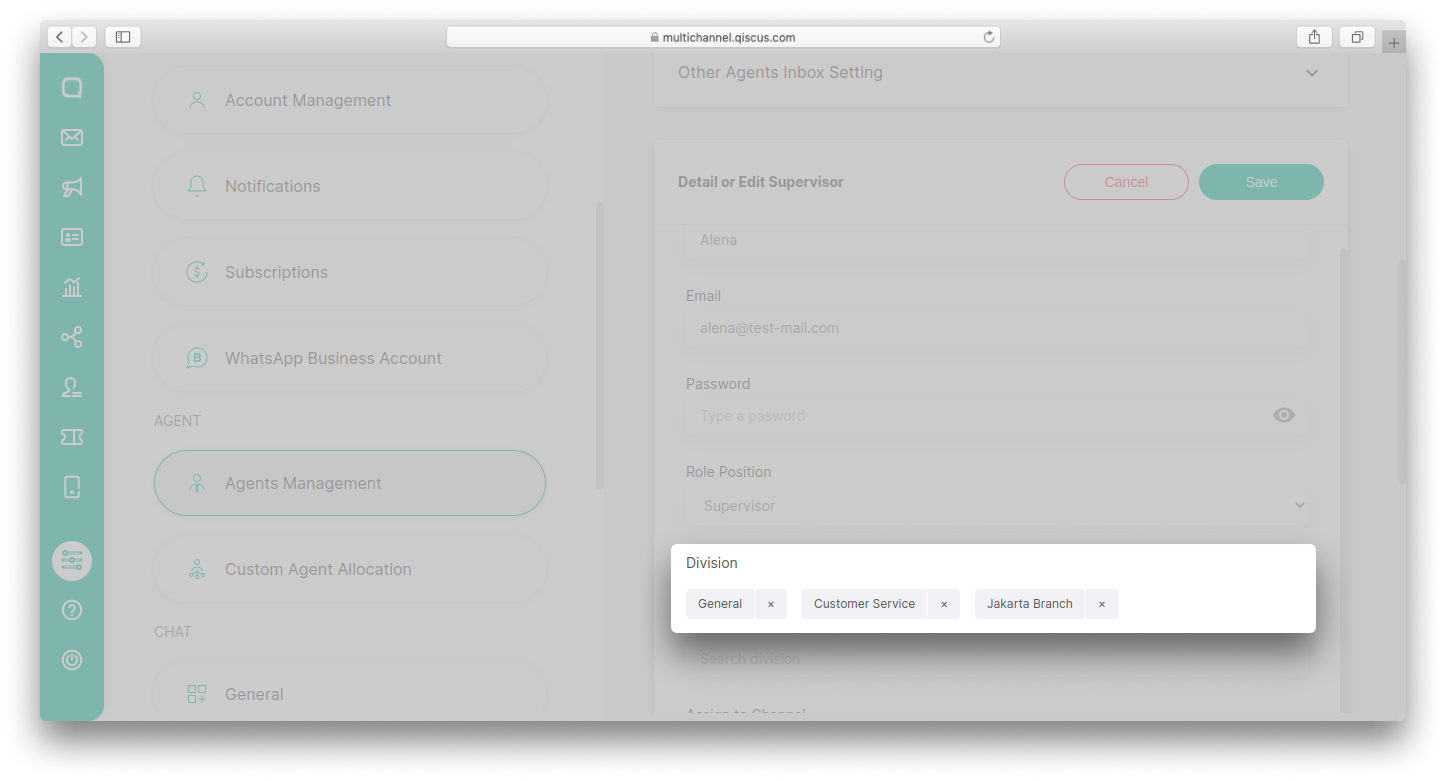
- In the Division field, select one or more divisions from the list provided,
- Click Save button,
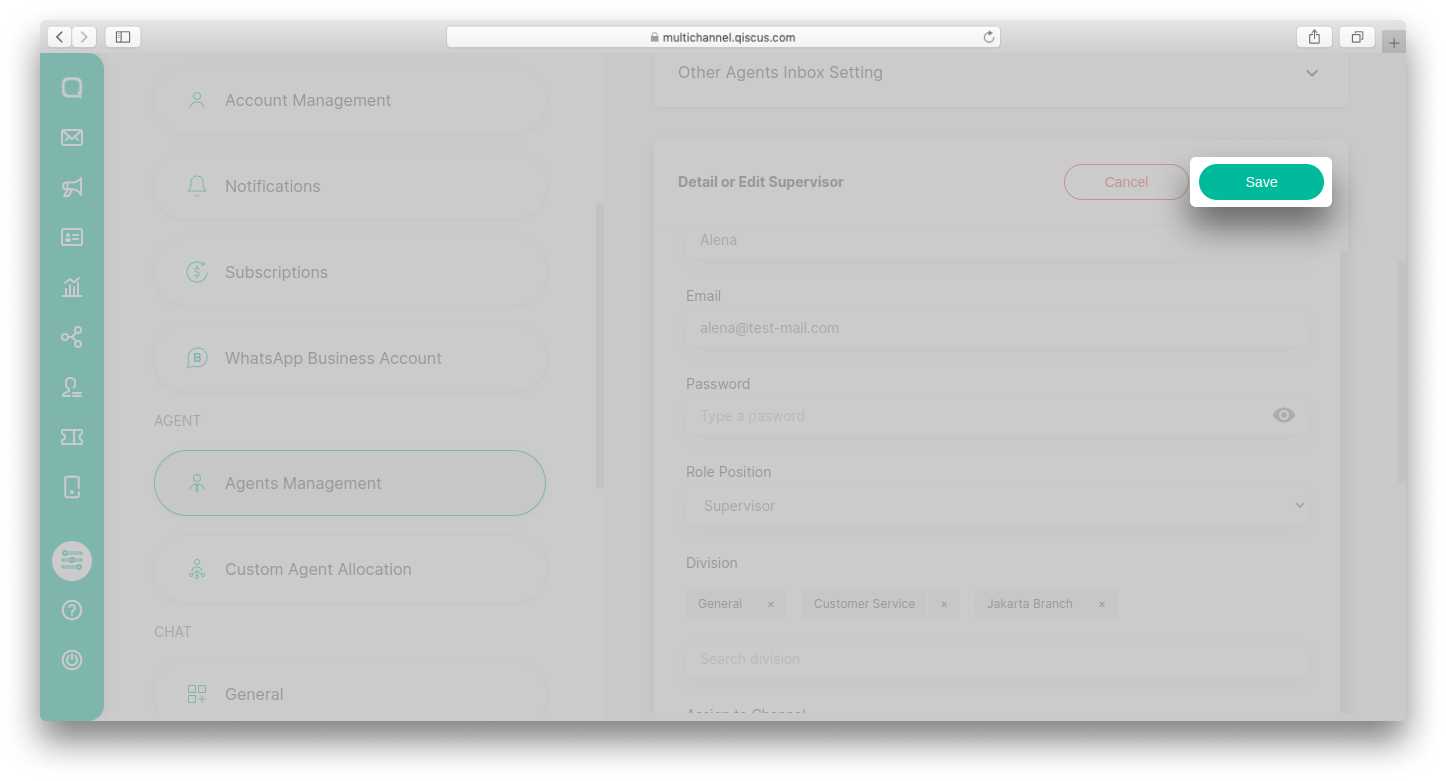
- Changes in division information can be seen in the Supervisor List section.
Custom Agent Allocation
By default, each agent you have in Qiscus Omnichannel Chat will be automatically assigned to an incoming conversation room. This assignment is distributed evenly for the first time since each agent has no room to handle yet. As soon as each agent has his/her one or two conversations to handle, the assignment allocation would be in regard to which agent handles less conversations.
So for example if we have three agents (A, B, and C), and agent A has 3 rooms to handle, agent B has 2 rooms to handle and 1 on-going room for agent C, any incoming new room created would be assigned to agent C.
Another thing to take into account when assigning room to agent is the availability of each agent. Based on this availability, there are several scenarios to note:
- When agents are online, the allocation would be done as described above
- If some agents are off, they will not get allocation until they online again
- And if some reasons, all agents are off, any new incoming message would be distributed to the agent with less rooms in hand.
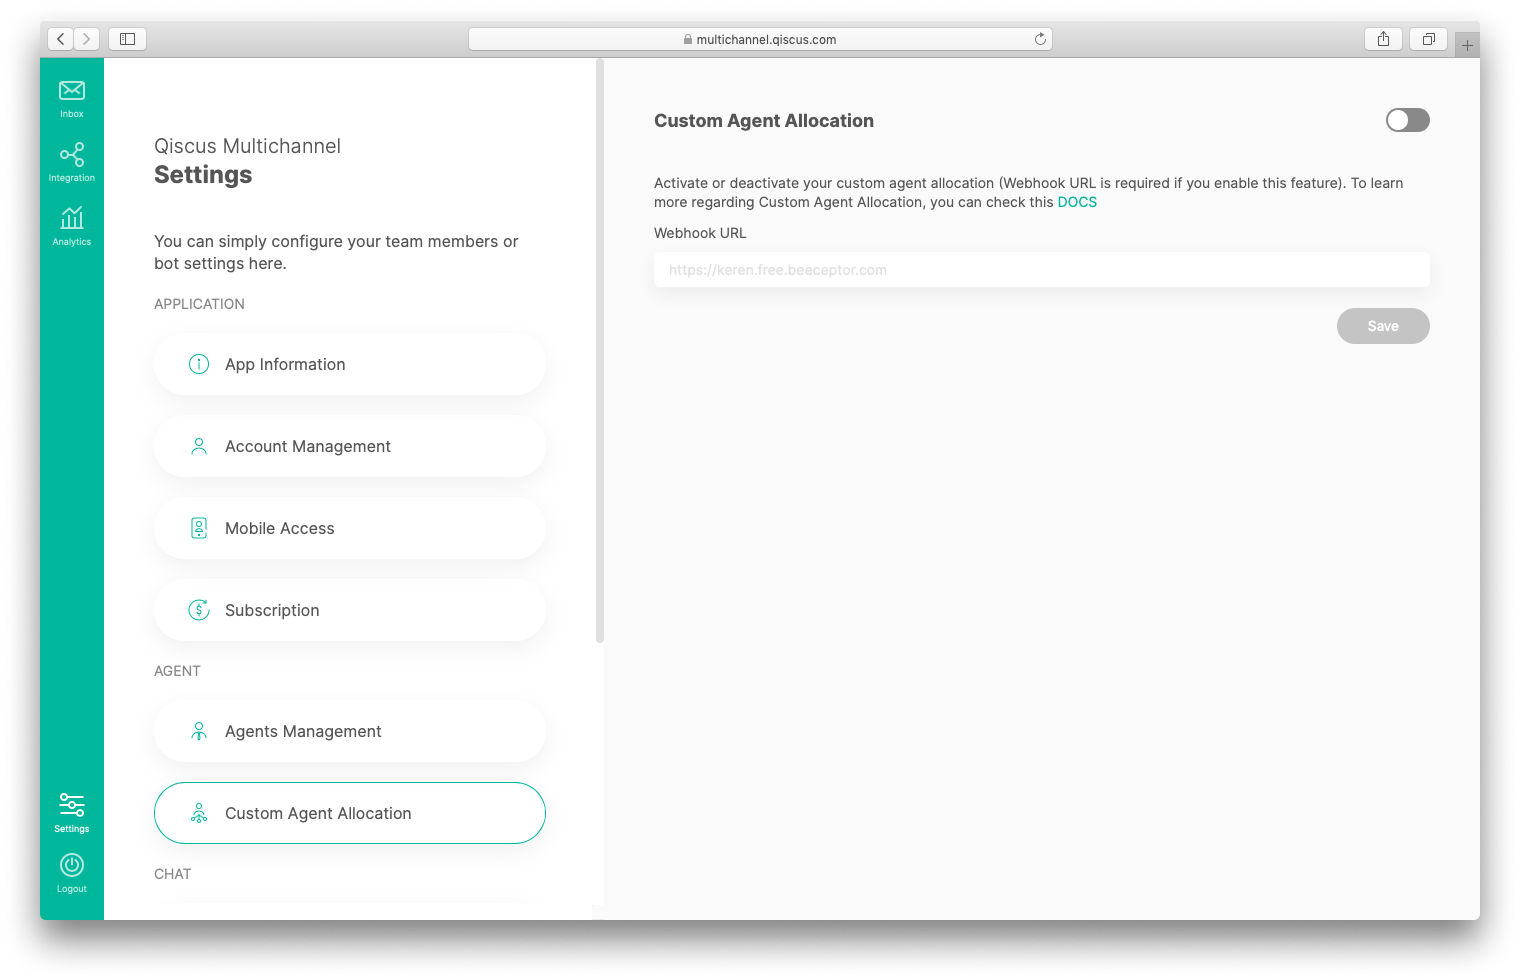
However, if you have specific rule in allocating agents to rooms, you can override the above rule with your own rule. To do so, you need to toggle on the custom agent allocation button above and provide a webhook URL of your custom agent allocation server. For more information about this, please head over to Custom agent allocation section.
General
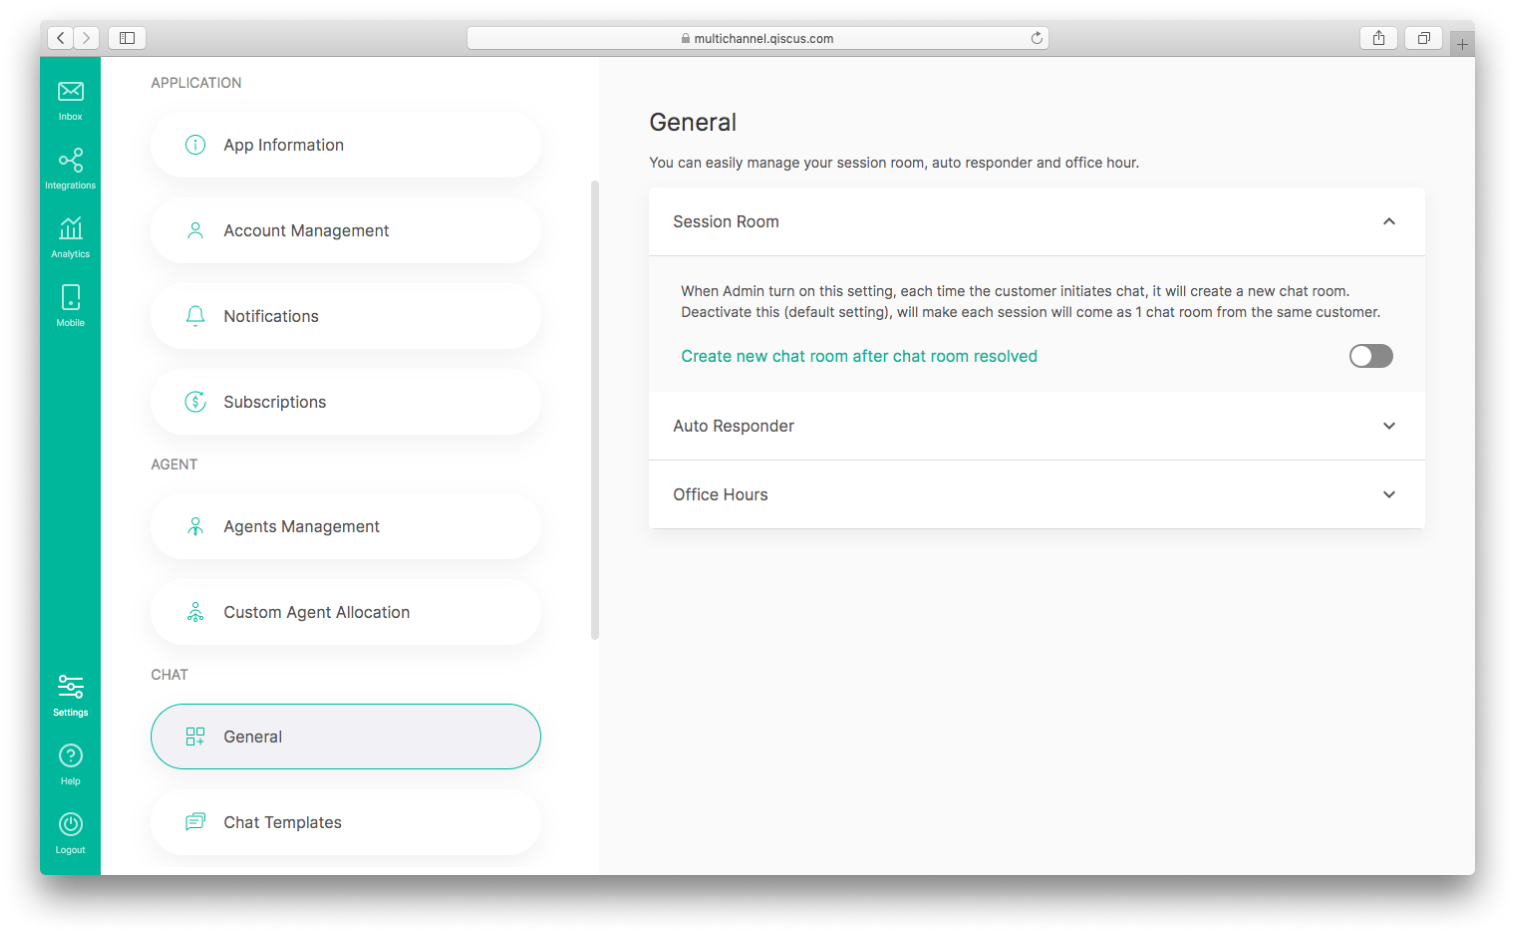
The general settings tab allows you to adjust the management of session room, auto responder and office hours. Users can access these settings on page Settings then select General. Settings can only be accessed by administrators and supervisors.
Session Room
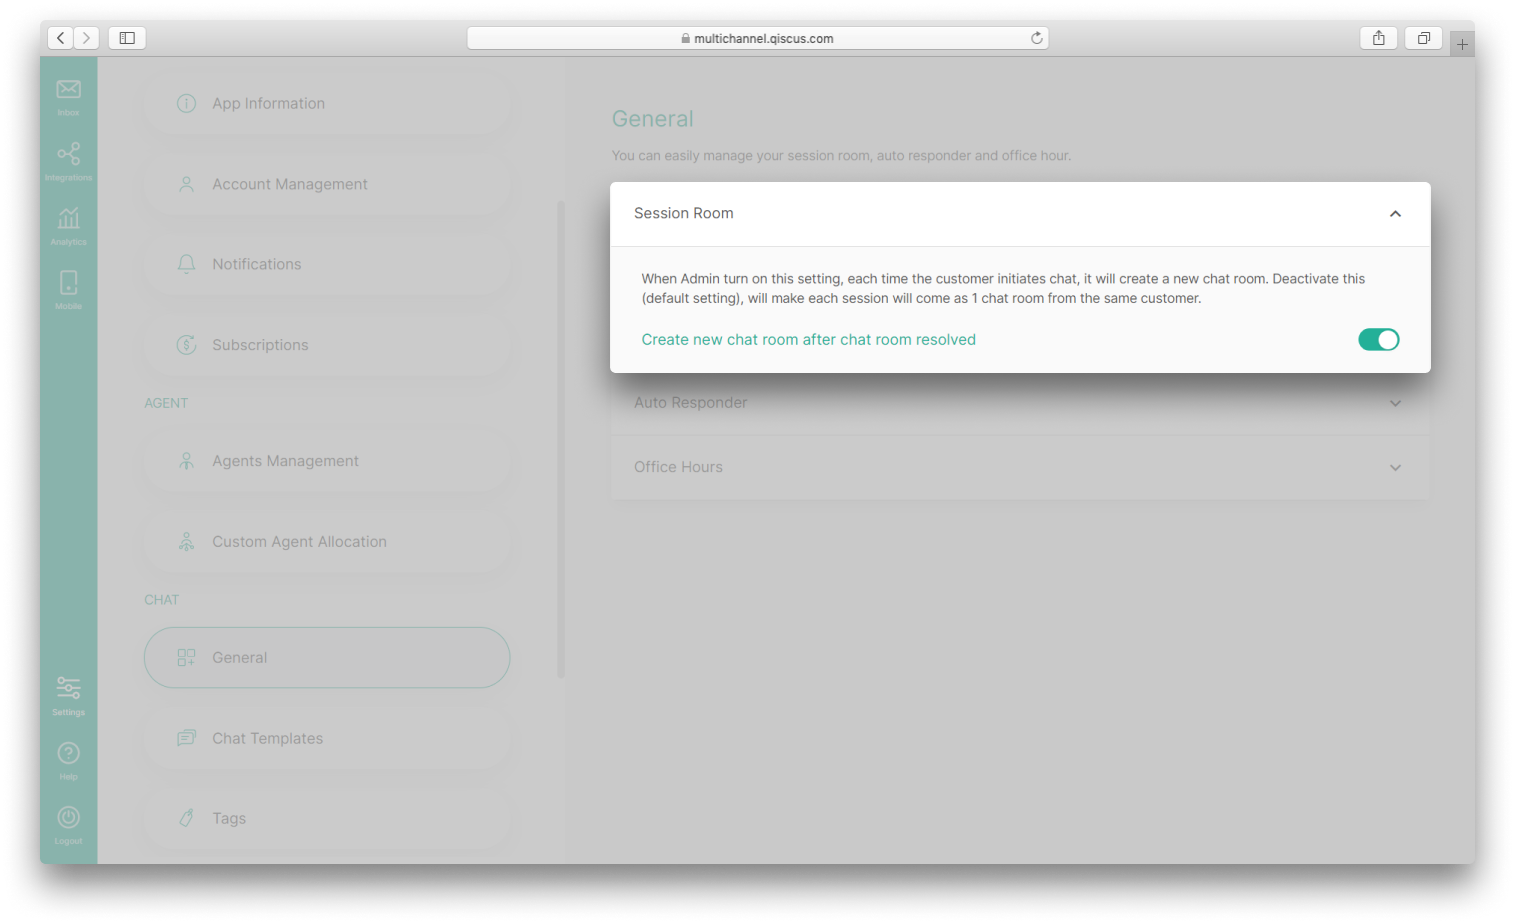
Session room settings are used to enable or disable the function "Create new chat room after chat room resolved". When users turn on this setting, each time the customer initiates chat, it will create a new chat room. Deactivate this (default setting), will make each session will come as 1 chat room from the same customer. One session begins when the customer initiates chat until that chat is resolved.
Auto Responder
- If you setup an Auto Responder after you have several chats, then existing customers will not get this Auto Responder;
- If you deactivate the session room setting, then the Auto Responder During Office Hour only appears when the customer chats for the first time of the whole conversation; After resolved, customer will not get auto responder anymore since they already got for the first time interaction.
- If you activate session room settings, the Auto Responder During Office Hour will appear each time the customer starts a new chat session on office hour.
- The autoresponder setting will be only working if the chatbot setting is disabled.
Auto responder is a system which automatically sends messages according to the customer service operating hours. Users can set the auto responder’s message when services are both in the during and outside the office hour.
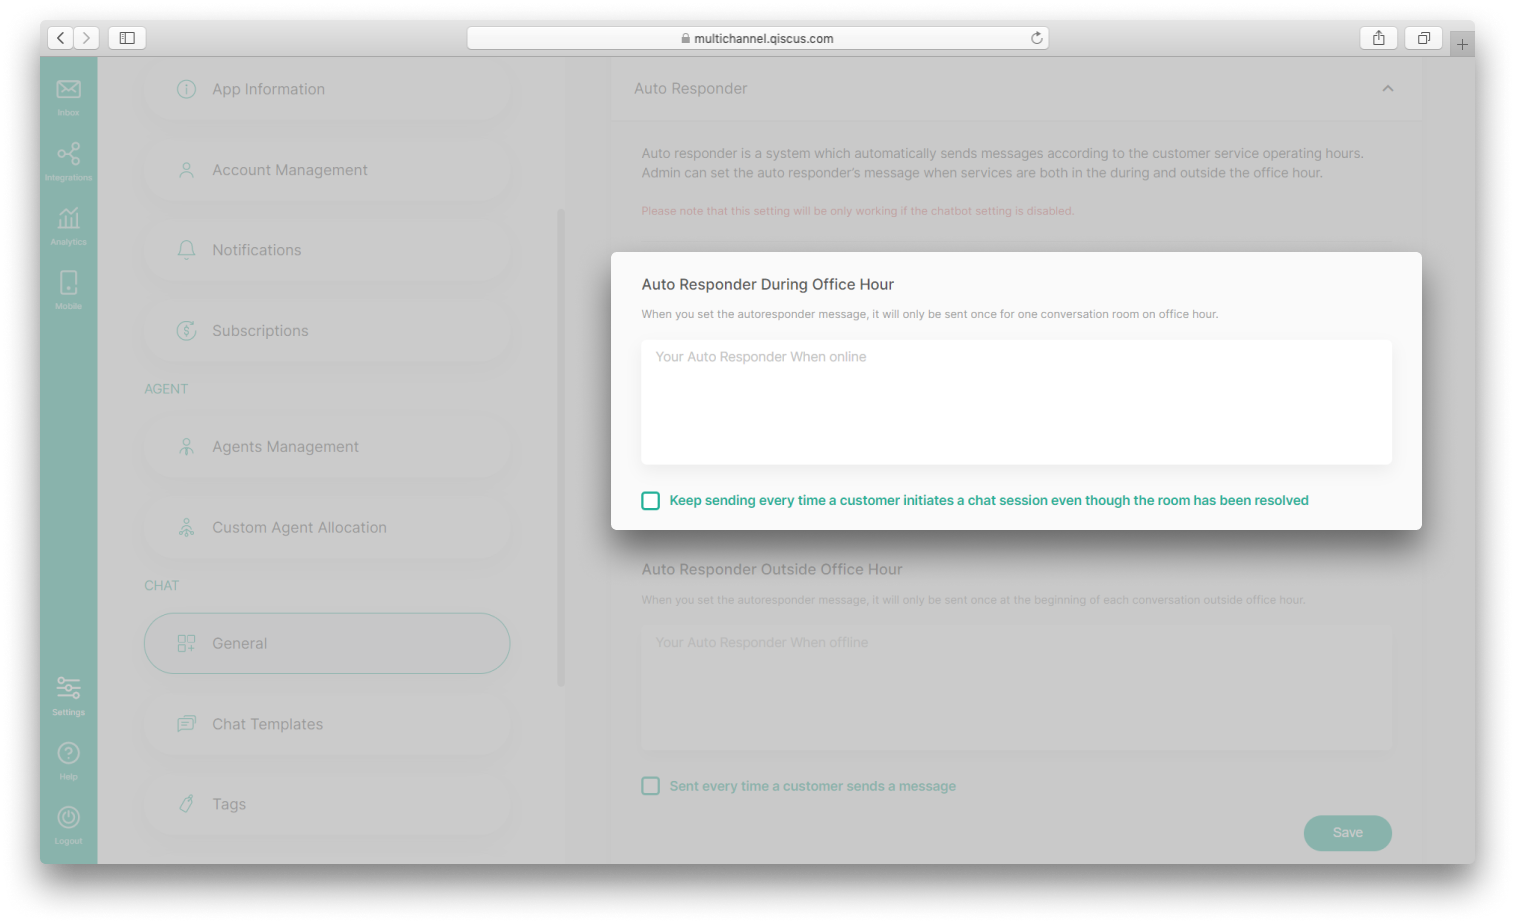
Auto responder during office hour has a default setting of messages will only be sent once for the whole one conversation room (after resolved, customers will not get auto responder anymore since they have got it the first time they interact). But if you want an autoresponder message to be sent every time a customer starts a conversation session even though the room has been resolved then you can activate the checkbox 'Keep sending every time a customer initiates a chat session even though the room has been resolved'.
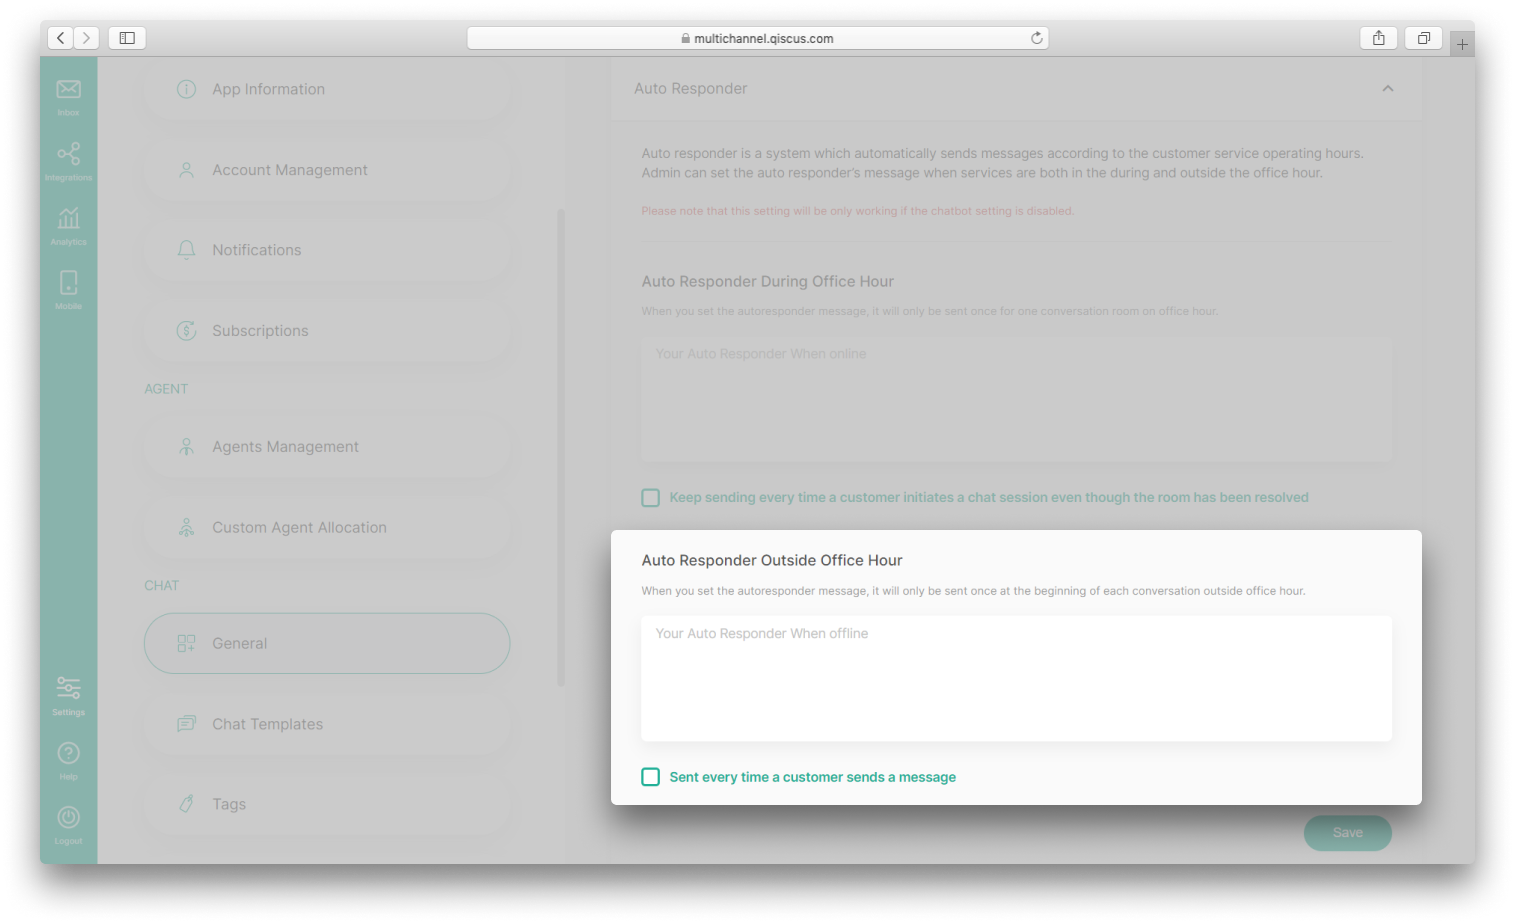
Auto Responder Outside Office Hour has a default setting that is messages are only sent once at the beginning of each conversation outside office hour. If you want an autoresponder message to always be sent when getting a message from a customer then you can activate the checkbox 'Sent every time a customer sends a message'.
Office Hours
Users can set the services’ operating hours. The user can also set several operating hours in a day. For example, on Fridays, users may set operating hours between 08:00 to 10:30 AM and between 01:30 - 05:00 PM. It is assumed that the timing between 10:30 AM - 1:30 PM is a break, so the service closes. In addition, users can set their hours according to their country’s time zone.
Customer Properties
Customer Properties page is the place to identify your customer better across the conversations by adding customer information to customer properties. You can add information such as their website, their interest, their address, etc.
To use customer properties, follow these steps:
Add Customer Properties
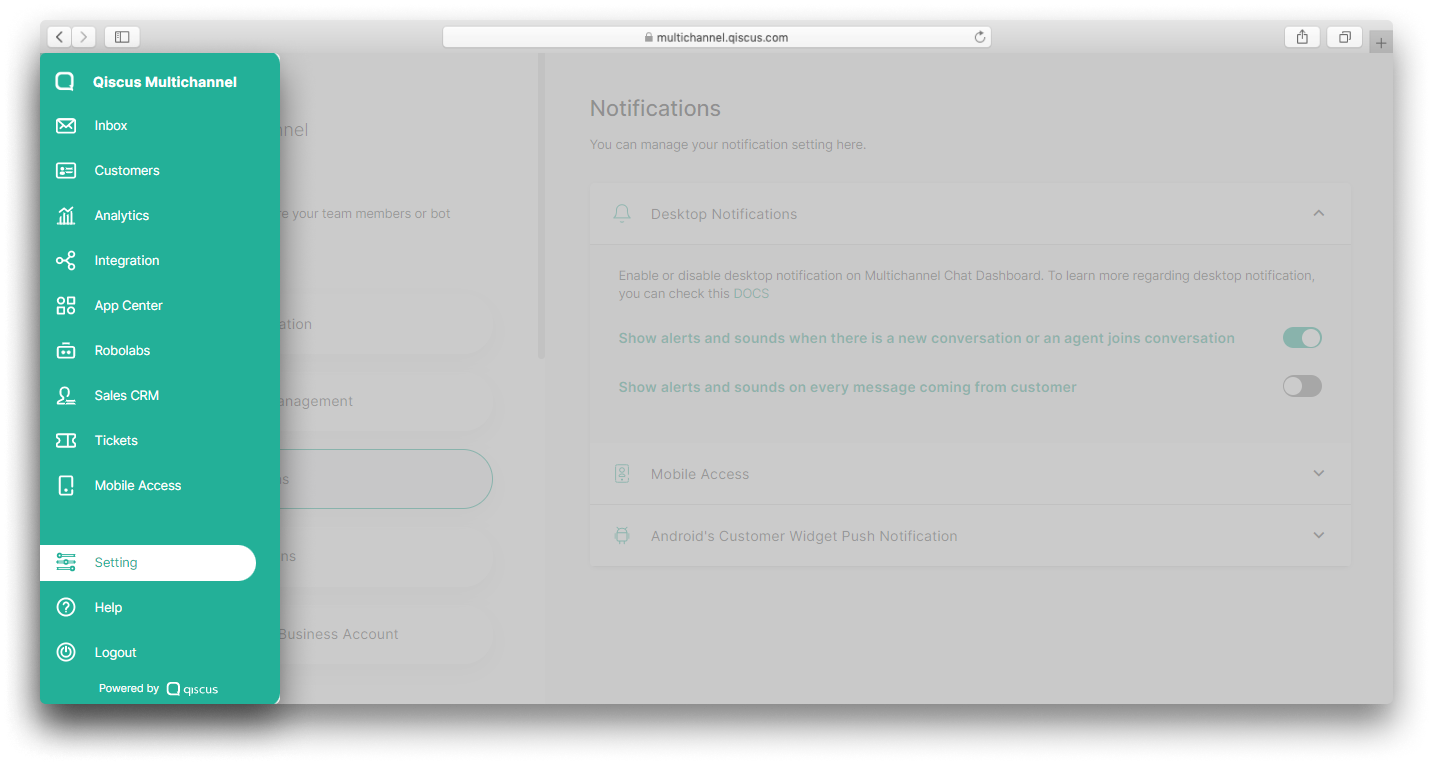
- Go to Setting Page on the sidebar,
- Click Customer Properties on the Chat section,
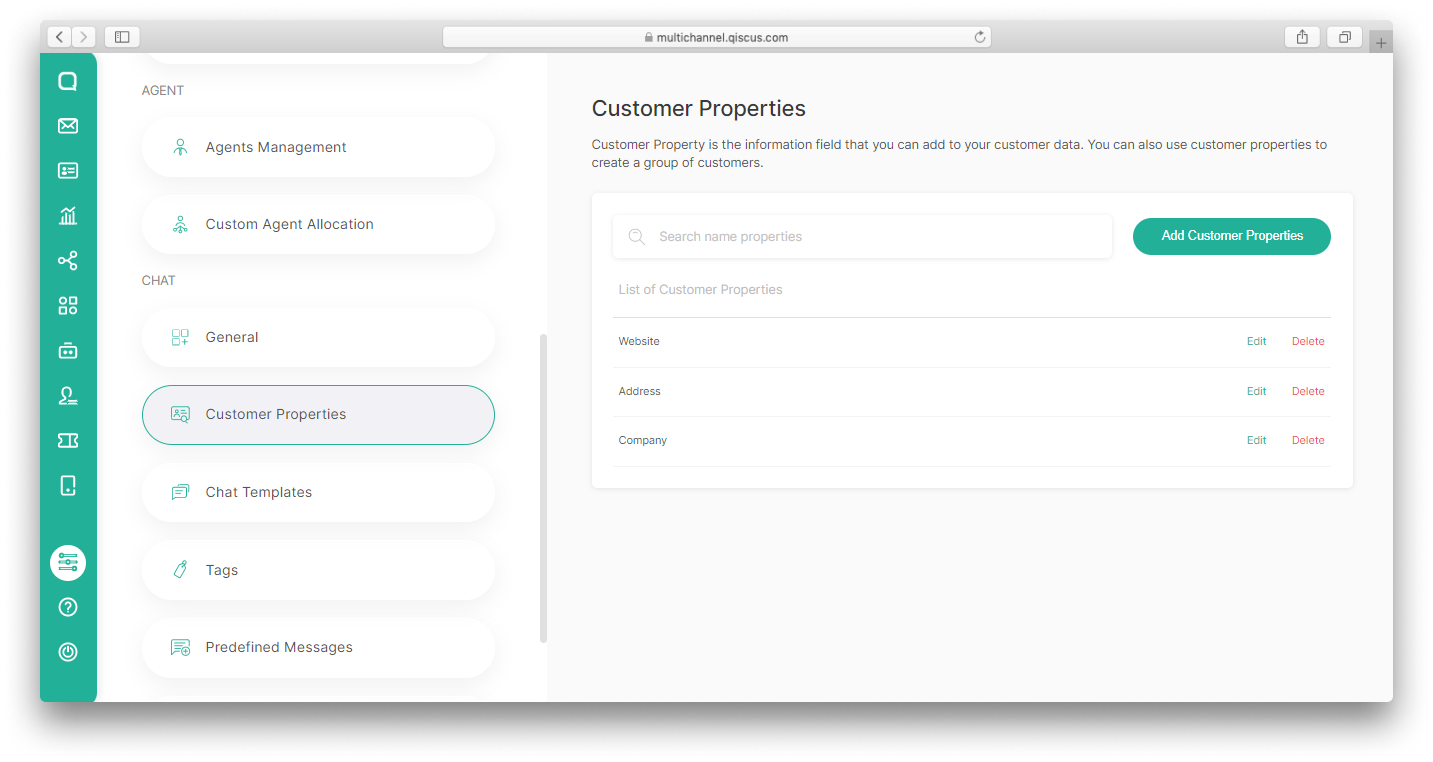
- Click the Add Customer Properties button,
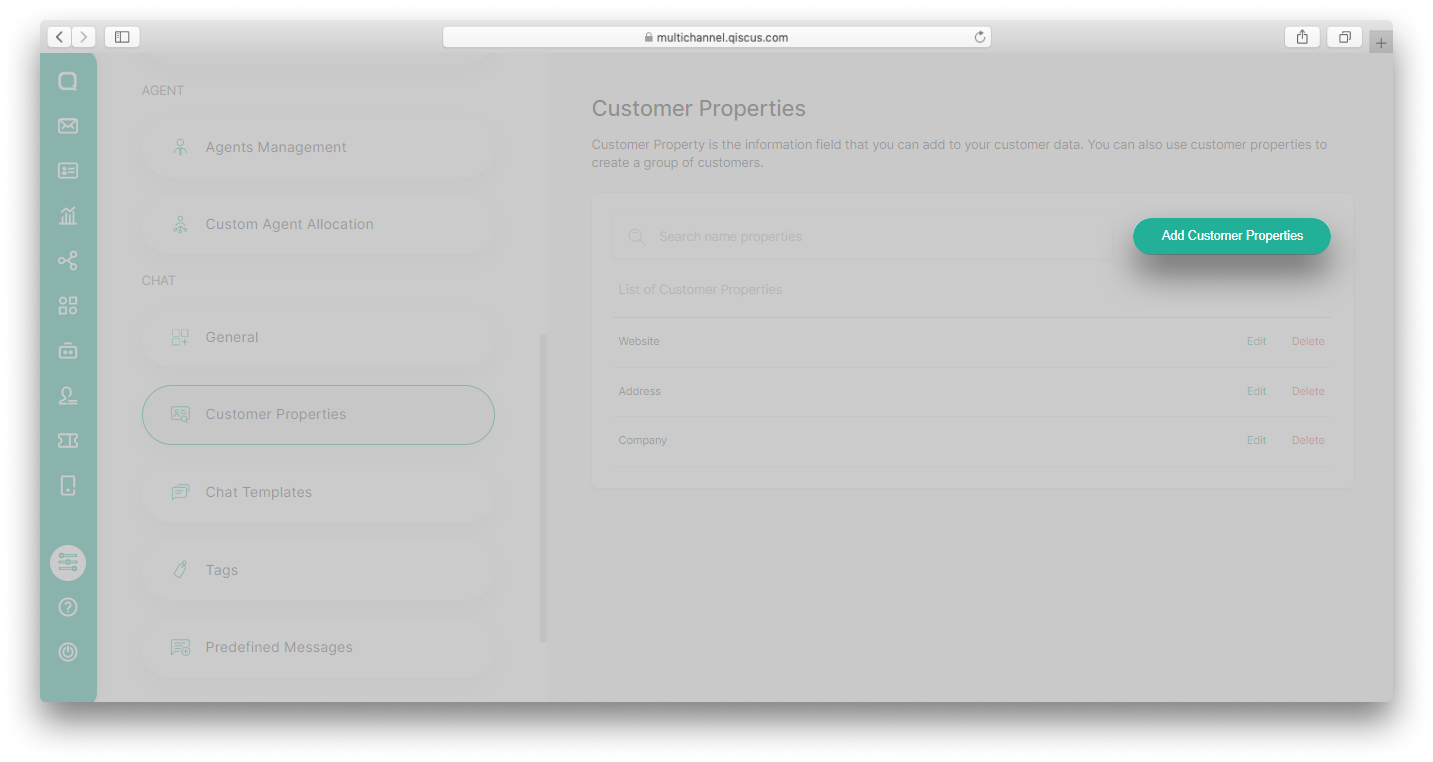
- Fill in the Label of Customer Properties, and Click the Add button.
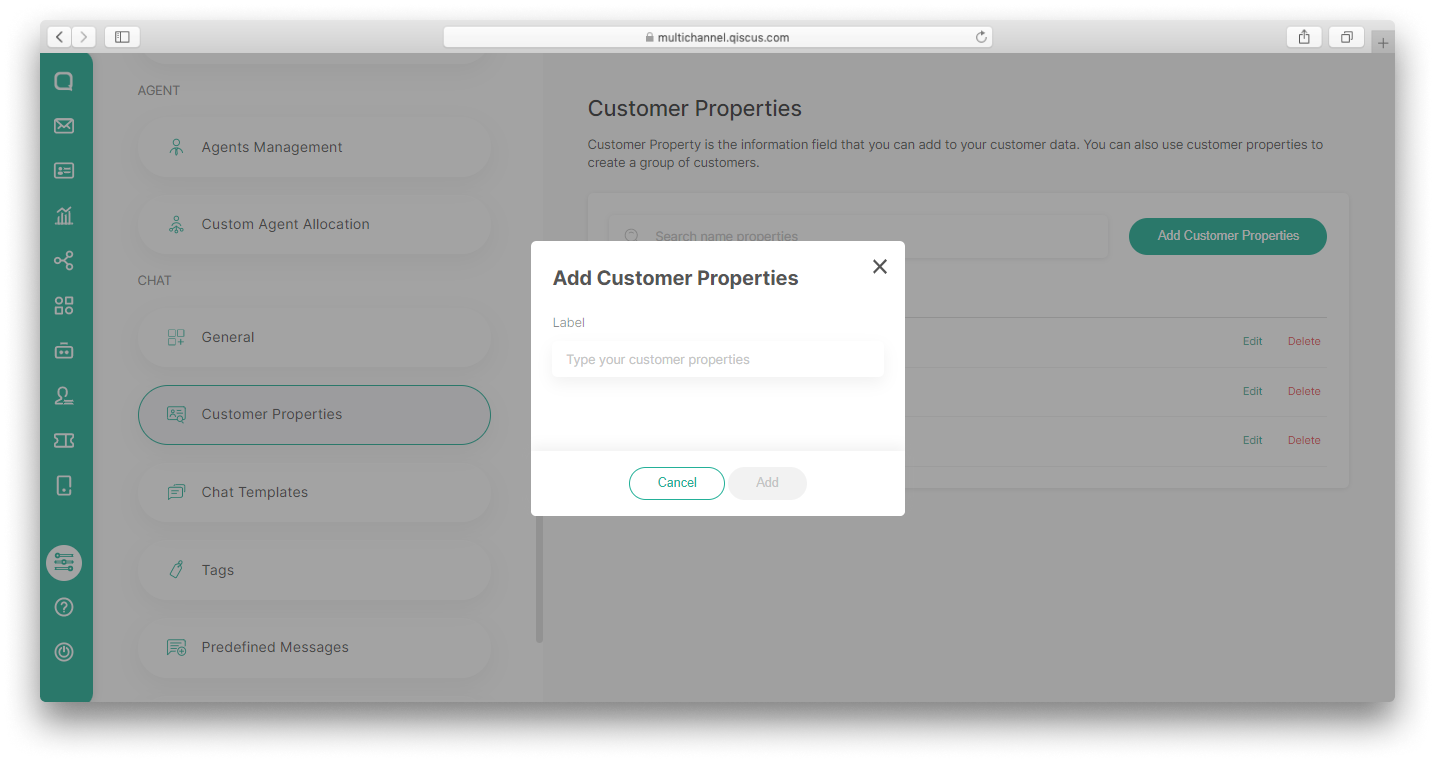
Customer Properties Maximum 25 Labels
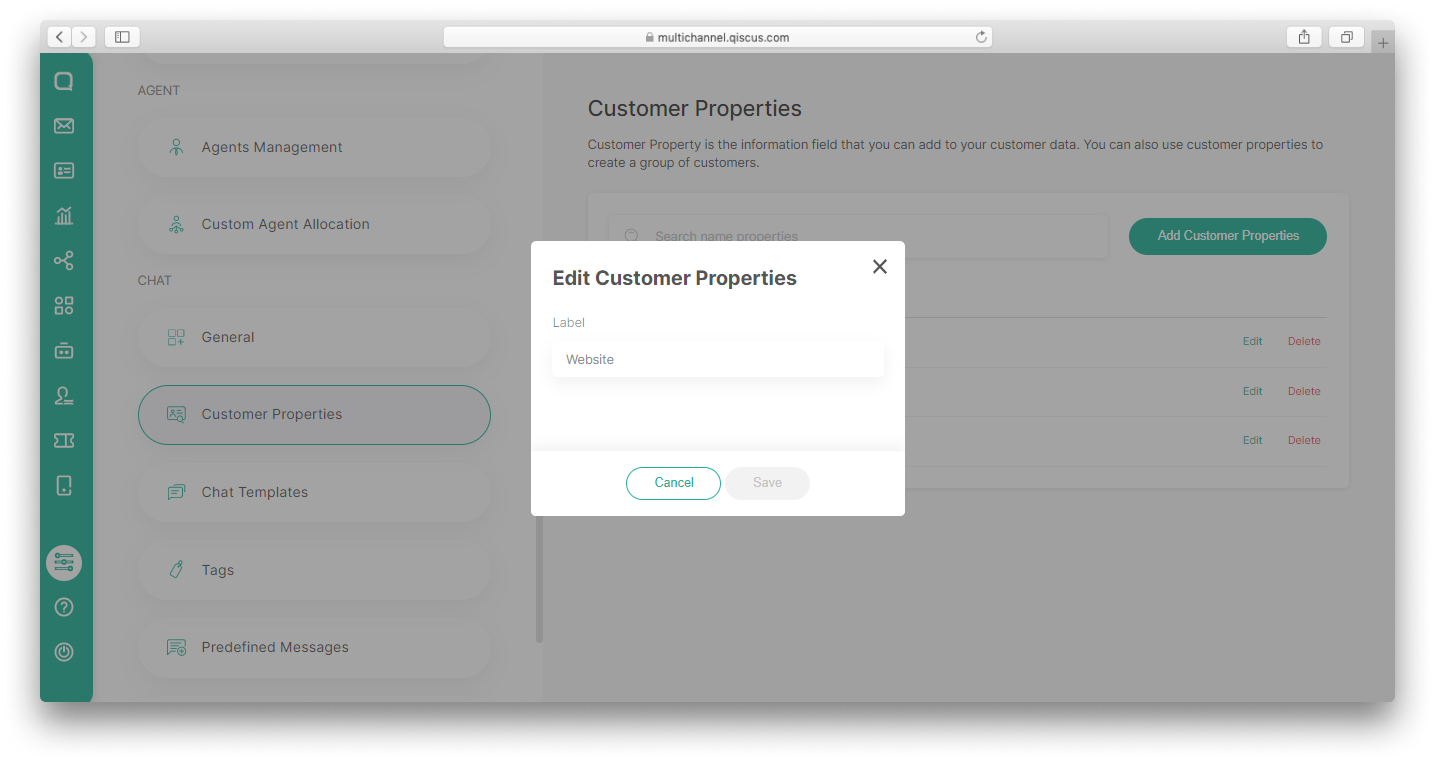
Edit Customer Properties
- Go to Setting Page on the sidebar,
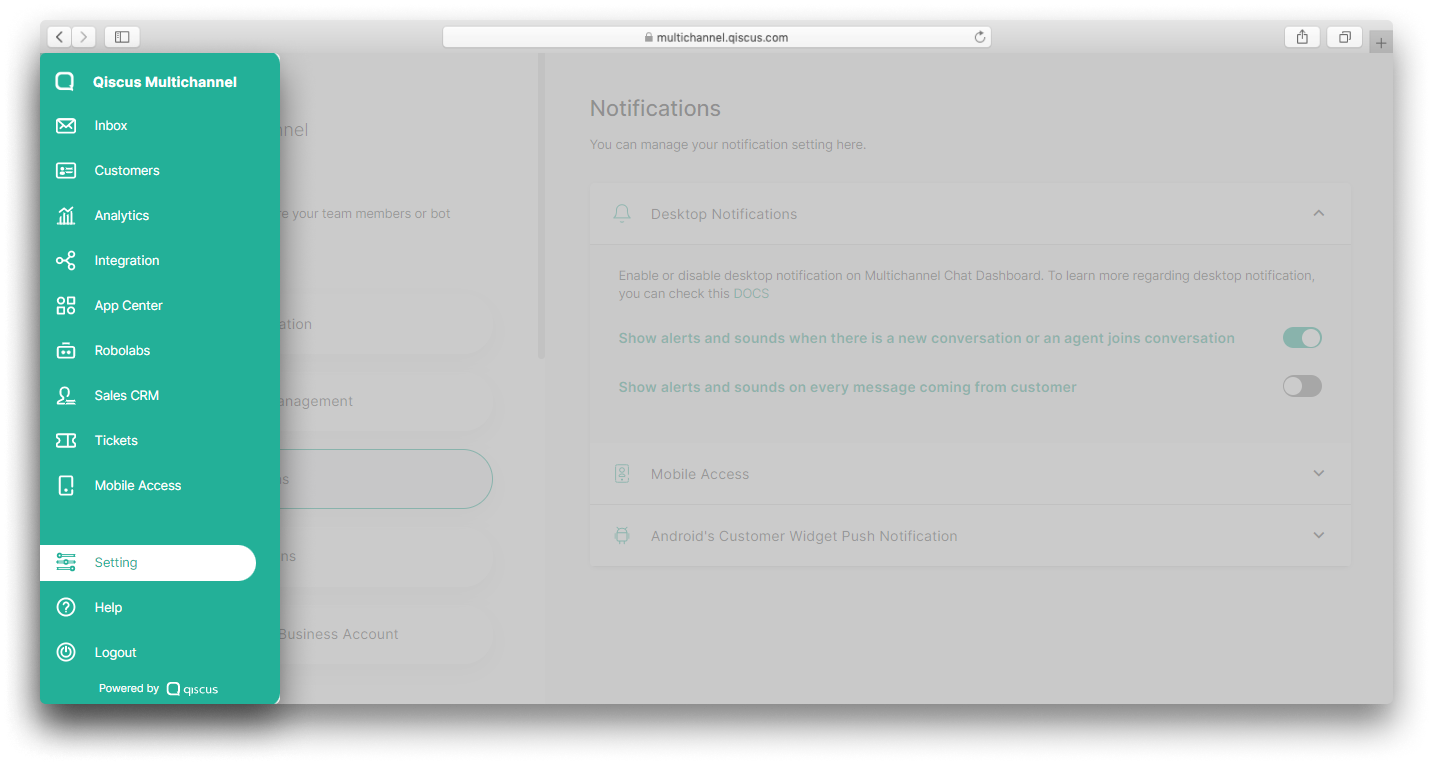
- Click Customer Properties on the Chat section,
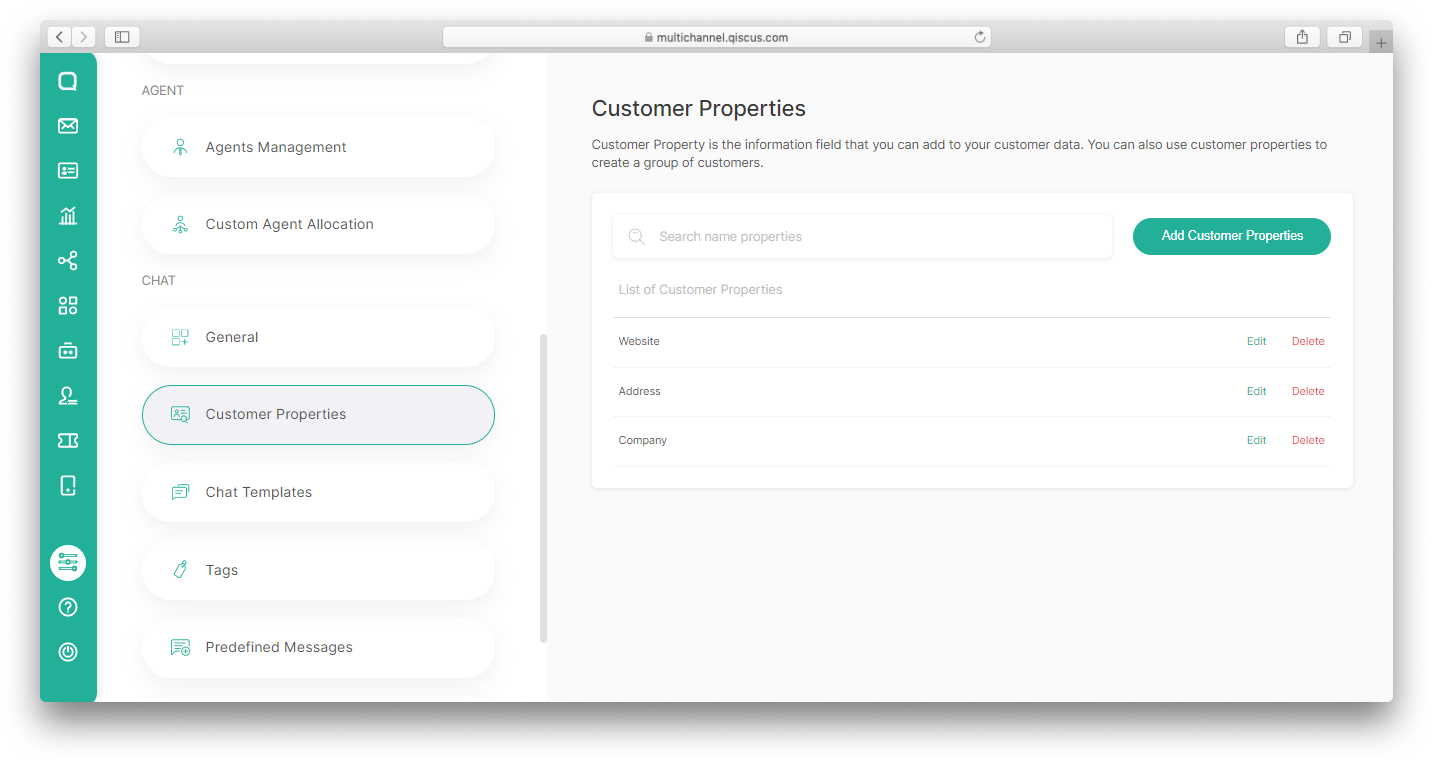
- Click the Edit Customer Properties button,
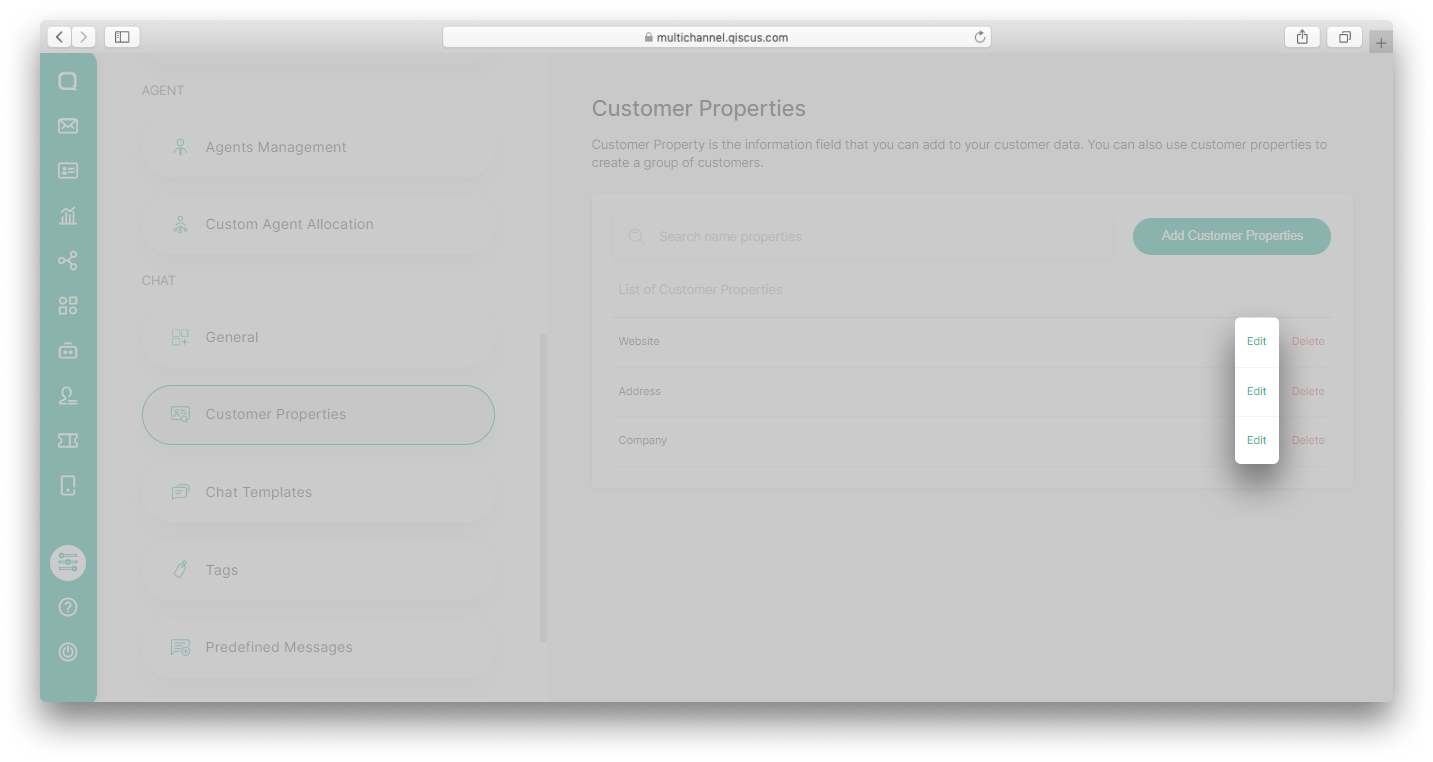
- Fill in the Label of Customer Properties, and click the Save button.
Delete Customer Properties
- Go to Setting Page on the sidebar,
- Click Customer Properties on the Chat section,
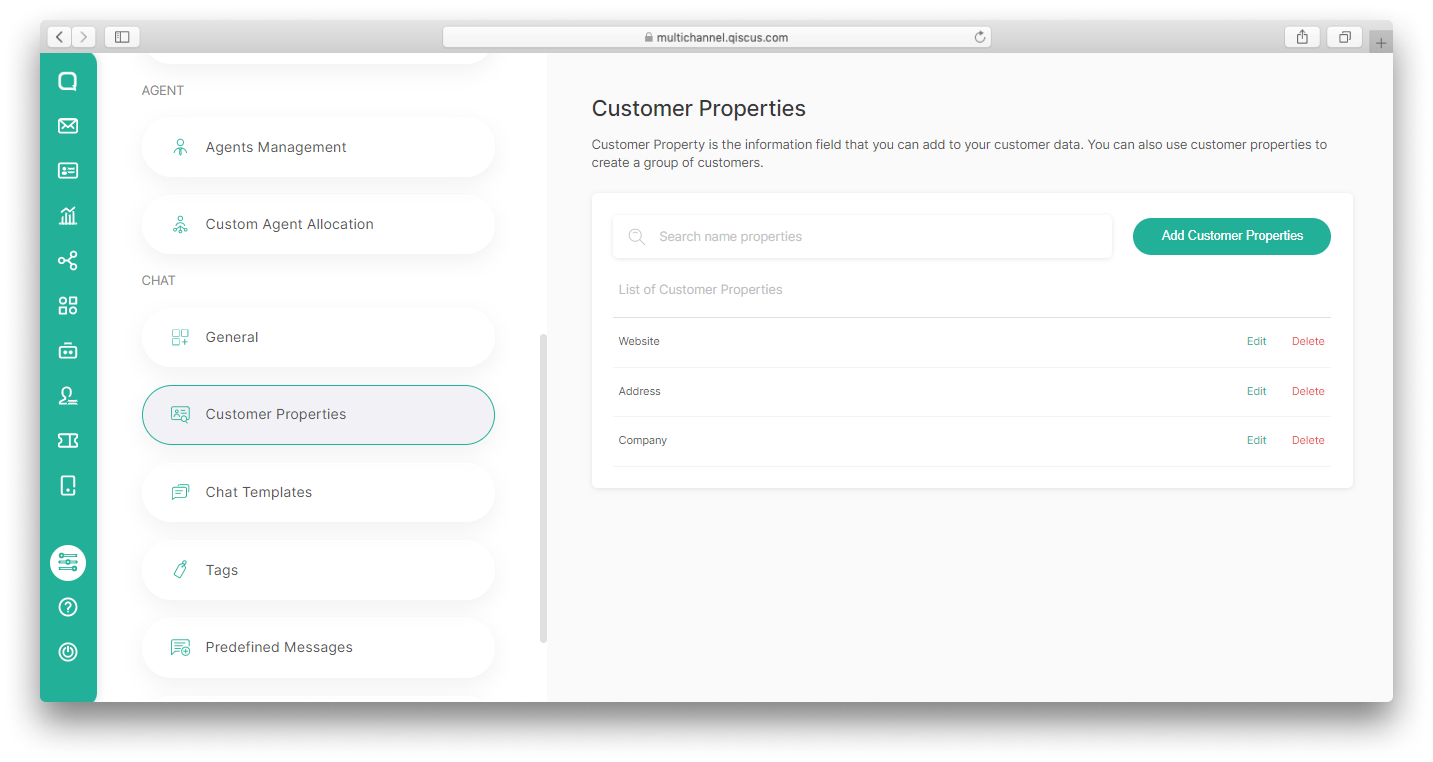
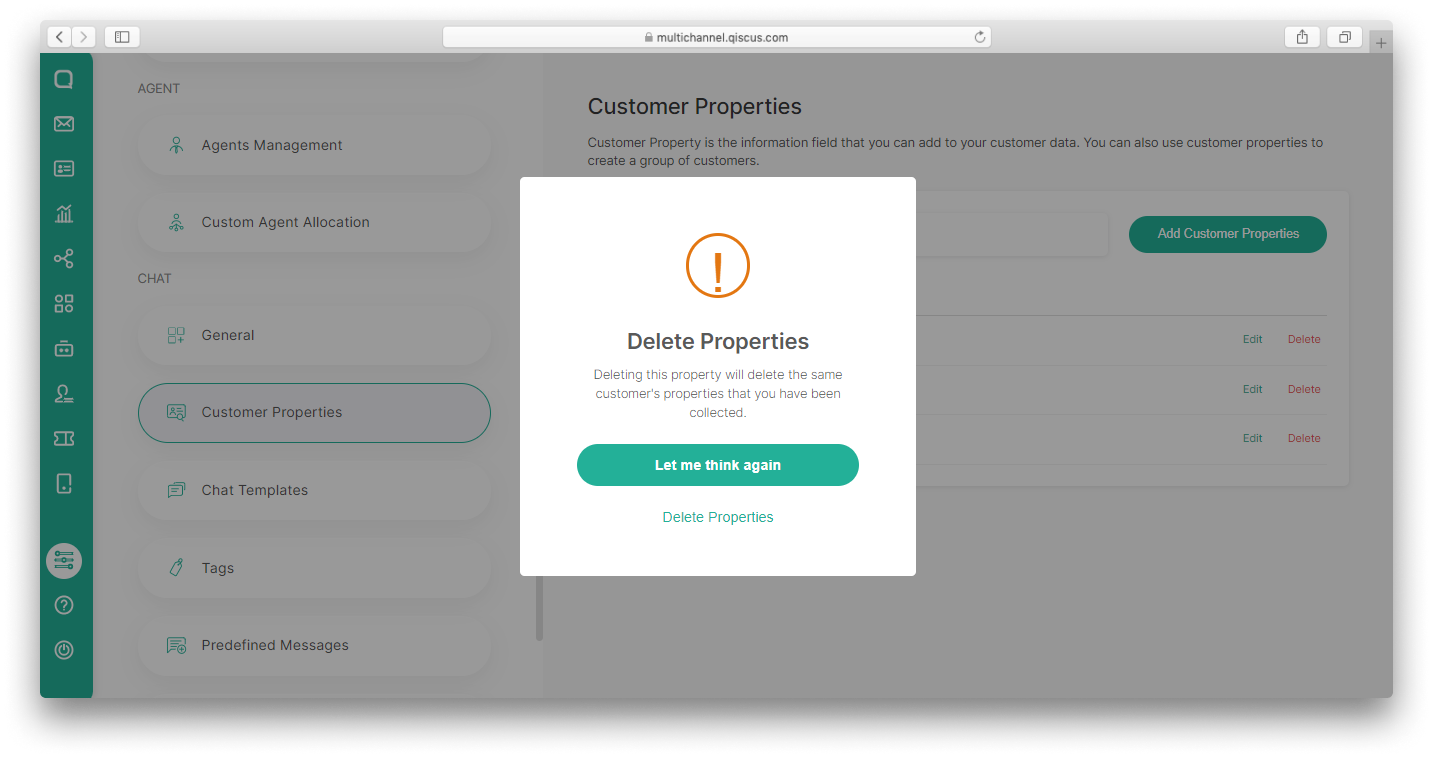
- Click the Delete Customer Properties button,
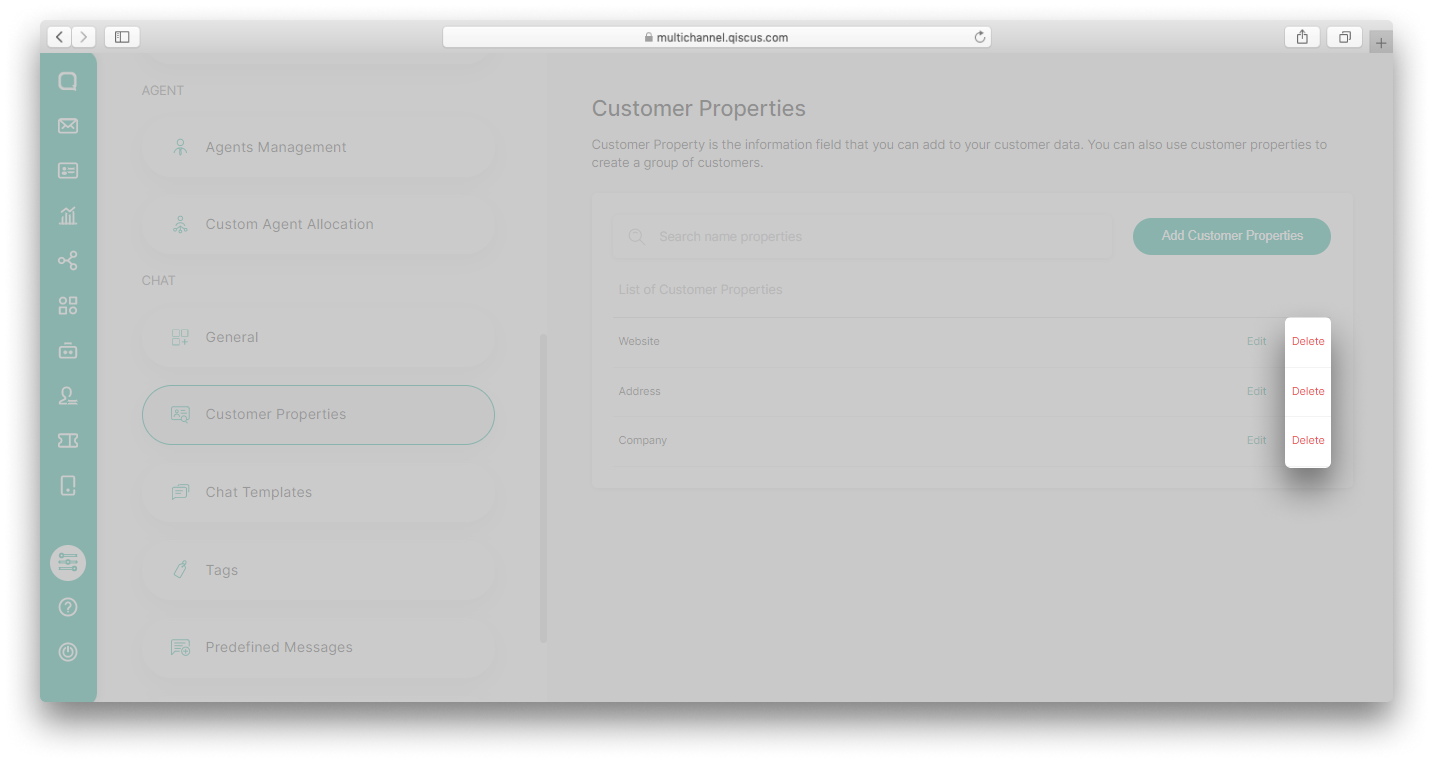
- Click the Delete Properties button.
Quick Replies
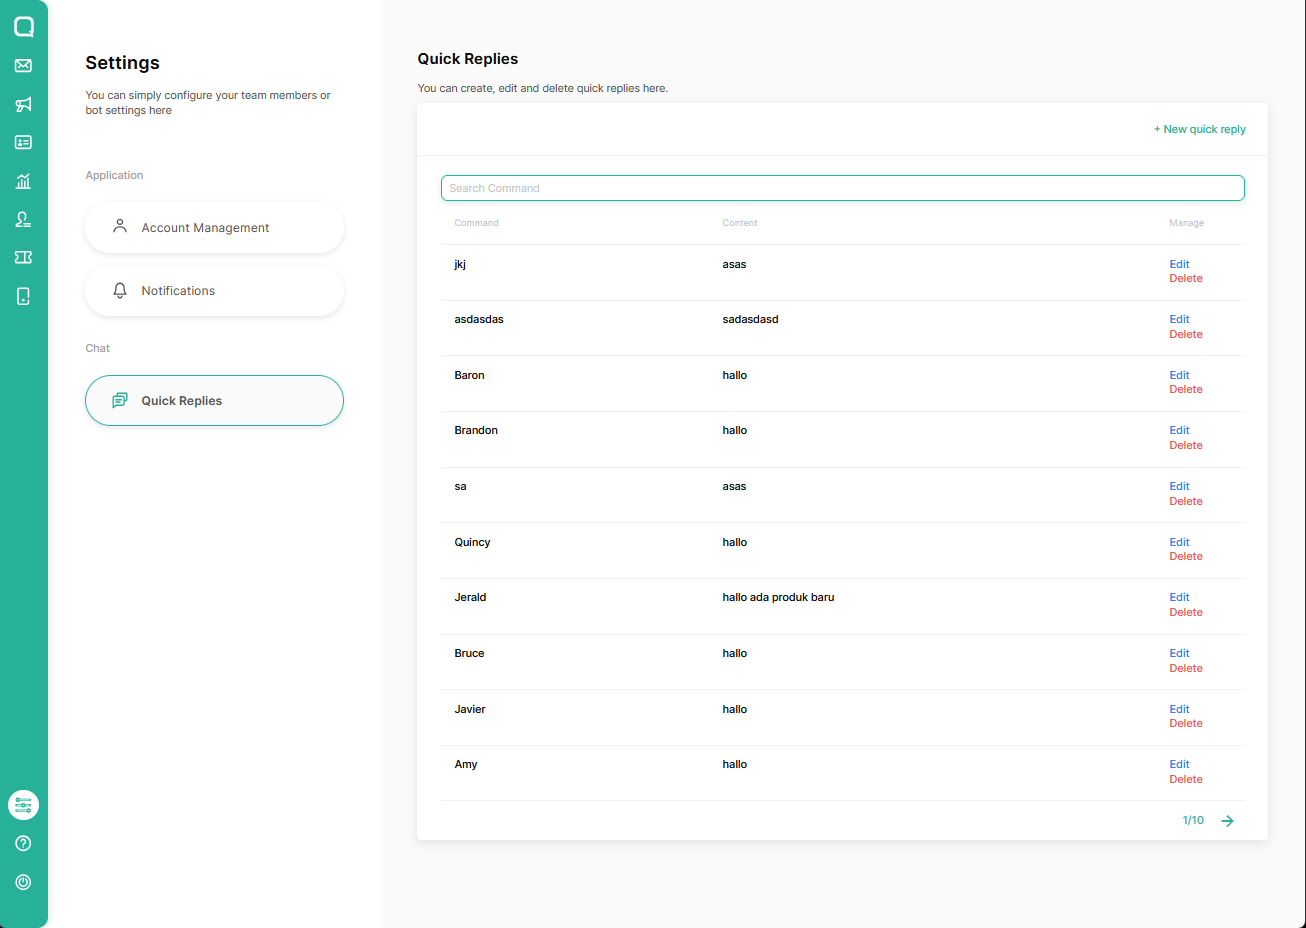
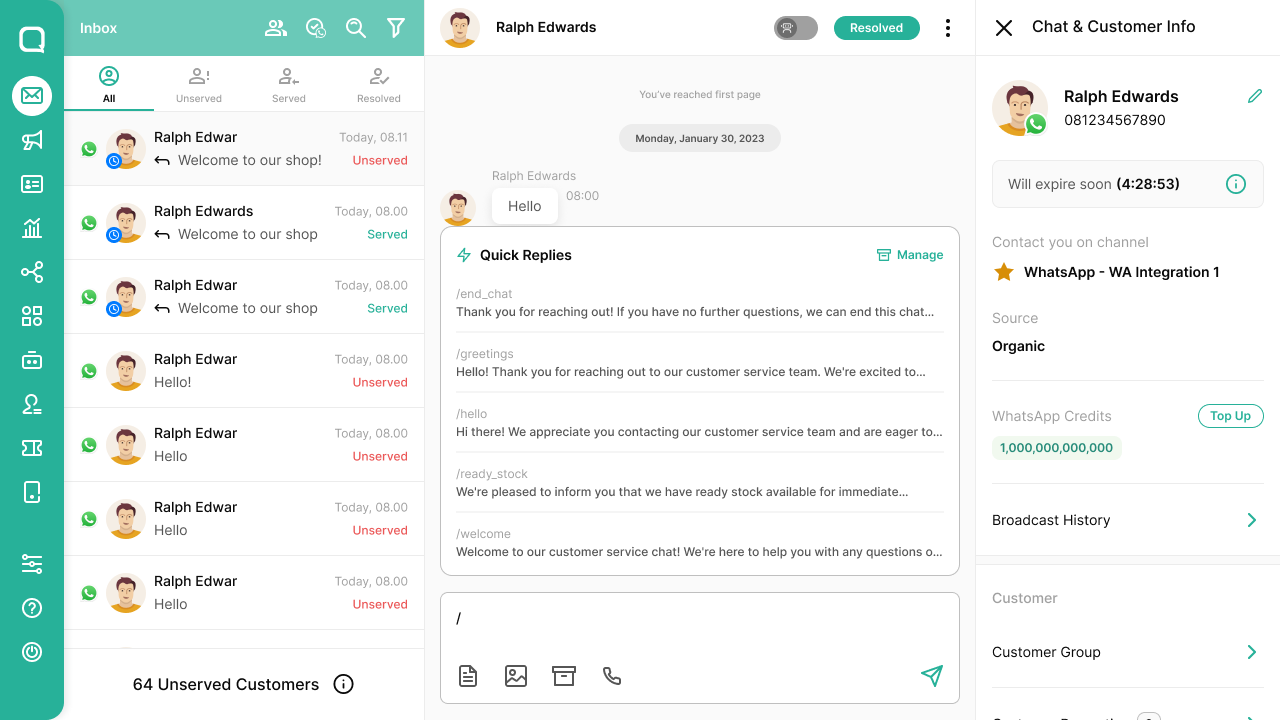
There are several chat phrases which are common and frequently used such as, "Thank you", "Can we help you?" and so on. For ease and efficiency, users can define the messages that are often used under the quick reply settings. Quick Replies only contain text by limiting the characters in the content to a maximum of 4000 characters. Users can manage quick replies and use it in conversations. To create a quick reply, users must define command and content.
To be able to use it, users need to type command '/' followed by intended keyword.
Tags
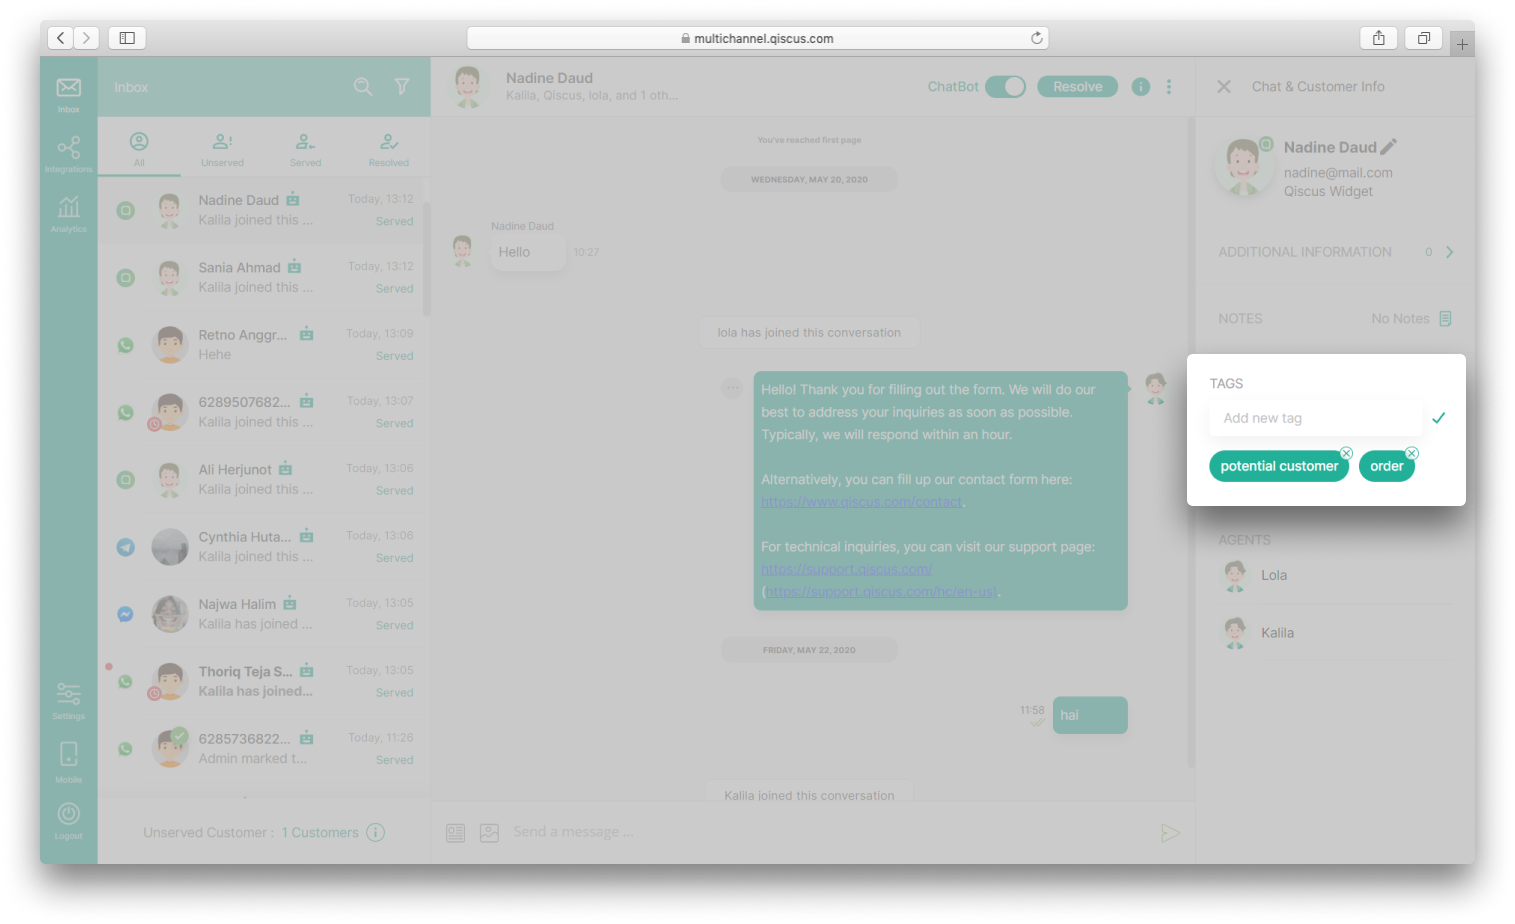
Tags are used to mark a chat room. Users can add and delete tags in each chat room in the Chat & Customer Info section on the right side of the Inbox page.
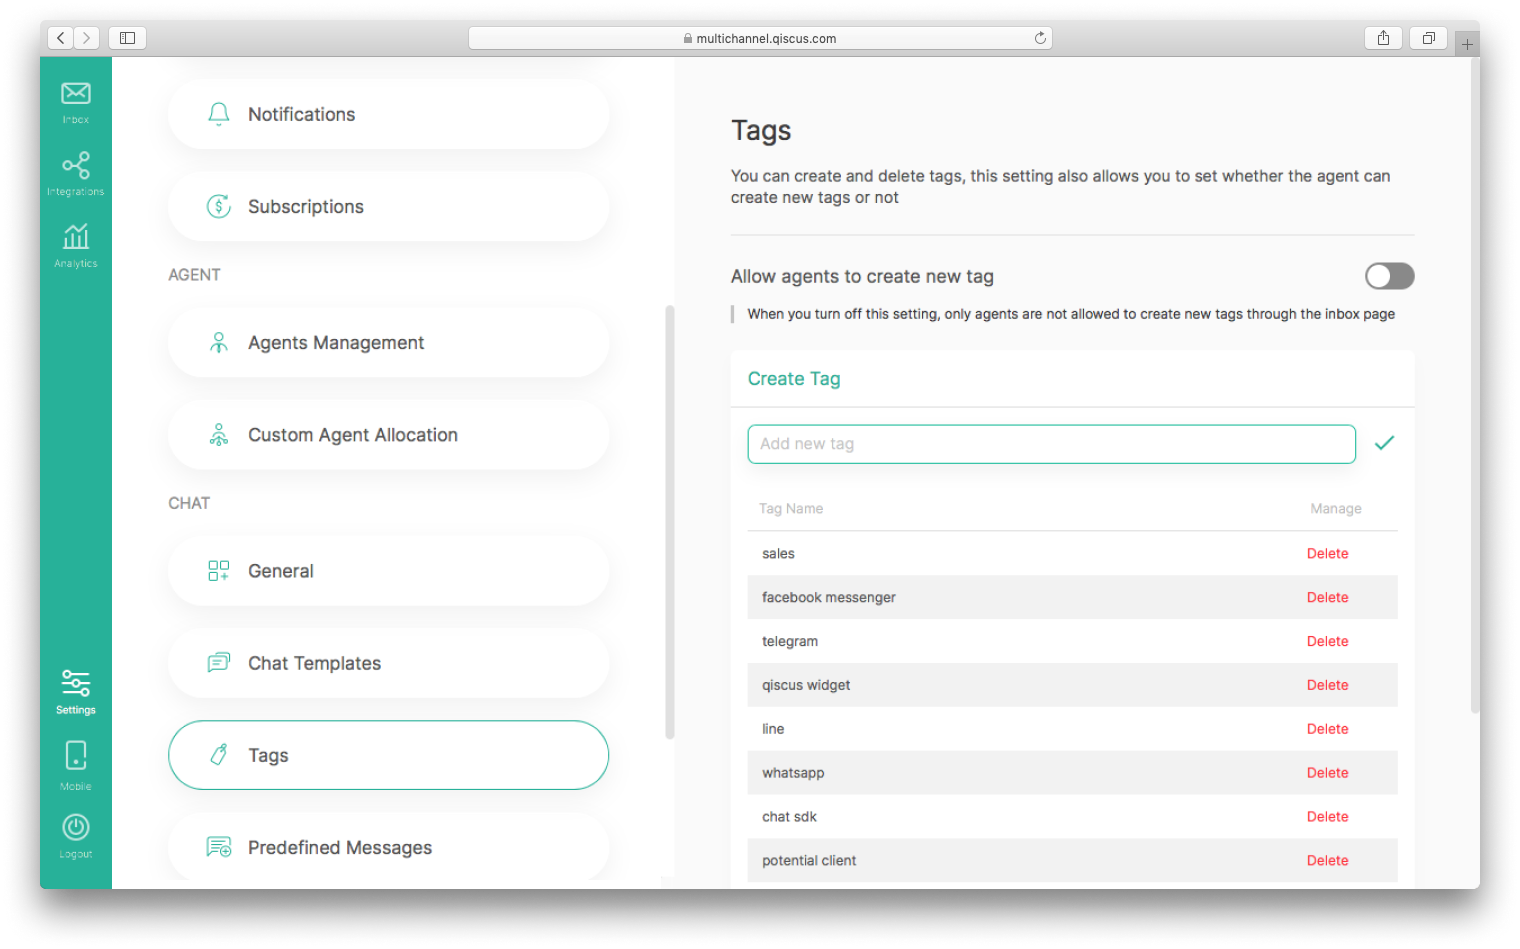
The tag configuration can be accessed on the Tags Settings page by Admin and Supervisor. This configuration includes tag management in the form of adding and removing tags and settings to allow agents to create new tags. The default setting Allow agents to create new tags is active.
If the Allow agents to create new tag setting is active then all Agents are allowed to create new tags through the Inbox page, while the Admin and Supervisor are also allowed to create new tags both in the inbox page and in the Tags Settings page. Meanwhile, when this configuration is deactivated then all Agents cannot create tags through the Inbox page, Agents are only allowed to use existing tags, while Admin and Supervisors are still allowed to add new tags through the Inbox page or through the Tags Settings page.
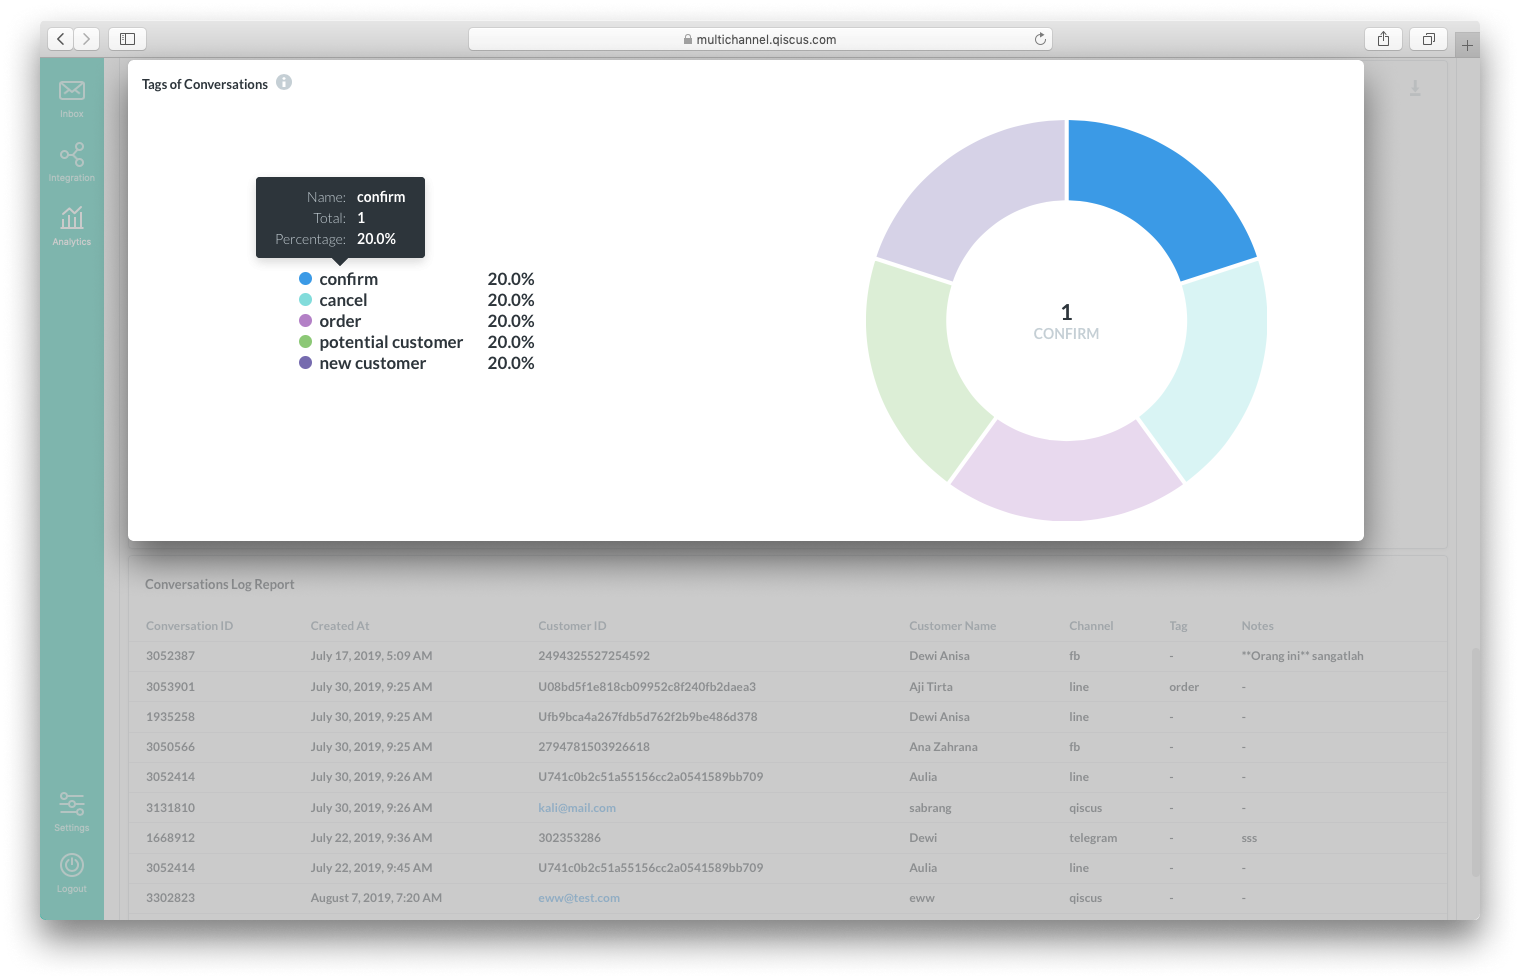
Tags of conversations can be accessed by Admin and Supervisor on Analytics page on section Chats.
Predefined Messages
Predefined messages are pre-determined messages that can be sent directly to the customer. This message can be a product, article, or other related messages. Users can choose products from existing catalogs and send them to customers. Predefined messages are displayed in the form of cards. This feature only support Qiscus Widget, LINE, and Facebook Messenger Channel. To use this feature Admin must activate predefined message on the Settings page.

Follow steps below to activate predefined message:
- Click Settings , then select Predefined Messages .
- Enable Toggle Predefined Messages.
- Fill in API URL . The API required is API method GET which can accept parameter named keyword . This API is used to store content from predefined messages. If you search with keyword "item" then the app will send
keyword=itemin its URL Query when hitting your API. - The results of the API must be match with Qiscus Omnichannel Chat specified as follows.
[ { "title": "Predefined Message Title", "url": "https://predefined-message-url.com", "subtitle": "Predefined Message Subtitle", "image_url": "https://predefined-message-image-url.jpg", "description": "Predefined message description", "button_text": "Predefined message button text" } ]- All parameters must be filled in___ _**** _** **_ _ _ .
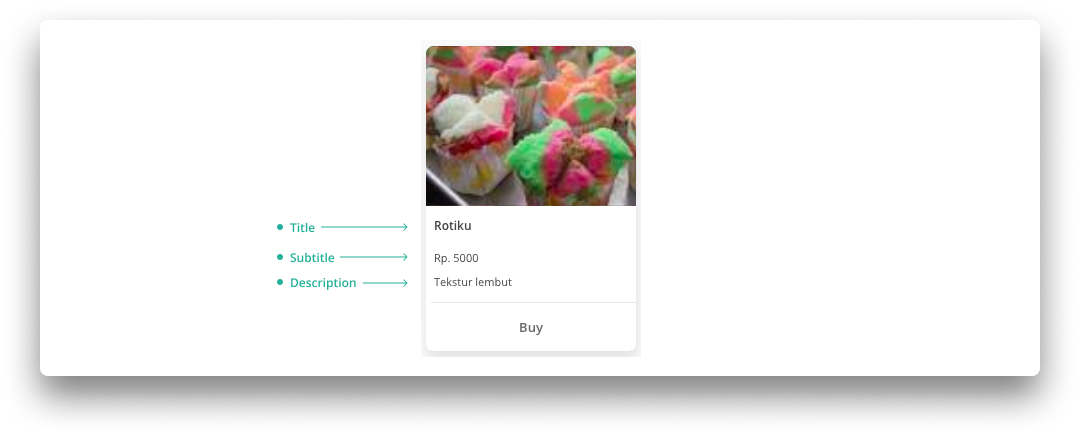
- Parameter title is the title of predefined message and will be displayed as a card title.
- The URL parameter is the URL address of predefined message.
- The subtitle parameter will be used as subtitle of the predefined message that will be displayed below the card title.
- The image_url parameter is used to define a predefined message image.
- The description parameter is a description of predefined messages and will be displayed under the card subtitle.
- The button_text parameter is a button label. When the button clicked, it will go to the URL that already defined in the previous URL parameter.
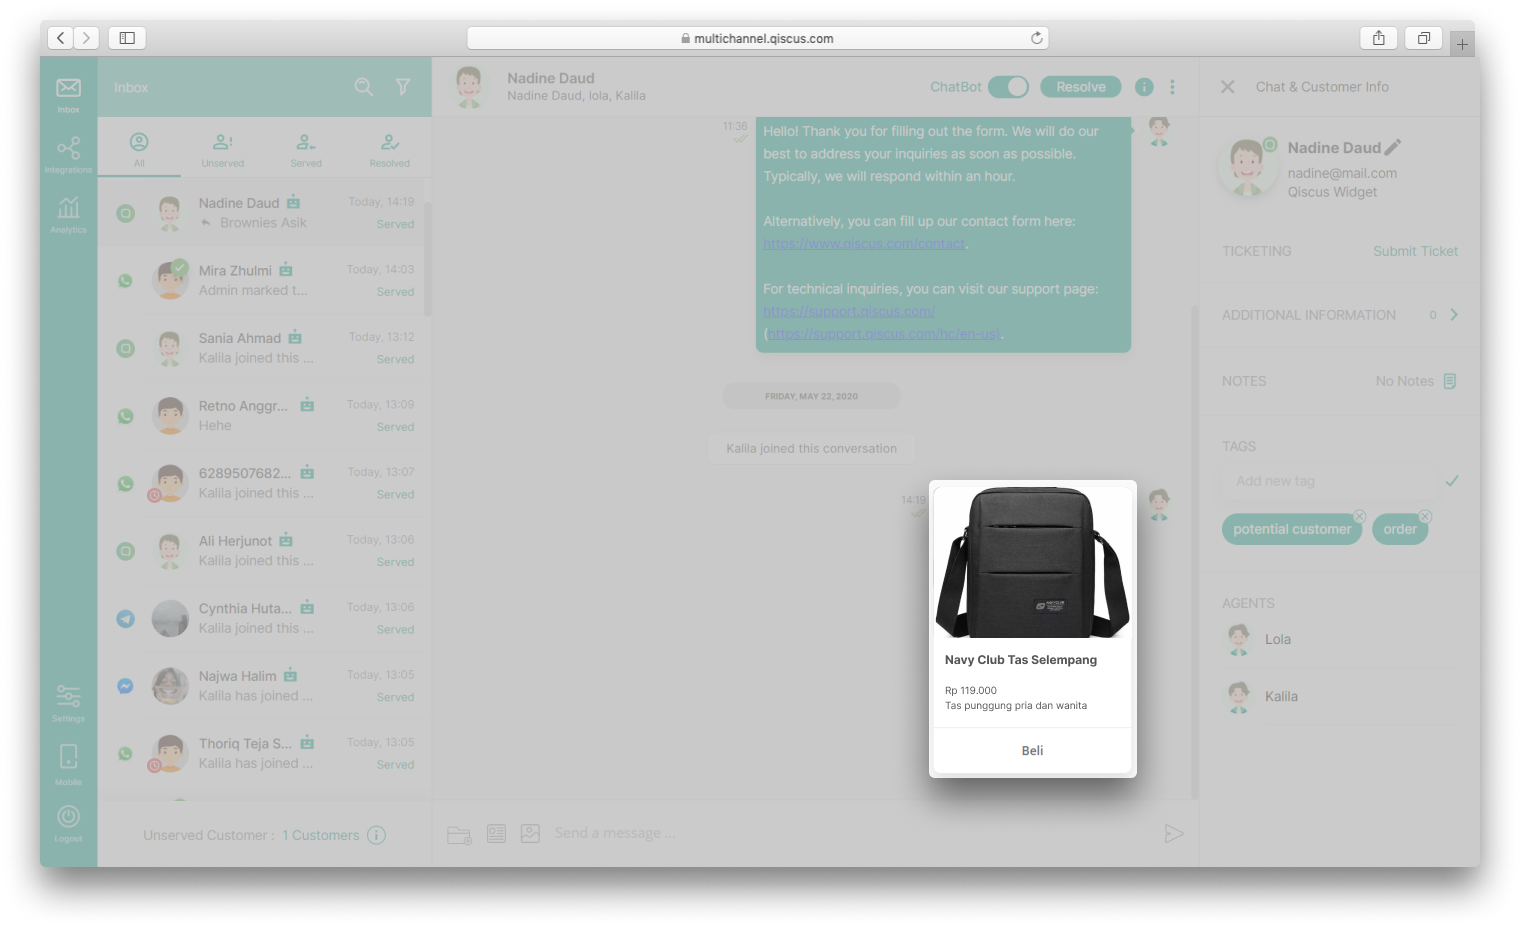
- Predefined messages are displayed in the form of cards.
- Click Save and “success” status will appear. After predefined message is successfully activated, users can employ it right away.
The application of predefined message as follows:
- After the predefined message is activated, the predefined message icon will appear in a chat room. The predefined message icon is located in the left side of the file attachment and image icon.
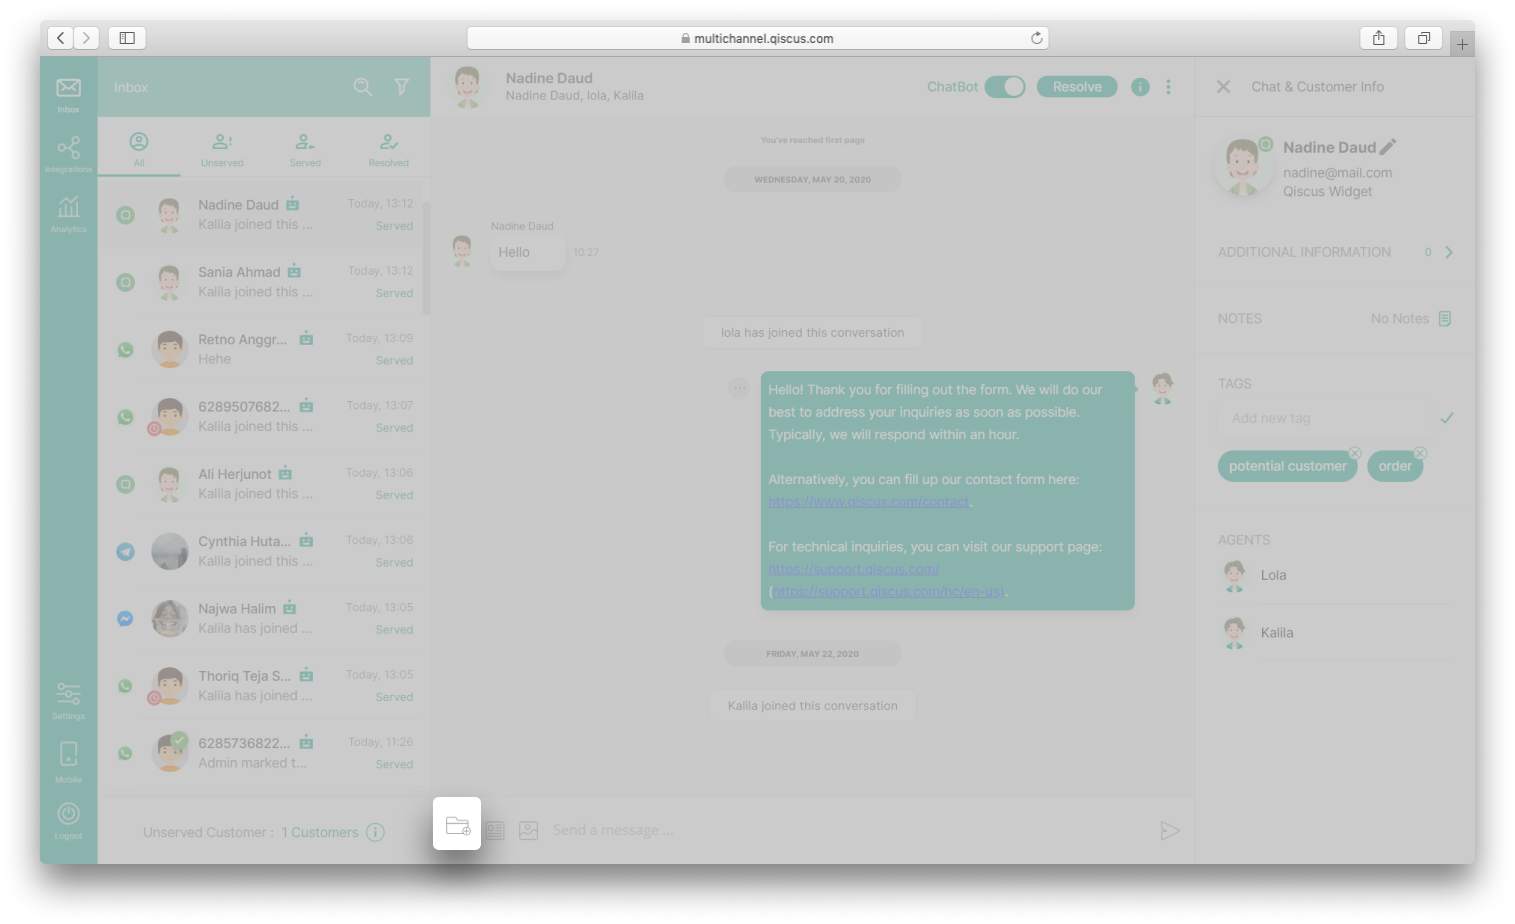
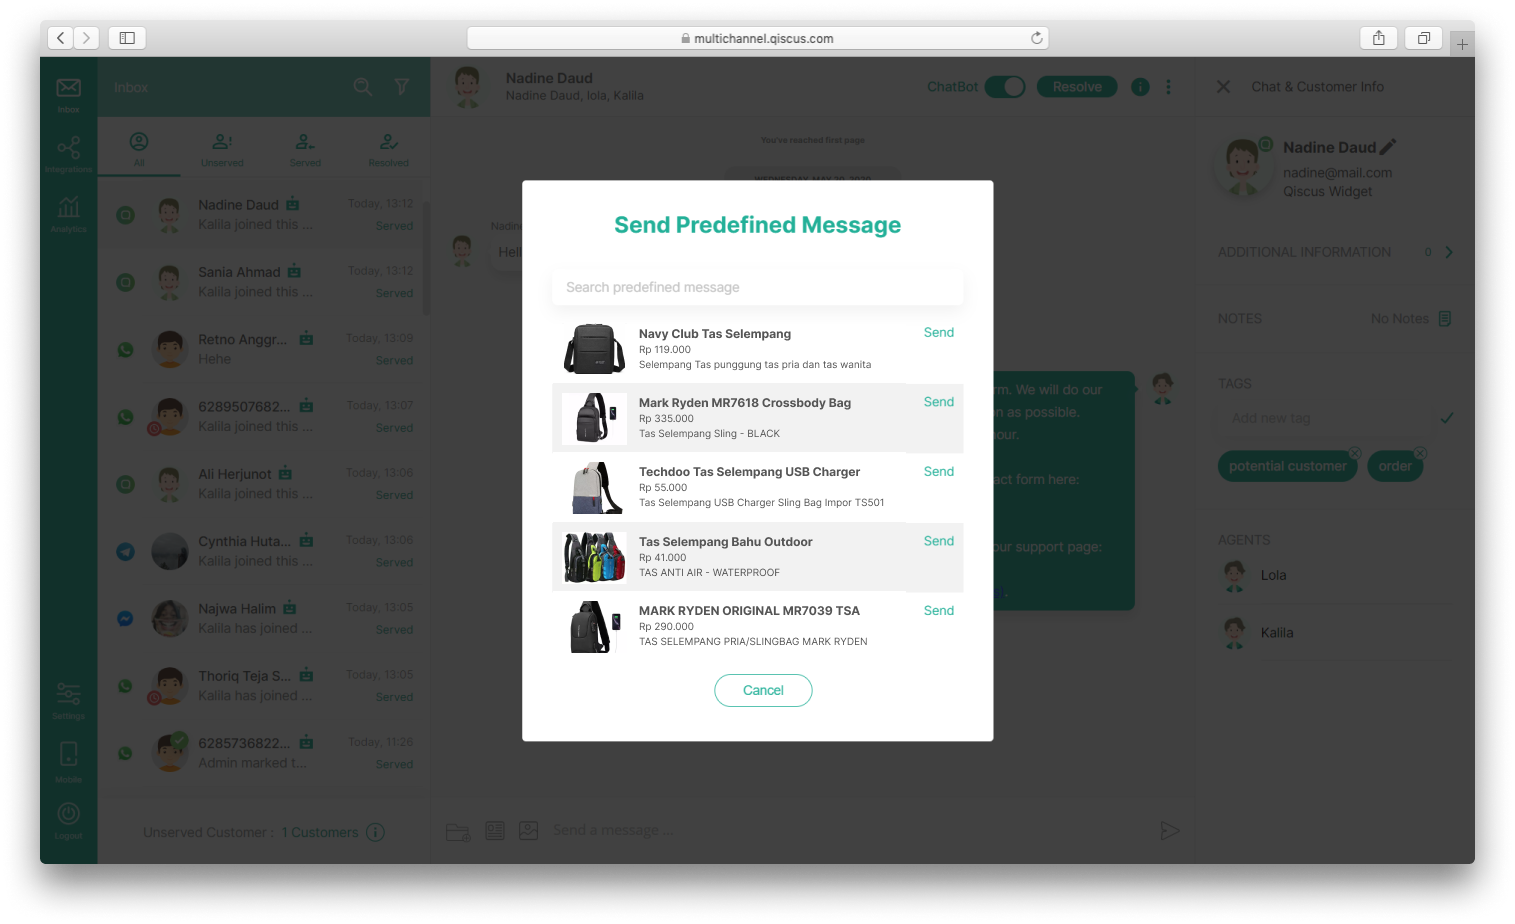
- Click the predefined message icon, so it will display a list of predefined messages. There will be five predefined messages displayed after you clicked it. Another predefined message can be found by searching through search feature.
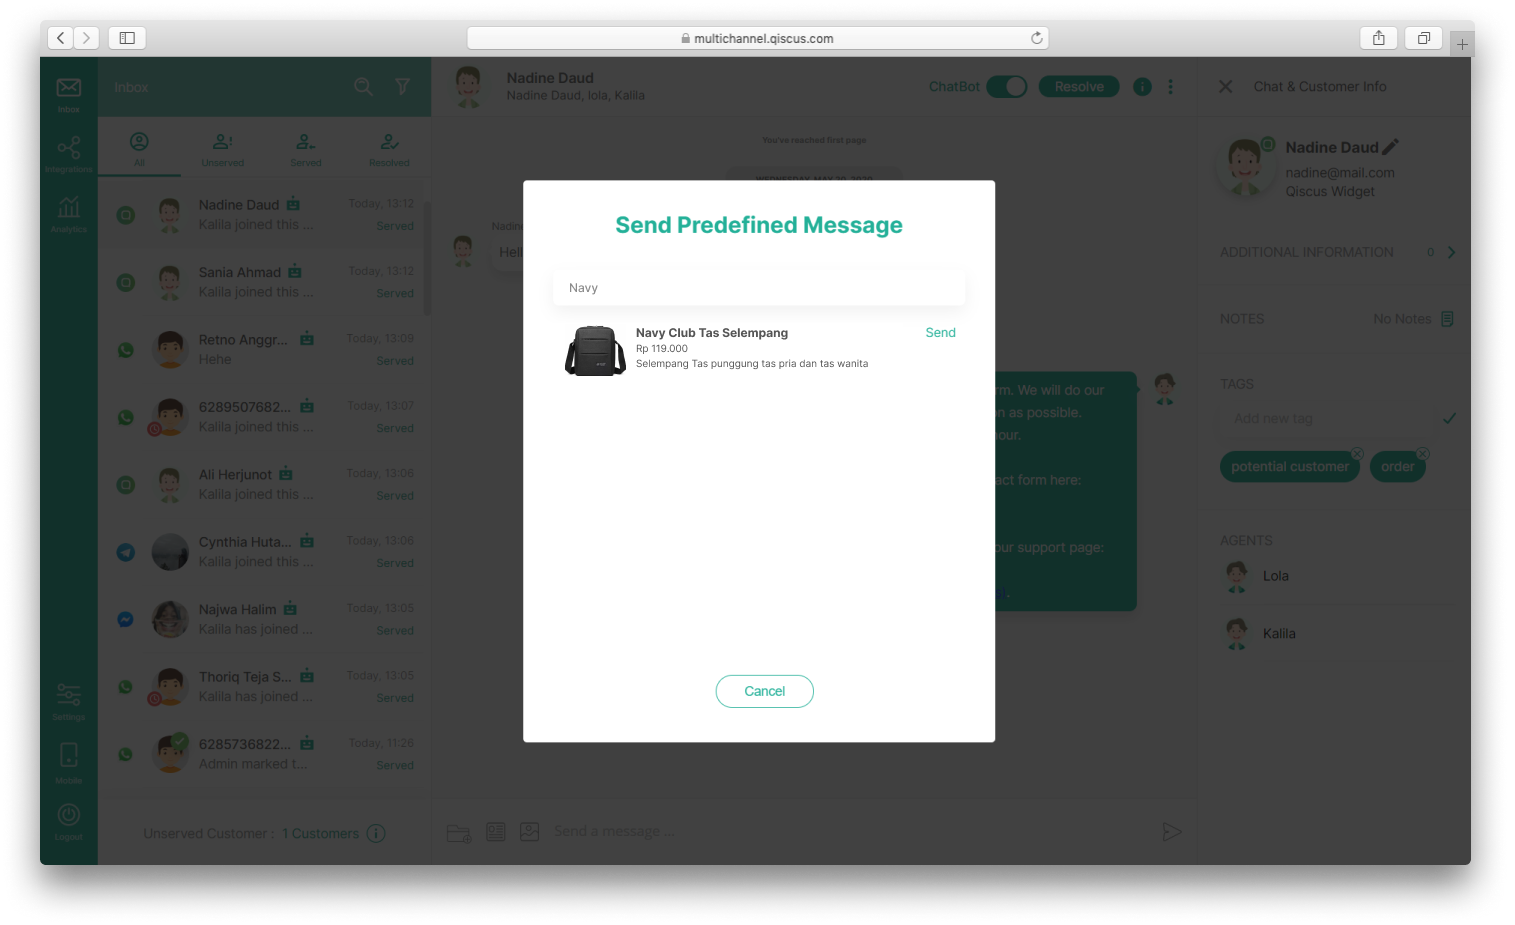
- Fill in the keyword as a predefined message title in the search text field. At this point, the app will send
keyword=Navyin its URL Query when hitting your API. Please be informed that the app will not do local filter and will only load 5 items from your API,so please adjust your API accordingly.
- Click Send to send predefined messages. Message will be sent as a card.
Custom Button
Custom Button is a feature that makes it easy for you to integrate a conversation that already exists on Qiscus Omnichannel Chat to connect it to your third-party system such as CRM, Ticketing, Analytics, and many more with one click. This feature is intentionally designed to suit your needs, among which you can easily change the default name of the button provided and be free to associate with whatever third-party system you want.
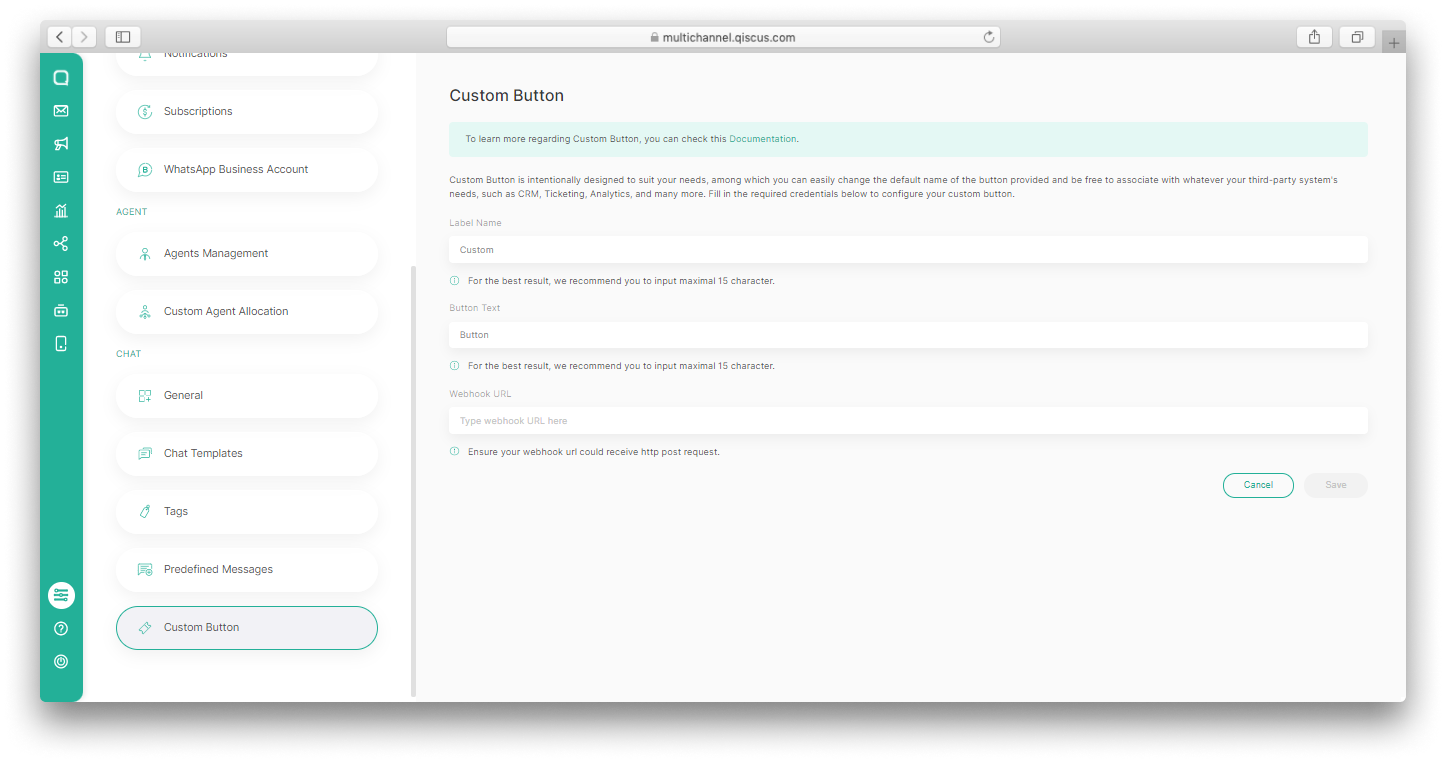
To activate the Custom Button feature the Admin must enable the Custom Button configuration on the Settings - Custom Button page first. The following are the steps to configure the Custom Button :
- Click Settings, then select Custom Button,
- Click Add Custom Button
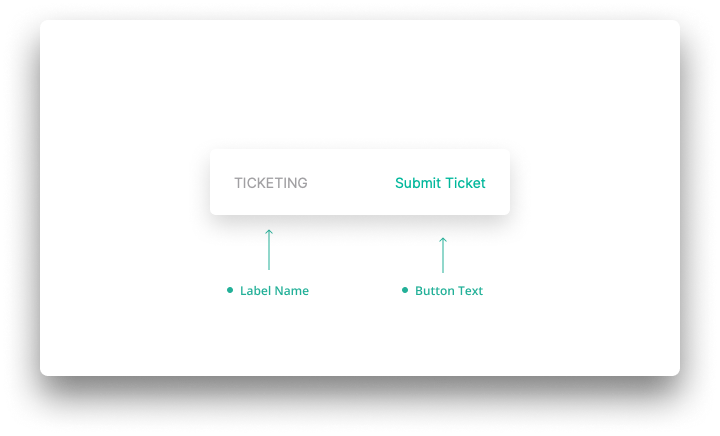
- Input name label, the default for name label is “Custom”,
- Input button name, default for button name is “Button”,
- Input Webhook URL in the field provided. Ensure that the inputted Webhook URL can receive an http post request. Webhook URL entered must provide a maximum response of 5000ms otherwise it will be considered a timeout so that the request will not be forwarded,
- Click Save and “success” status message will appear. After custom button is successfully activated, users can employ it right away.
If you want to activate two custom buttons, then please repeat the steps above.
After the Custom Button configuration on the Settings page has been successfully activated, all Qiscus Omnichannel Chat users can interact via the Inbox page. Also make sure to always activate this setting if you want to use it. Following are the steps for interacting through the Inbox page:
- Select one of the conversations you to make your integrate to your third party system (for example CRM),
- Under Chat & Customer Info, click the your Custom Button (the name of the button matches that on the Settings - Custom Button page)
- Wait for success validation to appear, with this your custom button has been successfully created.
Qiscus Omnichannel Chat will hit your webhook with this payload that you could use in custom button :
{ "additional_info": [ { "anykey": "any value" }], "agent": { "email": "[email protected]", "name": "Agent", "type": "admin" }, "channel_id": 0004, "channel_name": "Channel 1", "channel_type": "Qiscus Widget", "customer": { "avatar": "https://dxxx/xxxxxx-xxlient.png", "name": "Customer Name", "user_id": "[email protected]" }, "customer_properties": [ { "id": 1, "label": "WEBSITE", "value": "" }, { "id": 2, "label": "ADDRESS", "value": "" }, { "id": 3, "label": "COMPANY", "value": "" } ], "notes": null, "room_id": 0000002, "tag": []}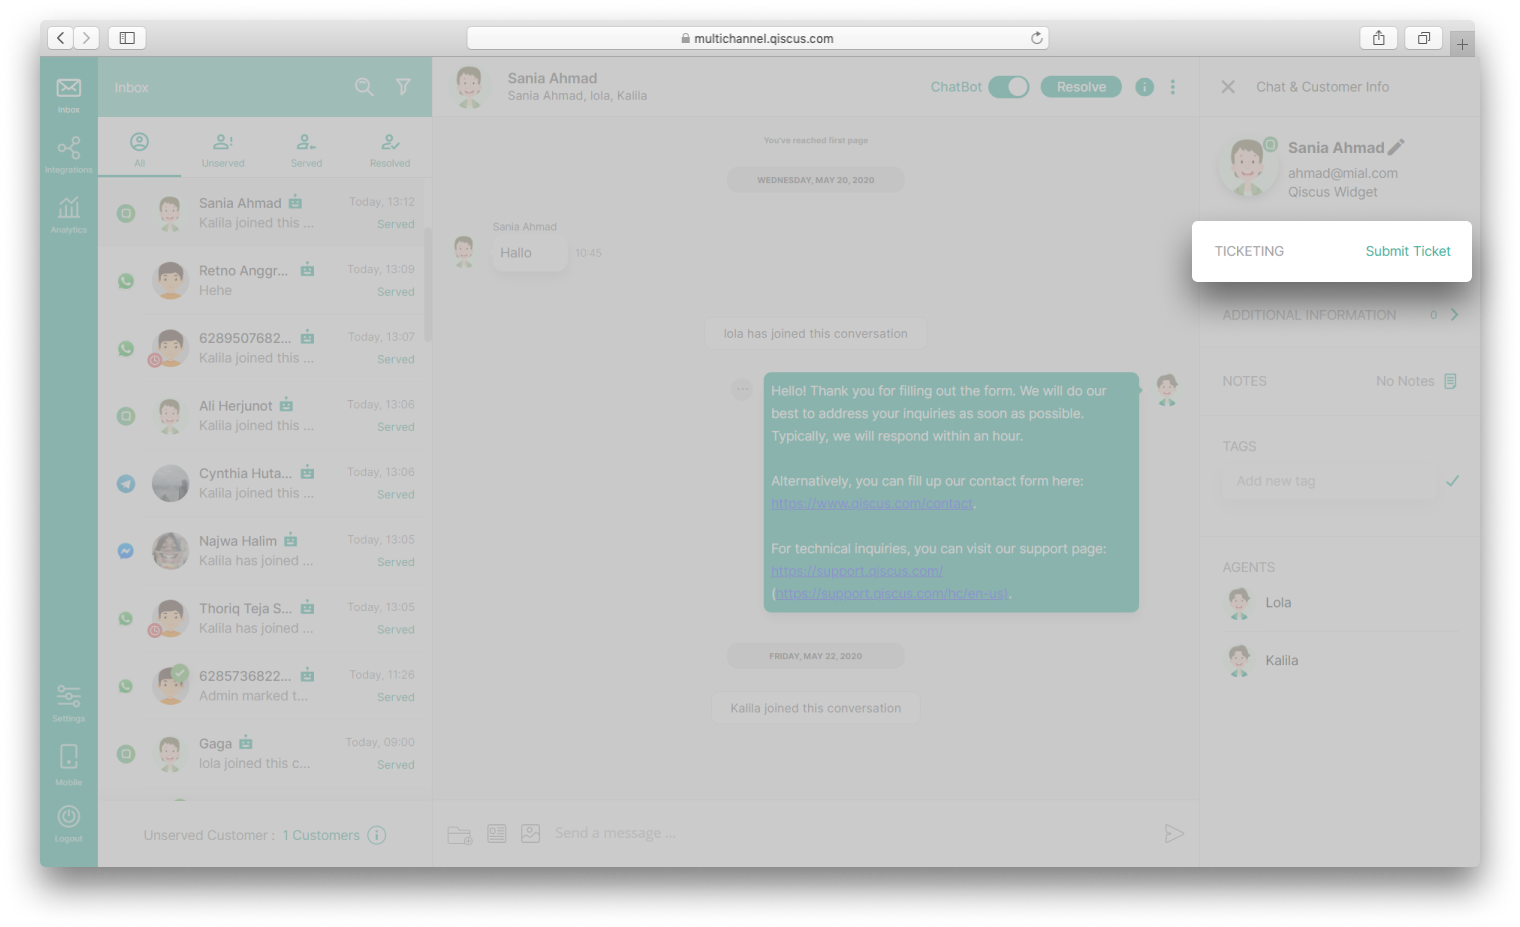
Qiscus Technology