Beside the channels that are already available, you can also integrate any service you want as long as it is related to text exchange, which we call a Custom Channel. The idea behind this Custom Channel is that you provide your own server for Qiscus Omnichannel Chat to connect to with whenever are exchanged between your service and Qiscus Omnichannel Chat. For instance, if you want to enable interactions via SMS, you can do so by providing a webhook URL for your Custom Channel.
Below there are the steps for integrating and setting up a Custom Channel:
Custom Channel Integration
To integration Custom Channel, follow these simple steps on the Integration Channel page:
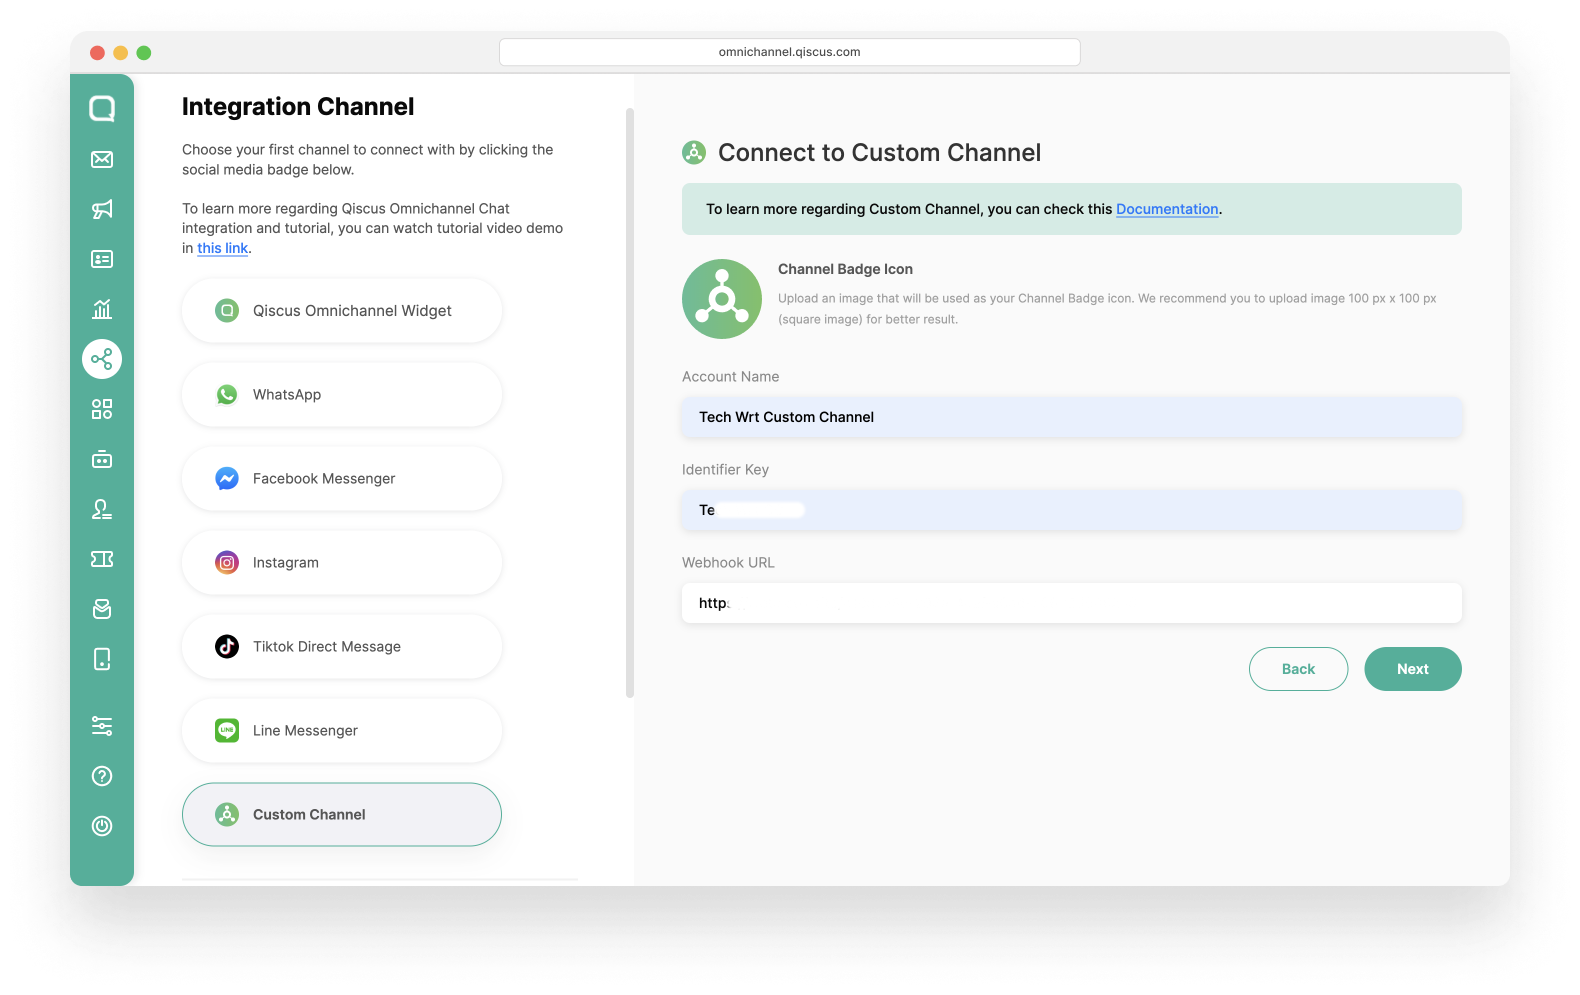
- Navigate to the Custom Channel Integration page and click Add Custom Channel,
- Upload a Channel Badge Icon. By default, the channel badge will display the Custom Channel icon. This icon identifies the source of the channel.
- Set the Account Name for the Custom Channel integration. This name will help differentiate various Custom Channels.
- Enter an Identifier Key. This key is used to match the source of requests coming from your webhook and is a required parameter. You can input any value you prefer.
- Input Webhook URL. This webhook is your custom channel webhook URL,
- Confirm the integration by clicking the Next button. You can set up the Channel Auto Responder now or set up it later.
Once everything is configured, any messages sent through your Custom Channel service (e.g., Telegram, Slack, etc.) will appear in Qiscus Omnichannel Chat. You can reply to these messages directly from the Qiscus Omnichannel Chat.
Custom Channel Settings
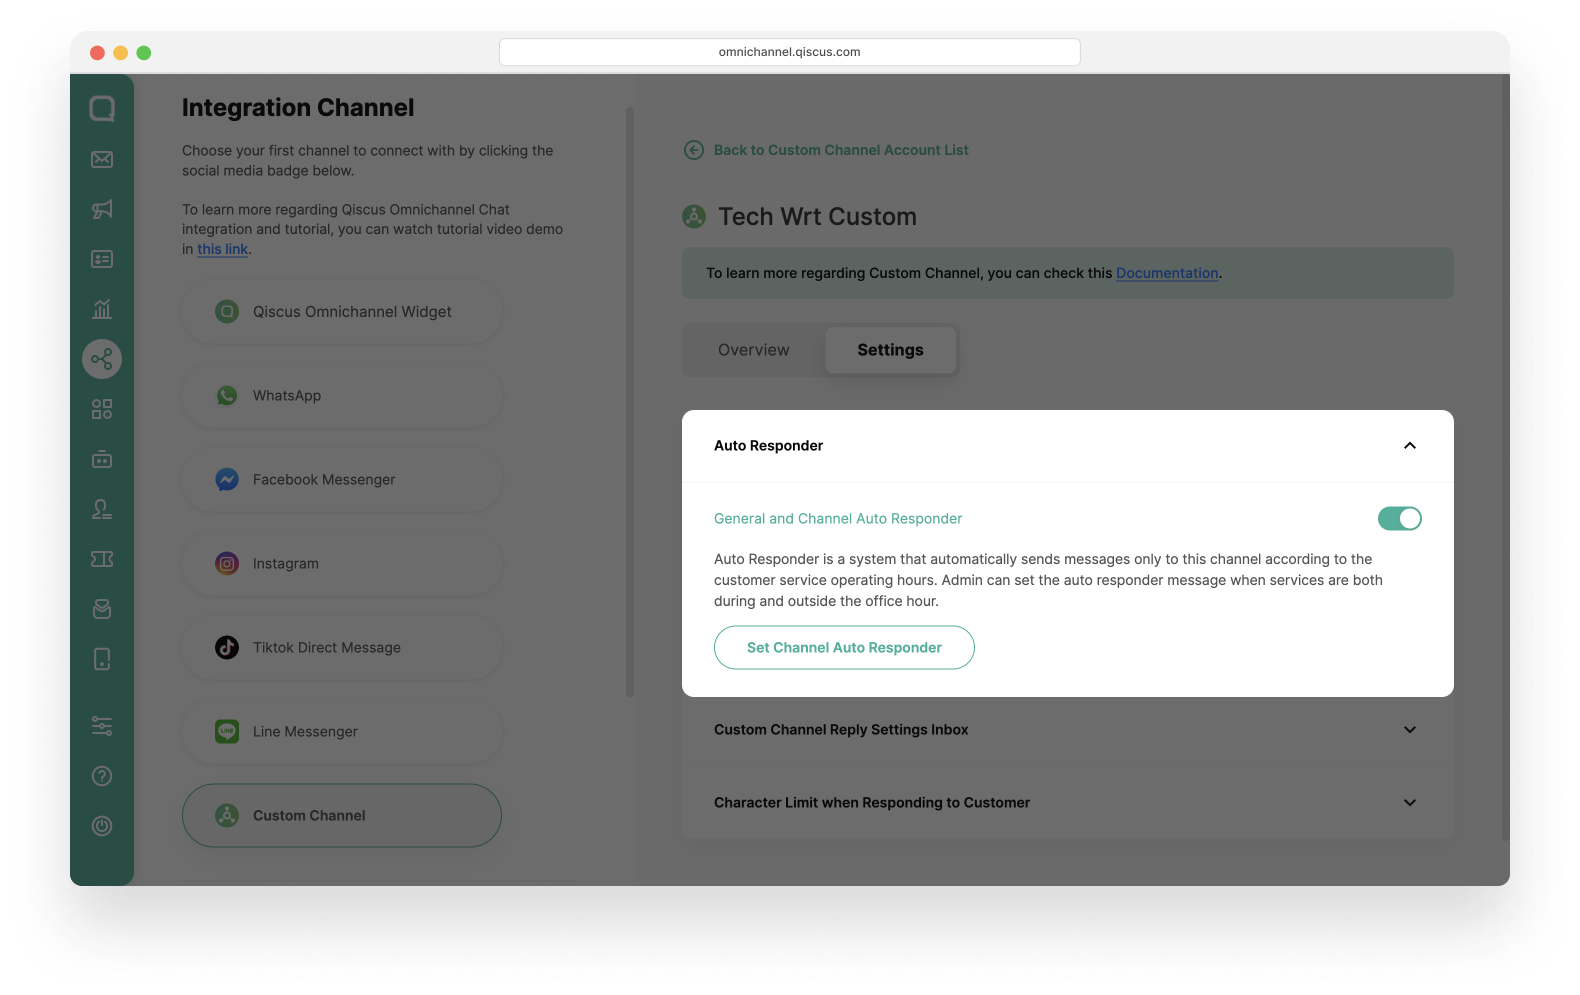
Autoresponder
The Channel Auto Responder automatically sends a message to customers at the beginning a conversation after they send their first message. It is available for all channels, including Custom Channels. For details on setting up the Auto Responder, refer to this documentation.
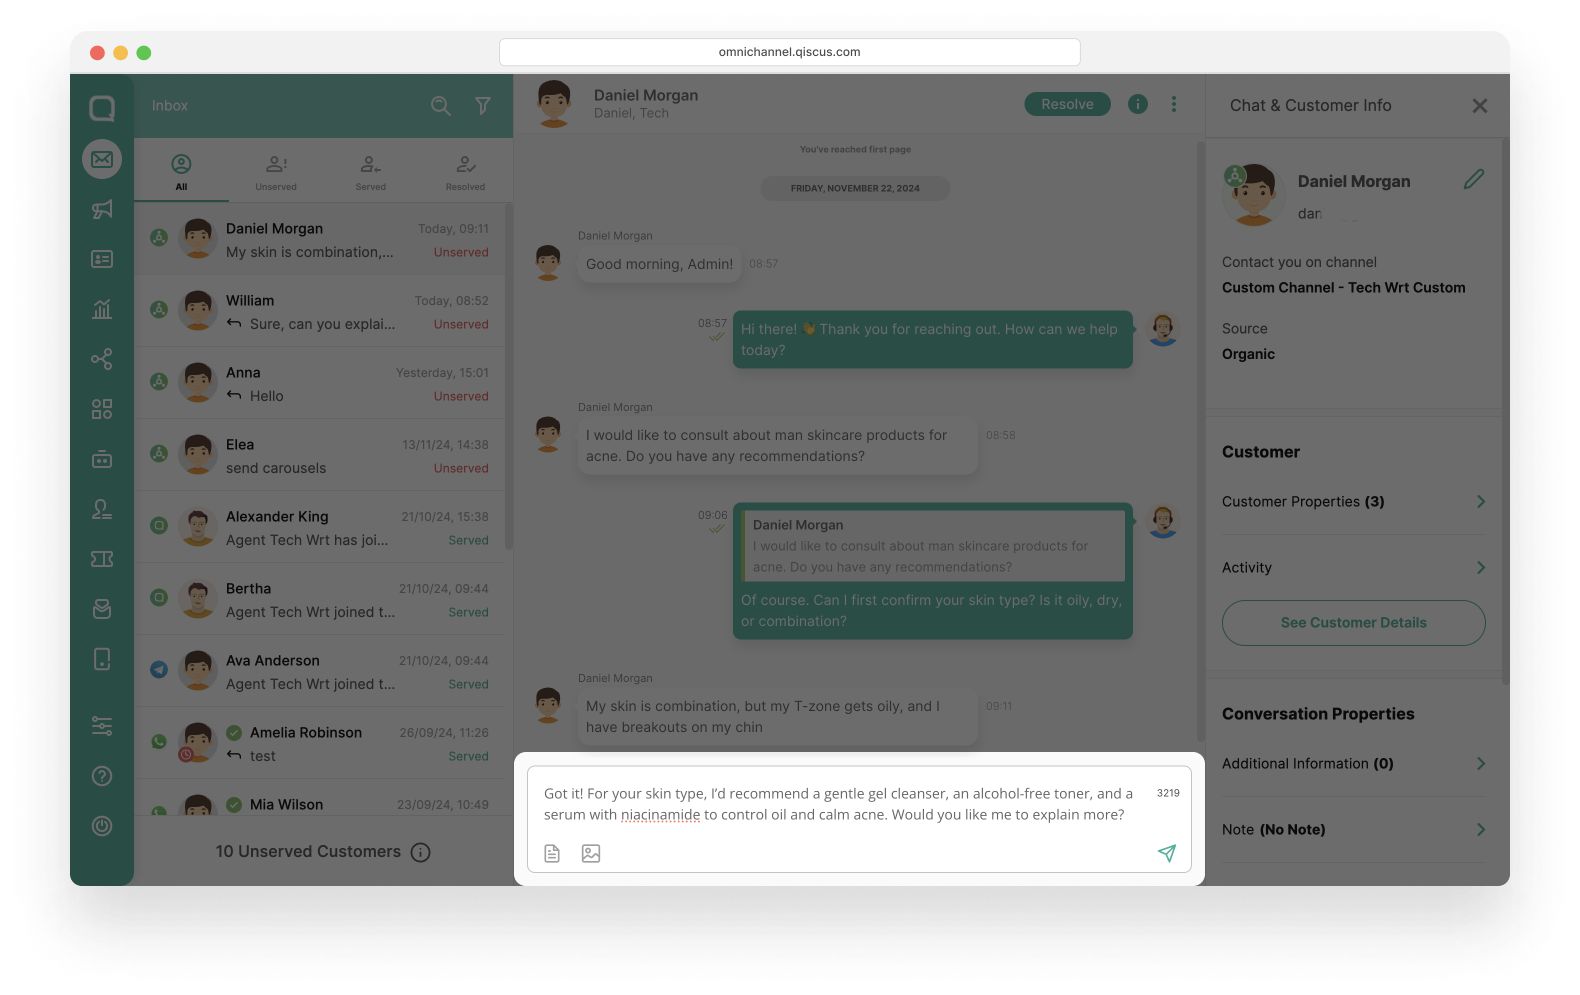
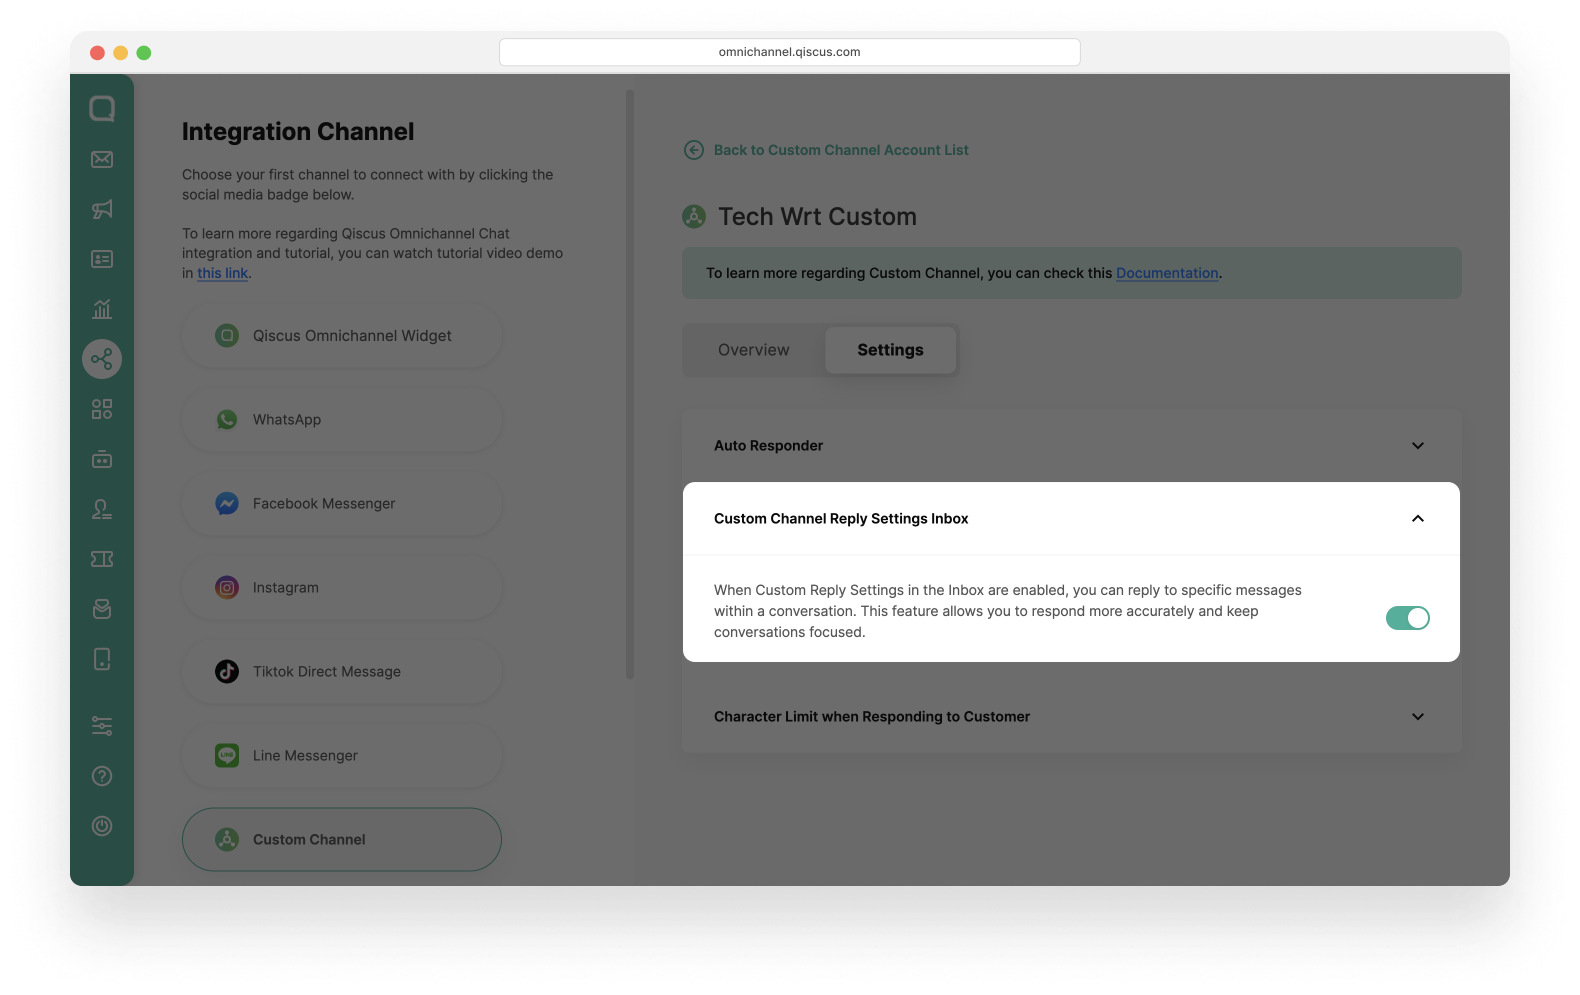
Custom Channel Reply Settings Inbox
The Custom Channel Reply enables you to respond to specific customer messages within a conversation. This feature allows you to provide accurate and focused replies, ensuring clear communication and improved customer experience. To activate this feature, enable it in your Custom Channel Setting.
Here’s how to use the Custom Channel Reply Message:
- You can go to the chat room and hover in the specific message you want to reply and a reply icon will appear.
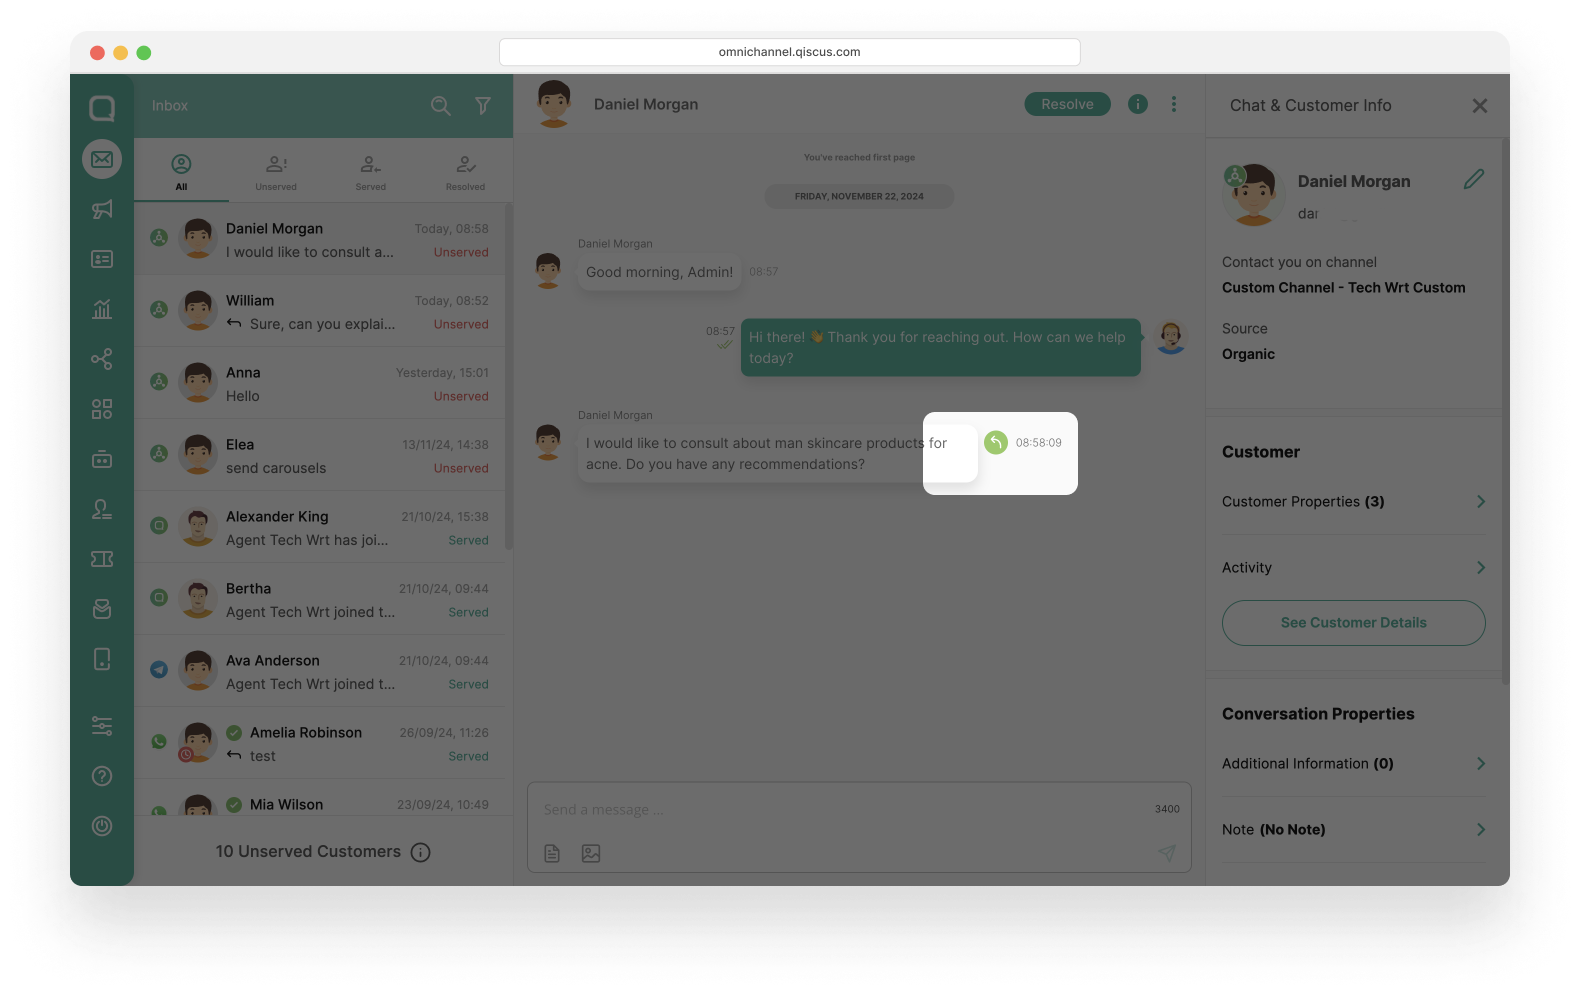
- Click Reply Icon, you can send a respond specific message in Chat Area,

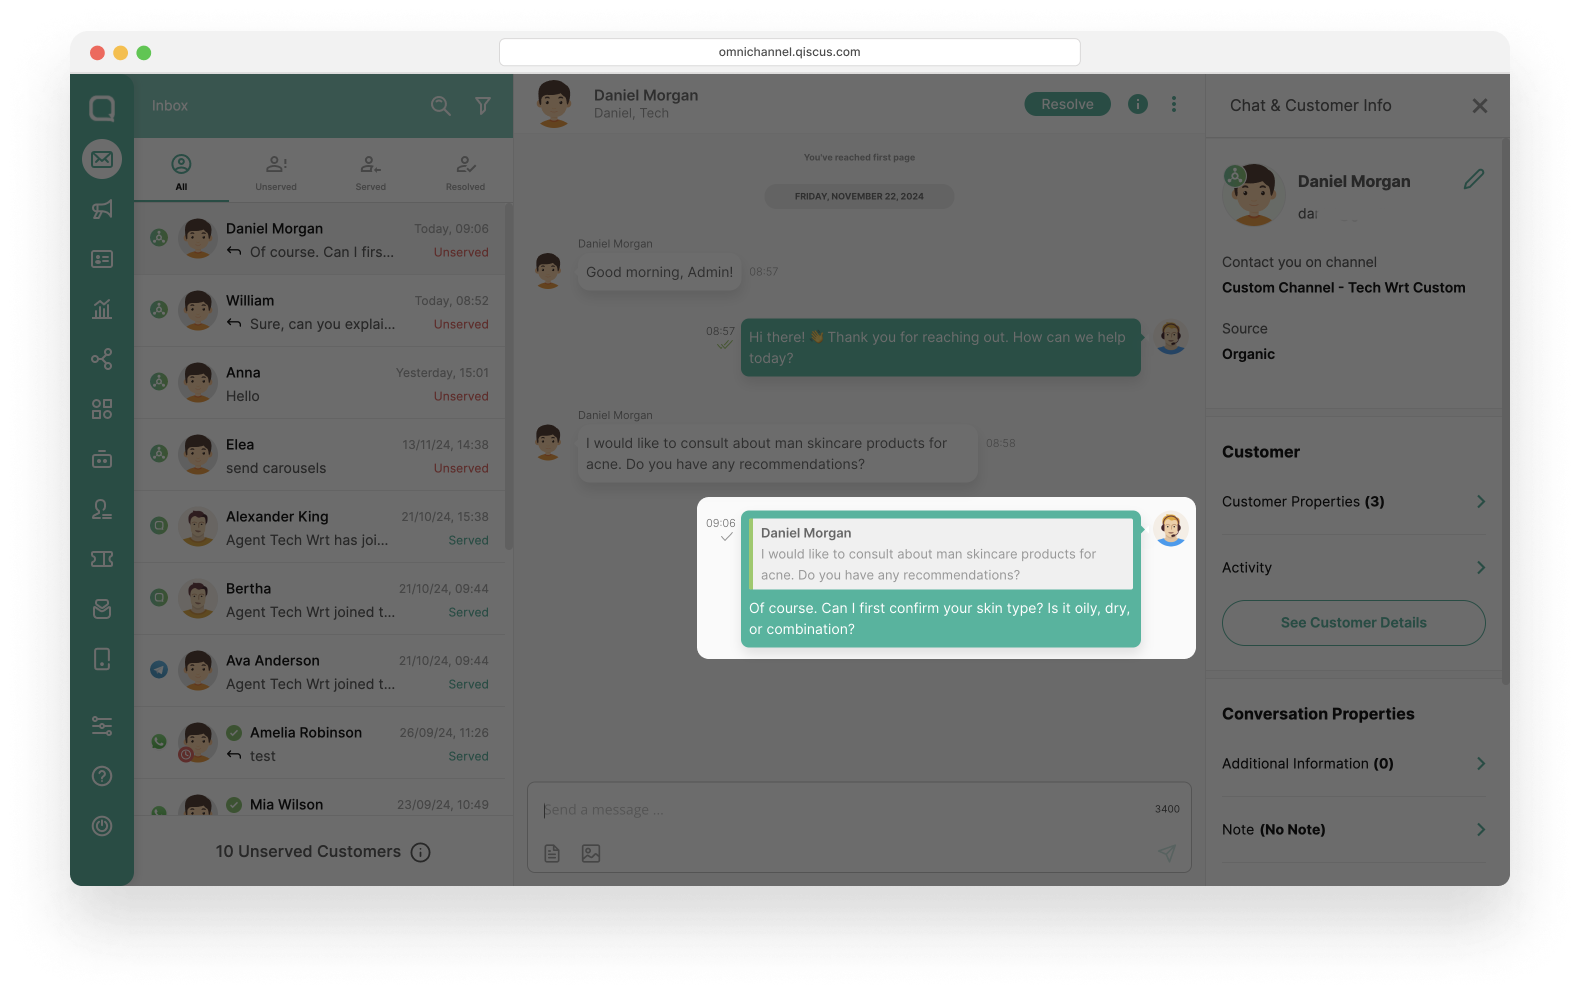
- Write and send your reply message. The result will appear as a directly linked response to the specific message.
Character Limit when Responding to Customer
To maintain clear and concise communication, we have a character limit for customer responses. By default, the maximum allowed characters is 4096 per message, ensuring messages are manageable for both businesses and customers. You can customize this limit within the Custom Channel Settings, as long as it does not exceed the maximum allowed characters.
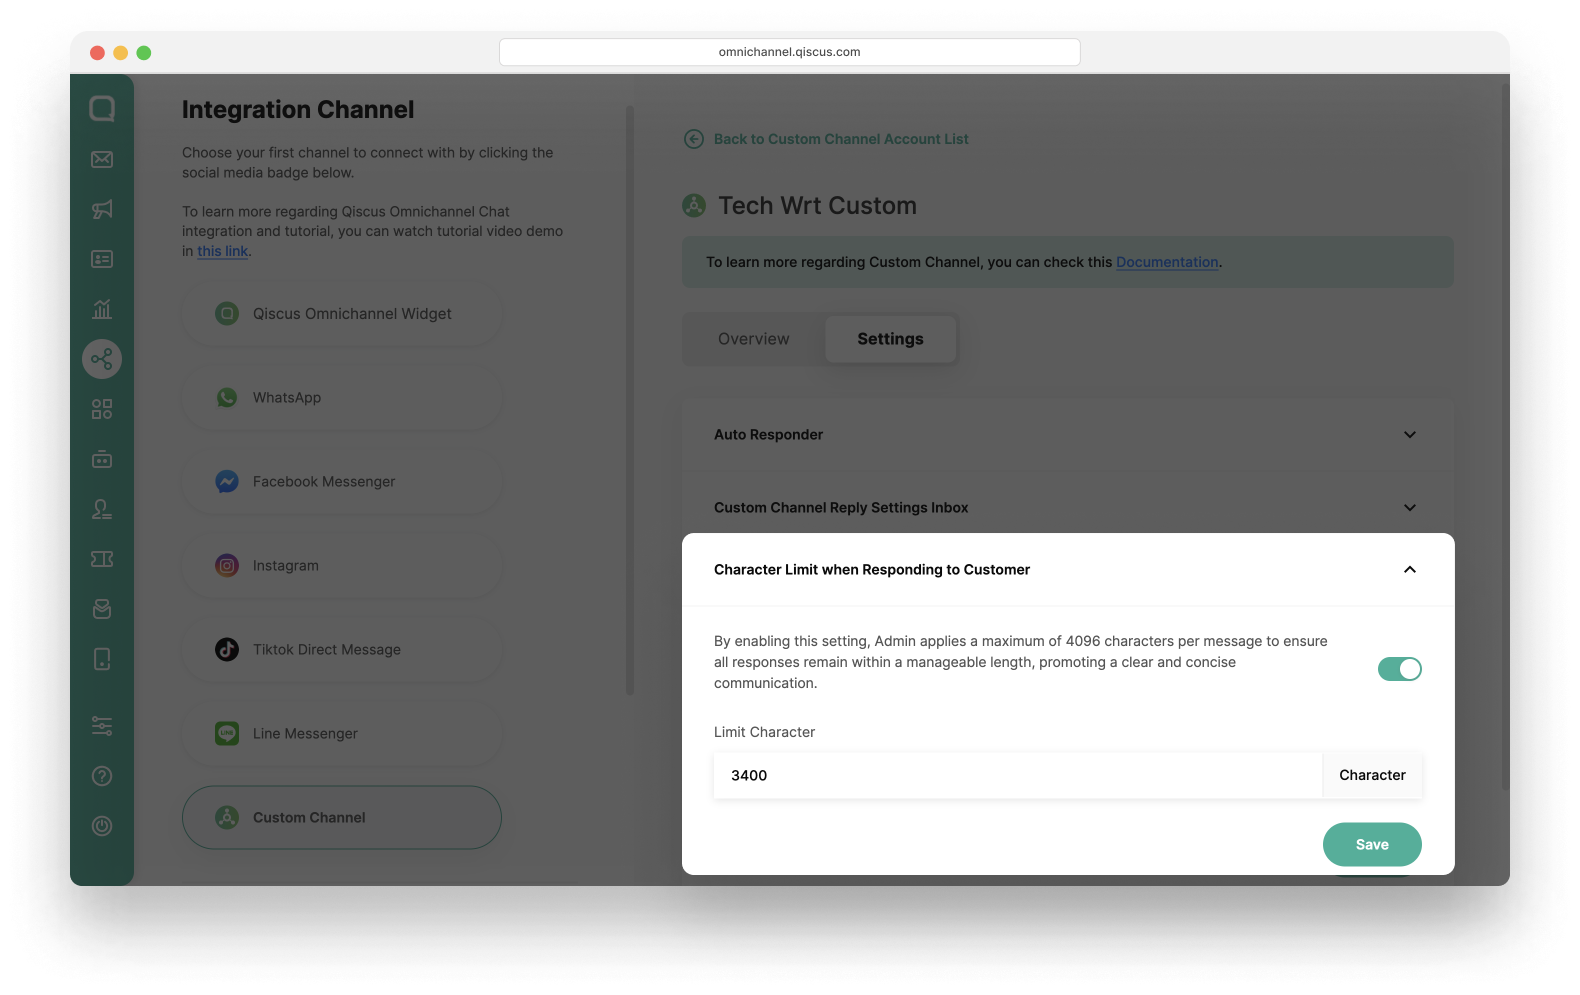
The character counter limit is displayed in the chat area, so you’ll know how many characters you have left while composing a message.