
Menu Based lets you build a menu bot (buttons, lists, and keyword triggers) directly inside an AgentLabs project, without IBE or Dialogflow. You can run the menu on its own, or put it in front of your AI Agent so the menu answers first and the AI answers everything outside the menu from your knowledge base.
Menu Based is in the Flow and Guidance group of the project sidebar. Every change you make goes to a draft first, so you can test it before customers see it, and every published version is kept so you can roll back.
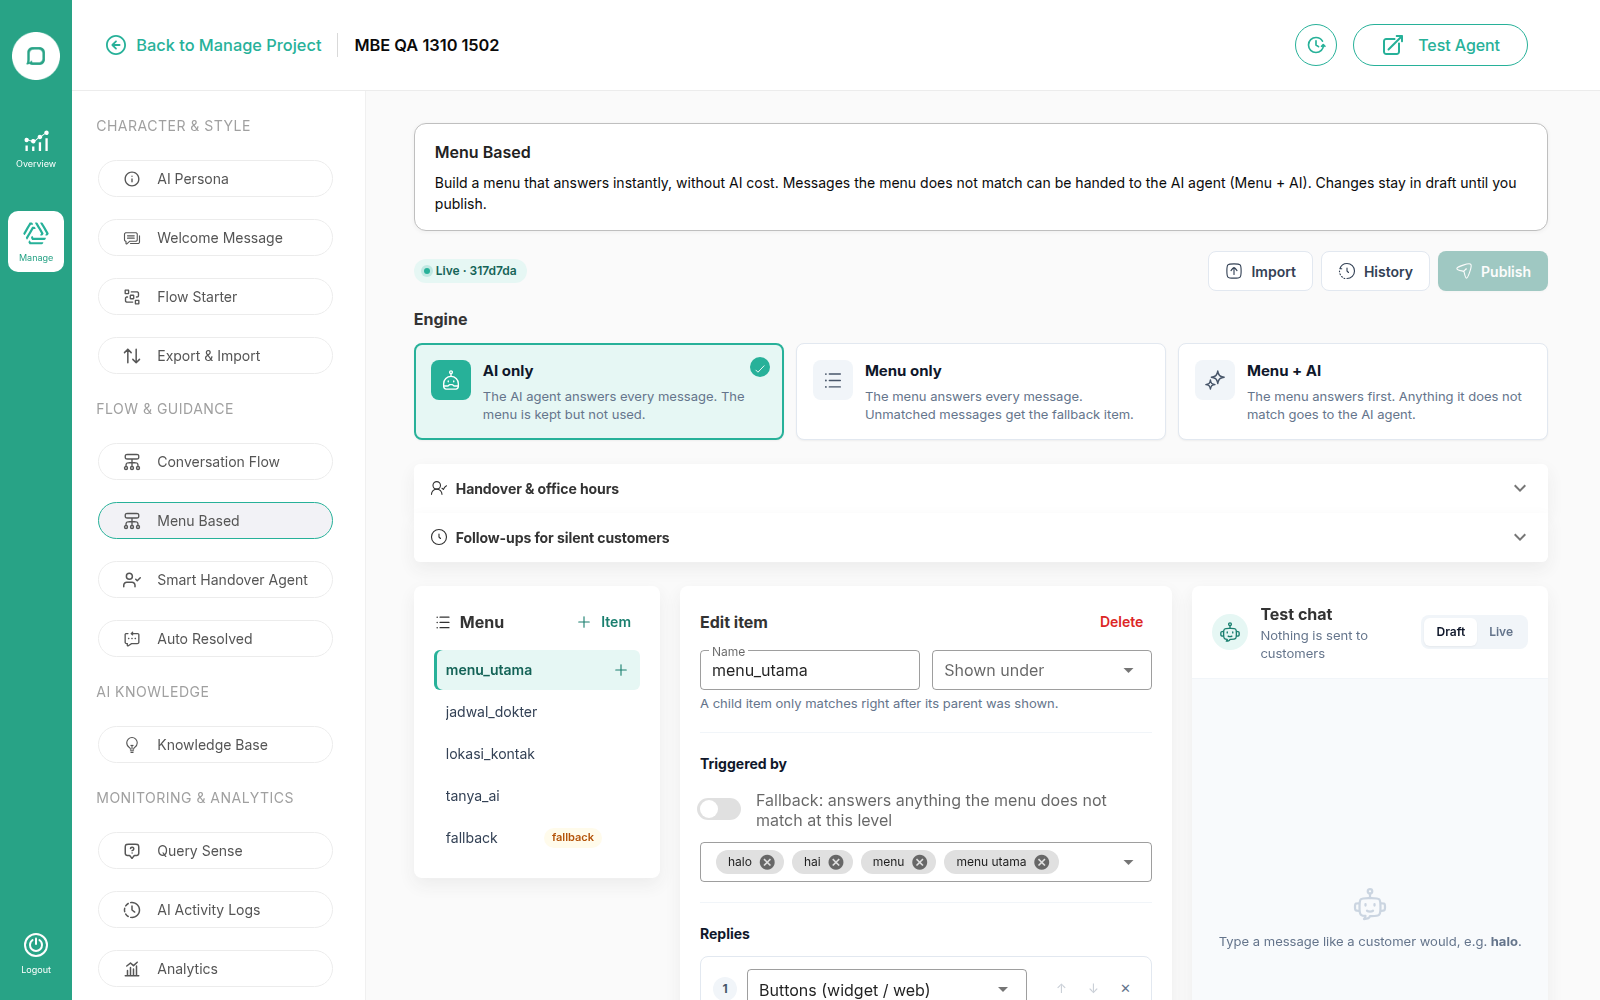
Choose the Engine
The engine decides who answers incoming messages in this project.
Engine | Who answers | Use it when |
|---|---|---|
AI only | The AI Agent answers every message, as before. The menu is kept but not used. | You only need the AI Agent. |
Menu only | The menu answers every message. Messages that do not match any item get the fallback item. The AI Agent is not used. | You need a fixed menu bot, for example to replace a bot built on IBE or Dialogflow. |
Menu + AI | The menu answers first. A message that does not match any menu item is answered by the AI Agent from the knowledge base. | You want guided menus for common requests and AI answers for free-text questions. |
Menu only and Menu + AI can be selected only after the menu has been published at least once.
With Menu + AI, the customer's place in the menu is kept while the AI answers. If the customer taps a menu button after an AI answer, the menu continues from where they were.
How Menu Matching Works
A menu is a tree of items. Each item has:
Triggers: the button titles or words that select this item. A customer's message matches an item when it matches one of its triggers.
Replies: what the bot sends when the item is selected.
Optional actions: a Custom API call, a handover to a division, and room tags.
An item can be placed under another item with Shown under, which makes it a child item (a sub-menu). A child item only matches right after its parent was shown, so the same button title can lead to different places in different sub-menus.
An item with the Fallback toggle on answers anything the menu does not match at its level.
Add a fallback item at the top level and in every sub-menu, so a message the menu does not understand still gets a reply (for example, the main menu again or a short "please choose one of the options" message). With Menu + AI, the AI Agent answers in place of the fallback item.
Build Your Menu
Open your AgentLabs project, then click Menu Based in the Flow and Guidance group of the sidebar.
Choose the engine: AI only, Menu only, or Menu + AI. If this is a new menu, keep AI only until you have published the menu once.
Click + Item in the Menu panel to add an item, or click + next to an item to add a child item under it.
In Edit item, fill in the item Name. To make it a child item, choose its parent in Shown under.
In Triggered by, type each trigger and press Enter after each one. Button and list titles from the parent item's replies are suggested automatically. Turn on Fallback instead if this item should answer anything the menu does not match at its level.
Write the replies in Replies. Click Add reply to combine several replies in one item:
Text. Use
{$.name}to insert the customer's name.Buttons (widget / web), for the Qiscus Widget.
WhatsApp buttons, up to 3 buttons.
WhatsApp list, up to 10 rows.
WhatsApp limits are checked directly in the form.
Optionally, configure the item's actions:
Custom API: turn on Call an API when this item matches, then set the URL, headers, and a body template. Values from the conversation can be inserted with JSON Path, such as
$.multichannel.payload.room.id. You can also set a reply template that builds the bot's reply from the API response.Handover & tags: choose a division in Hand over to division, and add tags in Room tags.
Click Save item. The change is saved to the draft and is not live yet.
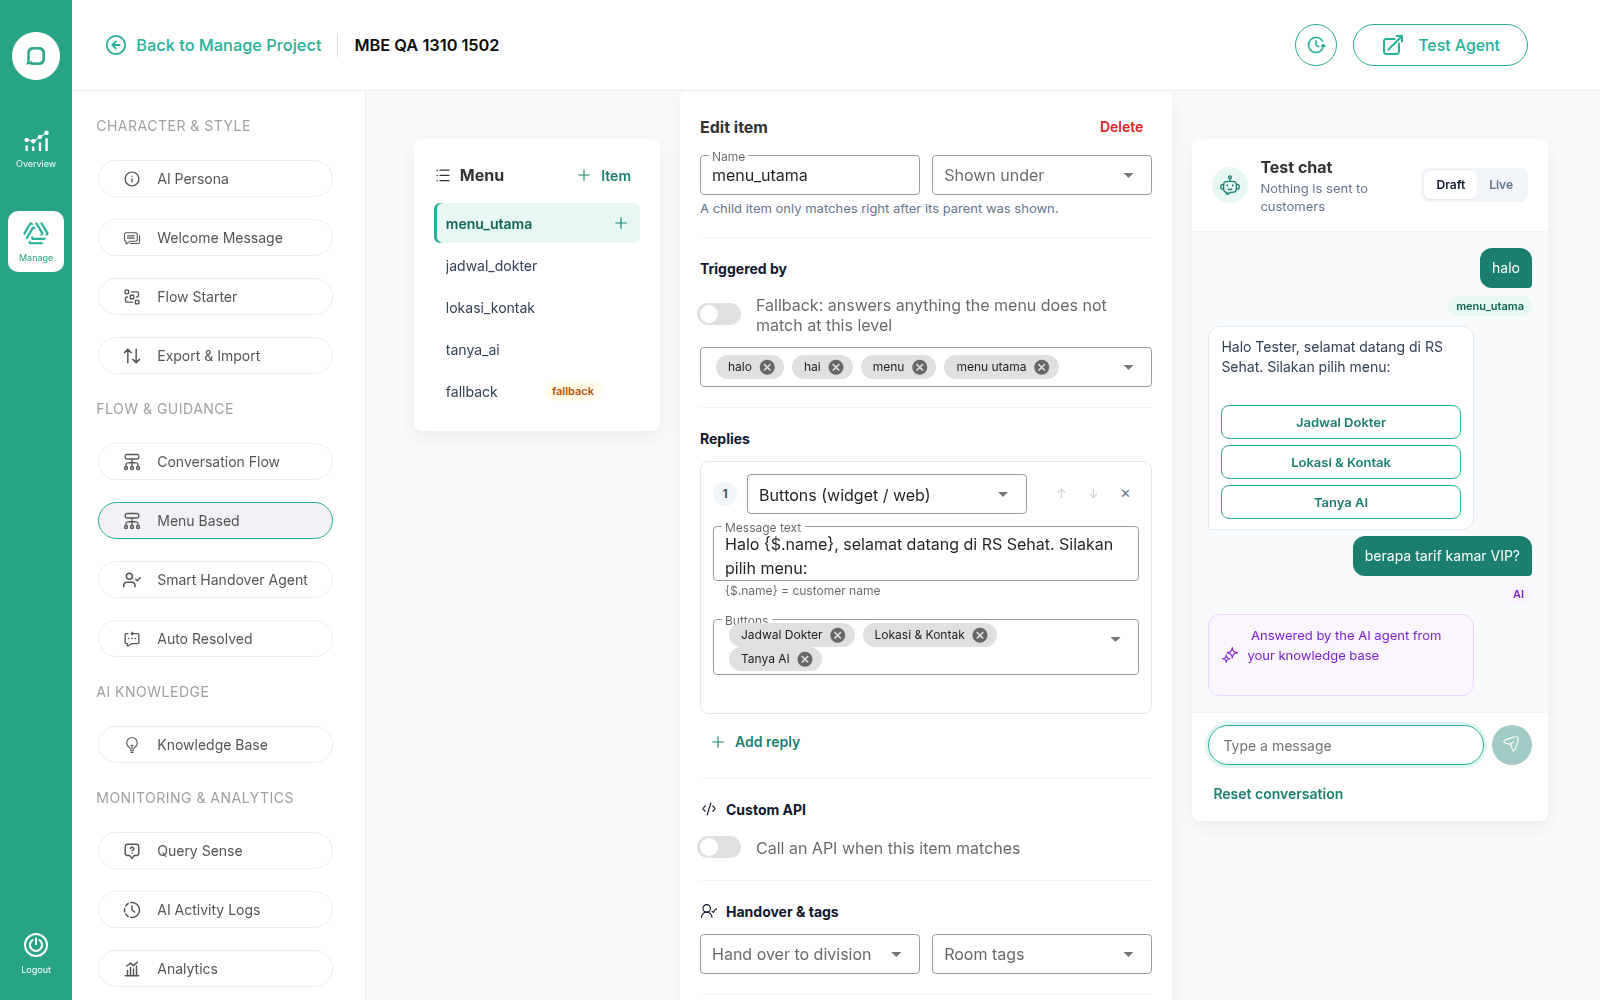
Test Your Menu
Use the Test chat panel on the right side of the editor to chat with your menu before customers see it.
Choose Draft or Live to test the draft or the published version.
Buttons in the bot's replies can be clicked, like in the widget.
Each reply shows which item matched. With Menu + AI, answers from the AI Agent are marked Answered by the AI agent from your knowledge base.
Click Reset conversation to start again from the beginning.
Nothing is sent to customers, and Custom API endpoints are not called.
Publish and Roll Back
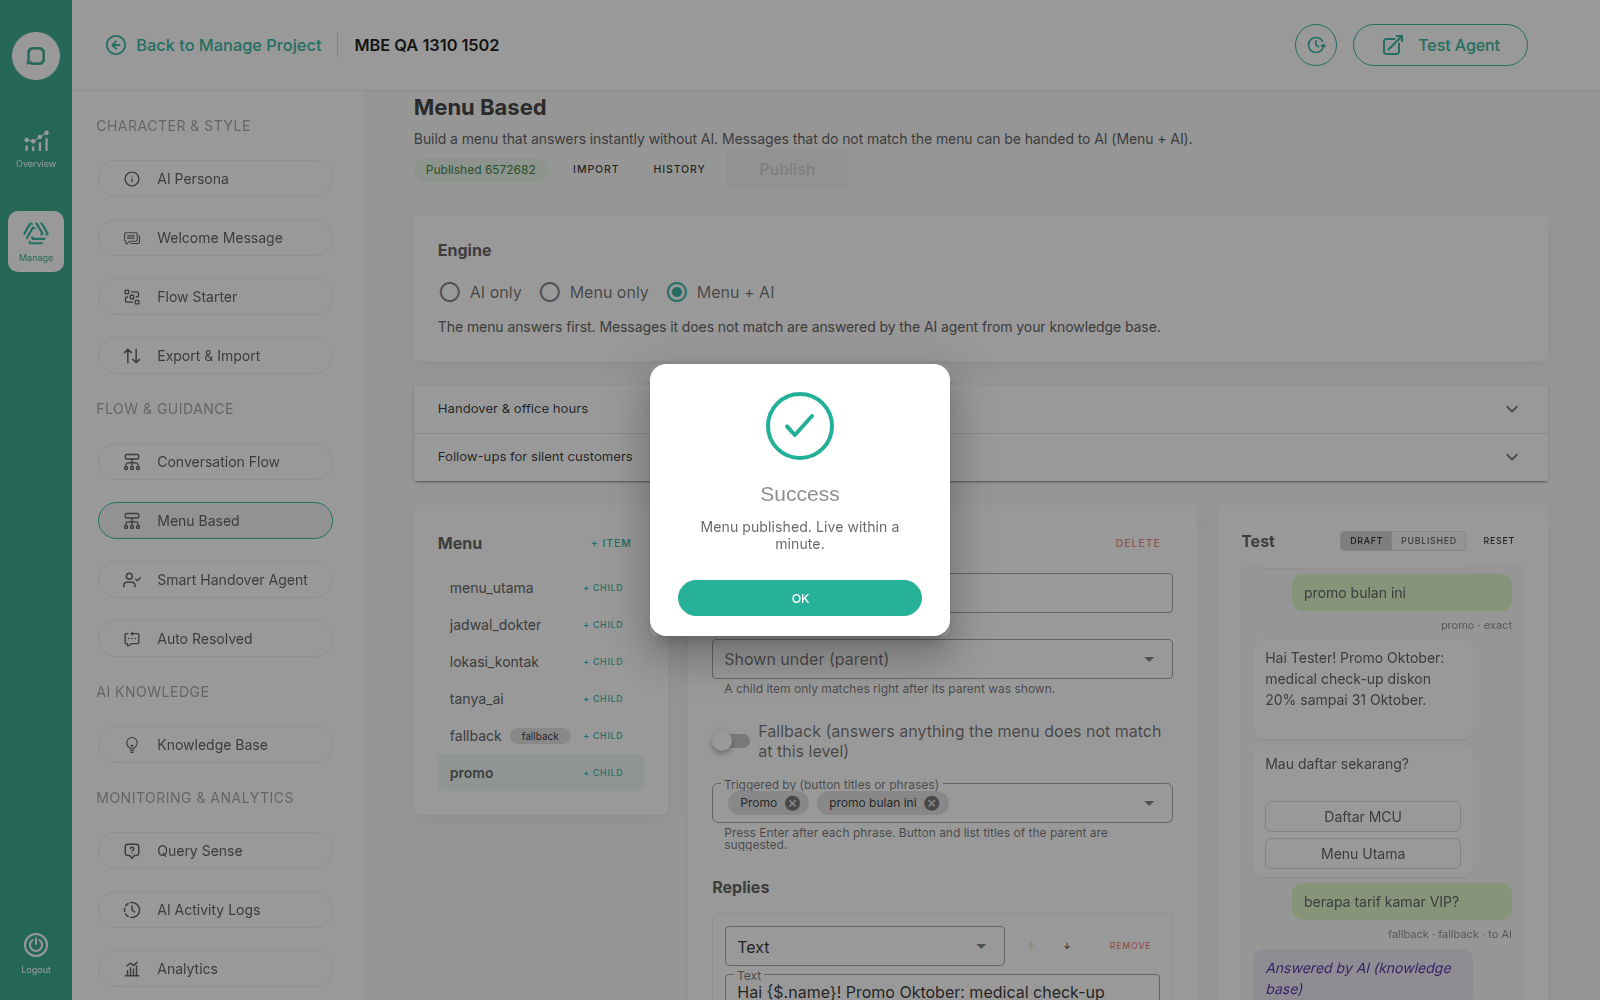
Click Publish. You can add a version note, for example "Add promo menu". The new version is live within about 1 minute.
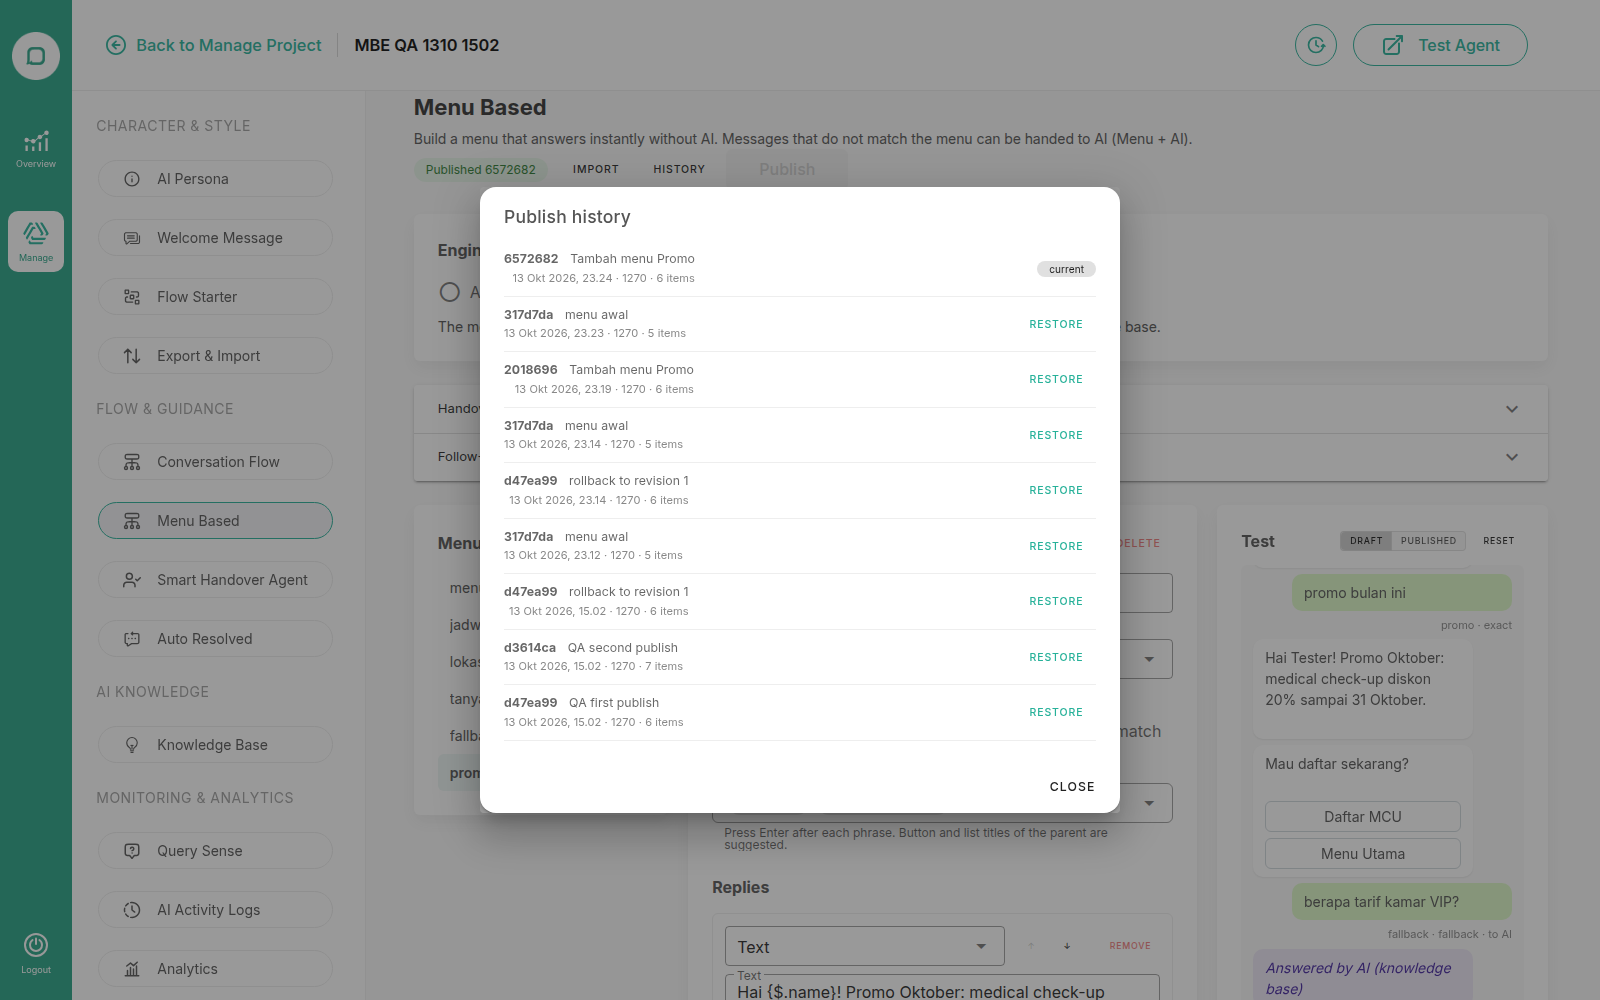
Click History to see every published version, with its note, time, and number of items.
Click Restore on a version to roll back to it, or to discard draft changes you no longer want.
The status badge at the top of the editor shows Live with the version code of the published menu, and Unpublished changes when the draft has changes that are not live yet.
Bot Settings
These settings apply to the whole menu. After changing them, click Save settings, then Publish.
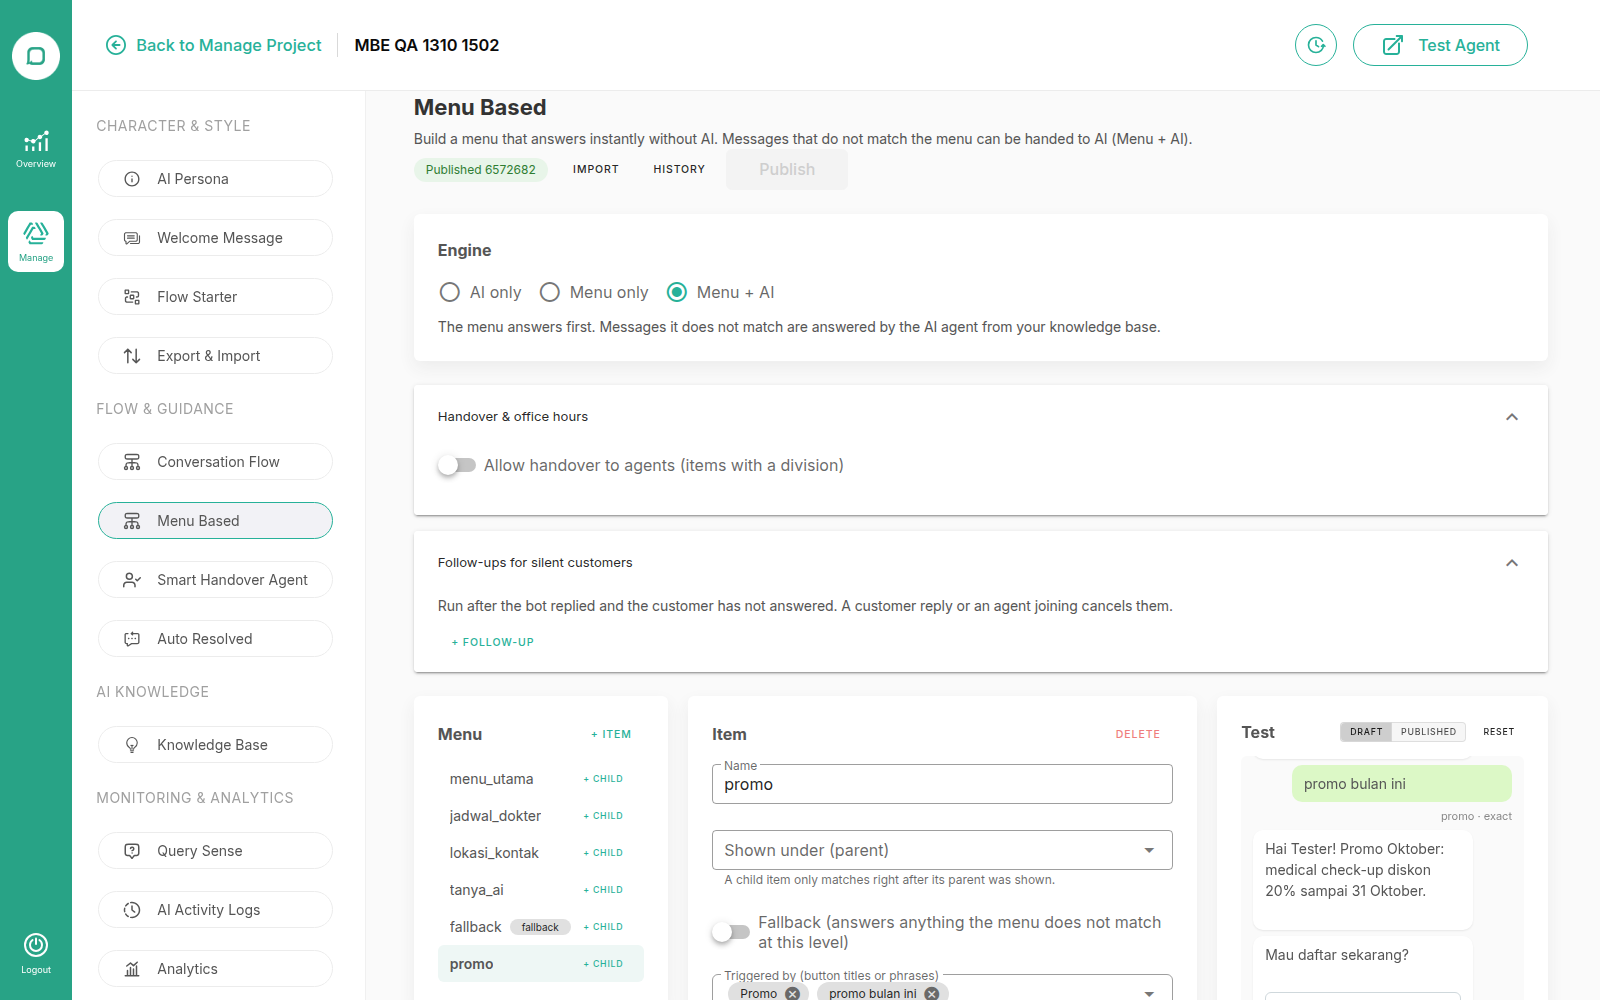
Handover and Office Hours
Turn on Allow handover to agents so that items with a division can hand conversations over to agents. Then set:
No agent online message: sent when the bot hands a conversation over but no agent is online.
Outside office hours message: sent when a handover happens outside office hours. Office hours are set in Omnichannel at Settings → General → Office Hours.
Hand over when office hours start: conversations that asked for an agent outside office hours are handed over automatically when office hours start.
Follow-ups for Silent Customers
Follow-ups run after the bot replied and the customer has not answered. Click + Follow-up to add one: you can send a message after a period of silence, and resolve the room if the customer still does not reply. A customer reply or an agent joining the room cancels the follow-ups.
Import from IBE or Dialogflow
If your menu bot already exists on IBE or Dialogflow, you do not have to rebuild it by hand.
Click Import in the editor.
Upload one of these files:
A
.jsonbundle exported from IBE or from another Menu Based project.A
.zipagent export from Dialogflow.
The imported items go to the draft. Check them, test them in Test chat, then click Publish.
Move a Channel to Menu Based
To move an existing menu bot to Menu Based:
Create a new AgentLabs project, the same way you create an AI Agent project. The knowledge base and prompt can stay empty when you use Menu only.
Open Menu Based, import your existing bot (see Import from IBE or Dialogflow), publish it, and set the engine to Menu only or Menu + AI.
Test the published version in Test chat.
Route the channel to the new project through channel routing.
Test again on the real channel, including handovers, Custom API calls, office hours, and follow-ups.
From then on, edit the menu only in the Menu Based editor. Changes made in the old IBE or Dialogflow bot no longer affect this channel. To roll back, route the channel back to the old project.
Limitations
WhatsApp buttons and WhatsApp lists can be sent only to WhatsApp rooms. For the Qiscus Widget, use Buttons (widget / web).
Test chat does not call Custom API endpoints, so test Custom API items on a real channel before going live.