The Dialogflow integration will be deprecated on October 2, 2025, but existing projects whose services are already running will remain operational.
Robolabs is a platform integrator between bot engines and Qiscus Omnichannel Chat. To create a chatbot on Robolabs, it is necessary to integrate it with a bot engine in a Dialogflow project. Previously, users had to manually set up integration, obtain a service account key file in JSON format, and go through complex steps. To simplify this process, Robolabs now provides an easier integration method via Google OAuth.
There are two ways to integrate Dialogflow with Robolabs:
Creating a New GCP Project - Automatically create a new Google Cloud Platform (GCP) project and integrate it with Robolabs using Google OAuth.
Using an Existing GCP Project - Use an already existing GCP project and manually integrate it with Robolabs by providing necessary credentials.
Prerequisites:
Access to GCP: Ensure you have access to Google Cloud Platform.
Accept Google Cloud Platform Terms of Service (ToS).
Google Account: Required for authentication and integration.
1. Creating a New GCP Project
Get Acces to GCP
If you have never created a project and entered the console in Dialogflow you can follow this steps:
Visit Google Cloud Console to gain access to your GCP
Accept the Terms of Service if you haven't done so.
The chatbot creation process in Robolabs will fail if you have never accepted ToS in GCP console before. Make sure you have granted GCP access through the Google Console before you integrate into Robolabs.
Add New Project at Robolabs
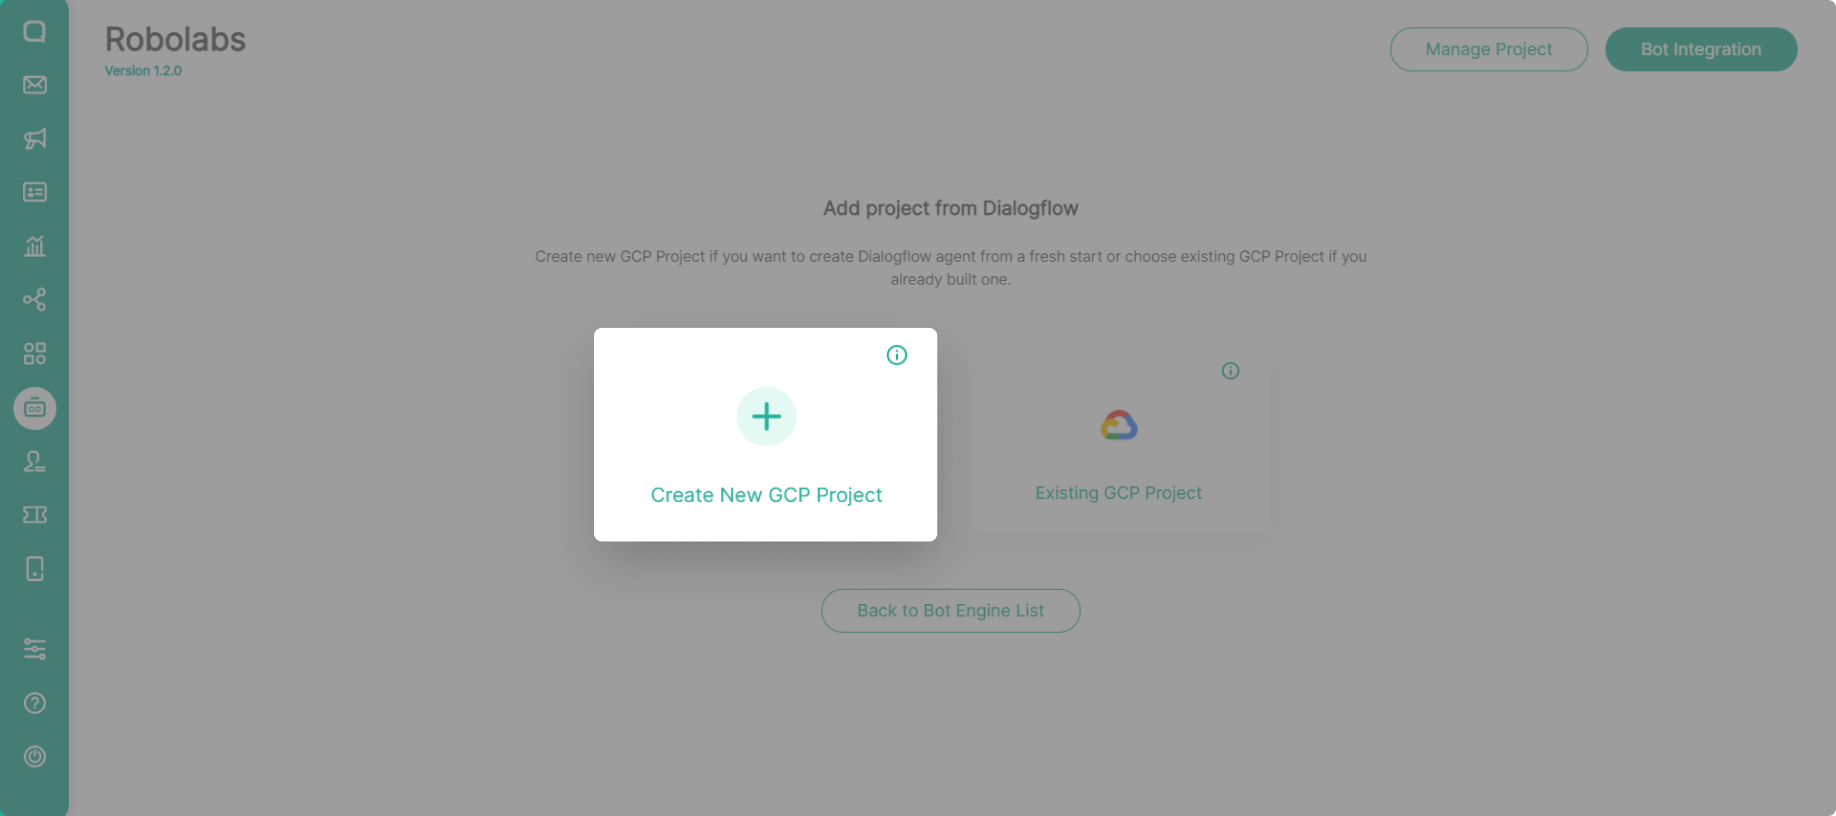
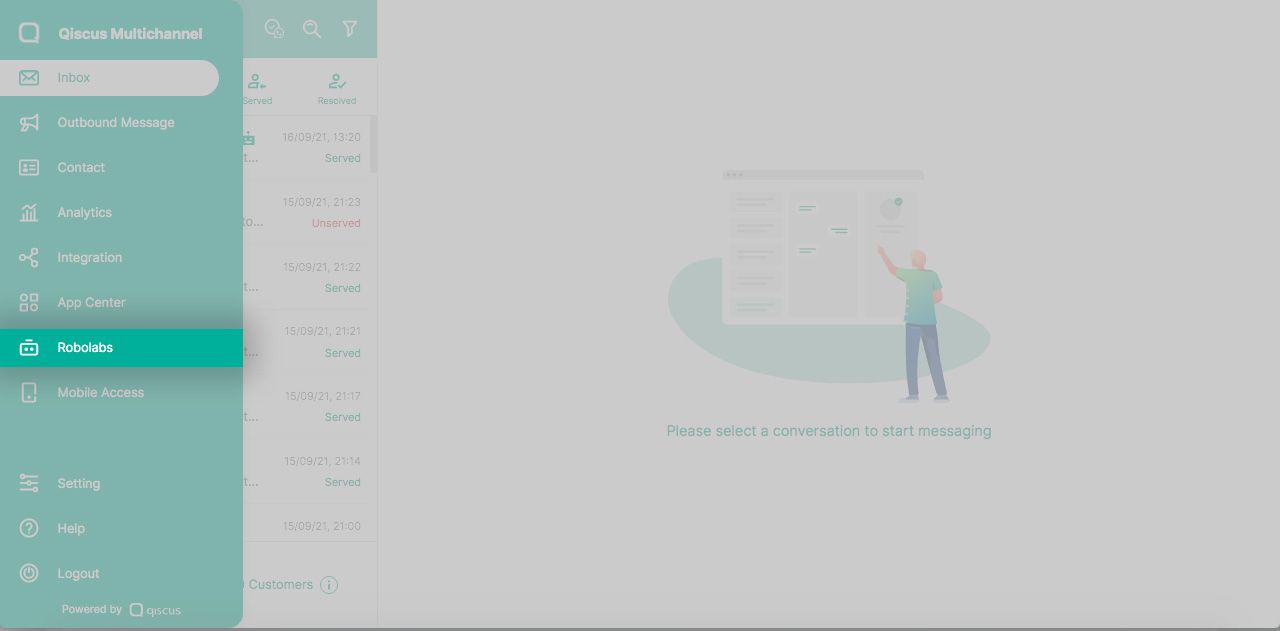
Sign in to Qiscus Omnichannel Chat, navigate to Robolabs from the sidebar.
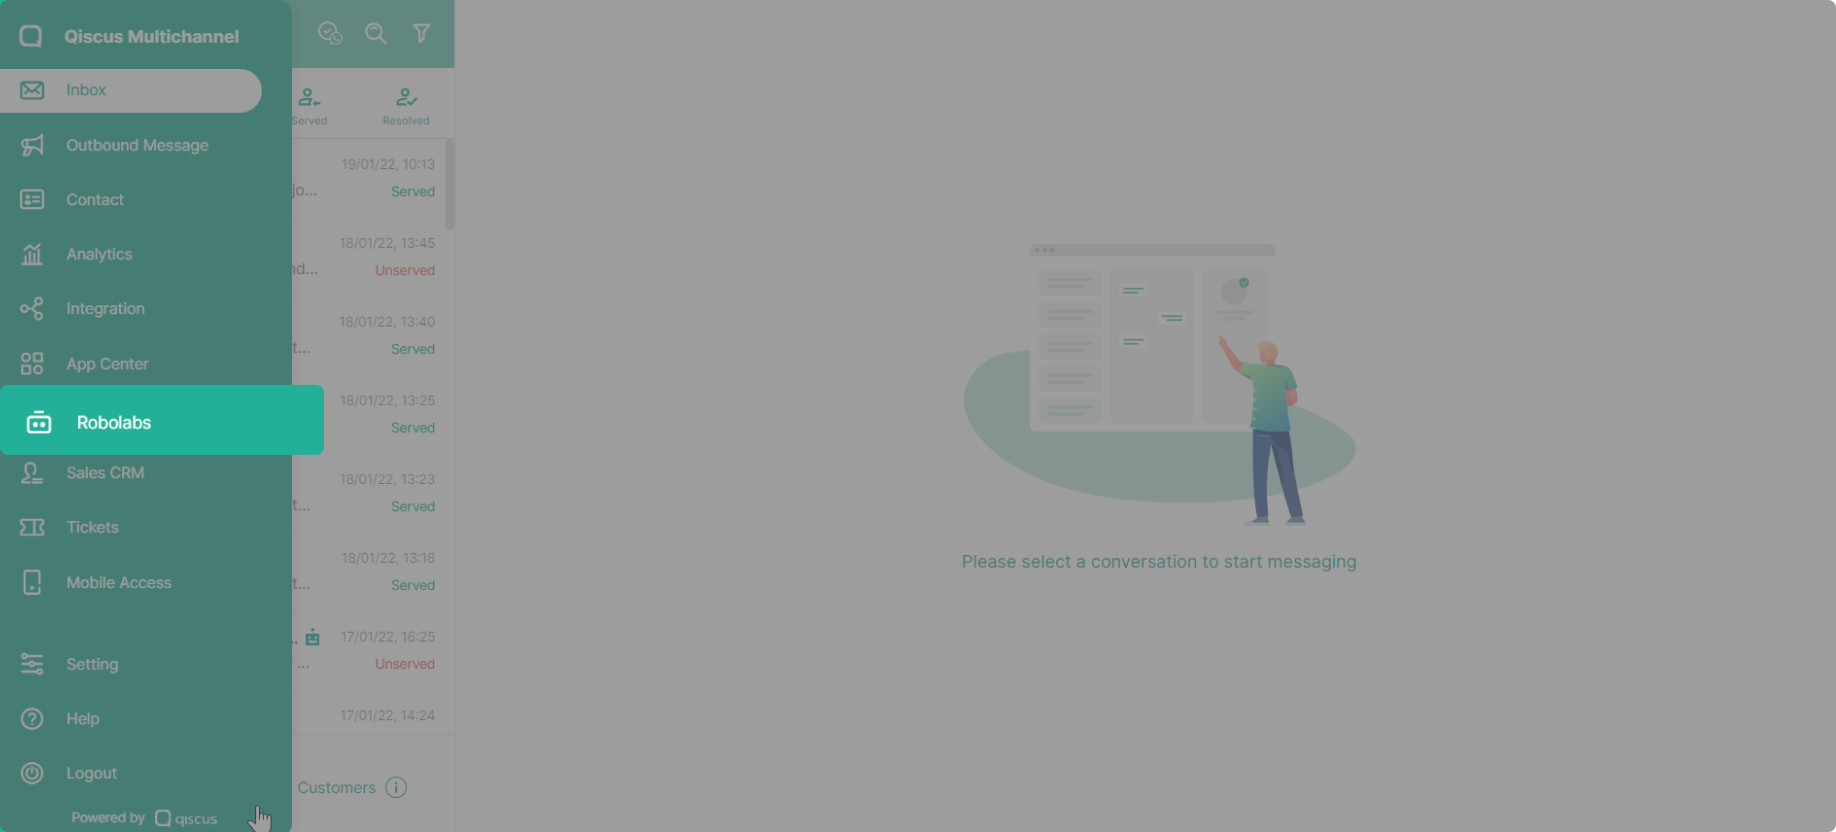
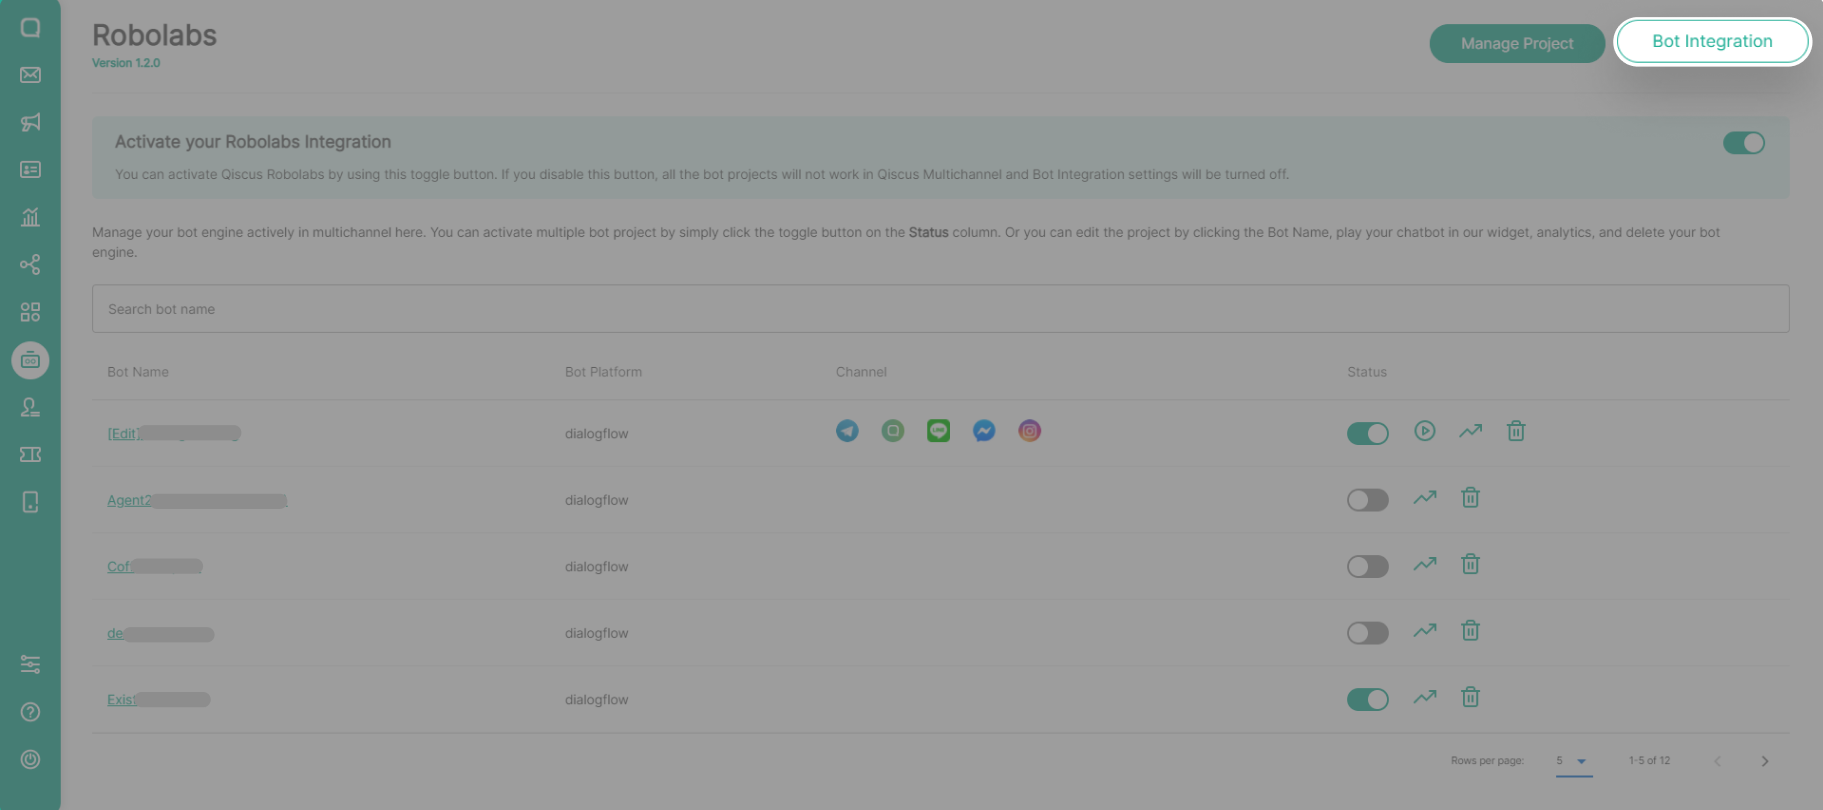
Click the "Bot Integration" button at the top-right corner.
Select "Add Project from Dialogflow".
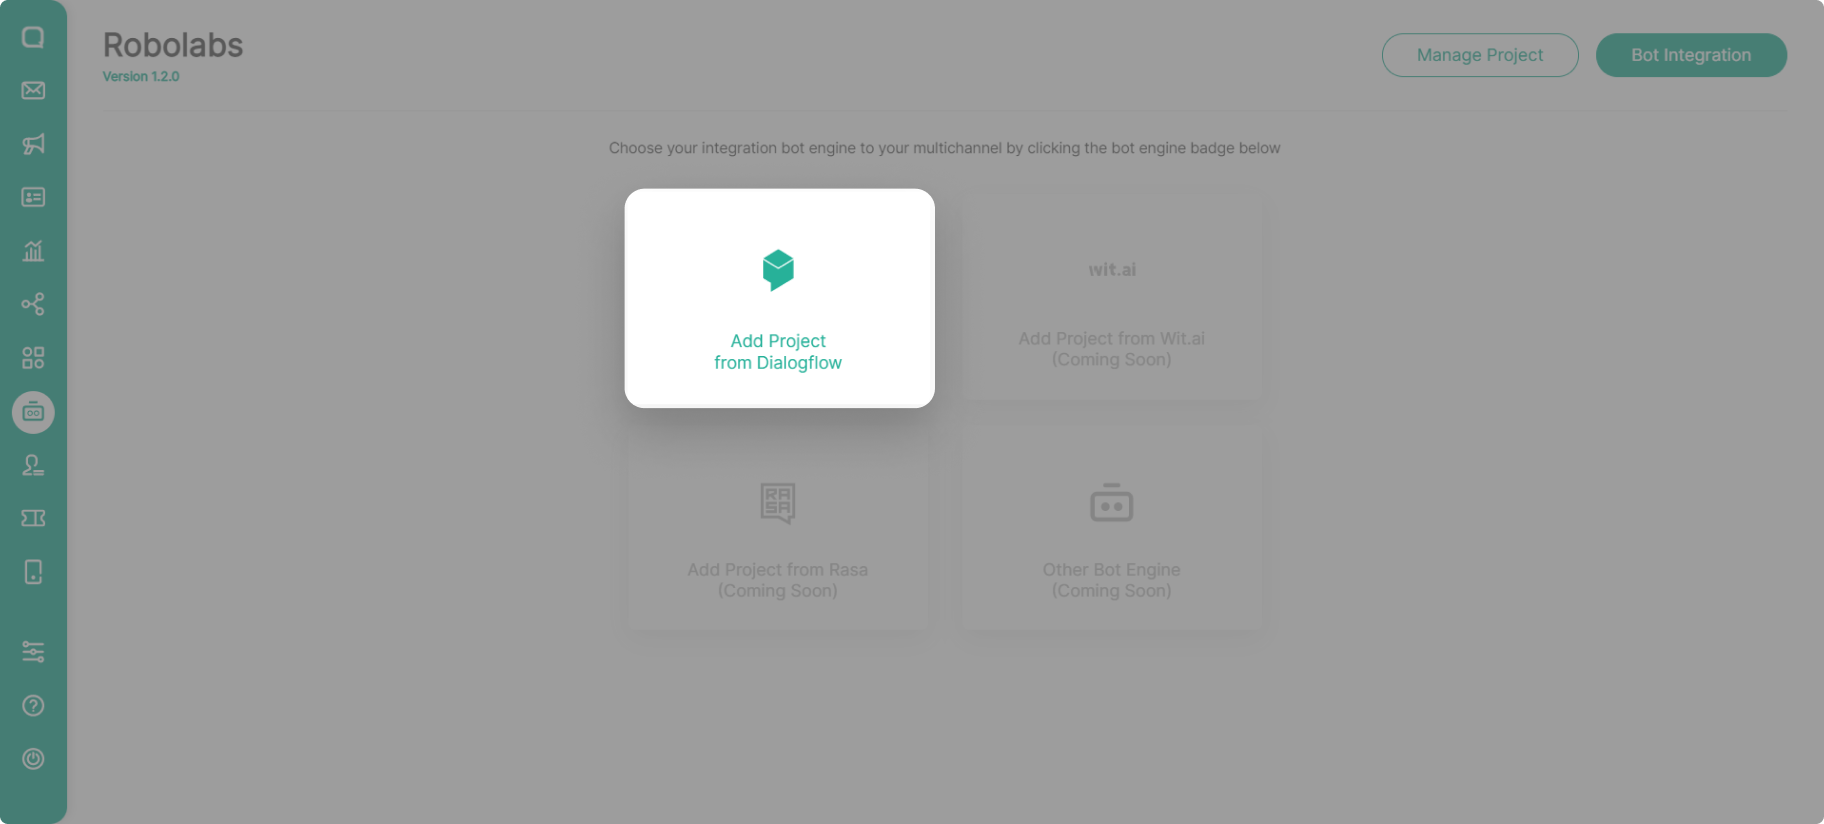
Choose Create New GCP Project to integrate and create a new project in Dialogflow. You don't need to create a project in Dialogflow first because the process is done simultaneously.
Select the Google Account that will be used to create bot engines and projects in Dialogflow by clicking Sign In with Google.
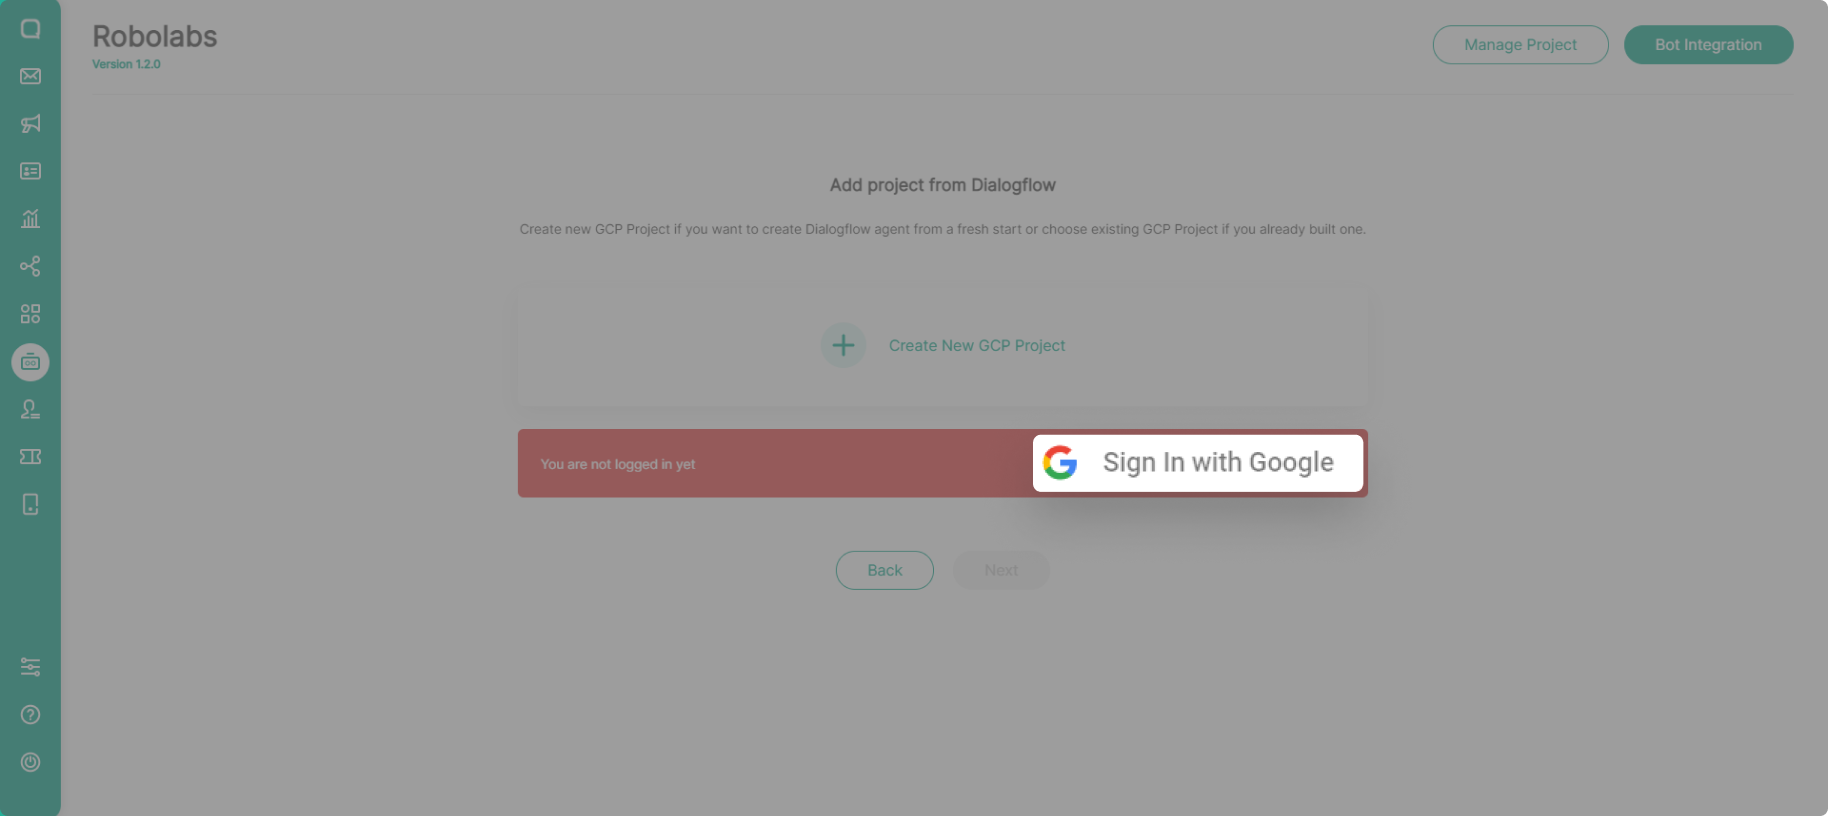
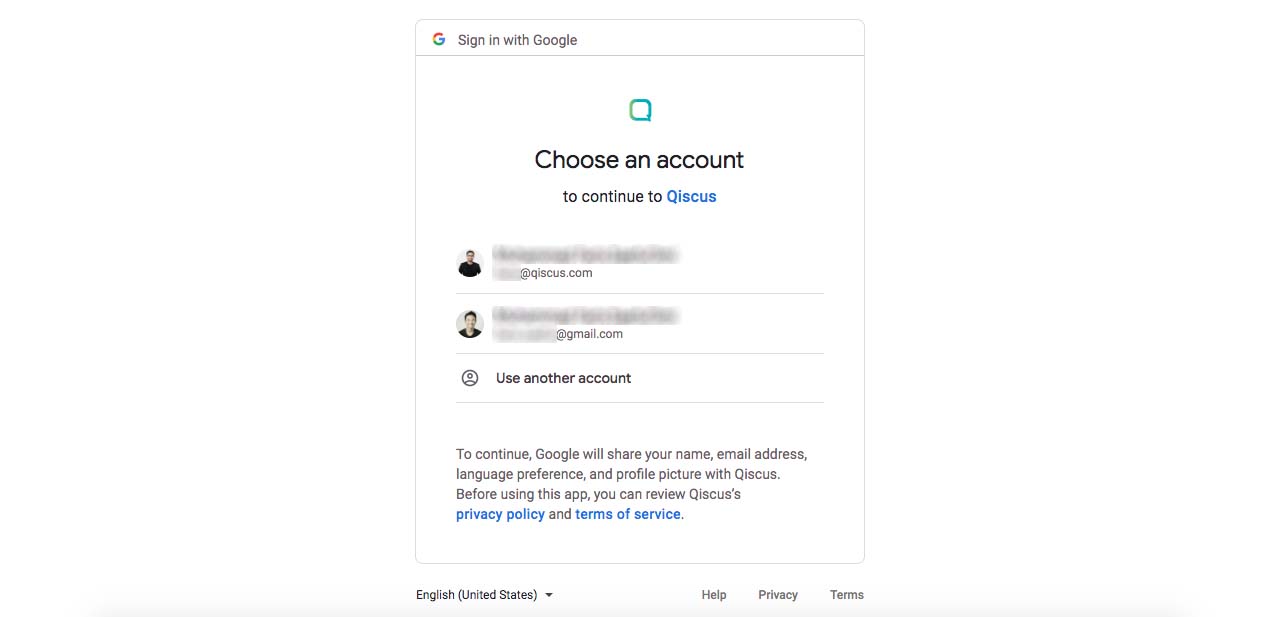
Make sure the previously selected email already appears on the integration page. If you want to change the email that will be used, you can Sign Out and then Sign In again. If you are sure of the email to be used, click Next to continue with the integration process.
If you have never created a project and entered your Dialogflow console, go to the Google Console first to accept Term of Service before you integrate into Robolabs for the first time.

Integration Process
The integration process is divided into 4 stages:
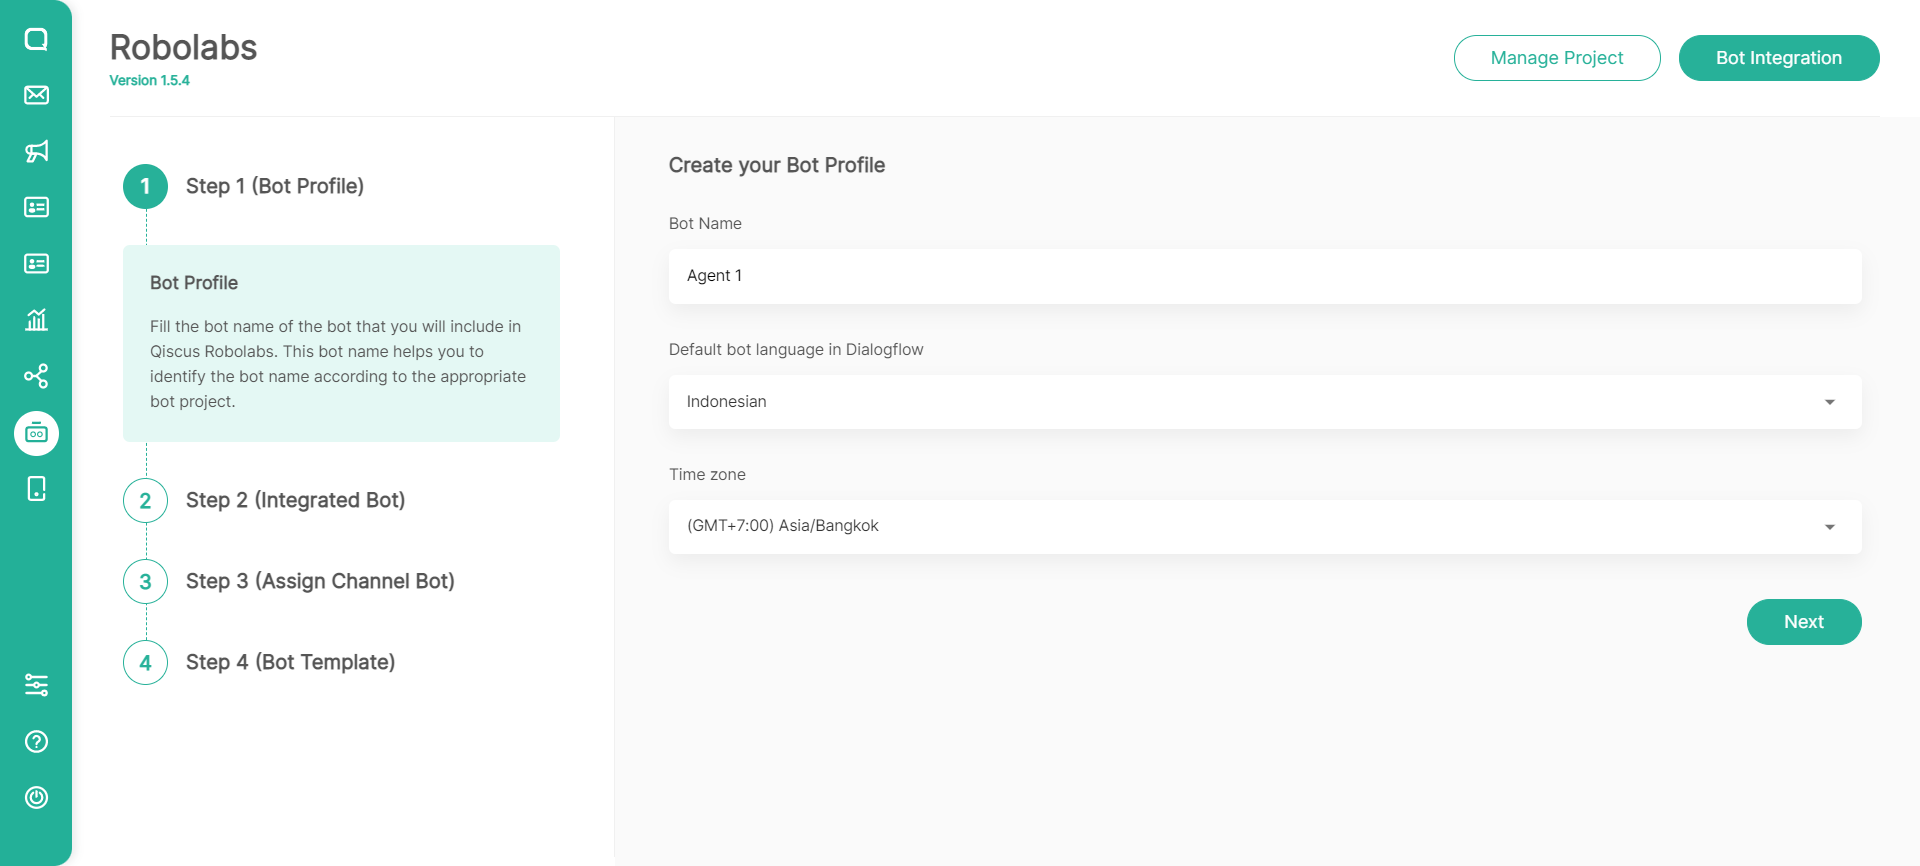
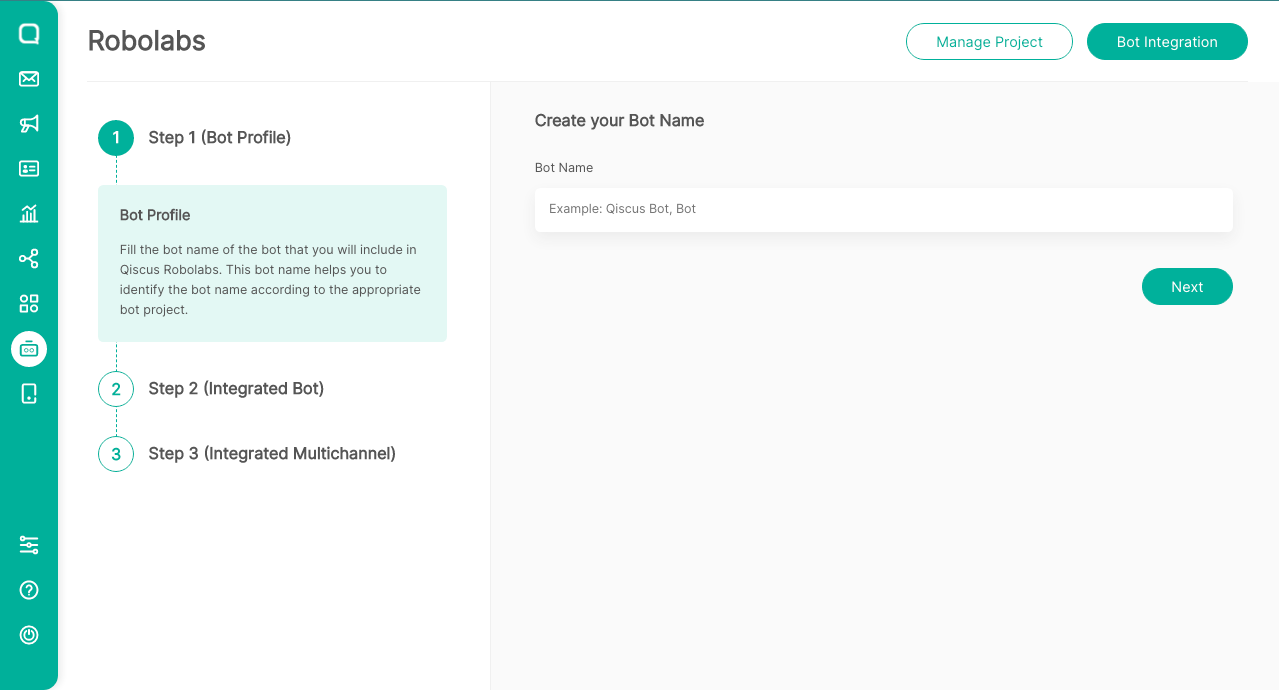
Step 1: Configure Bot Profile
** Bot Name
- is the name of the bot that will be created. The name created will also be the name of the Dialogflow project. For the record, the input name must contain between 4 and 25 characters, both alphabetical and numeric.
Default bot language in Dialogflow by default is Indonesian and can be changed as needed.
Time zone by default is Asia/Bangkok (GMT+7:00) and can be changed as needed.
**
**
Step 2: Integrate Bot with Dialogflow
Integrated bot step is the process of integrating the bot engine in Robolabs. There is no need to upload the JSON file from the project to Dialogflow during this process. At the end of the integration process, the service account key will be generated and downloaded automatically. To proceed to the next integration stage, all you have to do is click the Next button.

**
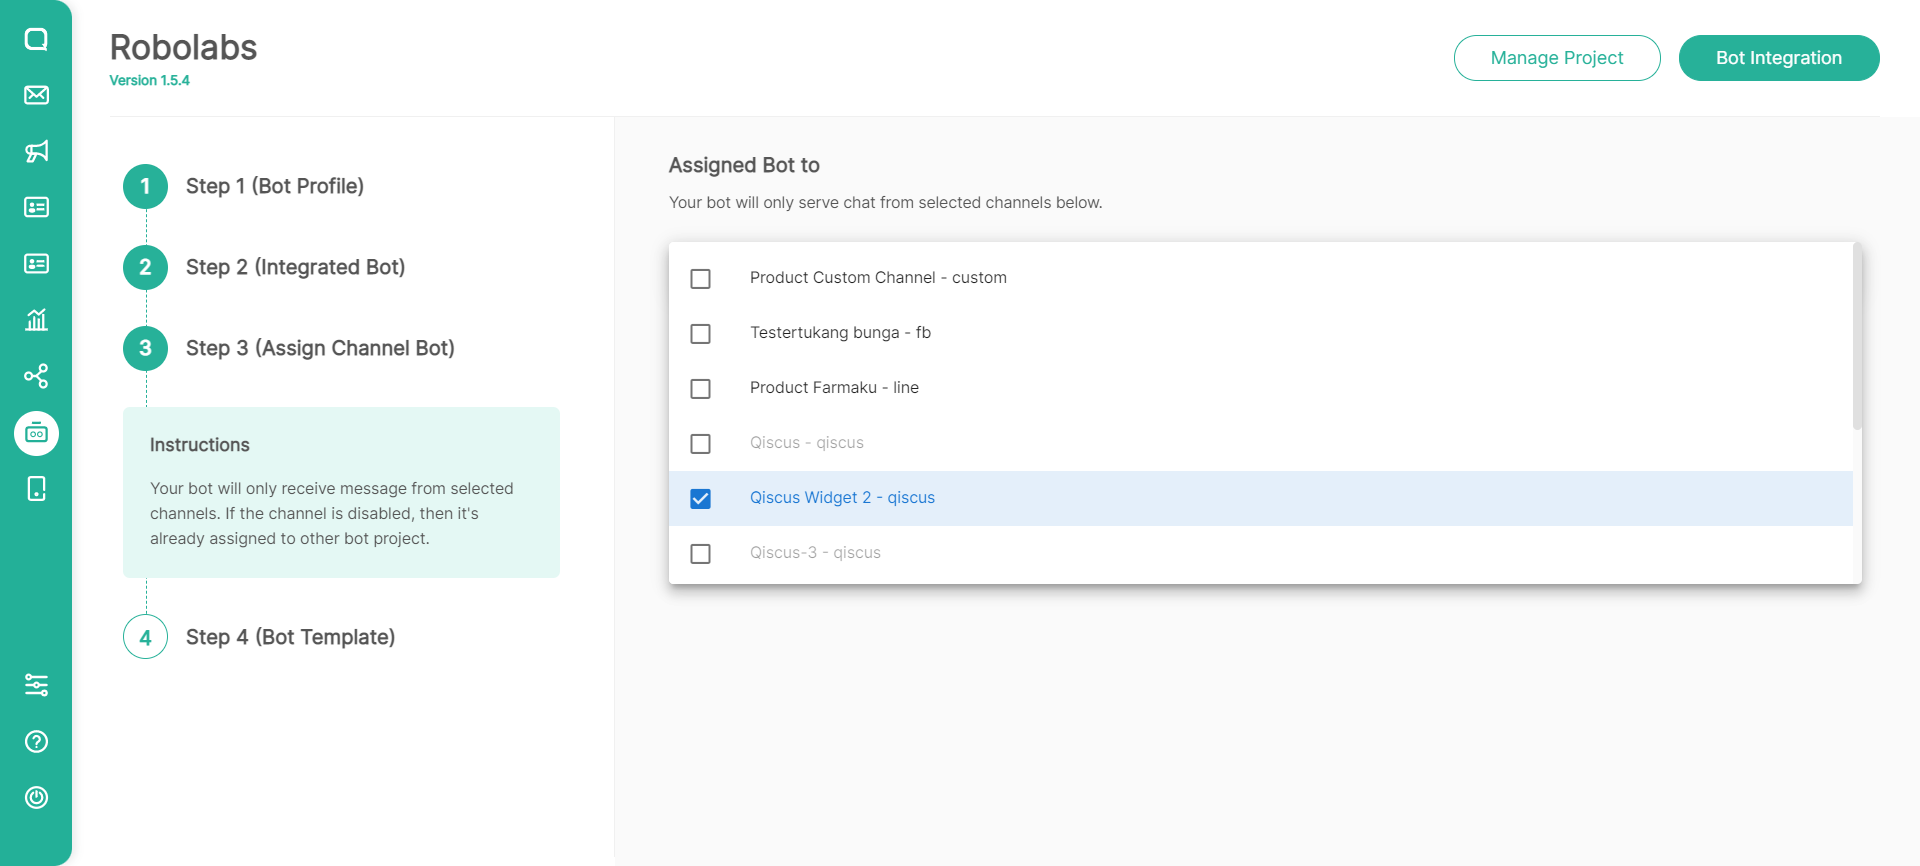
Step 3: Assign Channel Bot
** The third stage is the Assign Channel Bot _process, which allows you to specify which channels will be linked to the bot you created. There are no restrictions on the number of channels that can be used. You can select one or all of the channels that have been created, as long as the channel is not currently being used by other bots. What must be considered is which channels can be chosen. The conditions are as follows:
Grey indicates that the channel has already been used by another bot and the channel cannot be selected.
Black indicates that the channel is still not being used by other bots, and it can be selected.
**
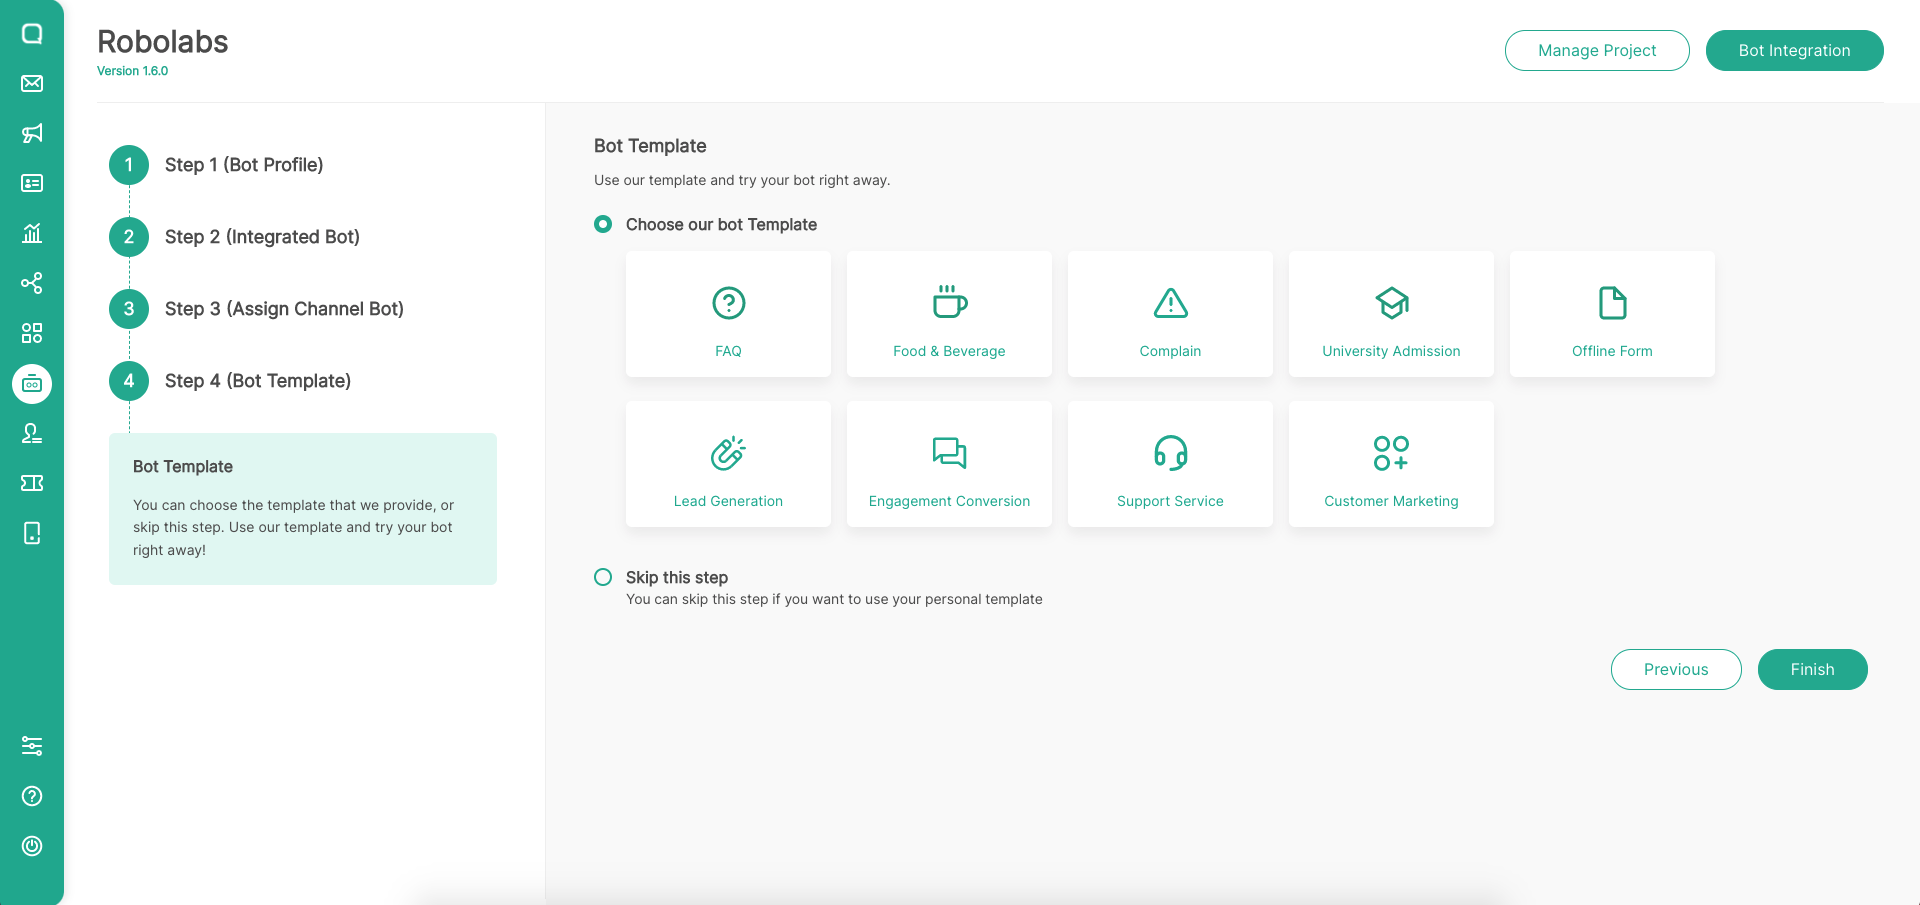
Step 4: Select Bot Template (Optional)
** Robolabs provides ready-to-use bot templates that you can use. You can choose by selecting a bot template, then the template will be implemented in your bot project. You can also skip this step.
For now, we have 9 bot templates that you can use according to your business needs.
Finalizing Process
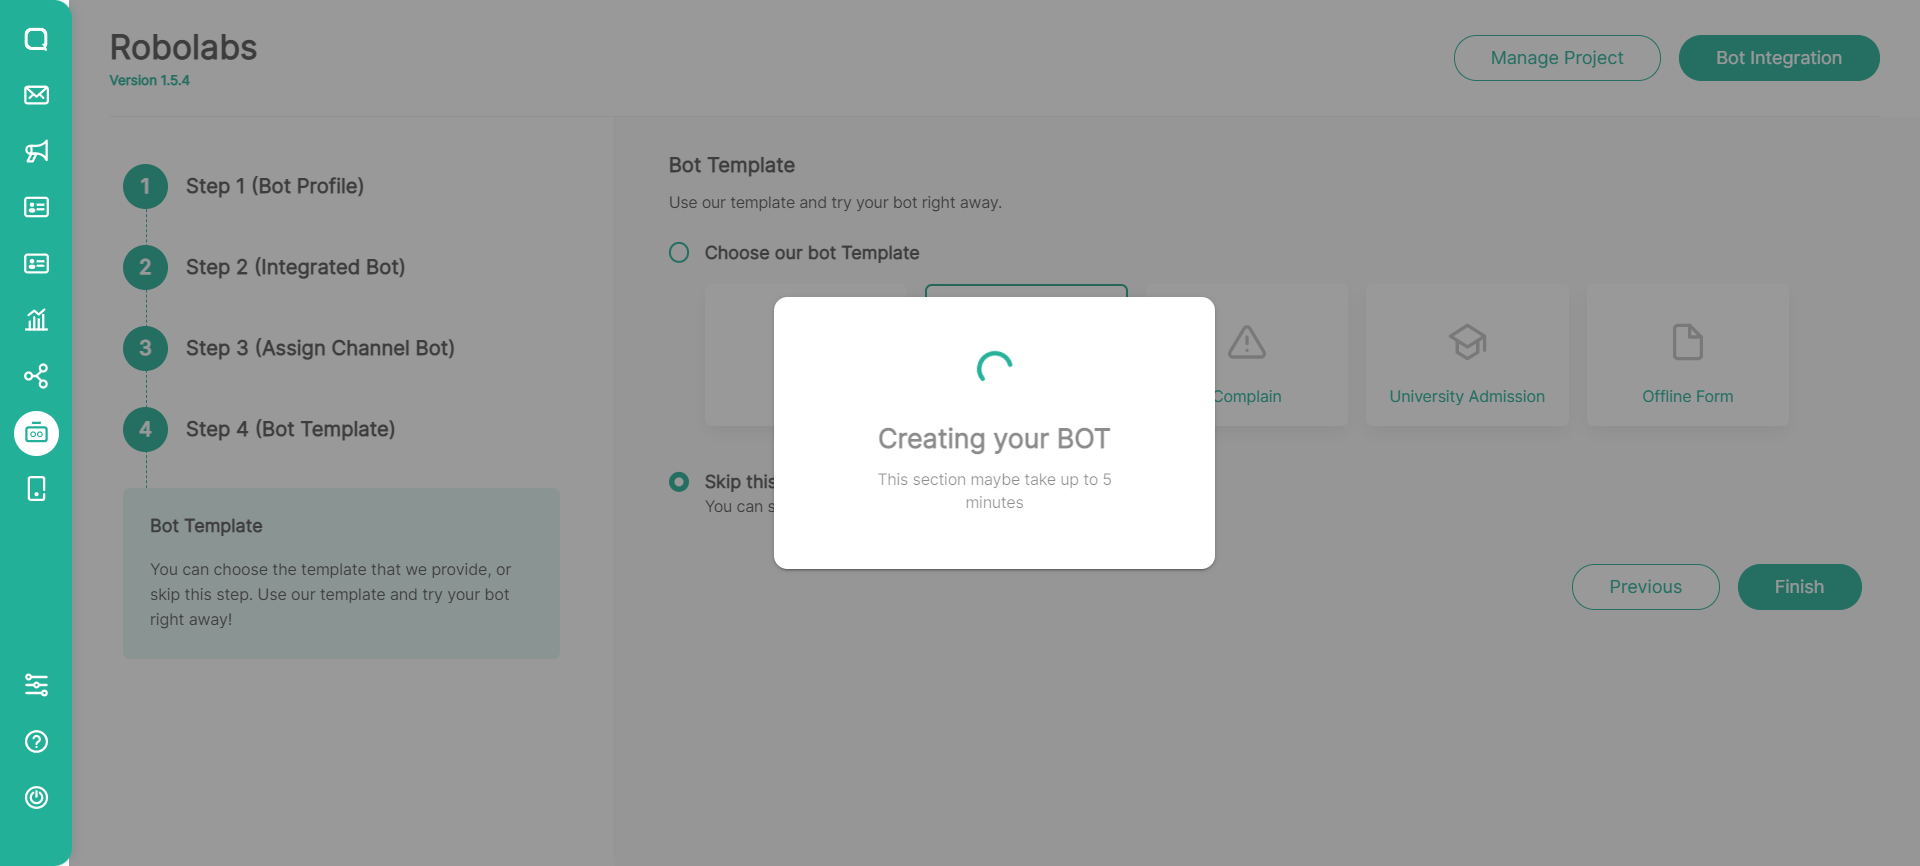
In the process of making this project, it will take about 3-5 minutes. Make sure you don't reload or leave this page.
Then the following pop-up will appear, indicating that the integration process was successful. For the record, this integration process is time-consuming. As a result, please remain on the integration page until the integration process is complete.
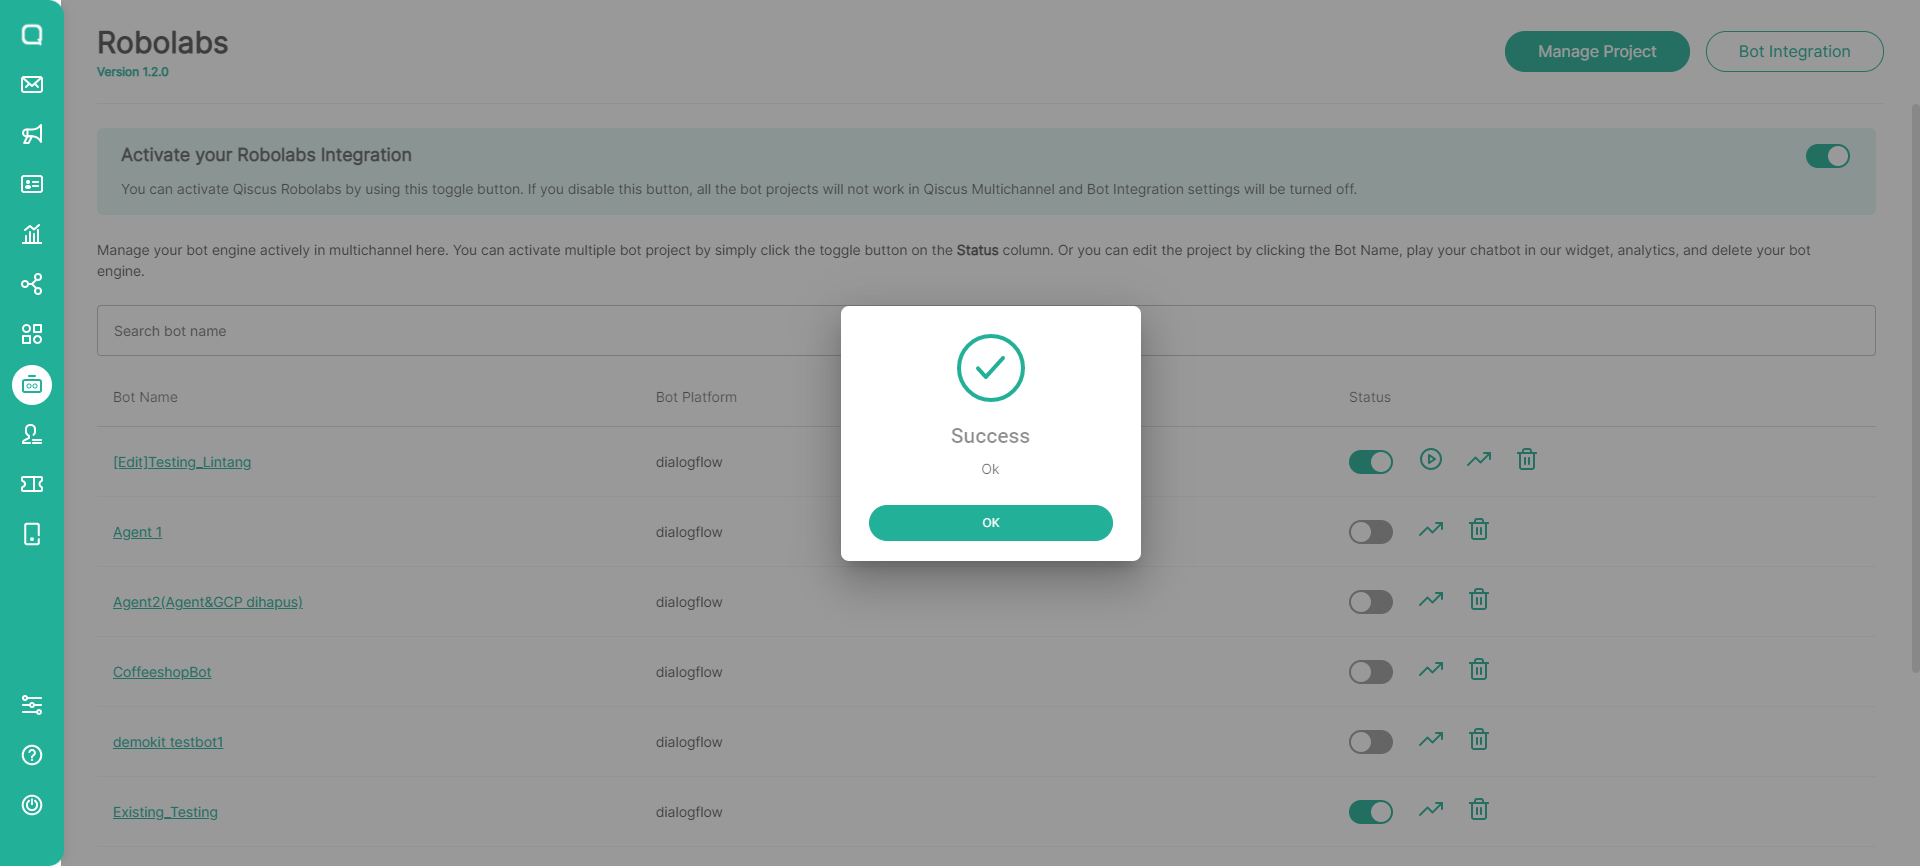
The bot engine that has been created will be displayed on the Manage Project page, allowing the process of creating the bot engine's flow to be continued in greater detail. For instance, by activating a bot engine, creating a flow in the Bot Template or Intent, creating a delegate flow in the Handover Agent menu, configuring the Auto Resolve feature, or performing other Robolabs activities.
2. Using an Existing GCP Project
Create a Bot Project in Robolabs
To create a bot project in Robolabs, you will need to integrate the bot in Robolabs with the Dialogflow project. Dialogflow is a bot engine owned by Google. Users can create chatbots according to their business’ needs, starting from creating agents, intents (representing a mapping between what the user says and the action the user must take), and training phrases. You can follow this steps to create a bot project in Robolabs using Existing GCP Project:
Go to Robolabs on the sidebar in Qiscus Omnichannel Chat.
Click "Bot Integration" and select "Add Project from Dialogflow".

After selecting the integration with Dialogflow, you will set up the bot to be used. The steps are as follows:
Step 1: Configure Bot Profile
Write the name of the bot to identify the project. Enter the name of the bot in the Bot Name. column, then select Next
Step 2: Integrate Bot
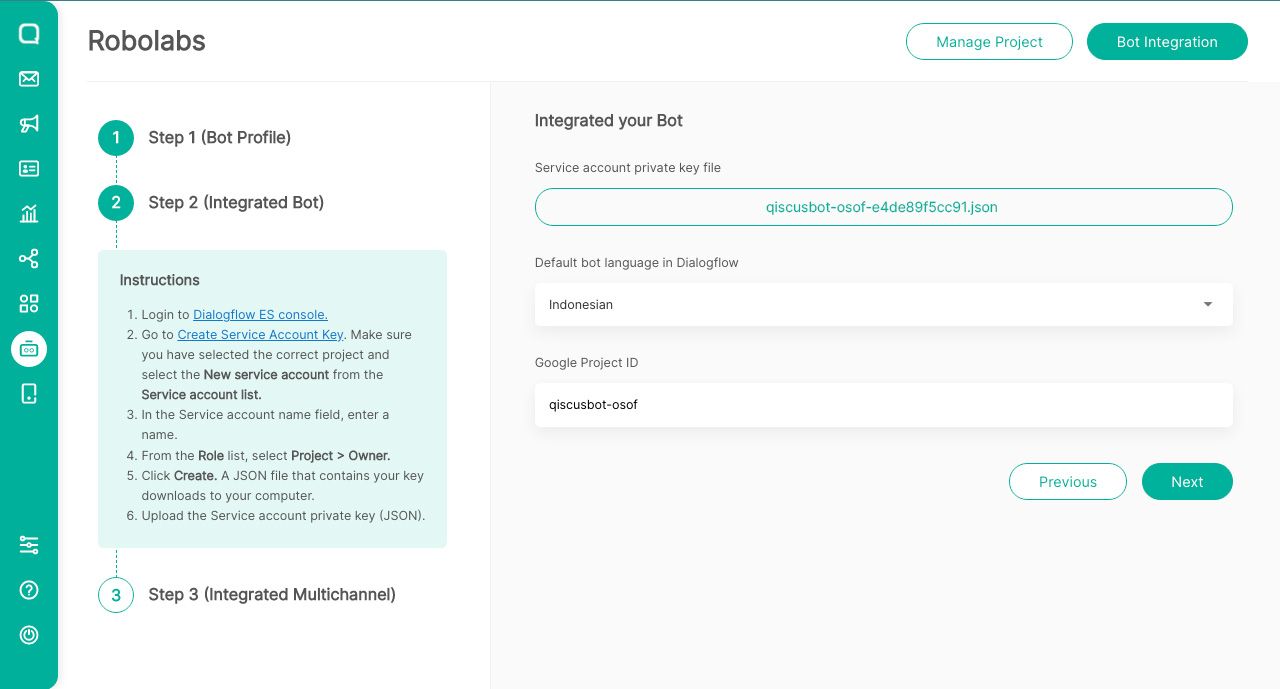
Here, you will have to integrate with Dialogflow according to the instructions on the page. You are also expected to include some credential items contained in Dialogflow to be included in Robolabs, including:
Service account private key, in the form of .json file which you must upload here
Default bot language, the language used to correspond with the bot project in Dialogflow
Google Project ID according to the bot project in Dialogflow
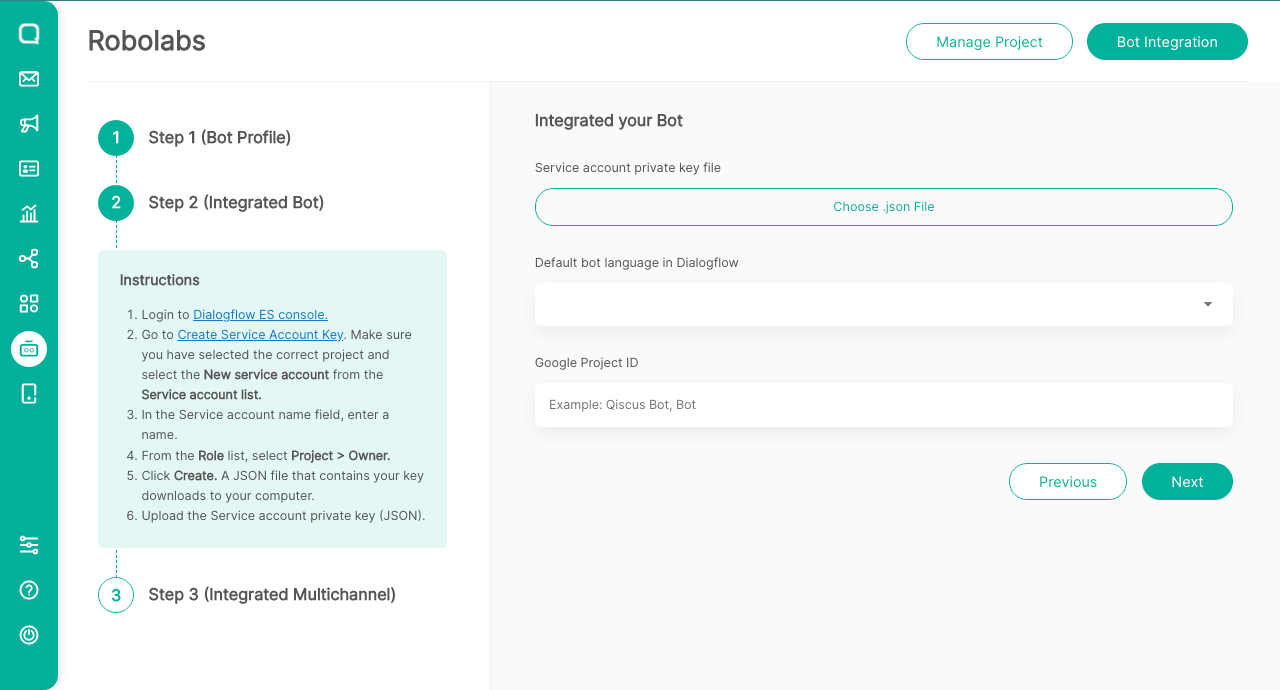
To source for these items, you must go to the Dialogflow ES page via the following page.
Integrate Existing GCP Project with Robolabs
Step 1: Get Google Project ID
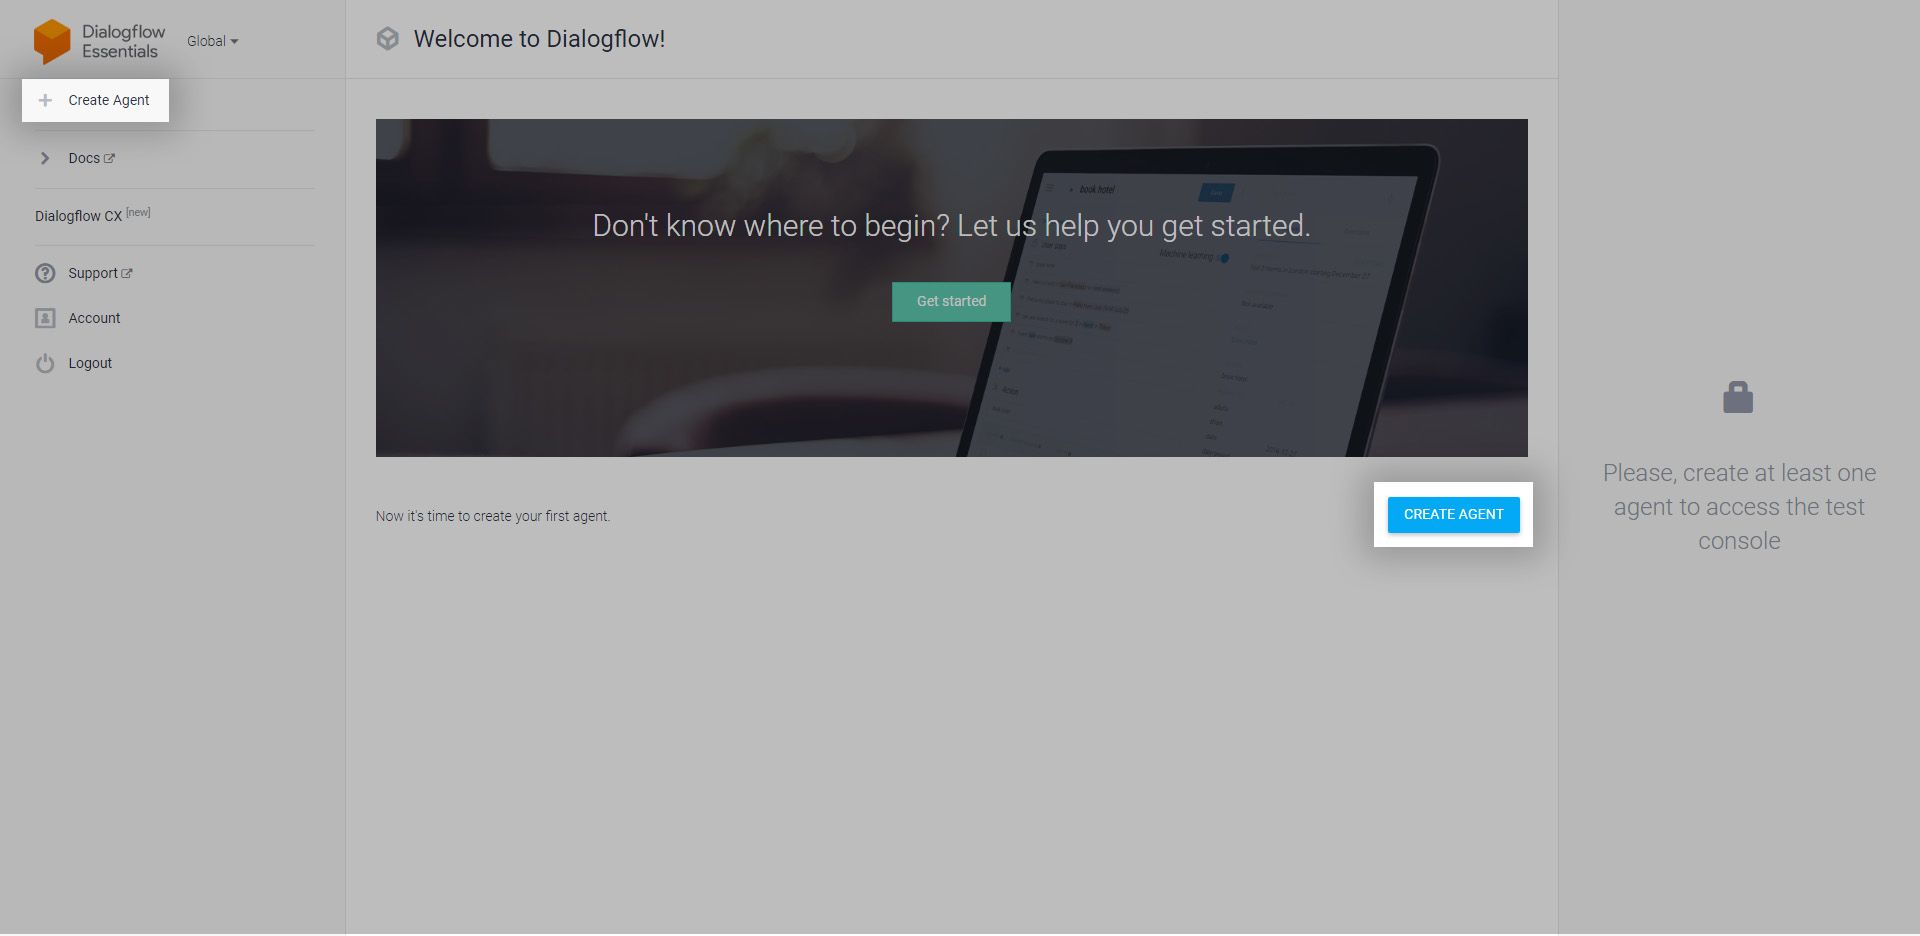
Visit Dialogflow Console, the click Sign-in with Google.

After entering your Dialogflow ES, the first step is to create a new agent. You can do this by clicking Create Agent on the page.
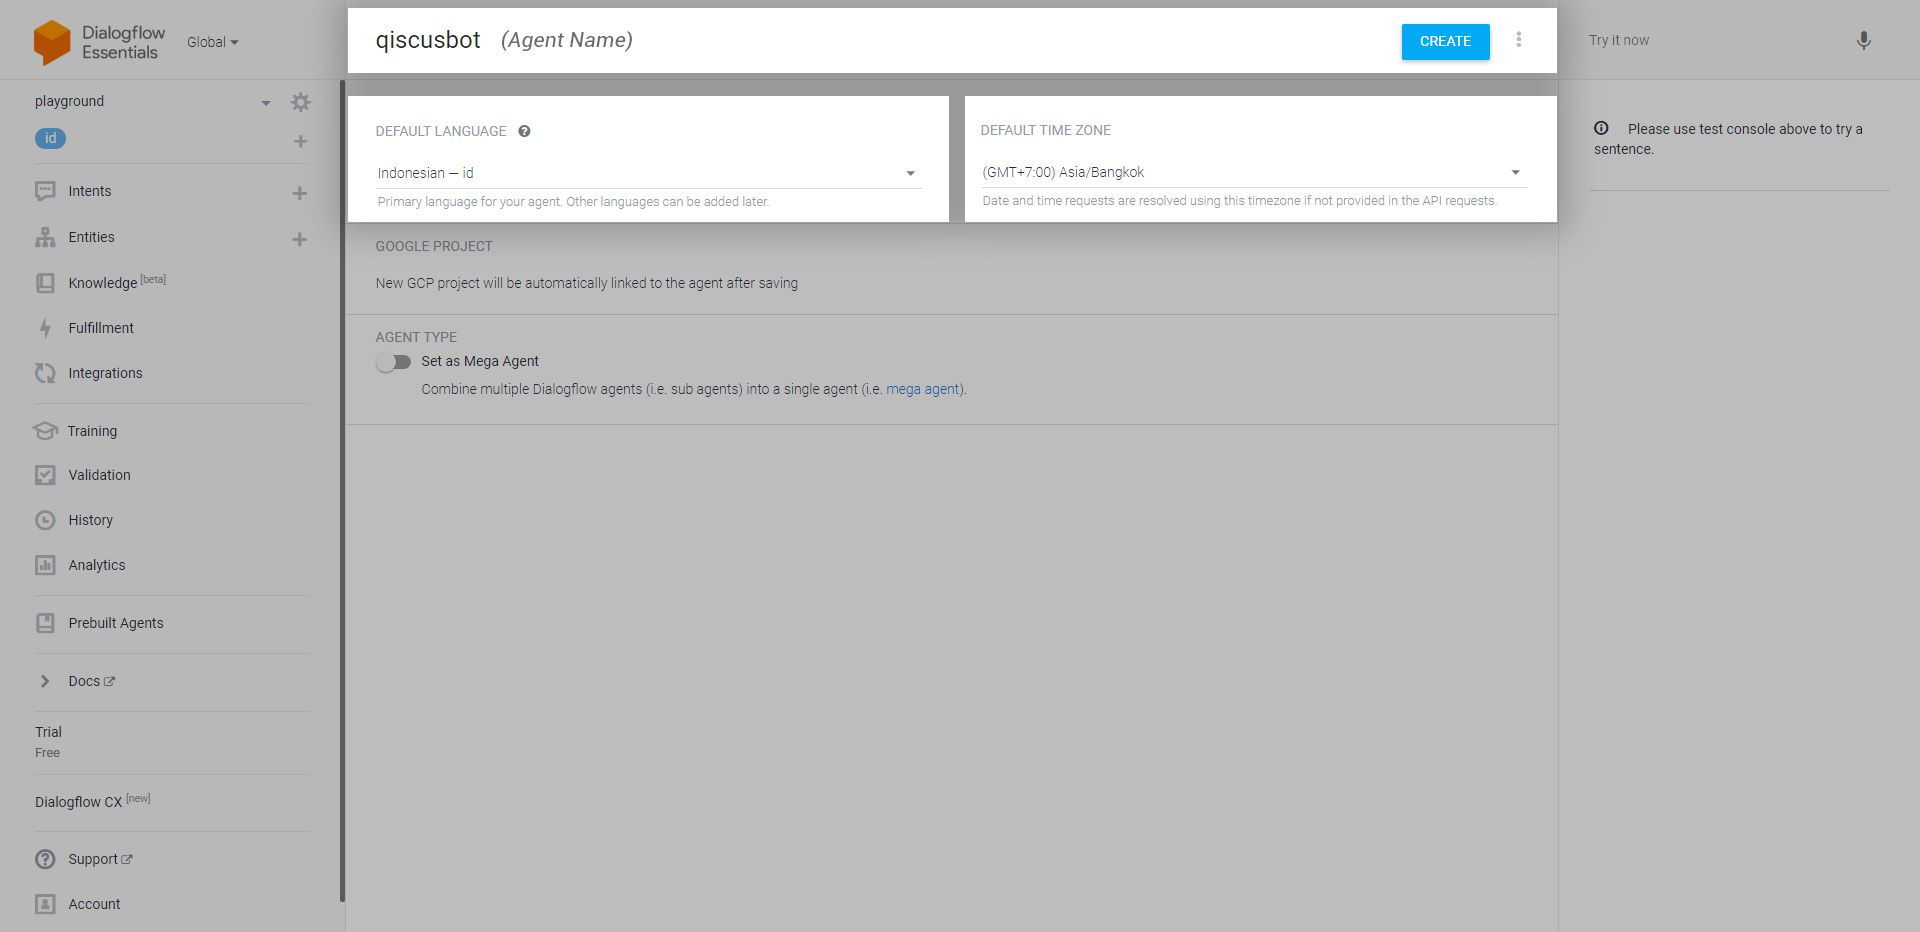
Next, fill in the Agent Name. You will then need to select the Default Language and Default Time Zone. For example, select the city where the agent “qiscusbot“ is located and select Default Language Indonesian -id. Click Create to create the profile.
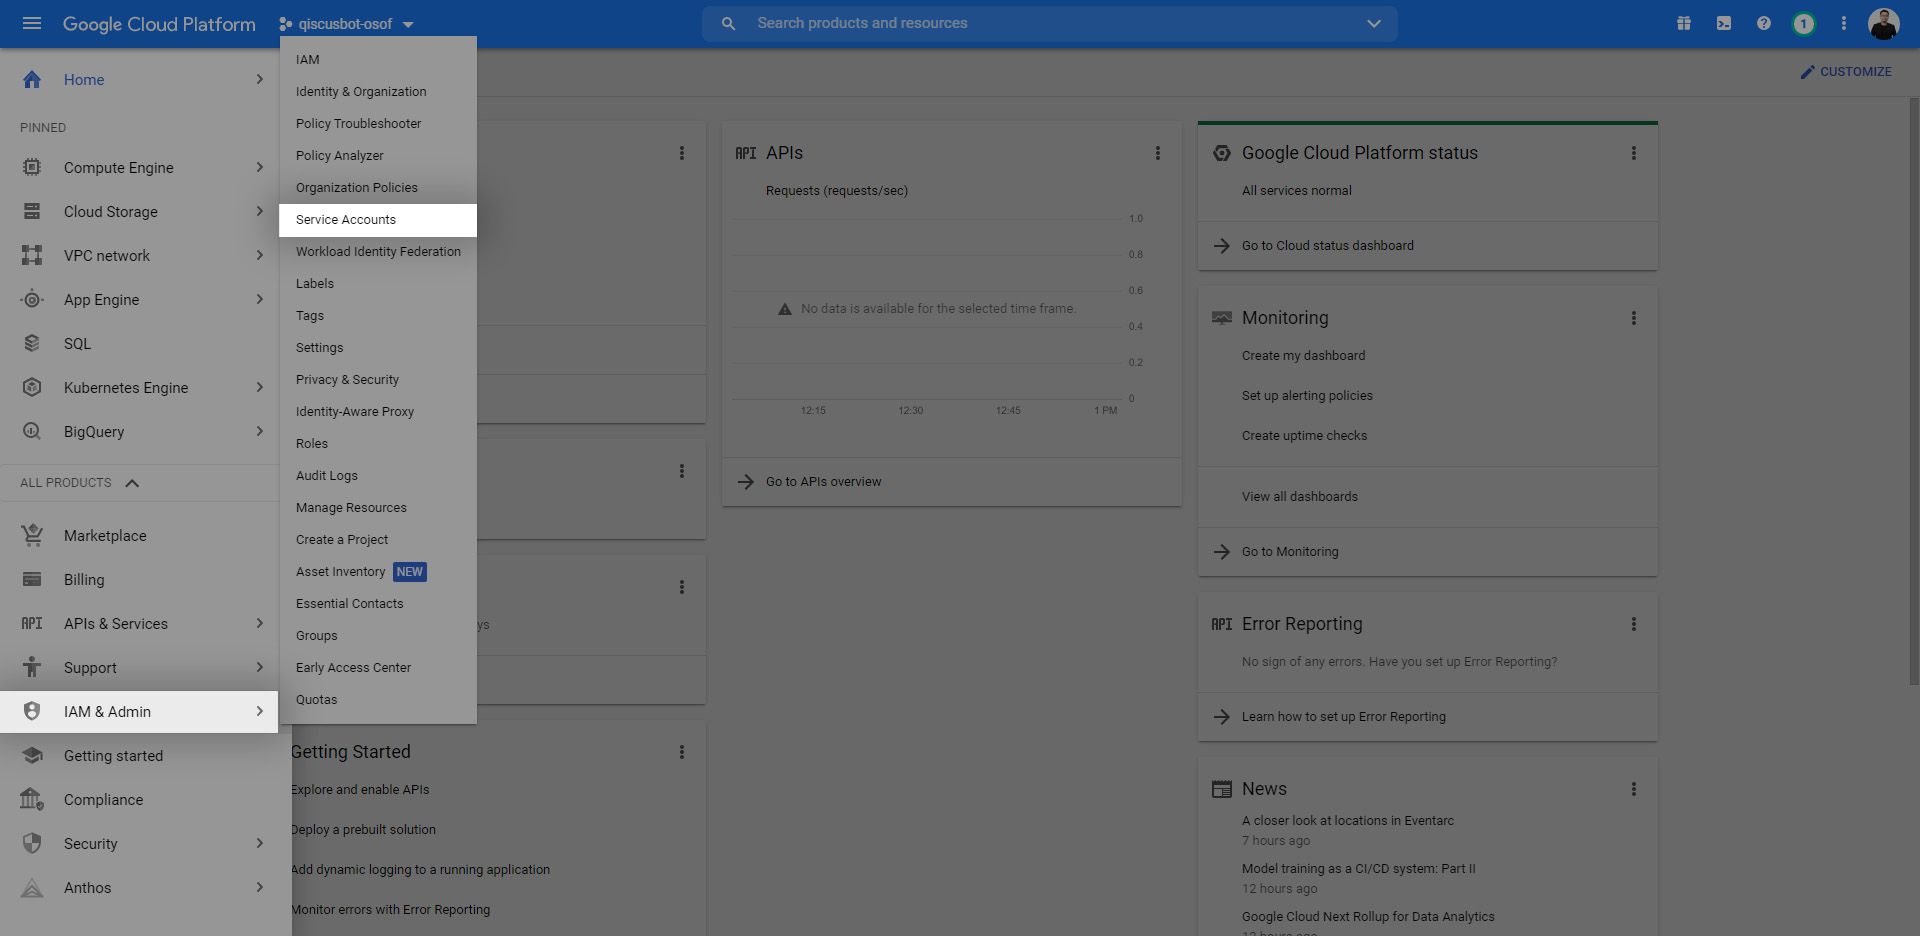
The bot project has been successfully created in Dialogflow. The next step is to search for the Google Project ID of the project by clicking the Settings button or the ️⚙️ icon on the left sidebar, next to the agent name qiscusbot. Click the icon and you will enter the Settings page. A Google Project ID can be located on that page to be copied and pasted into Qiscus Robolabs. In this example, the Google Project ID is qiscusbot-osof_._ After that, click the Google Project to receive the Service Account Private Key via the Dialogflow ES console page

Step 2: Create and Download Service Account Key
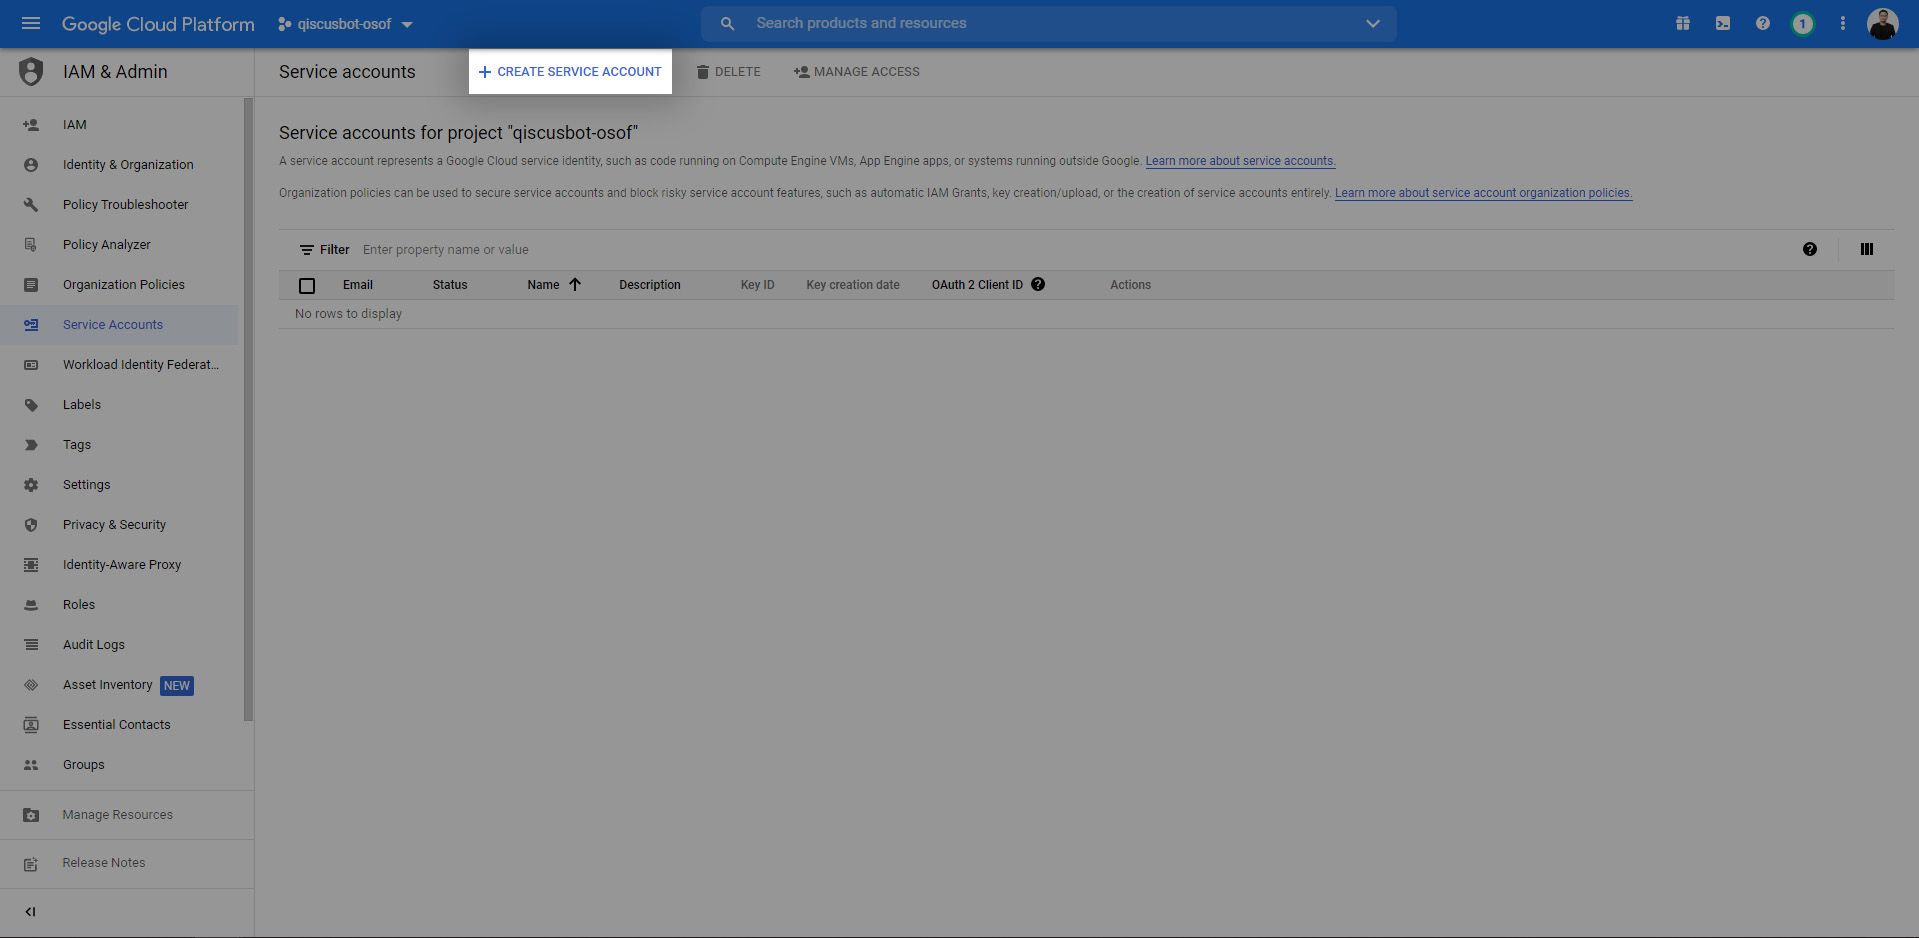
After entering the Dialogflow ES console page of the Project ID, go to the sidebar. Select IAM & Admin, then select Service Accounts
After that, select + CREATE SERVICE ACCOUNT on the page
After entering the Create Service Account page, enter the Service Account Name according to the project name. Here is an example: we enter the name Qiscus Bot. Then, click CREATE AND CONTINUE
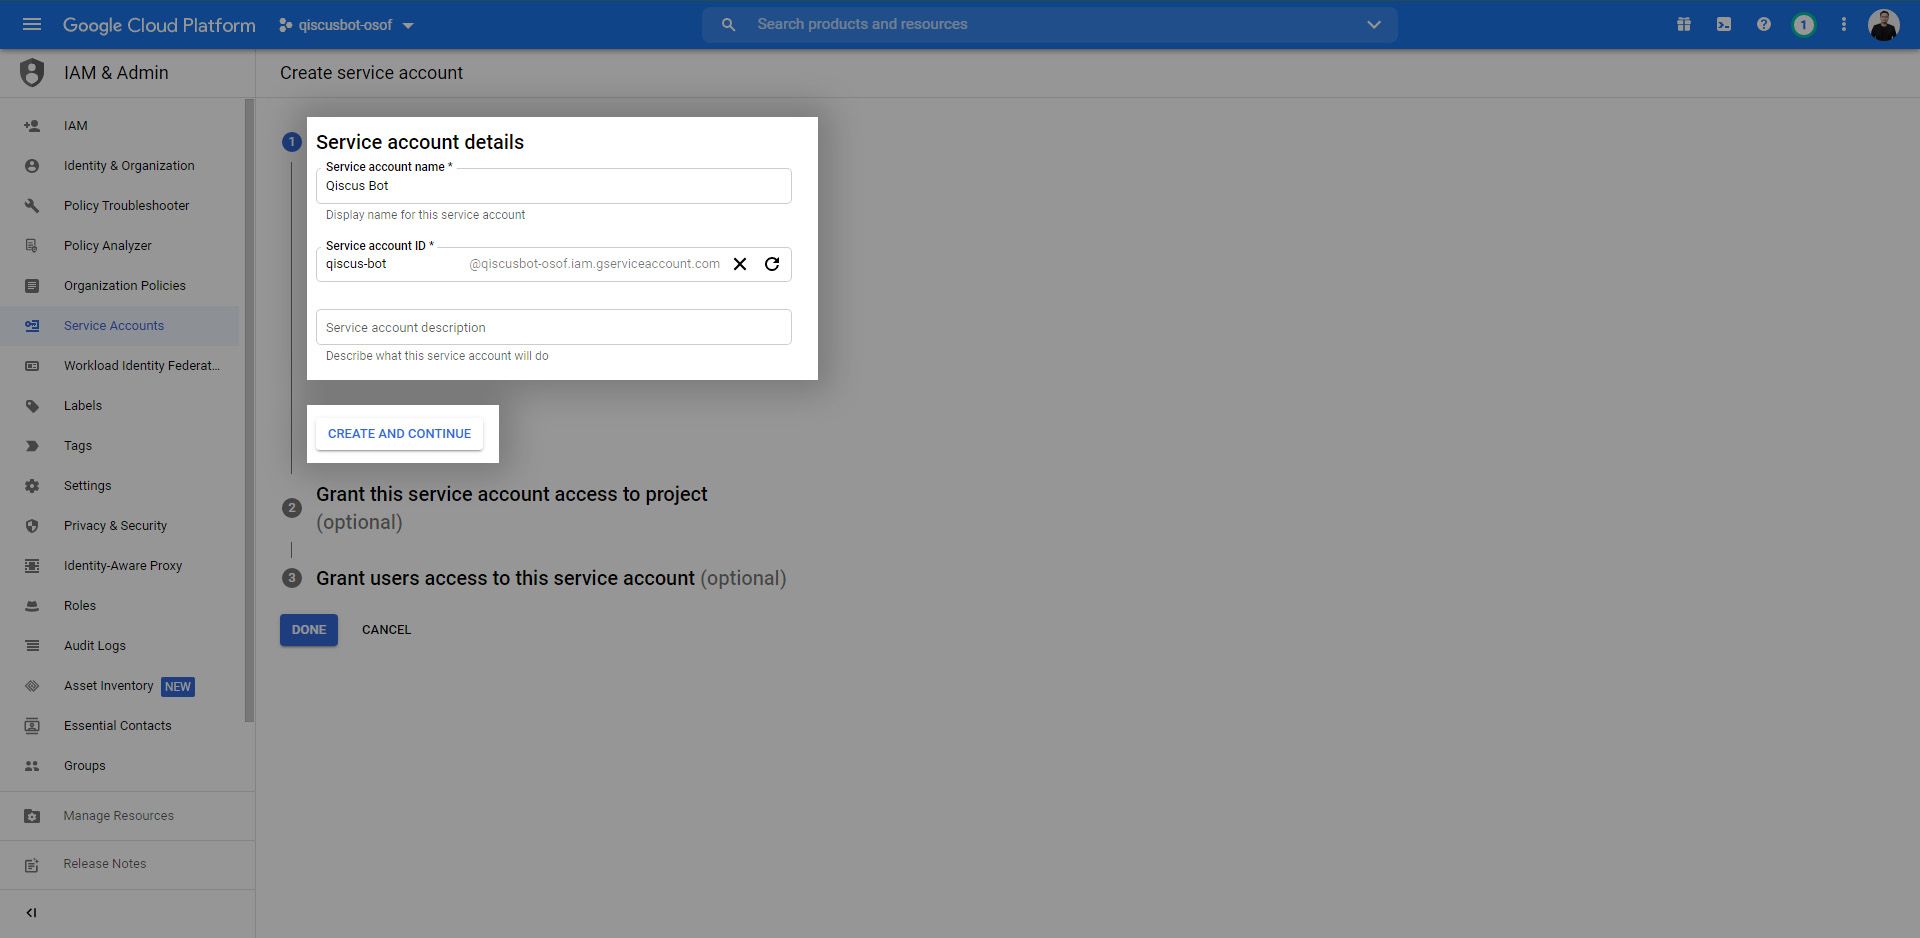
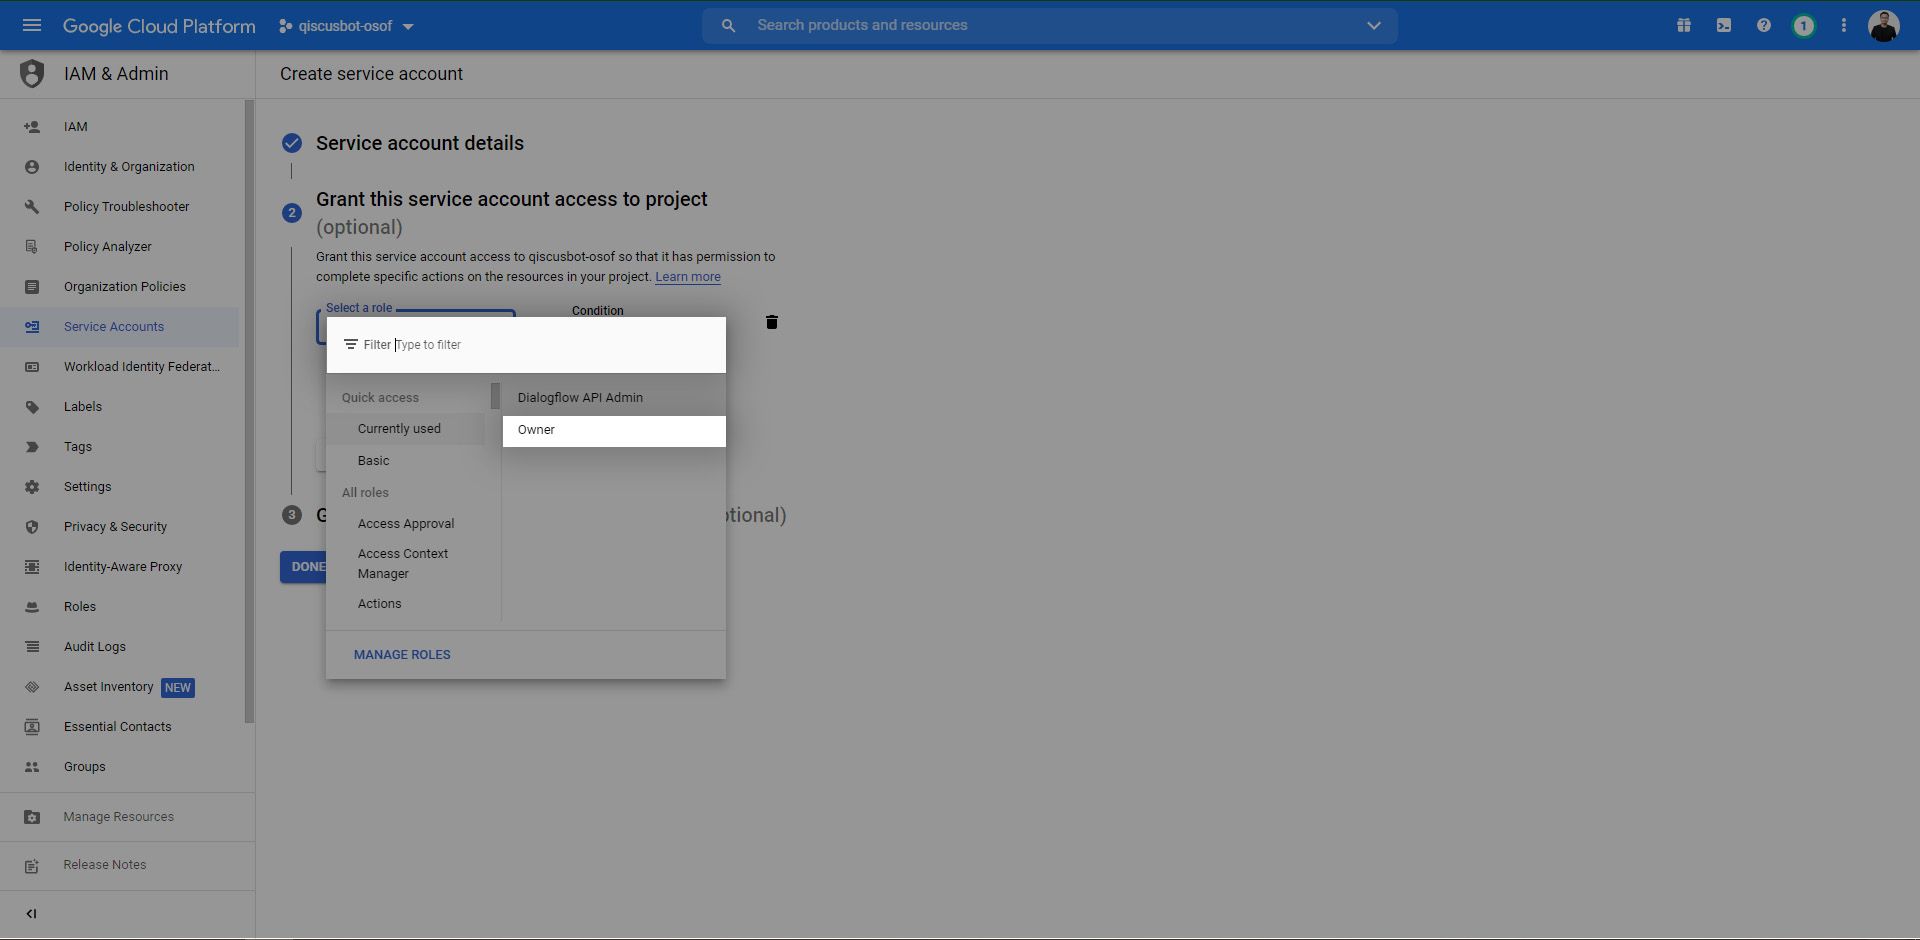
In the second step, click on Select a role, then click Search or select Owner to determine the role access to the project**.** Click, then set the task as Done
In the last step for this service account, leave the user role blank (optional), then click Done

In this step, the service account has been created in the qiscusbot-osof project. The next step is to download the JSON file in the project
Select the email address for the project whose service key has been created on this page. In the example here, click email [email protected] to go to the service account page

On that page, select the KEYS menu. Then click ADD KEY, and select Create New Key
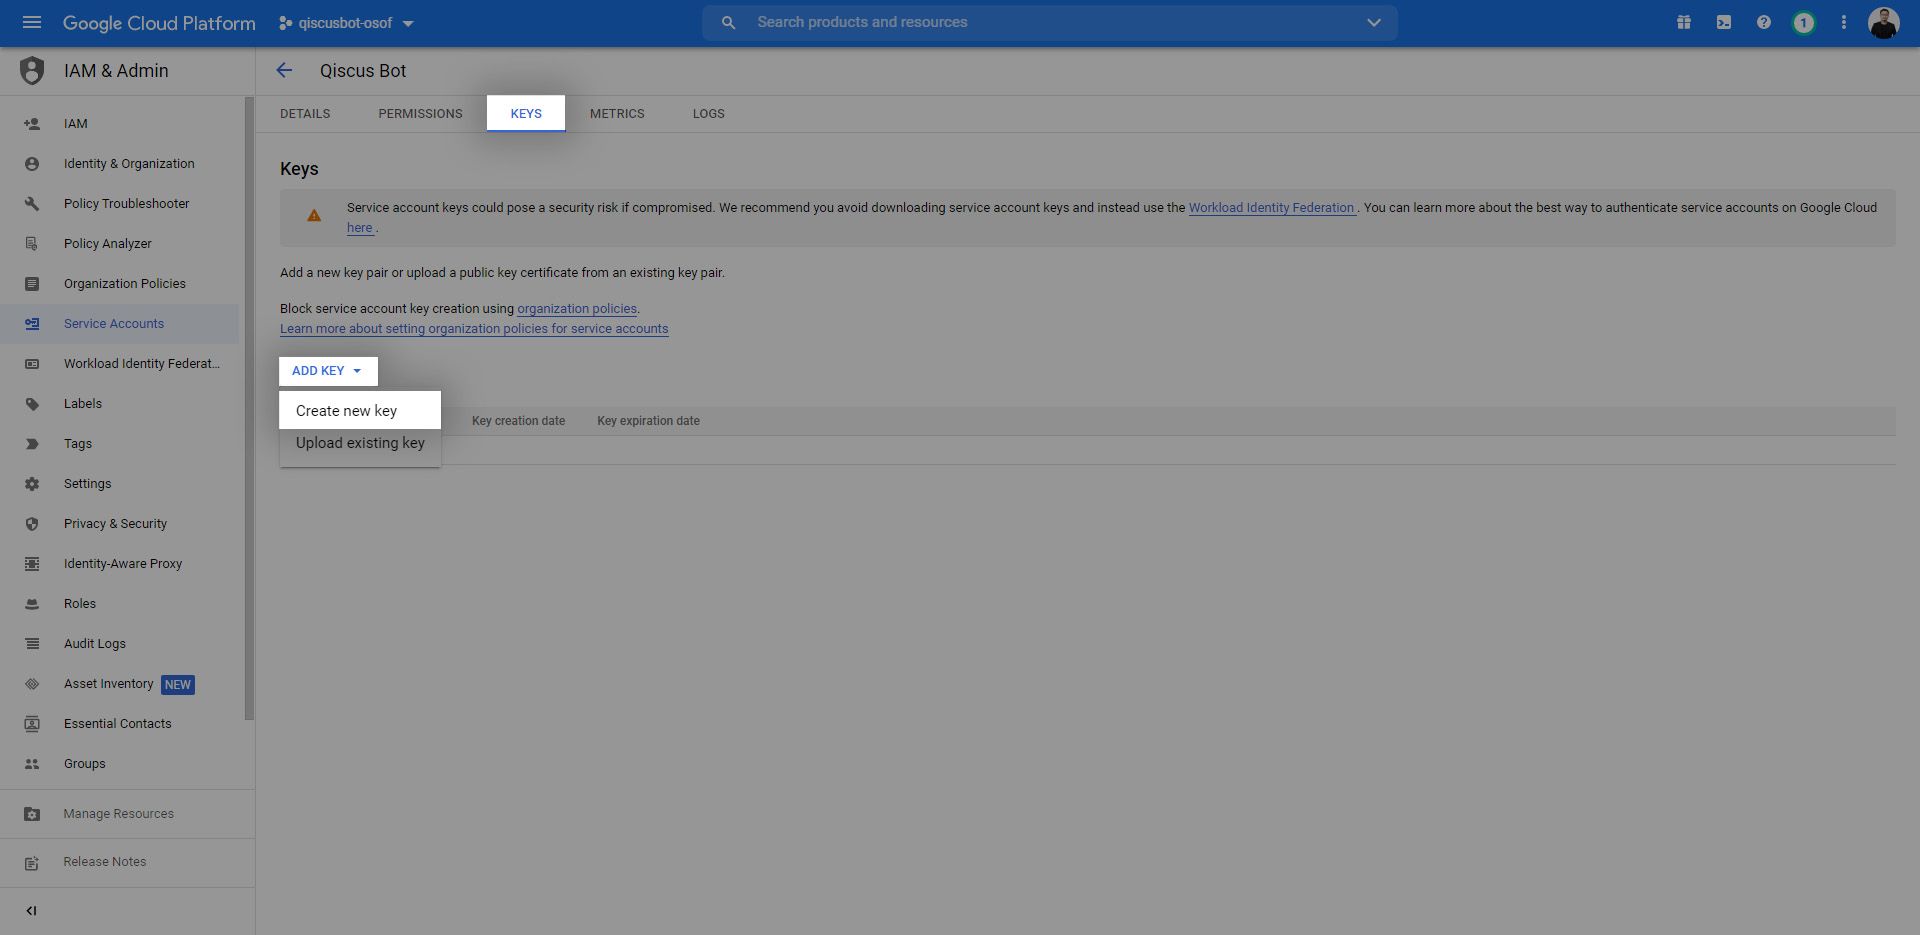
A pop-up will appear like this, then select key type in the form of JSON. Click Create for the service key to be downloaded to your computer. Once the service key has been downloaded successfully, the last step is to enter the file into Qiscus Robolabs
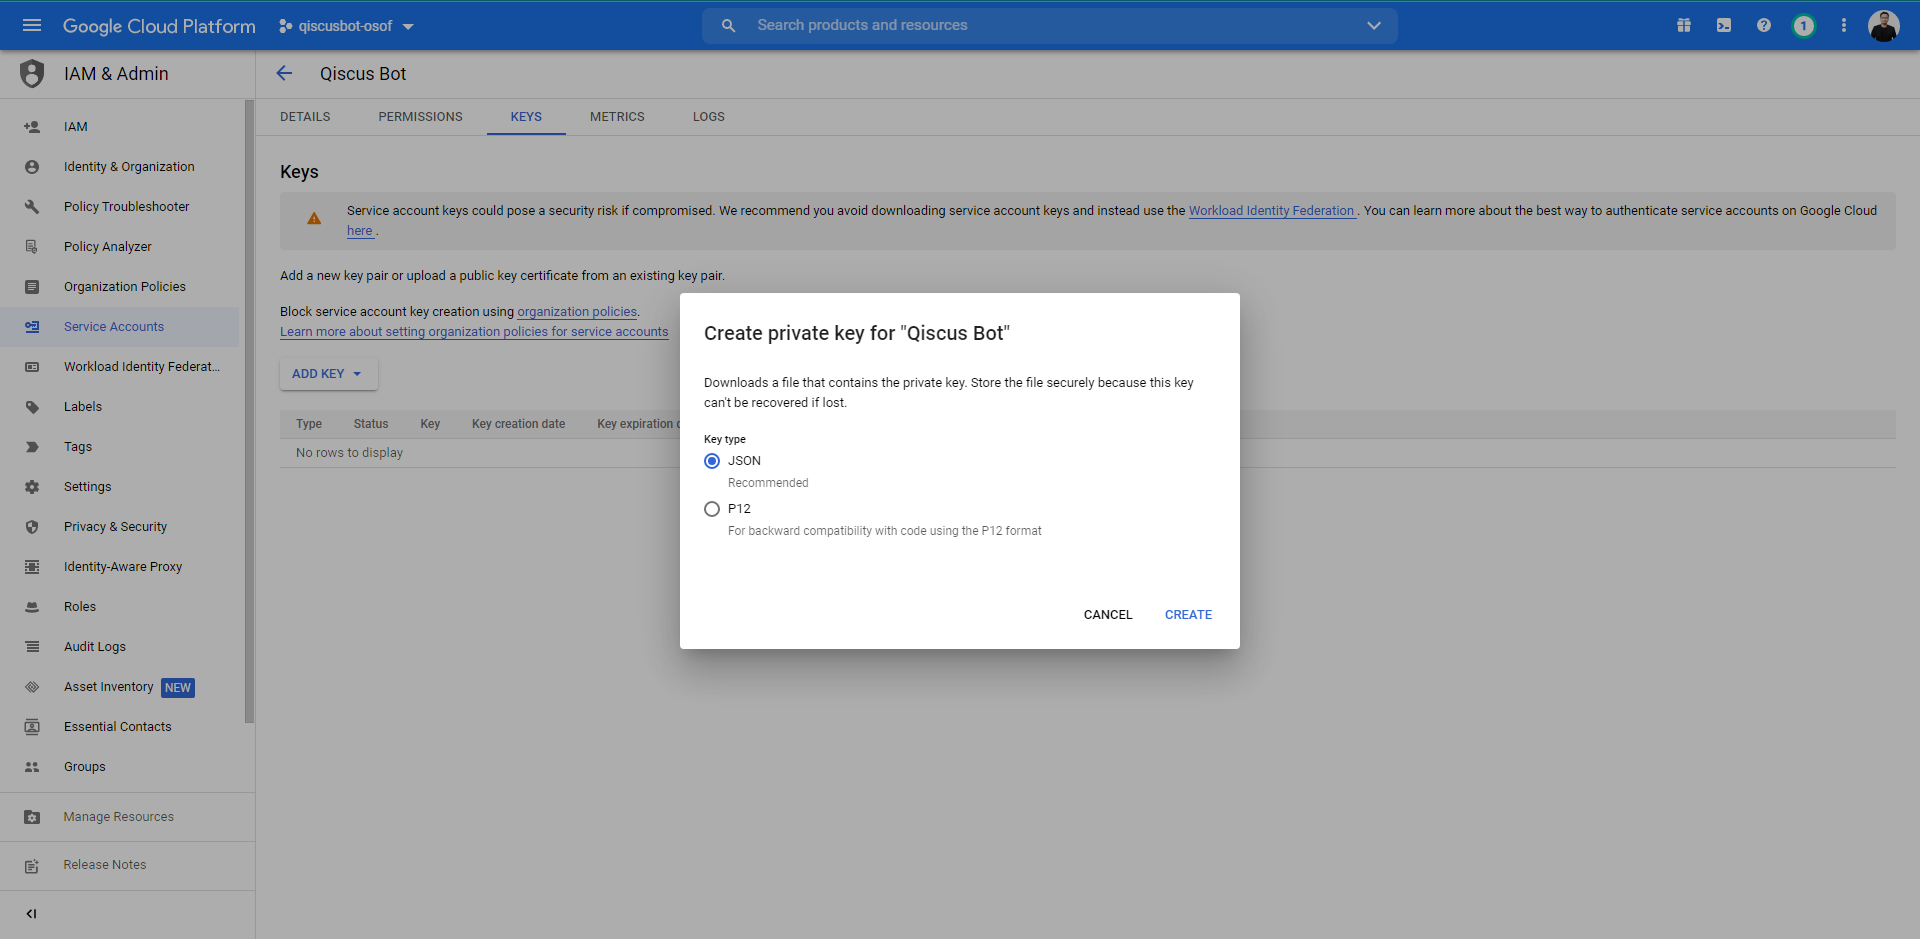
This service key can only be downloaded once. Make sure the JSON file is not lost. If it is missing, then you will have to create a new service key.
Step 3: Enter Dialogflow Credentials in Robolabs
After obtaining the Google Project ID, Default Bot Language, and Service Account Key in Dialogflow, you can return to the Integrate Bot page on Qiscus Robolabs. Enter the item in Robolabs according to the project that has been created in Dialogflow. In this example, we have implemented the project ID qiscusbot-osof in Qiscus Robolabs. Then, click Next
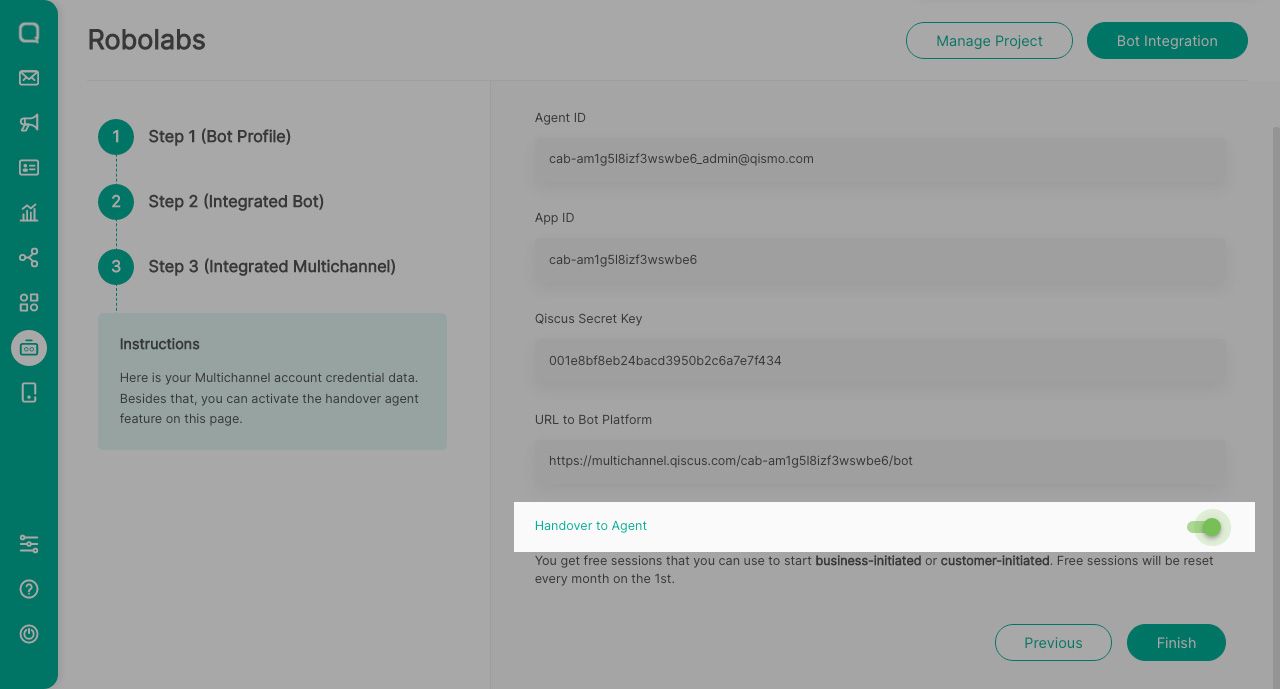
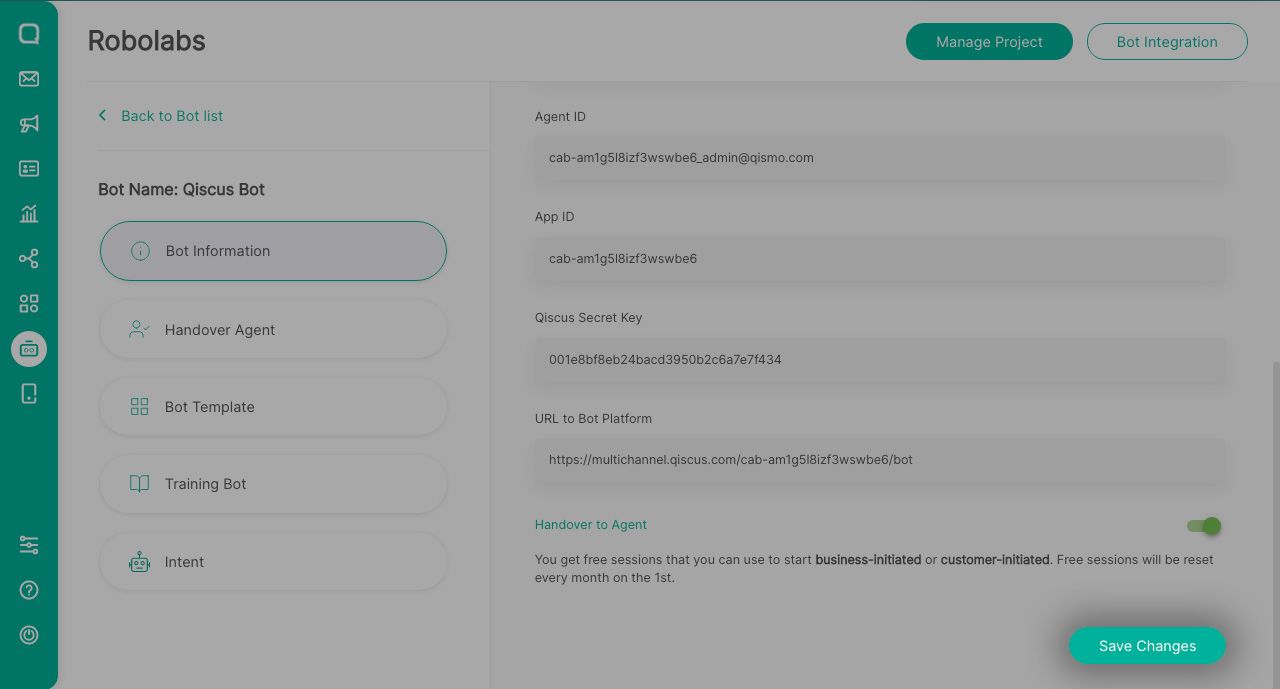
After that, you will return to the third page to Integrate Multichannel. Here, you do not need to change the settings contained in Multichannel because it is automatically integrated. Also, if you want to activate the Handover to Agent feature, you must change the position of the toggle contained in the feature on this page to activate it. Then, click Finish
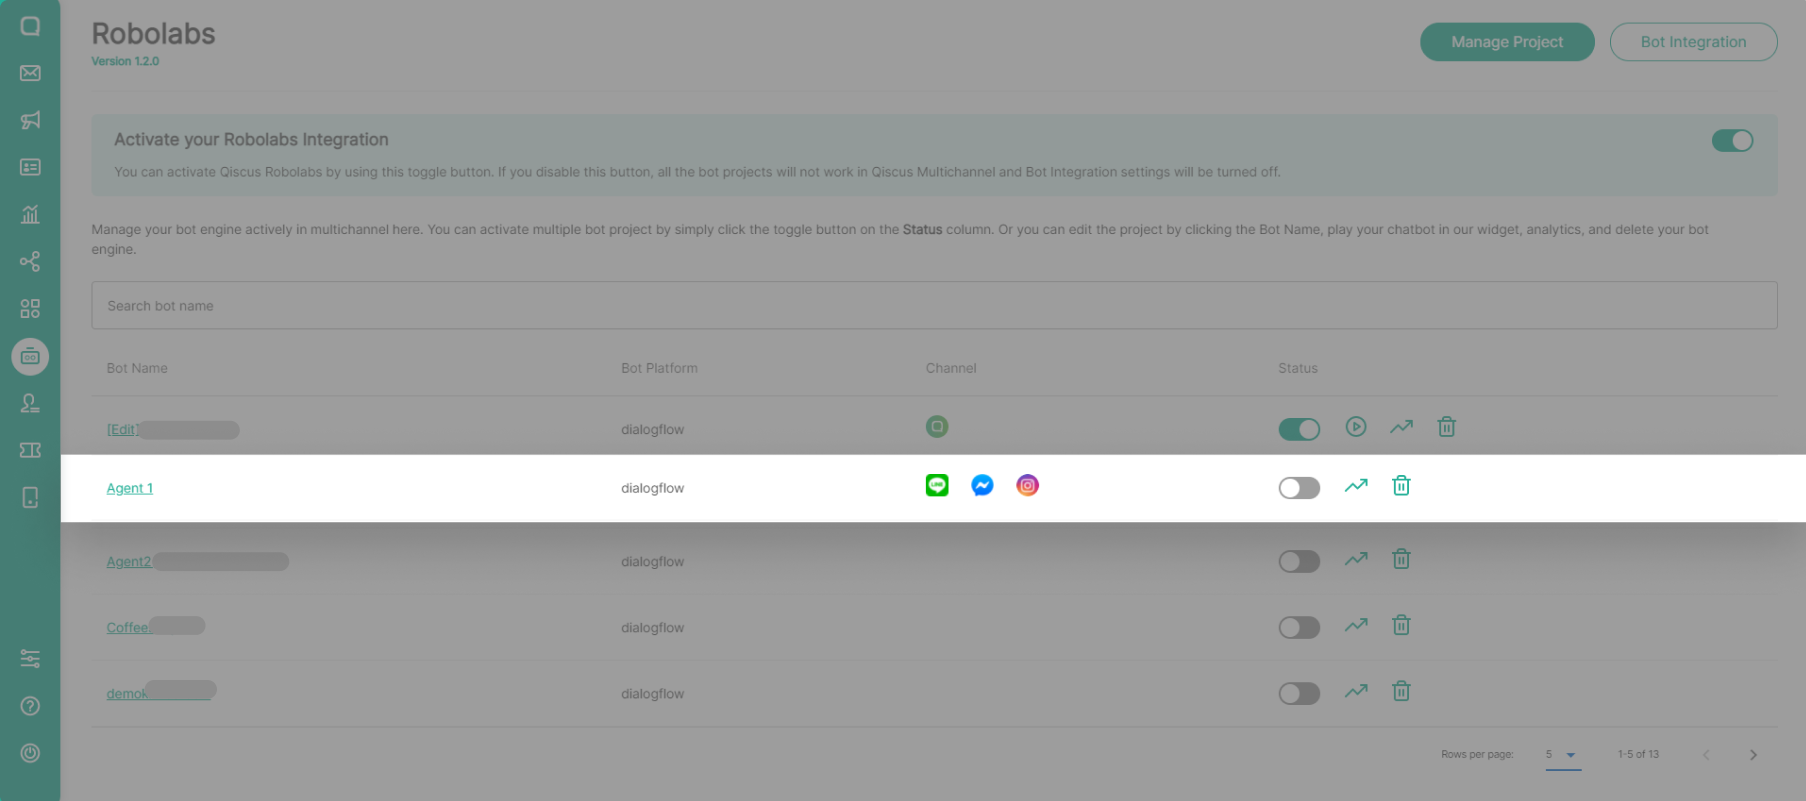
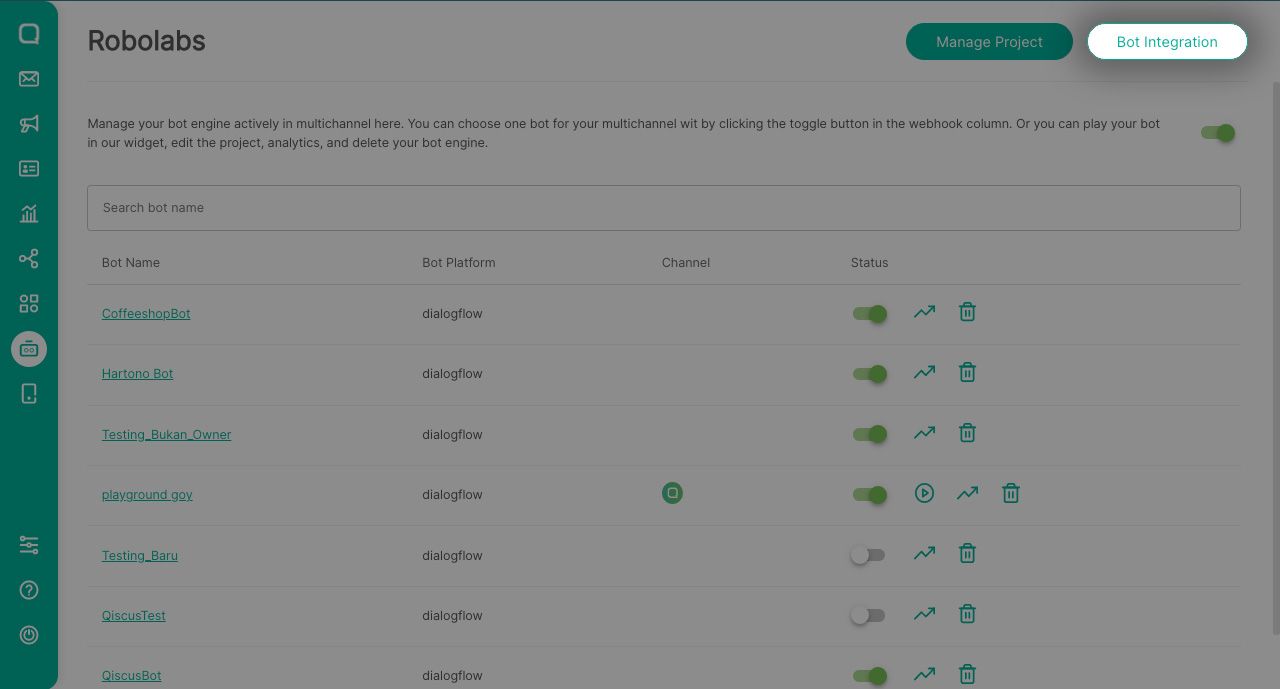
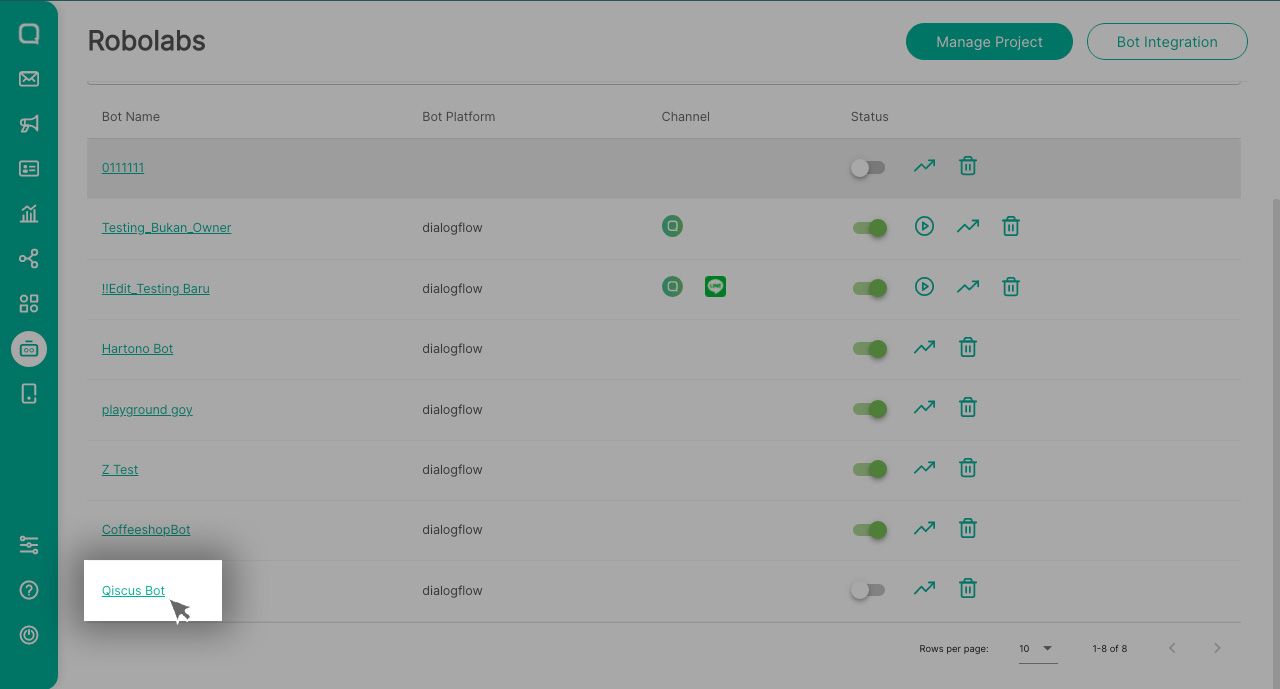
Managing and Activating Bot
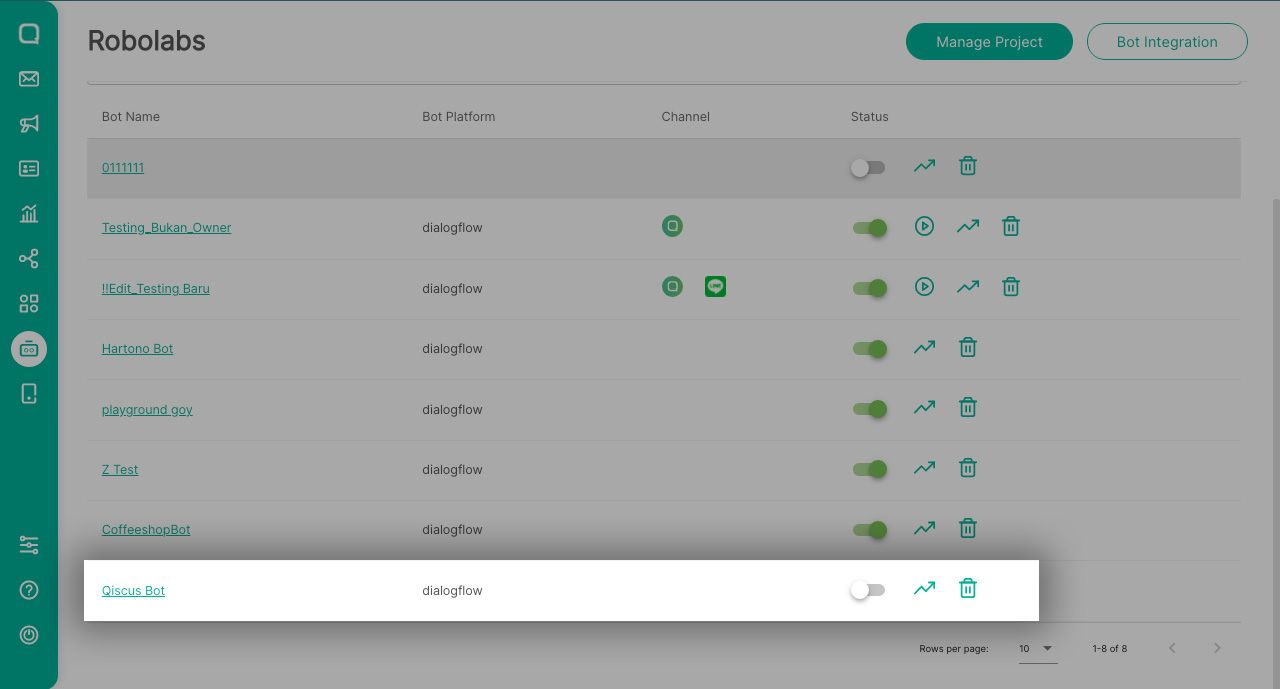
Next, you will enter the Manage Project page. To ensure that the bot has been successfully integrated with Dialogflow, you should see the bot name on this page.
Your bot is now successfully created. The next step is for you to assign the project bot to a channel it will enter. Click the bot name in the project to enter the Bot Information page**.**
In the Bot Information page, select the Assigned Bot to to select the channel set in your Multichannel account.
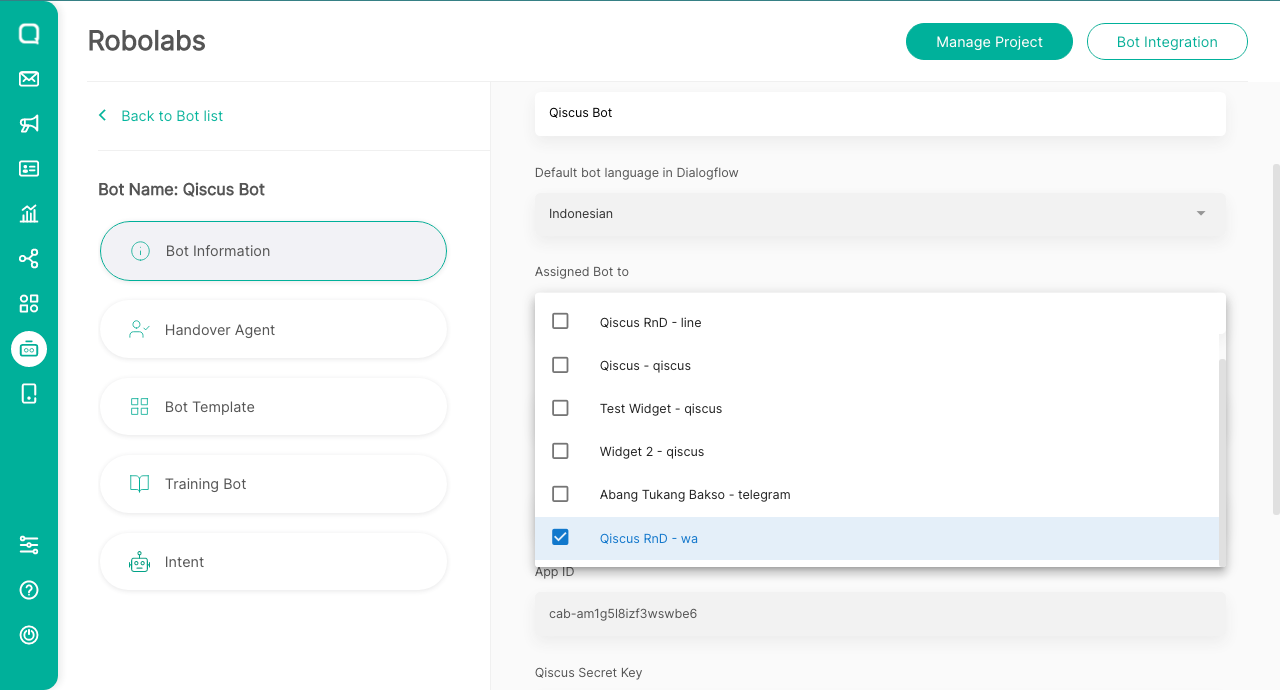
Next, select Save Changes.
After that, return to the Manage Project page to activate the project bot by activating the toggle located next to the bot name in the Status column.
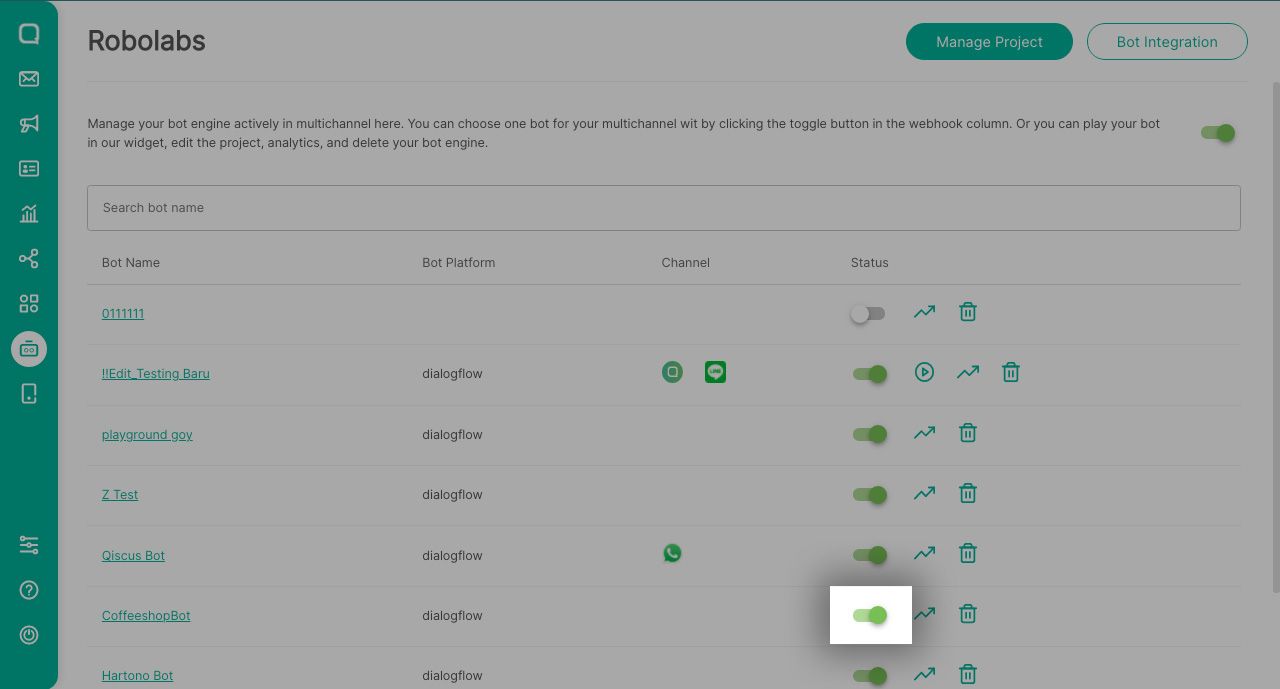
Congratulations! Your bot has been successfully created and integrated with the Dialogflow and your Multichannel account.