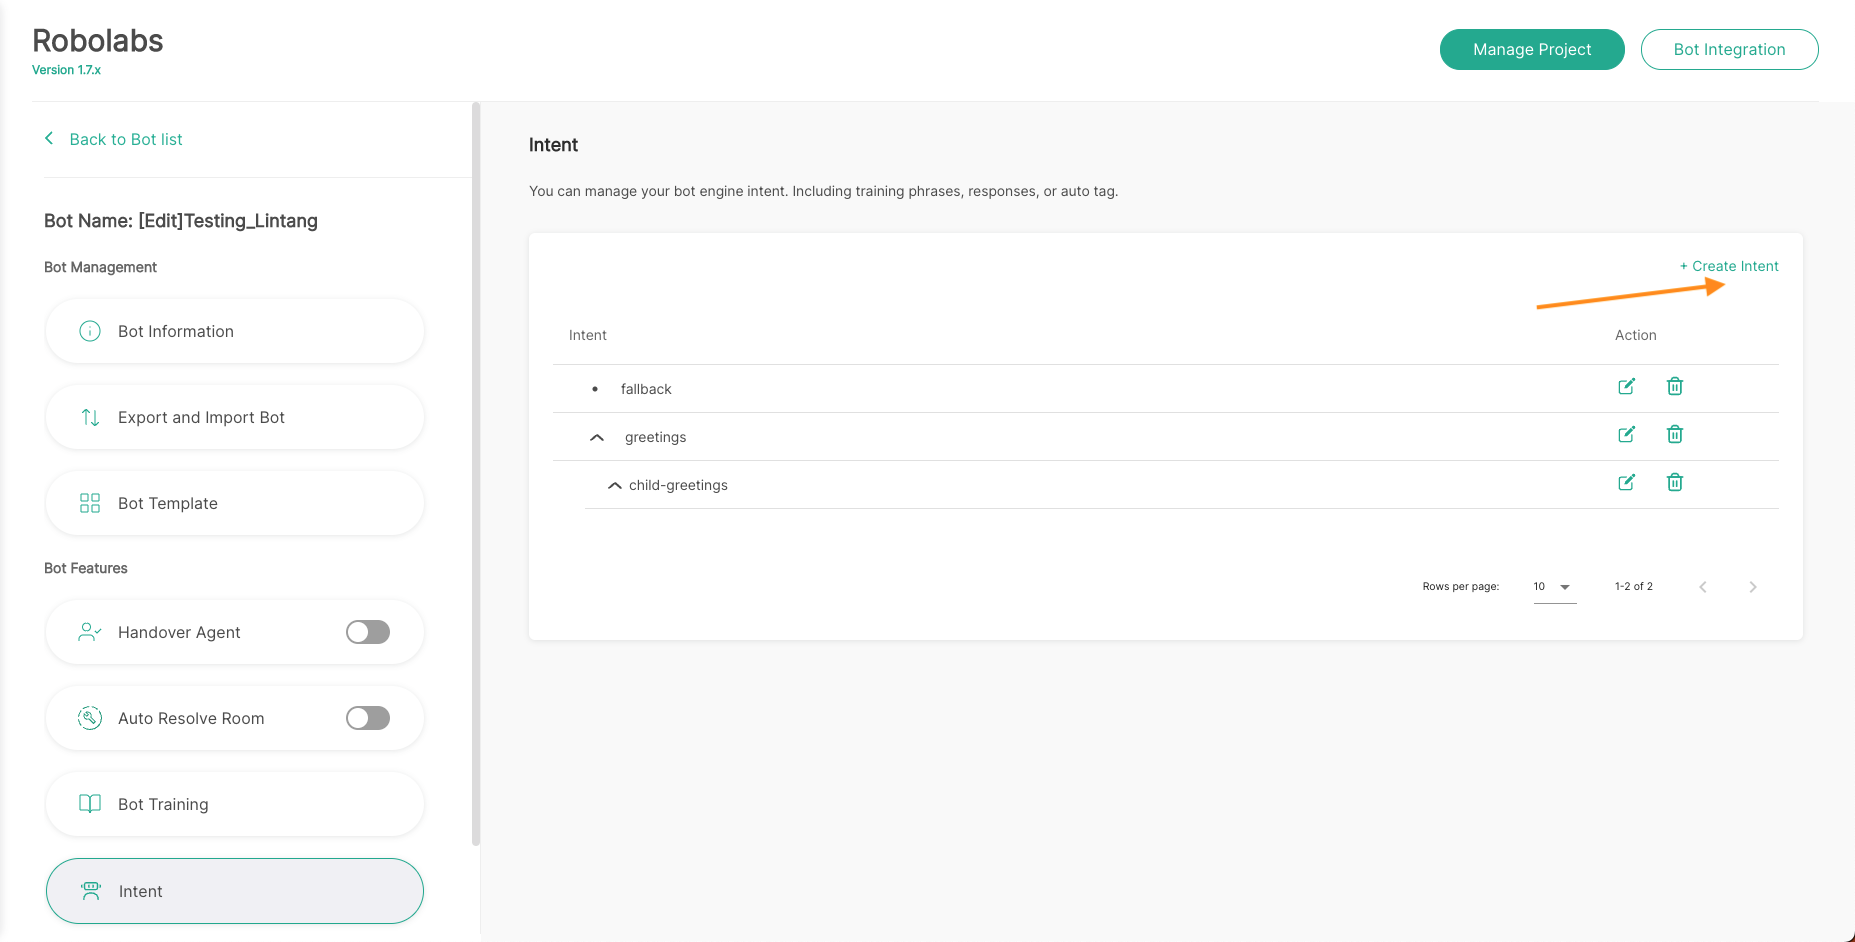
Manage Intent
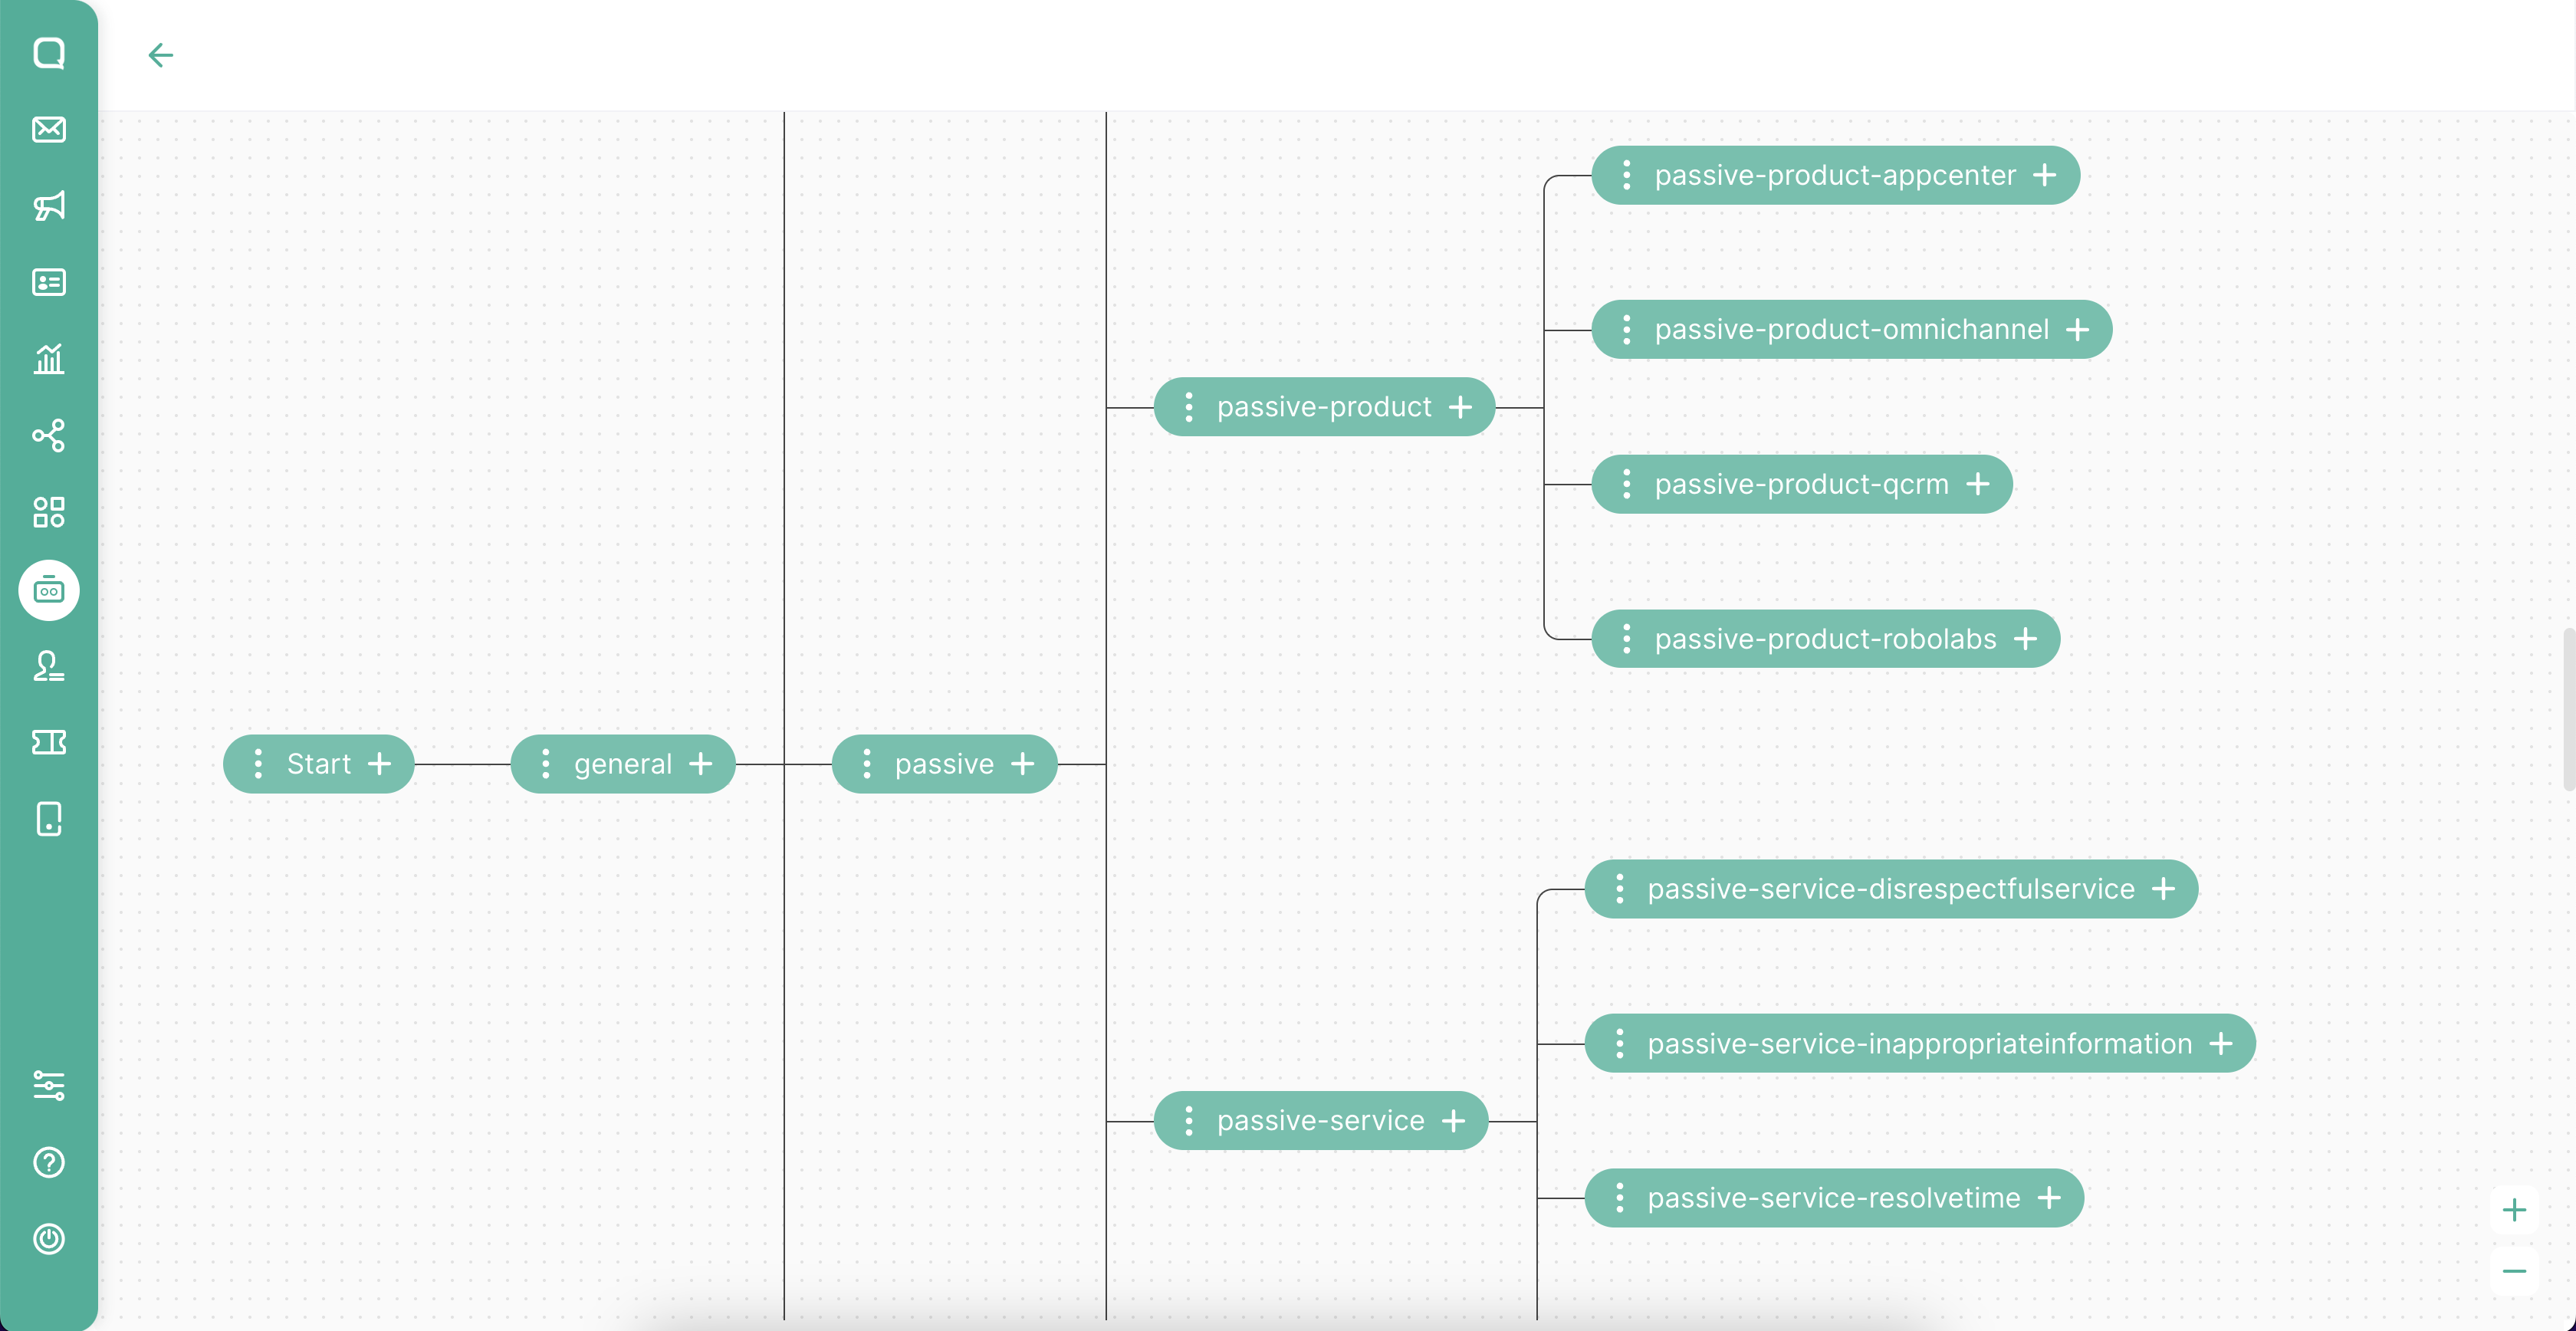
Apart from using bot templates, you can also create flow bots via the intent menu. This feature is connected to the Dialogflow Console, so changes made in Robolabs will appear in the Dialogflow Console. Intent on the Dialogflow is in the form of a hierarchy, to learn more please see the following page.

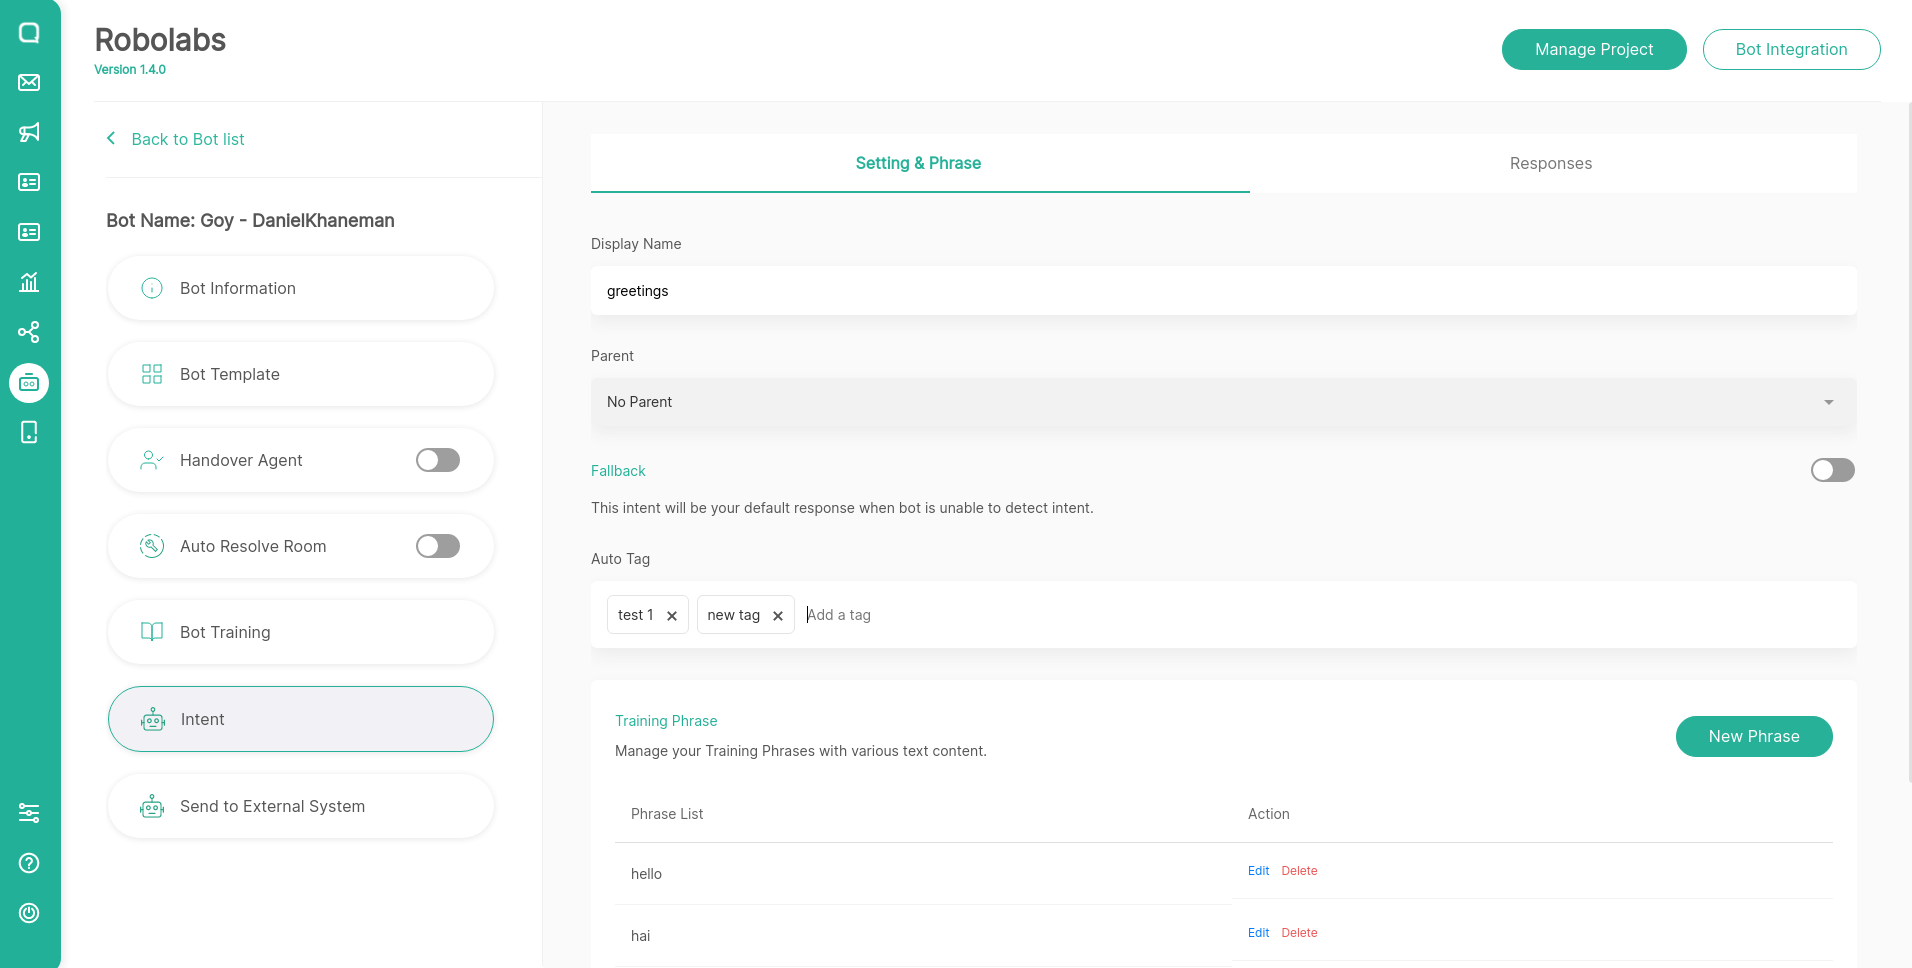
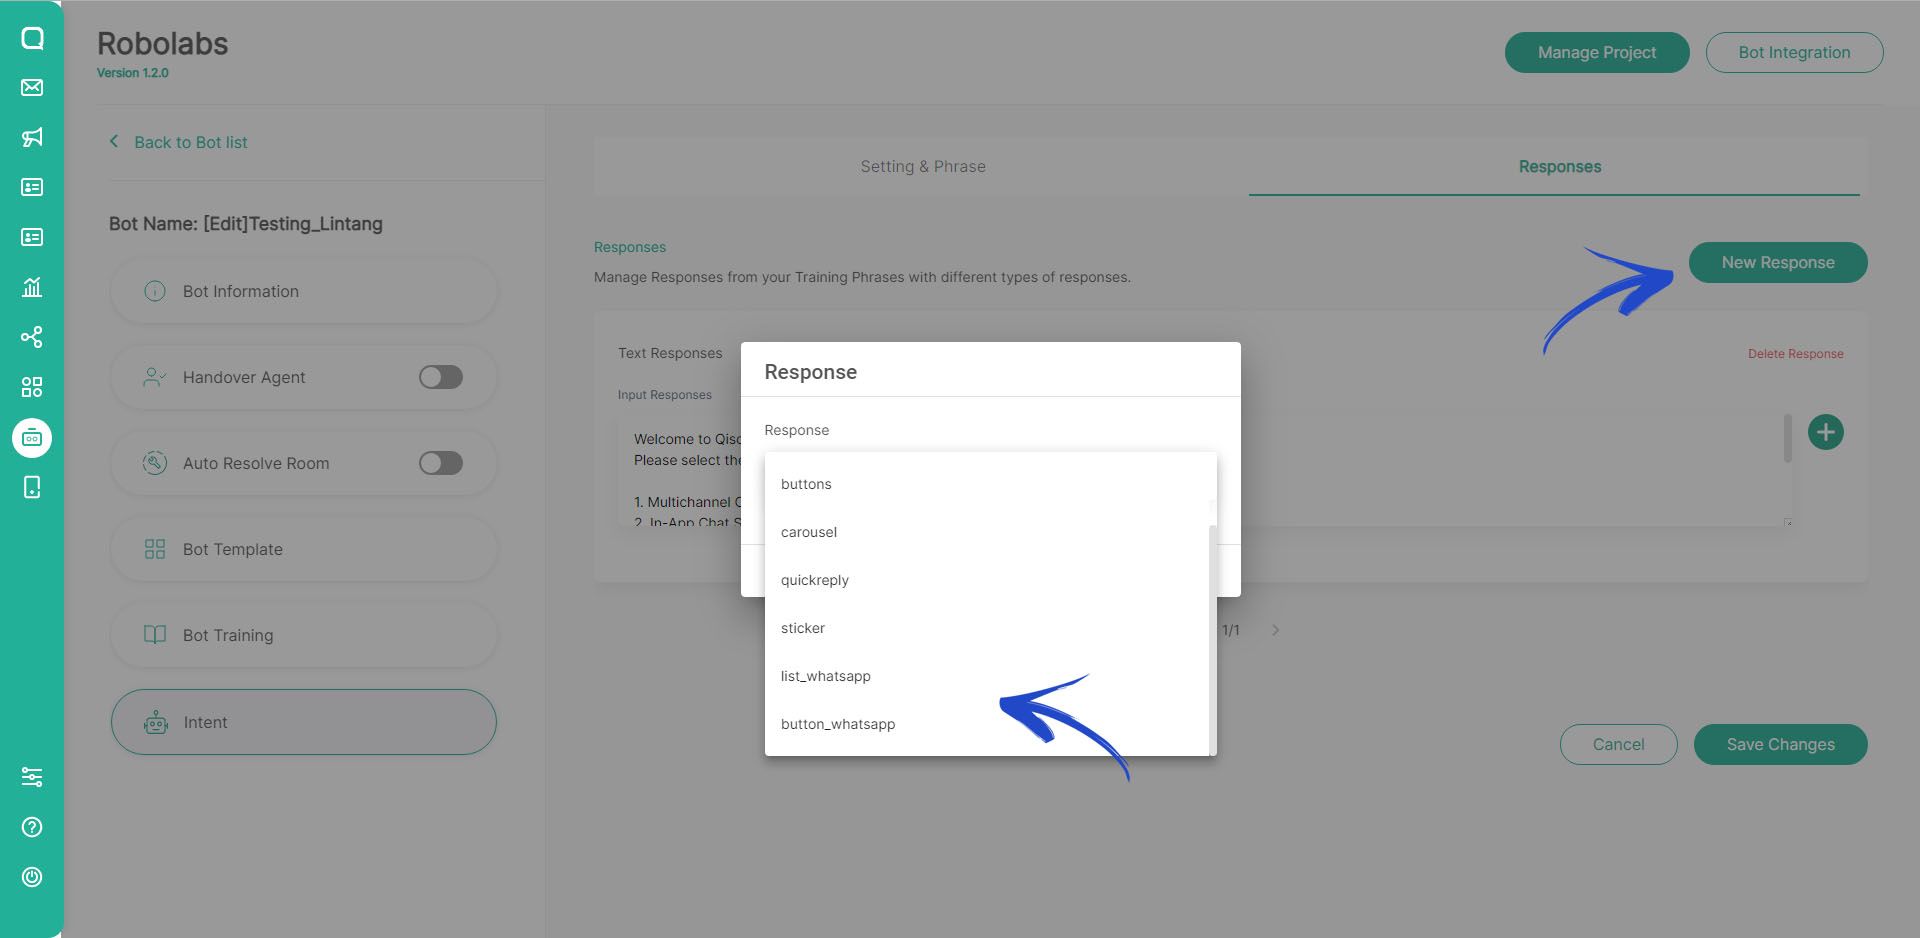
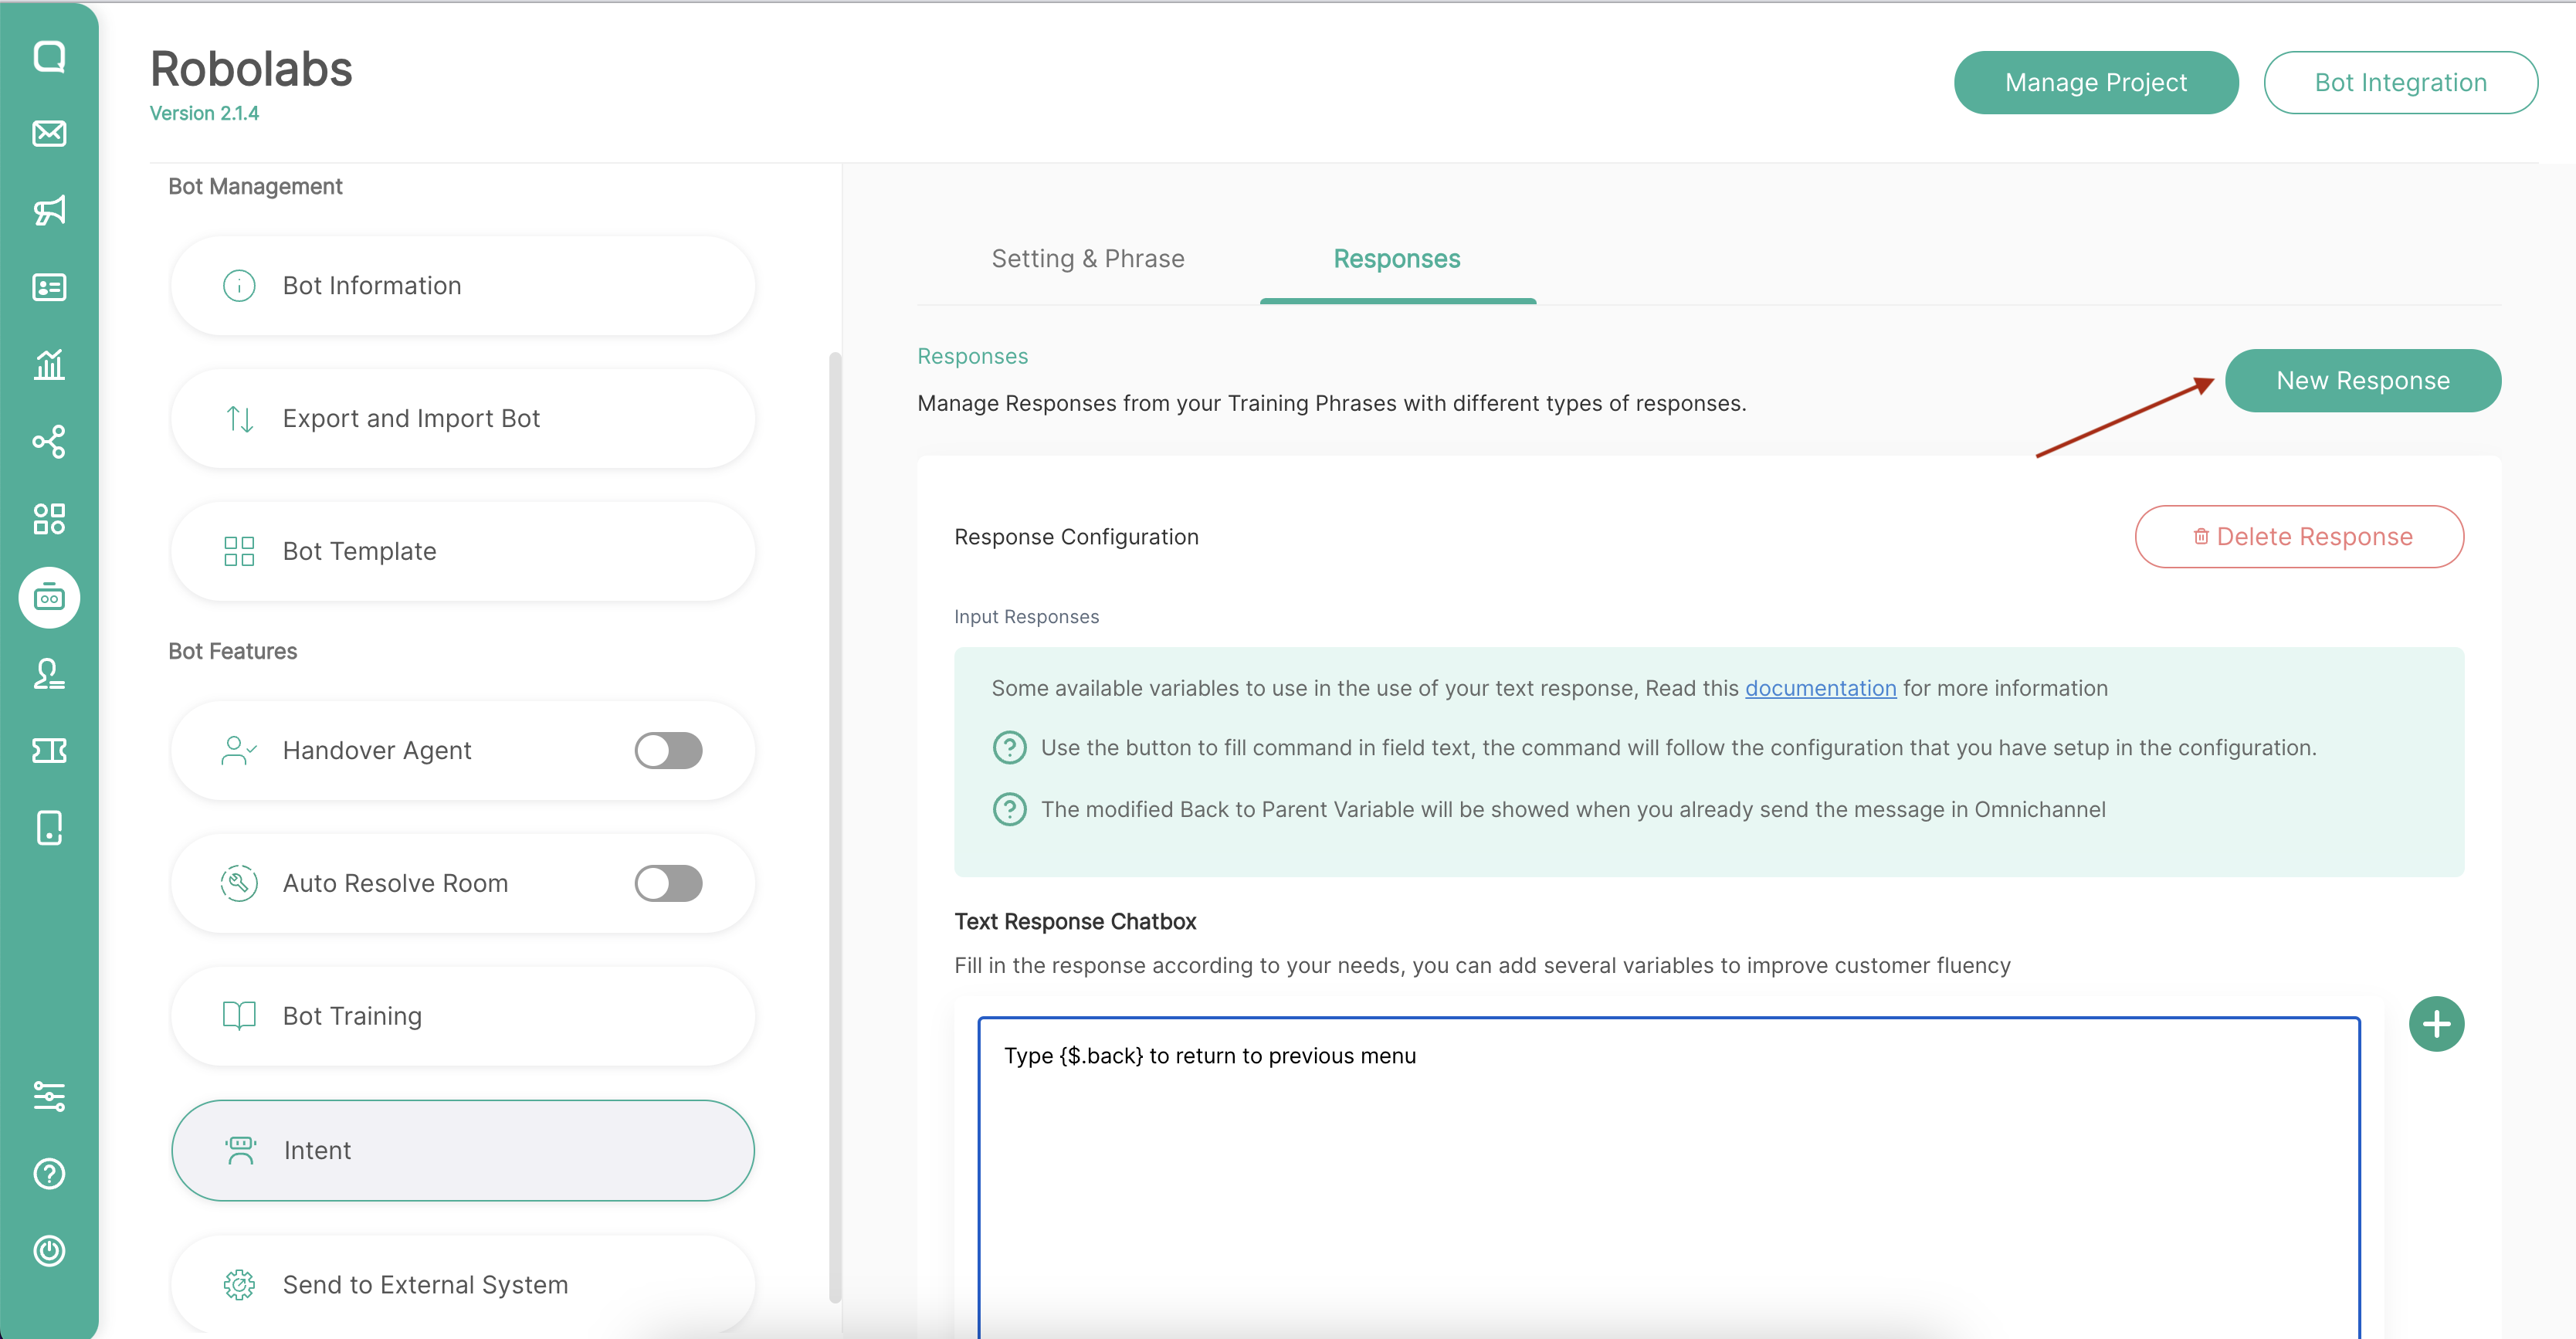
To create a new intent, click the create button. If you want to change the intent content, click the Edit button. Both actions will refer to the same page where there are 2 tabs, Settings & Phrase and Responses. On the Settings & Phrase tab you can set the following:
Auto Tag feature can only be used on Robolabs Premium plan
Display Name: The name of the intent.
Parent: The name of the intent above the intent you created. Robolabs will automatically create a context linking the parent to the intent you created with lifespan 1.
Fallback: When activated, the intent you create becomes a reference if Dialogflow fails during the detection process. You can only create 1 fallback at 1 hierarchy level.
Training Phrases: A collection of end-user-submitted sample texts. If there is similar text, Dialogflow will detect the text as this intent.
Auto Tag: When the matched intent has an auto tag, the bot will automatically create the tag in the conversation room. You can select an existing tag or create a new tag by directly typing it and clicking enter.
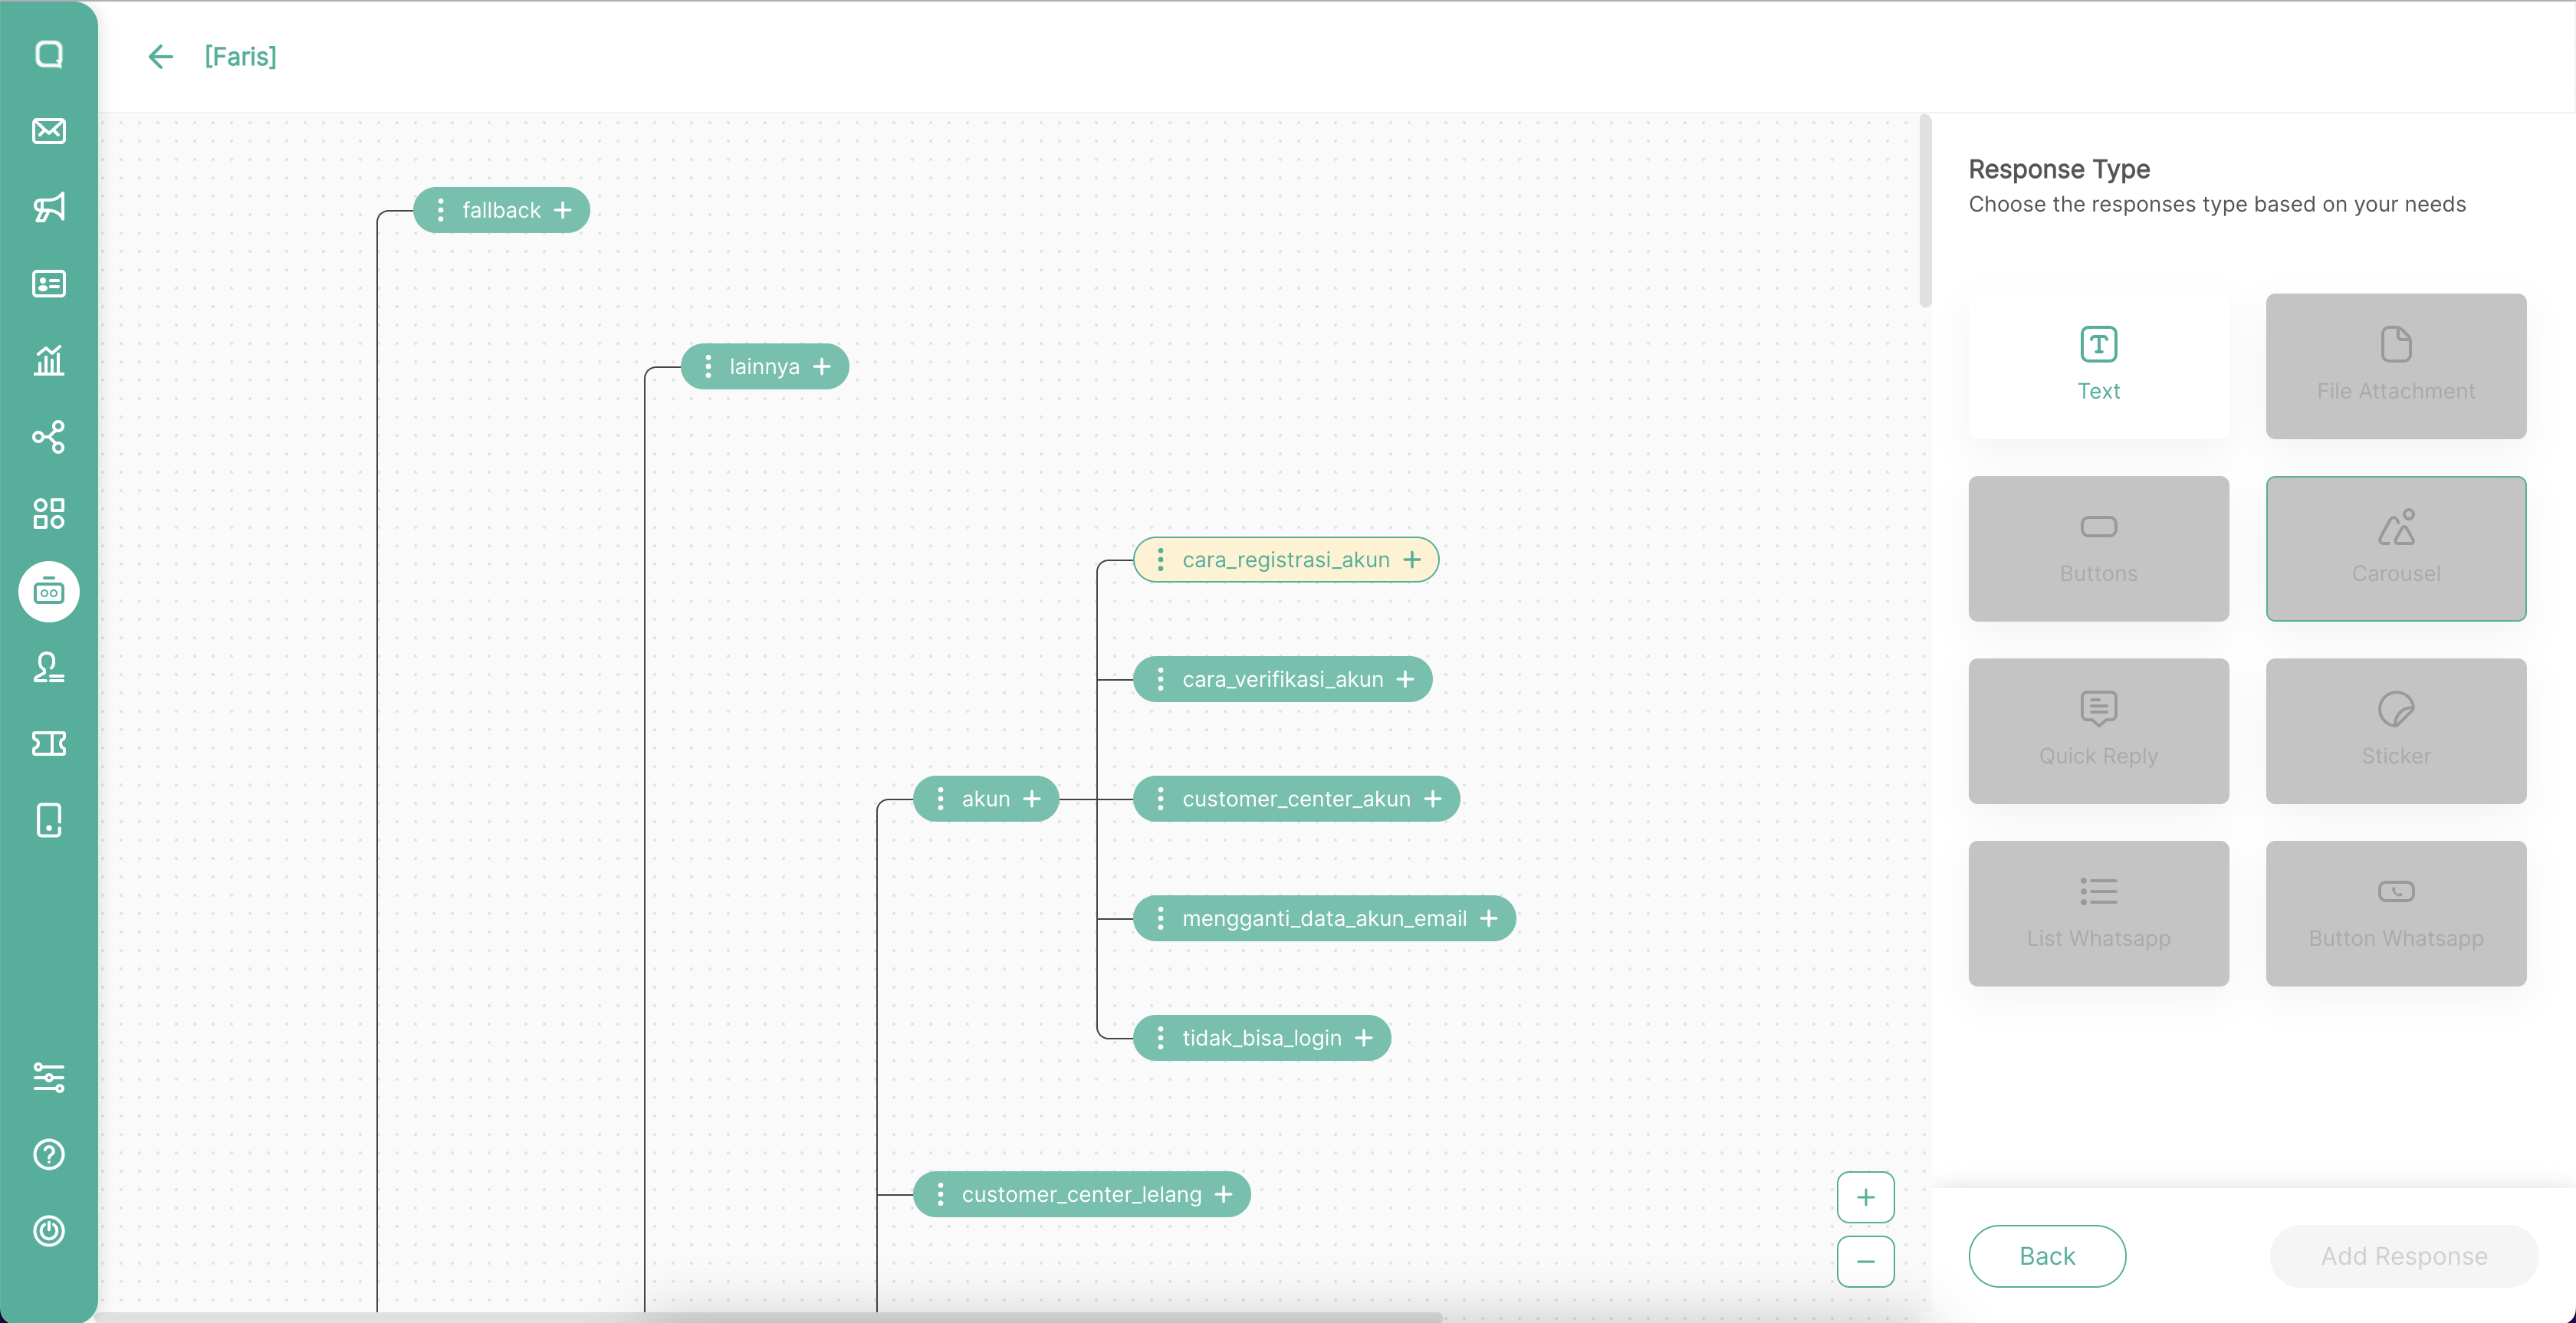
The Responses tab is devoted to setting the types of responses. There are several types of responses that you can send. However, there are types of responses that can only be applied to certain channels. Robolabs provides a default sample of each type for you to try.
Intent Visual Builder
This feature can only be used on Robolabs Premium plan

Now you can manage your intent through a more intuitive and easy to use interface. You can create an intent in the visual builder, edit all the components in the intent, up to the response in the intent.
For now, the response type that can be created and edited in Intent Visual Builder is only text. In the future we will present all response types that can be set in Intent Visual Builder.
Responses
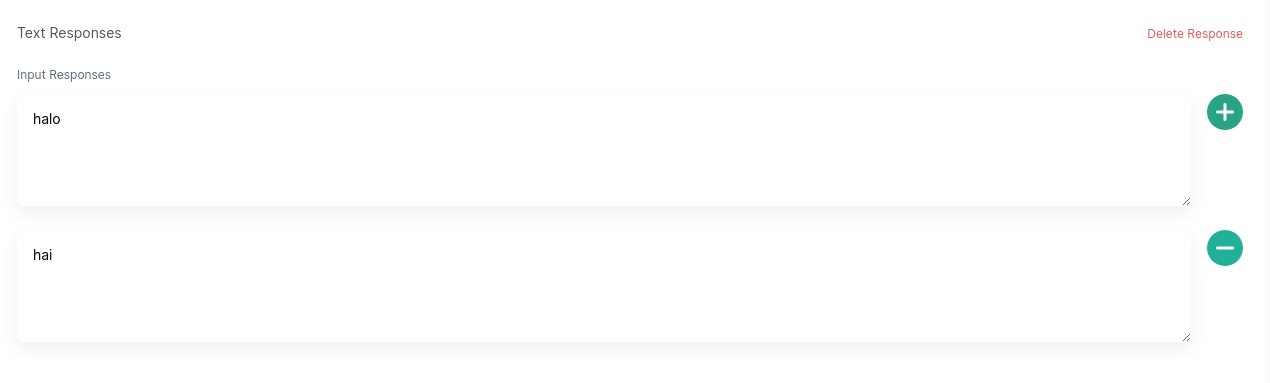
Text
Compatible: All of your channels
You can provide a variety of answers for text types. However, Dialogflow will only send one which is chosen at random.
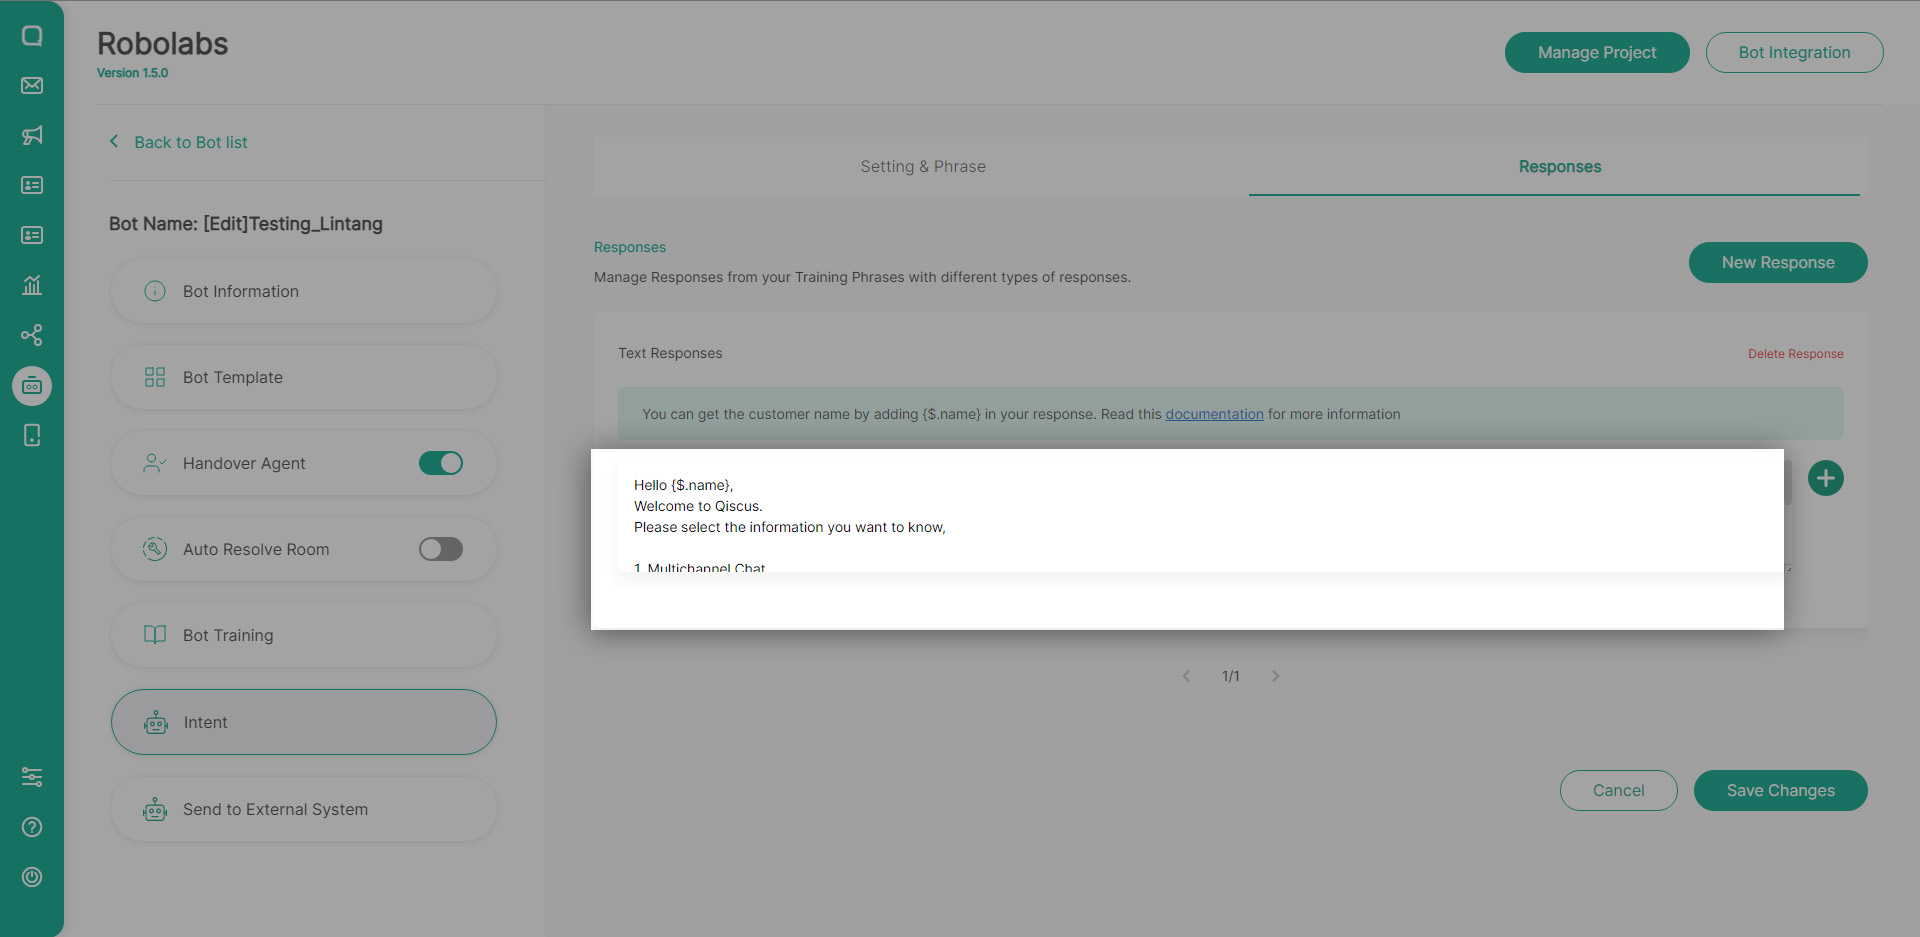
Get Customer Name
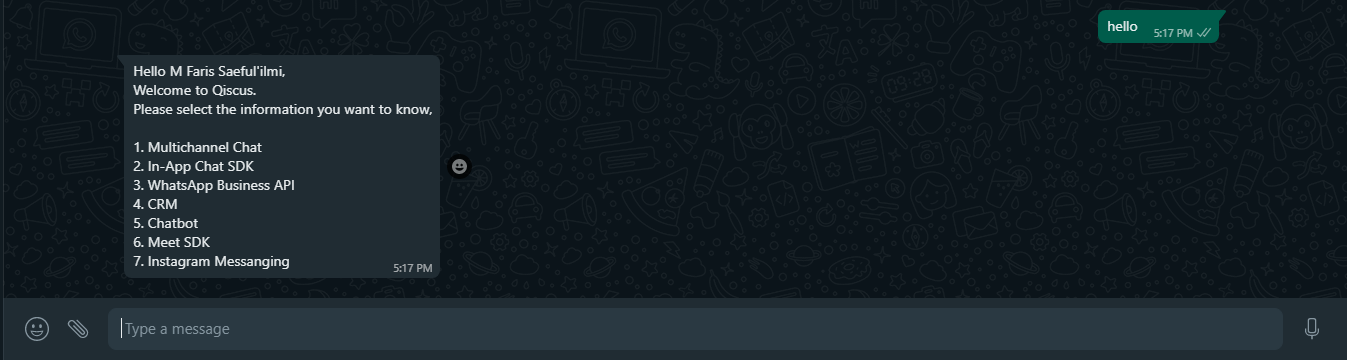
You can set your bot's response by calling the customer's name in this response text, put{$.name} in the response text to get the customer's name. here's an example:
And this is the view from the customer side via WA channel:
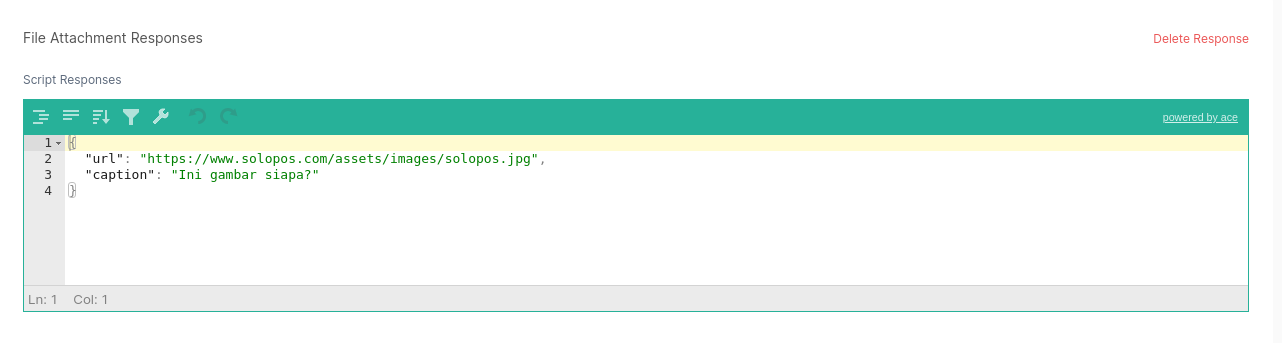
File Attachment
Compatible: All of your channels
You can send images and files of this type. Enter the URL where your image or file is saved. You can also provide a caption or description of what you sent.
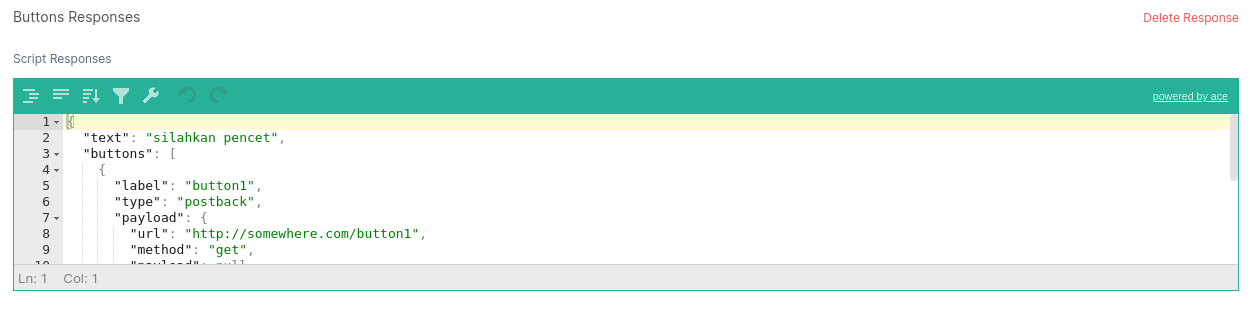
Buttons
Compatible: Does not work on the WhatsApp channel
Bot will display a response in the form of a button which when pressed the bot will perform the command as defined on each button.
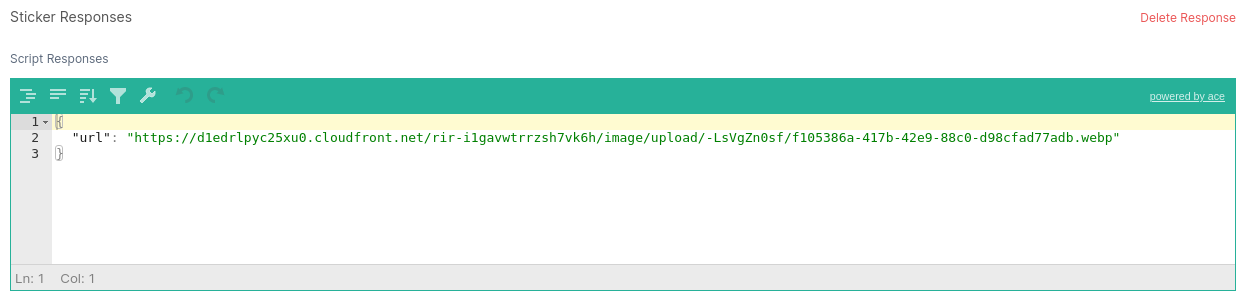
Stiker
Compatible: WhatsApp channel
You can also send images in the form of stickers provided that:
Sticker URL is publicly accessible
the resolution must be 512X512 pixels
size < 100KB
.webp image format
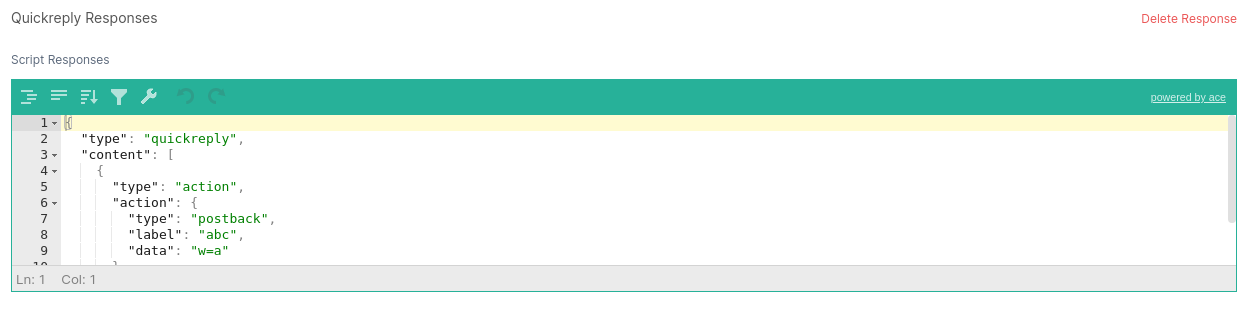
Quick Reply
Compatible: Line and Facebook channel
Bot will display response in the form of a button which when pressed the bot will perform the command as defined on each button and the button will disappear from the display.
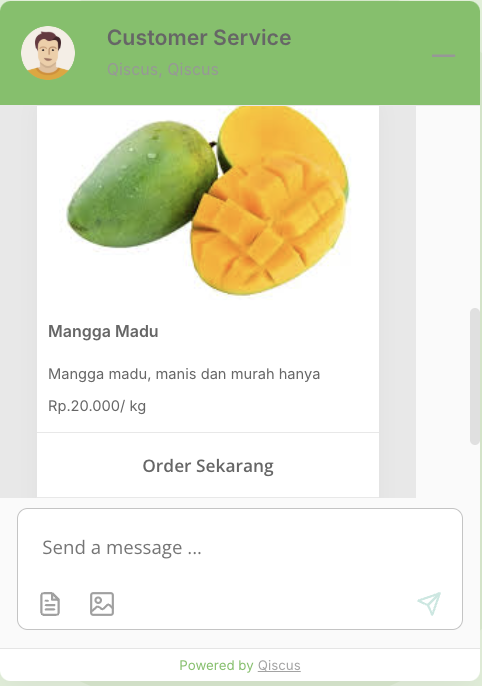
Carousel
Compatible: Facebook, LINE, Instagram, Telegram, Qiscus Widget Channel
The bot will display the response as a horizontally scrollable set of cards, each containing an image, text, and up to 3 interactive buttons. Some component to create carousel are:
Image (Max 5 MB)
Card title
Description
Carousel link
Button type
Postback Button: To call a special function of an intent
URL : To call a special function on a link that is listed
Button title
Cards per carousel: 2
Buttons per card: 3
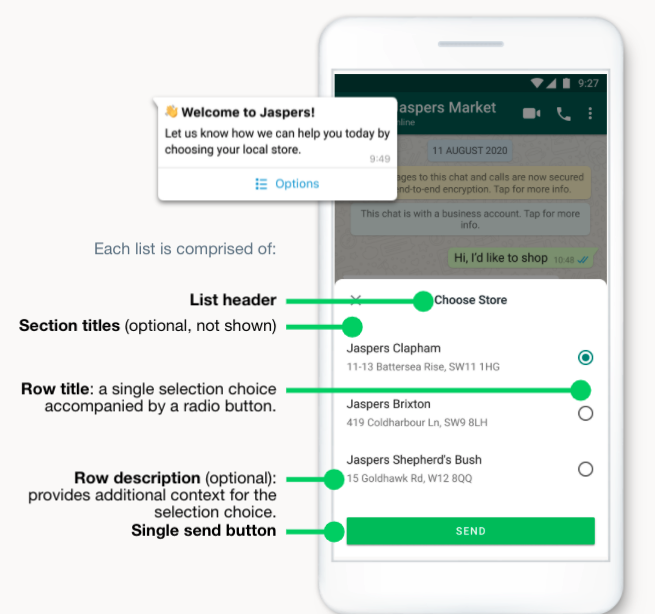
WhatsApp Interactive - List
Compatible: WhatsApp channel
Bot will display the response in the form of a list. Some of the components to create an interactive list are:
Header (optional)
Text with a maximum length of 60 characters.
Body (required)
Text with a maximum length of 1024 characters.
Footer (optional)
Text with a maximum length of 60 characters.
Action (required)
You can create up to 10 sections.
There is at least one set title-description in each section.
The title is text with a maximum length of 24 characters.
Description in the form of text with a maximum length of 72 characters.
List that has been selected by the end-user will then be received by the bot for the detect intent process. The text that will be processed by bots is only in the title section. Here's the final display of the interactive list:
You must assign channels a project bot to WhatsApp channel to be able to use the response type in the form of Interactive Message WA
Ensure that the bot project has been assigned to the WhatsApp channel:


Interactive Message will be dislplayed on intent responses if the project bot has been assigned to WA channel:
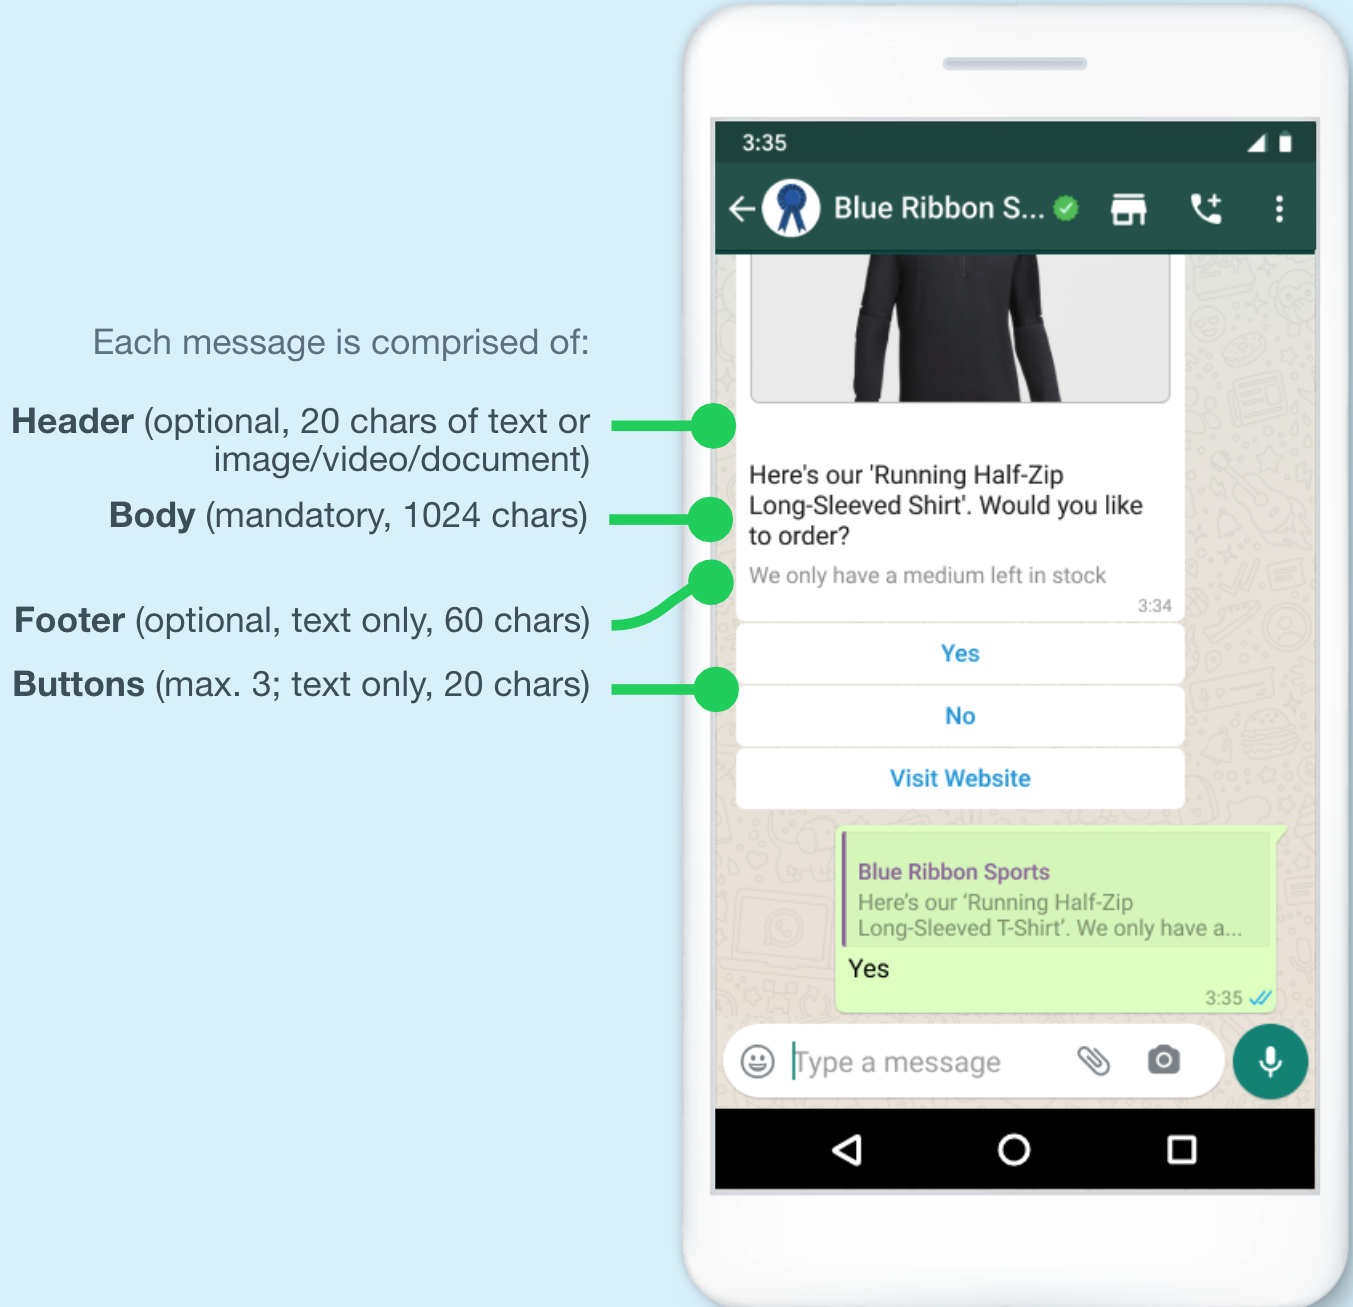
Whatsapp Interactive - Button
Compatible: WhatsApp channel
Bot will display the response in the form of a button. Some of the components to create an interactive list are:
Header (required)
Text with a maximum length of 60 characters.
You can add image, video, or document.
Body (required)
Text with a maximum length of 1024 characters.
Footer (optional)
Text with a maximum length of 60 characters.
Action (required)
You can create up to 3 buttons.
The title is text with a maximum length of 20 characters.
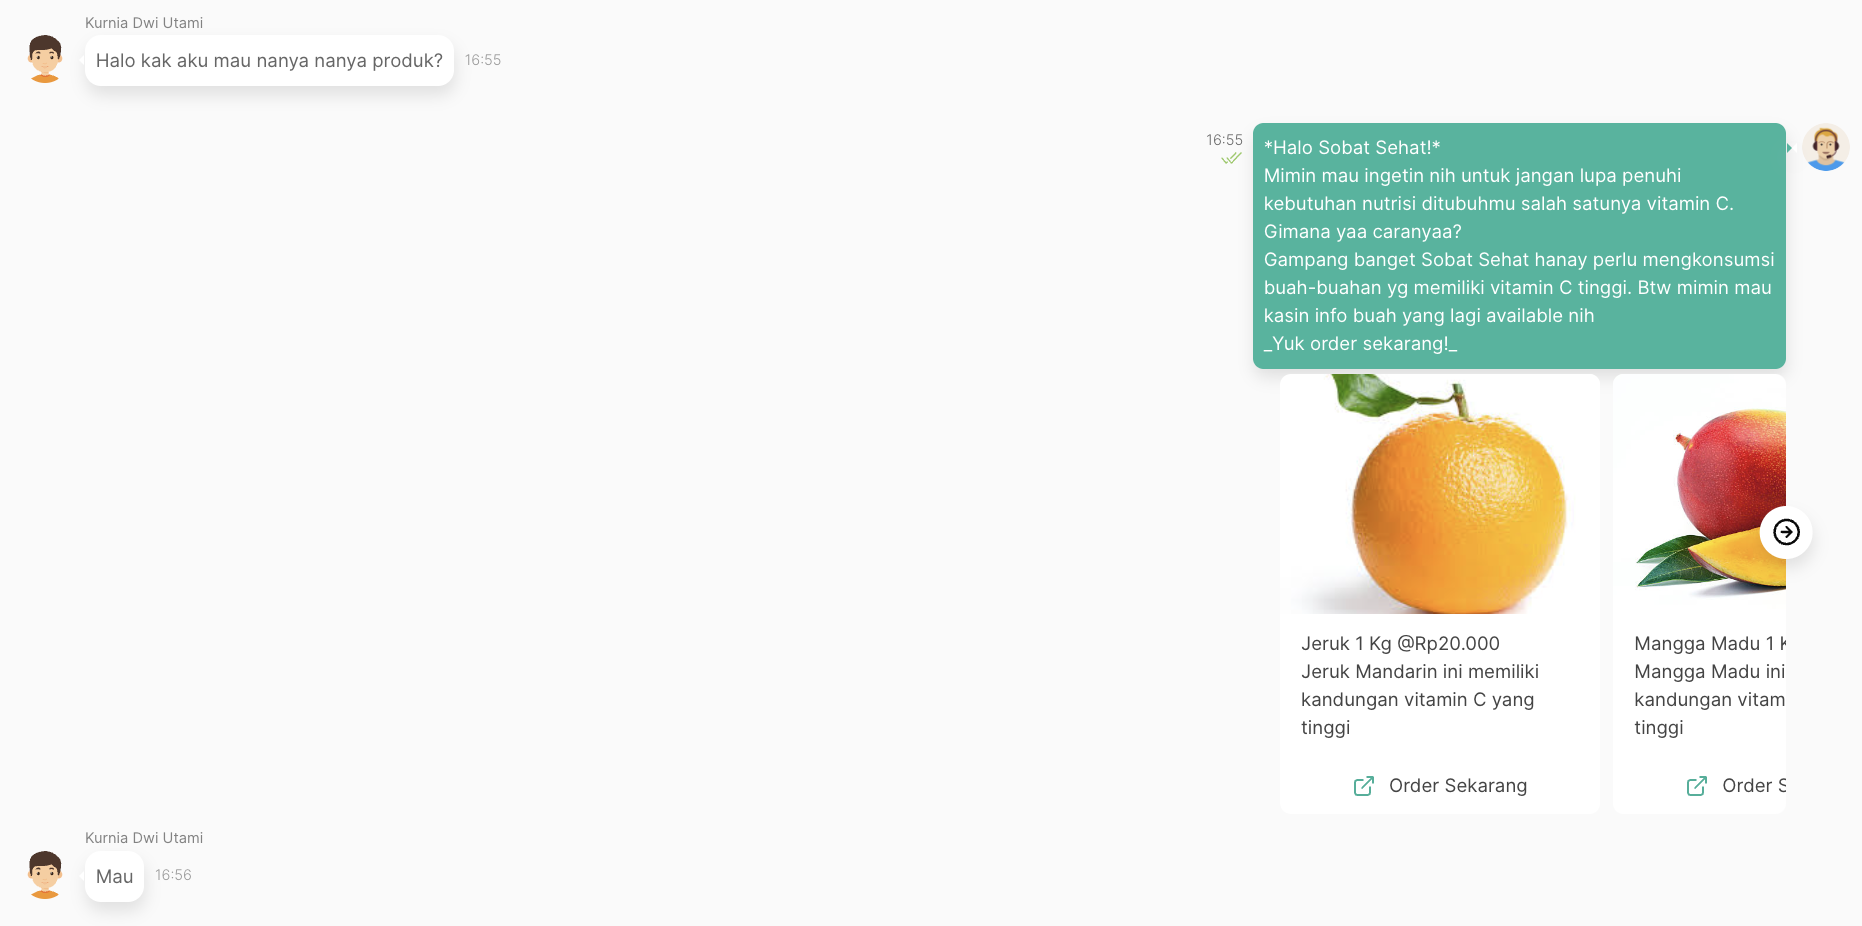
Button that has been selected by the end-user will then be received by the bot for the detect intent process. Here's the final display of the interactive button:
You must assign channels a project bot to WhatsApp channel to be able to use the response type in the form of Interactive Message WA
Ensure that the bot project has been assigned to the WhatsApp channel:

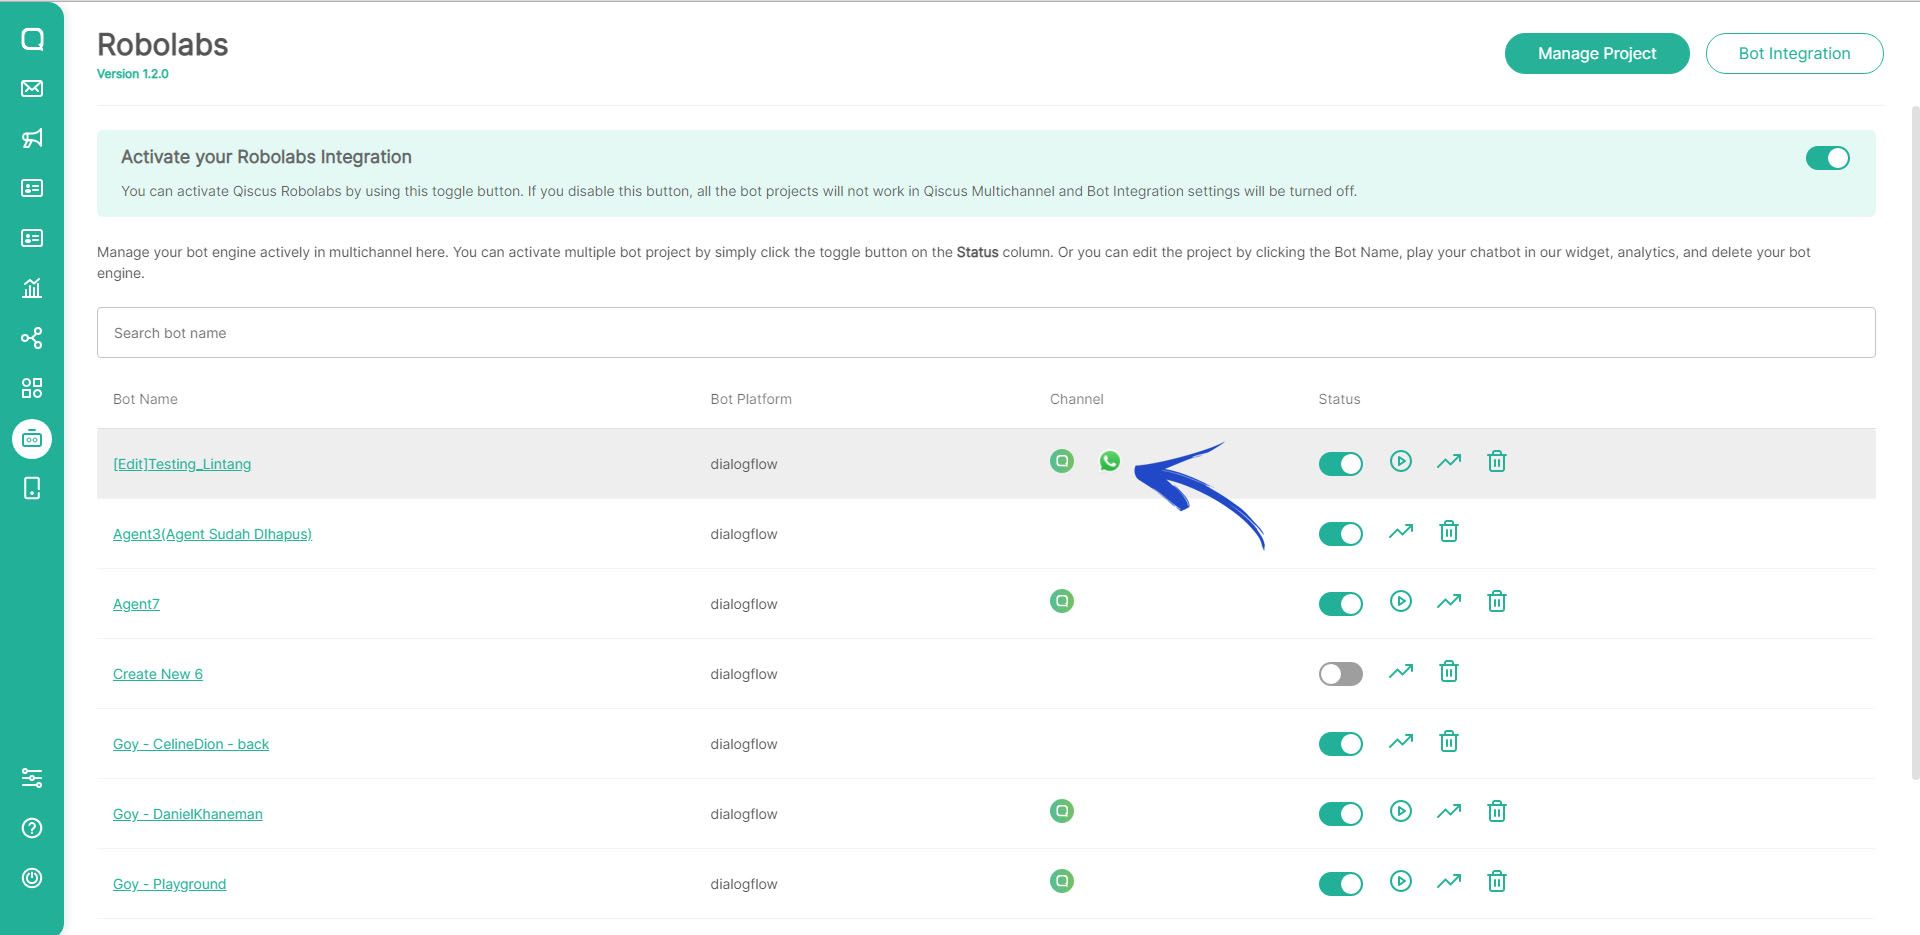
Interactive Message will be dislplayed on intent responses if the project bot has been assigned to WA channel:

WhatsApp Carousel
Compatible: WhatsApp channel
The WhatsApp Carousel feature allows you to configure and preview carousel-style messages that are sent through the WhatsApp channel. This feature is organized into three main configuration tabs on the settings page:
1. General Settings
This tab allows users to define the basic configuration of the WhatsApp Carousel message.
Required Fields:
Phone Number Select the phone number used for sending WhatsApp messages.
Template Choose a pre-approved WhatsApp carousel template.
If no templates are available, you must create one from Outbound Messages > WhatsApp Template before proceeding.
Language This dropdown only shows languages supported by the selected WhatsApp template (based on languages defined in WhatsApp template)
2. Variable Content
In this tab, users can define or map variables required by the template, such as dynamic text, image URLs, buttons, or other placeholders defined in the selected template
3. Carousel Preview
This tab is for preview purposes only. To make changes to the content, edit the template in Outbound Messages > WhatsApp Template.
Preview Includes:
Body Text Shows the main message content defined in the template.
Buttons Displays the call-to-action buttons configured in the template (e.g., Quick Reply, Phone Number, URL Button).
Website URL If the button links to a website, the URL will be shown in this preview

To help you better understand how the WhatsApp Carousel appears and functions in a real conversation, below are some screenshots demonstrating its layout and behavior.
Back to Parent
Back to Parent is a feature that allows a response in an intent to return to the previous menu or the parent of that intent. By default, if the end-user's flow is in an intent that has a parent, they cannot return to the previous menu or the parent of that intent, so by enabling this feature in the intent, the end-user can return to the previous menu with input from the end-user. By default the command is "Back".
Go to Robolabs, then select the desired project.
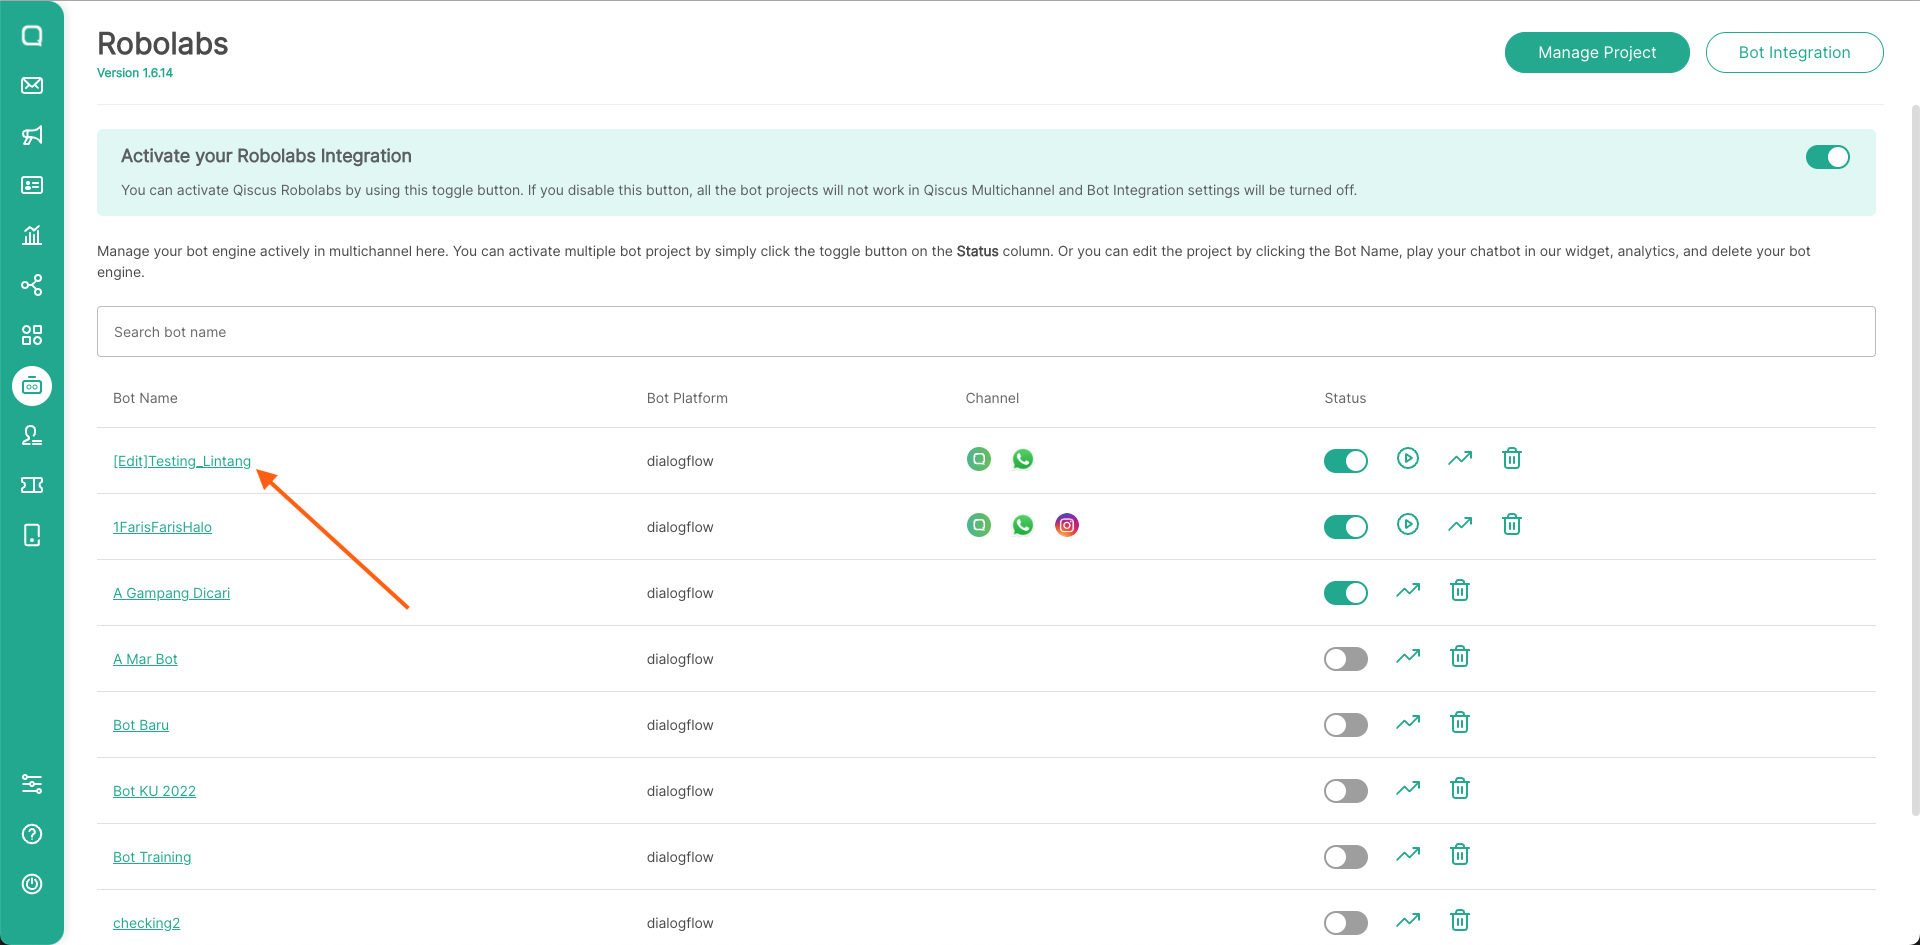
Then select the Intent menu, select the intent that you want to be eligible to return to the previous menu/parent. For the example, we will create a
sub-greetingsintent to be eligible back to thechild-greetingsintent. Click Create Intents
In this example, enter the display name in the form
sub-greetings, enter the parent, and activate the Back to Parent feature and make sure the intent already has a parent. If the intent doesn't have a parent, the Back to Parent feature cannot be used.
Back to Parent feature cannot be used in fallback intents. Then, if you have used the Back to Parent feature, you cannot disable this feature, you have to create new intent again.
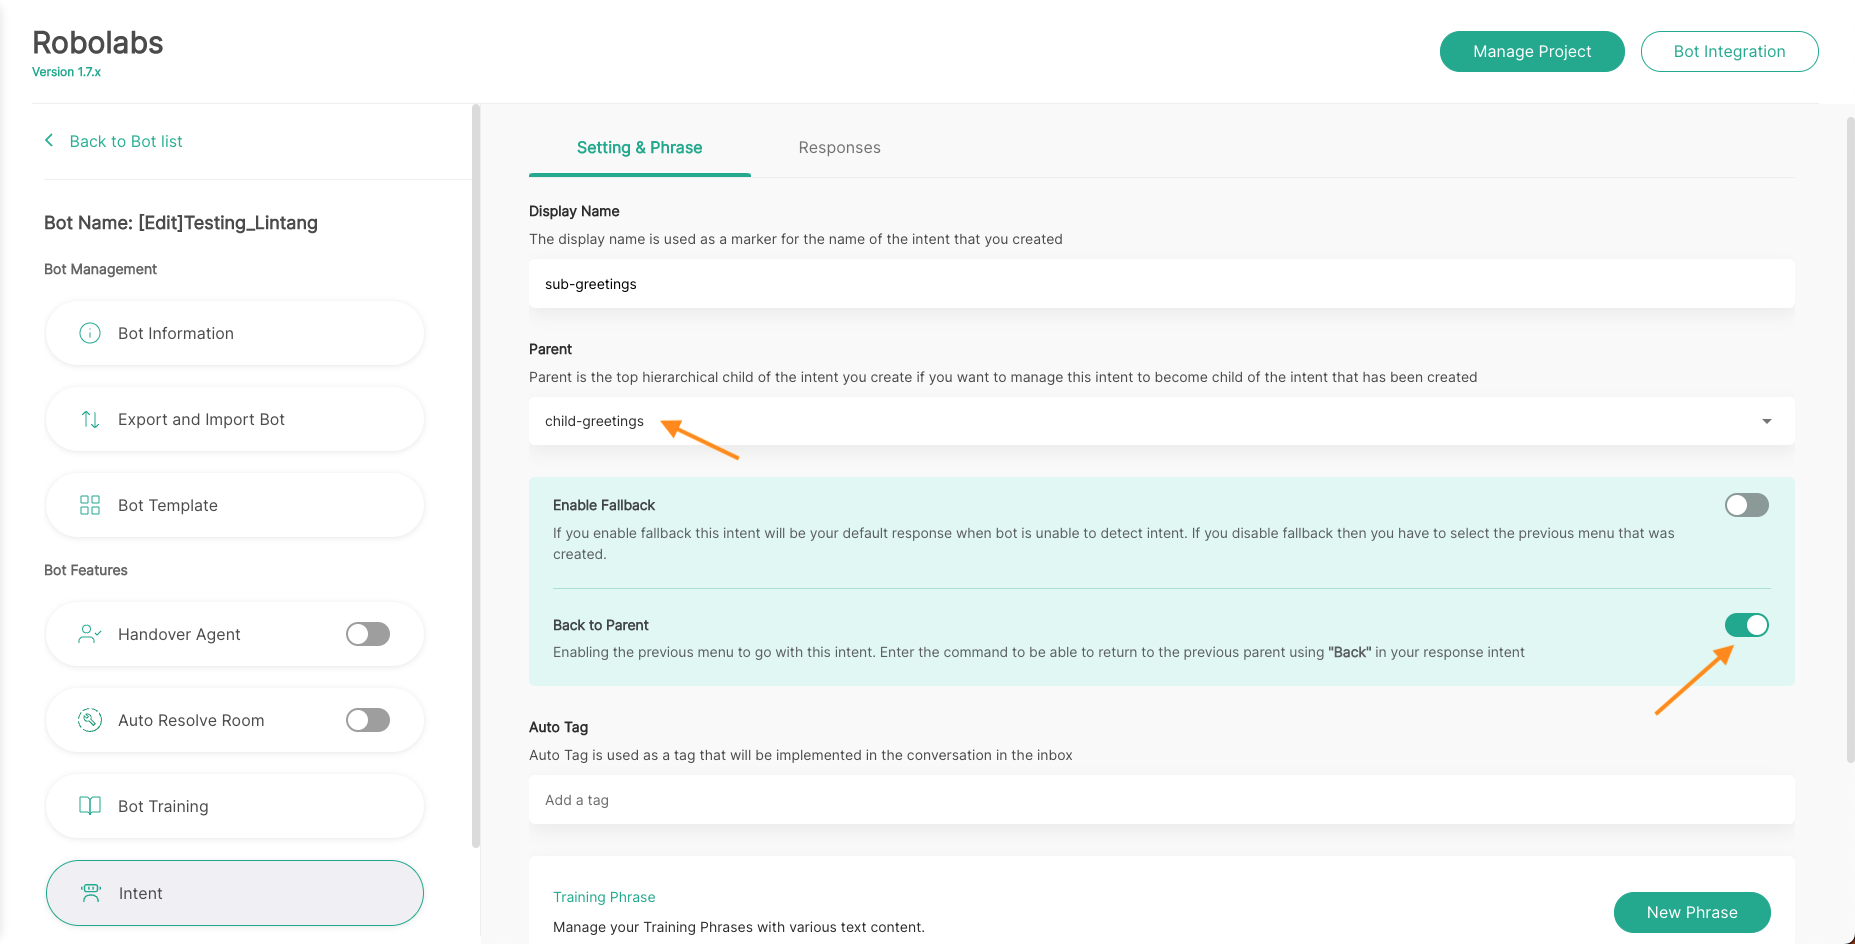
After activating the Back to Parent feature, the command will automatically fill in the response. You can change the response intent as needed. Then click the +Add to Back to Parent Command button to give the command variable back. To set the command you want, you can read our documentation below regarding Configure Command.
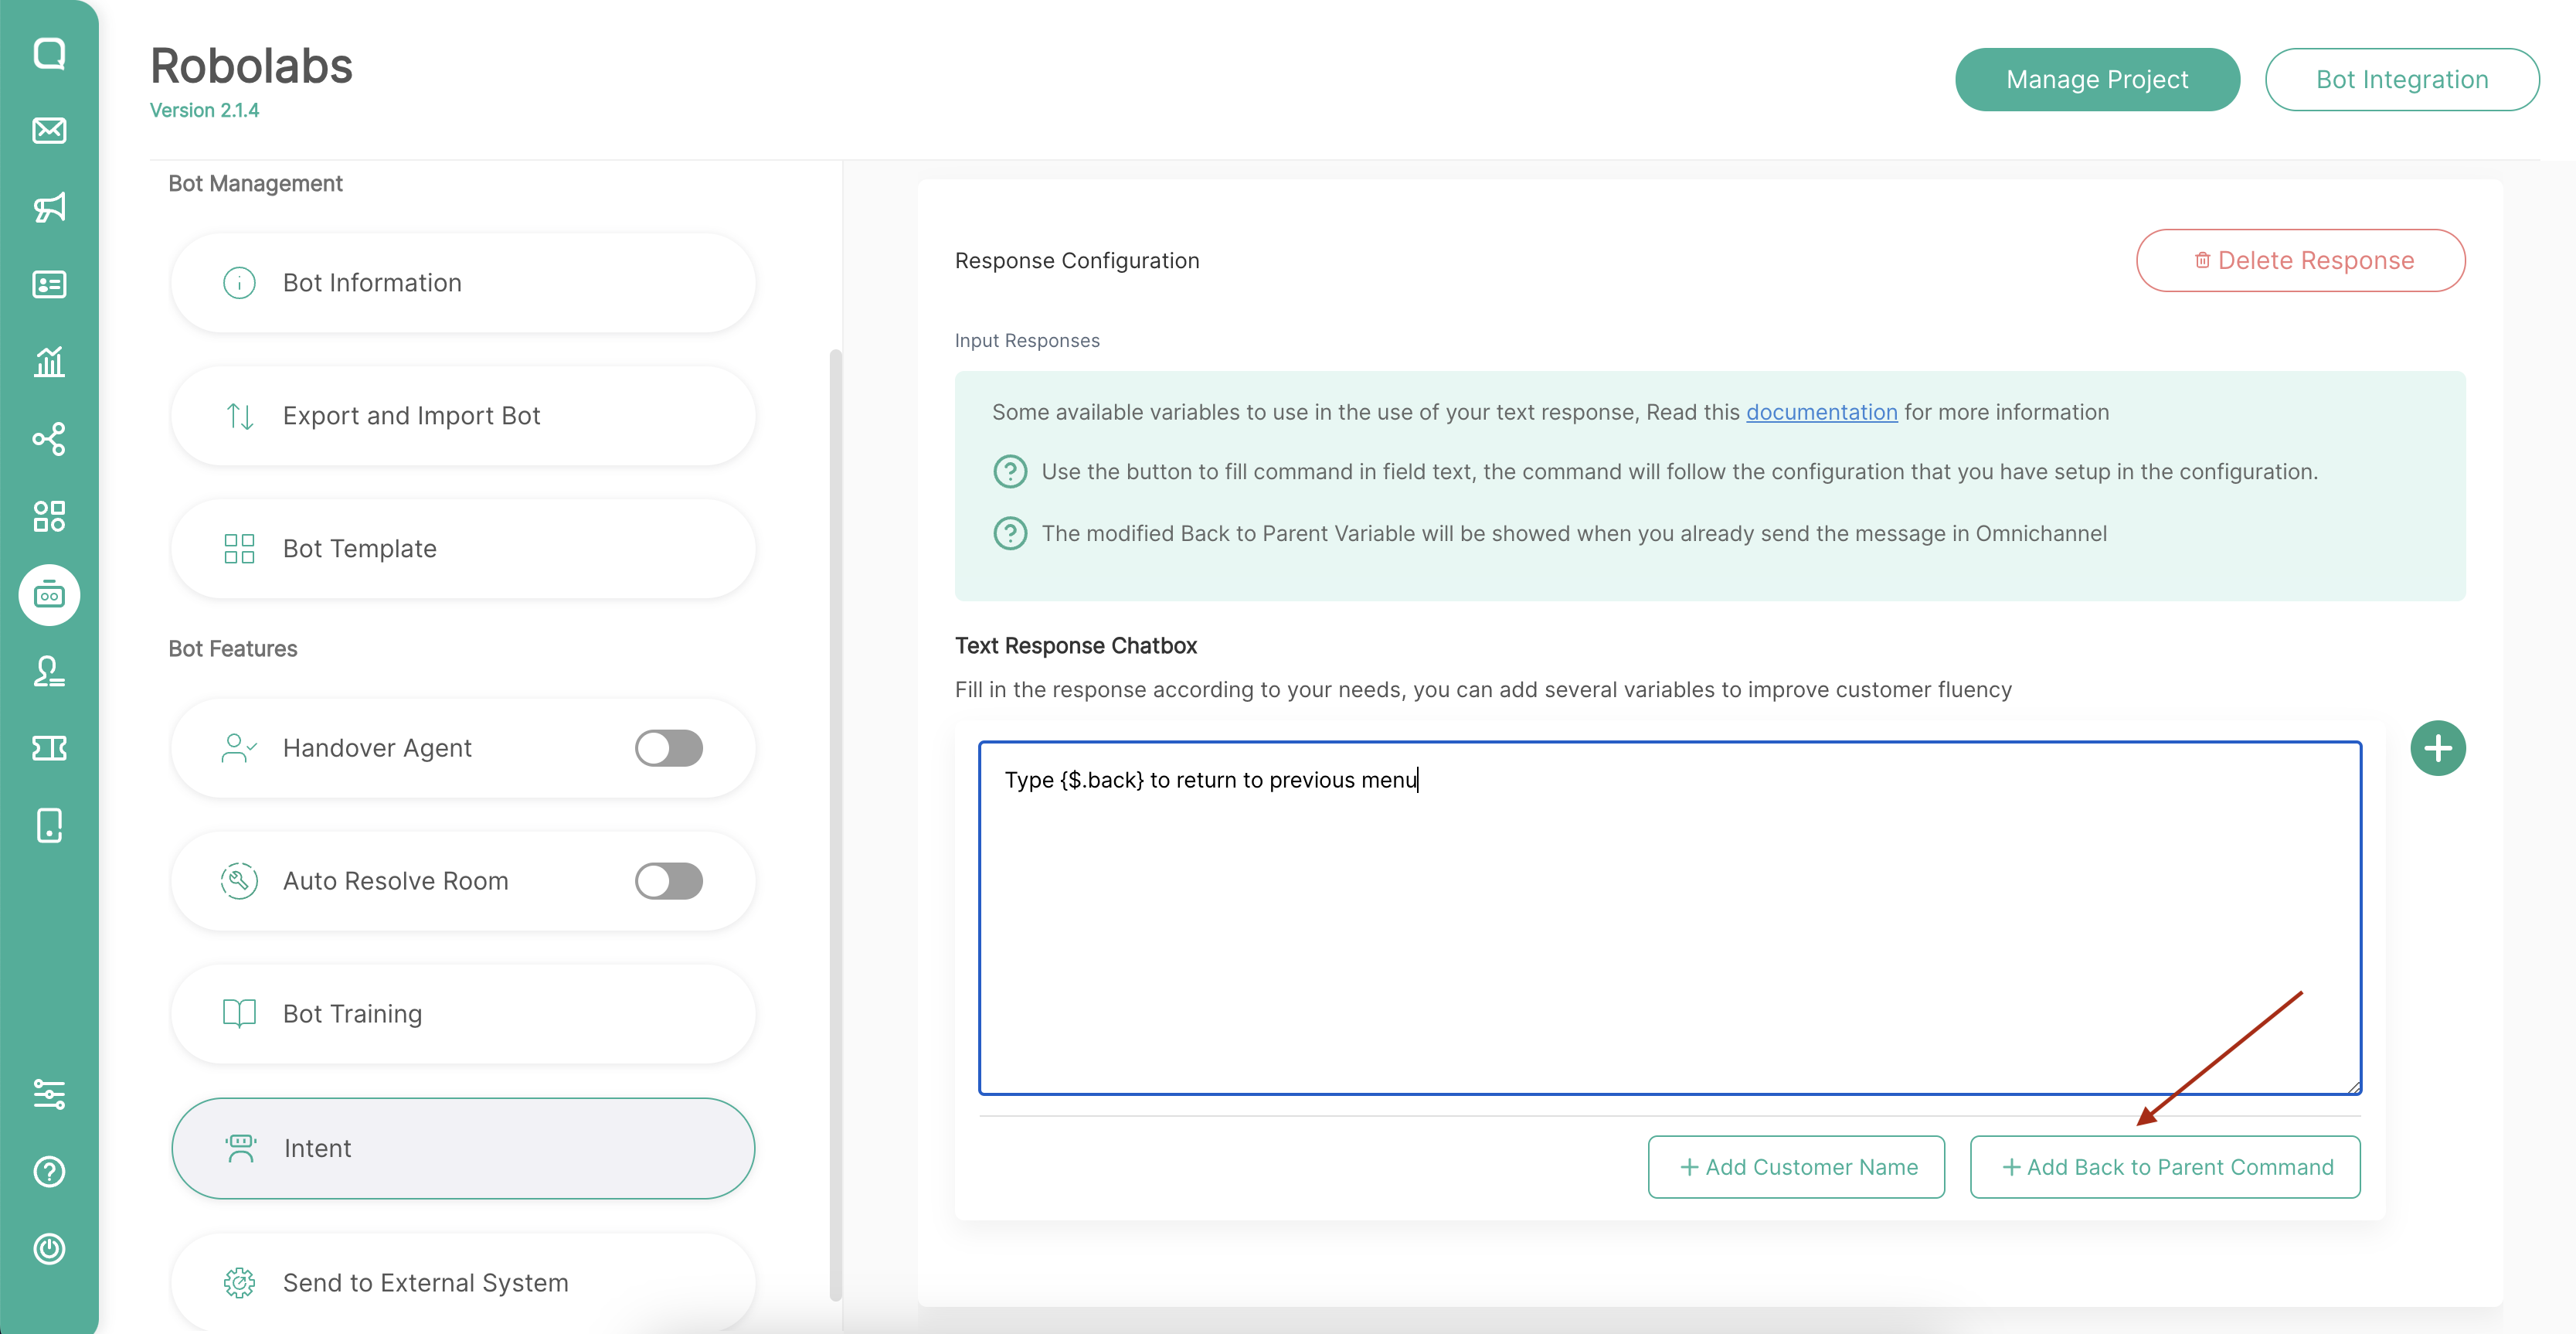
You can also add multiple response text and other responses as needed.
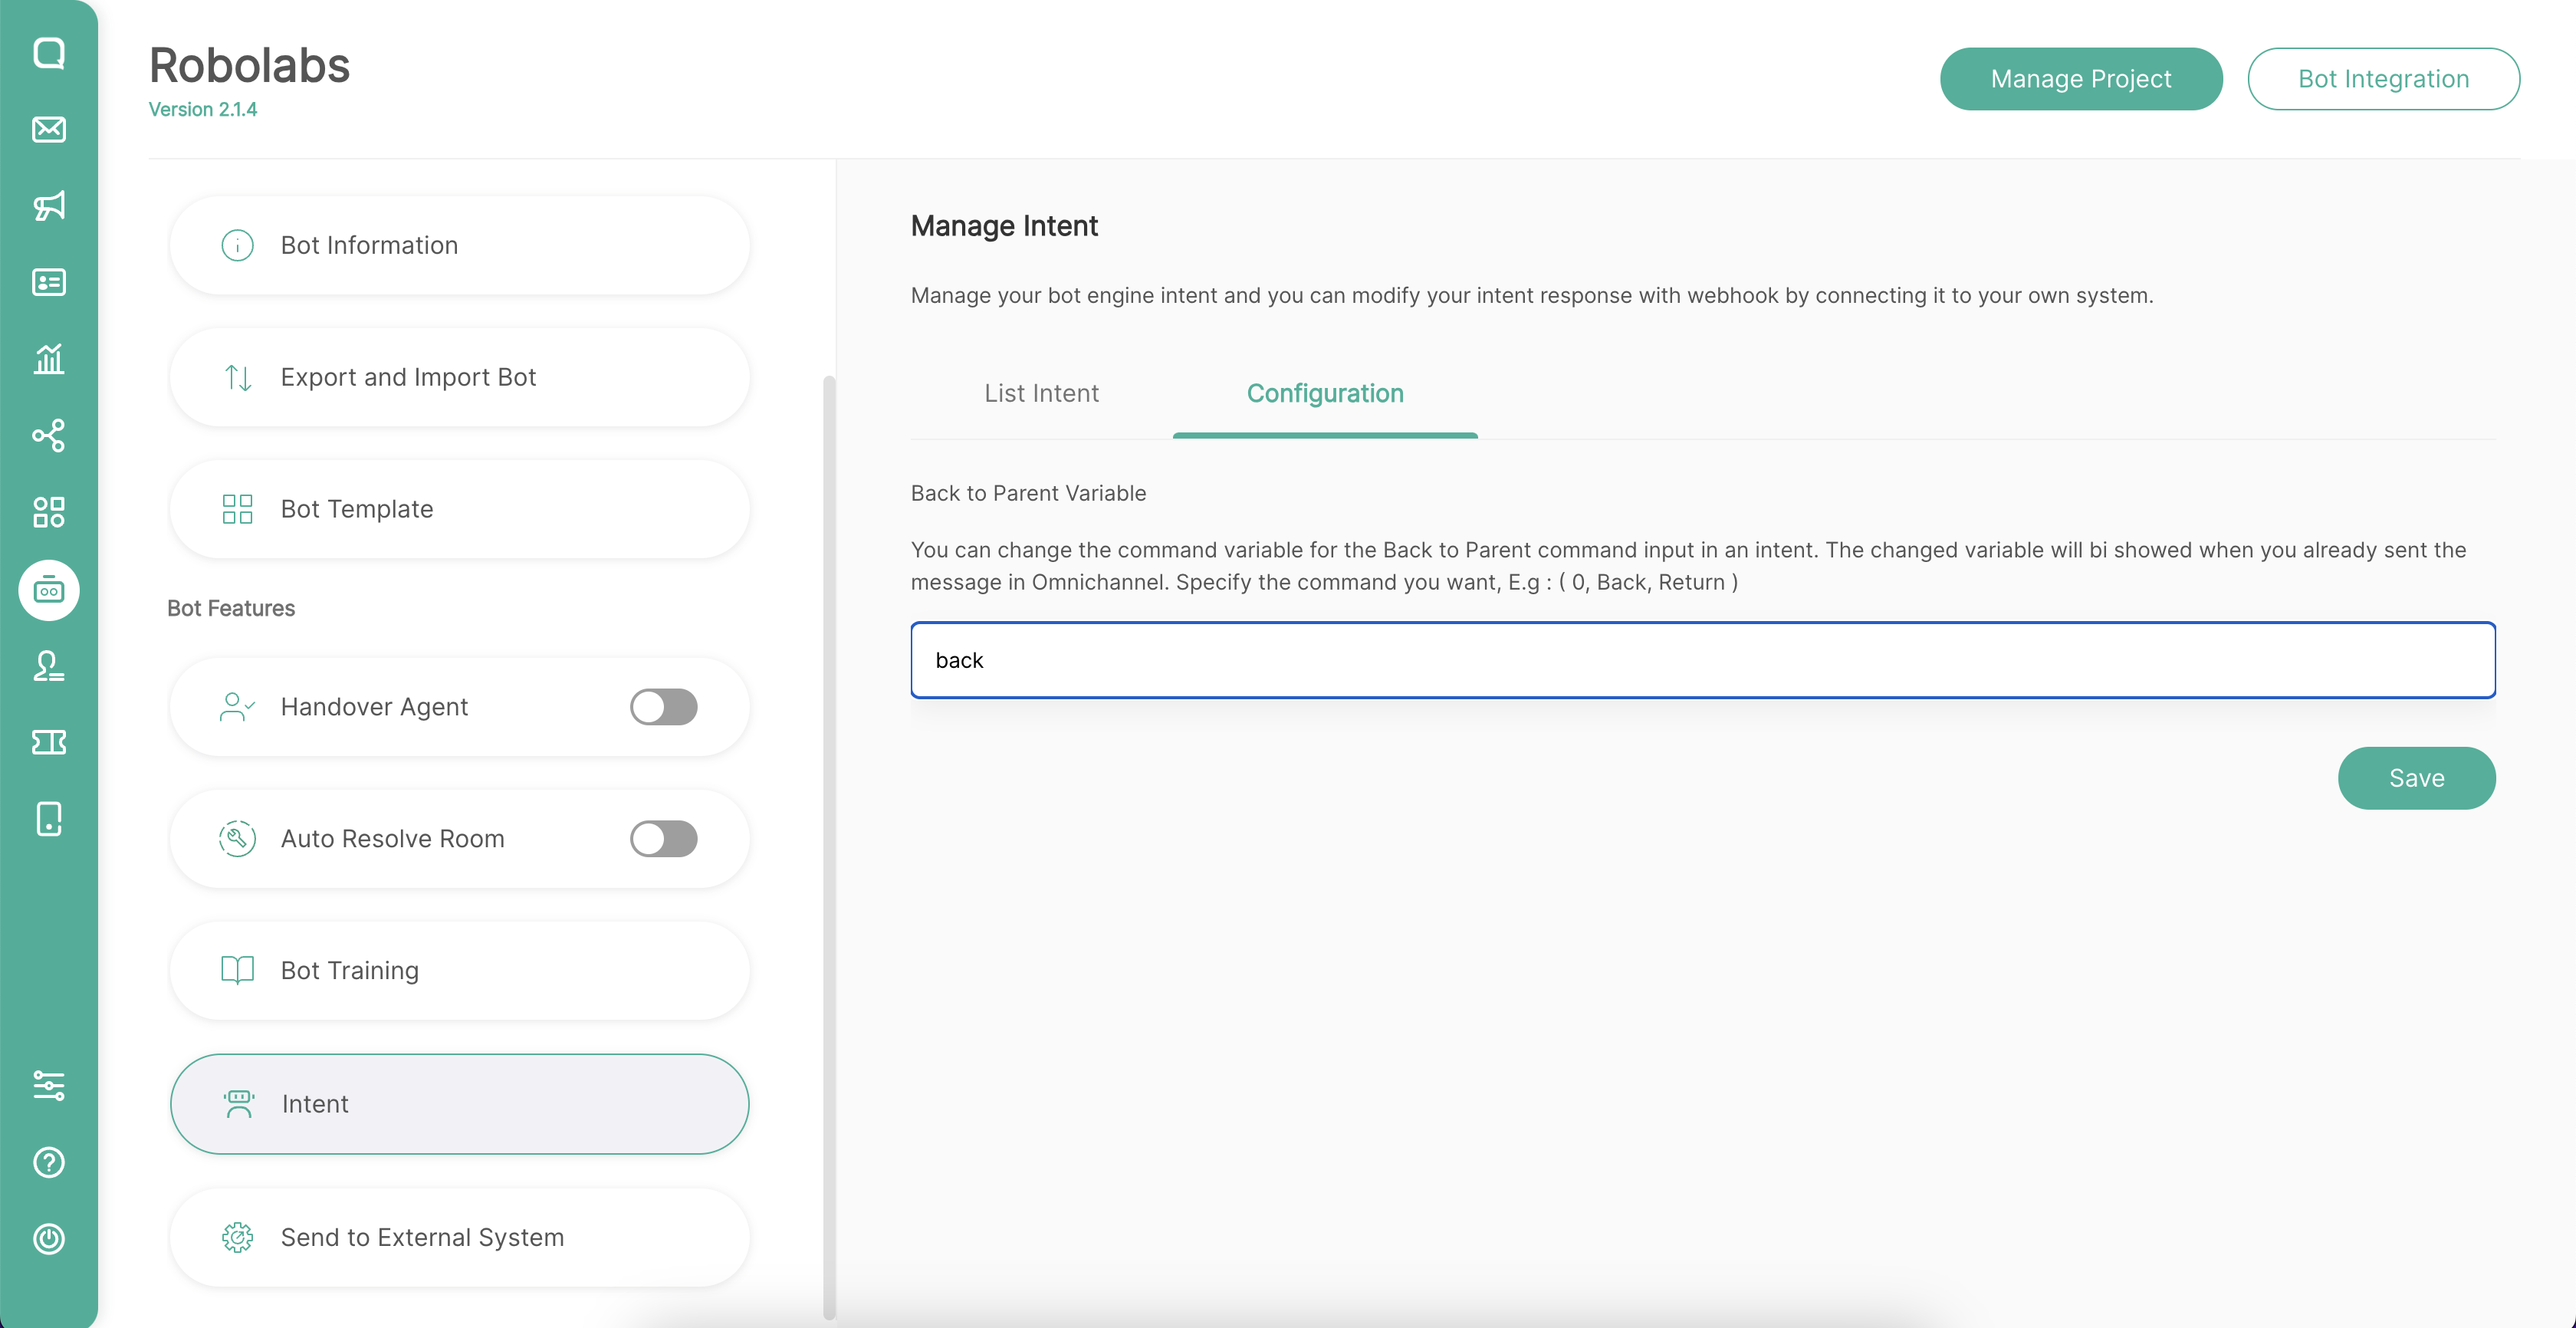
Configure Command
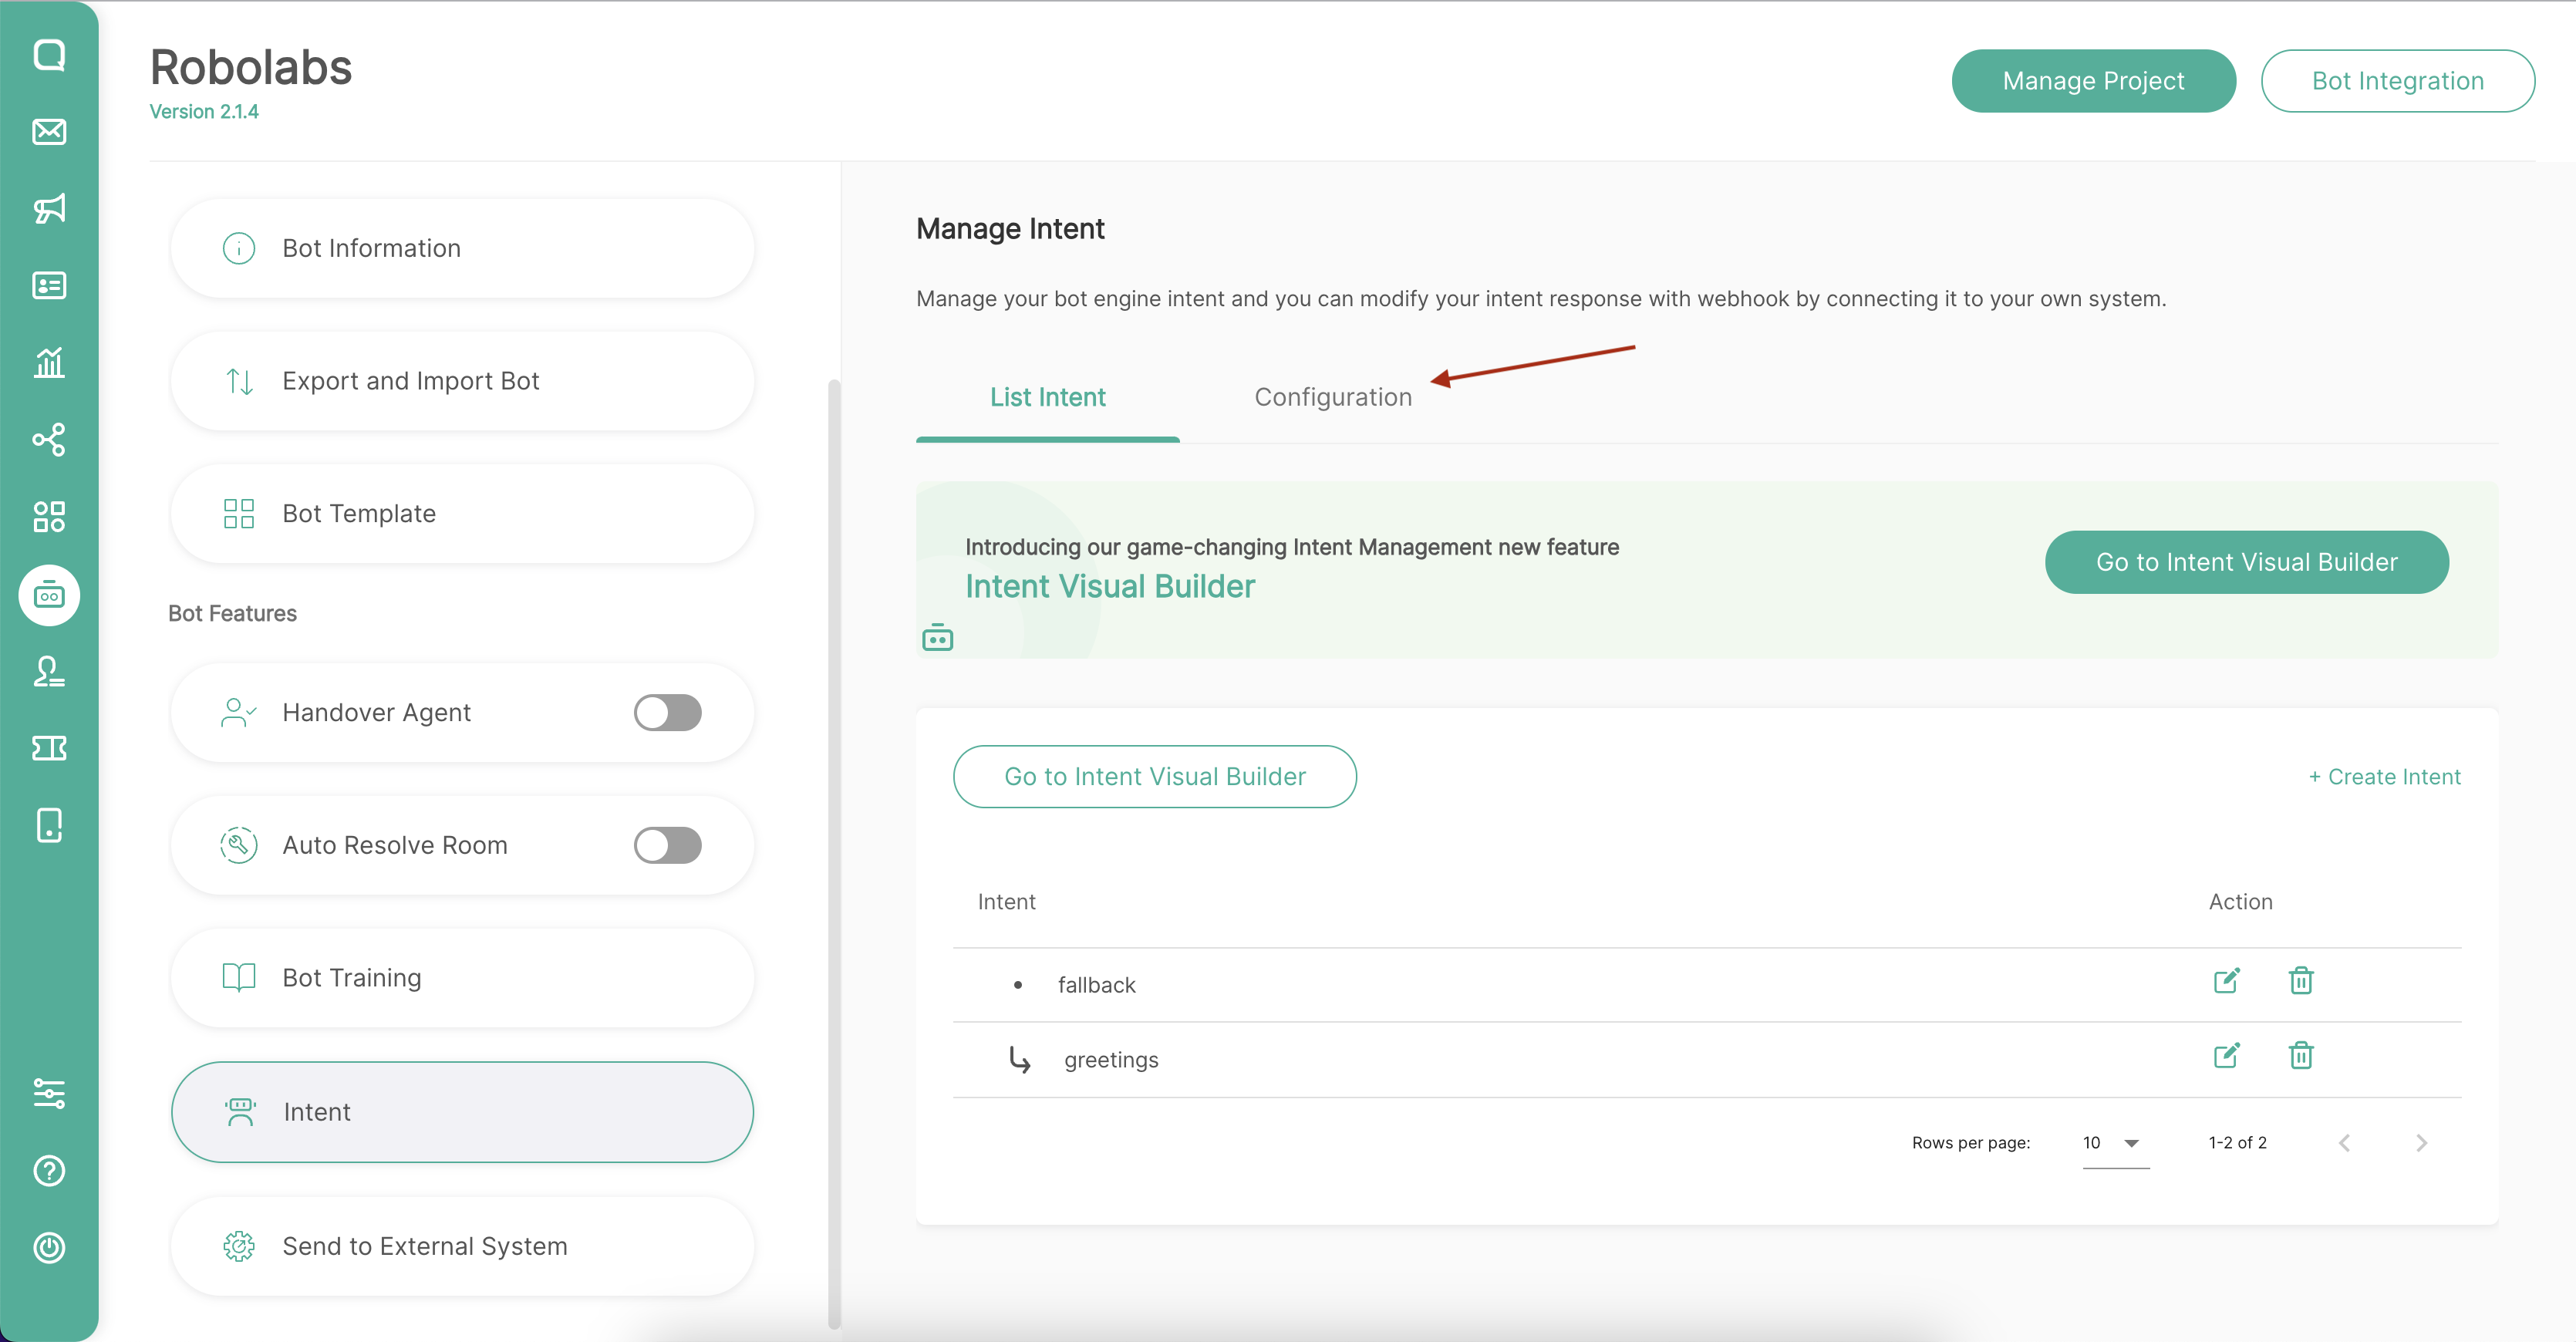
By default, Back to Parent command is "Back". Then if you want to change the command, you can go to the Configuration page which is on the Intent page.
First, go to the Intent page in Robolabs. Then choose Configuration menu in the tab bar.
On this page you can change the Back to Parent command according to your needs.
This command will be implemented for all intents that use the Back to Parent feature in this bot project, you cannot use a different command for each intent.
Limitation
You must know the limitations of using this "Back to Parent" feature
There are limitations to the Back to Parent feature, including:
Back to Parent feature can only be activated when creating a new intent. If you want to disable the Back to Parent feature in an intent, you must first delete that intent.
Back to Parent can only be used by intents that have a parent.
The choice of training phrases in an intent layer needs to be considered. If an intent activates the Back to Parent feature, it must follow these rules:
Intent in layers 1 and 2 must have the same training phrase to select the Menu, for example, layers 1 and 2 use letters (choose a, b, c, d, etc.).
Then in layers 3 and 4, training phrases must be different from layers 1 and 2, so if layers 1 and 2 use letters to select the Menu, then in layers 3 and 4 use numbers (choose 1, 2, 3, 4, etc.) or a combination of letters and numbers (choose a1, a2, a3, etc.).
Dialogflow Quota
Your Dialogflow project has 60 request per minute for design time quota. Design time quota is a request quota that deducted from building a Dialogflow agent. This won’t effecting bot conversation with your customer.
If your project happens to reach the quota, then Dialogflow cannot receive any request. Hence, you cannot access some features that related to Dialogflow. After a minute passed, Dialogflow automatically reset your quota and you can use Robolabs again.
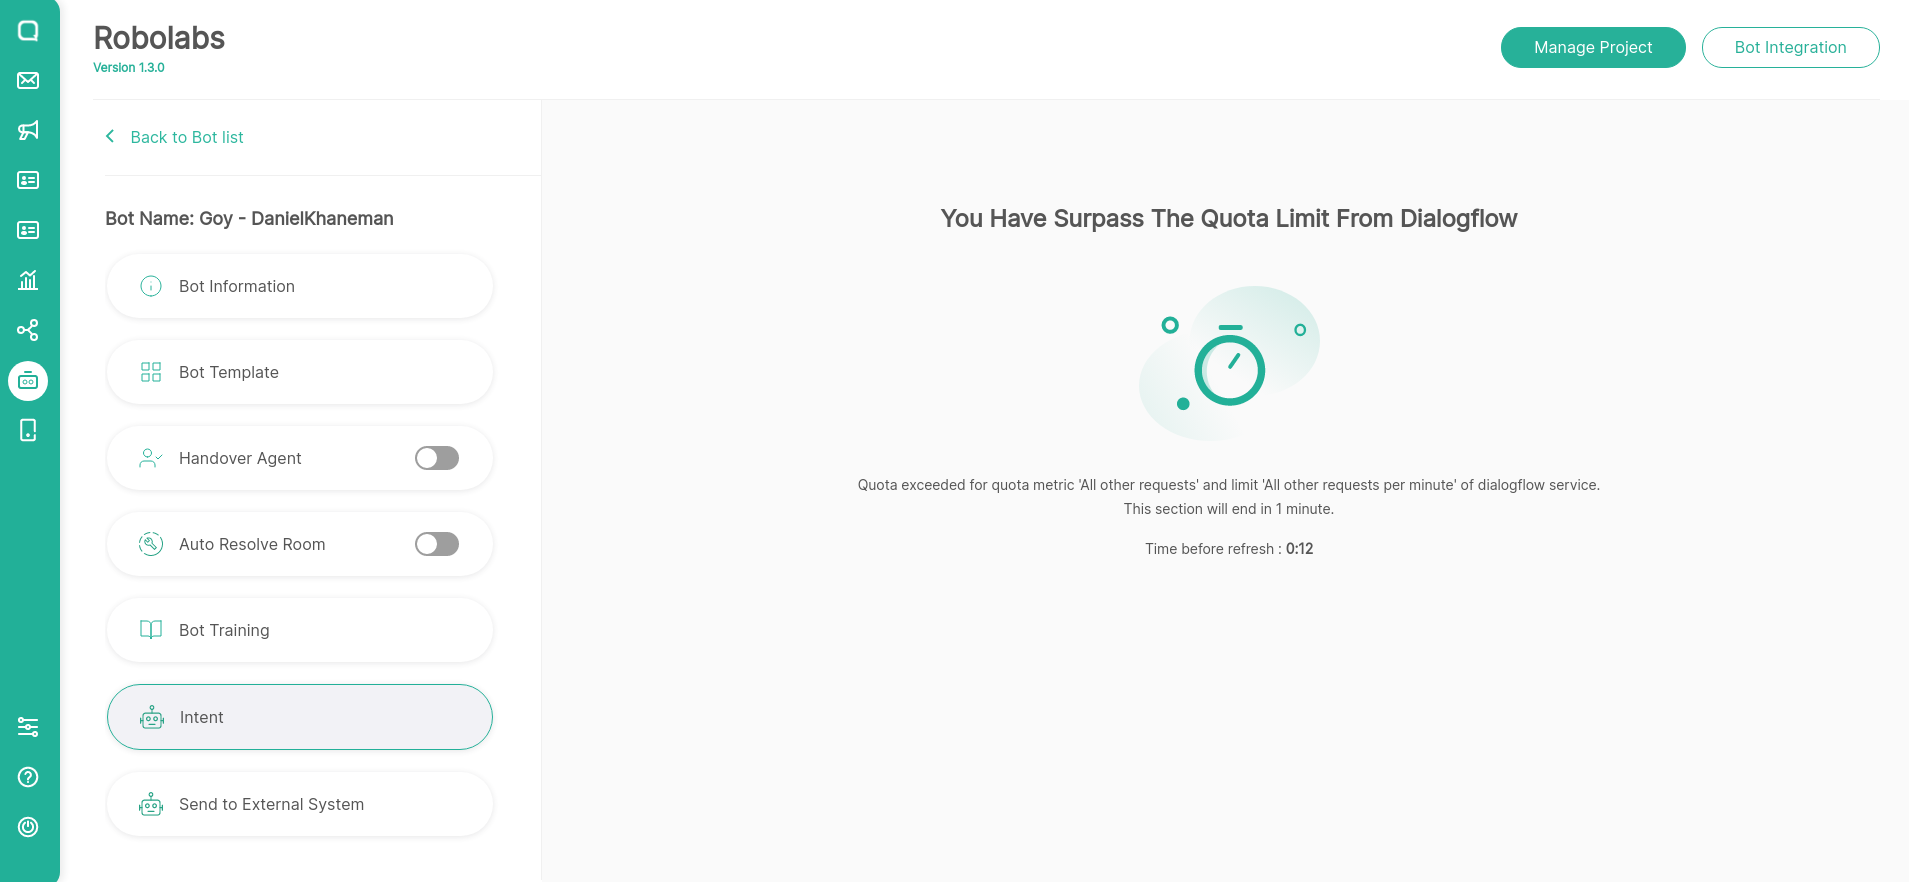
Dialogflow Quota Page most likely appears in upload action such as upload a template, import a project, or train in batch. You can avoid this situation simply by splitting the file with maximum 20 intent per file.
For more information about Dialogflow quota, you can visit this link.