Dialogflow Webhook
By default, your agent responds to a matched intent with a static response. If you're activate webhook, you can provide a more dynamic response. When you enable webhook for an intent, Dialogflow responds to that intent by calling a service that you define.
Each intent has a setting to enable webhook. If an intent requires some action by your system or a dynamic response, you should enable webhook for the intent. If an intent without webhook enabled is matched, Dialogflow uses the static response you defined for the intent.
When an intent with webhook enabled is matched, Dialogflow sends a request to your webhook service with information about the matched intent. Your system can perform any required actions and respond to Dialogflow with information for how to proceed. When fulfillment is enabled, the static response you defined for the intent is only used if your webhook service fails. The following diagram shows the processing flow for fulfillment.
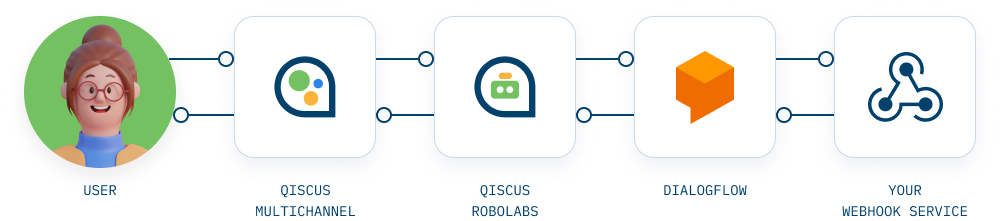
The end-user types an expression.
Qiscus Omnichannel pass expression to Qiscus Robolabs.
Qiscus Robolabs pass expression to Dialogflow.
Dialogflow matches the end-user expression to an intent and extracts parameters.
Dialogflow sends a webhook request message to your webhook service. This message contains information about the matched intent, the action, the parameters, and the response defined for the intent.
Your service performs actions as needed, like database queries or external API calls.
Your service sends a webhook response message to Dialogflow. This message contains the response that should be sent to the end-user.
Dialogflow sends the response to Qiscus Robolabs.
Qiscus Robolabs parse Dialogflow response and check handover agent if any. Then pass response to Qiscus Omnichannel.
The end-user sees the response.
We’ve created a webhook service sample using Flask, you may see the code here.
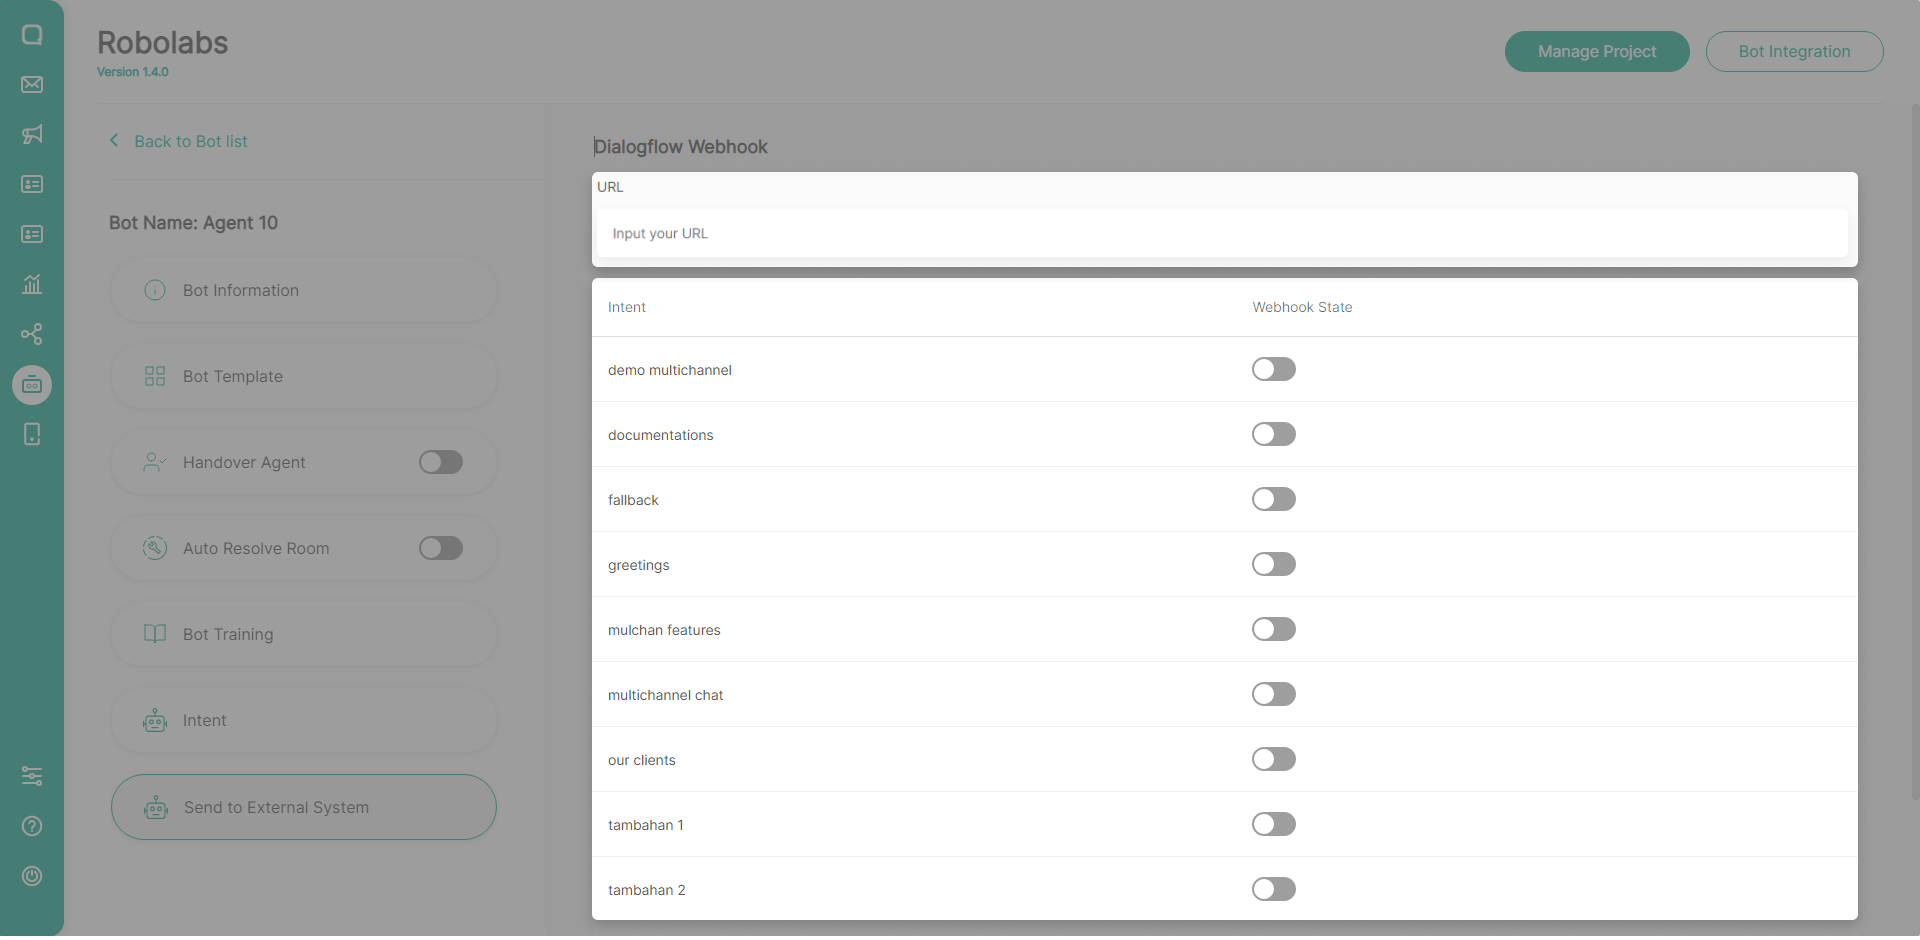
Setup your Dialogflow Webhhok
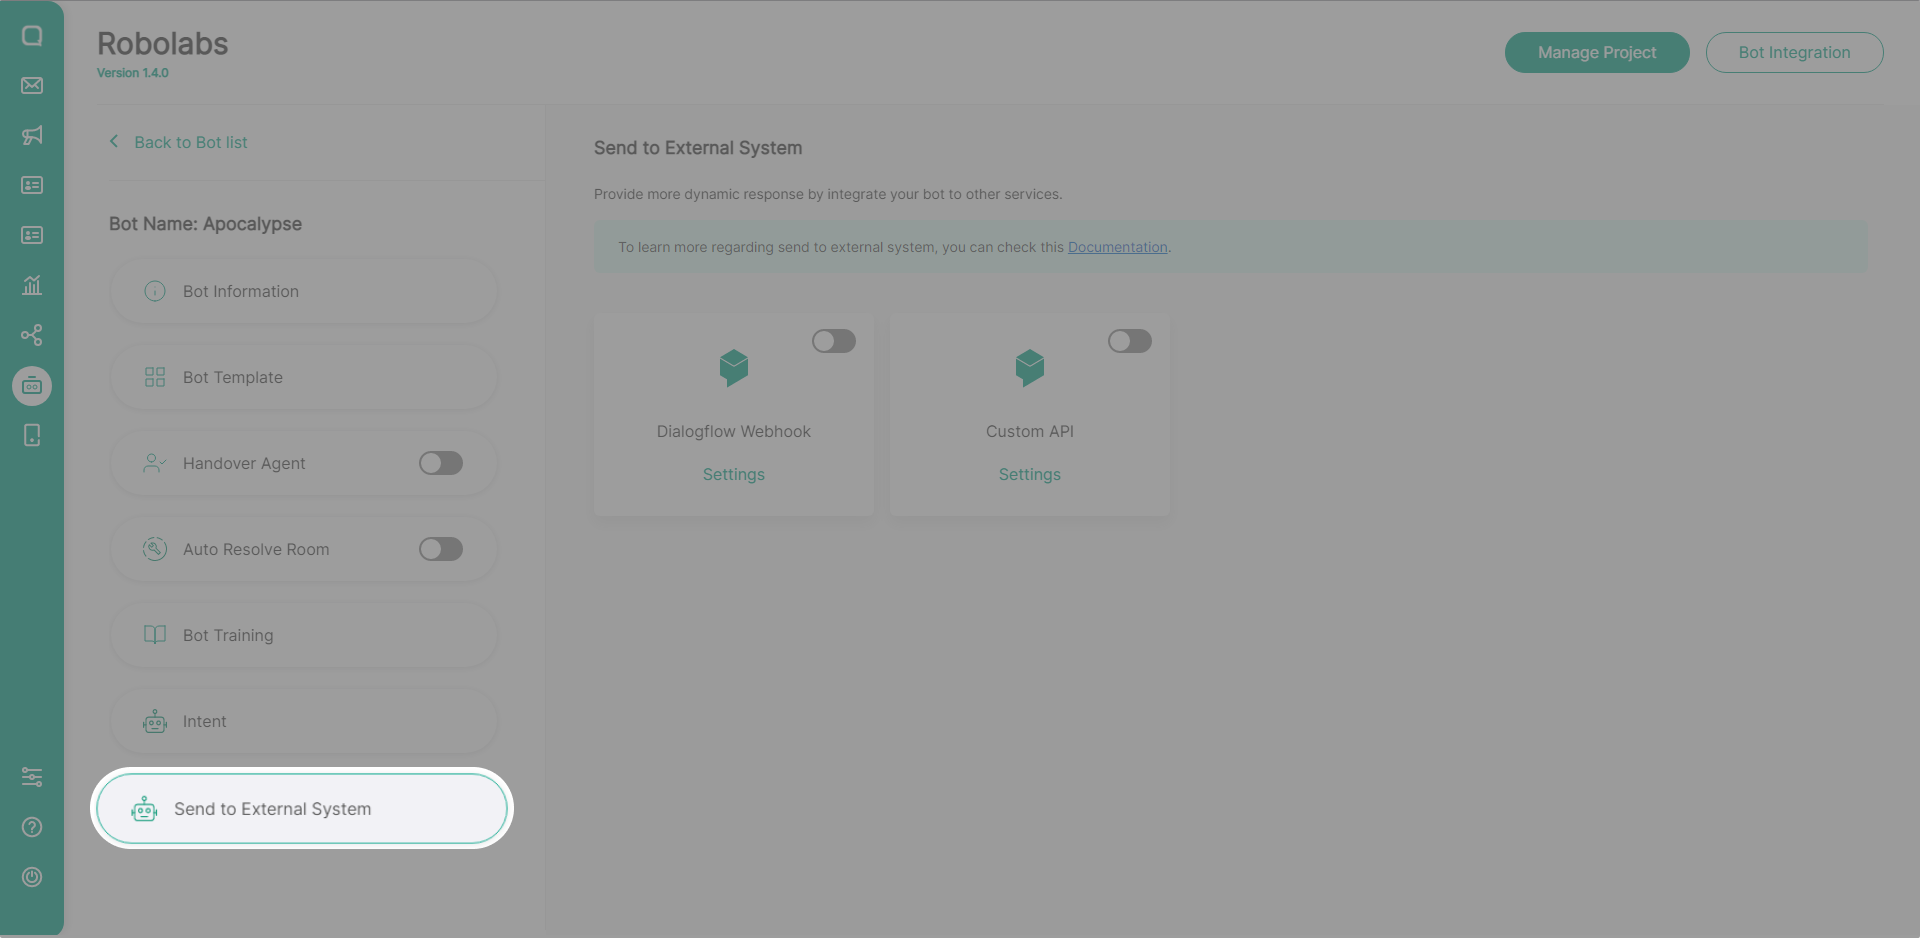
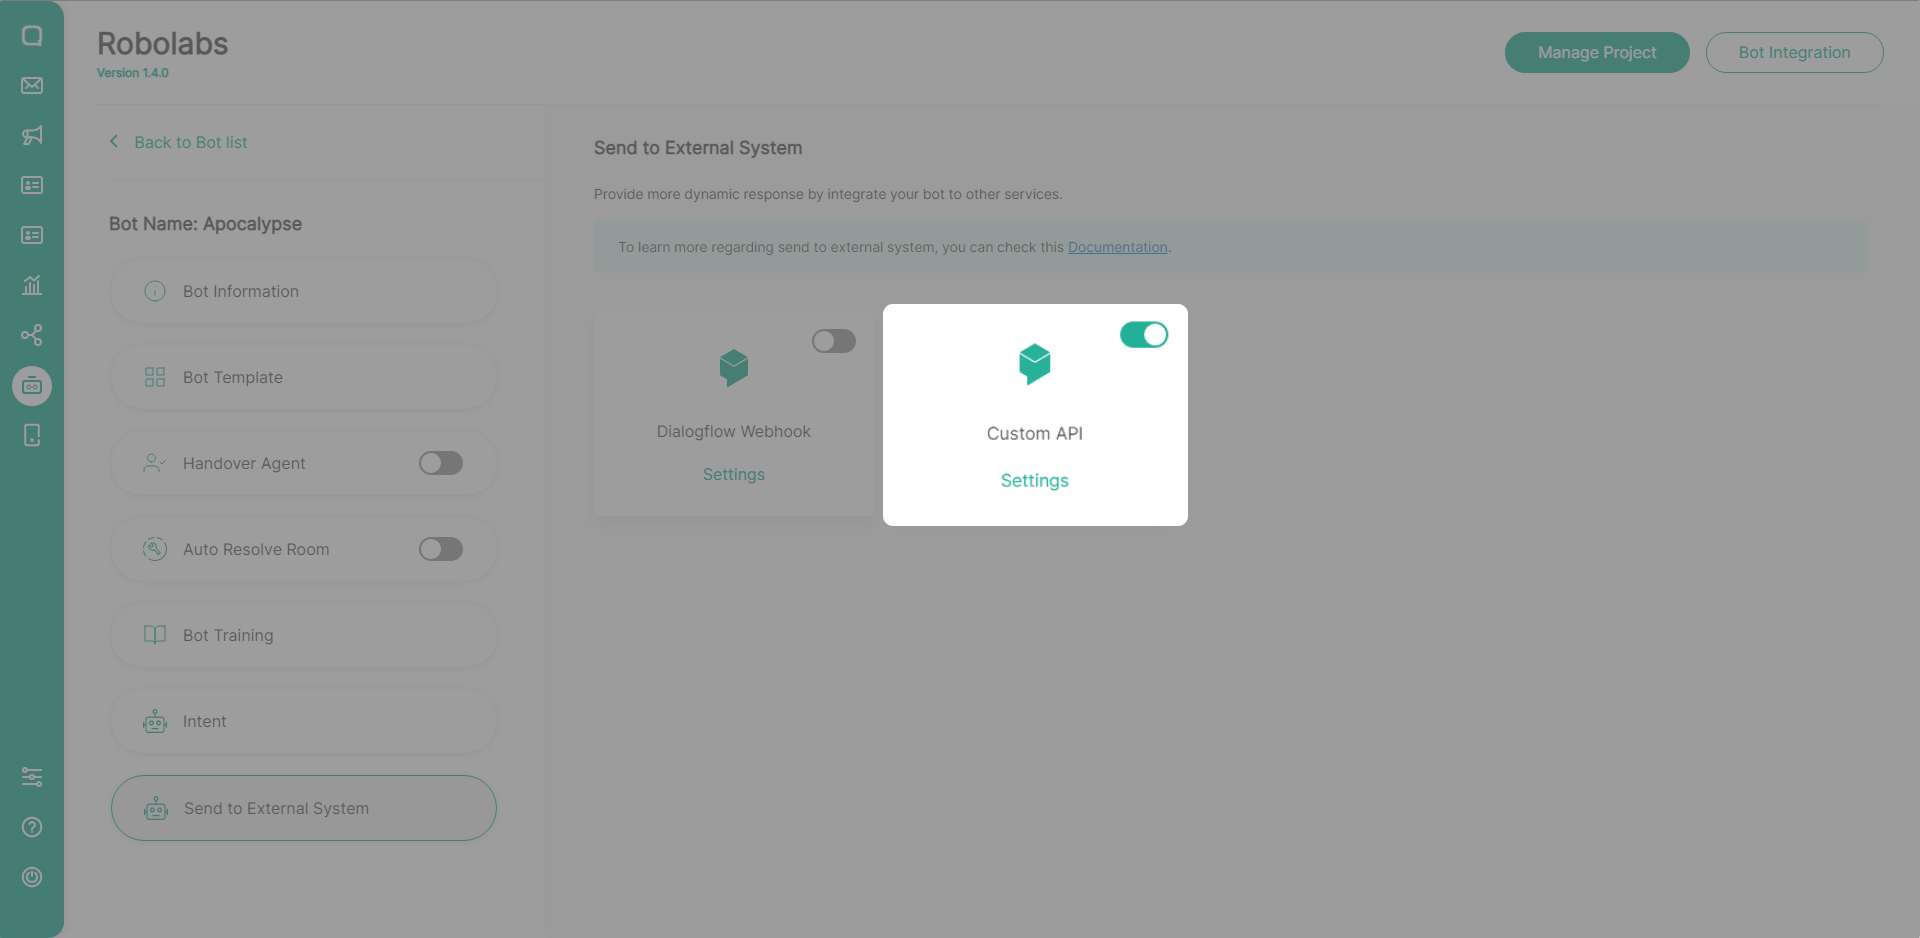
Go to Send to External System menu
To activate the Dialogflow Webhook, click the toggle in the upper right corner.

Fill your webhook service URL and select which intent will send request to your service.
Custom API
This feature can only be used on Robolabs Premium plan
This feature aims to accommodate external system integration without intermediary server and able to send and parse dynamically, so no change is needed in existing external system.
Some of the components for creating an interactive list are:
Methode: There are 2 choices of methods (GET, POST) which can be selected during Custom API settings
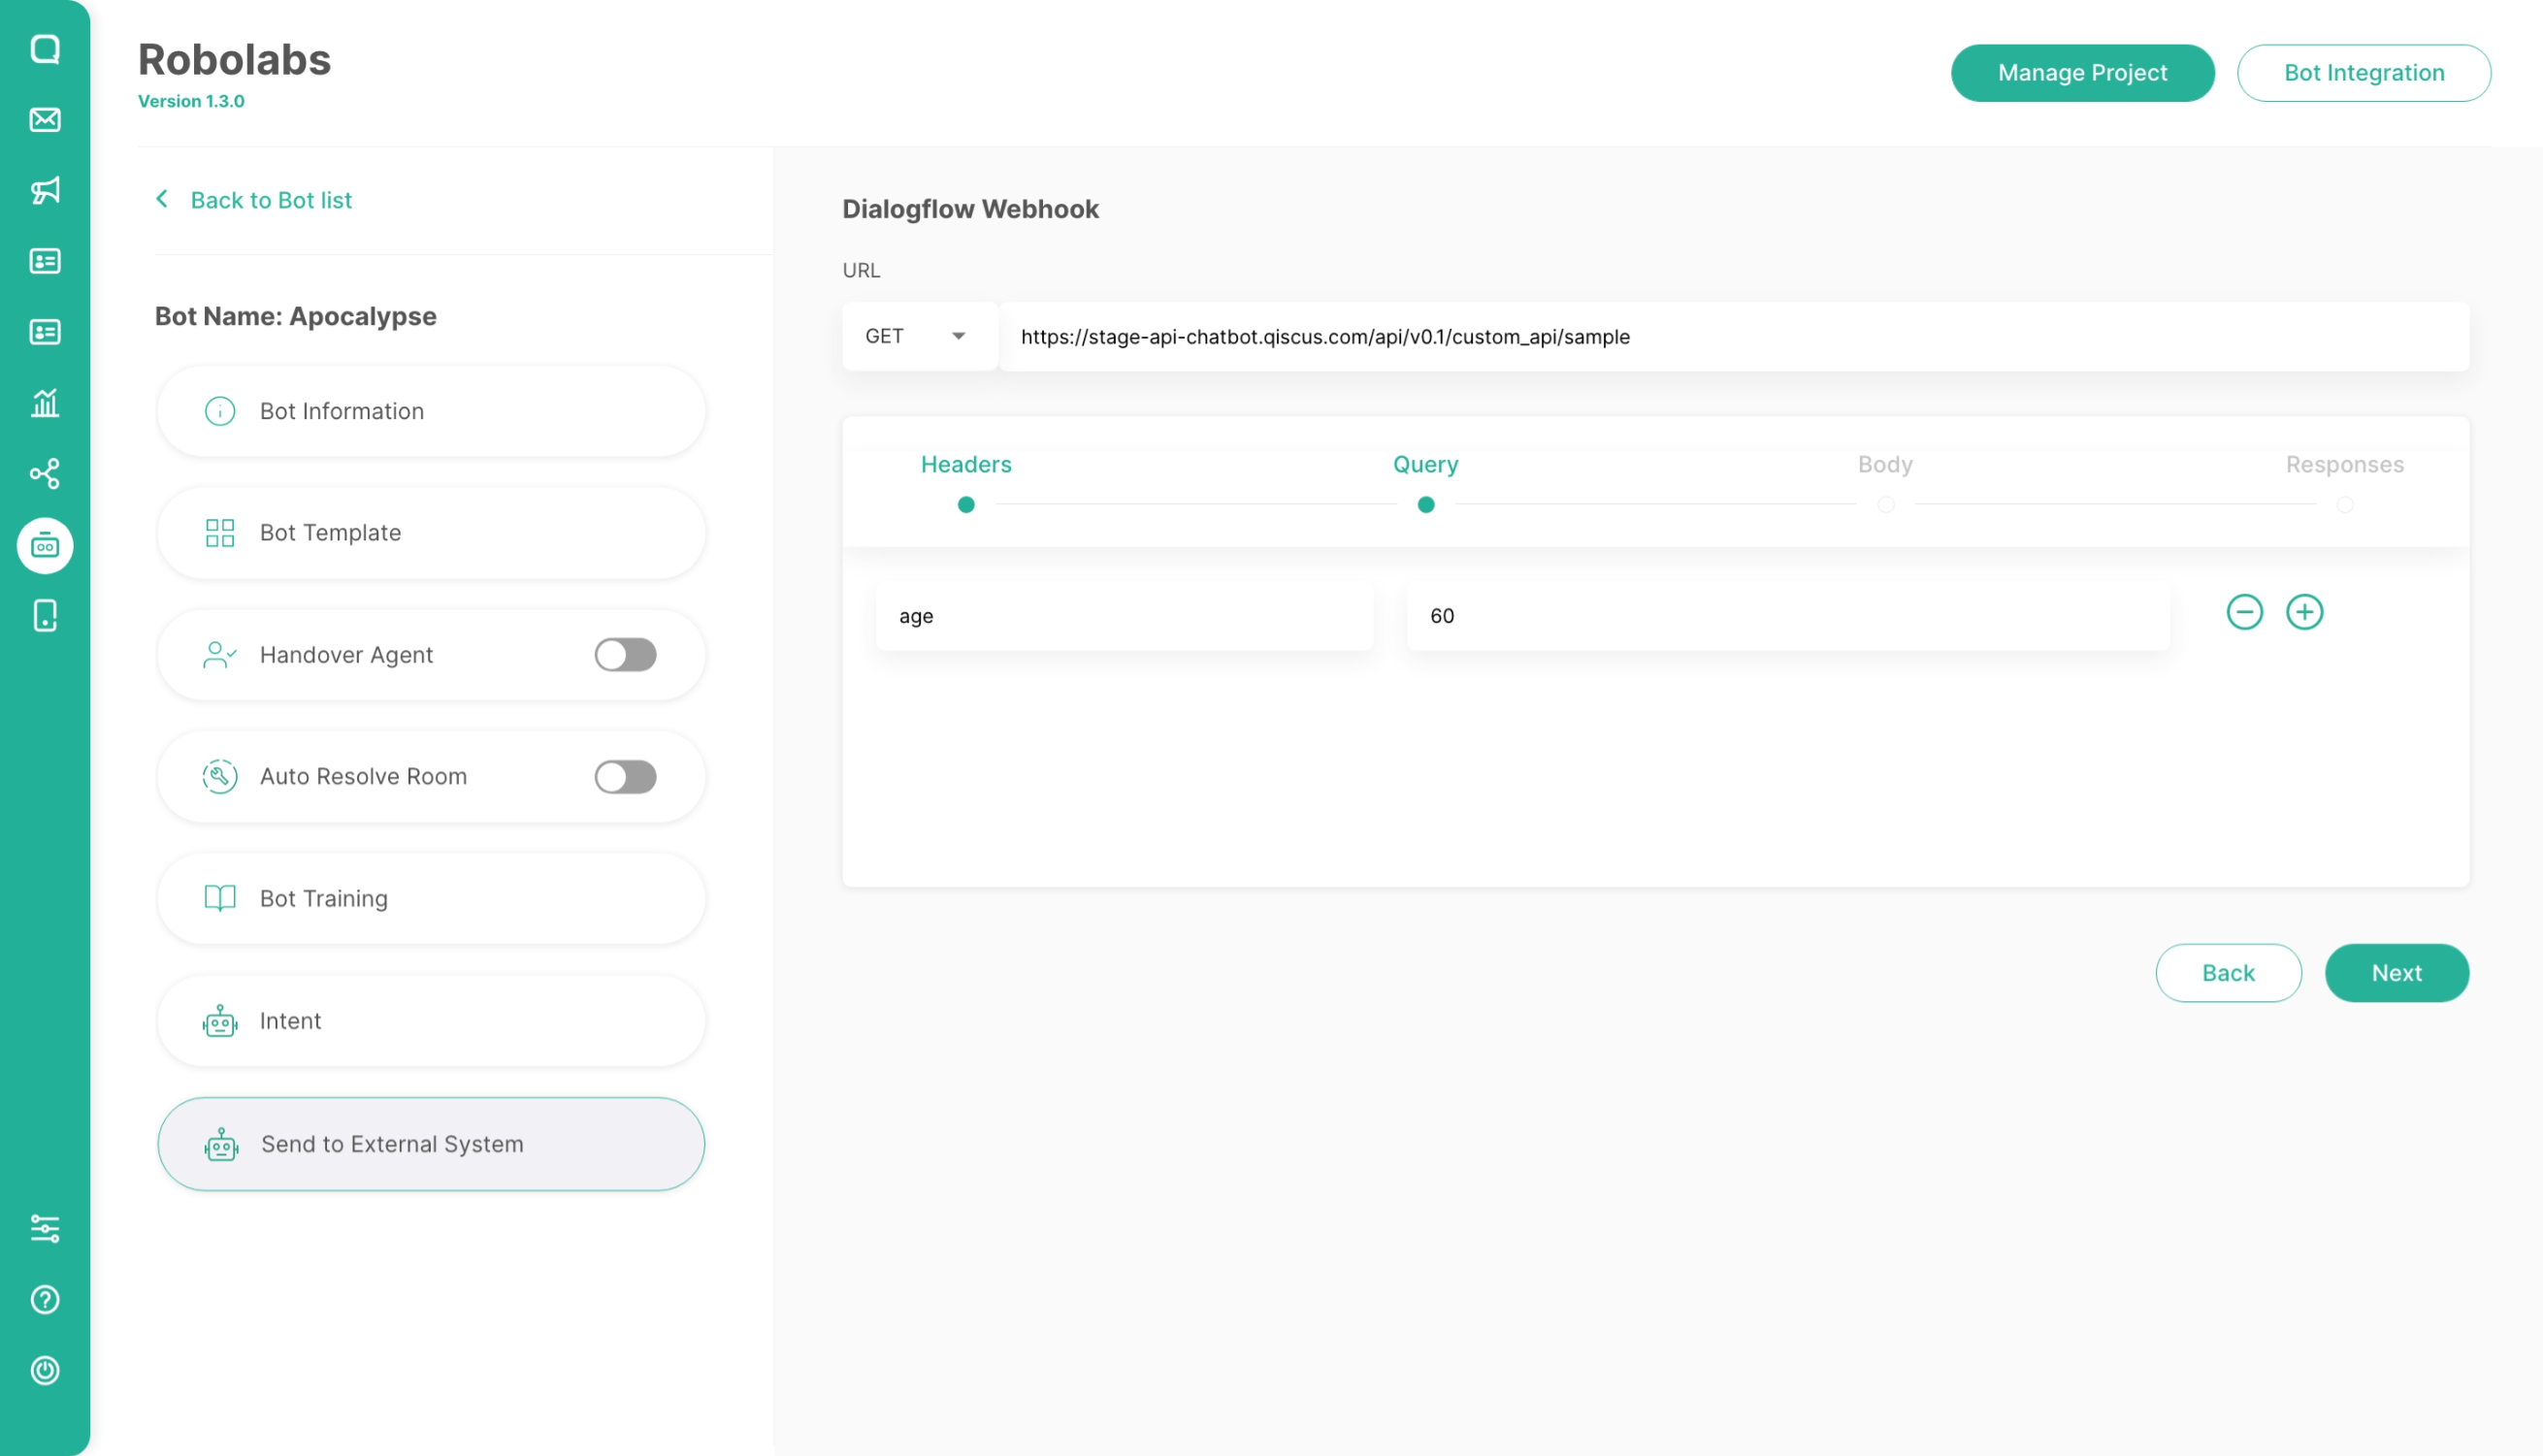
URL: URL of the external system to be integrated via menu Custom API settings
Headers : to input the key and value of the header parameter to be retrieved from an external system, this header is also multiple without any number limit
Query : to input the key and value of the query parameter to be retrieved from an external system, this query is also multiple without any number limit. Query can basically be adjusted according to need
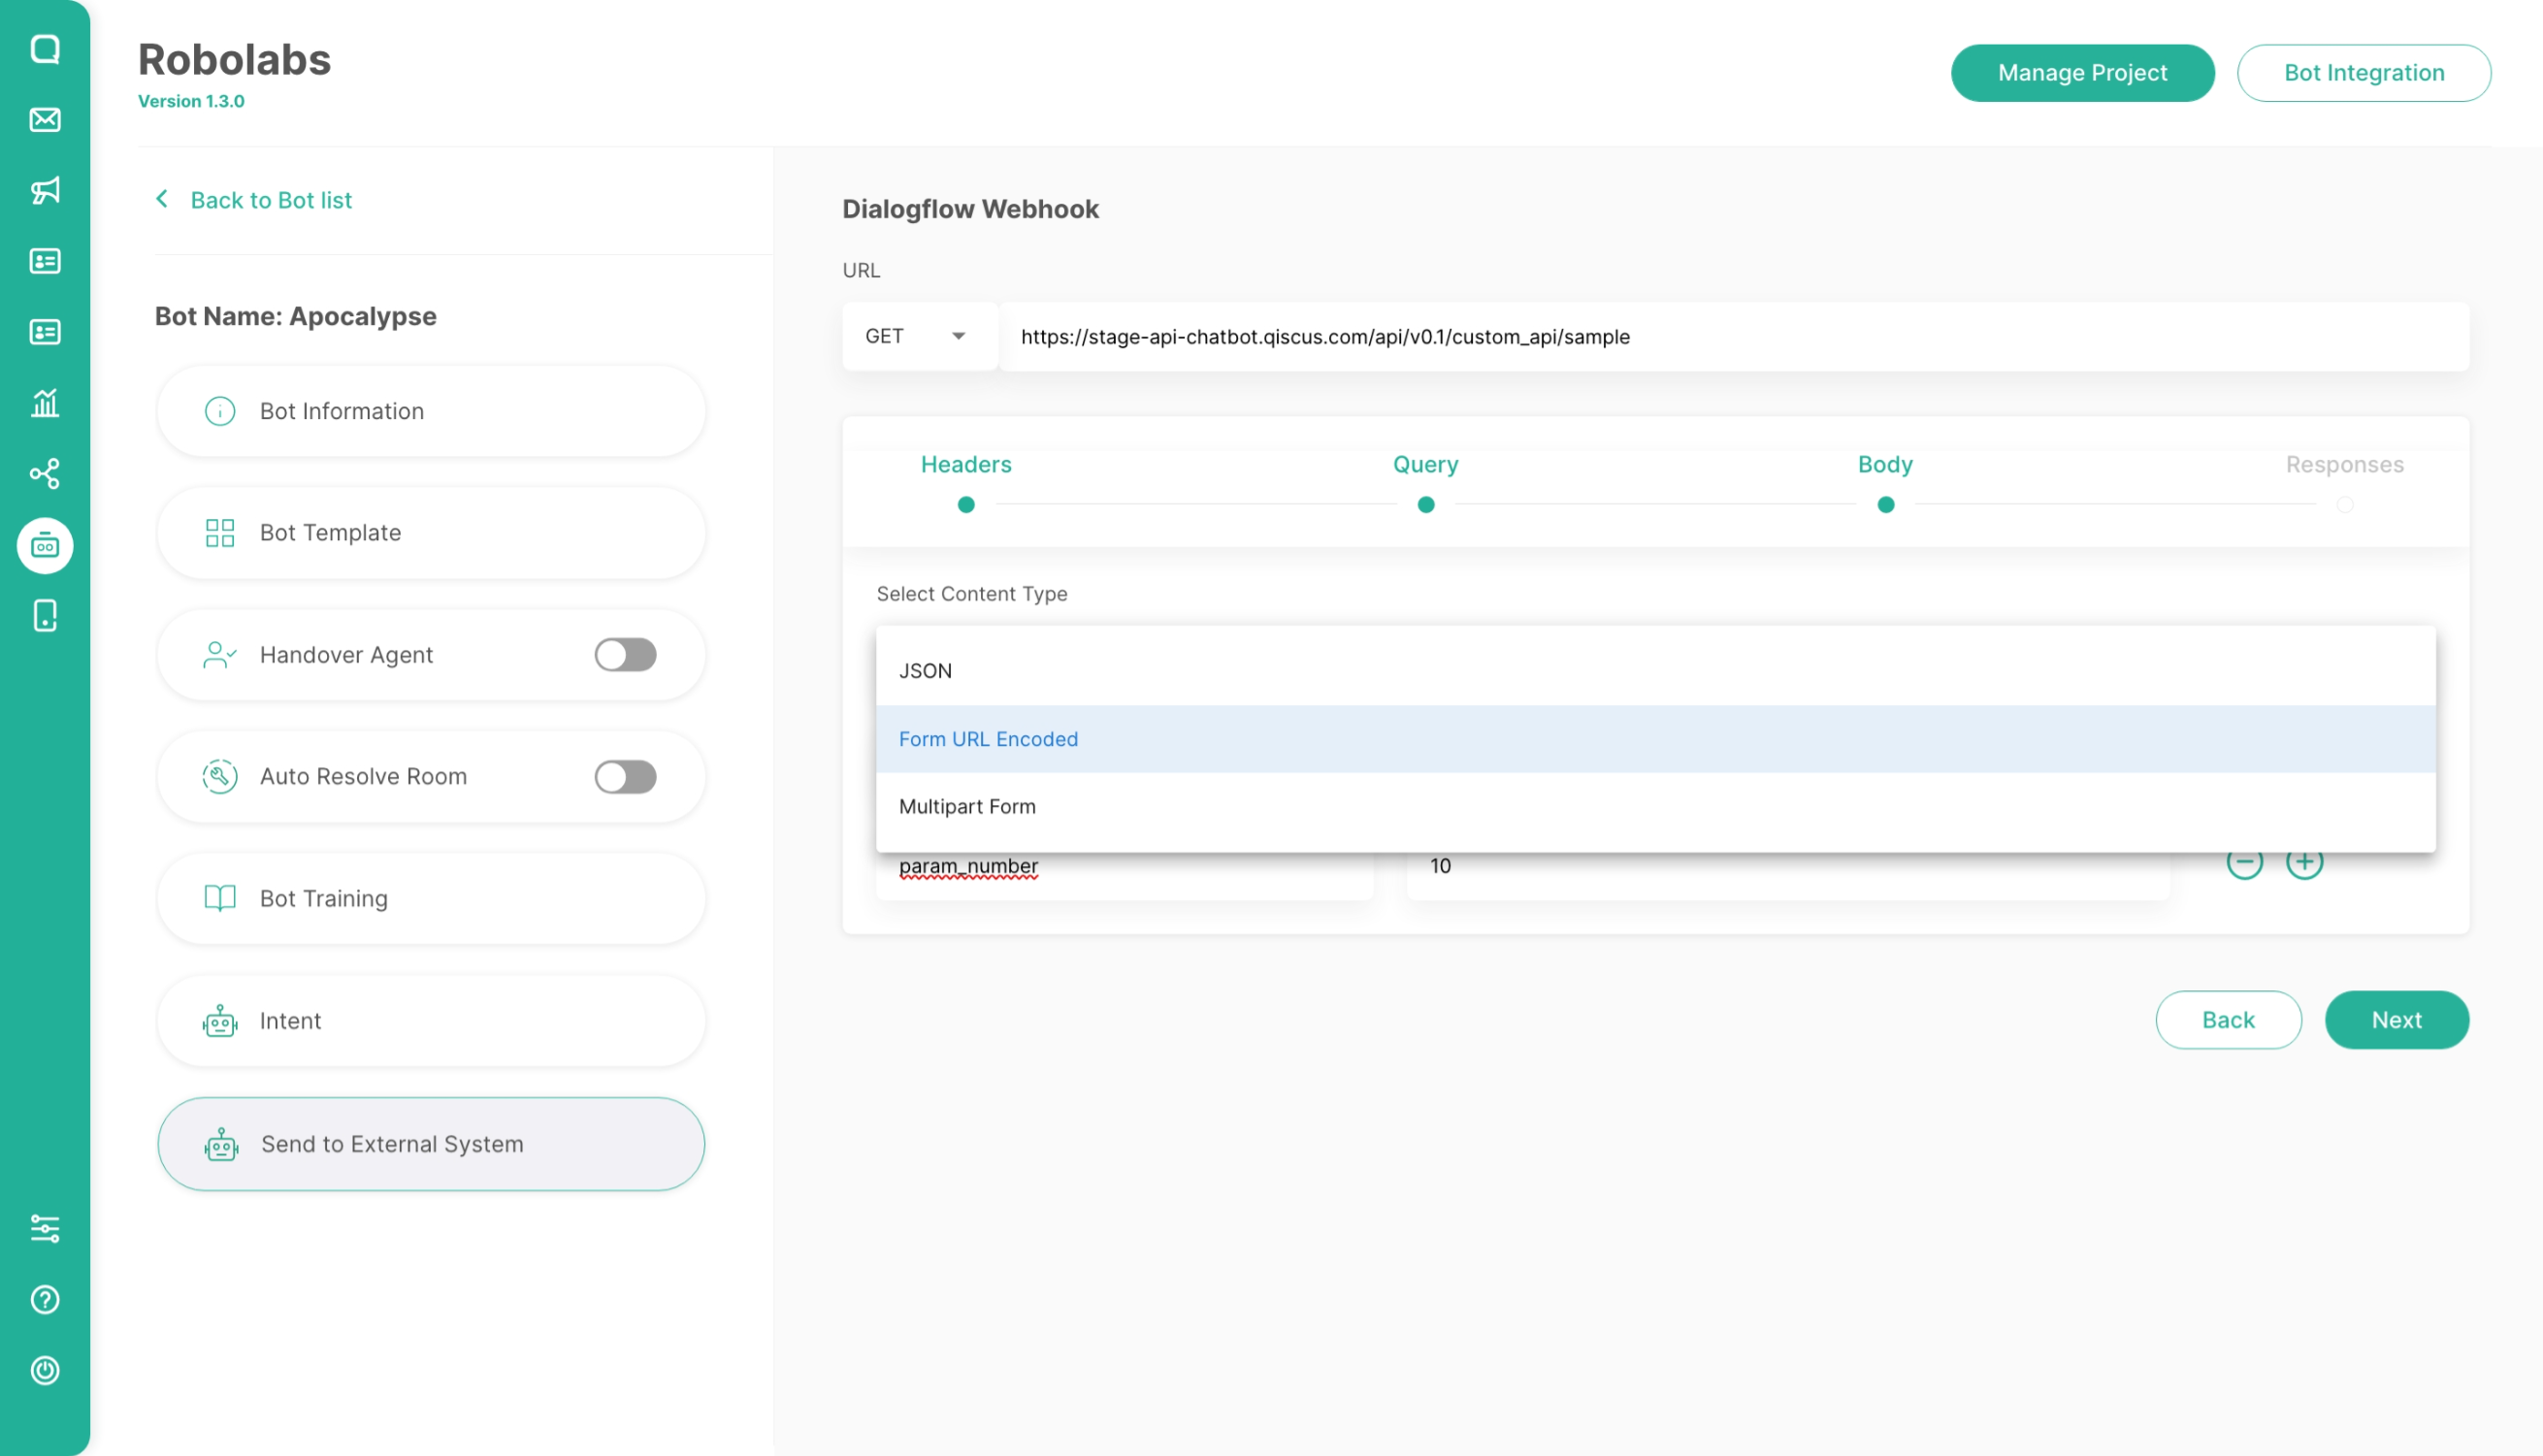
Body : there are 3 choices of body types that can be used (JSON, URL Encoded Forms, Multiple Forms) that can be selected during Custom API settings. Body can basically be adjusted according to need
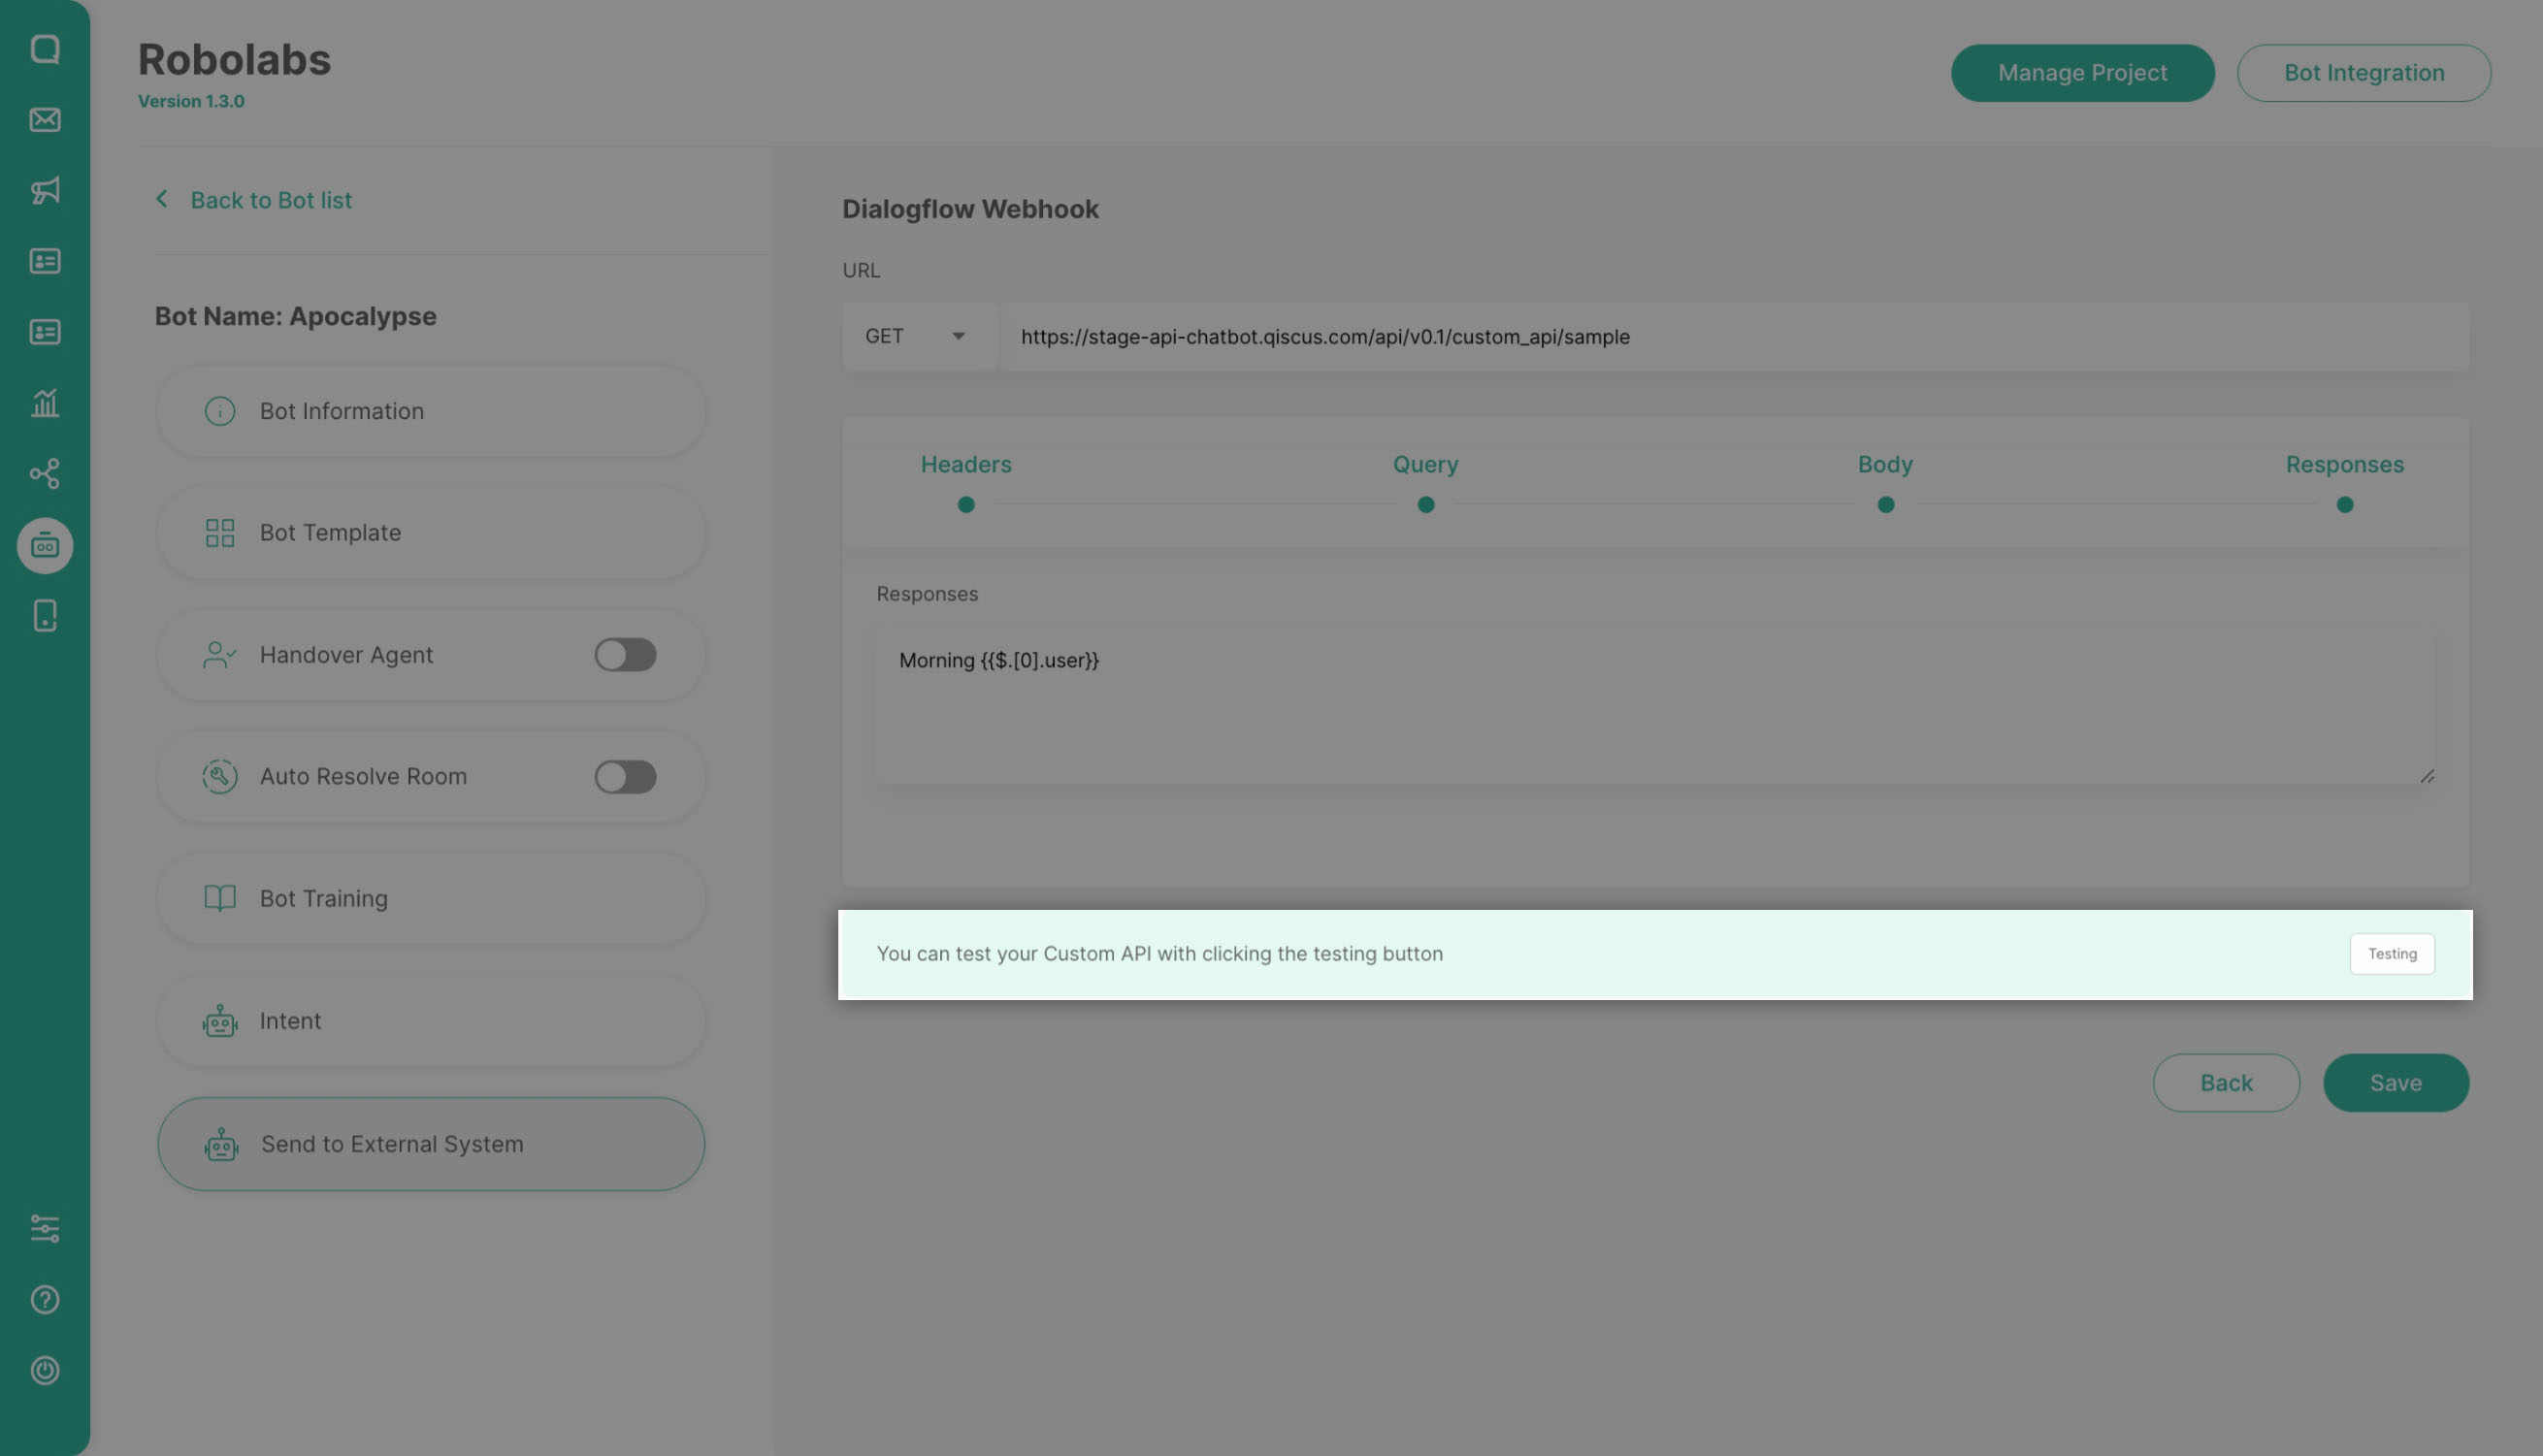
Responses : response must be written by adding value using JSON Path between double brackets, with the format {{$.path.to.the.value}}
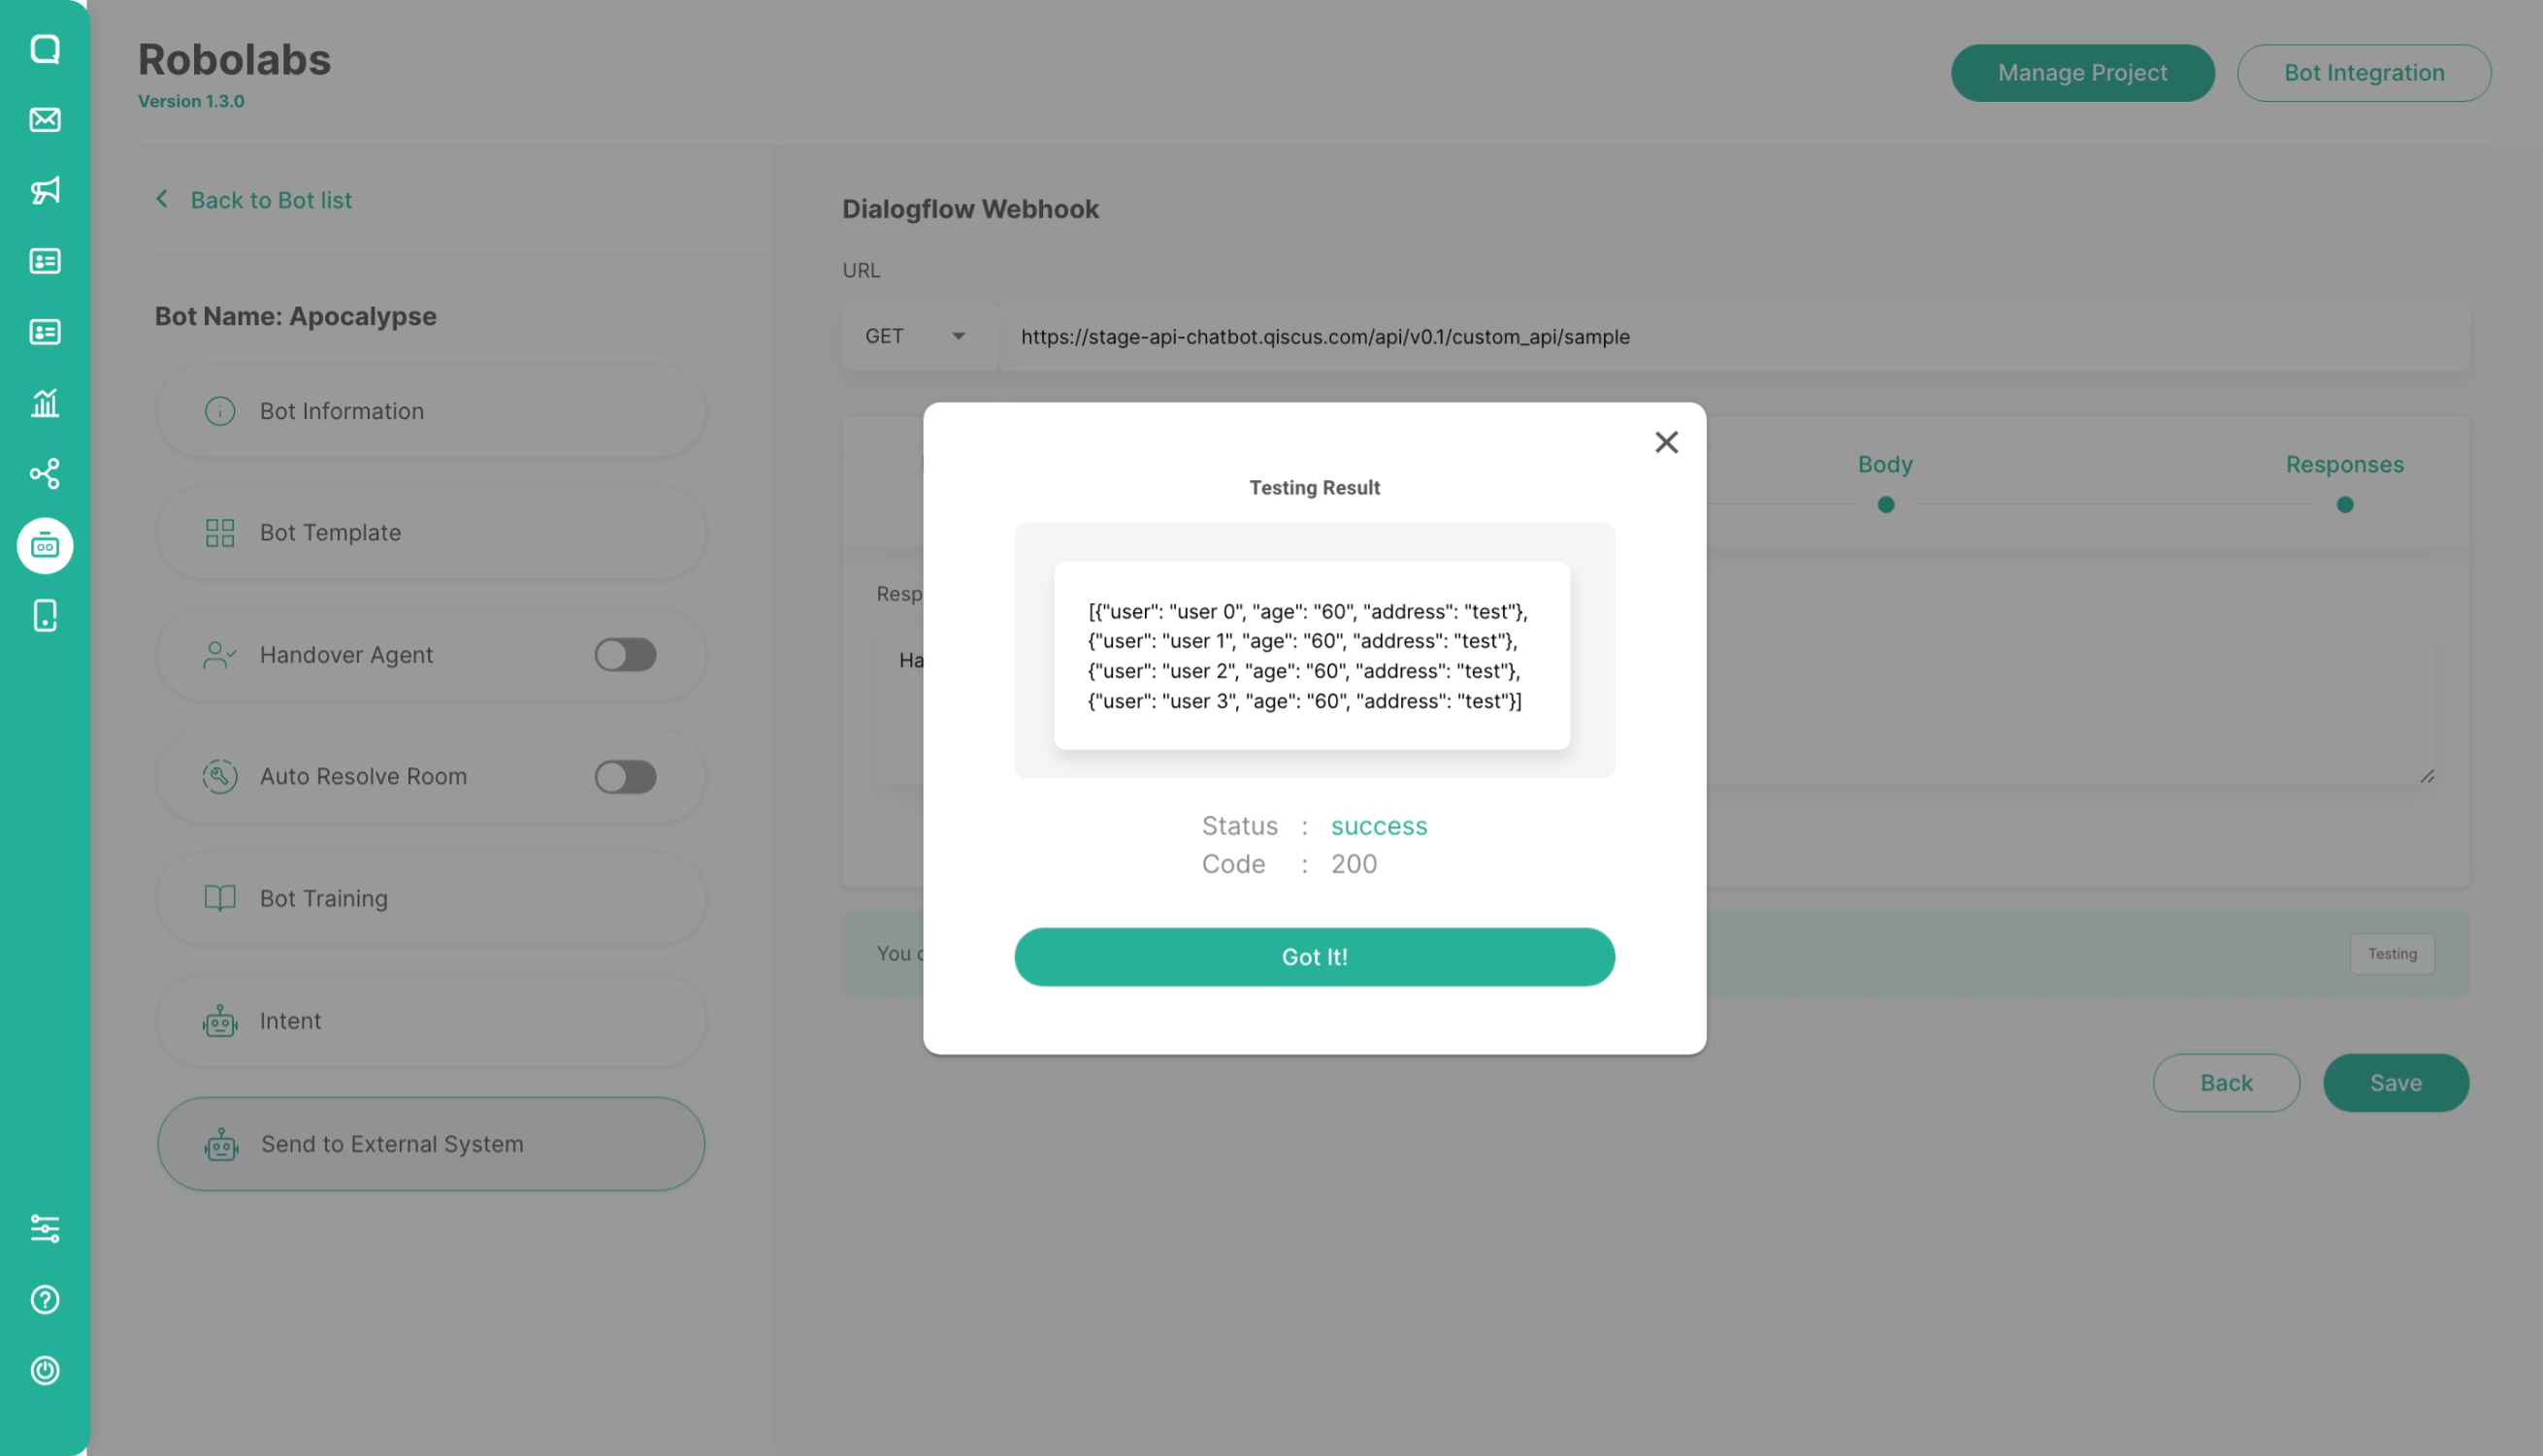
Testing : button on the response tab that can be used to test the results of settings that have been made. Test results will be displayed with a success or failure notification
Custom API settings can be used for special conditions. Headers, query, body, response content can be filled with variable for dynamic content. For example, to check the status of the delivery of goods that the data is taken from the chat by the customer which contains a certain unique code. This code will be a trigger to retrieve data from an external system and convert it into a conversation response according to the settings in the Custom API.
The method relatively easy, just by customizing it on the Header, Query or Body tab. Parameters that are made can be really custom according to the destination external system. Value in the parameter must be written by adding value using JSON Path between double brackets, with the format {{$.path.to.the.value}}.
Custom API Configuration
Go to Send to External System menu
To activate the Custom API, click the toggle in the upper right corner
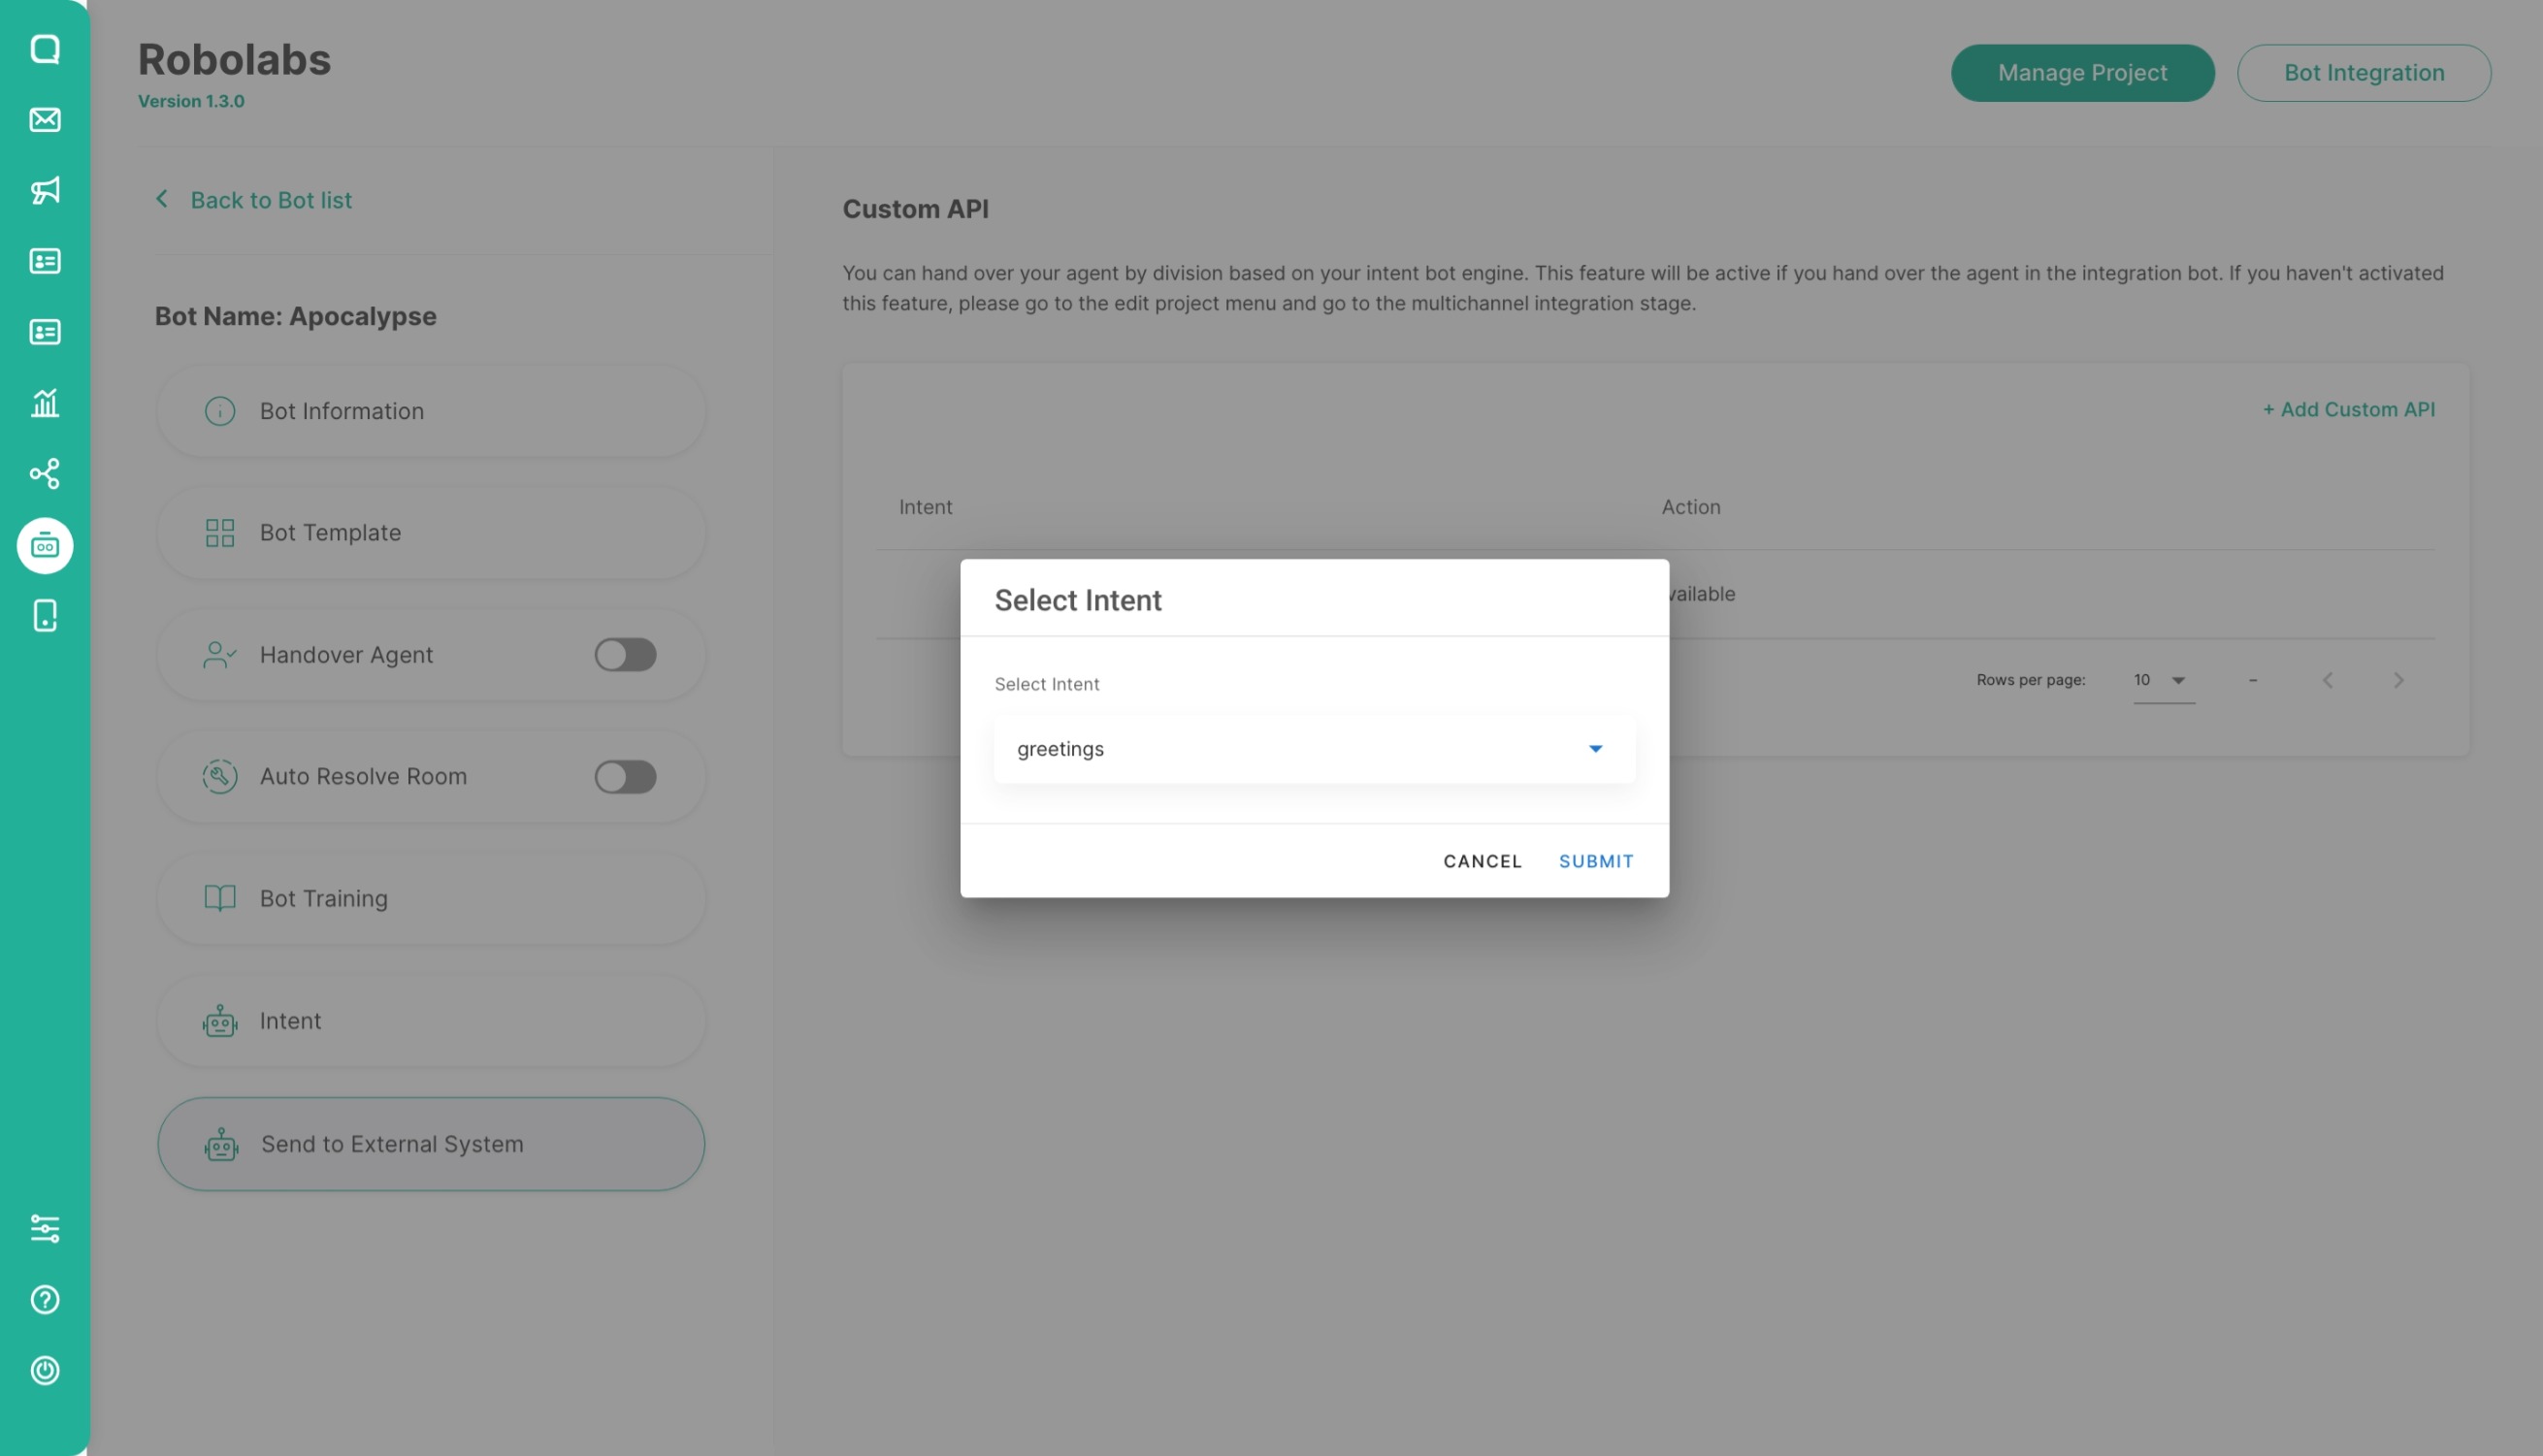
Add Custom API in the upper right corner and select the intent
Fill the URL and select the method to use
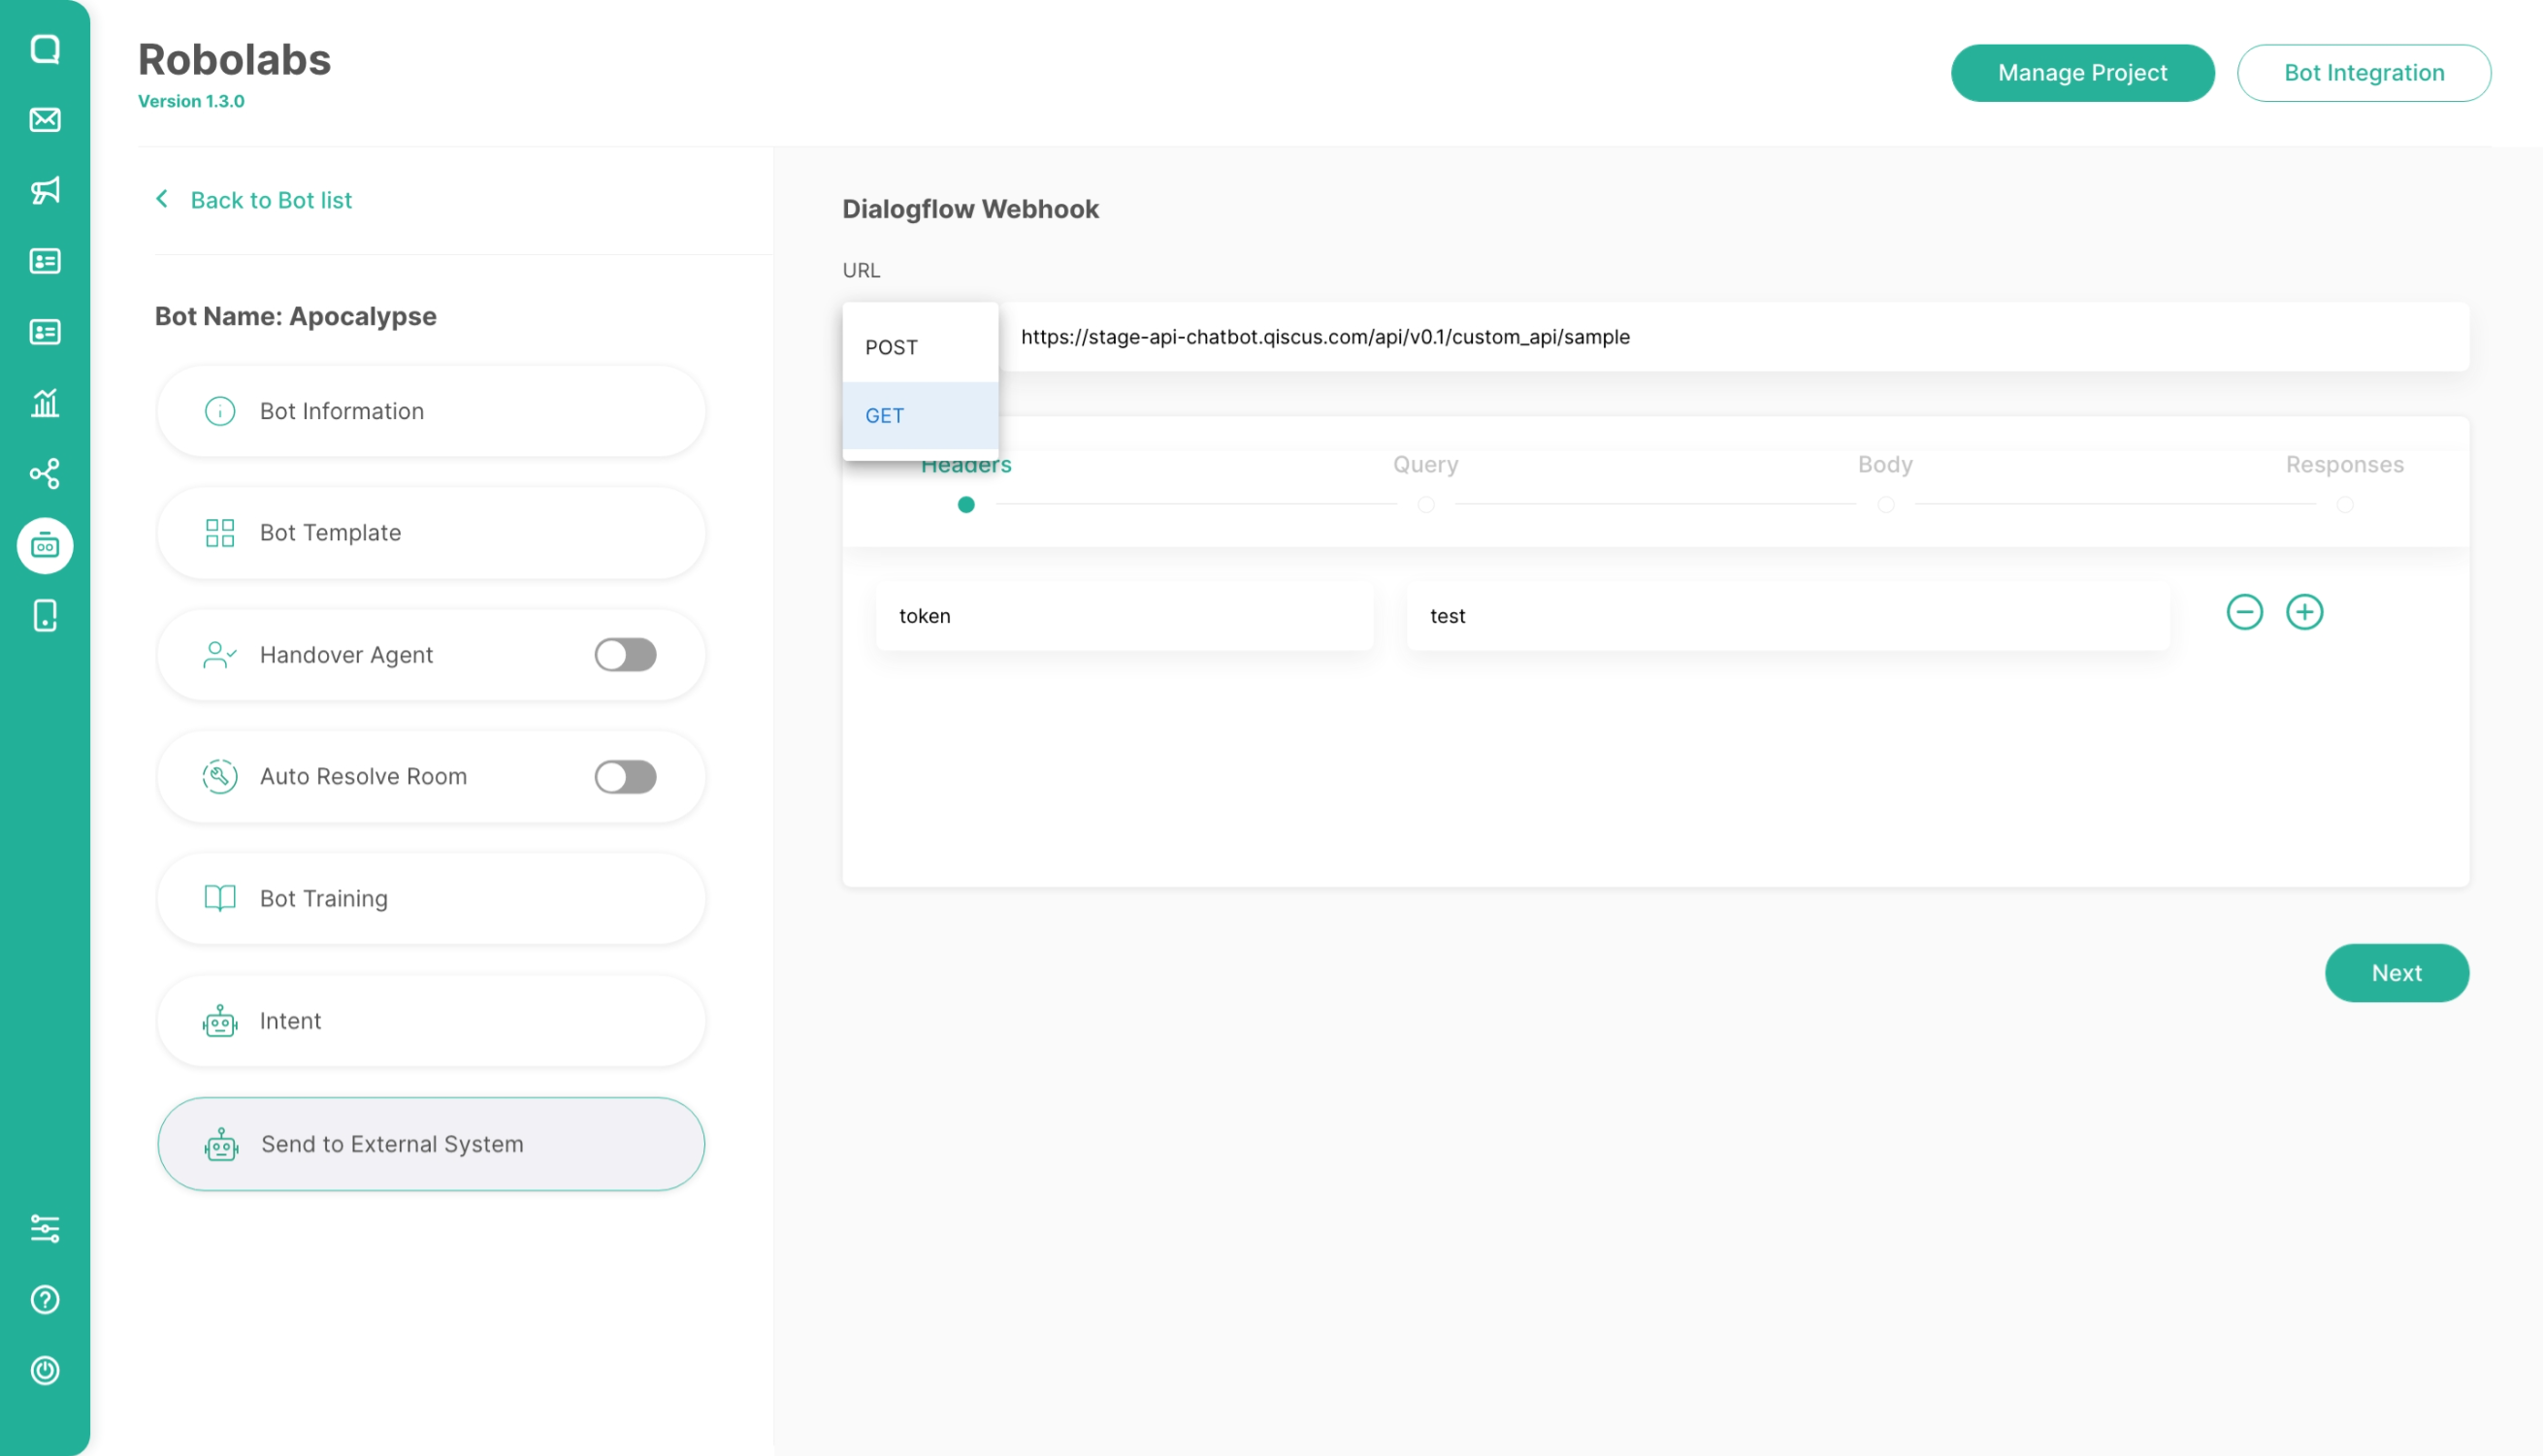
Customize value in the Query and the Body using JSON Path in between double brackets
{{$.path.to.the.value}}by the trigger to be taken is from the customer conversation chat. Here is the payload:
If the system can’t find JSON Path, the system will not request the API and the bot will response with an intent response.
Fill in the required data and for the body has three types: JSON, FORM URL Encoded, and Multipart Form
Customize response by adding the value using JSON Path in between double bracket
{{$.path.to.the.value}}
If the system can’t find JSON Path, the system will not request the API and the bot will response with an intent response.
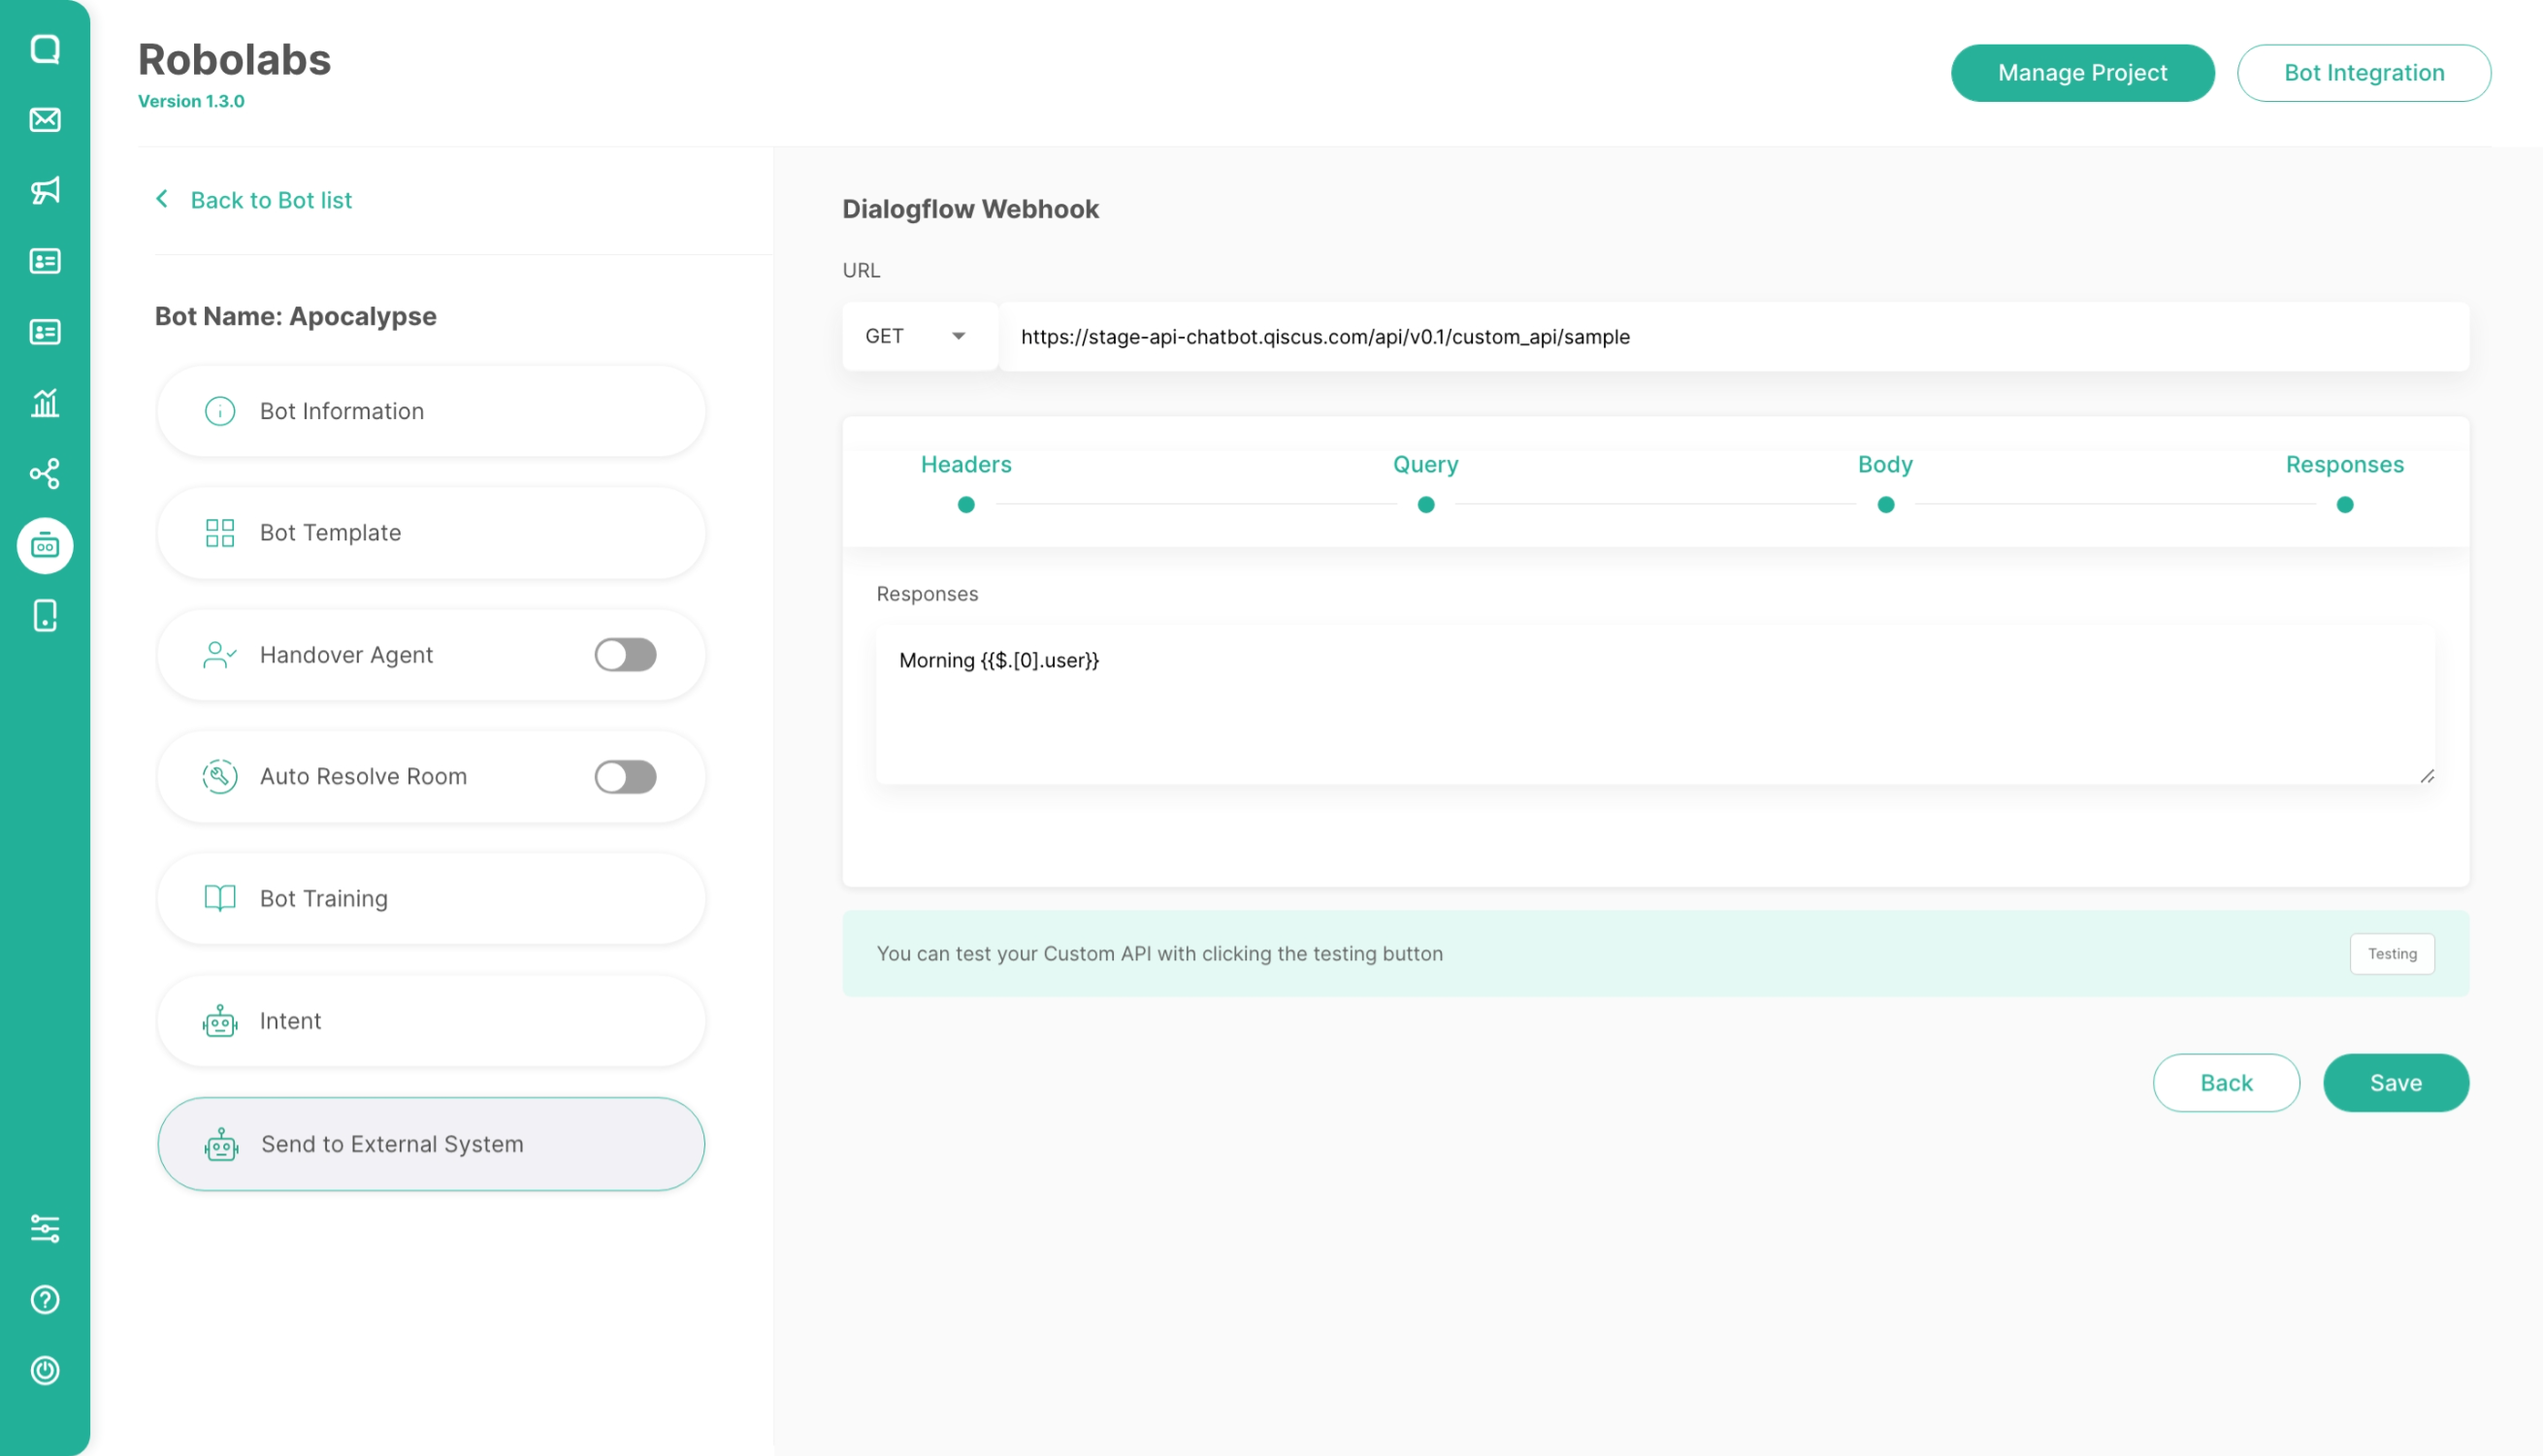
Testing the Custom API to make sure it responds according to the Testing button and save the Custom API Configuration by clicking Save Button