
This page is for admins who set up OmniForm: creating a form, choosing its fields, and deciding what is sent with each submission. If you are building the endpoint that receives the data, see the Developer Reference.
Create, save, and enable a form
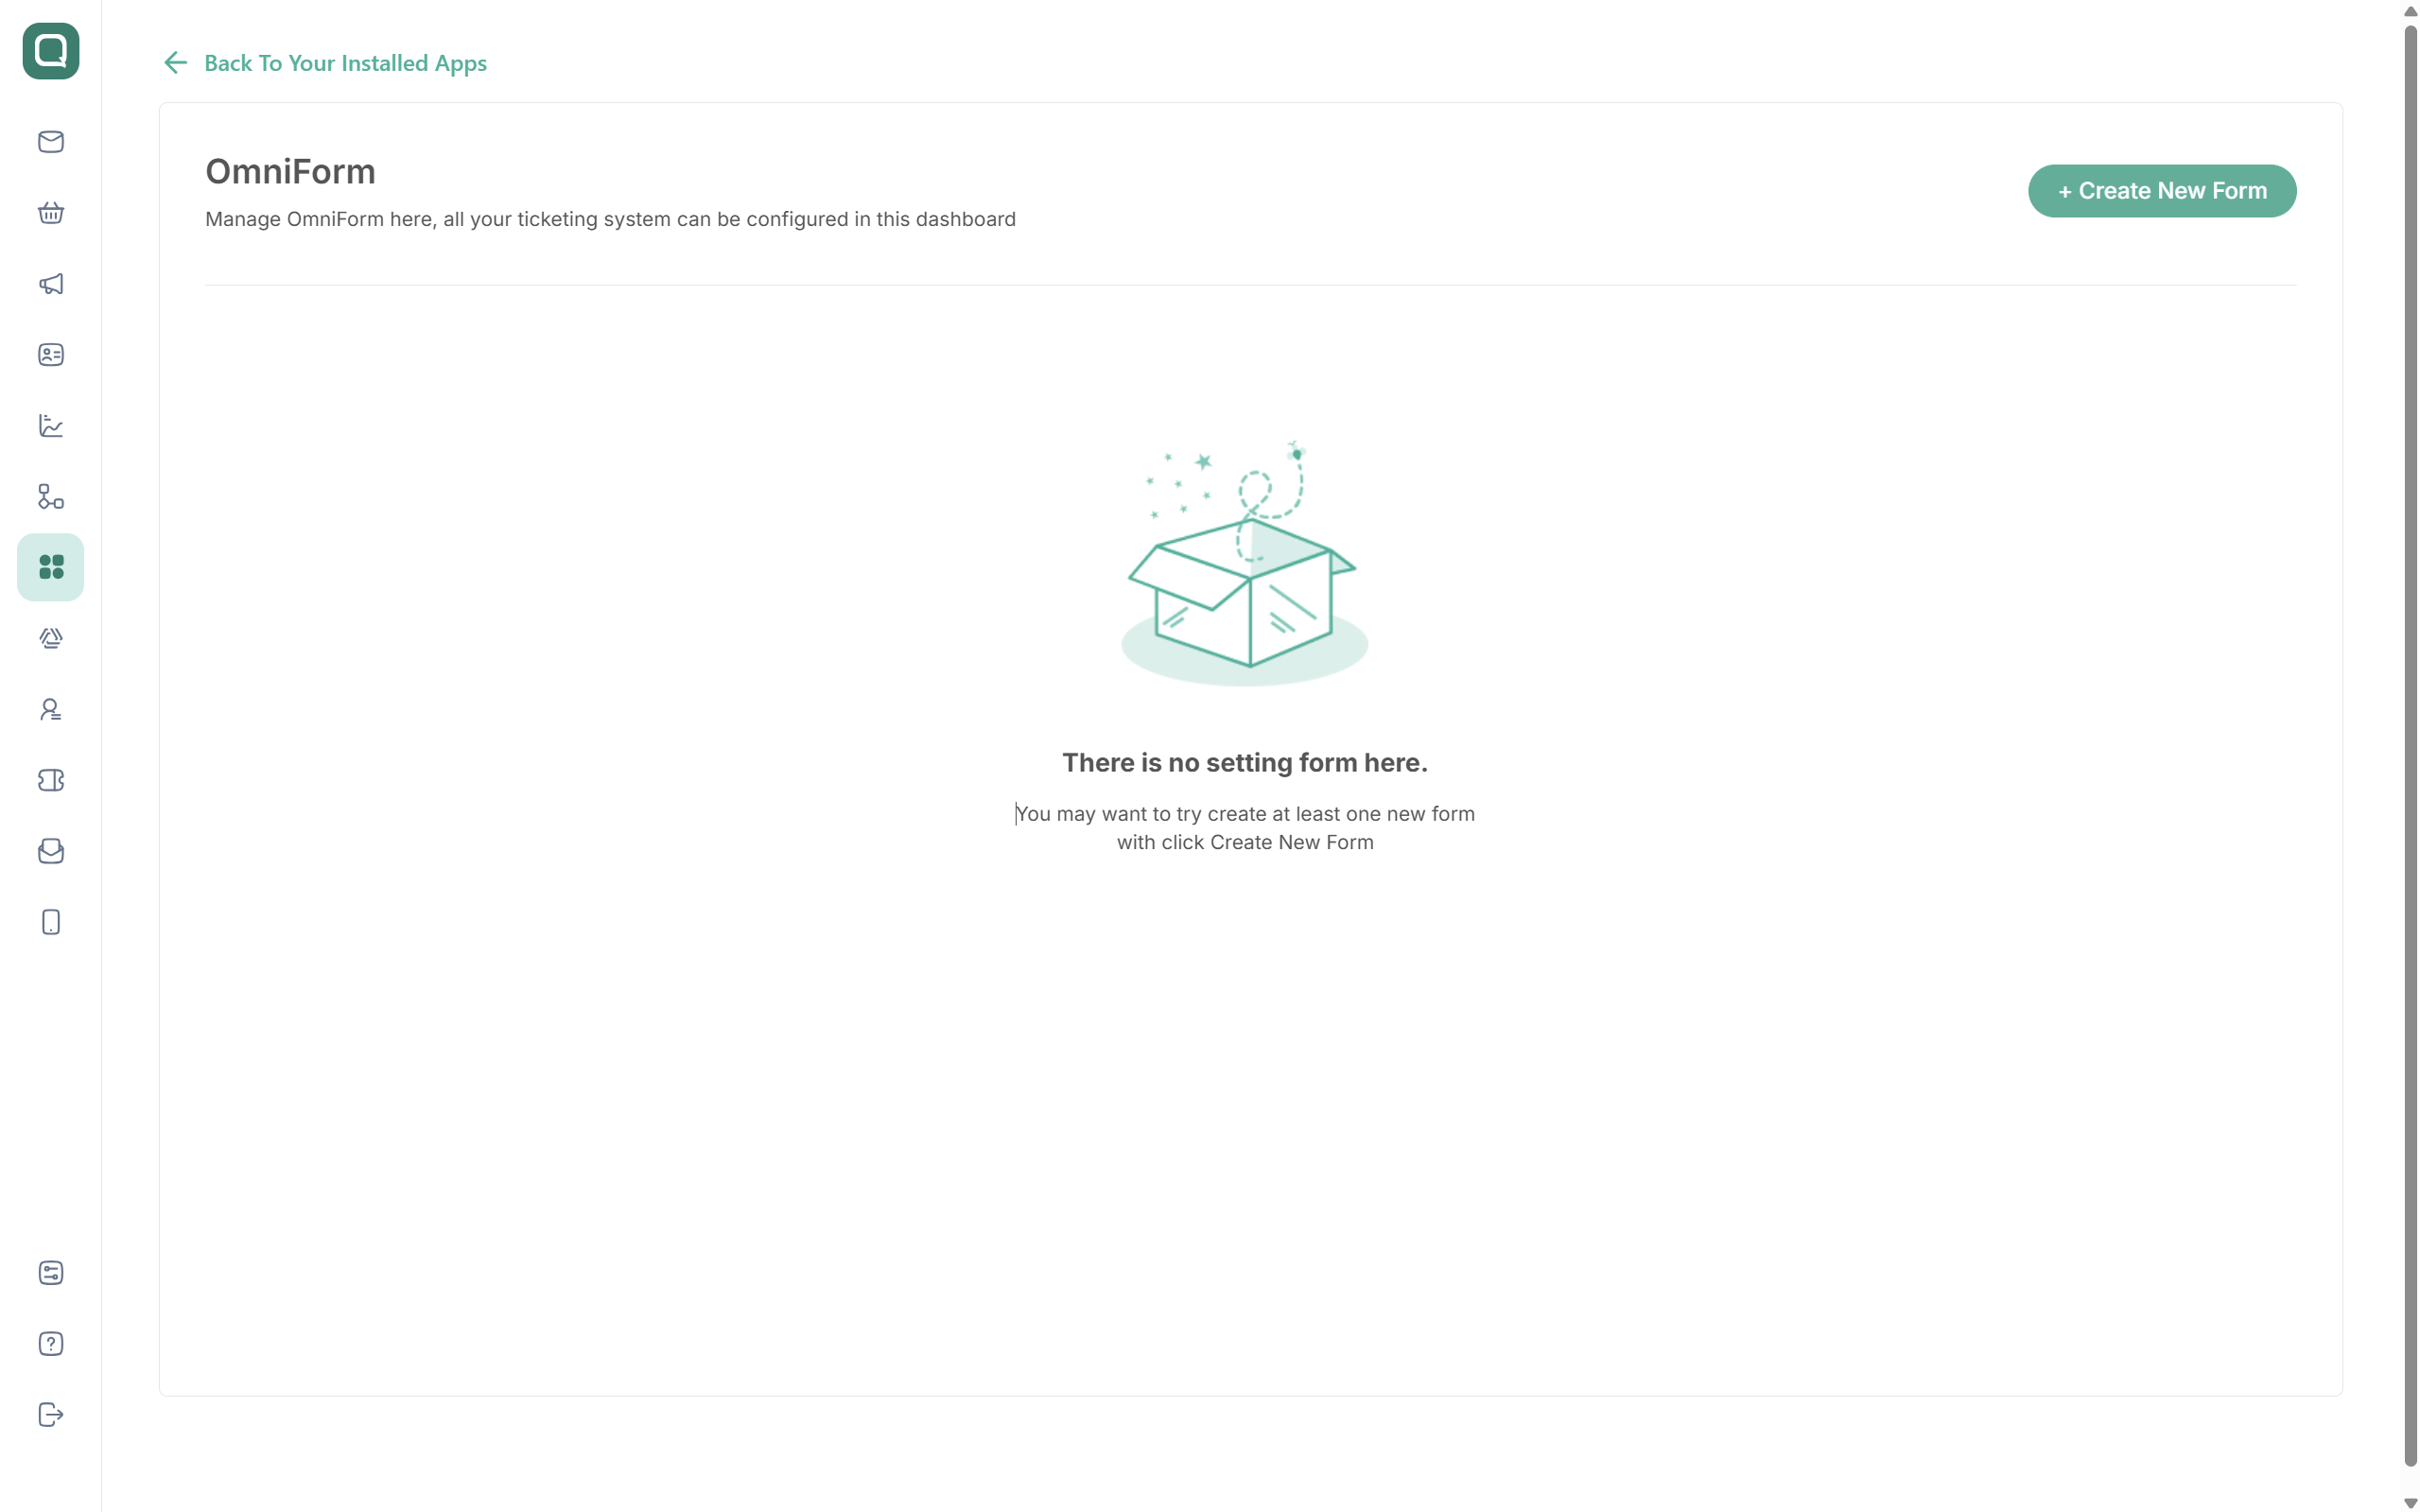
Click Create New Form.
Fill in Form Name and Short Description.
Add fields: click a field type in the FIELD TYPE panel, or drag it into the builder.
Set up each field in its card, then click Add Field to close the card. To change a field later, open its card and click Update.
Set up the Submit Button. It is required.
Click Save Form.
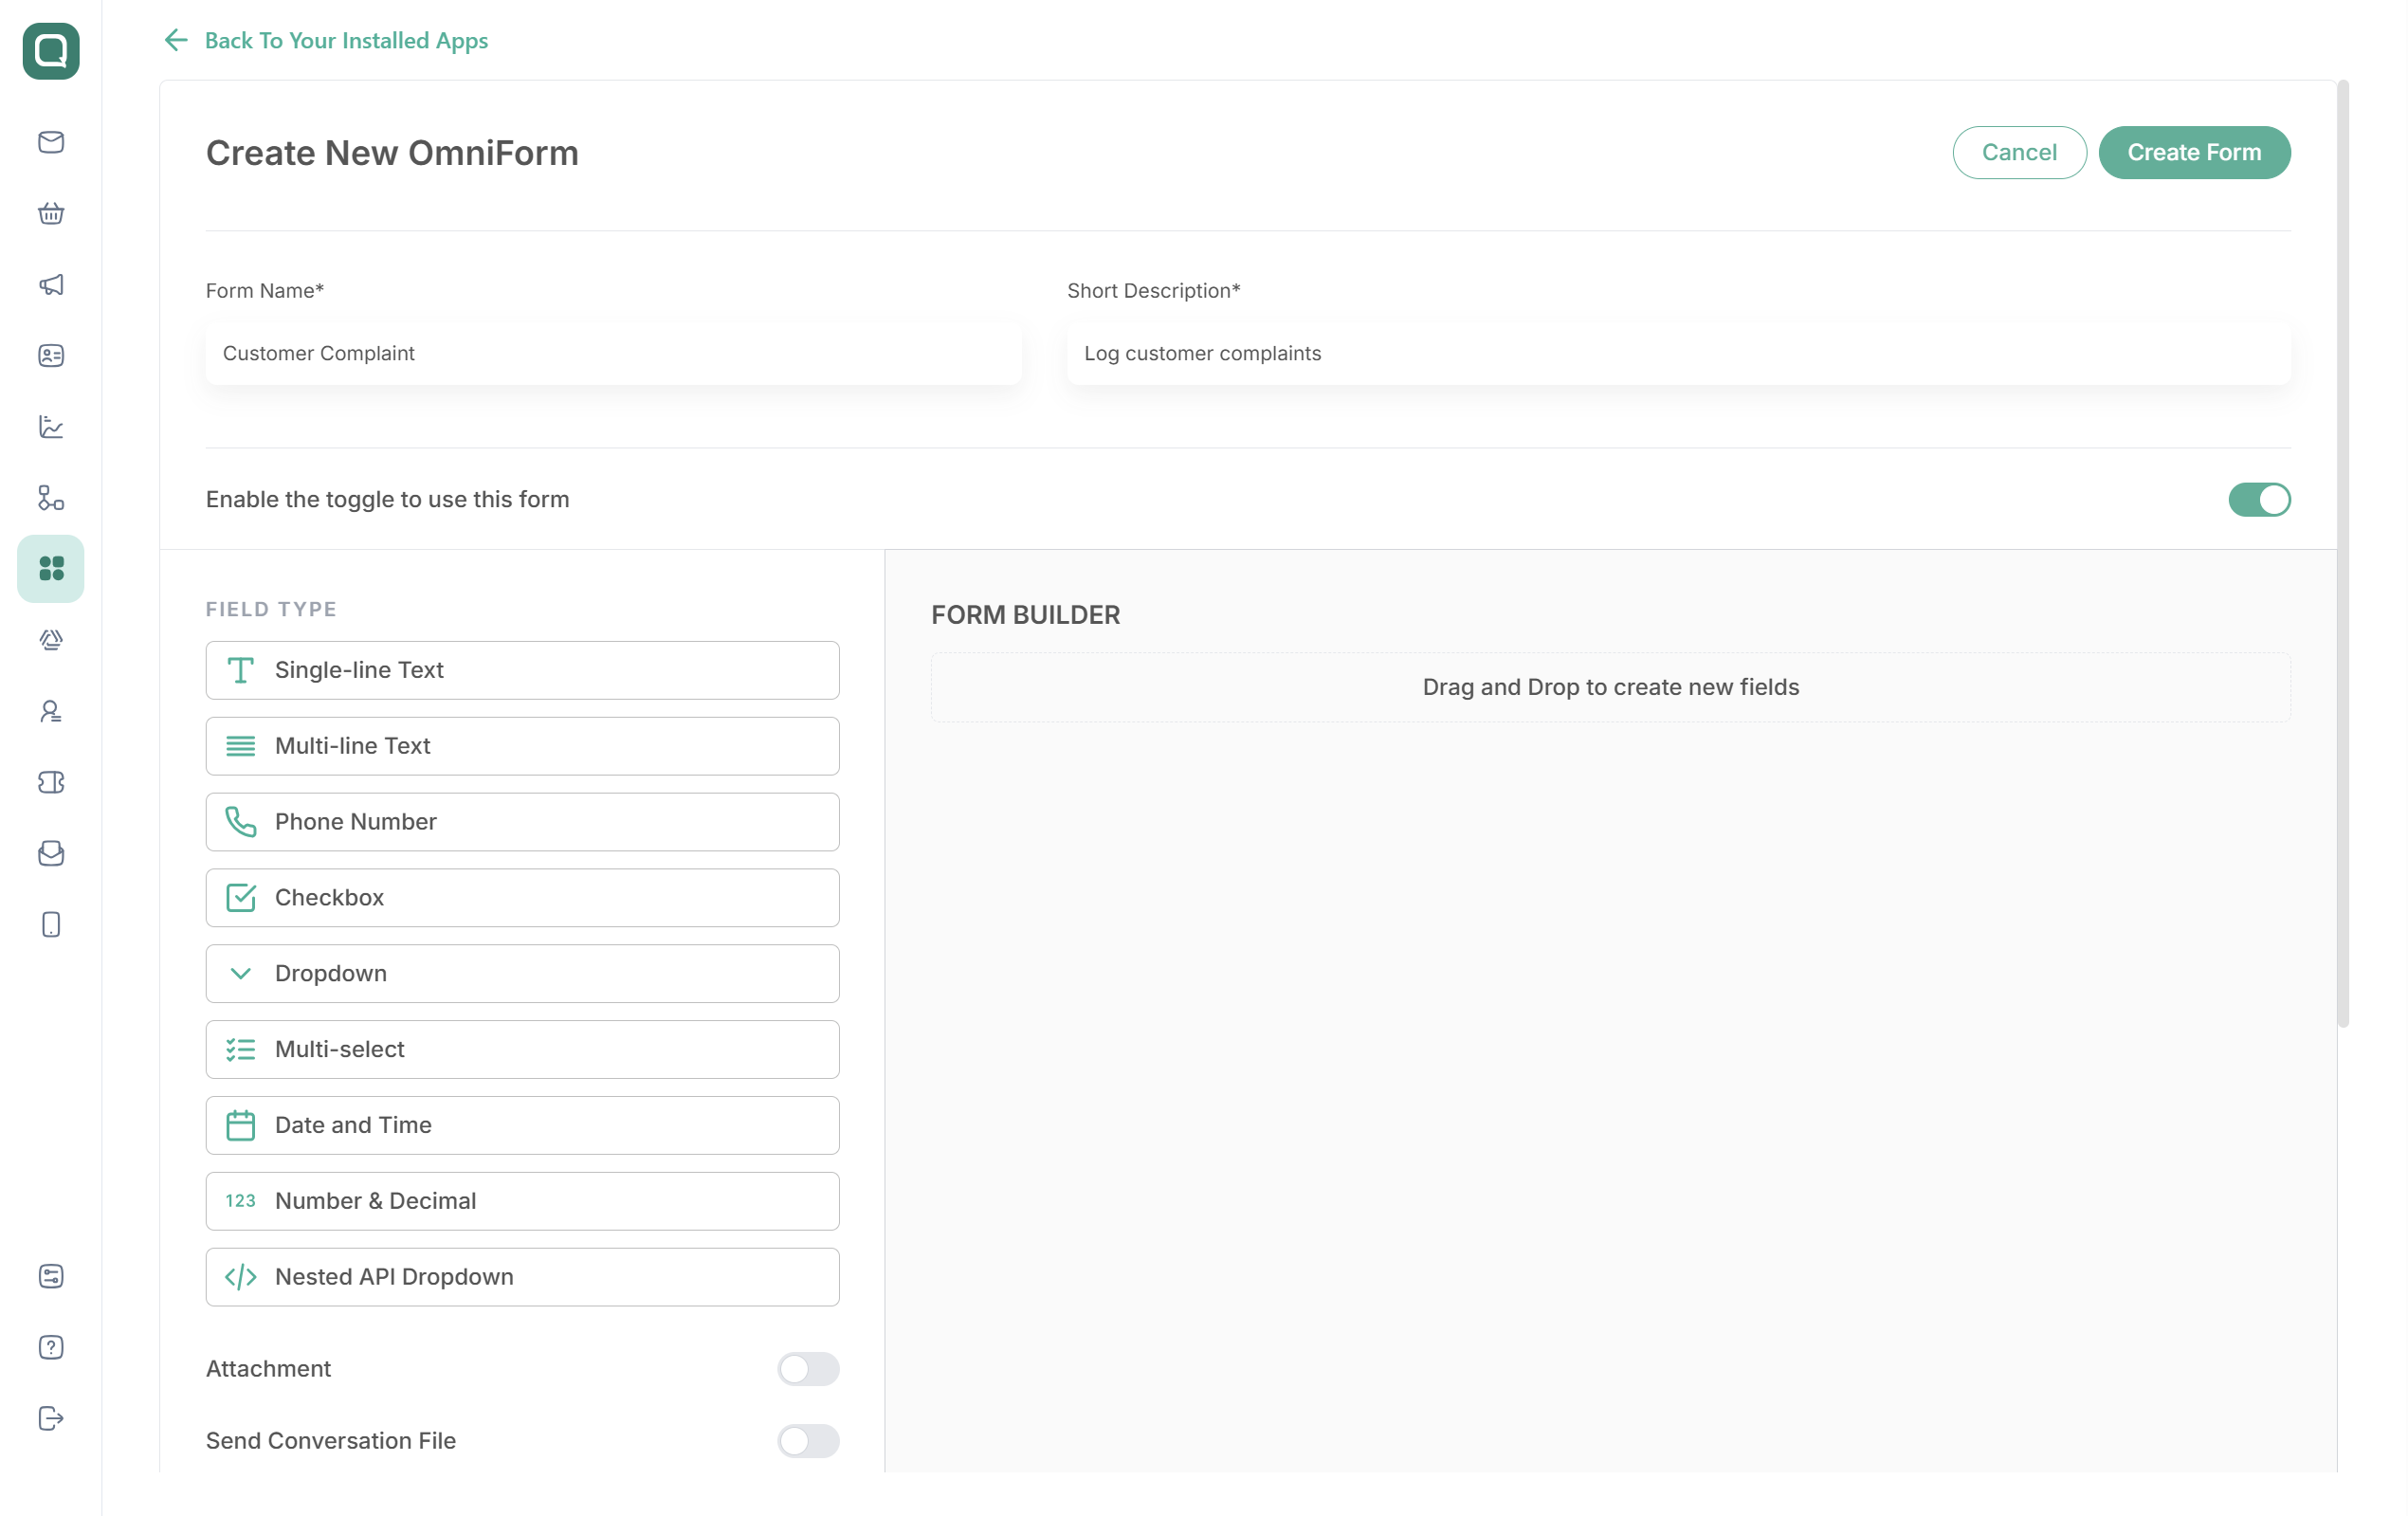
Good to know:
Changes take effect only after Save Form. Cancel discards them.
Save Form is available only when every field card is closed.
Drag a field card to change its position in the form.
Use the toggle Enable the toggle to use this form to control whether agents can see the form. Only enabled forms appear in the OmniForm widget.
Tick Mark as required to make a field mandatory. Optional fields show (optional) next to their label in the widget.
Field types
Choosing a field type
Field type | Use it for |
|---|---|
Single-line Text | Short answers, such as a name, an order ID, or an email address |
Multi-line Text | Longer answers, such as a description or notes |
Phone Number | Phone numbers, with a country code |
Checkbox | One or more choices from a short list where every choice should be visible |
Dropdown | One choice from a list you type, or load from your API |
Multi-select | One or more choices from a list you type or load from your API; suits long lists |
Nested API Dropdown | One choice across levels that depend on each other (for example Province → City), loaded from your API |
Date and Time | A date, or a date with a time |
Number and Decimal | Numbers, with or without decimals |
Every field has a Label Field (the name the agent sees) and Mark as required. The sections below cover the settings that differ. For the format each field sends to your webhook, see Field values by type.
Text fields
Single-line Text: Set Type Field to Free Text (default) or Email. With Email, the agent can submit only a valid email address.
Multi-line Text: No other settings. It can also receive the room's additional information; see Additional Info.
Phone Number: The agent picks the country code from a list and types the number; the field accepts digits only.
Choice fields
Adding choices
This applies to Checkbox, Dropdown, and Multi-select with a Manual source.
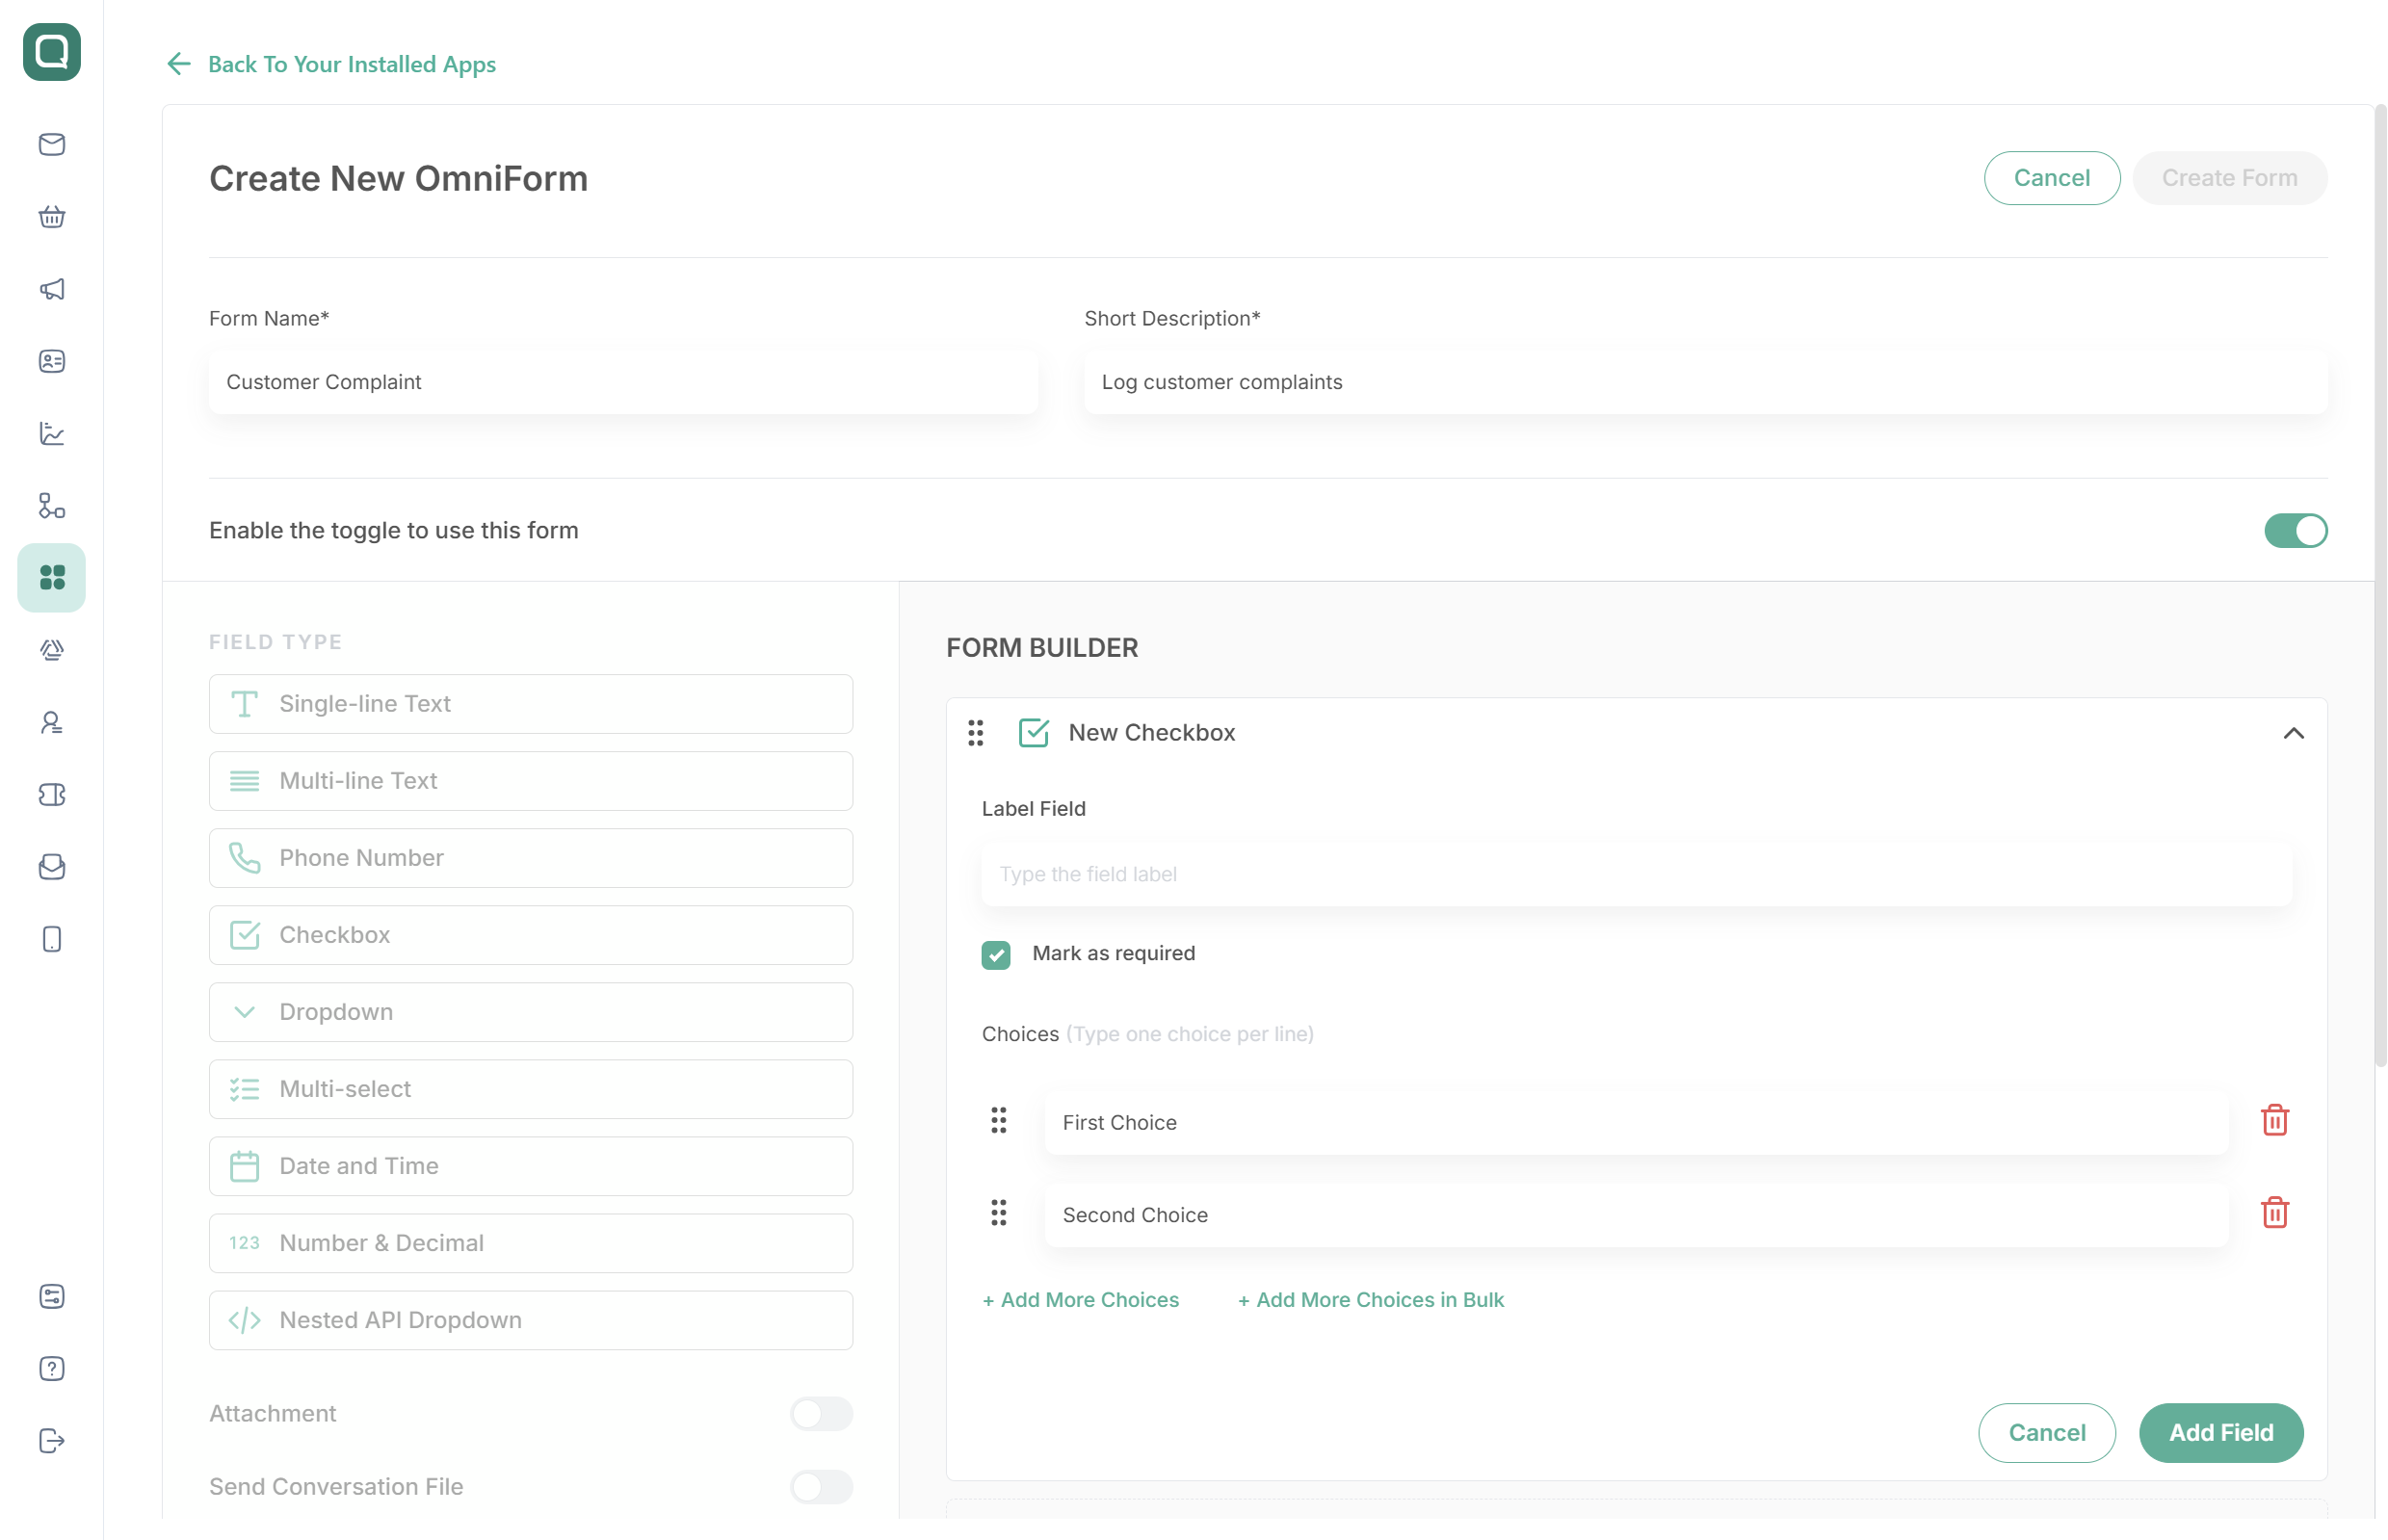
Type each choice on its own line, then click + Add Choices.
The choices appear as a list. Drag :: to reorder a choice, or click the delete icon to remove it.
Click Add More Choices to add one more choice.
To edit the whole list at once, click Add More Choices In Bulk. The text box is pre-filled with your current choices, one per line.
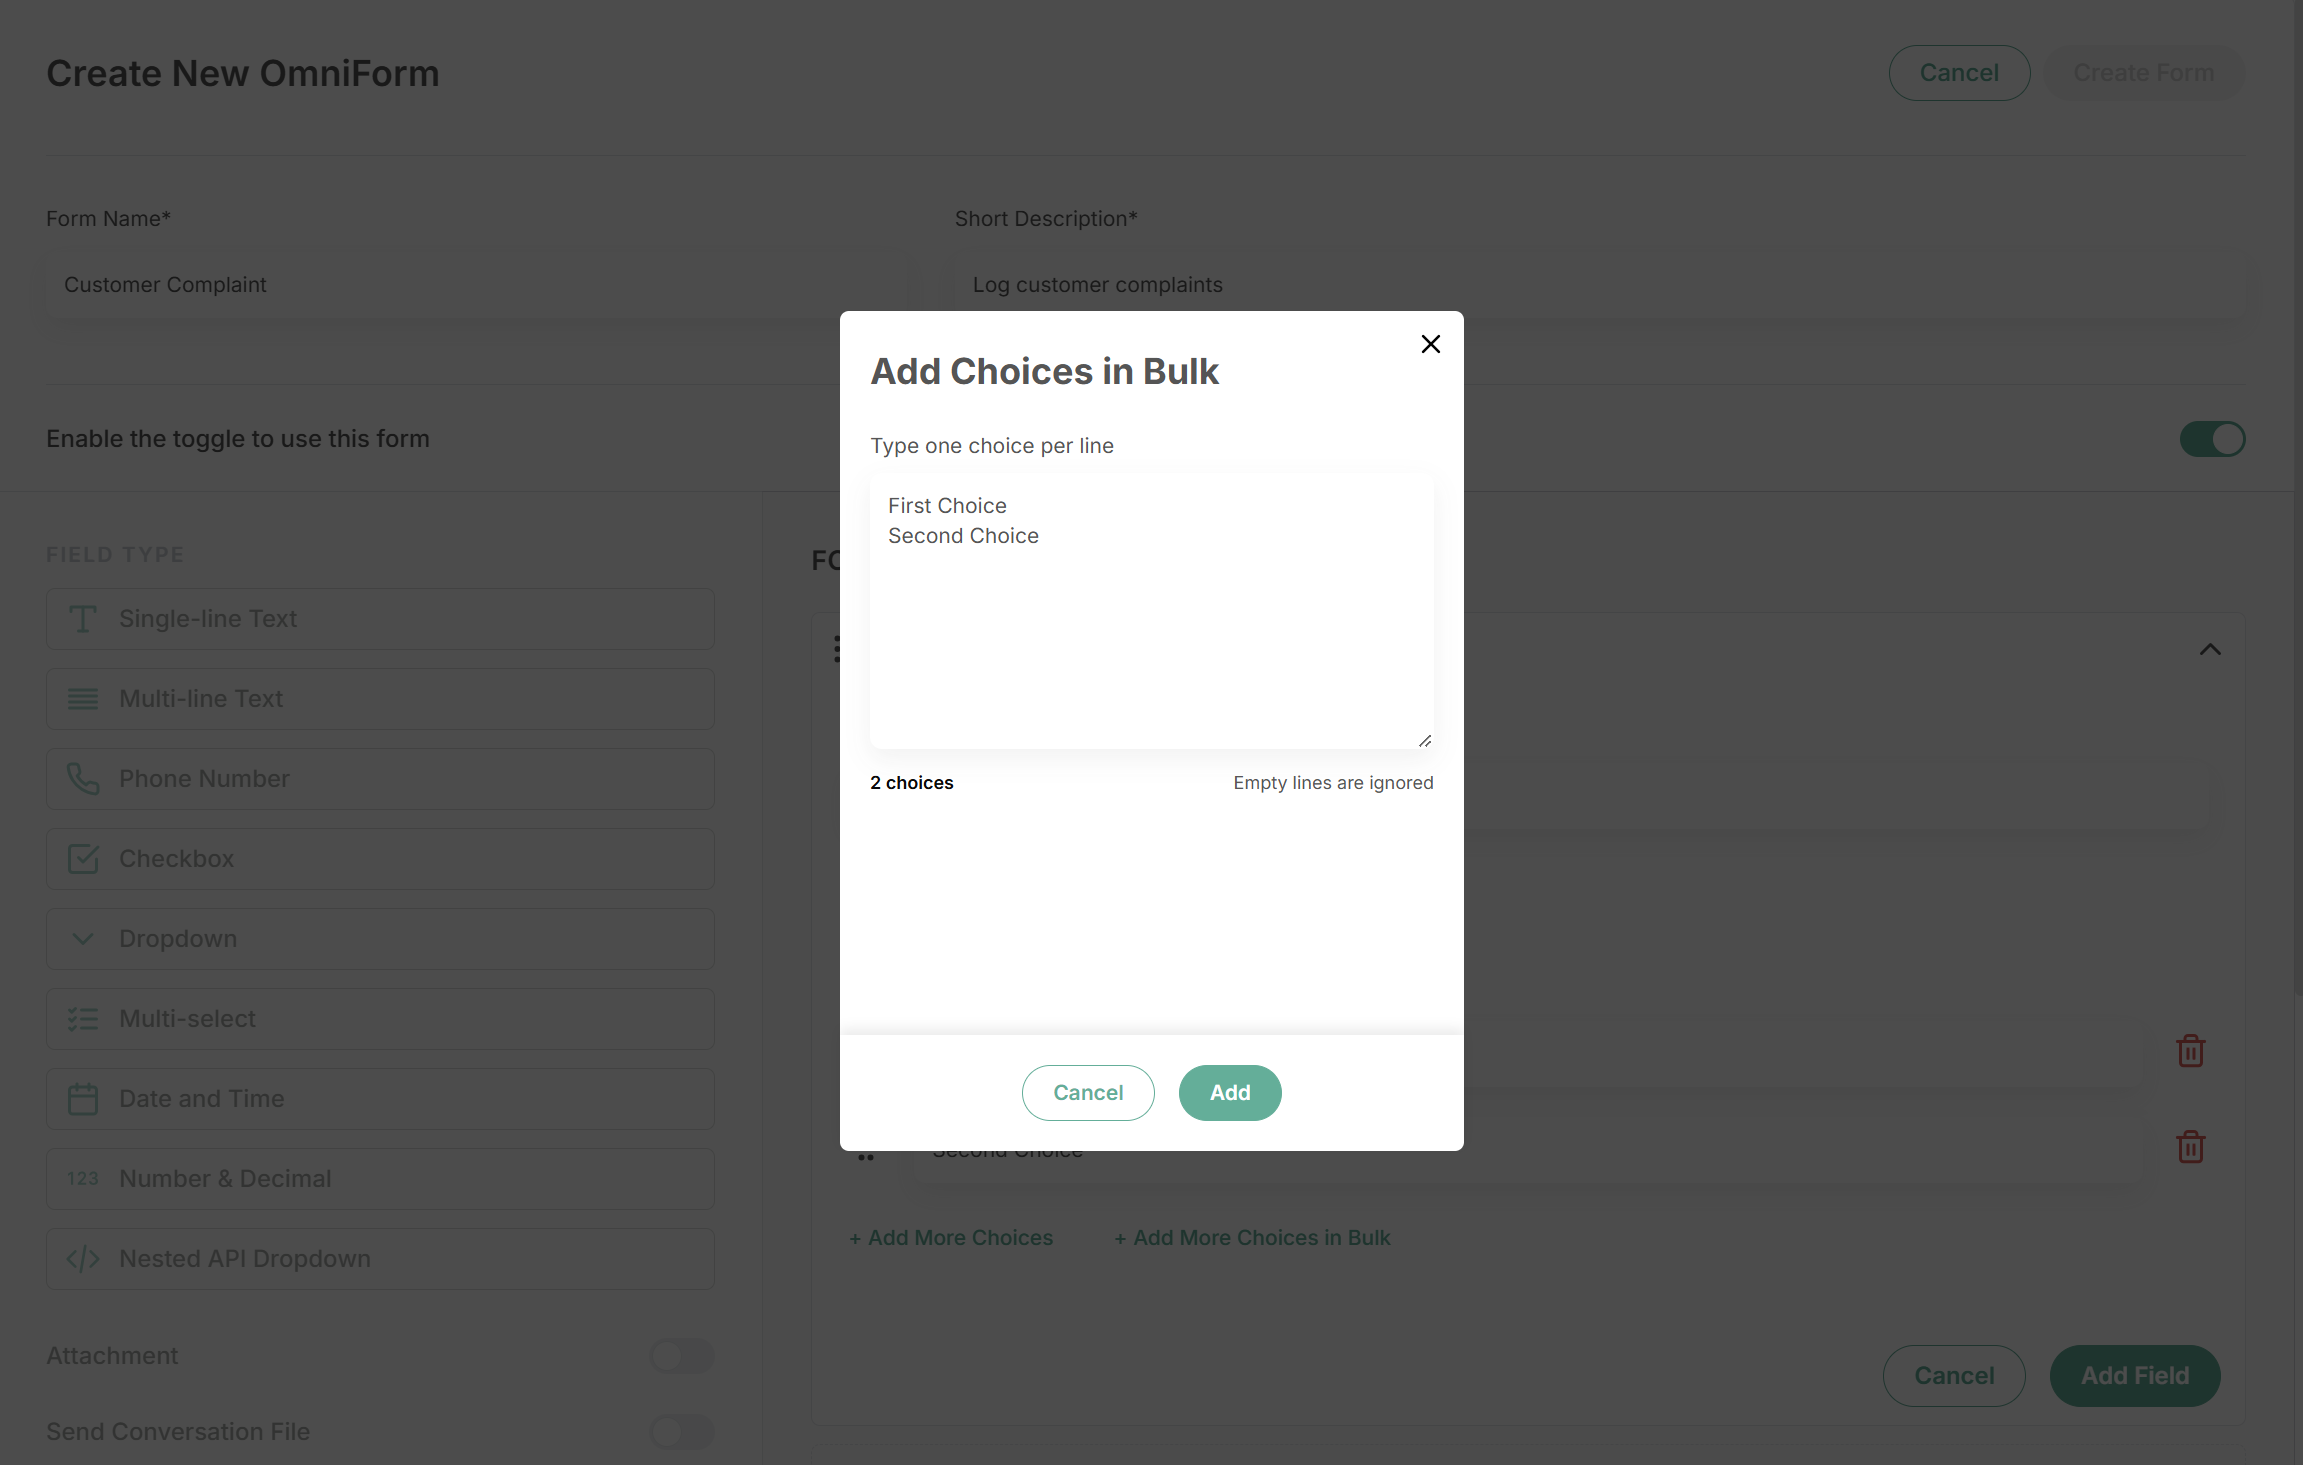
Add replaces the whole list with the content of the text box. It does not append to it.
Checkbox
Use it for: one or more choices from a short list where every choice should be visible.
In the widget, every choice is shown at once and the agent ticks one or more. For a long list, use Multi-select or Dropdown instead.
Dropdown
Use it for: one choice from a list.
In the widget, the agent opens the list and picks one choice. A search box appears when the list has more than 5 choices.
Settings:
Choices source: Manual (default) to type the choices yourself, or From API to load them from your endpoint. See Load choices from your API. Dropdown fields created before this setting existed use Manual.
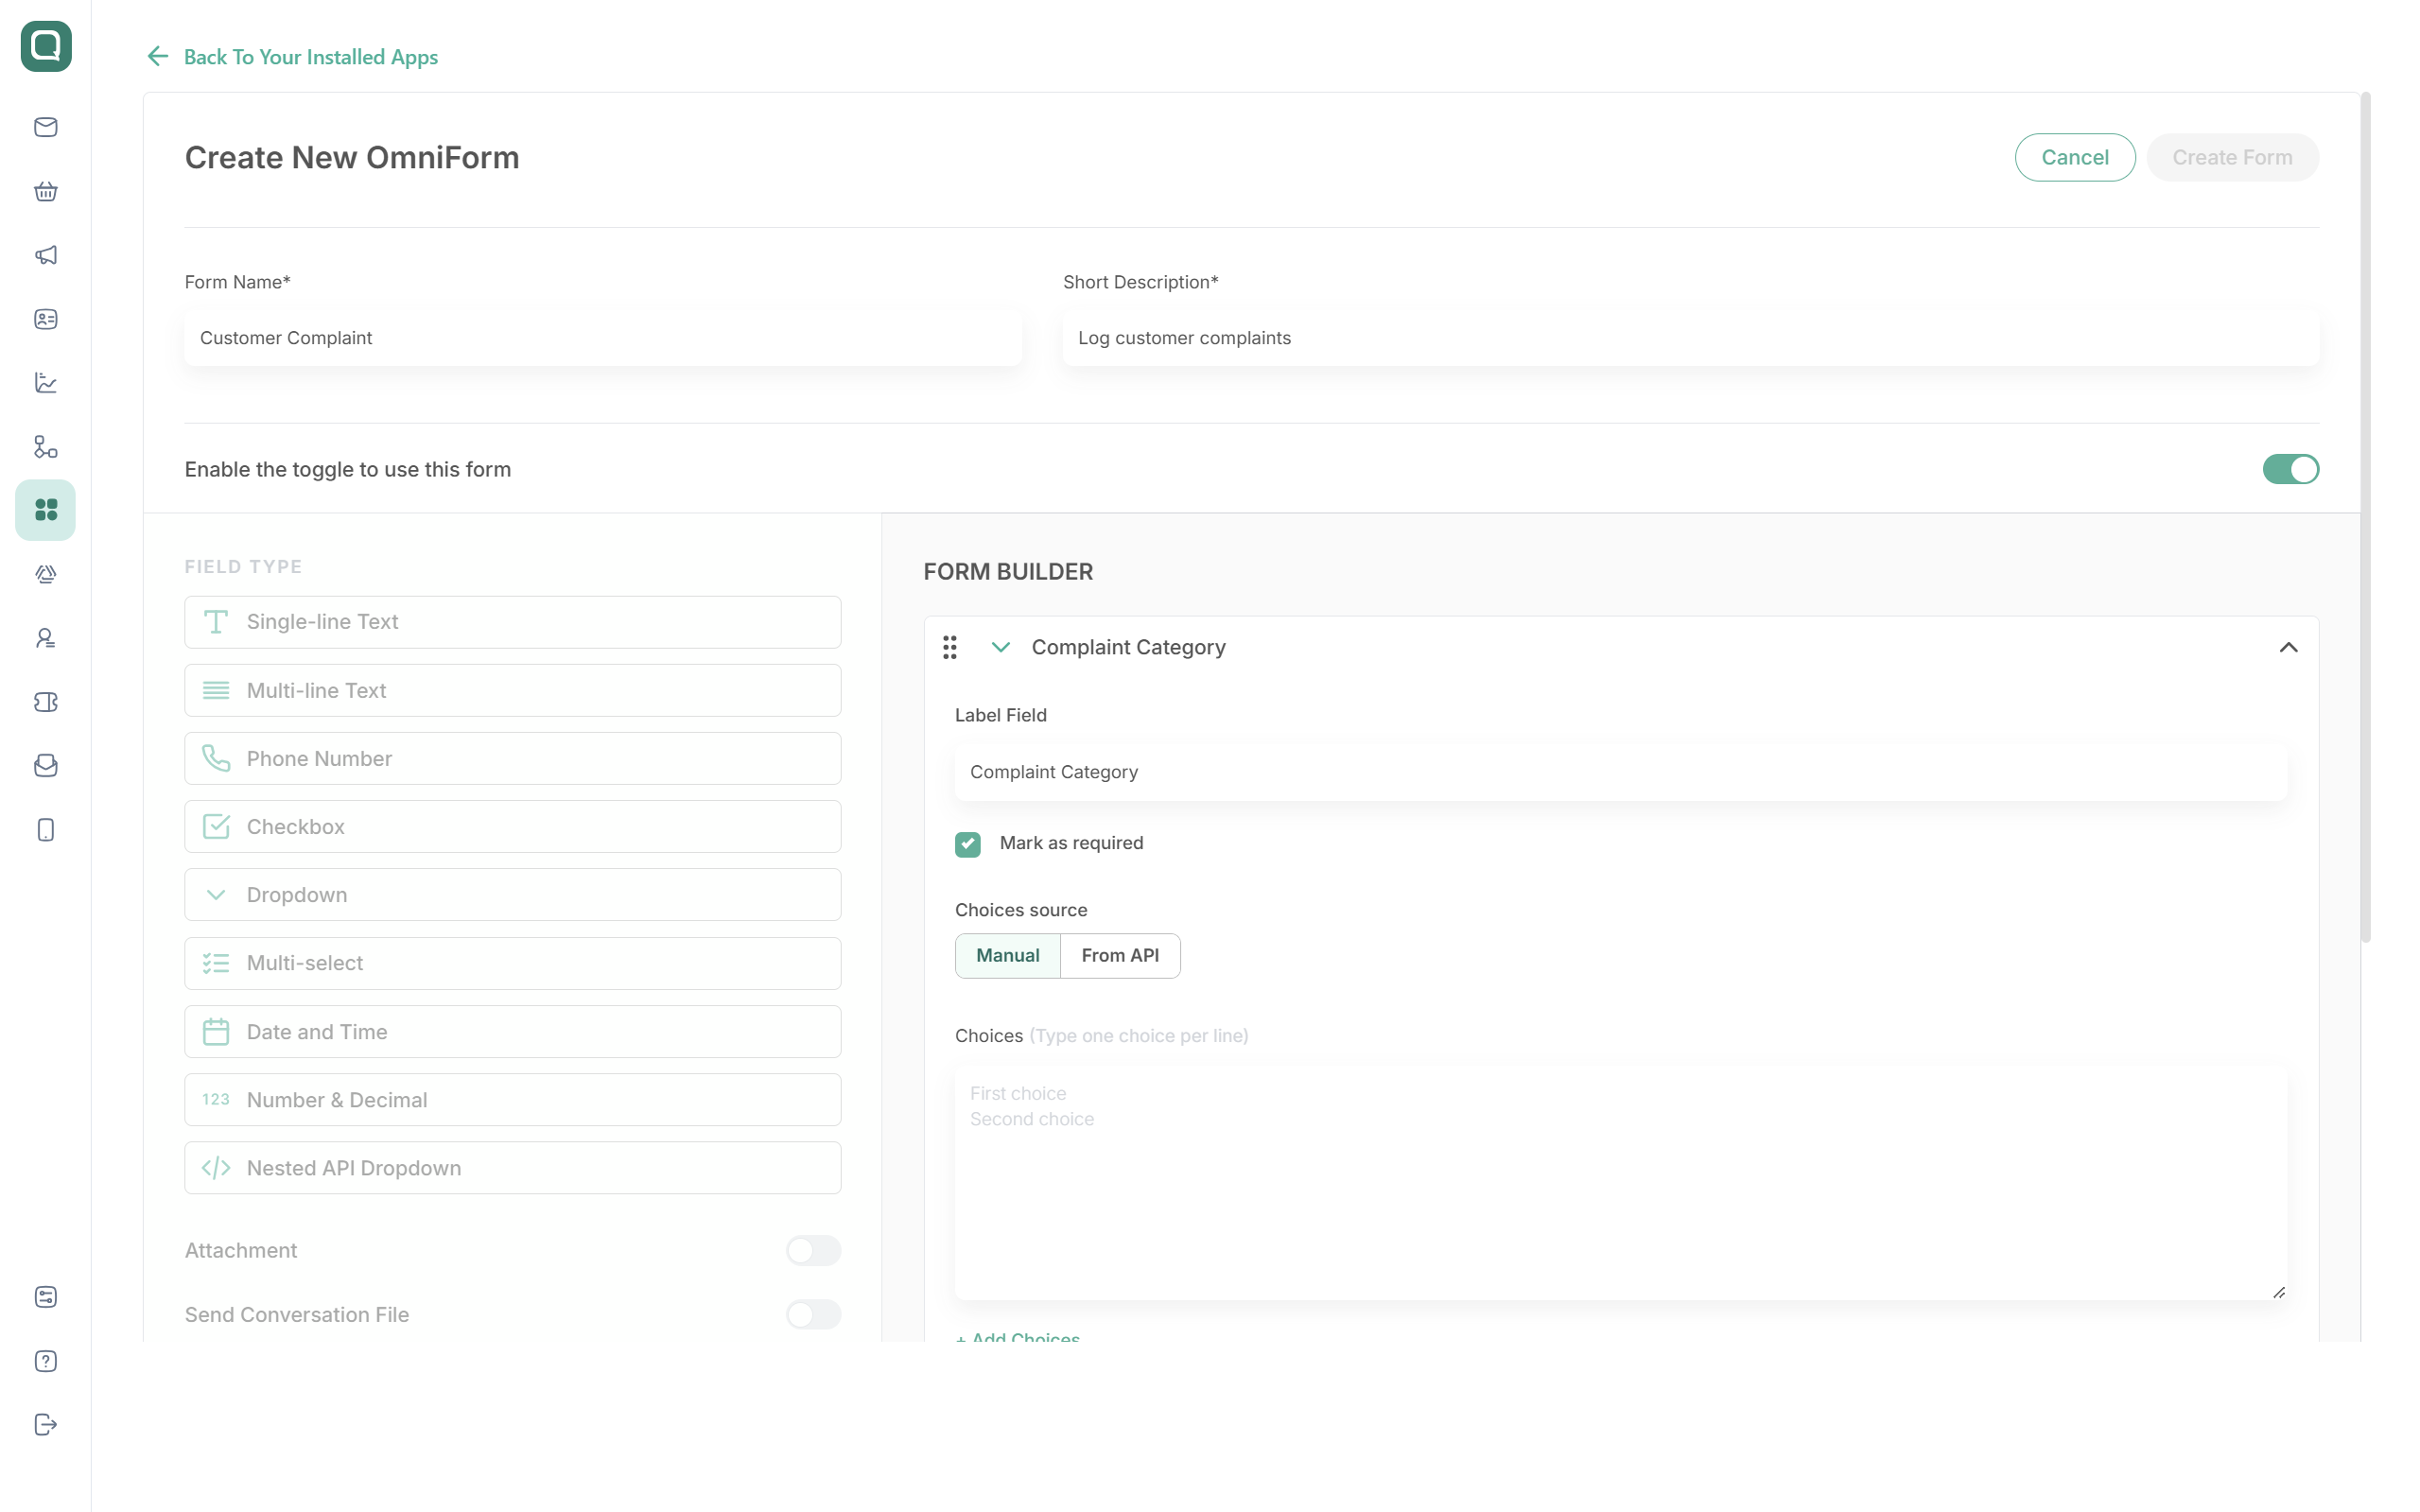
Multi-select
Use it for: one or more choices from a list you type or load from your API. Unlike Checkbox, the list stays collapsed until the agent opens it, so it suits long lists.
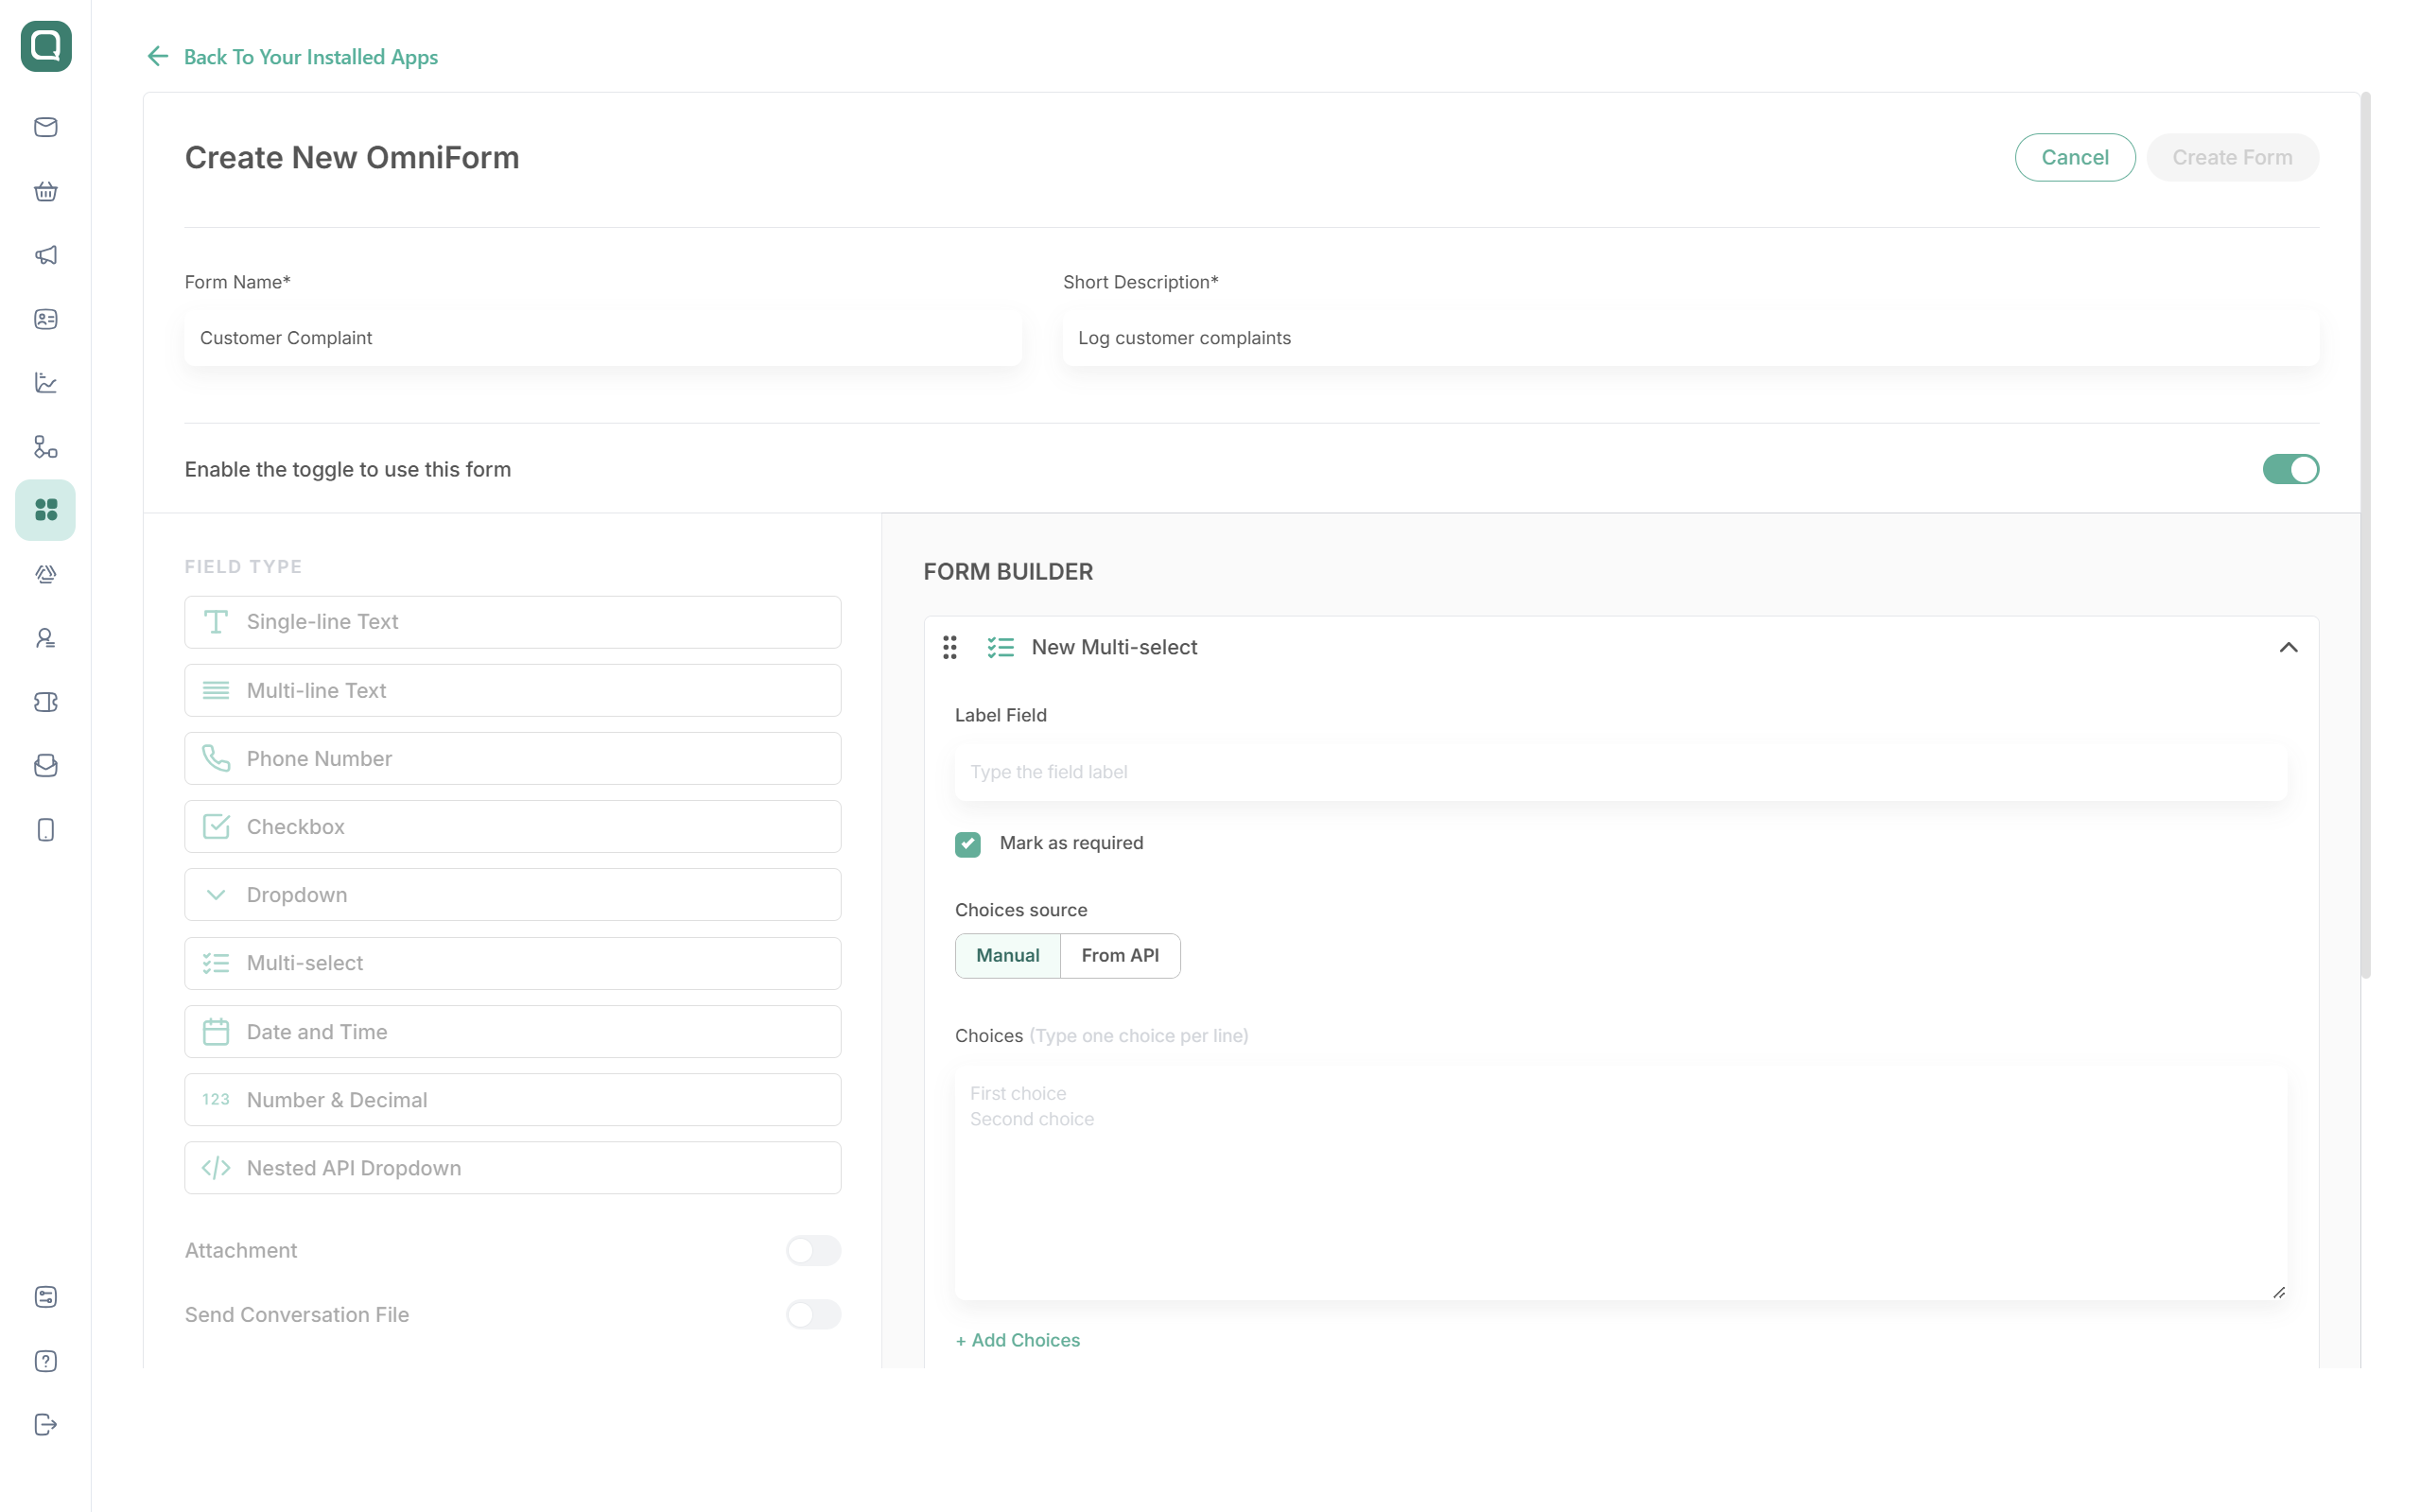
Settings:
Choices source: Manual (default) to type the choices yourself (see Adding choices), or From API to load them from your endpoint (see Load choices from your API). For Manual, the Add More Choices In Bulk pop-up also removes spaces at the start and end of each line, ignores empty lines, and shows how many choices the list will have.
Choice Limit (optional): Min and Max number of choices the agent may select.
Both accept whole numbers from 1 to 999. Leave a box empty for no minimum or no limit.
Min can equal Max when the agent must select an exact number of choices.
For a Manual source, neither value can be higher than the number of choices.
For a From API source, the number of choices is known only when the agent opens the form. If your endpoint returns fewer choices than Min, the agent is asked to select all available choices instead.
Min does not make the field required. If the field is optional, the agent may leave it empty; once they select something, they must select at least Min choices.
In the widget:
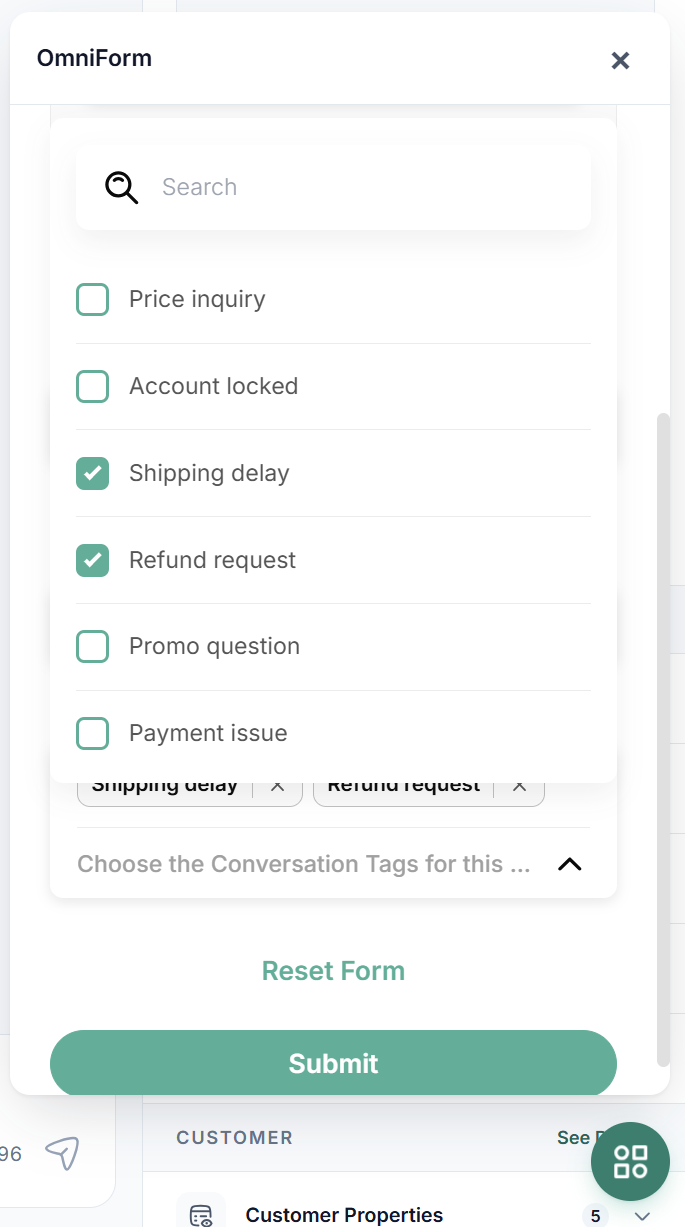
Selected choices appear as chips inside the field. The agent removes one by clicking × on its chip, or by unticking it in the list.
The list stays open while the agent selects, and closes when they click outside it. A search box appears when the list has more than 5 choices.
With a Choice Limit, the rule appears under the field label and the list shows a counter such as 2 of 4 selected. Once Max is reached, the remaining choices are disabled.
When many choices are selected, the chips collapse into +N more.
Nested API Dropdown
Use it for: one choice across levels that depend on each other, such as Province → City → Postal Code or Category → Subcategory → Item. Each level loads its choices from your API, based on the choice made in the level before.
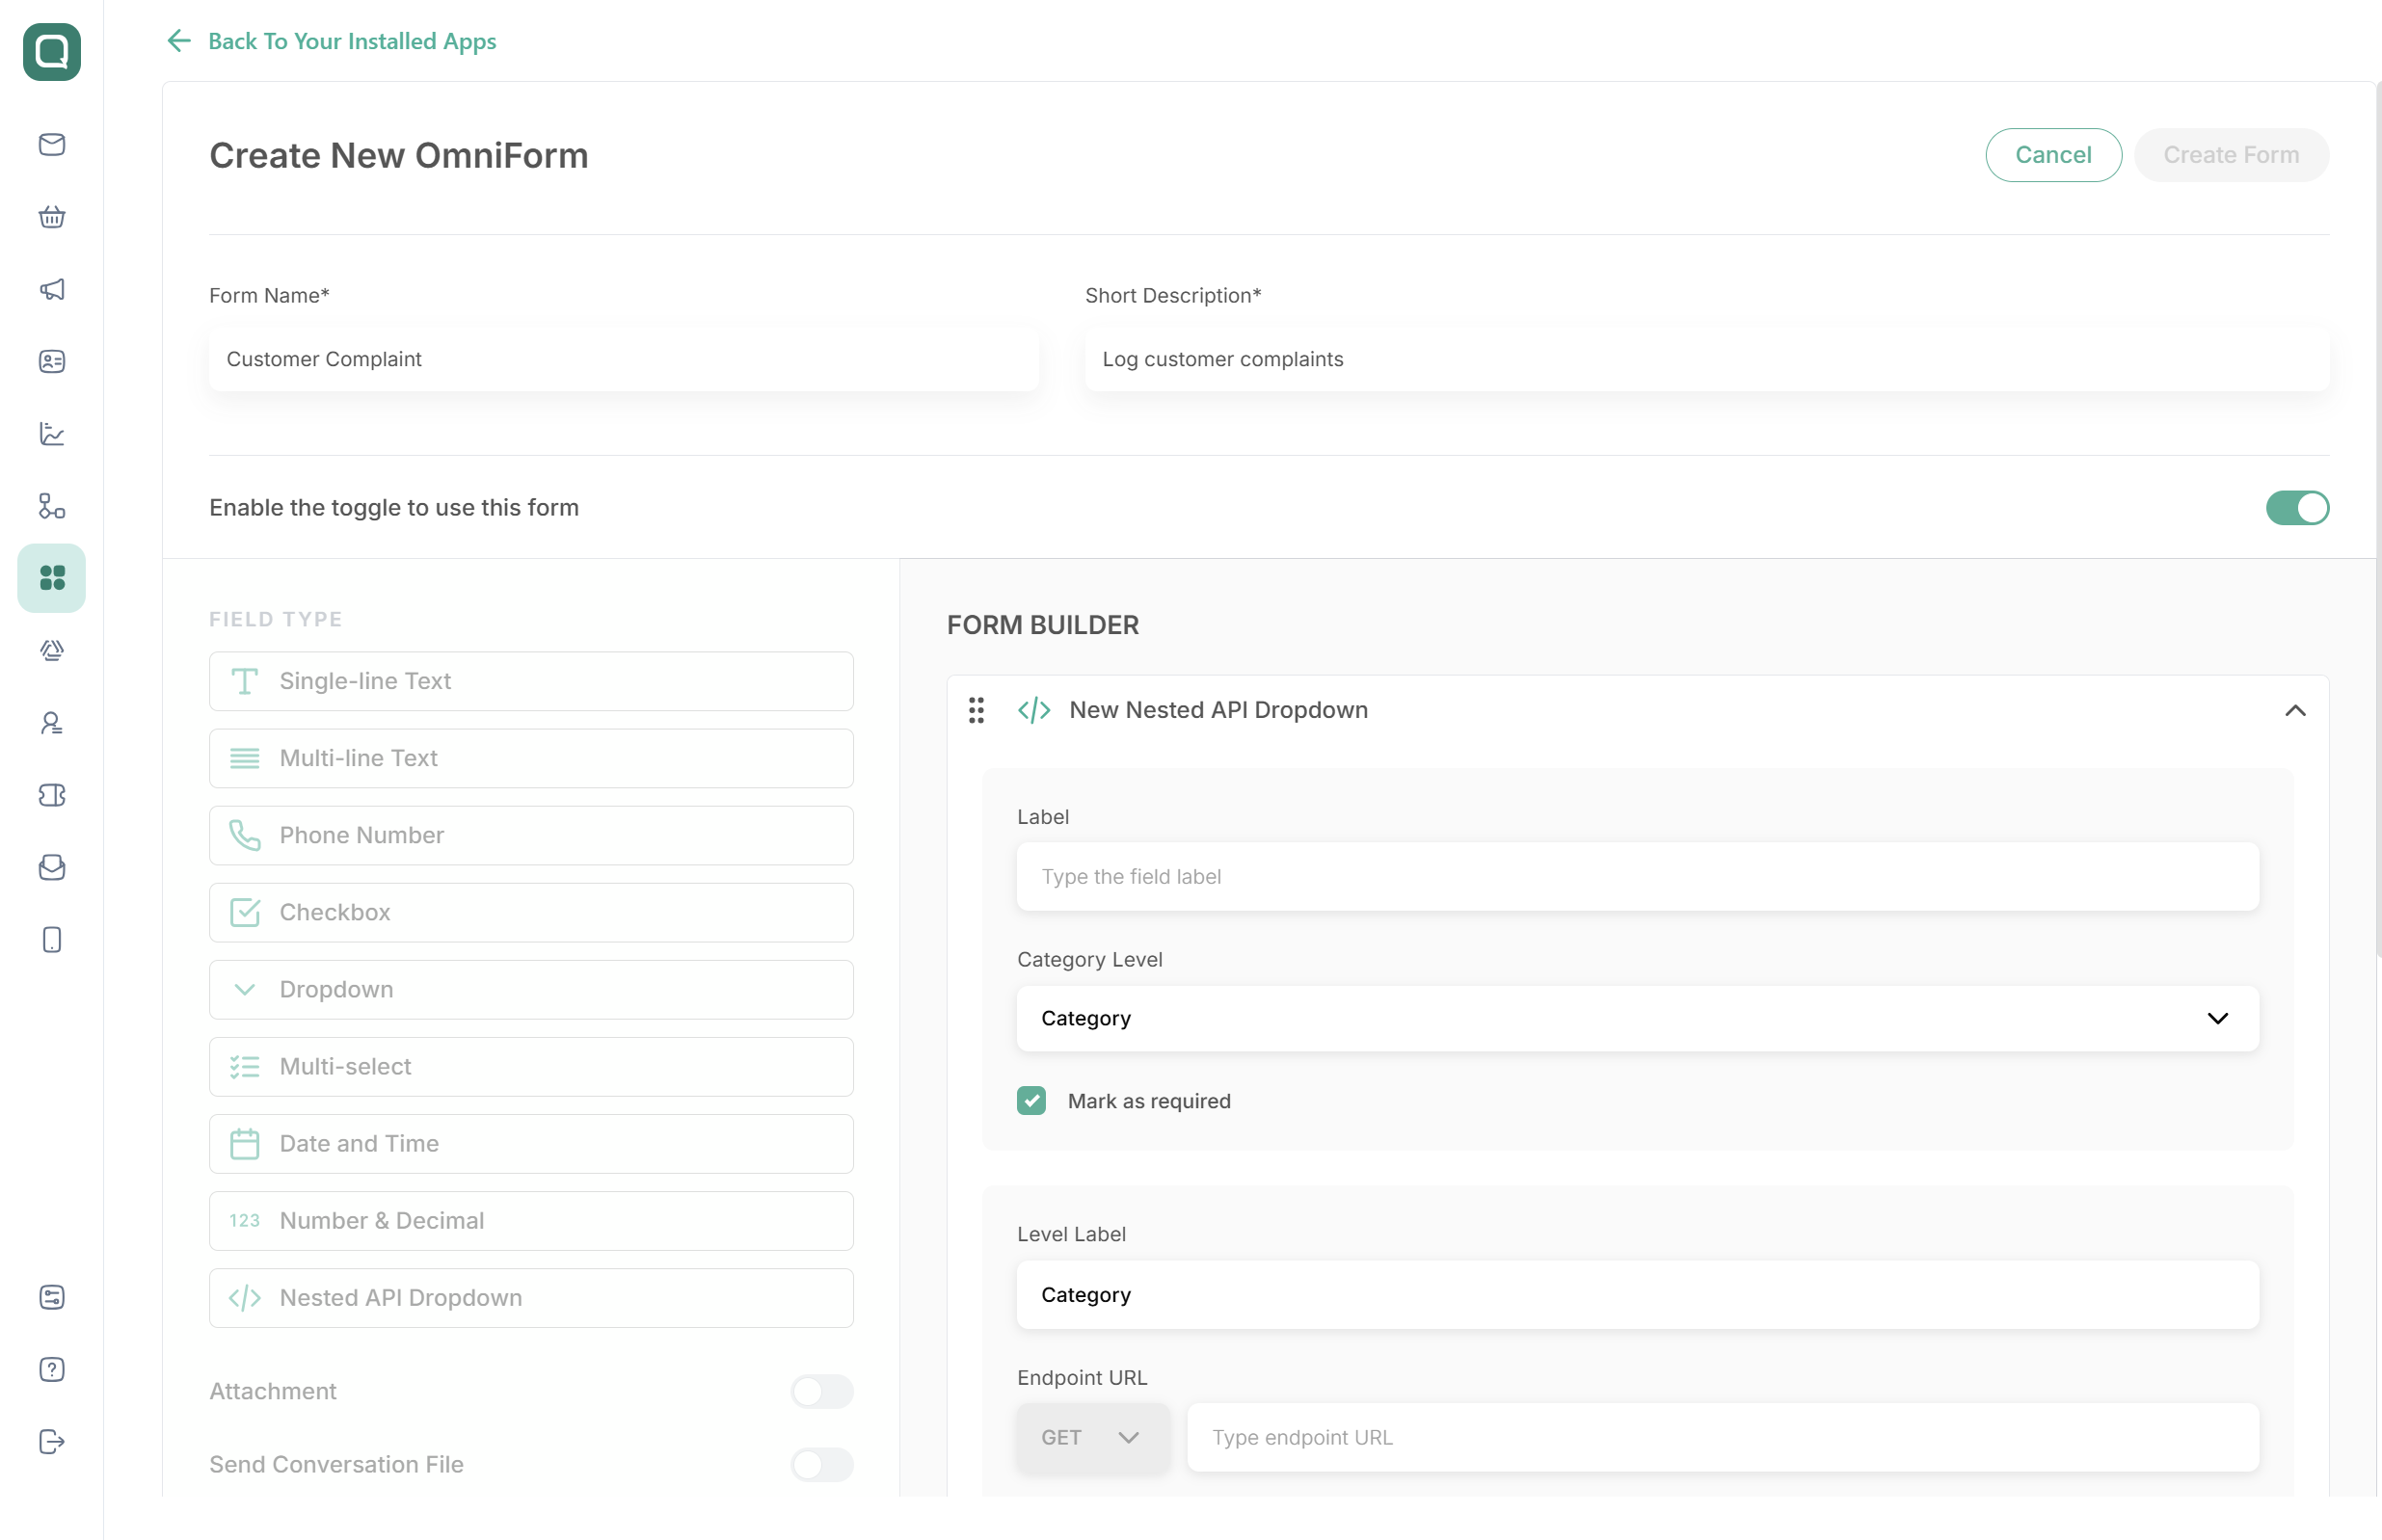
Dropdown Label: the name of the whole field.
Category Label: the label of the first level, for example "Province".
Set up the endpoint of this level; see Load choices from your API.
Click Add Subcategory to add the next level, and repeat from step 2. A field can have up to 10 levels.
To send the choice made in a previous level to the next level's endpoint, use that level's placeholder as a query parameter value, for example {[Category]} or {[Subcategory 1]}. When you add a subcategory, a query parameter id with the previous level's placeholder is added for you.
Load choices from your API
This applies to every level of a Nested API Dropdown, and to Dropdown and Multi-select with From API as their choices source.
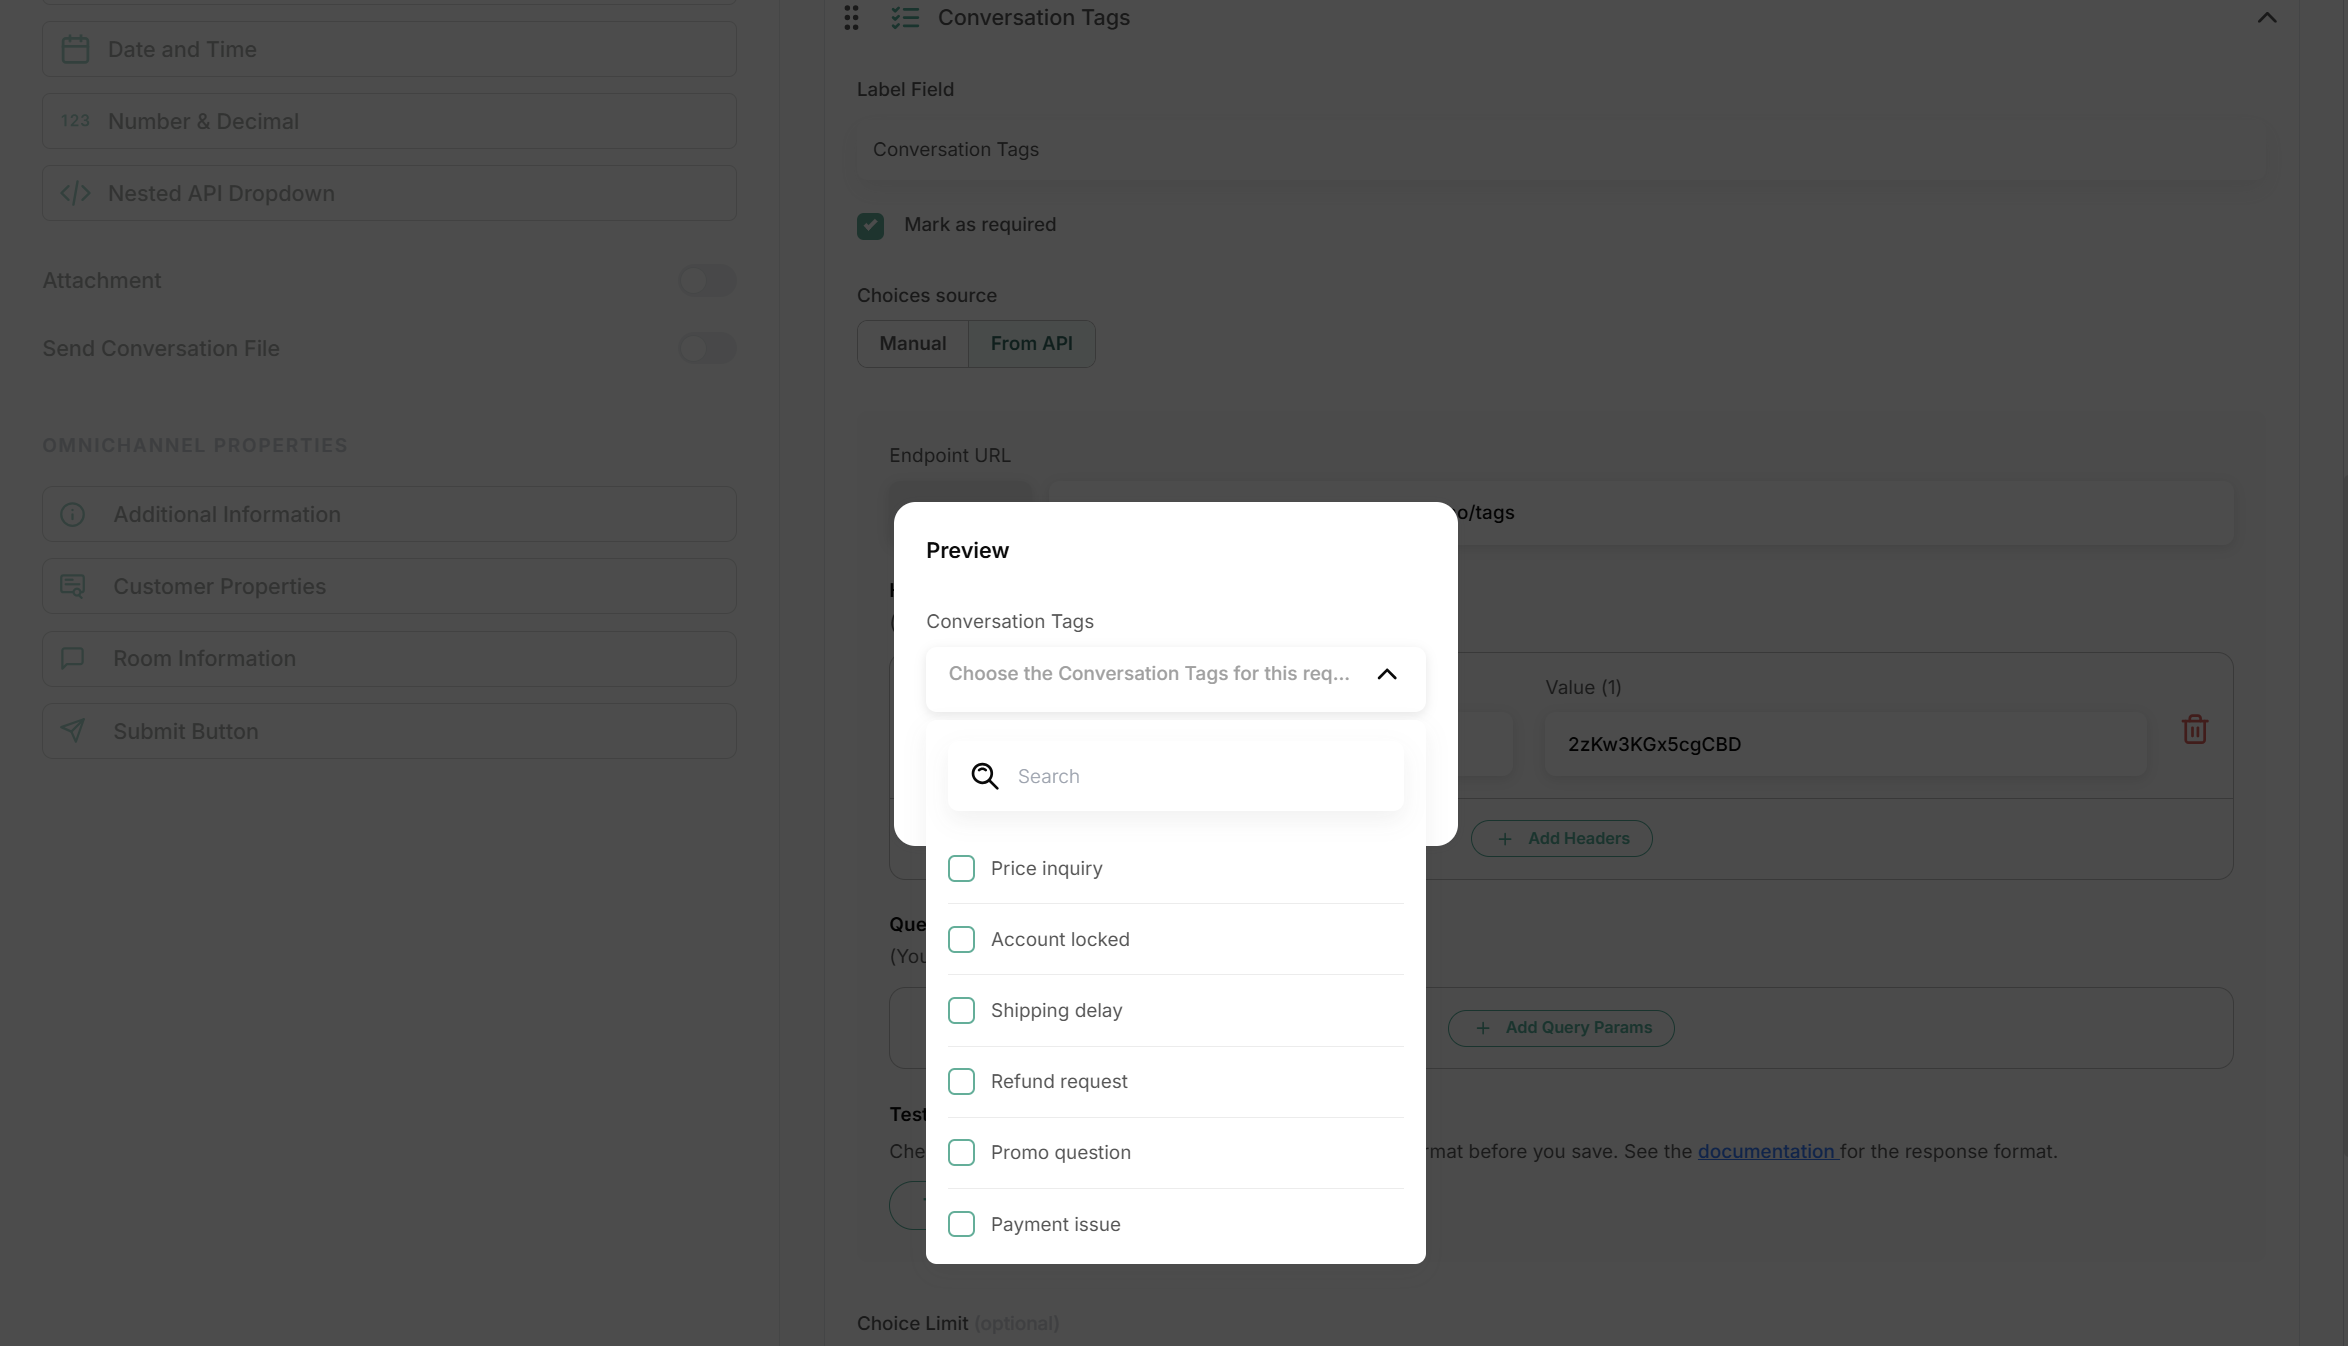
Endpoint URL: the URL that returns the choices. Only the GET method is supported. The URL must start with
http://orhttps://and use a domain name;localhostand URLs with a port number (such as:8080) are not accepted.Headers (optional): up to 5, for example for authentication.
Query Params (optional): up to 10.
Test API: calls your endpoint and opens a preview with the returned choices, so you can check them before saving.
Your endpoint must return choices in a specific format and allow requests from the agent's browser. Share the Developer Reference with whoever builds it.
You can switch a saved Dropdown or Multi-select between Manual and From API. After Save Form, new submissions send different values to your webhook (for example tag IDs instead of the choice text). Check with your developer before switching a field that is already in use. See Changing the source of a saved field.
Date and Time
Use it for: a date, or a date with a time, picked from a calendar.
Set Type Field to Date or Date and Time.
The value is sent to your webhook in UTC. If your system uses another timezone (for example UTC+7), convert it on your side.
Number and Decimal
Use it for: numbers. By default the field accepts whole numbers only. Tick Allow decimal to also accept decimals.
Form options
Attachment: adds a file upload area to the form. The agent can attach one or more files. OmniForm does not limit the file size, but large files take longer to upload.
Send Conversation File: sends a link to the conversation history with each submission. It covers the current session, from its start until the room is resolved.
Omnichannel data
Include data from the Omnichannel room with each submission. Each option is set up in its own window under OMNICHANNEL PROPERTIES.
Additional Info
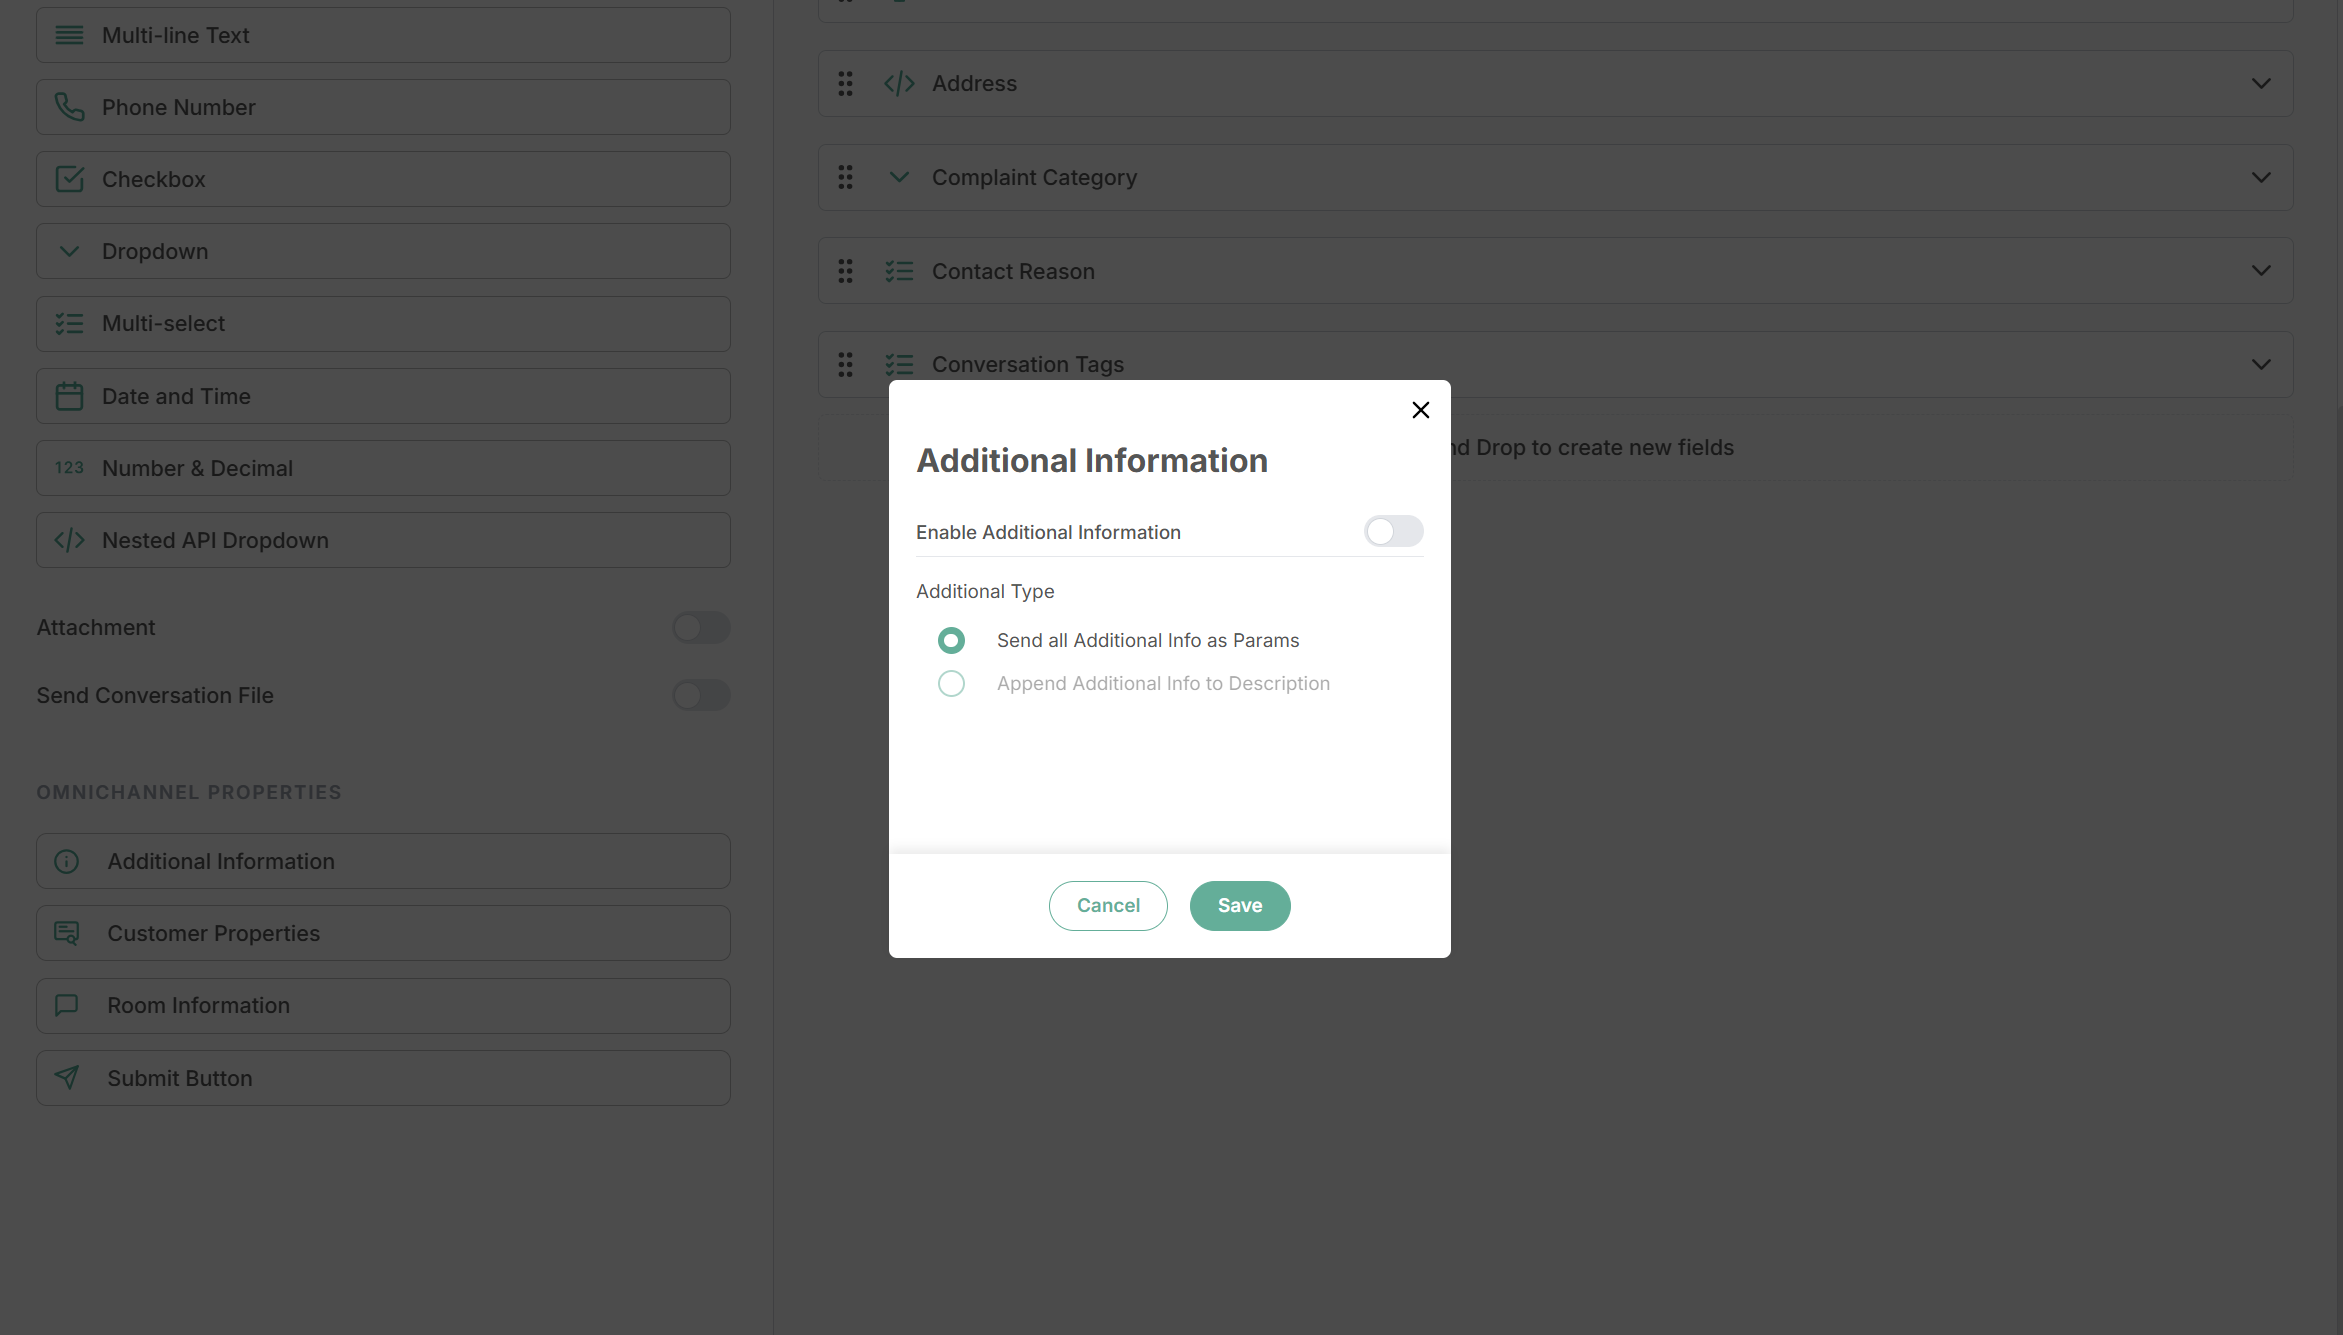
Enable Additional Information, then choose how to send it:
Send all additional info as params: the form shows all of the room's additional information, and it is sent as a separate list.
Append additional info to description: the information is added to a Multi-line Text field that you choose.
Customer Properties
Tick the Omnichannel customer properties to send with each submission.
Room Information
Tick the room details to send with each submission:
Item | Description |
|---|---|
Room Name | Name of the room, usually the customer's name |
Room ID | ID of the room |
Channel Name | Name of the channel the customer used to start the chat |
Channel ID | ID of that channel |
Customer ID | The customer's ID in the channel, for example a phone number or email |
Customer Email | The customer's email, if available |
Customer Phone Number | The customer's phone number. Sent only when the customer ID is a phone number |
Agent Name | Name of the agent who submits the form, if they are assigned to the room; otherwise the first agent assigned |
Agent Mail | Email of that same agent |
Tags | Tags on the room |
Submit Button
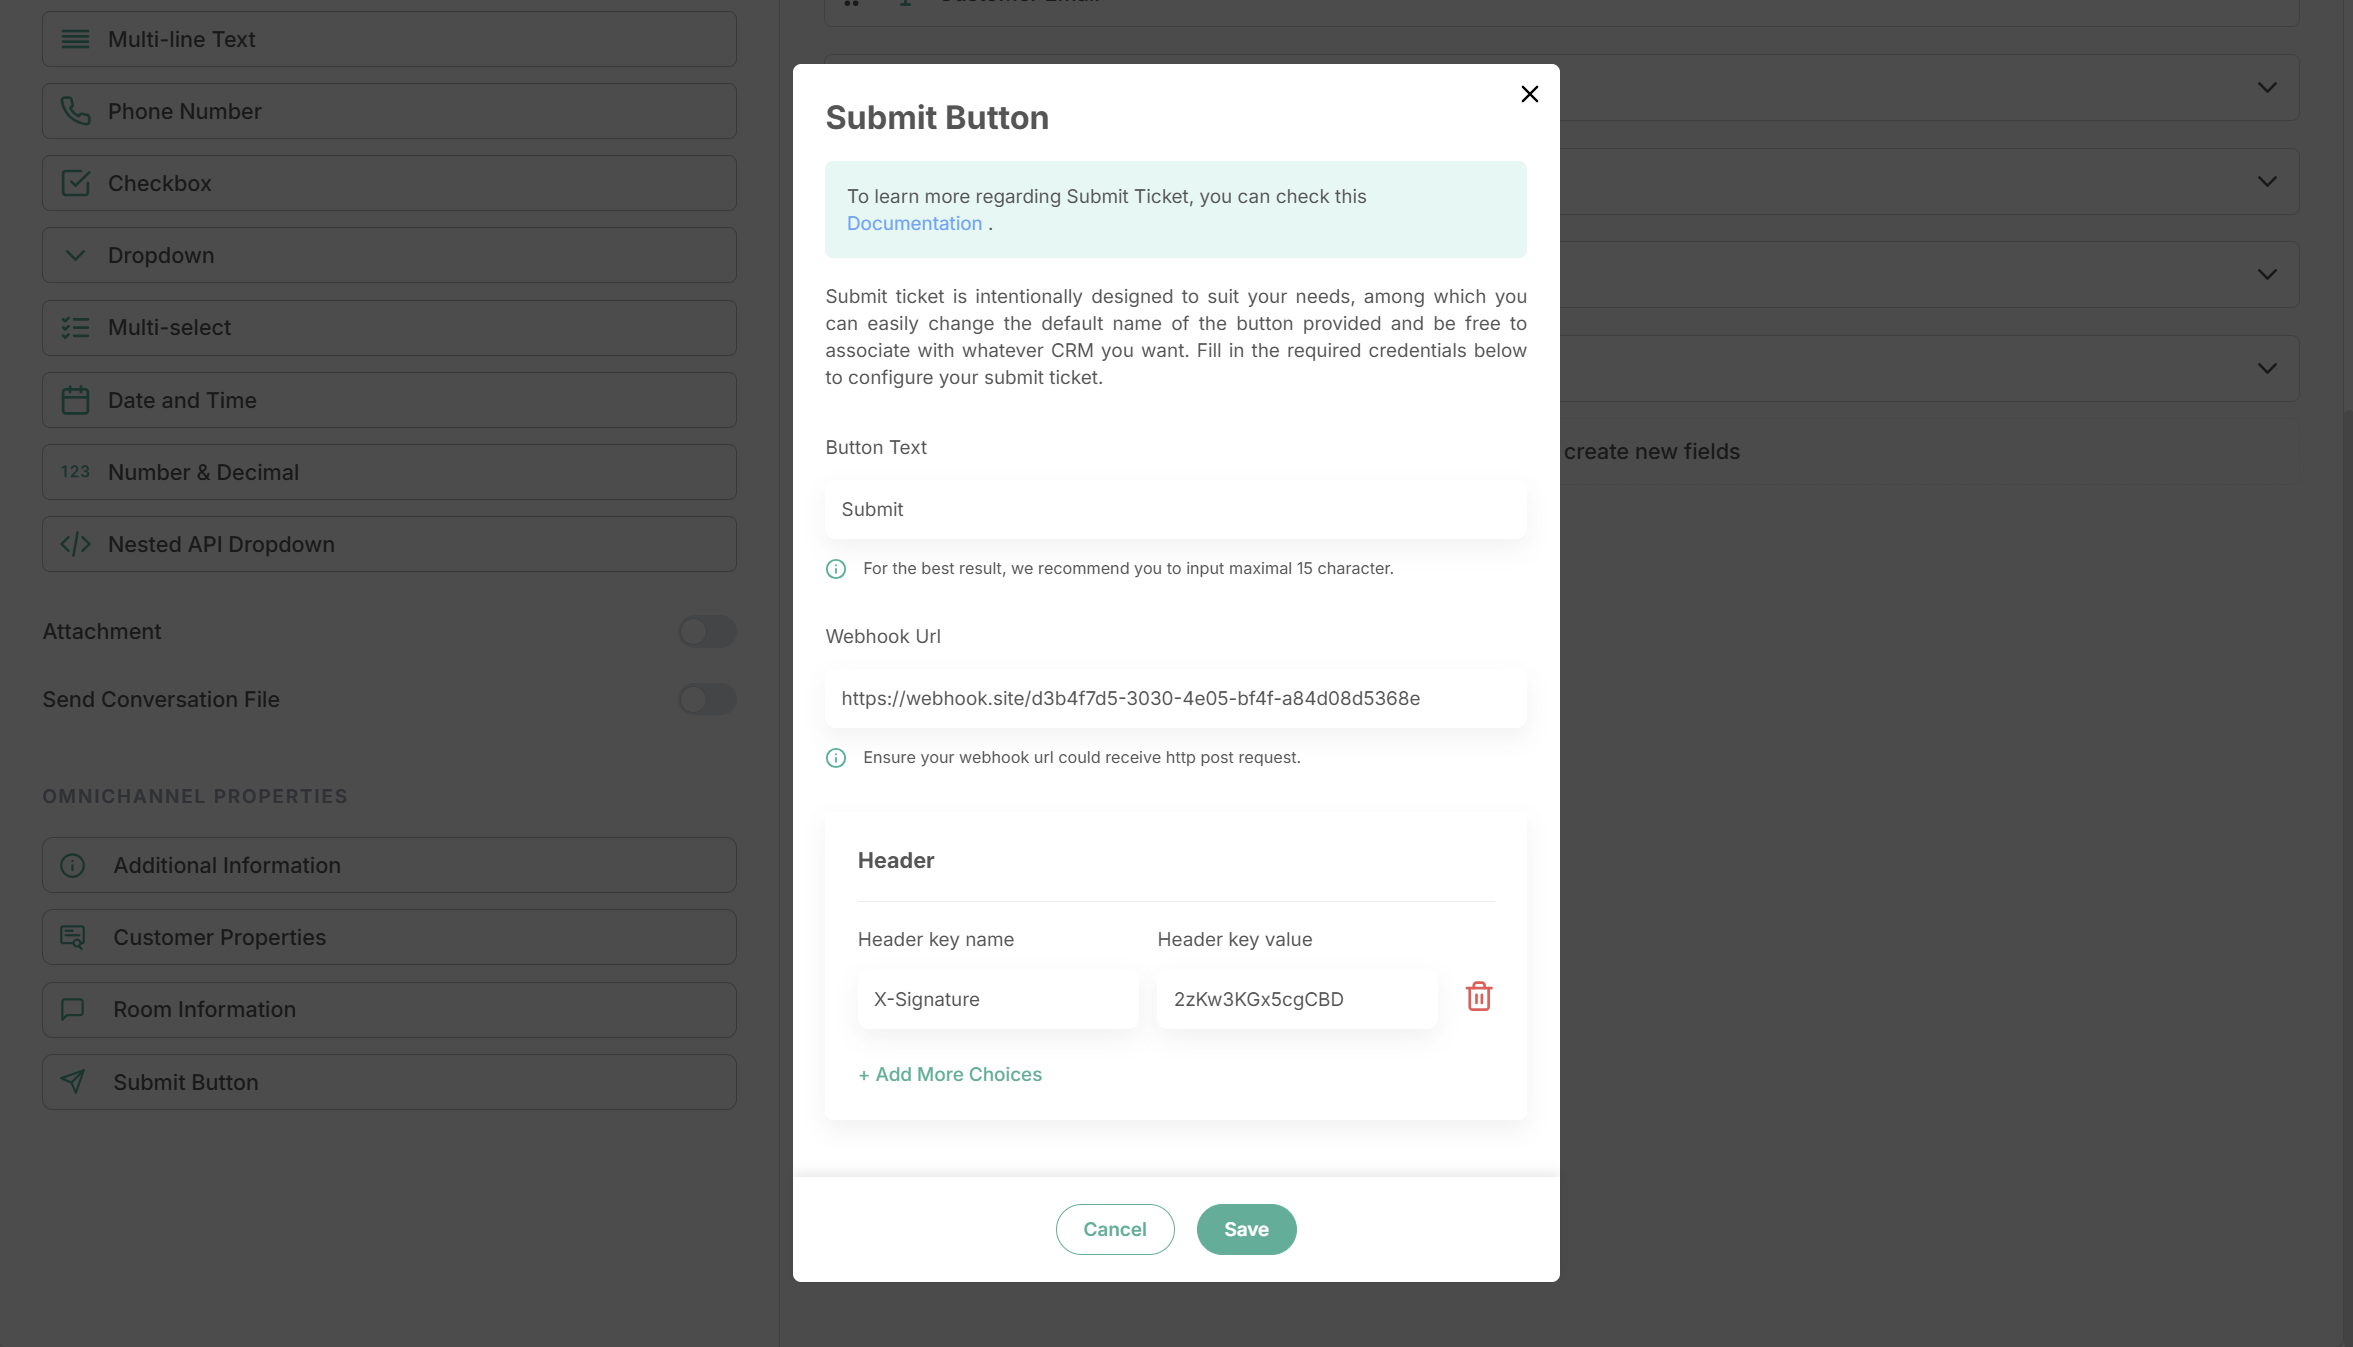
The Submit Button is required: you must set it up before you can save the form.
Button text: the label of the submit button in the widget.
Webhook URL: the URL that receives each submission.
Custom headers (optional): up to 5 key-value pairs, sent with every submission. Use them to let your system verify that a request comes from OmniForm.
What your webhook receives, and how it must respond, is described in the Developer Reference.