OmniForm Add-On are Qiscus Omnichannel widgets that can be used to connect the Omnichannel Agent user with the Client’s CRM or Ticketing System. The OmniForm widget will contain a list of fields that are already configured on the Form Builder in the OmniForm Add-on Setting through App Center pages.
Activation
Follow the instructions step on the Getting Started pages and try to activate OmniForm Add on.
Create New OmniForm
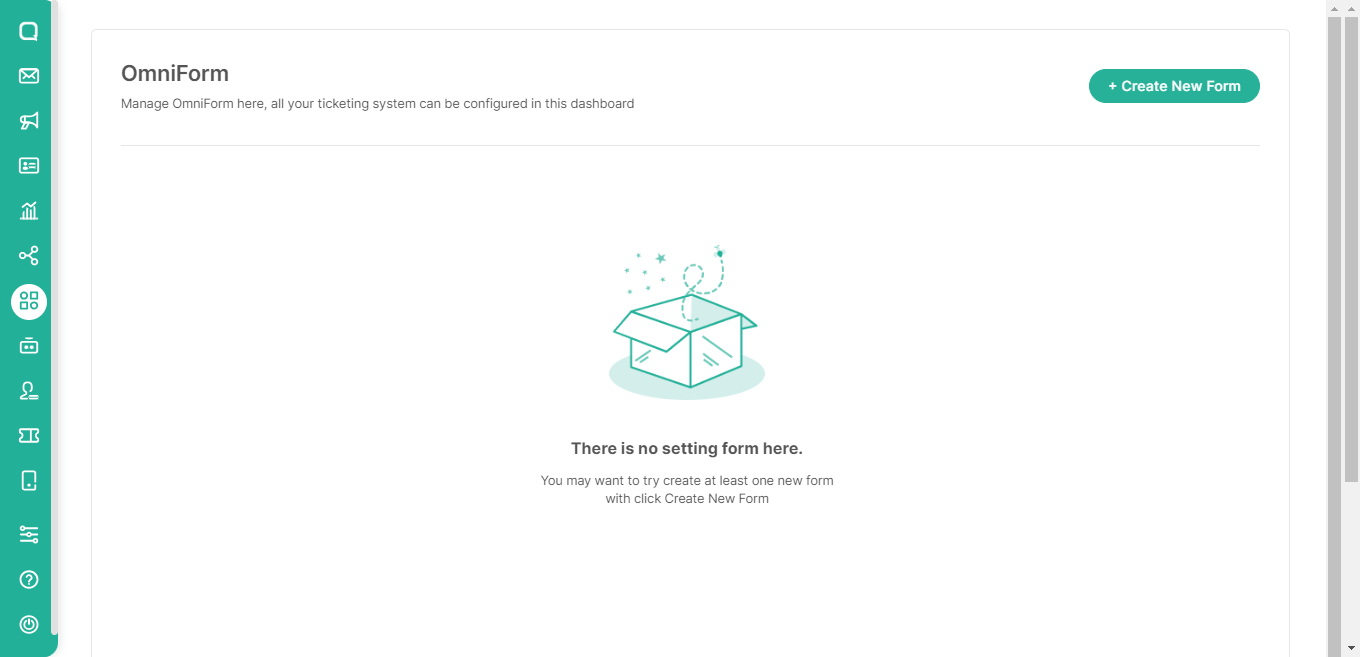
Create your first OmniForm by click Create New Form Button

Fill in the Form data details and start to build your form by selecting or dragging and dropping the field type item to the form builder.
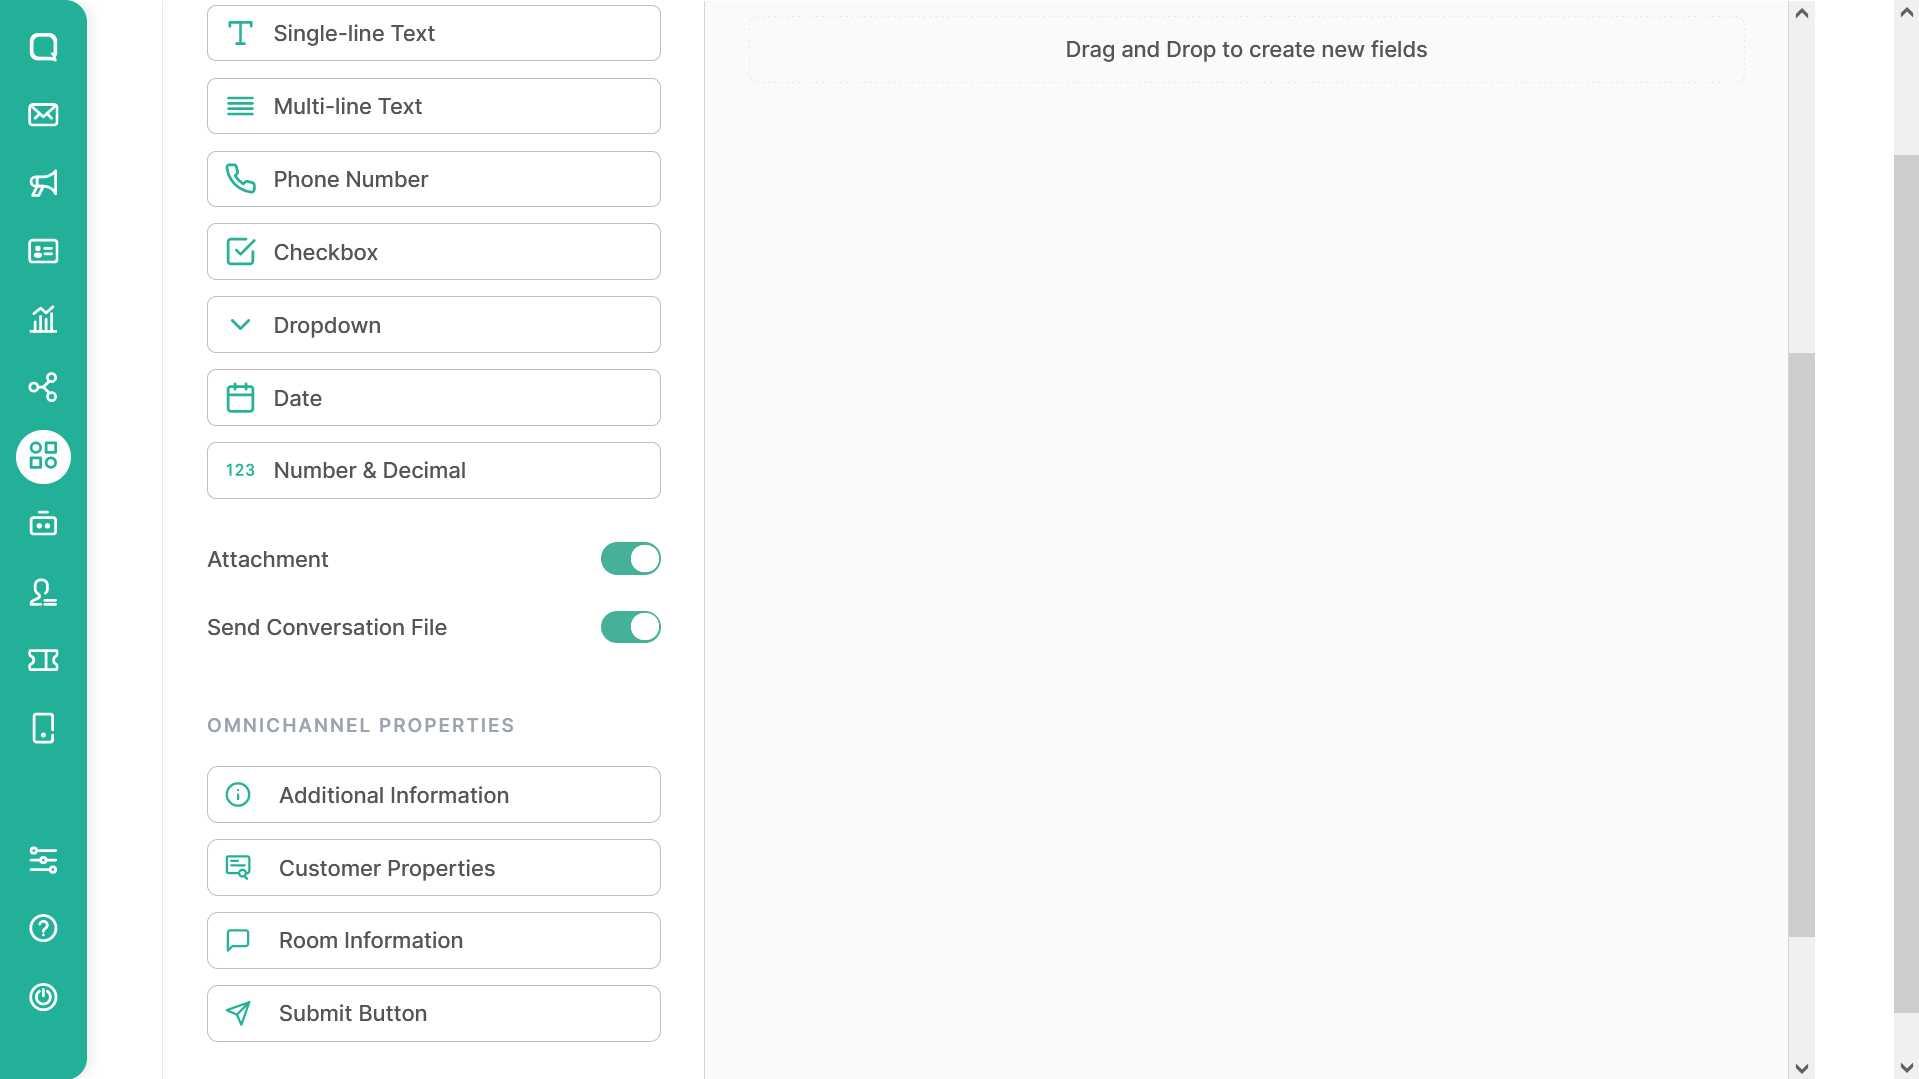
Single-line Text
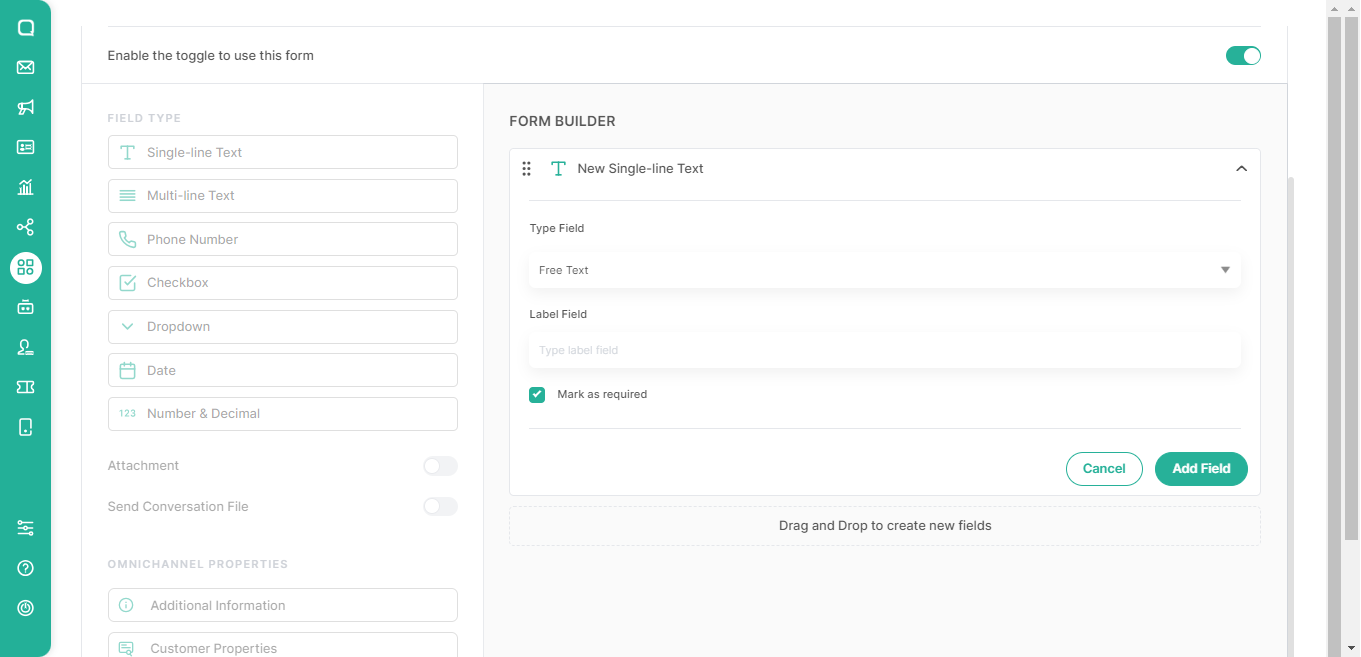
Single-line Text is a field type that can be used for short and direct answer choices. When you use Single-line Text, Free Text in the Type Field is the default option. The available default options can be changed to email through email validation which can be done simultaneously when filling out the form.
- OmniForm Widget with single-line text field

- OmniForm Widget with email validation

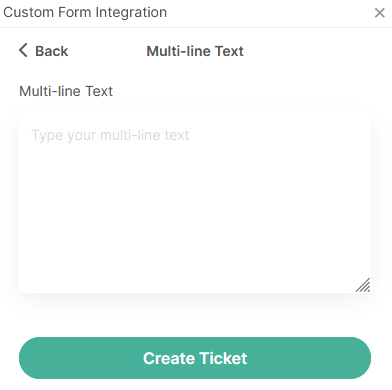
Multi-line Text
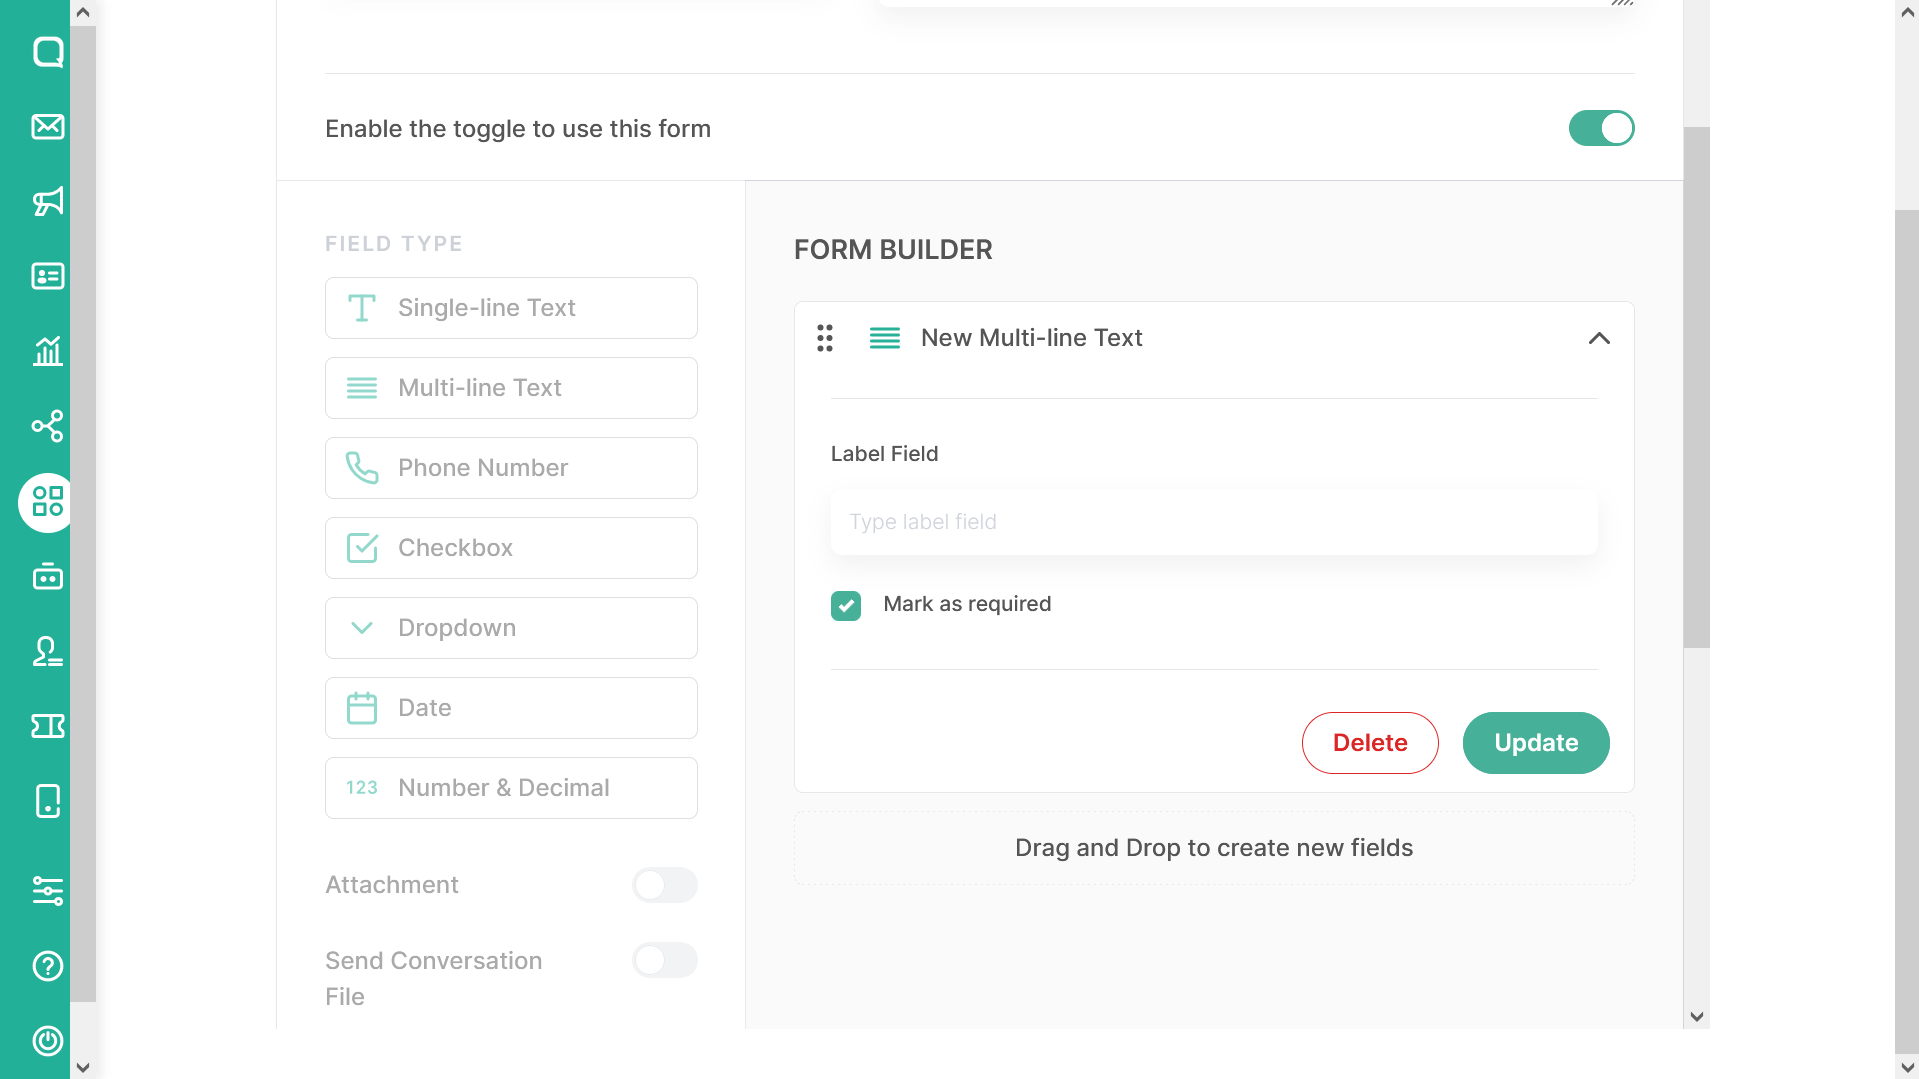
Multi-line Text is a field type that you can use to answer questions at length or in paragraph form.
When you decide to use a Multi-line field, fill in the Field Label to provide the field name. Thick the mark as required check box to make this field are mandatory field during the submitting the form and remove the thick to make it as optional field.
- OmniForm Widget with Multi-line text field
Phone Number
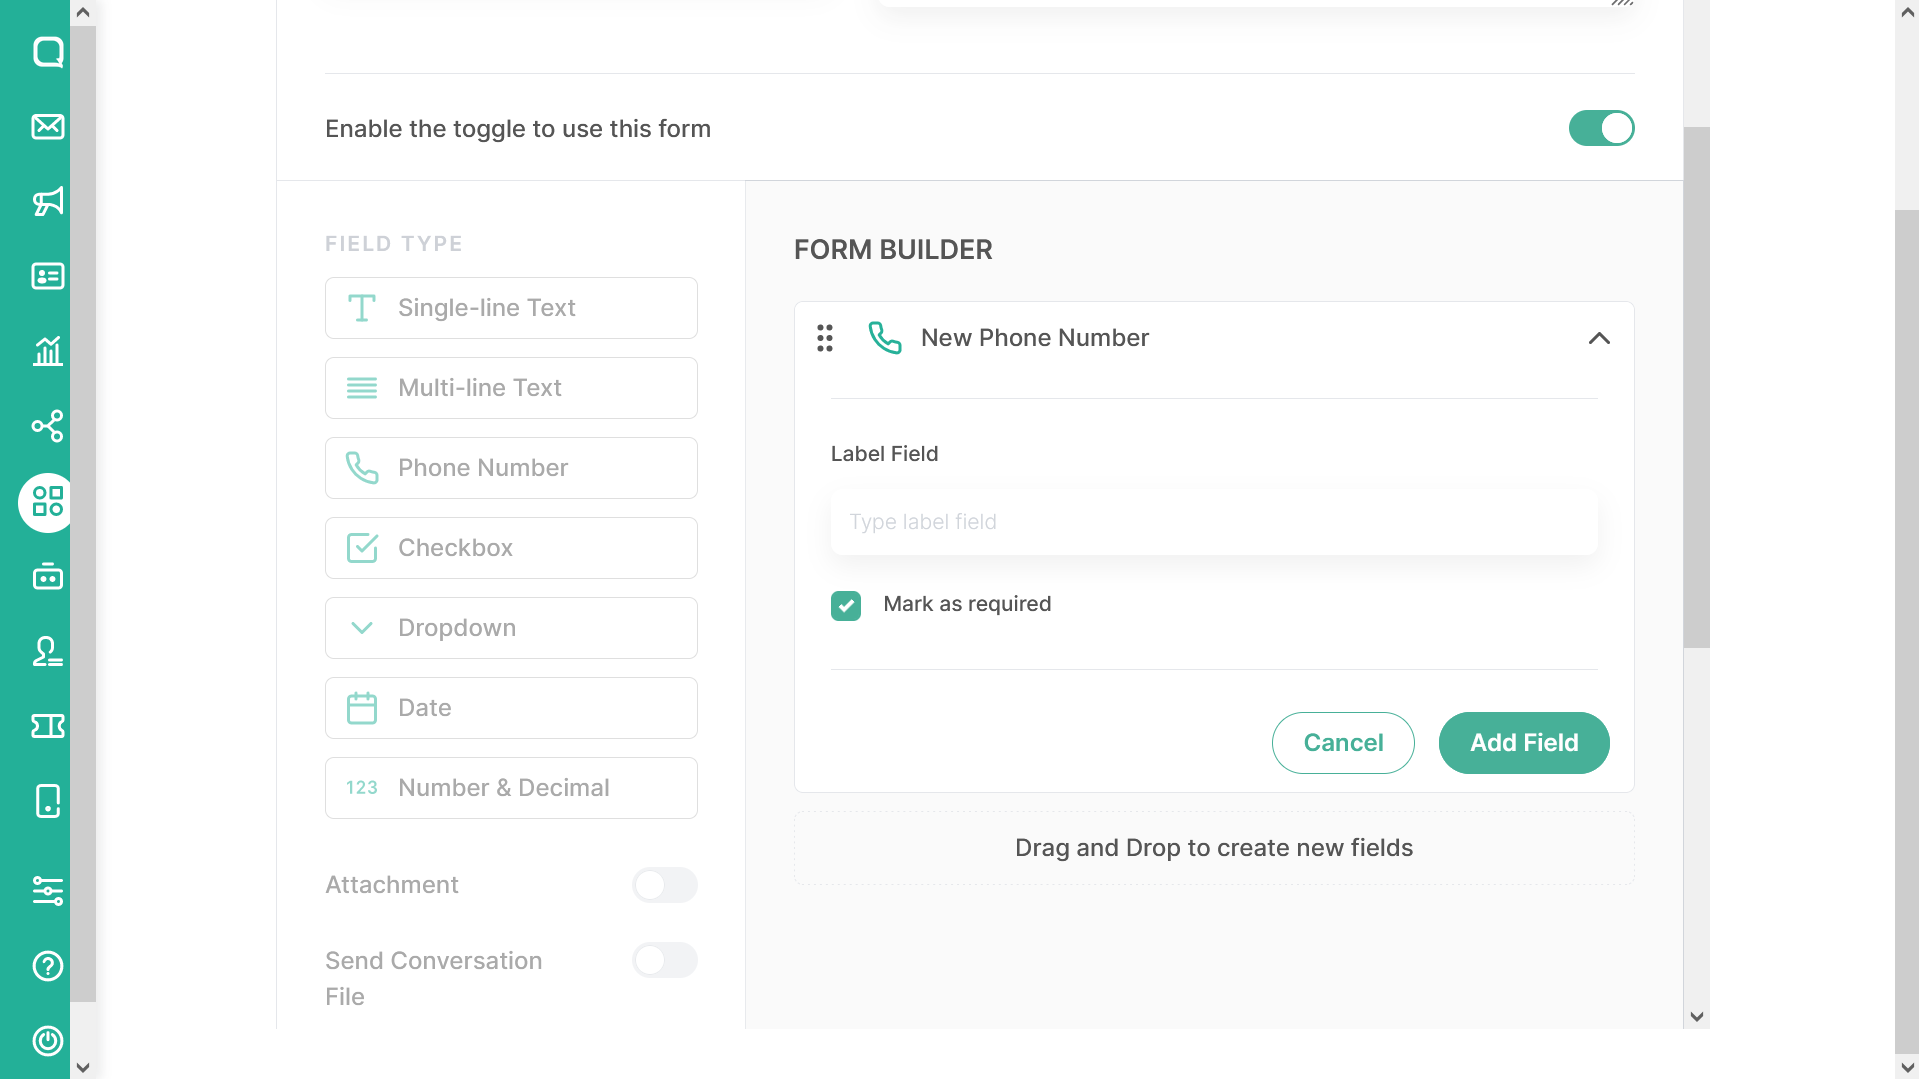
Phone Number is a field type that can be used to enter phone number data. In this field a country phone number will also be displayed which can be selected when filling in the phone number. The existing form cannot be filled in with other information or only for the phone number.
When you decide to using Phone Number field, fill the Label Field to give the name to the field. Thick the mark as required check box to make this field are mandatory field during the submitting the form and remove the thick to make it as optional field.
- OmniForm Widget with Phone Number field


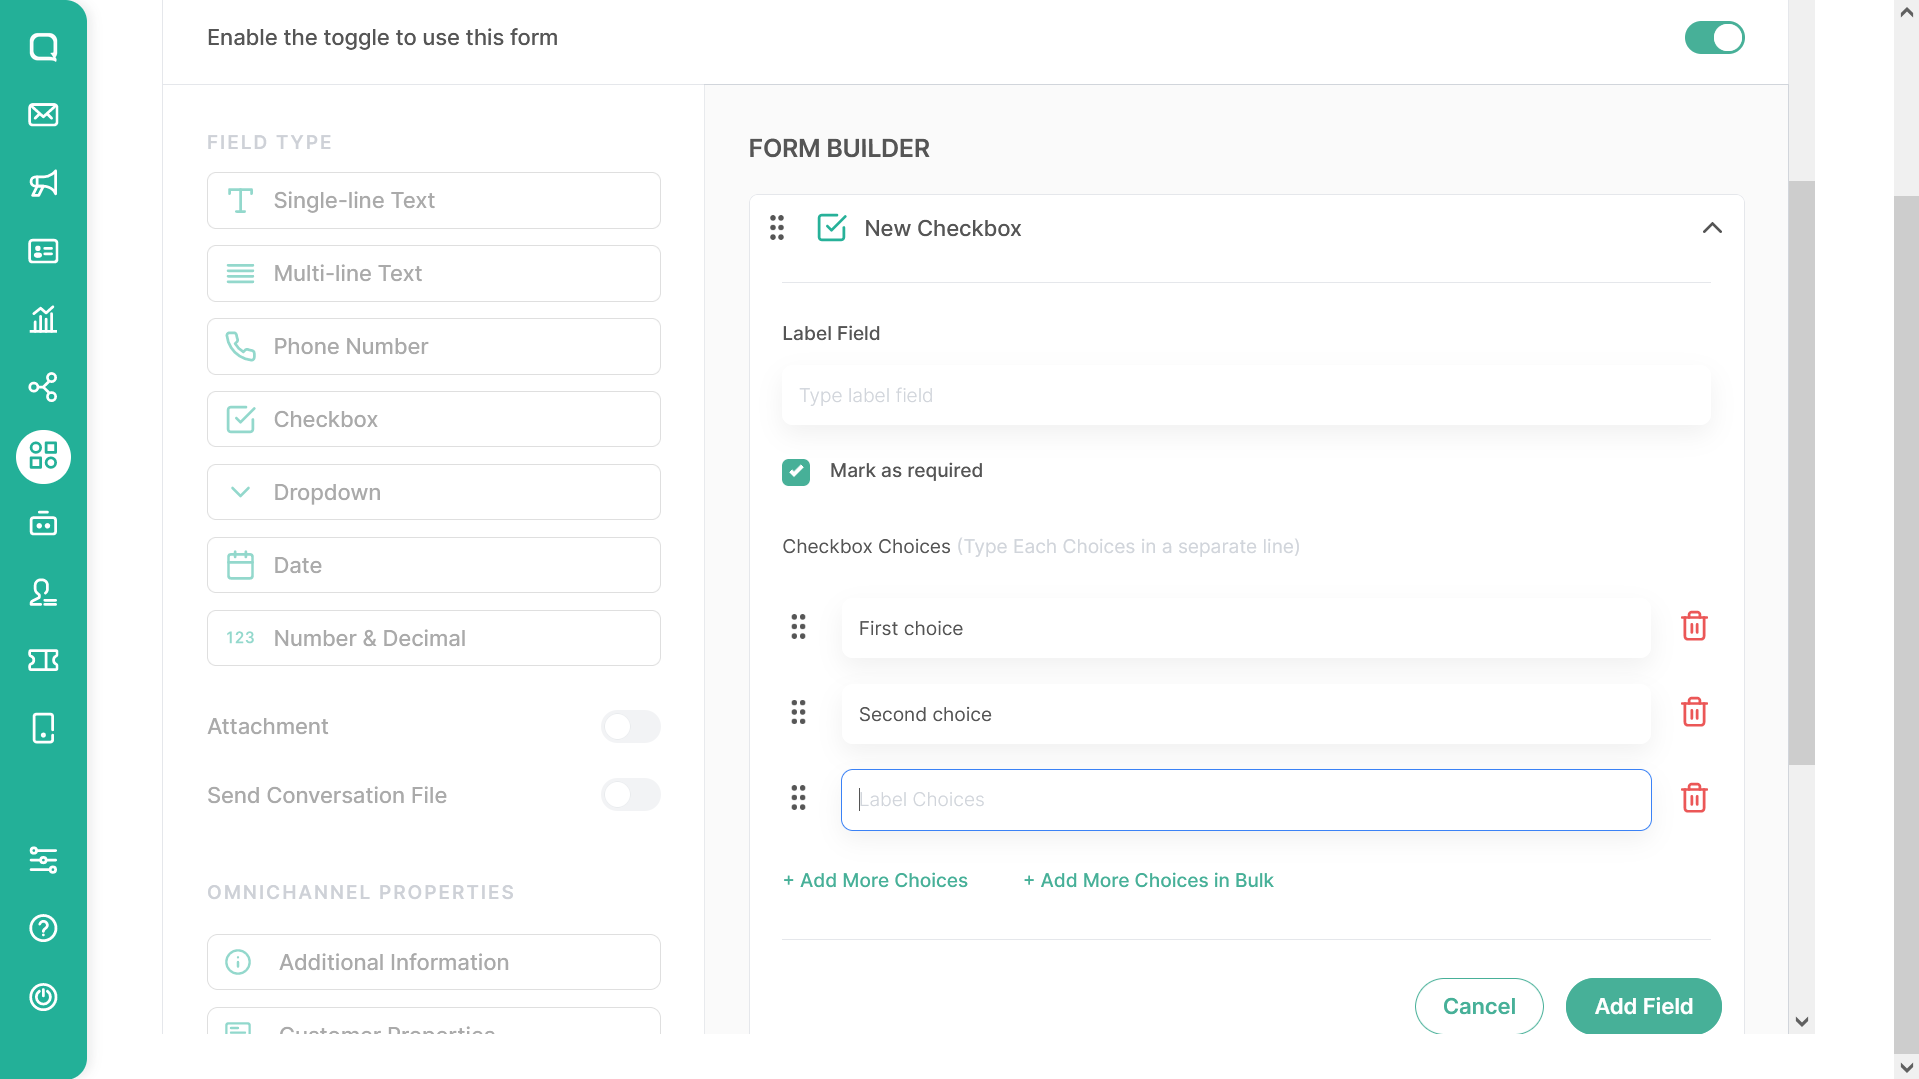
Checkbox
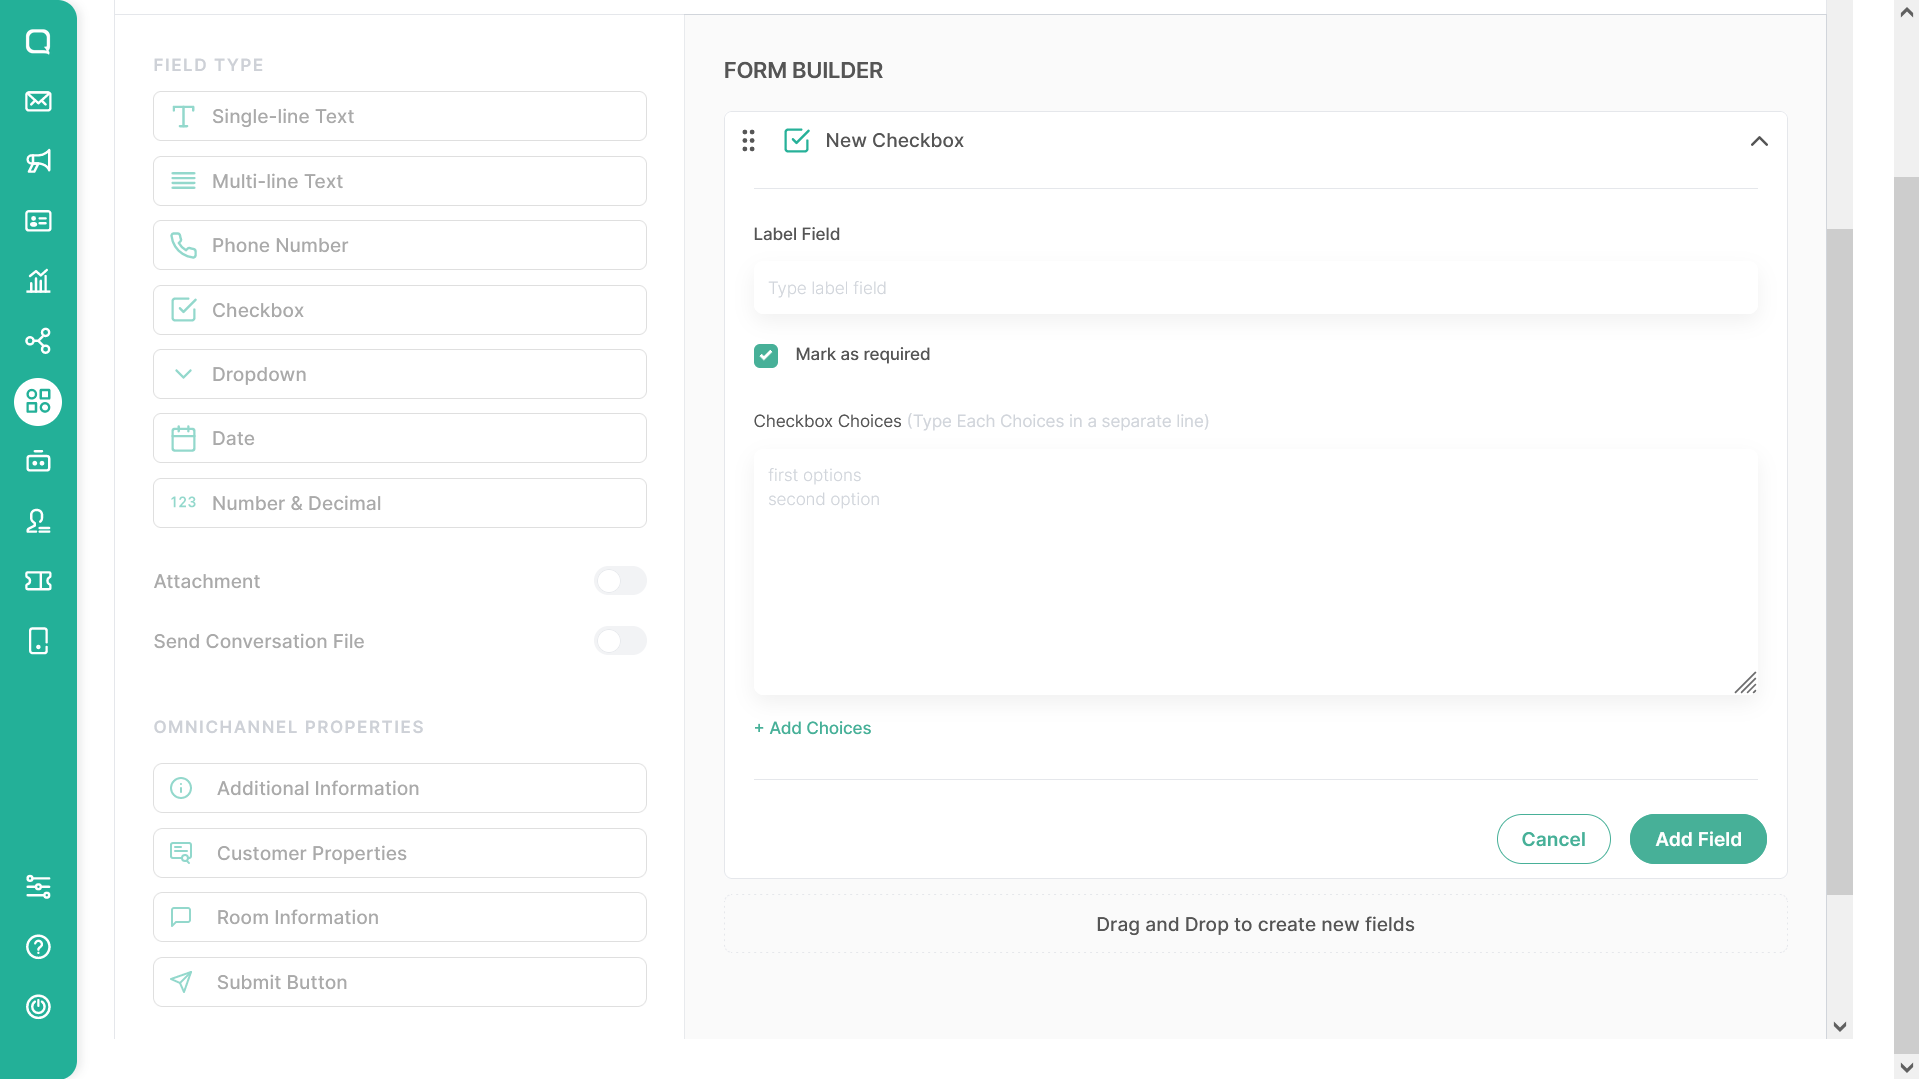
Checkbox is a field that you can use for multiple choice filling format. In making the form later, agents can determine one or more options that can be selected on the form.
When you decide to use Checkbox field fill the label field to give the name to the field. Thick the mark as required check box to make this field a mandatory field during the submitting of the form and remove the thick to make it an optional field.
In order to add a choice, you can type the answer of the answer choice and then press enter to separate the new choices from the existing ones. Once finished, click the “+Add Choices” button to arrange answer choices and make new choices so that they are detected by the system as new answer choices.
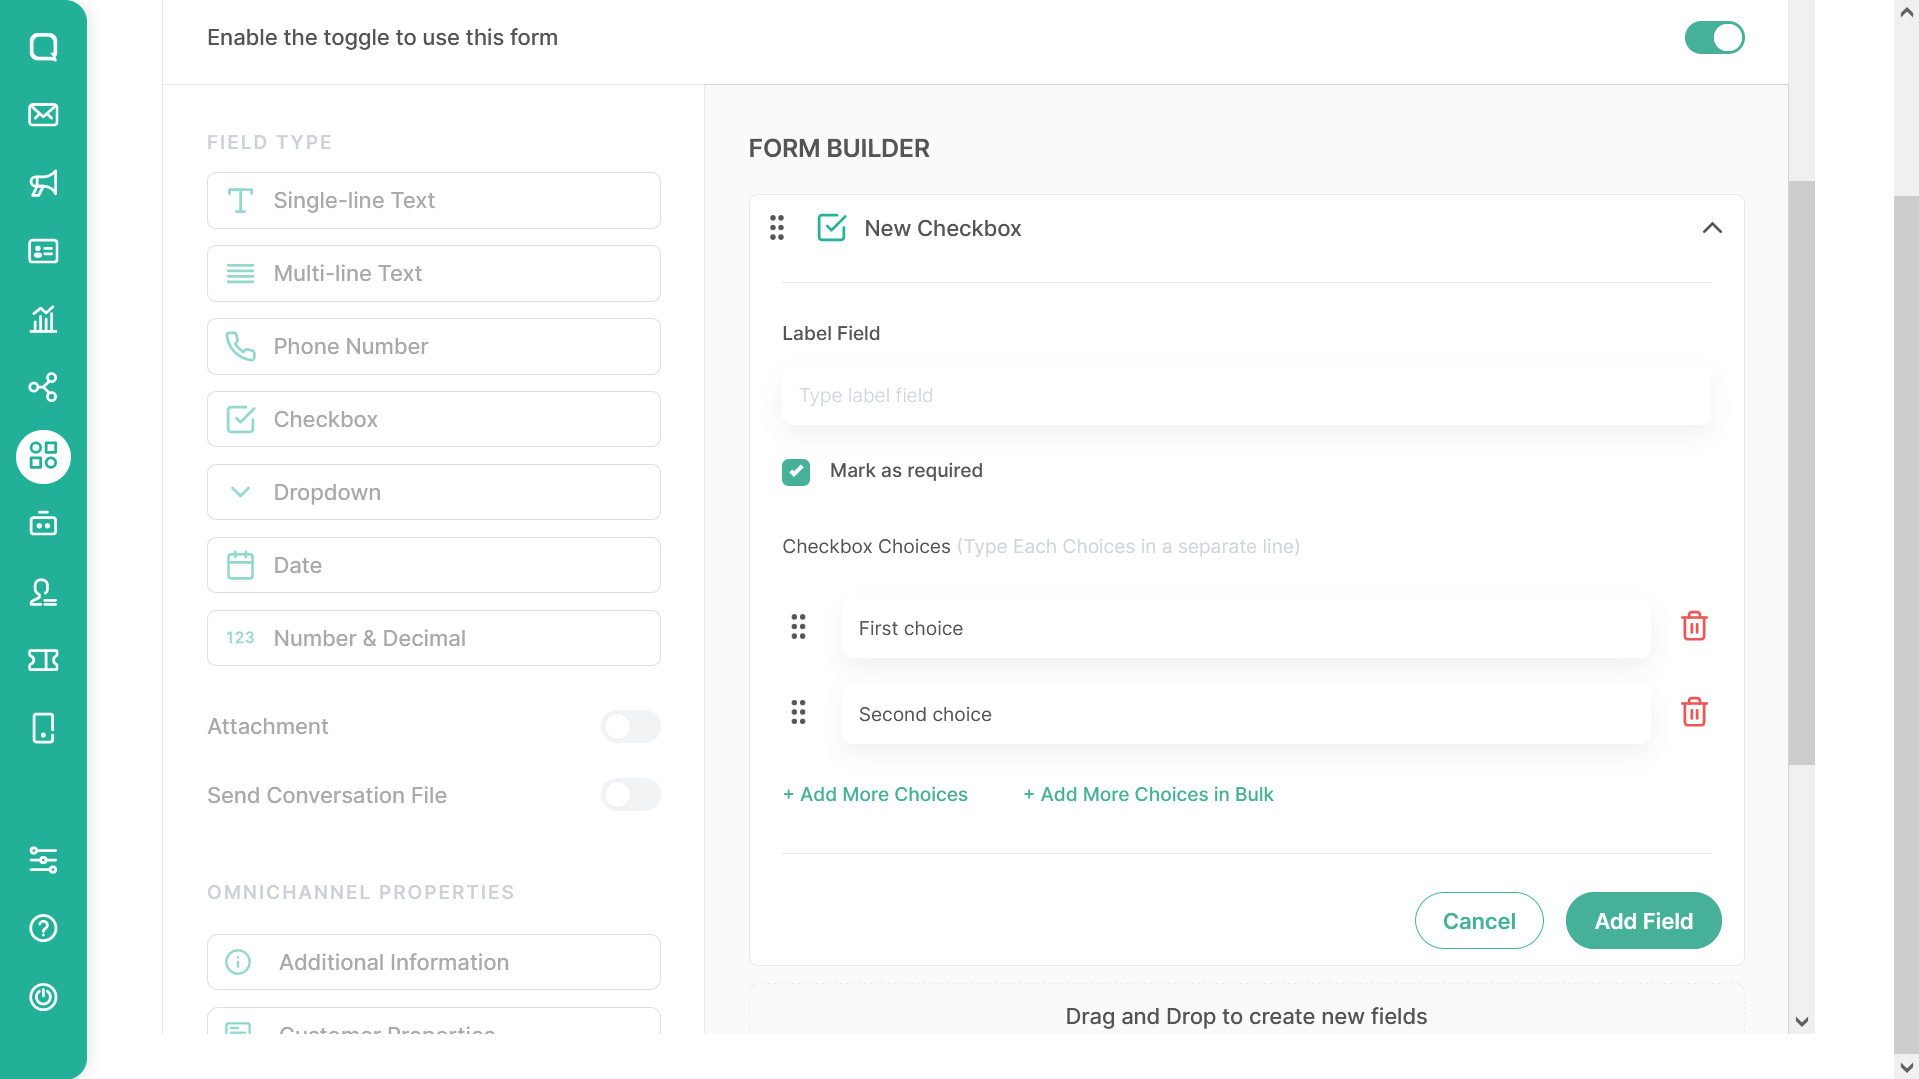
After tapping the add choices button, you will see the choices are generated. You can re-arrange the order of the choices answer by dragging the :: button and use the delete button on the right of the choice to delete it.
You can add new choices by tapping “Add More Choices” button like the picture bellows.
Add More Choices In Bulk
Try to re-add a bulk choices by tap “Add More Choices In Bulk” Button and system will displaying this pop up:
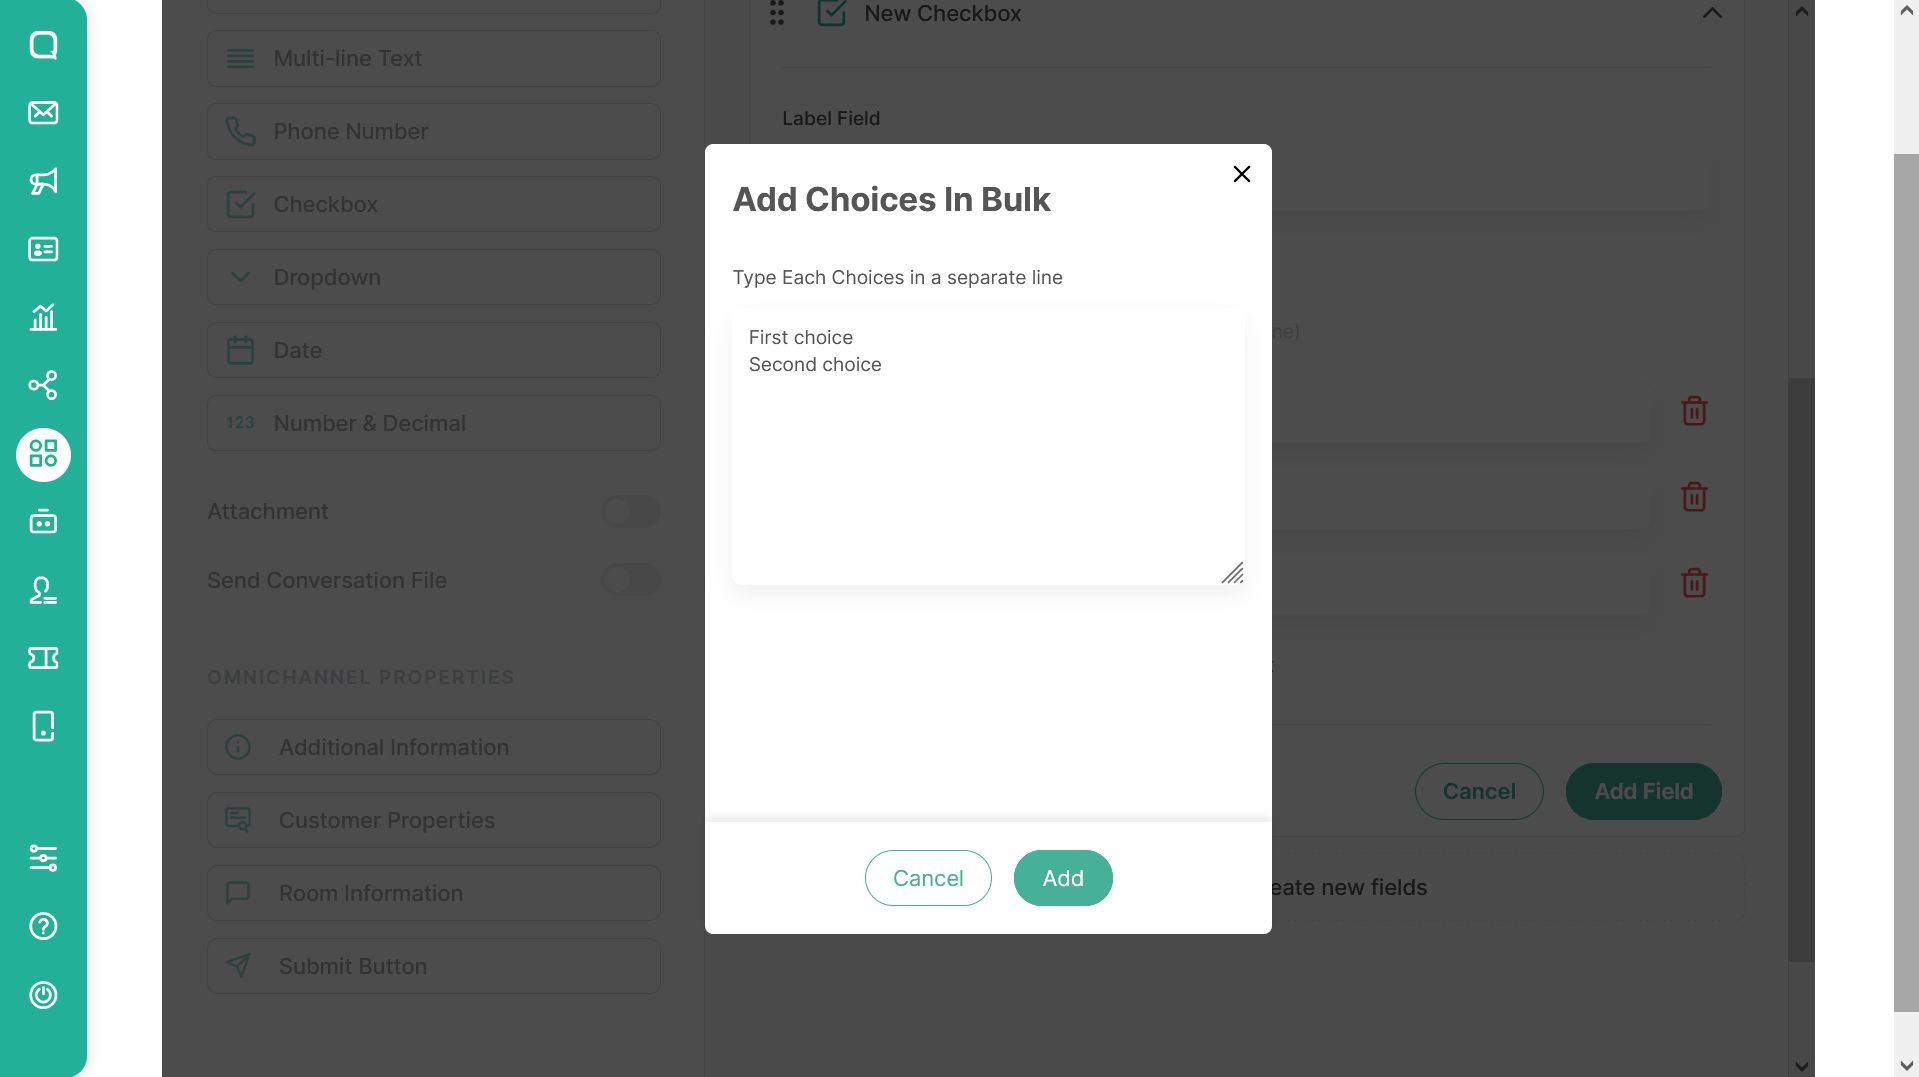
You can copy and paste all of your choices with separating it with new line. Once it done, tap add and all of your choices will be added to the checkbox choices.
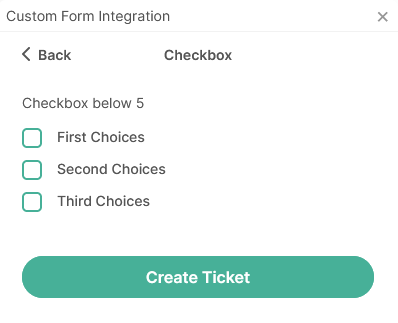
OmniForm Widget with Checkbox field
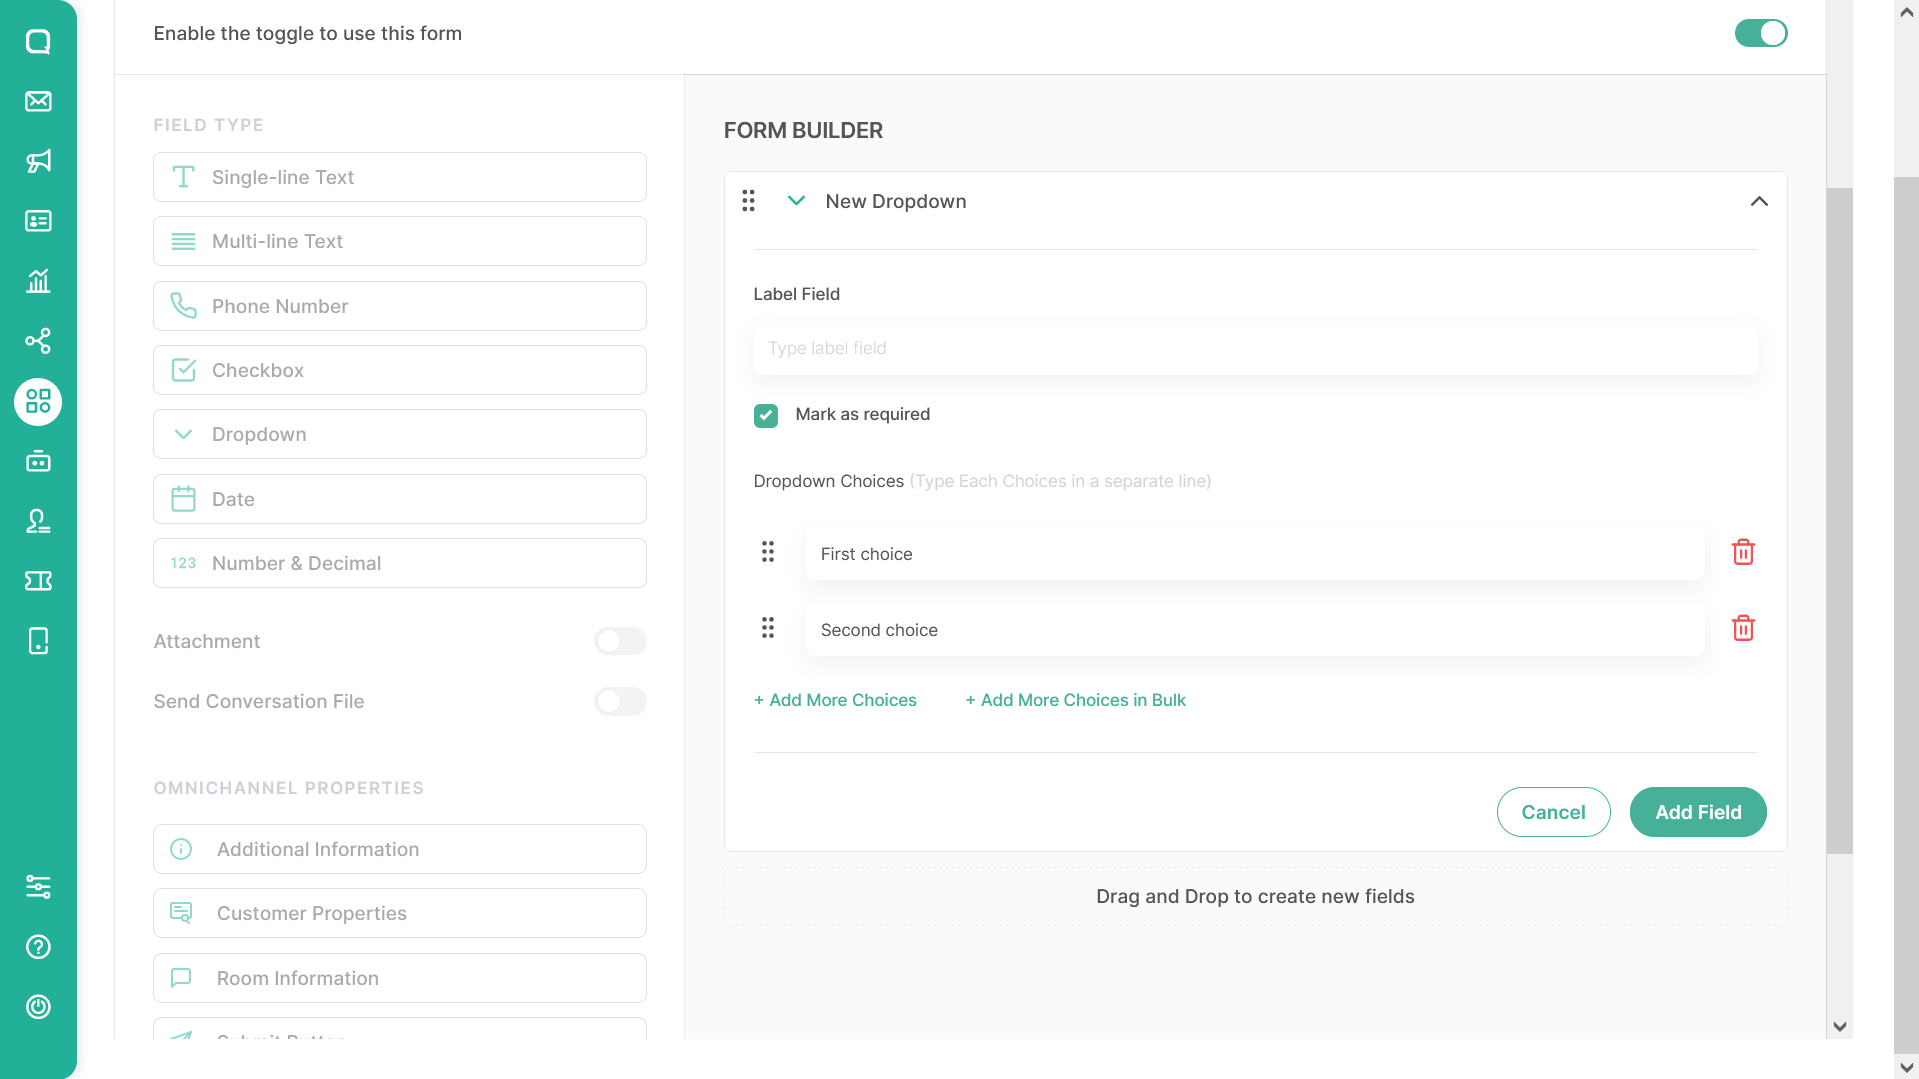
Dropdown
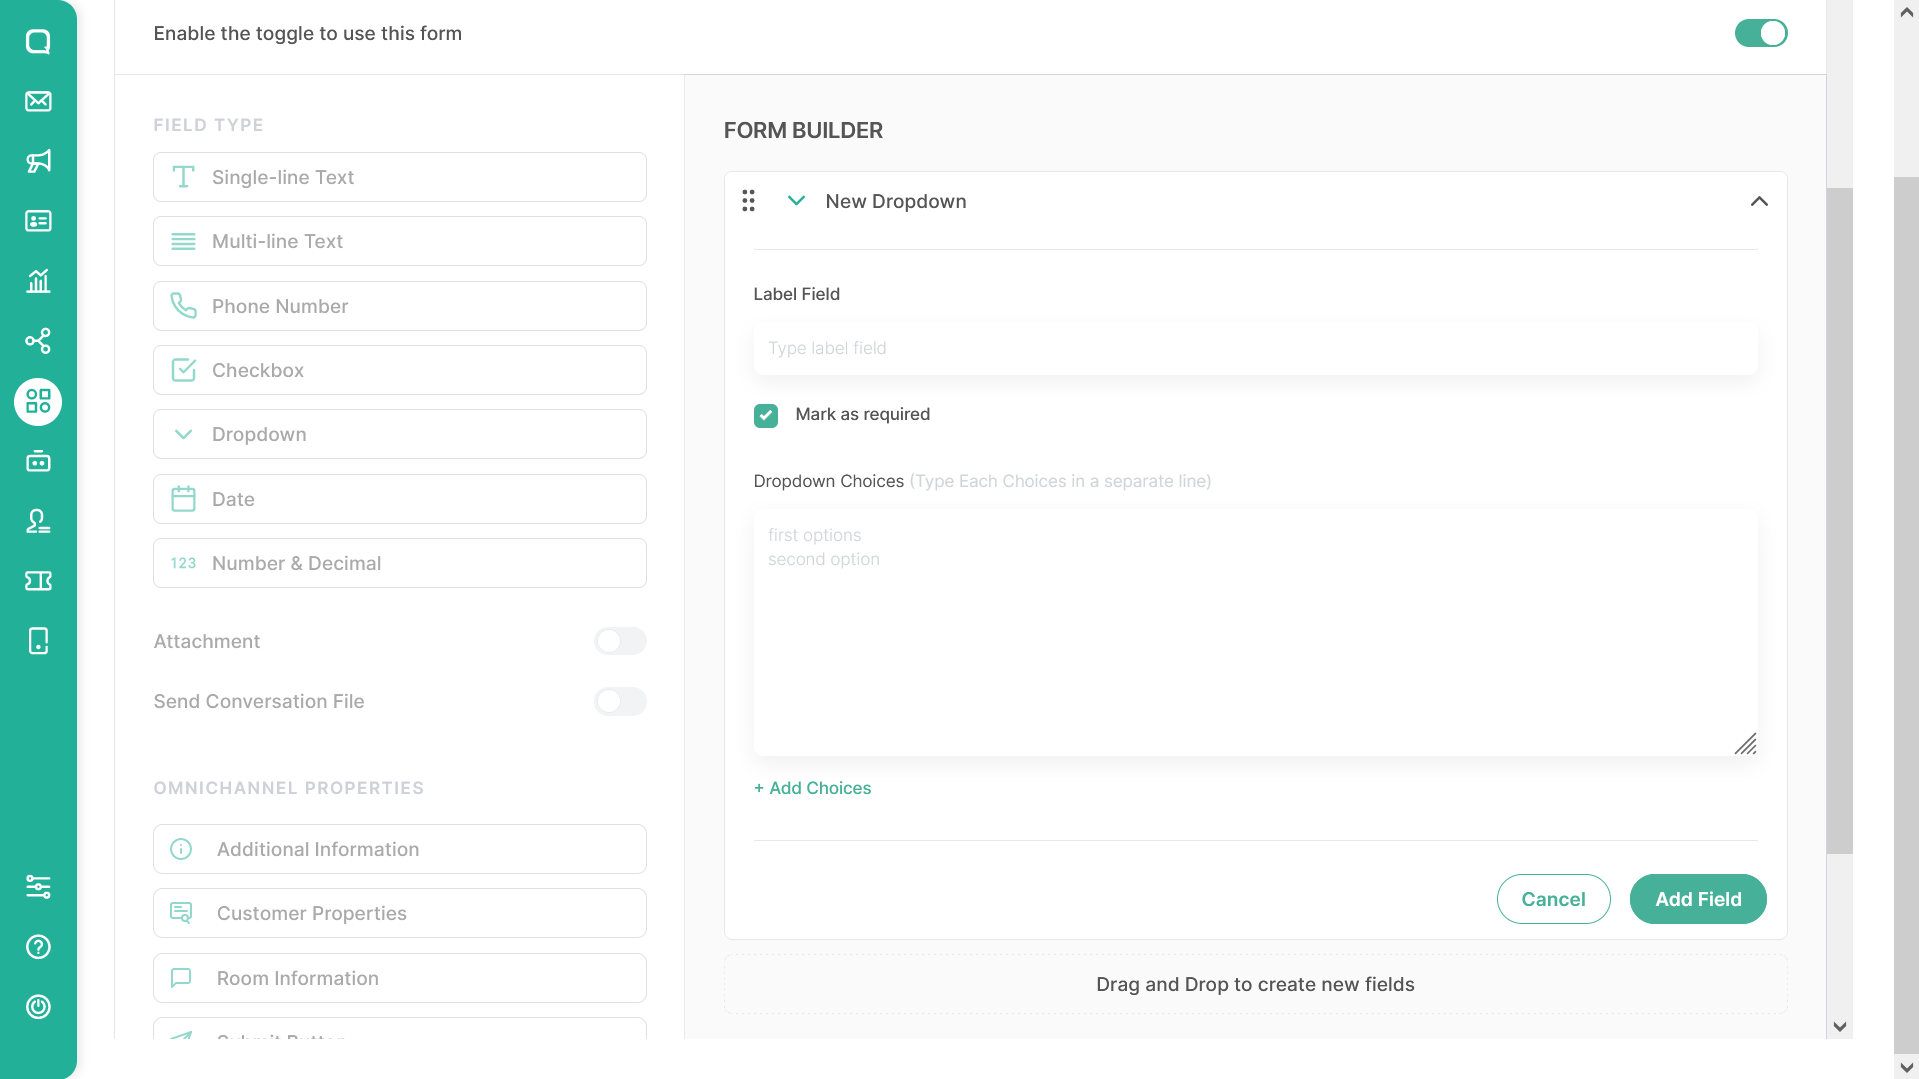
Dropdown is a field type that can be used as a multiple choice answer. On forms that are created later, your agent can only select one option from the options specified when filling out the form.
When you decide to use Dropdown, fill in the label field to give the field a name. Thick the mark as required check box to make this field are mandatory field during the submitting the form and remove the thick to make it as optional field.
In order to add a choice, you can type the answer of the answer choice and then press enter to separate the new choices from the existing ones. Once finished, click the “+Add Choices” button to arrange answer choices and make new choices so that they are detected by the system as new answer choices.
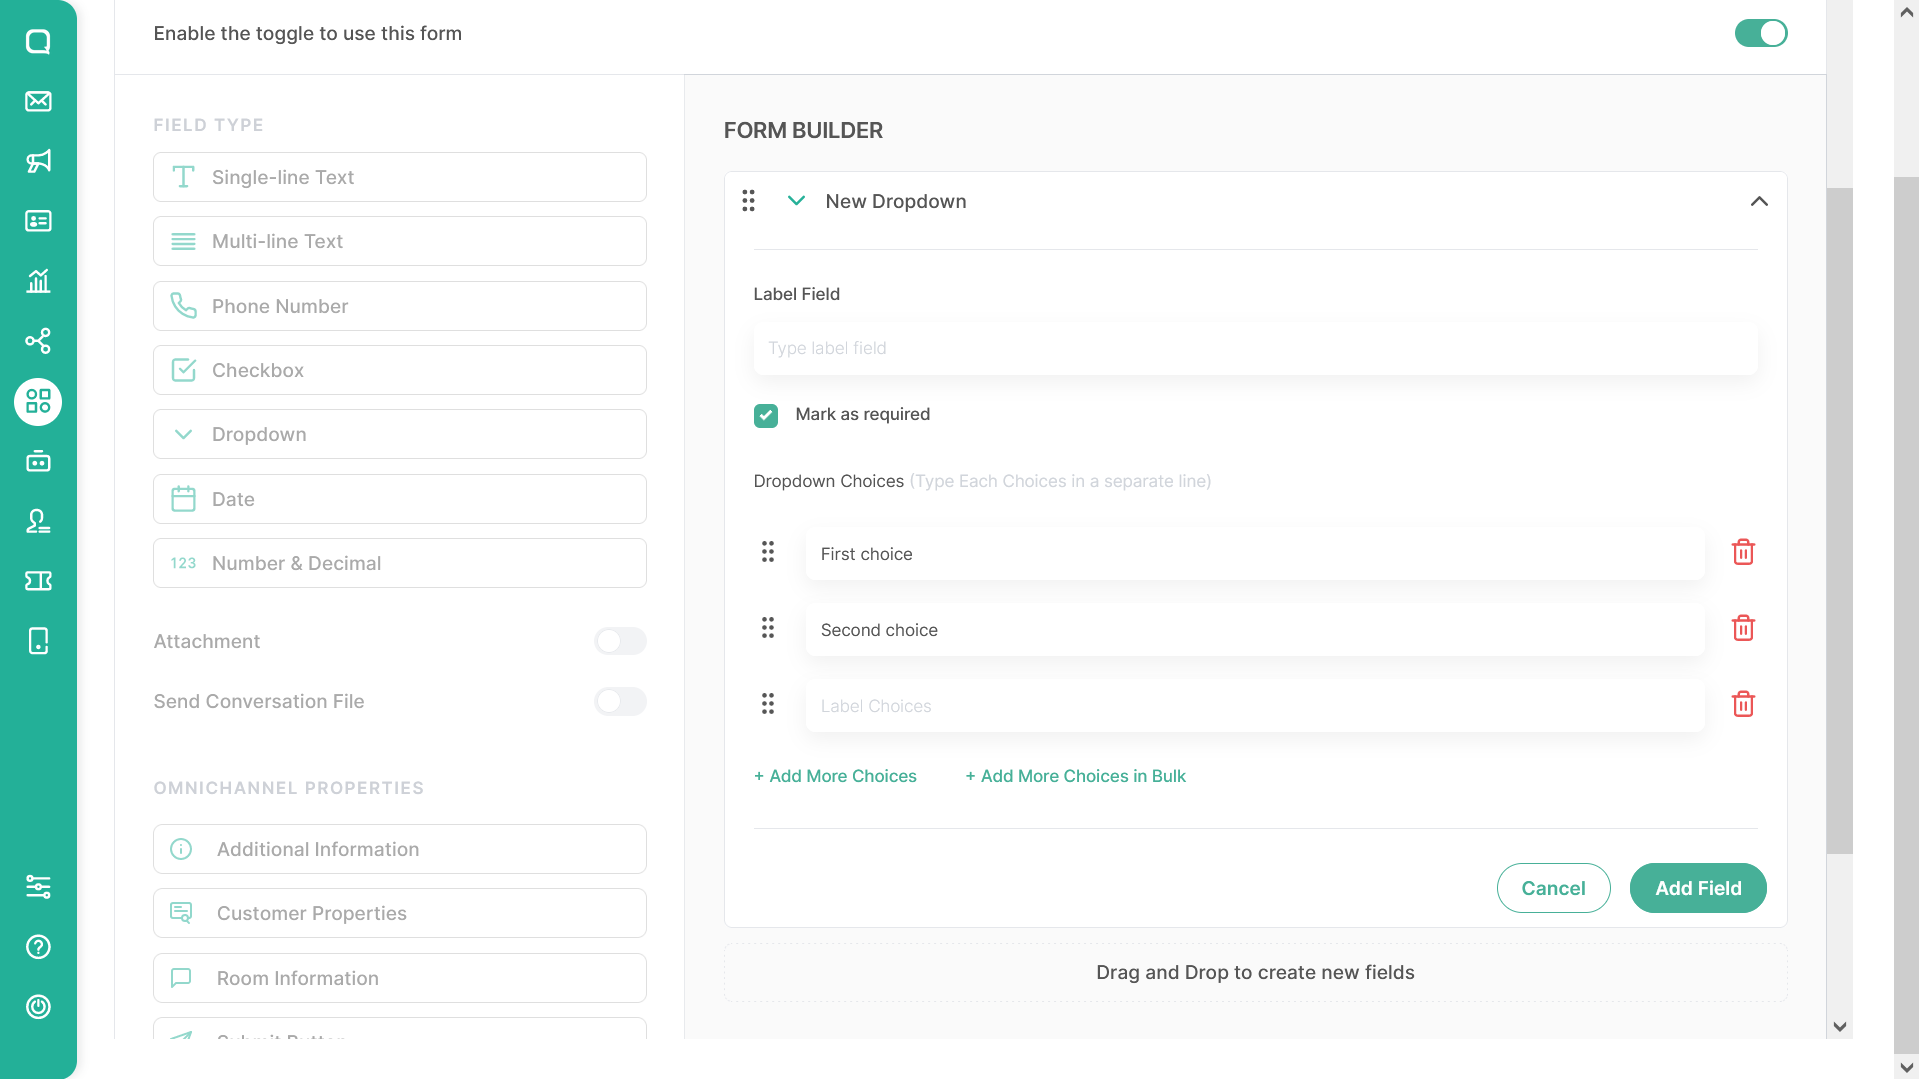
After tapping the add choices button, you will see the choices are generated. You can re-arrange the order of the choices answer by dragging the :: button and use the delete button on the right of the choice to delete it.
You can add new choices by tapping “Add More Choices” button like the picture bellows.
Add More Choices In Bulk
Try to re add a bulk choices by tap “Add More Choices In Bulk” Button and system will displaying this pop up:
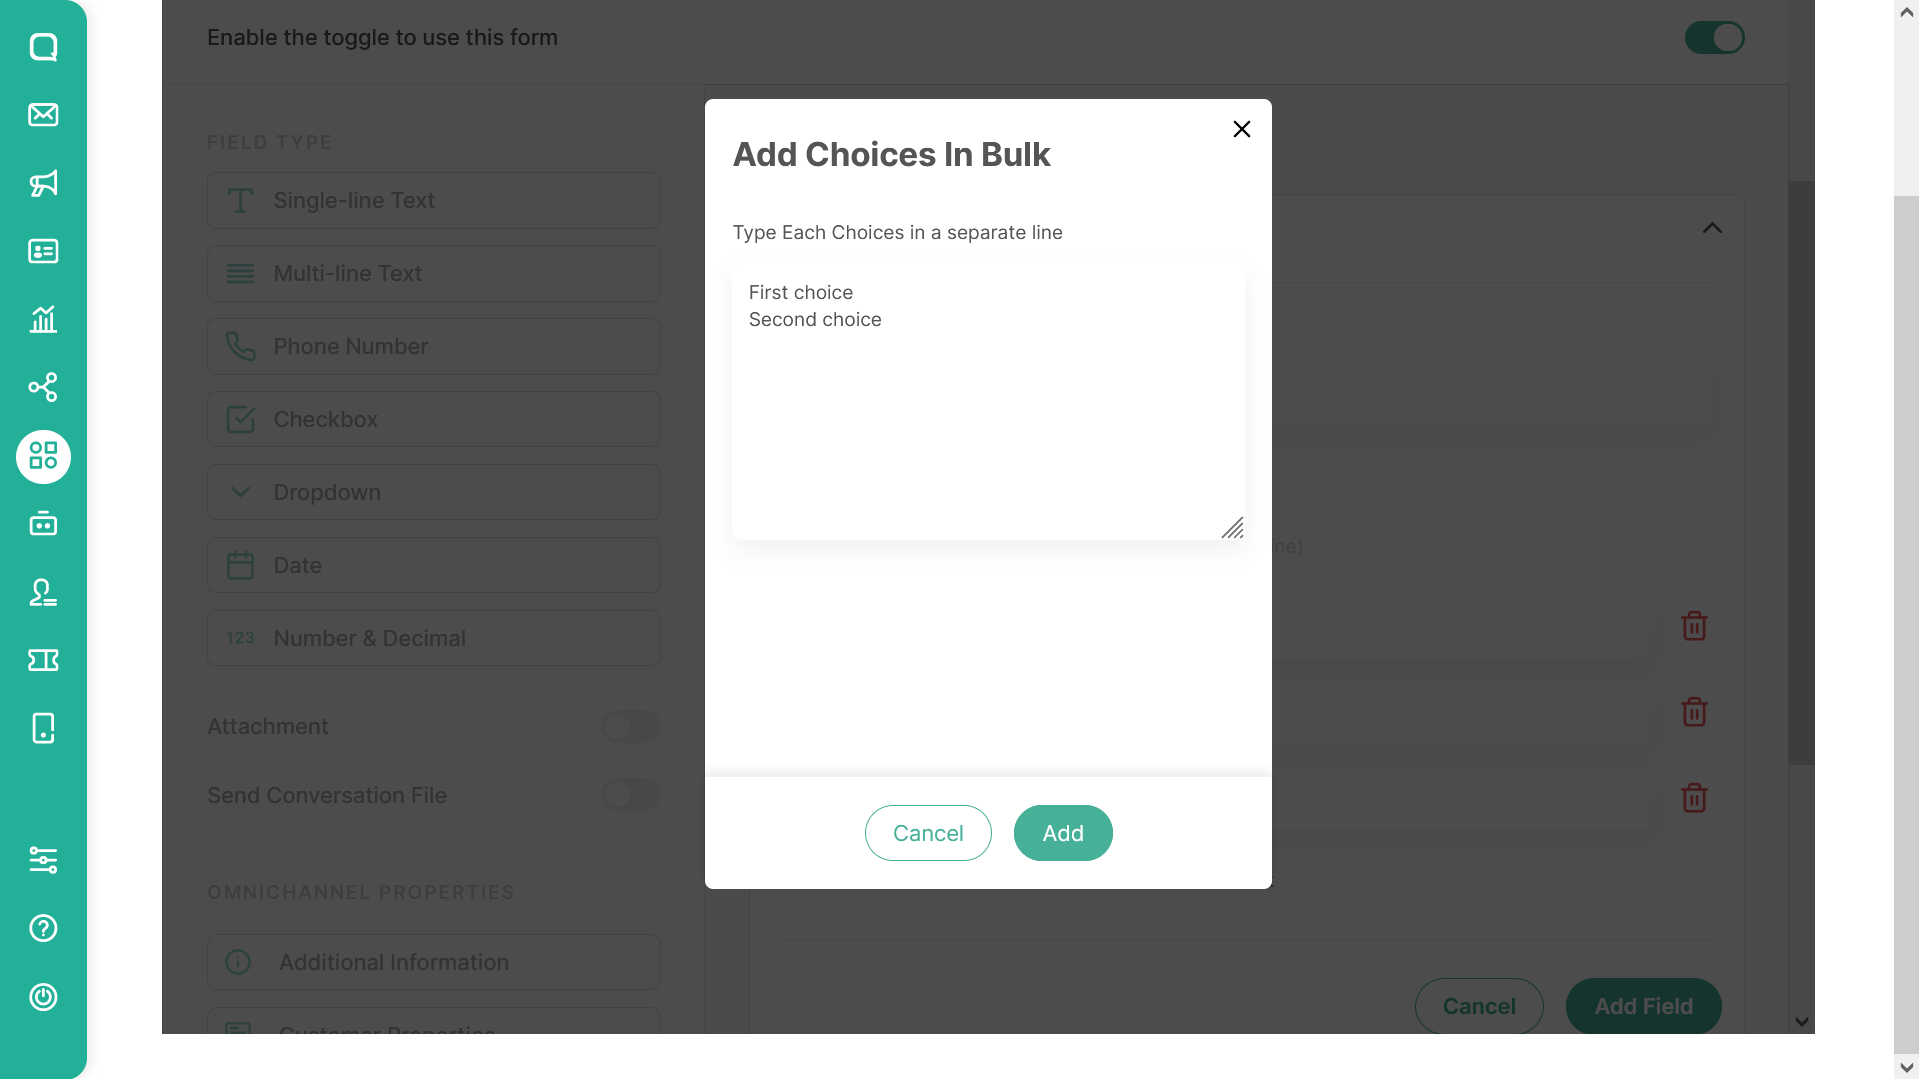
You can copy and paste all of your choices by separating them with new lines. Once it's done, tap add and all of your choices will be added to the Dropdown choices.
Nested API Dropdown
A Nested API Dropdown is a field type that allows users to create dependent dropdowns where the available options change dynamically based on previous selections. This feature is useful for scenarios where hierarchical data is required, such as address selection (Province → City → Postal Code) or product categorization (Category → Subcategory → Item).
How to Set Up a Nested API Dropdown
- Define the Dropdown Label – Name the dropdown group (for internal use only).
- Set the Category Label – Label the first-level selection (e.g., "Province", "Category").
- Enter the API Endpoint – Provide the GET API URL for fetching dropdown options.
- Add Headers (Optional) – Configure up to 5 headers if required for authentication.
- Set Query Parameters – By default, it sends values from previous selections.
- Test the API – Ensure the response follows the required label-value format.
- Add a Subcategory – Click "Add Subcategory" and repeat from Step 2 for nested options.
Response Format
To ensure OmniForm correctly processes and displays dropdown options, the API should return data in the following label-value format:
xxxxxxxxxx[ { "label": "Option 1", "value": "option_1" }, { "label": "Option 2", "value": "option_2" }, { "label": "Option 3", "value": "option_3" }]- The
labelfield is what users see in the dropdown. - The
valuefield is the backend identifier. - The API response must follow this format for OmniForm to recognize and display dropdown choices correctly.
Date and Time
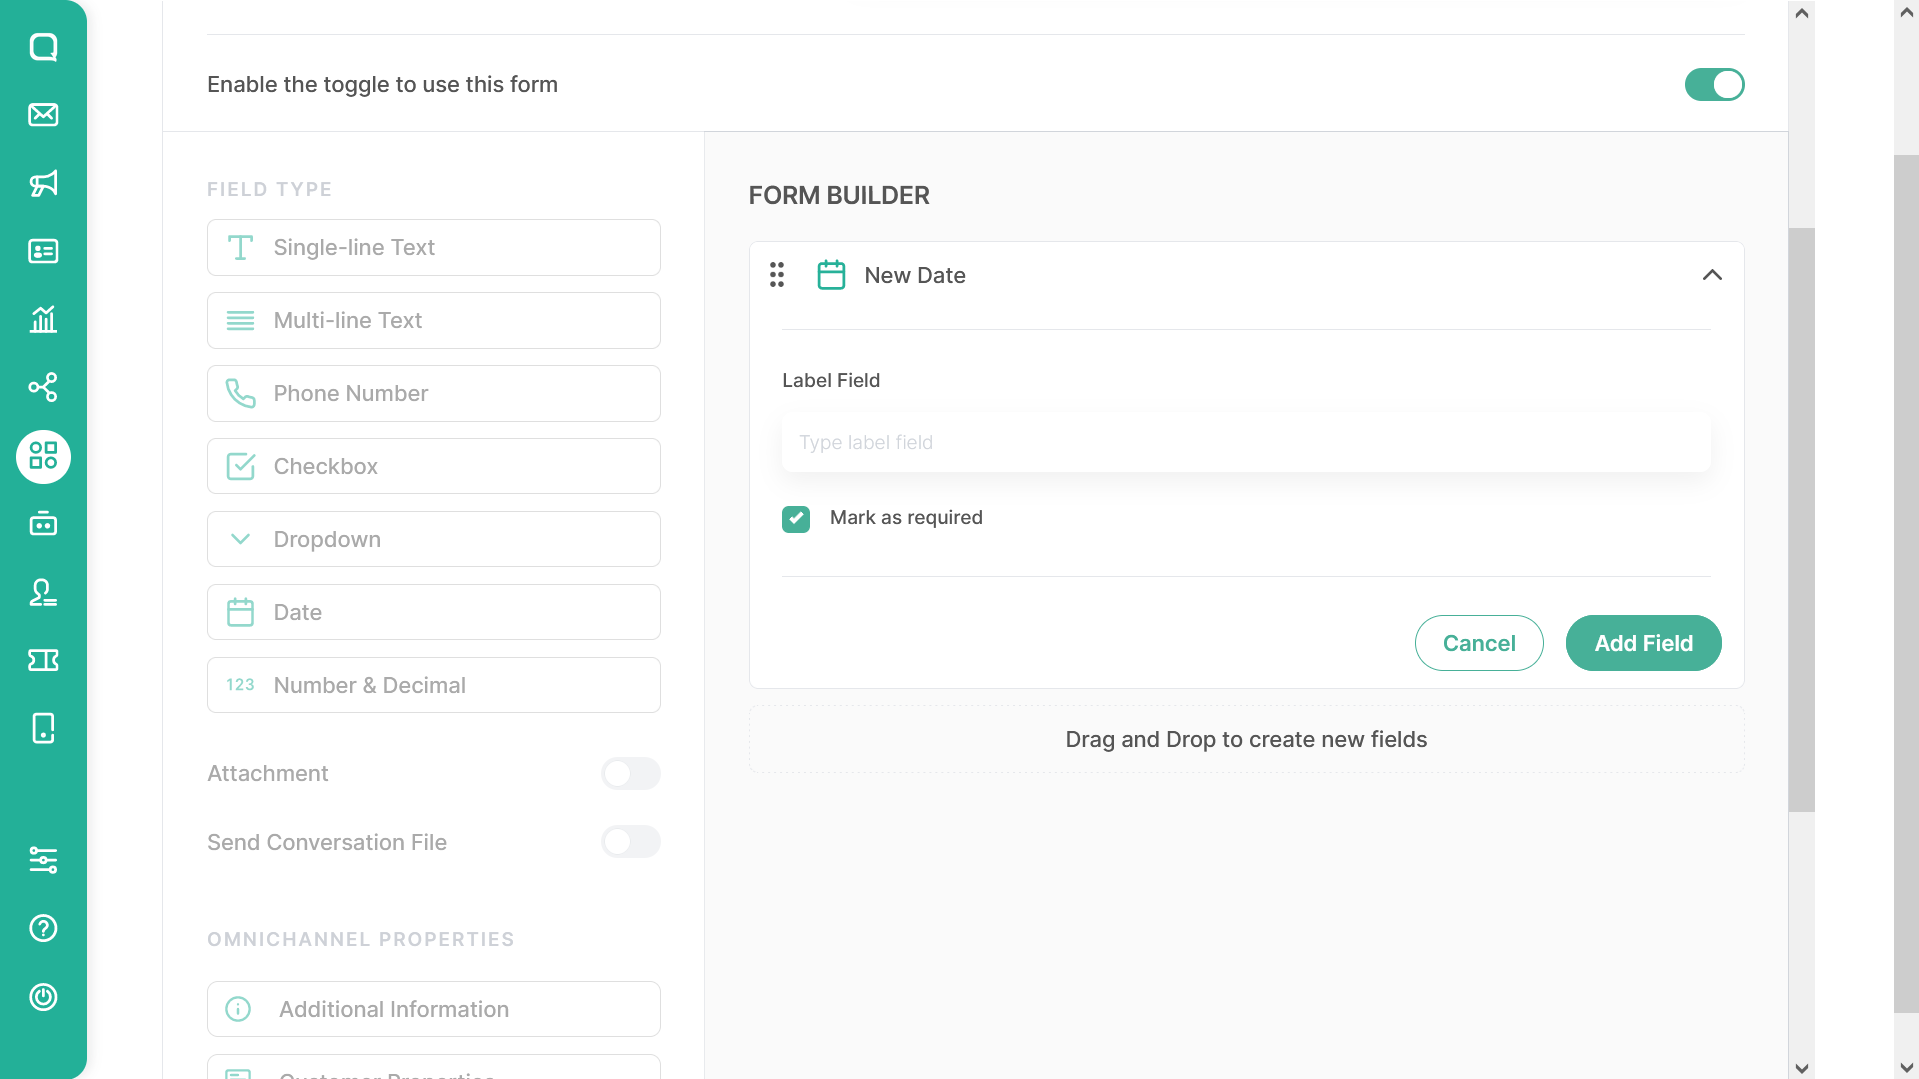
Date are a field type that can be used as a date picker data. You can use it to standardized the date data format during filling the form since the user only need to pick date from the calendar and system will fill the field automatically.
When you decide to using Date field, fill the Label Field to give the name to the field. Thick the mark as required check box to make this field are mandatory field during the submitting the form and remove the thick to make it as optional field.
- The date and time values sent to the Webhook destination URL are in UTC format by default. If your system operates in a different timezone (e.g., UTC+7), please ensure you convert the timestamps on your implementation side to reflect the correct local time.
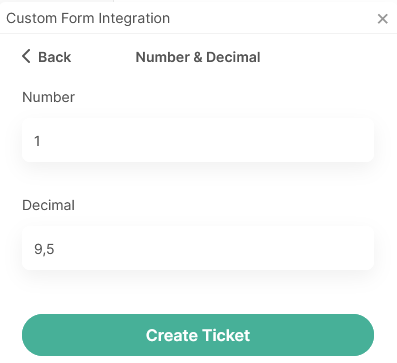
Number and Decimal
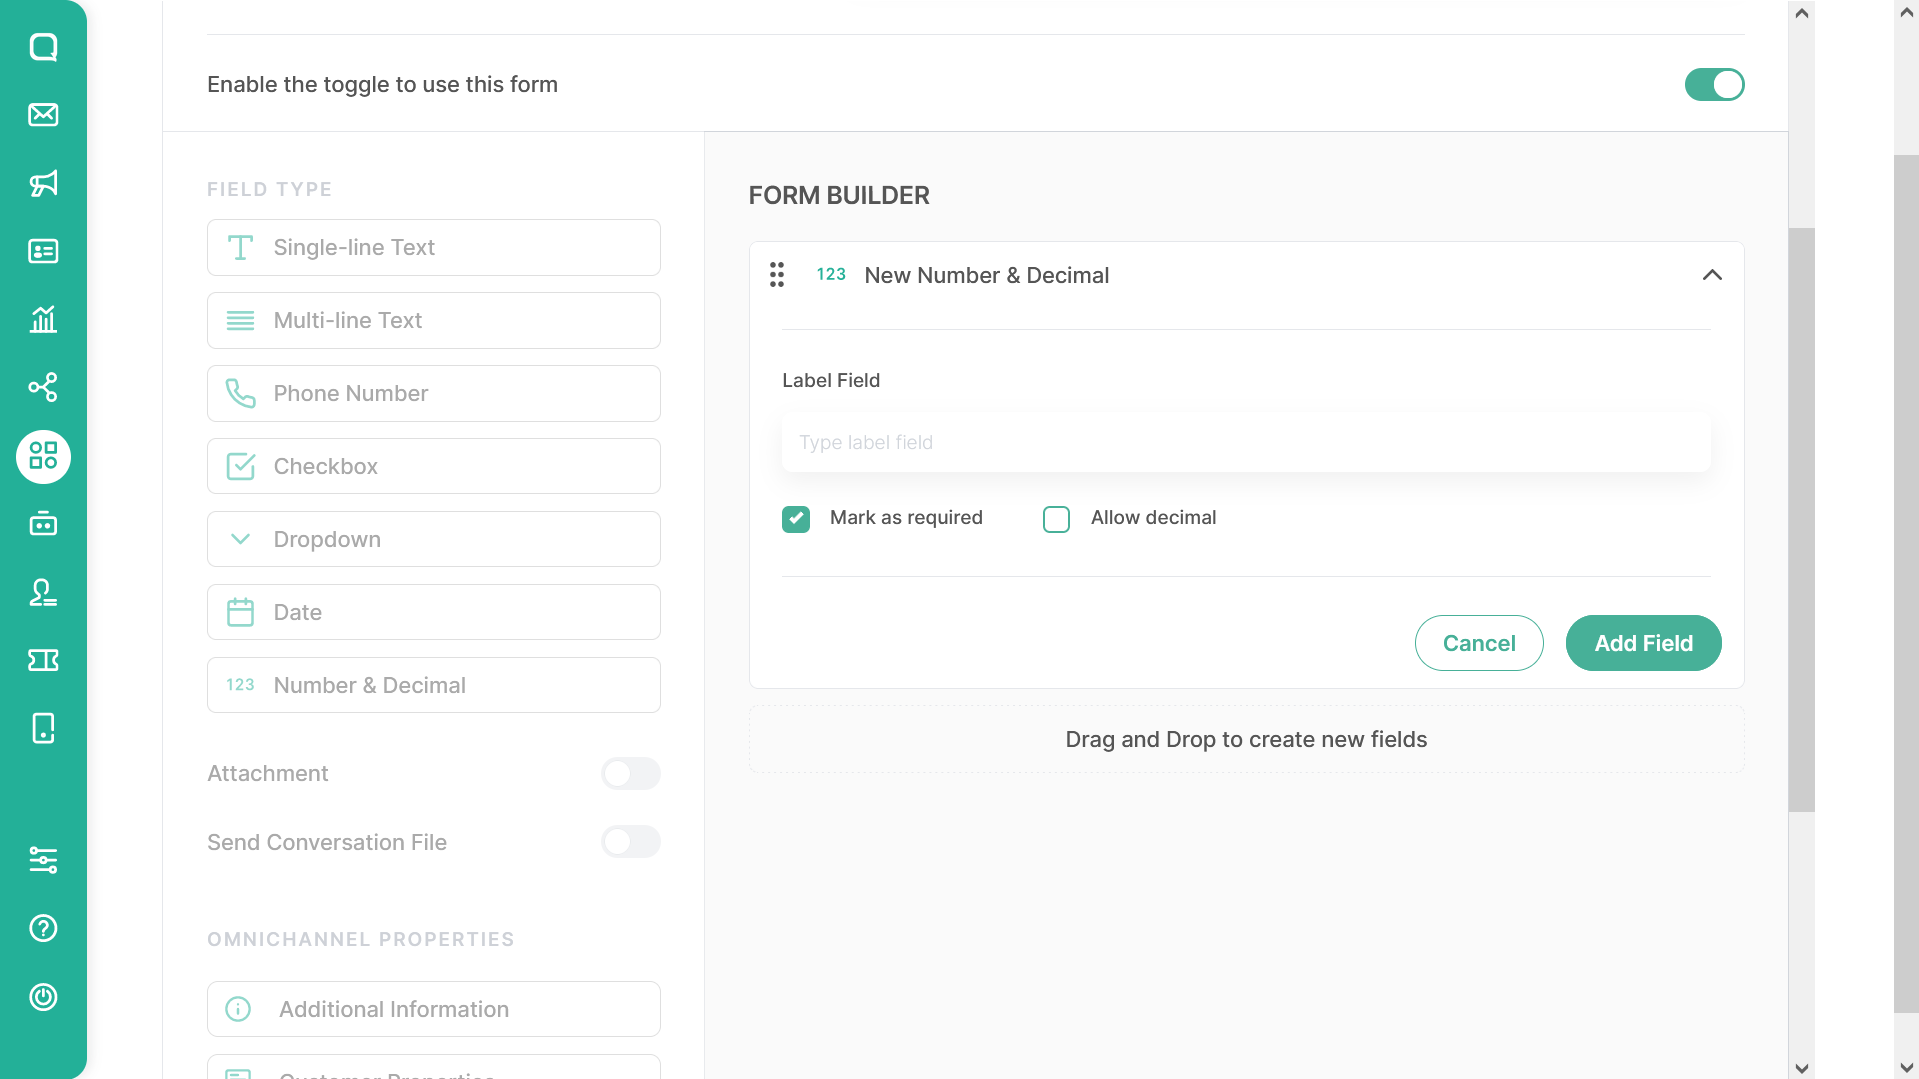
Number and Decimal are the field types that can be used as answers with number formats. By default, this field will only accept integers. Thick the allow decimal to make the field also accepting a decimal number.
When you decide to using Number and Decimal field, fill the Label Field to give the name to the field. Thick the mark as required check box to make this field are mandatory field during the submitting the form and remove the thick to make it as optional field.
OmniForm Widget with Number and Decimal field
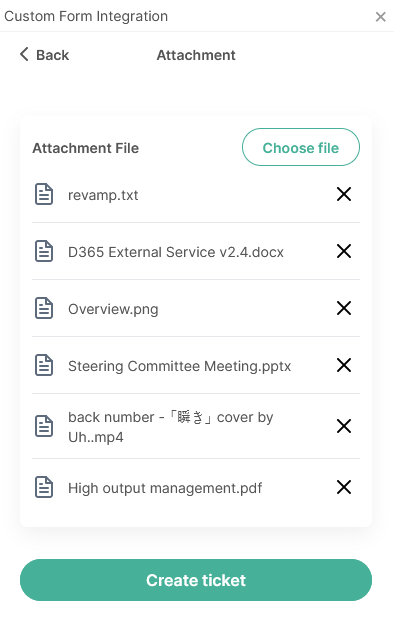
Attachment
Build your form by enabling attachments and you can see an attachment upload field in your form. There is no maximum file size requirement that can be uploaded. It's a good to consider the time of upload if the file size is too large or the file is medium or small in size.
OmniForm Widget with Attachment field
Send Conversation File

Our OmniForm also has the option to Send the Conversation File. Track the details of the conversation with your customer through this file by reading the conversation history from it.
Notes: Conversation history will only be sent if the conversation or room has already been done. The conversations also counted from the start of the new session until the session ended by the resolved room marks.
Setting Pages With Omnichannel Properties Integration
Additional Info
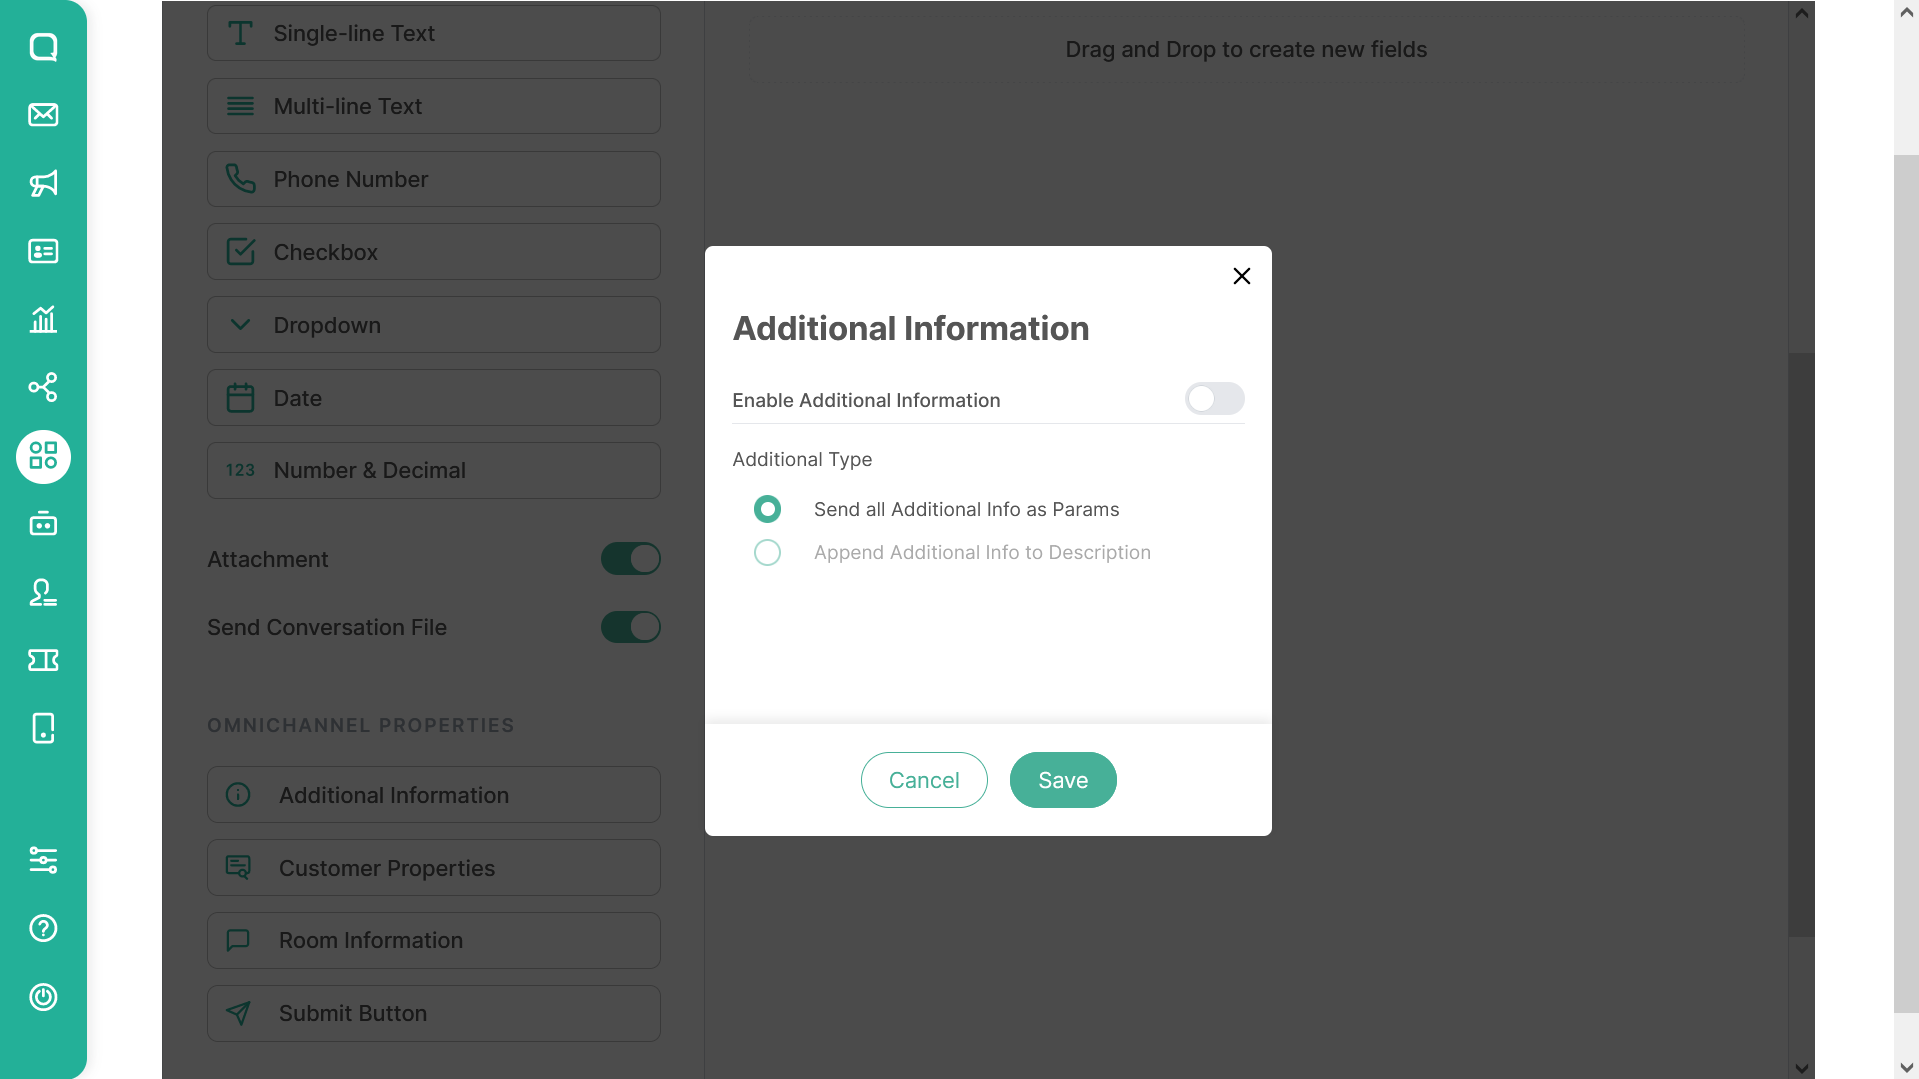
If your team uses the additional info field on Omnichannel then you can also send it via this form, with the following steps.
enabling the additional info on form builder,
select the additional type
- Send all additional info as a params, or
- Append additional info to description
Save the configuration.
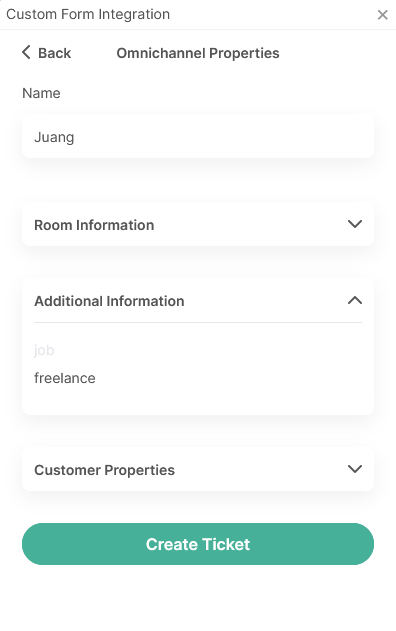
Sending all additional info as a params will make your form display all the additional info in the selected room.
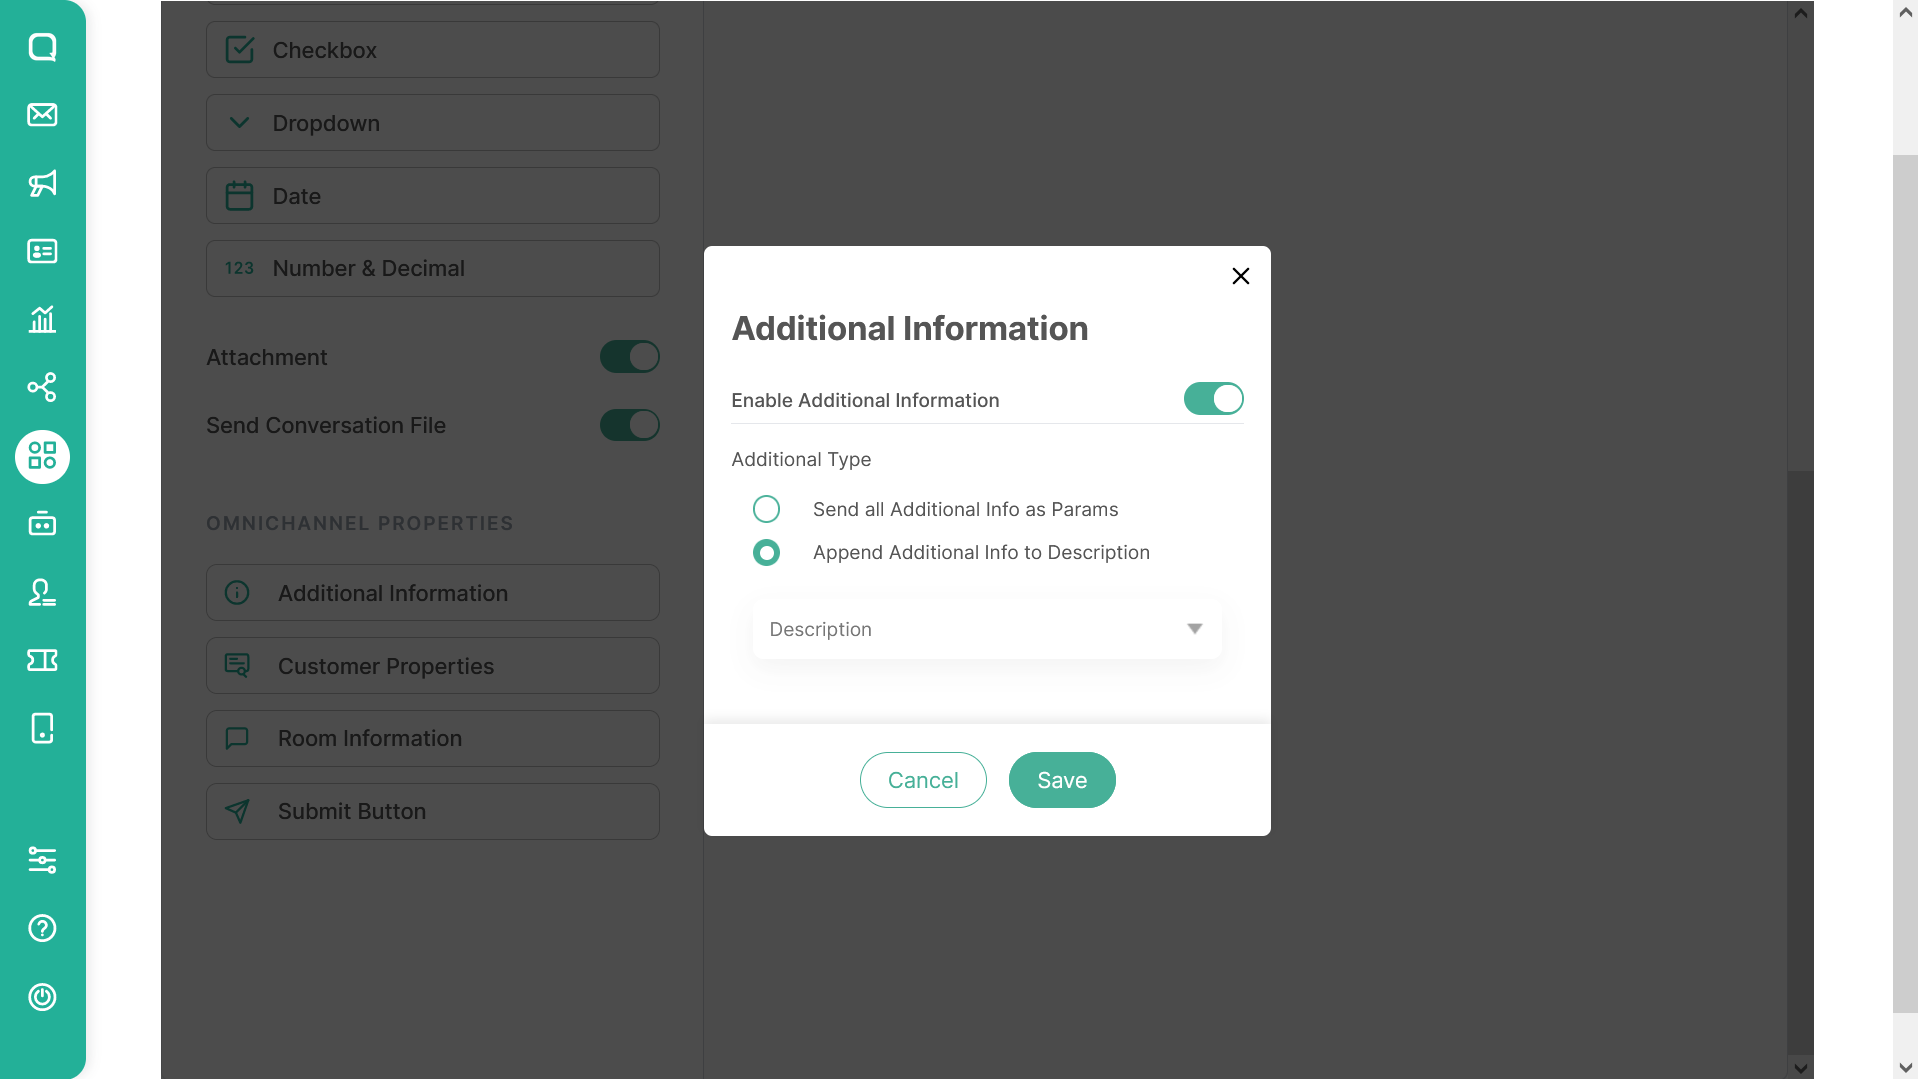
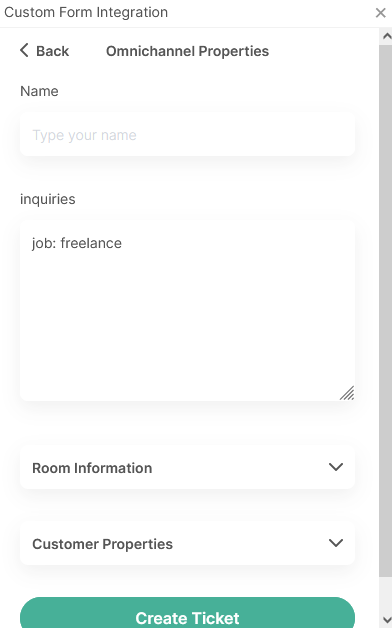
Selecting append additional info to description will make your room additional info appended to the multi-line text field. You can select which multi-line text that you want to append the additional info.
OmniForm Widget with Enabled Additional Information as params
OmniForm Widget with Enabled Additional Information as Append data in description
Customer Properties
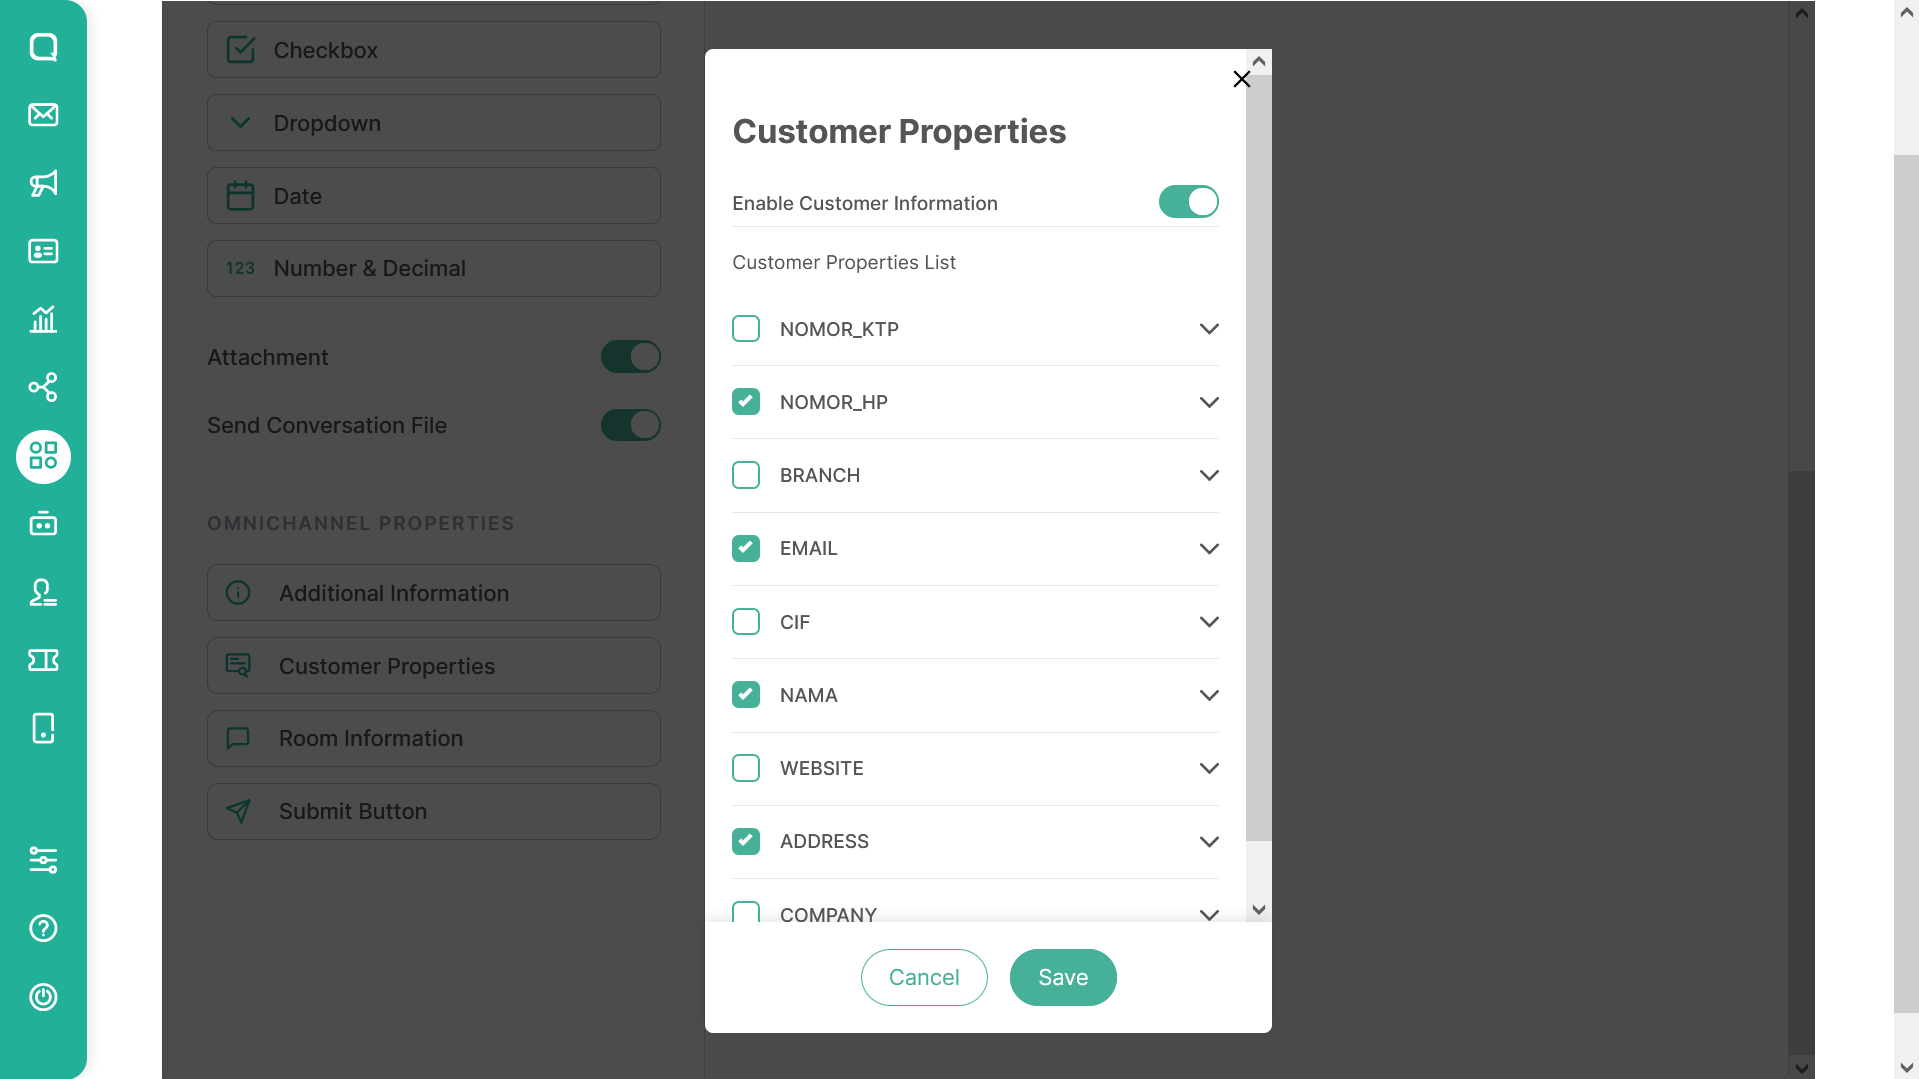
Customer properties feature on the OmniForm will make you to be able sending all the Omnichannel Customer properties during submitting the form. You can define the customer properties that you want to send or not by thick the checkbox and save the configuration.
OmniForm Widget with Enabled Customer Properties

Room Information
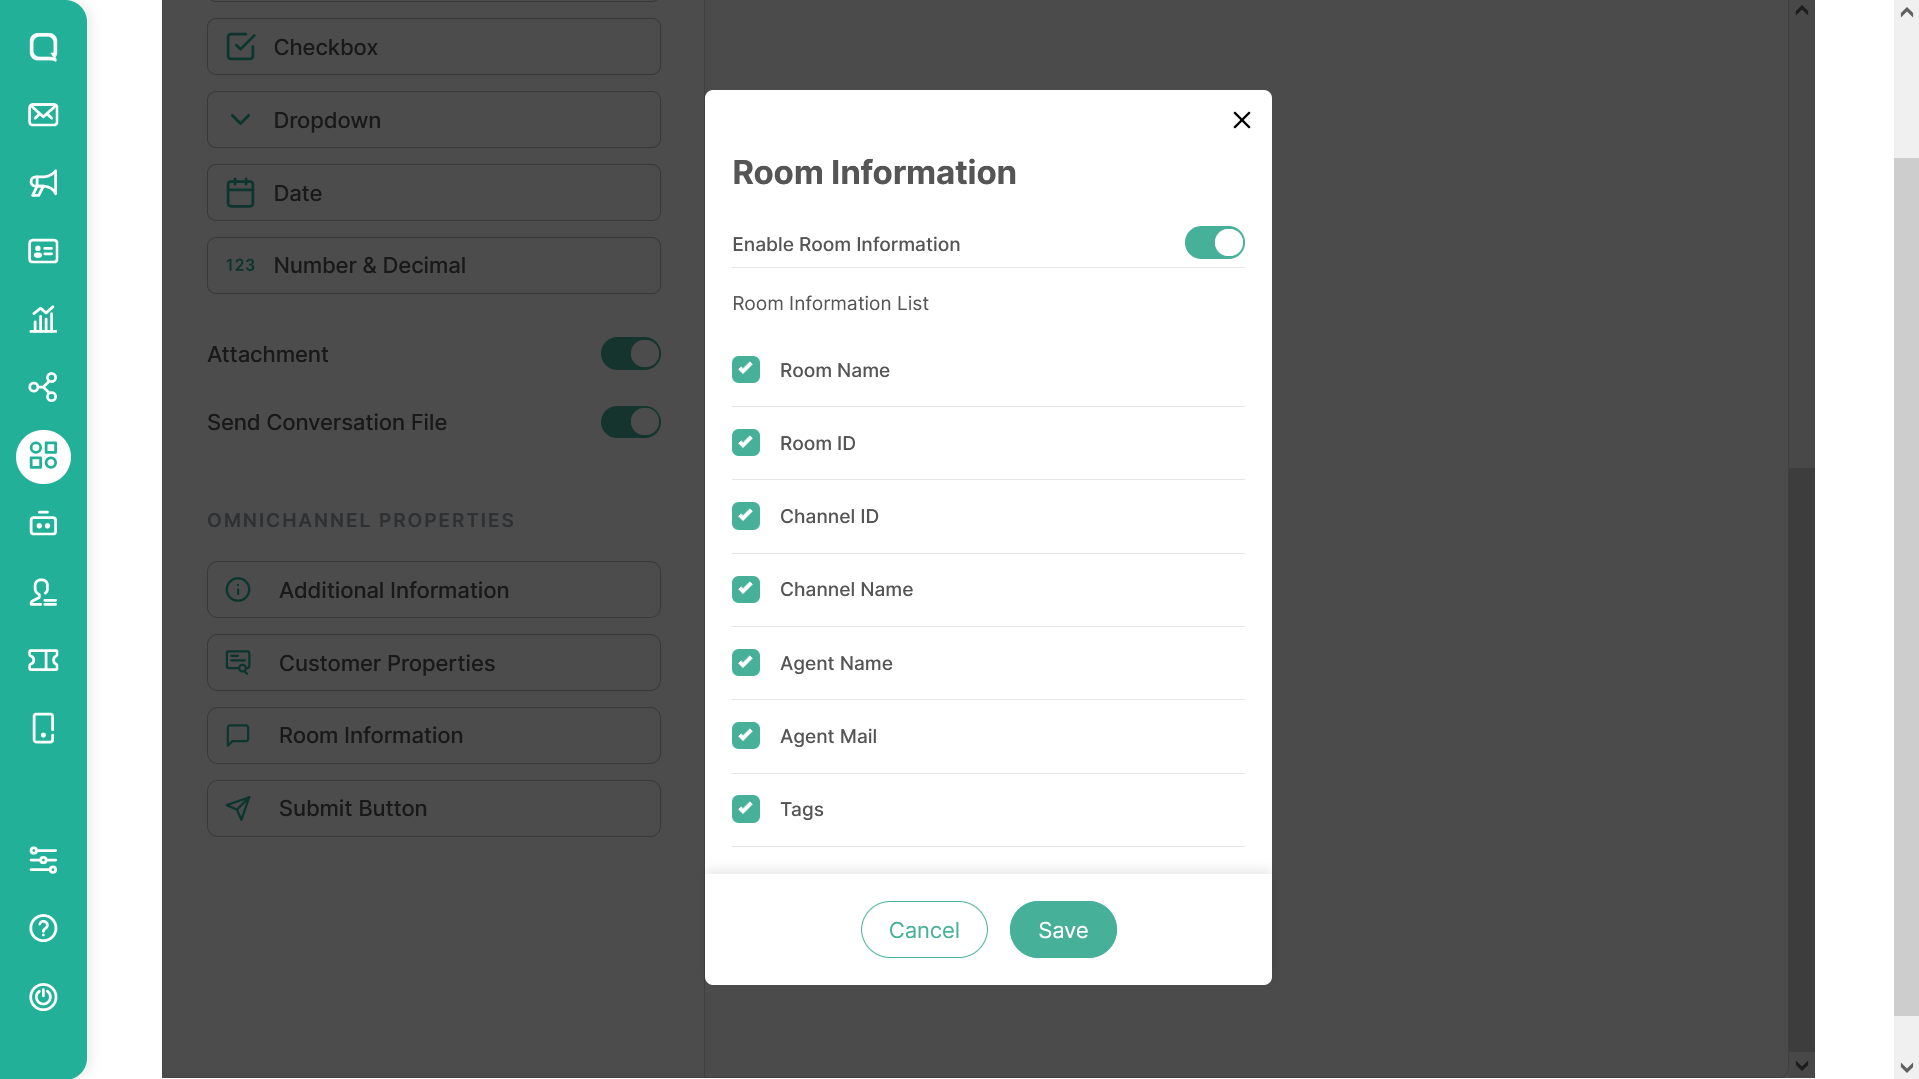
The Room Information feature on the OmniForm will make you able to send all of the Omnichannel Room Information during submitting the form. You can define the room information you want to send or not by checking the thick checkbox and saving the configuration.
Here are the listed items of Omnichannel Room Information that you can send:
- Room Name (Name of your customer)
- Room ID (ID of the room from your customer)
- Channel ID (ID of the channel/platform your customer starting the chat)
- Channel Name (Name of the channel/platform your customer started the chat)
- Agent Name (Name of the agent assigned to the room)
- Agent Mail (Email of the agent assigned to the room)
- Tags (list of tags that filled to the room)
OmniForm Widget with Enabled Room Information

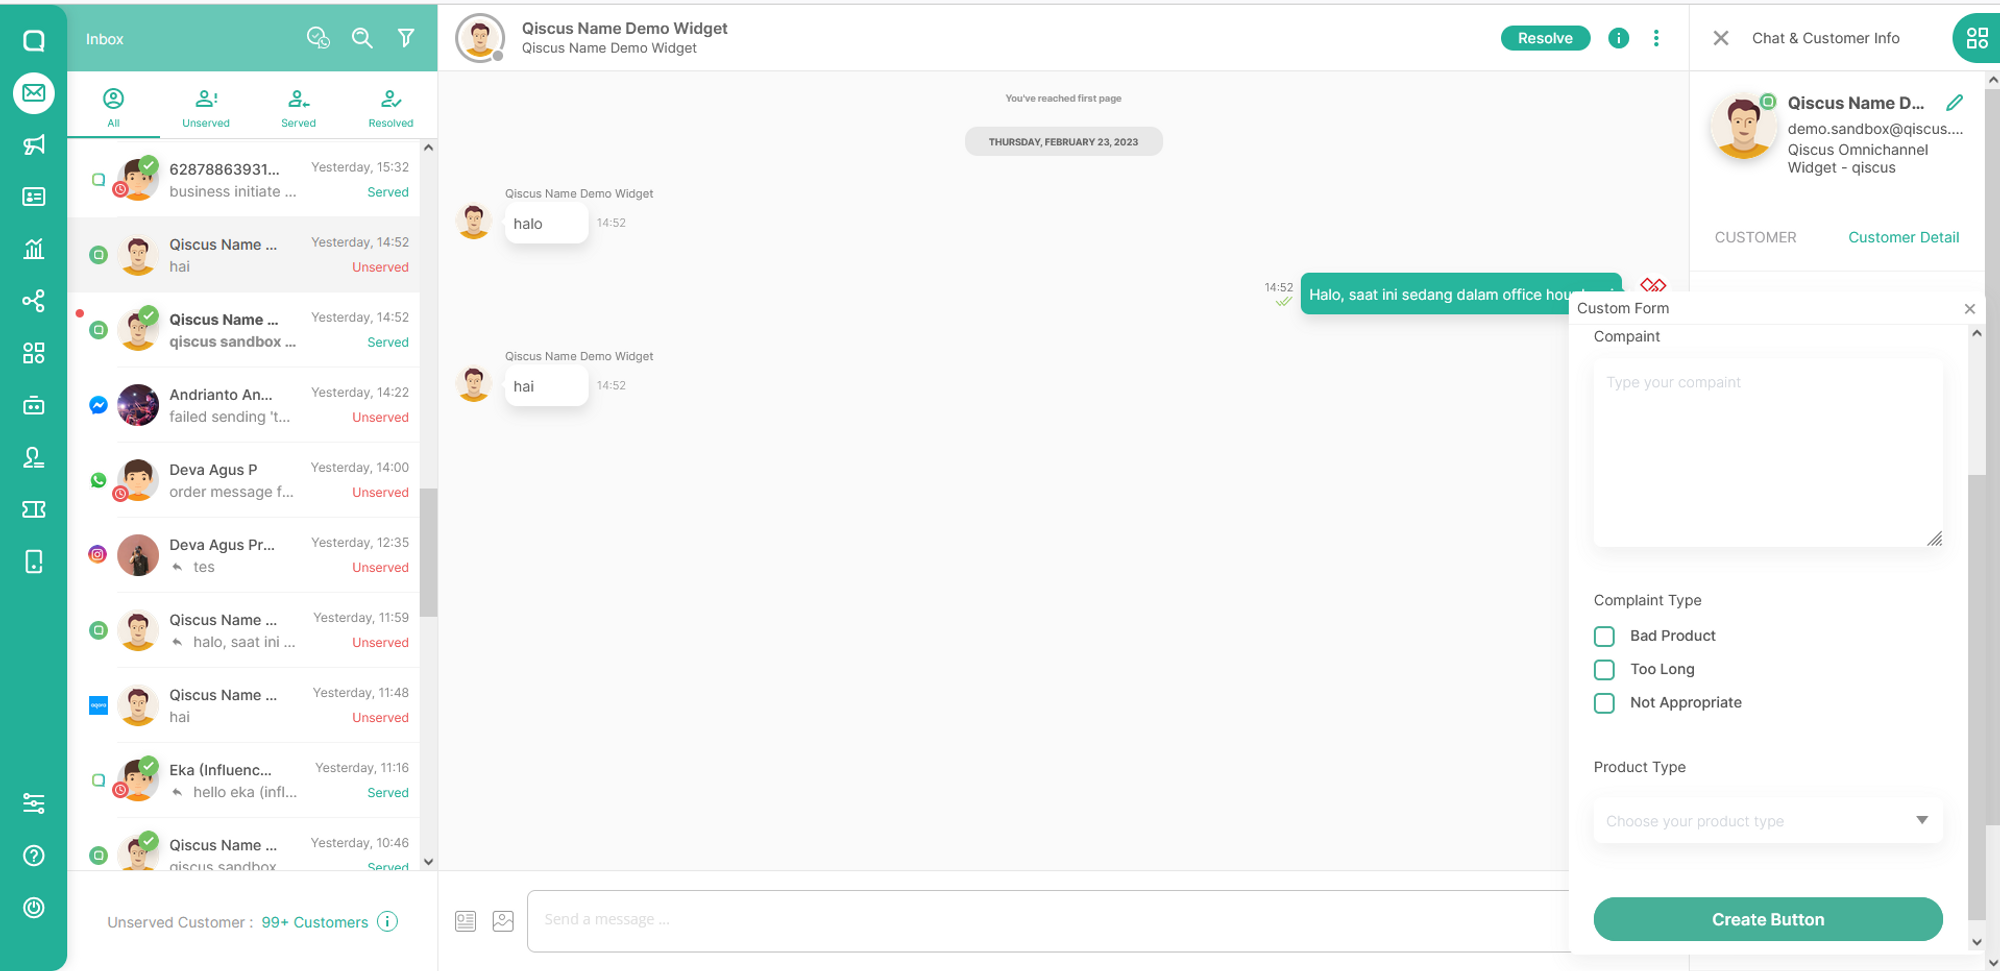
Submit Button
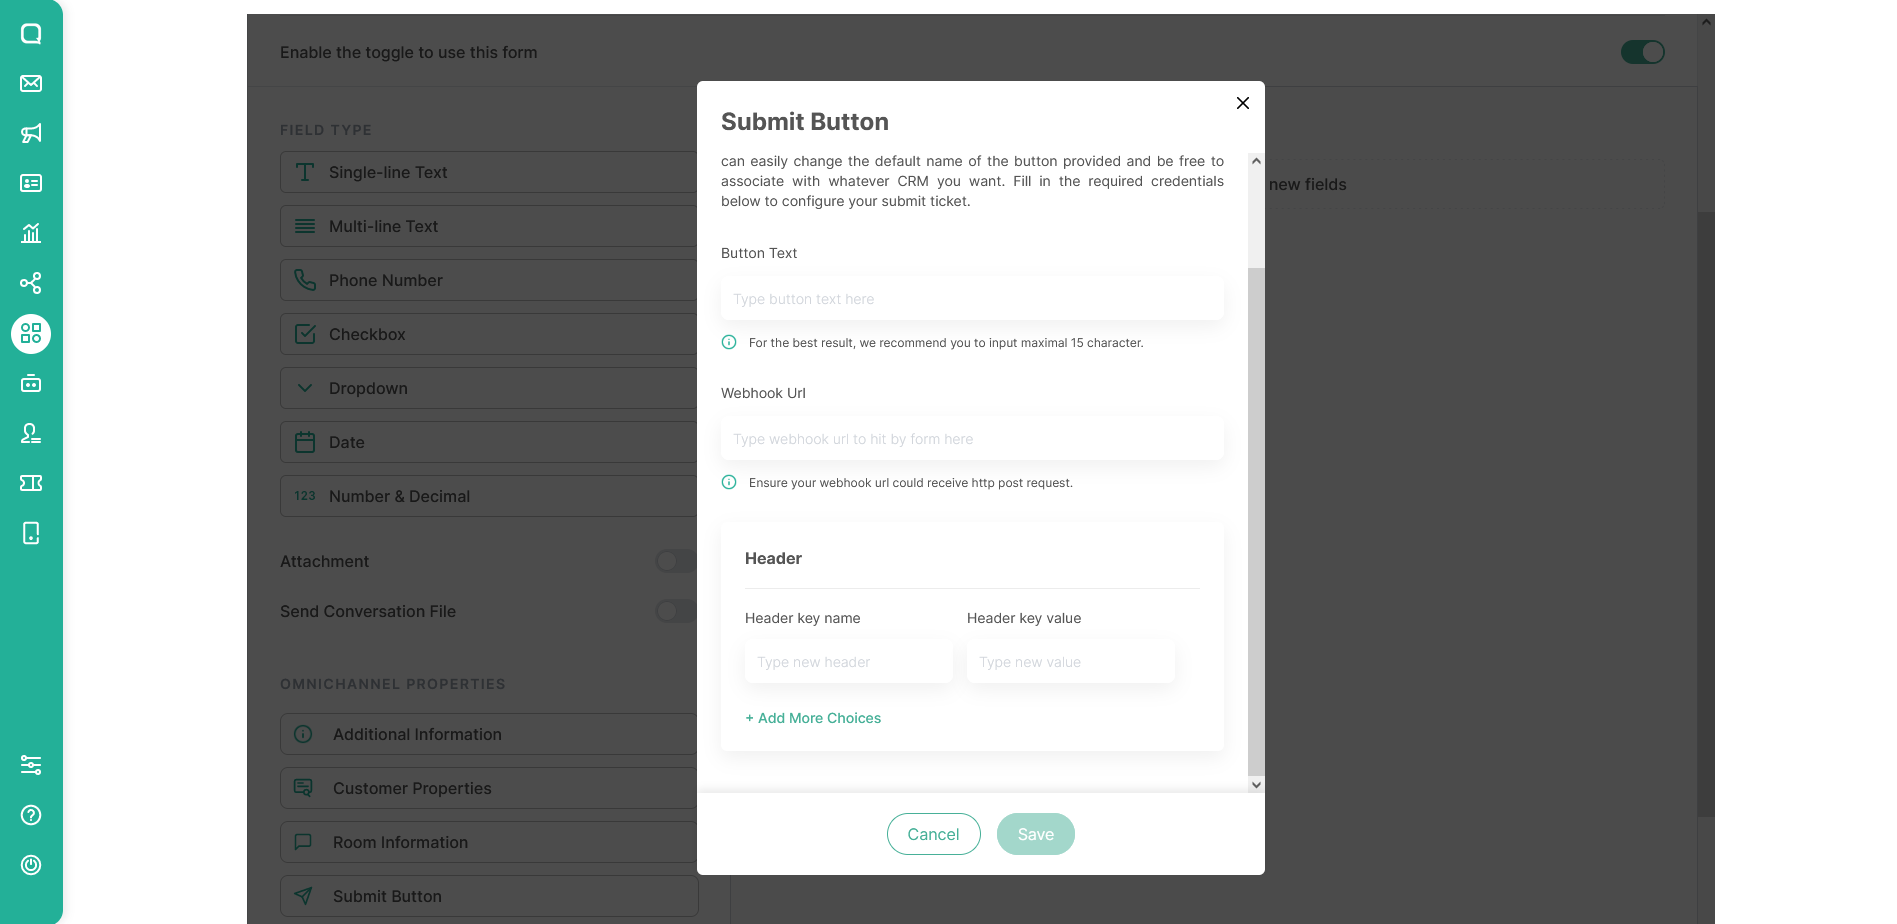
Submit button are mandatory field menu that need to be filled before saving the form. You also have to fill in the text button and webhook url to create submit button data. The button text can be filled with the name of the submit button and the webhook url is the webhook url address of your intermediate service, make sure the webhook can retrieve http requests.
Submit button menu also has additional header value that can be used as identifier key data to give your destination system a chance to validate the incoming data are delivering from a valid source or not.
Sample Request Submit Button
URL
xxxxxxxxxxPOST {{WEBHOOK_URL}}Header
xxxxxxxxxx{ "Content-Type": "application/json", "User-Agent": "custom-form-addon" "{{Additional-Key}}": "{{Additional-Value}}"}JSON Body
{ "additional_info": [], "attachments": [], "conversation_file": {}, "customer_properties": {}, "description": "Form ini di di edit", "fields": [], "name": "Form Testing", "room_info": {}}OmniForm Widget On Omnichannel
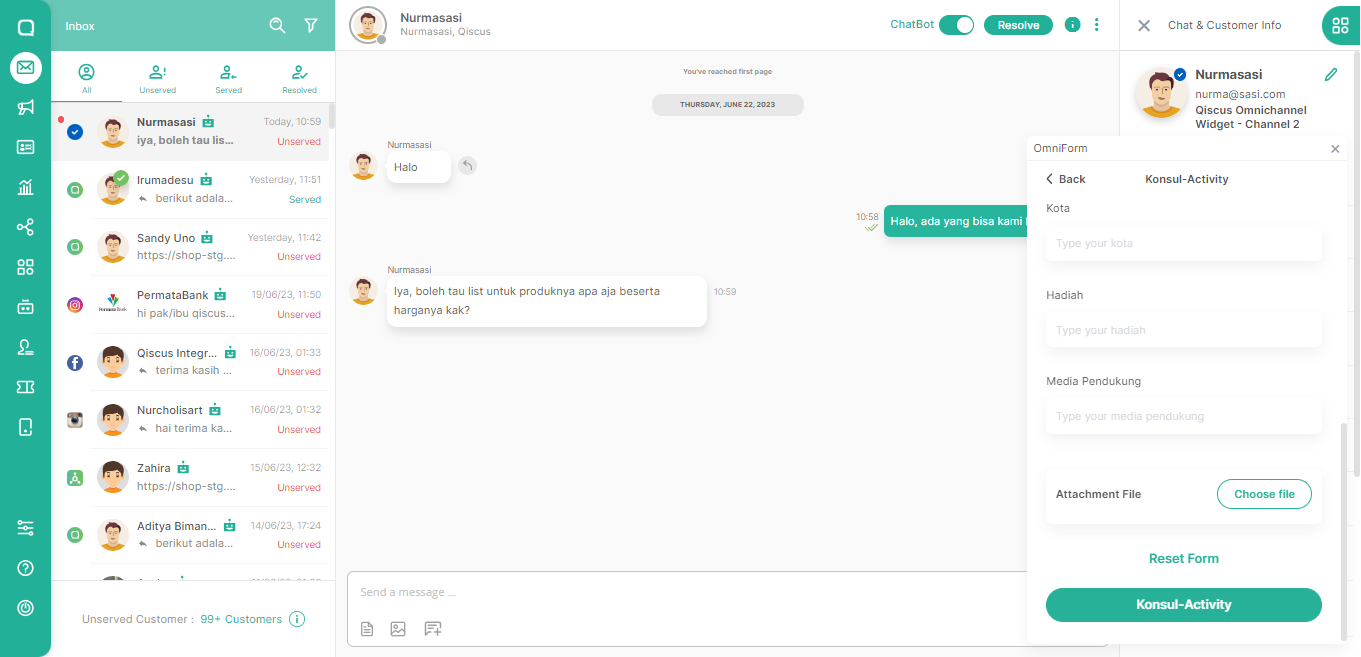
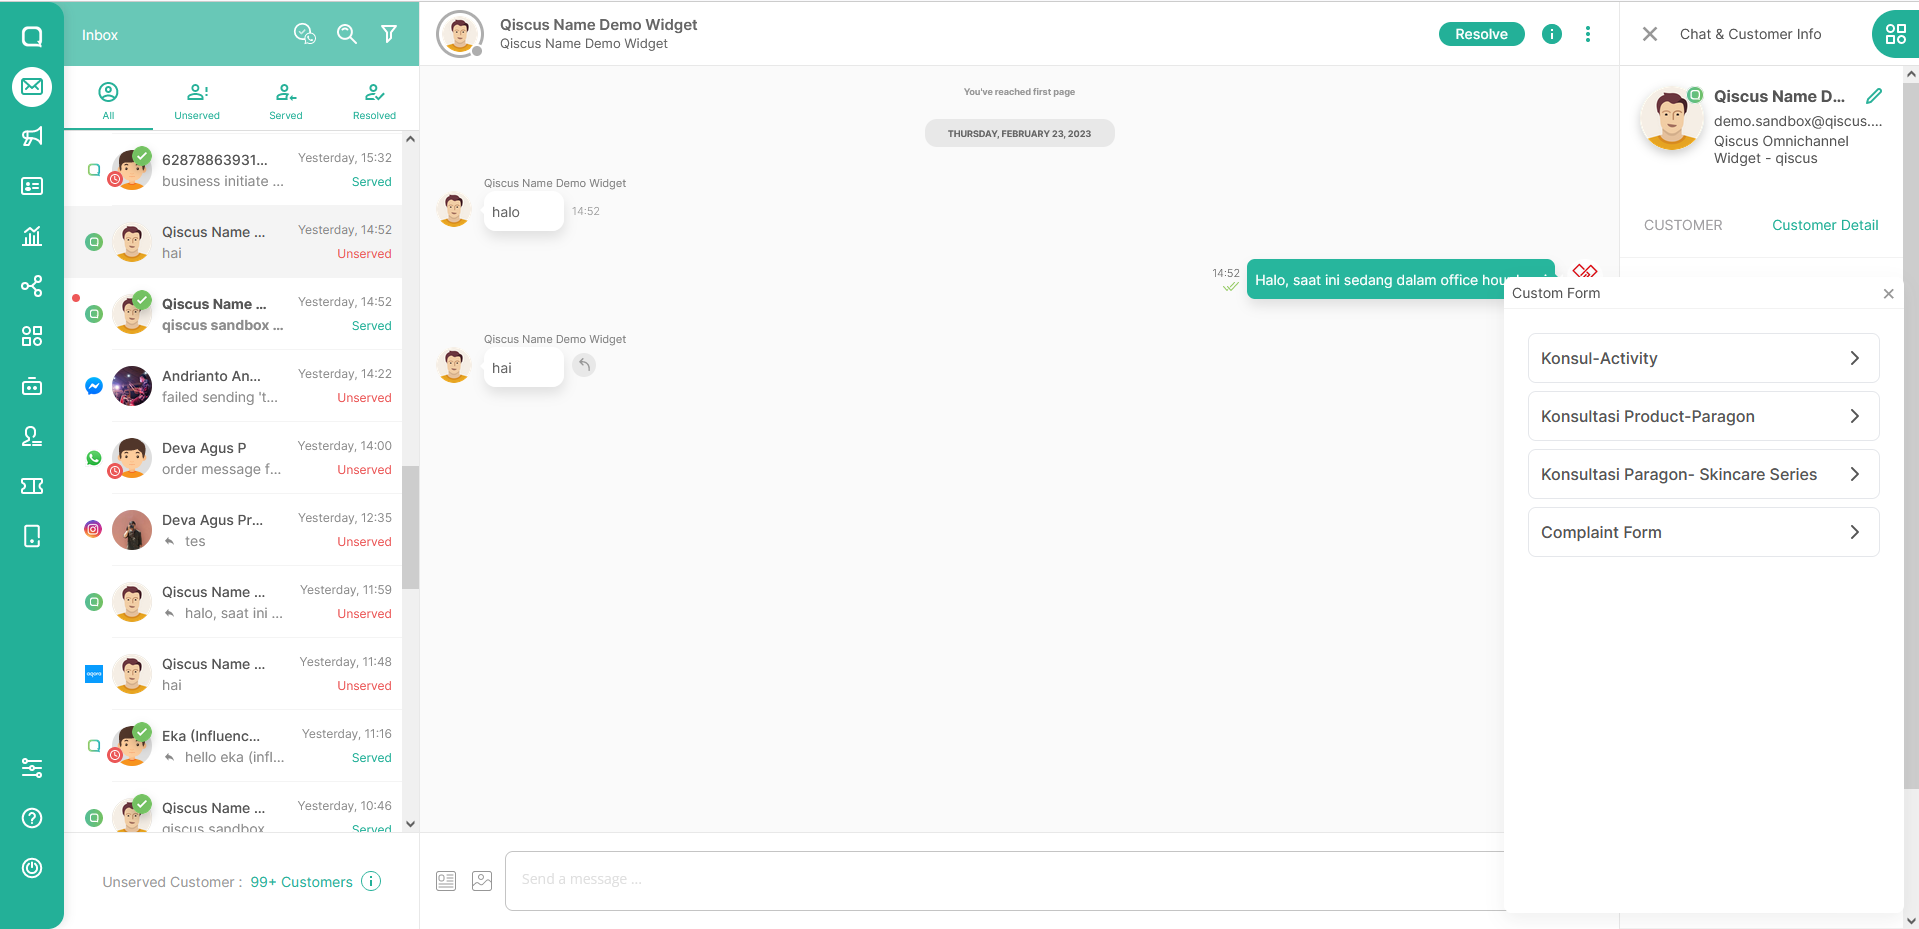
To open OmniForm widget, you have to follow this step:
- Click appcenter widget button
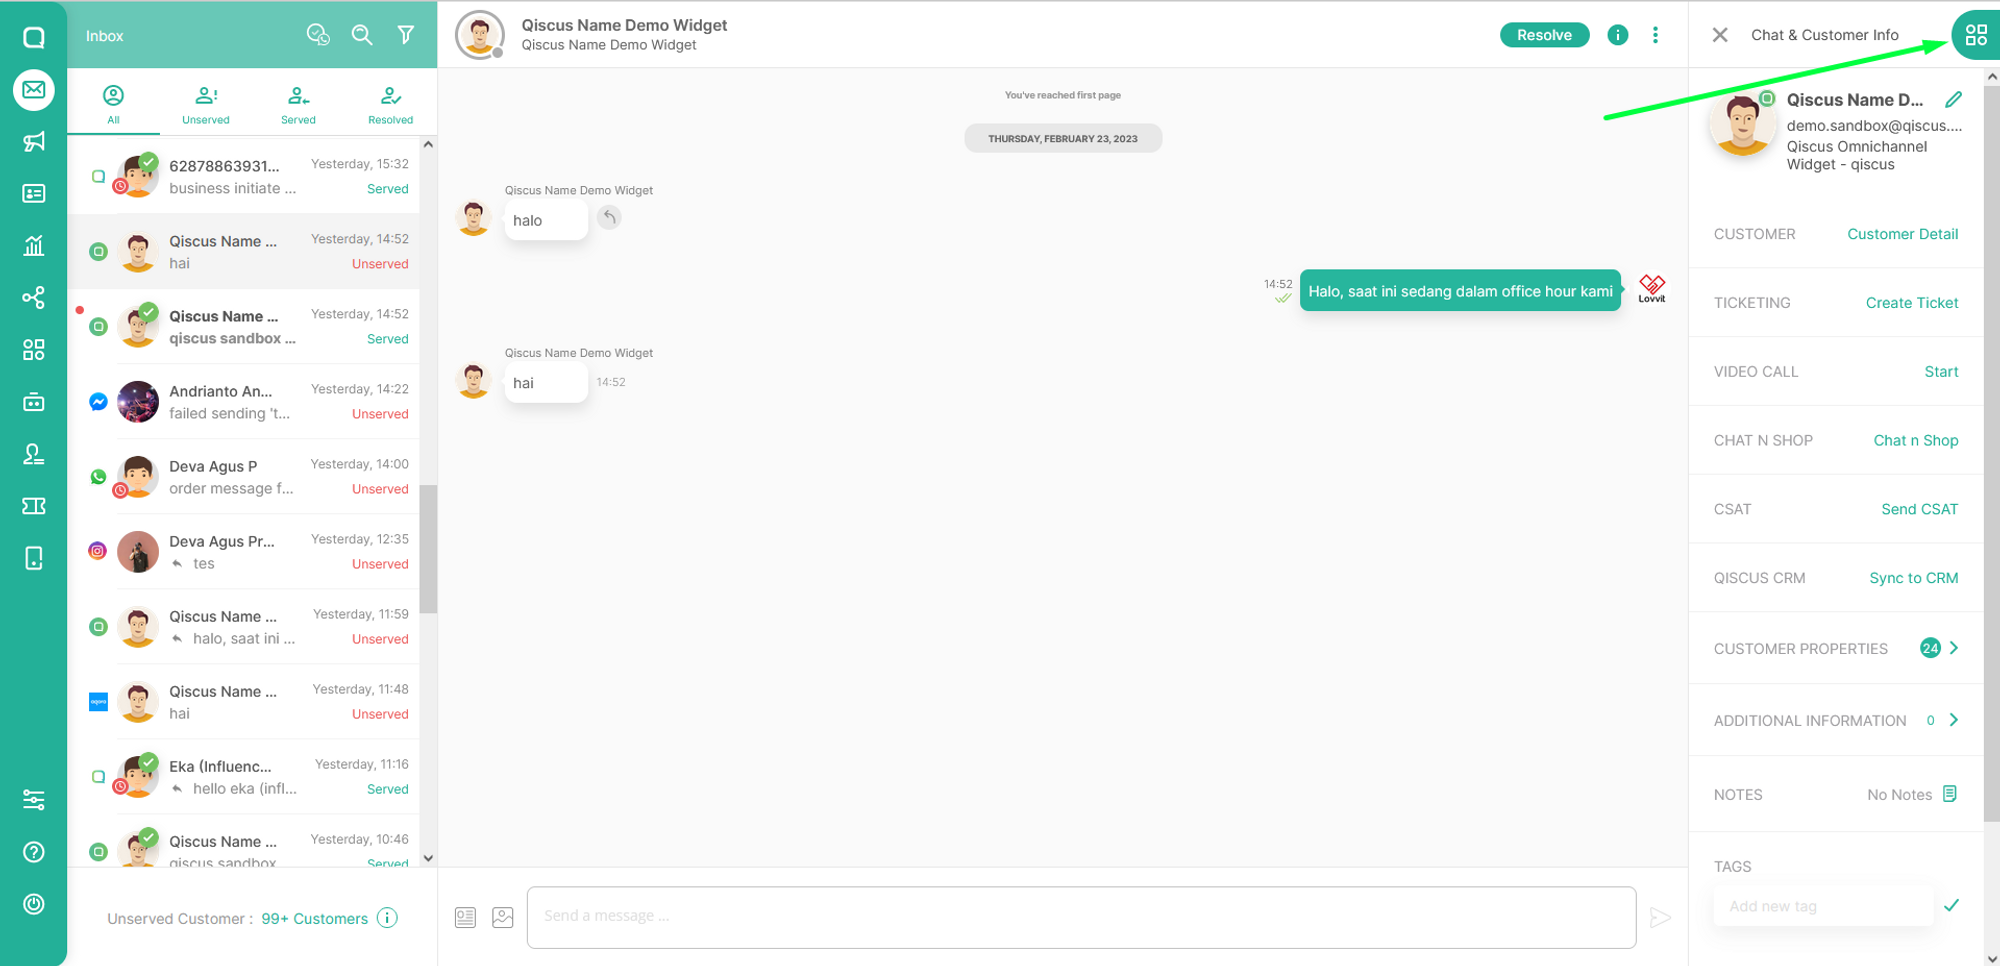
- Click OmniForm
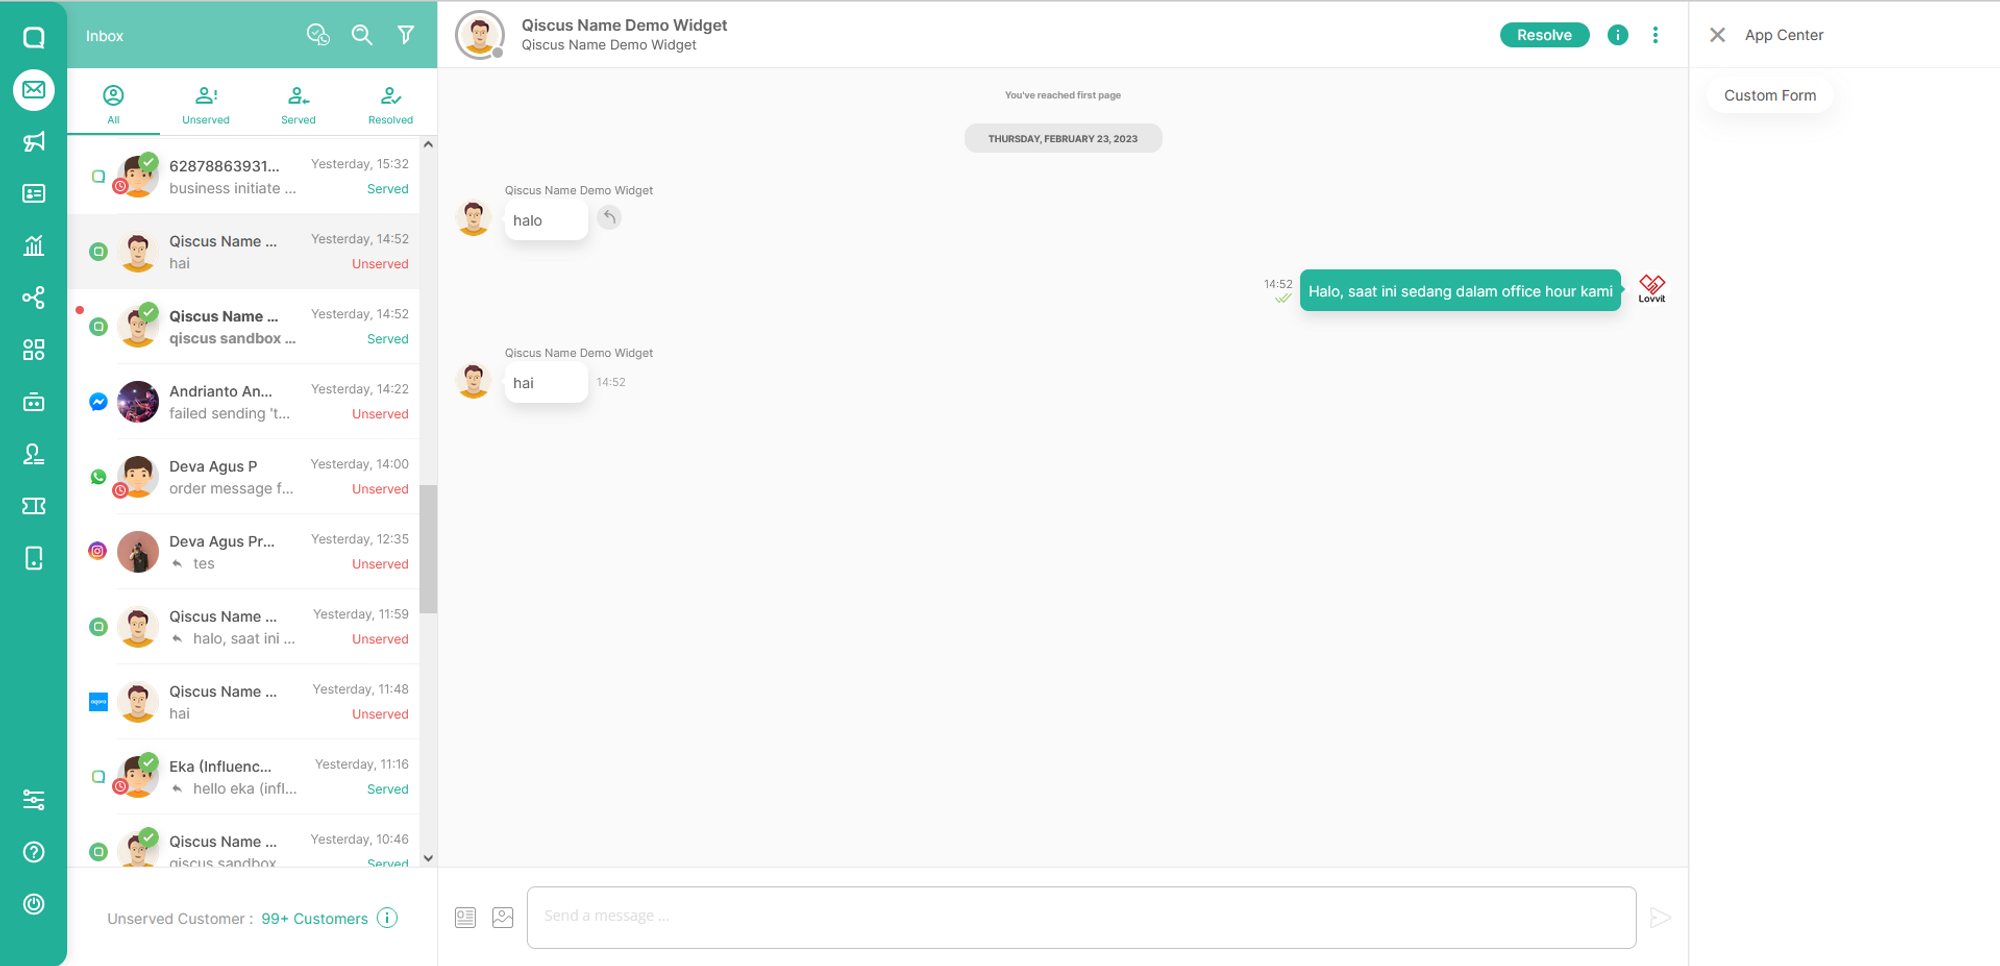
- You will be able to see your form immediately if you only have 1 form and see the form list if you have more than 1 form
Error Handling for Webhook Responses
When the OmniForm widget submits data to your service via webhook and receives an error response, the message can be shown directly in the agent interface. To ensure the error is displayed correctly, your webhook must return one of the supported JSON structures below.
Preferred:
xxxxxxxxxx{ "message": "Your error message here", "details": [ { "field": "field_name", "message": "Field-specific error message" } ]}Alternative 1:
xxxxxxxxxx{ "error": { "message": "Your error message here", "details": [ { "field": "field_name", "message": "Field-specific error message" } ] }}Alternative 2:
xxxxxxxxxx{ "error": { "data": { "message": "Your error message here", "details": [ { "field": "field_name", "message": "Field-specific error message" } ] } }}Notes:
- The
messagefield will be displayed directly in the agent interface. - The
detailsarray is optional and will not be rendered in the UI, but may be helpful for debugging purposes when inspecting the response. - Each
detailitem may include:field: the name of the field with the issue.message: a description of the error related to the field.
If none of the supported formats are returned, a fallback message will be displayed:
xxxxxxxxxxunexpected error when sending data to webhook url <your-url> status code: <status-code>