Title
Create new category
Edit page index title
Edit category
Edit link
Leads
In QCRM, leads represent individuals who show promising potential to become customers but may not yet meet the requirements or are in the early stages of the customer journey. With QCRM, you can conveniently store and manage all your company's leads in a centralized menu. The Leads menu provides a comprehensive list of the leads owned by your company.
Adding Leads
You can add leads from the Inbox or Sales CRM menus.
Adding Leads from the Inbox menu
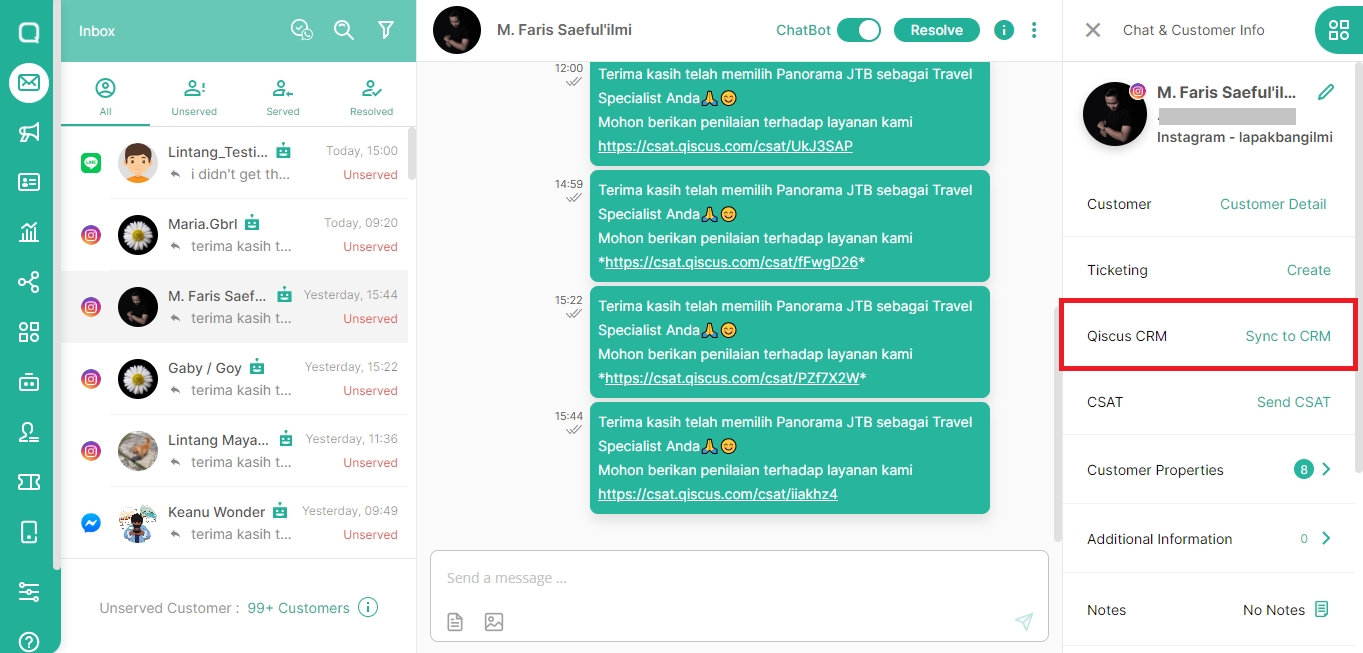
Qiscus has a Sync to CRM feature which will make it easier for you to add leads through the Inbox menu. You simply select the customer chat room that you want to add as a lead, then click the Sync to CRM button on the Chat & Customer Info page.
Adding Leads Manually
Apart from the Inbox menu, you can also add leads manually via the Leads menu. Here's how:
- Go to Sales CRM menu and select Leads tab,
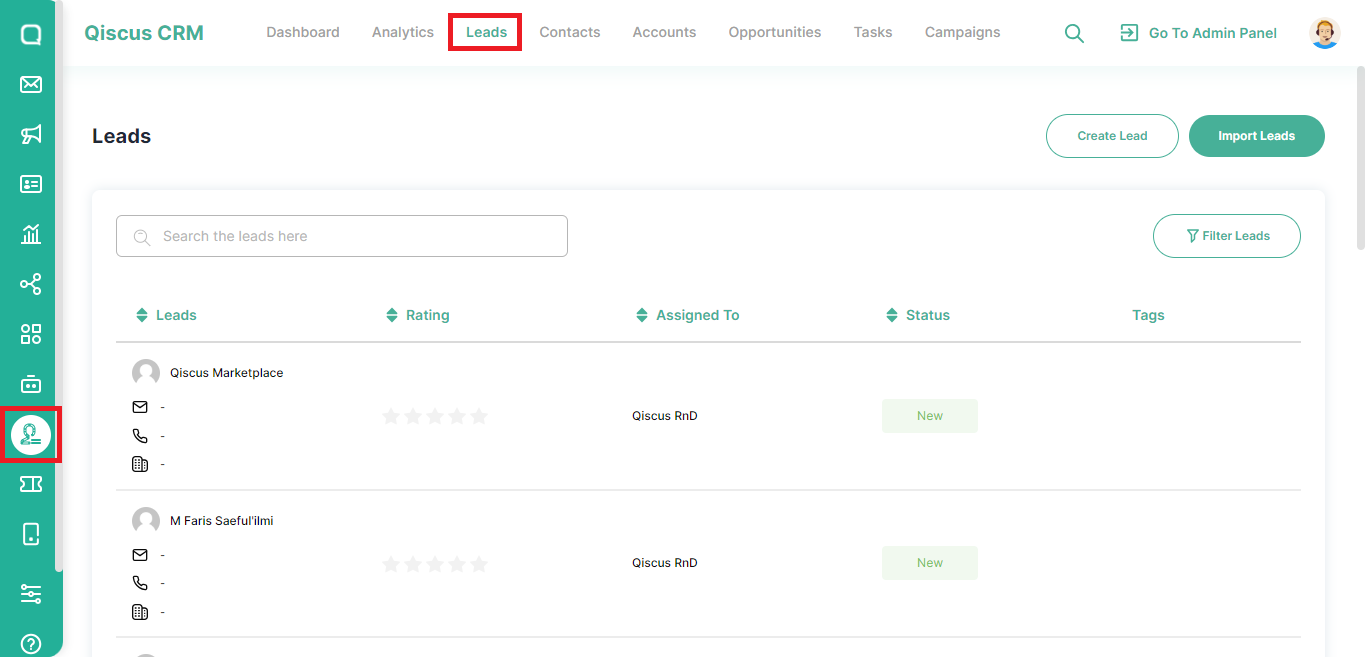
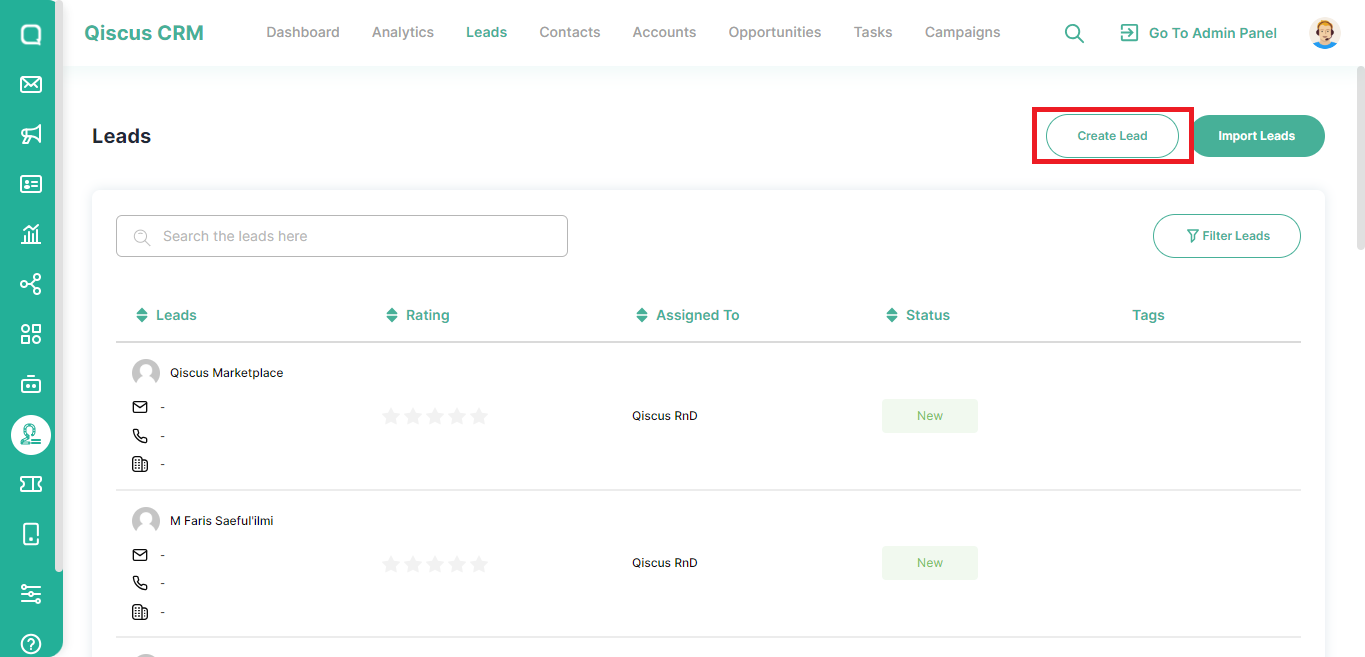
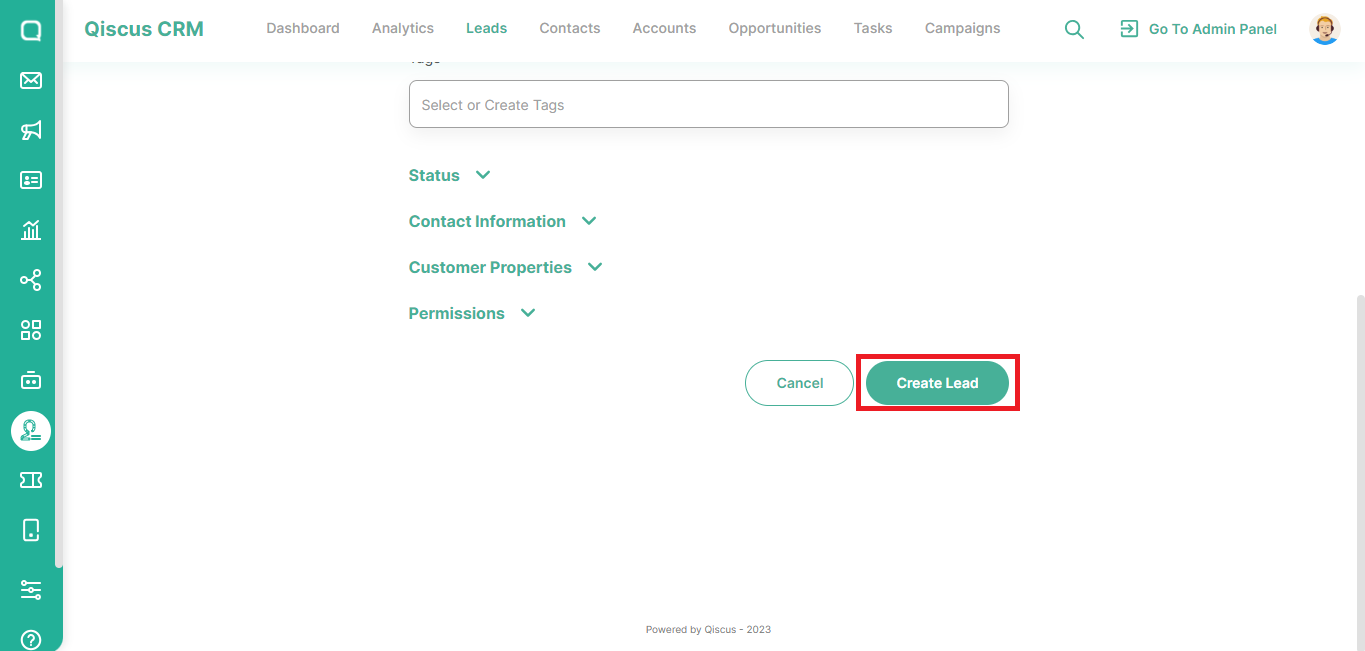
- Click the Create Lead button,
- You will be redirected to Create Lead page. Fill in important parts such as name, email, and phone number. For other information such as the status to whom the lead is assigned, contact information related to the lead, and permissions you can add after the lead is saved,
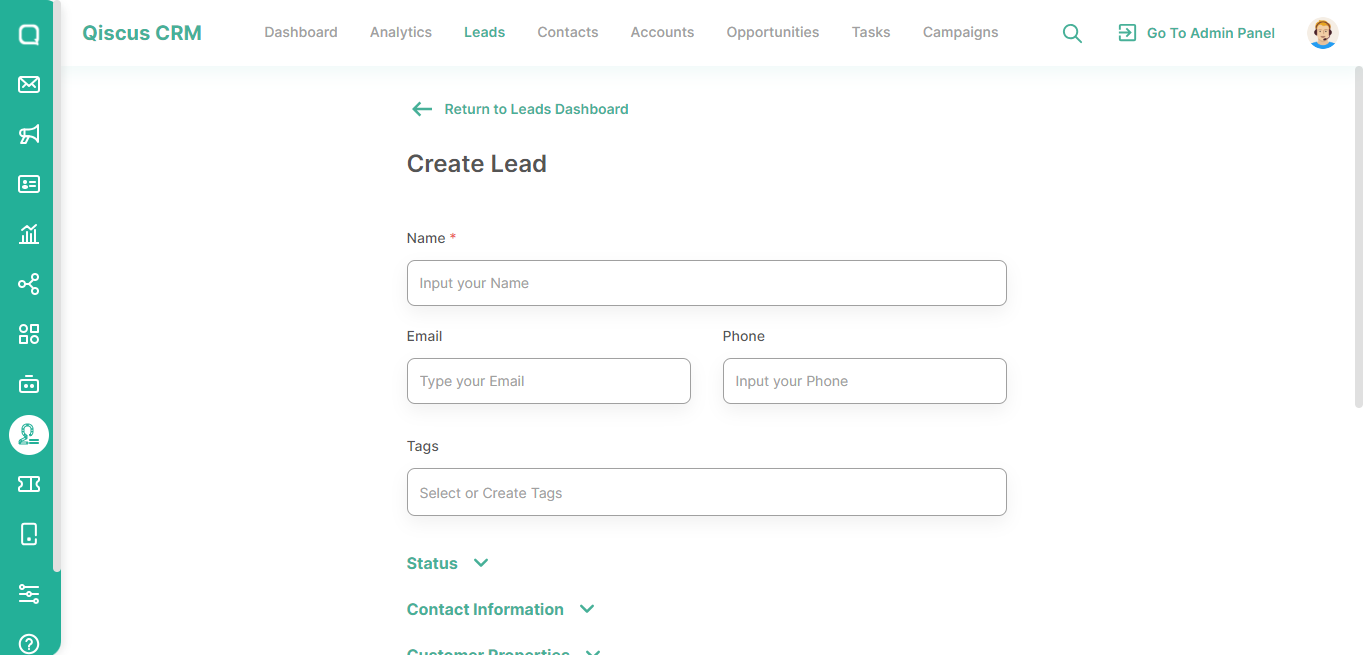
You can add an existing tag or add a new tag when creating a lead.
- Click Create Lead to save the lead.
Searching for Leads
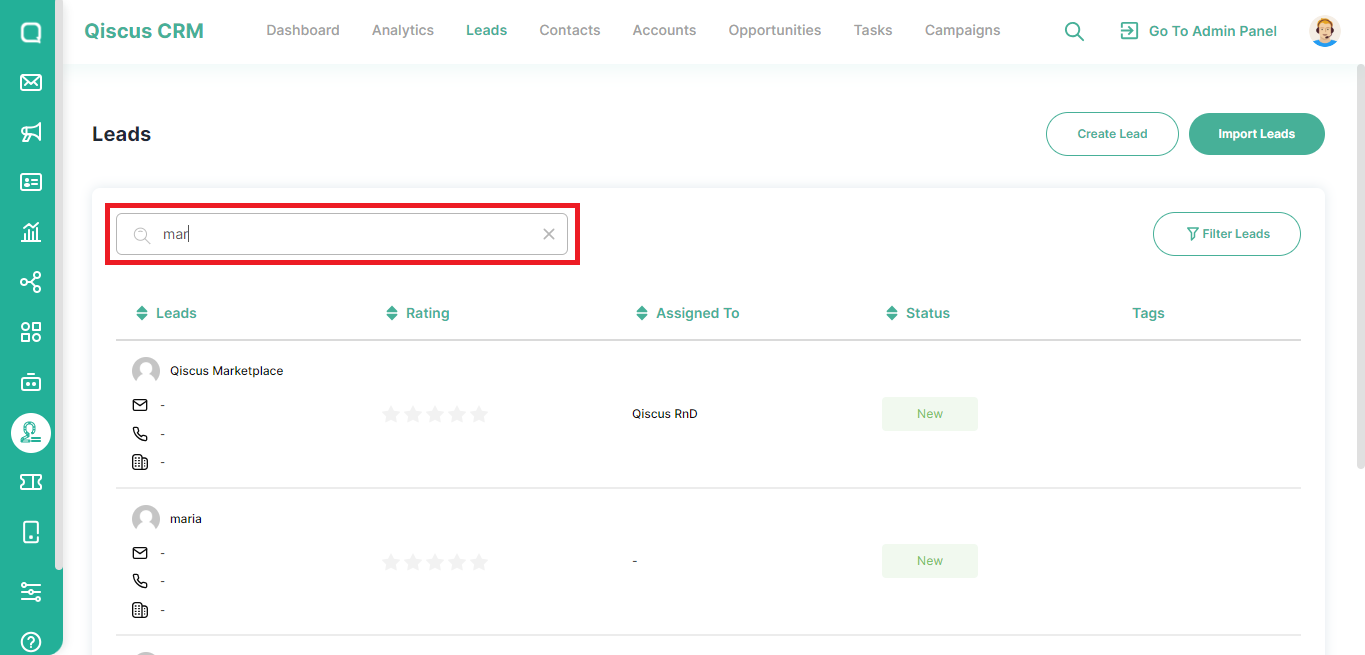
Within the Leads menu, you'll find a search feature that allows you to look up leads by their names. You just need to fill in the keywords in the search field then the list below will automatically change according to the keywords.
Filtering the Leads
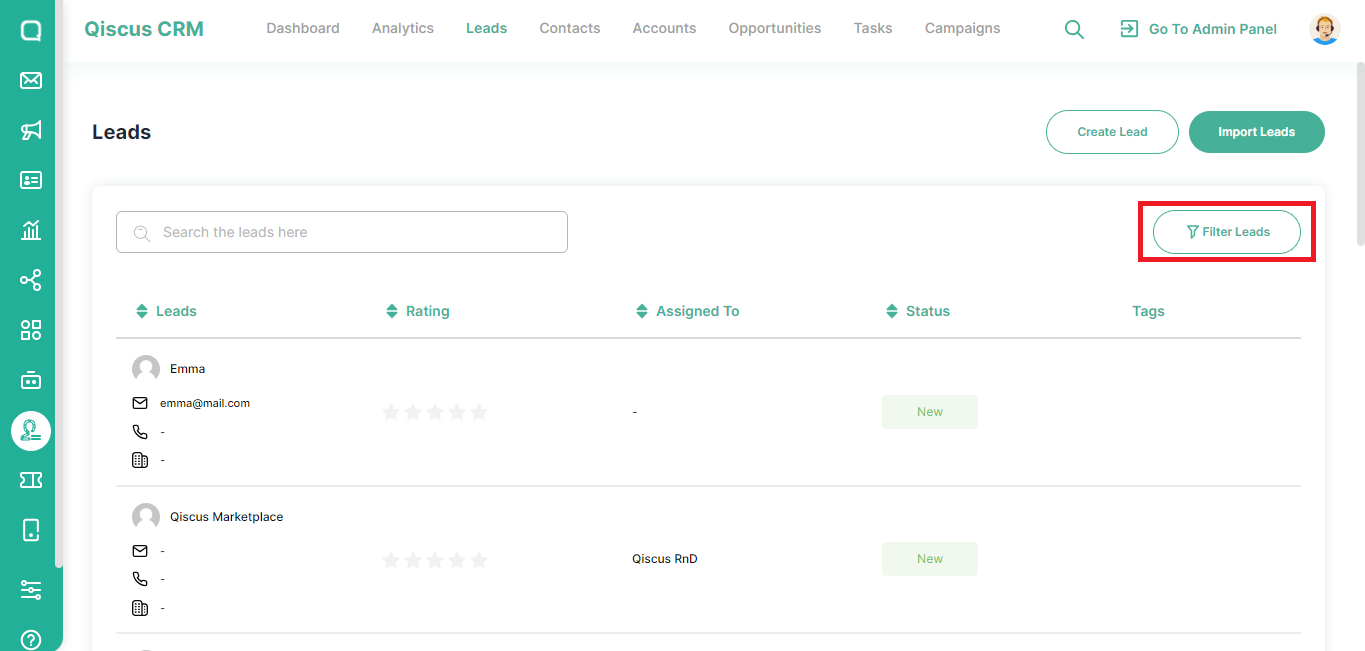
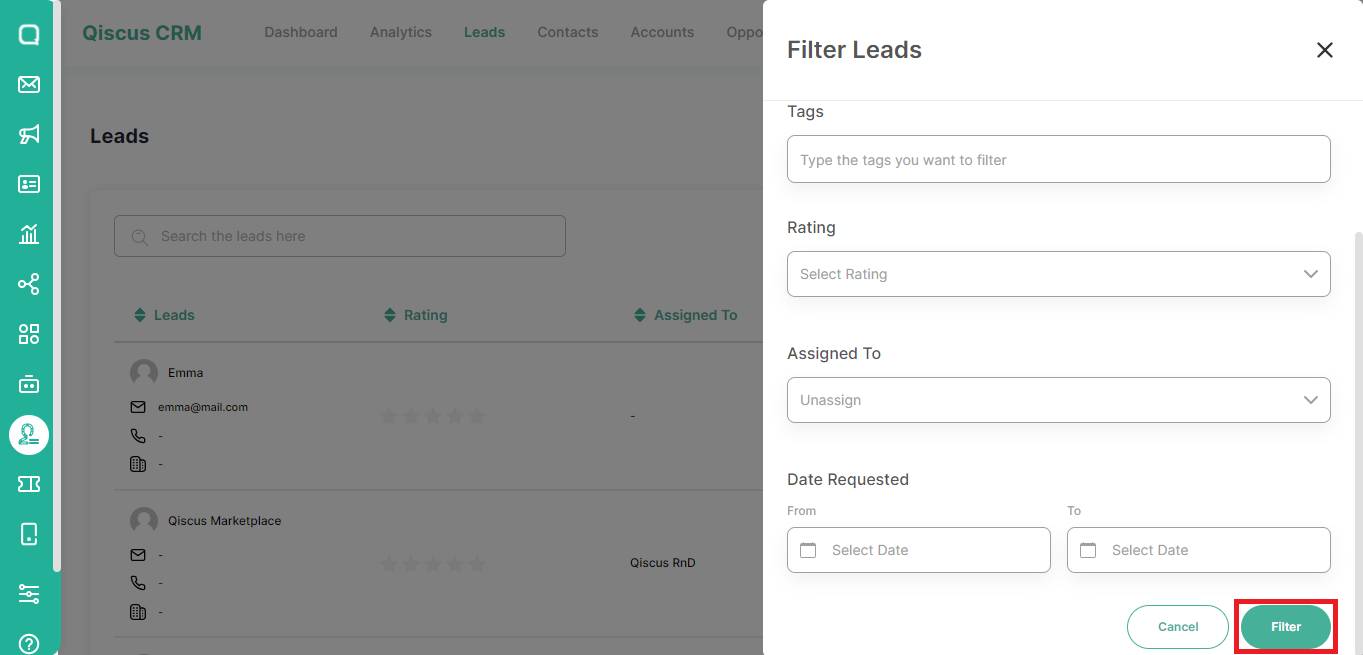
In addition to searching for leads, you also filter the list of leads. Here’s how:
- Click the Filter icon.
- You can filter leads based on Lead Statuses, Tags, Rating, Assigned To, or Date Requested,
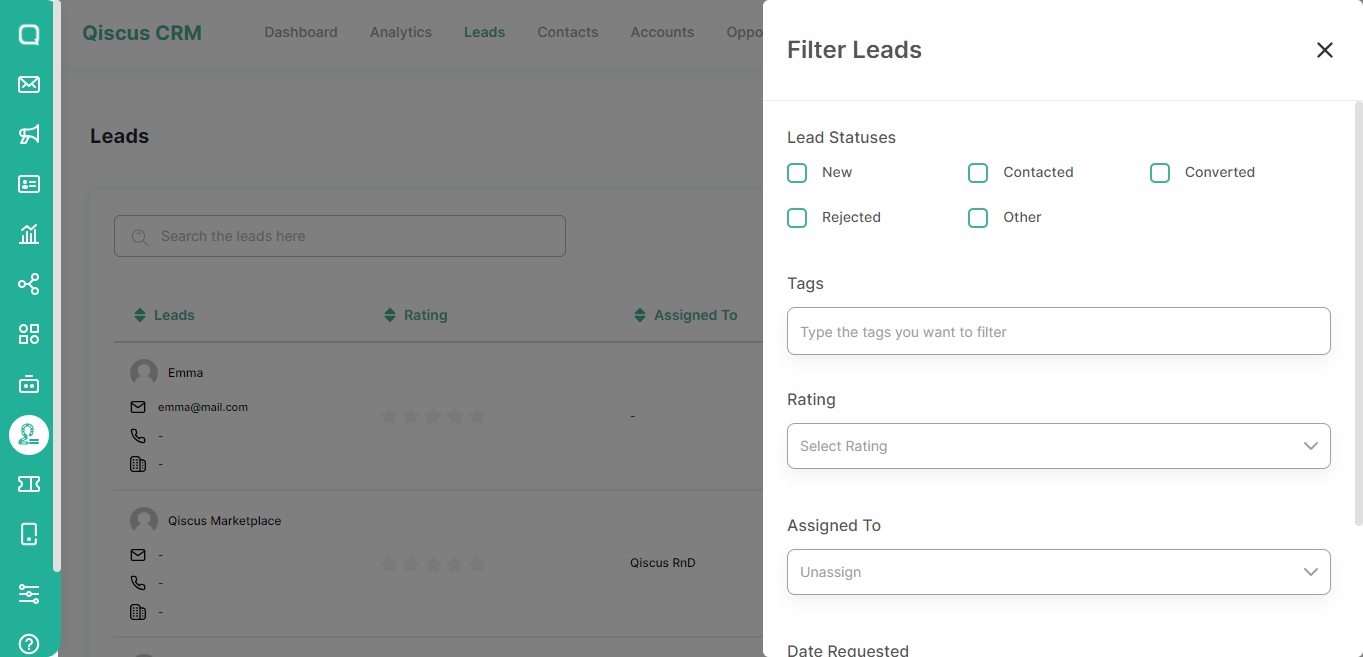
- Click the Filter button.
Changing Information of A Lead
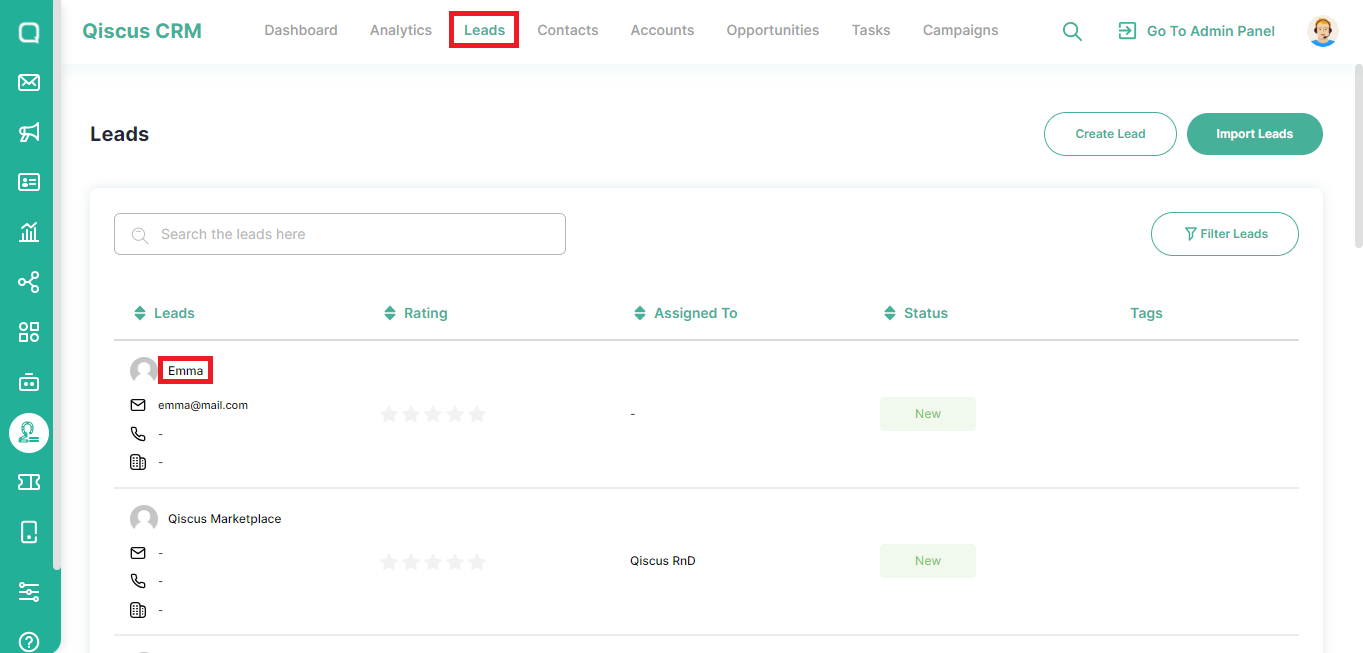
You can make changes to leads such as editing lead information, rejecting, or converting leads. To edit a lead information, you can follow these steps:
- Go to the Leads page and click on a lead's name,
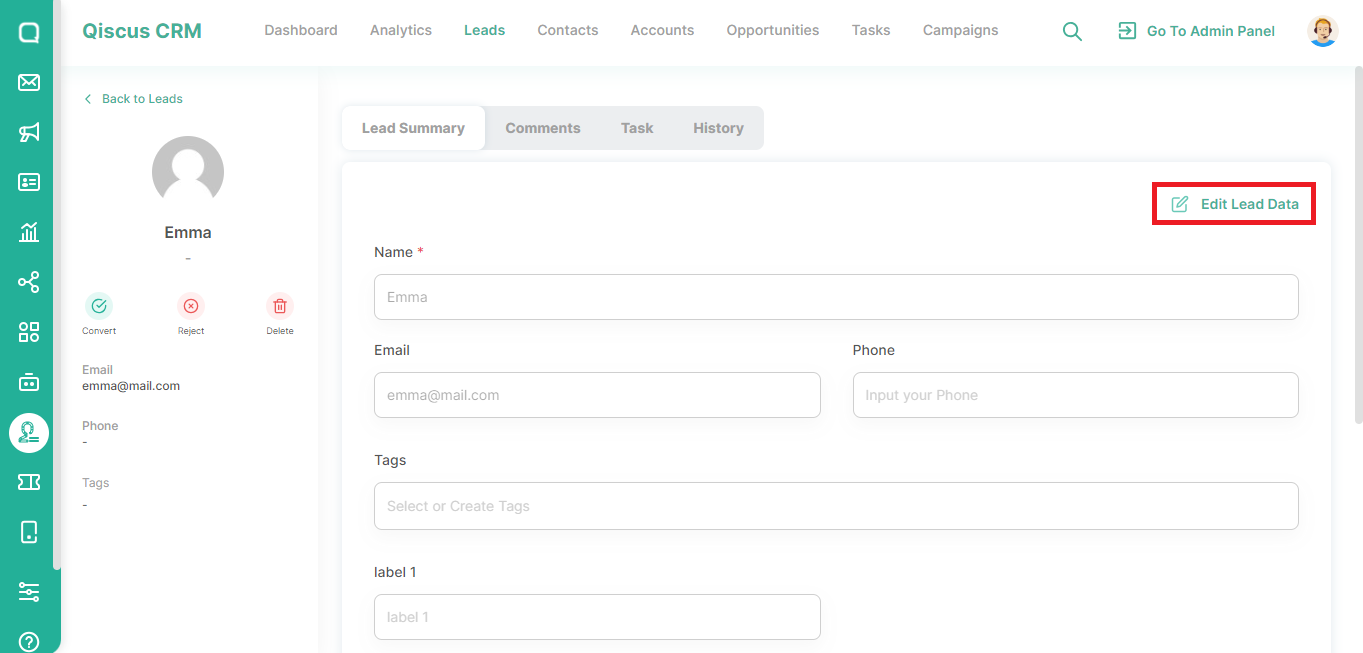
- Click Edit Lead Data,
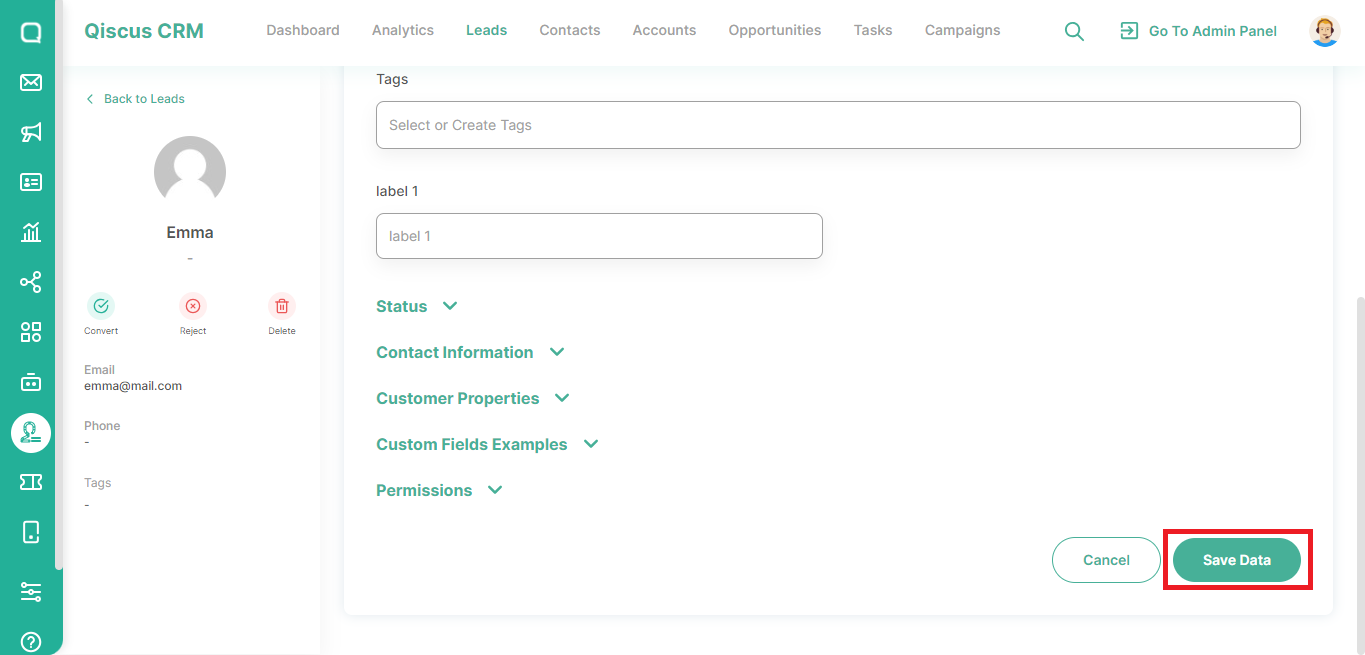
- Change the desired part, then click the Save Data button.
Once a team member has made contact, the lead can be modified or converted into a contact linked to an existing or new account. Alongside being designated as a contact, the lead status can also be updated to rejected. You can change the lead status by clicking one of the options on the detailed lead information.
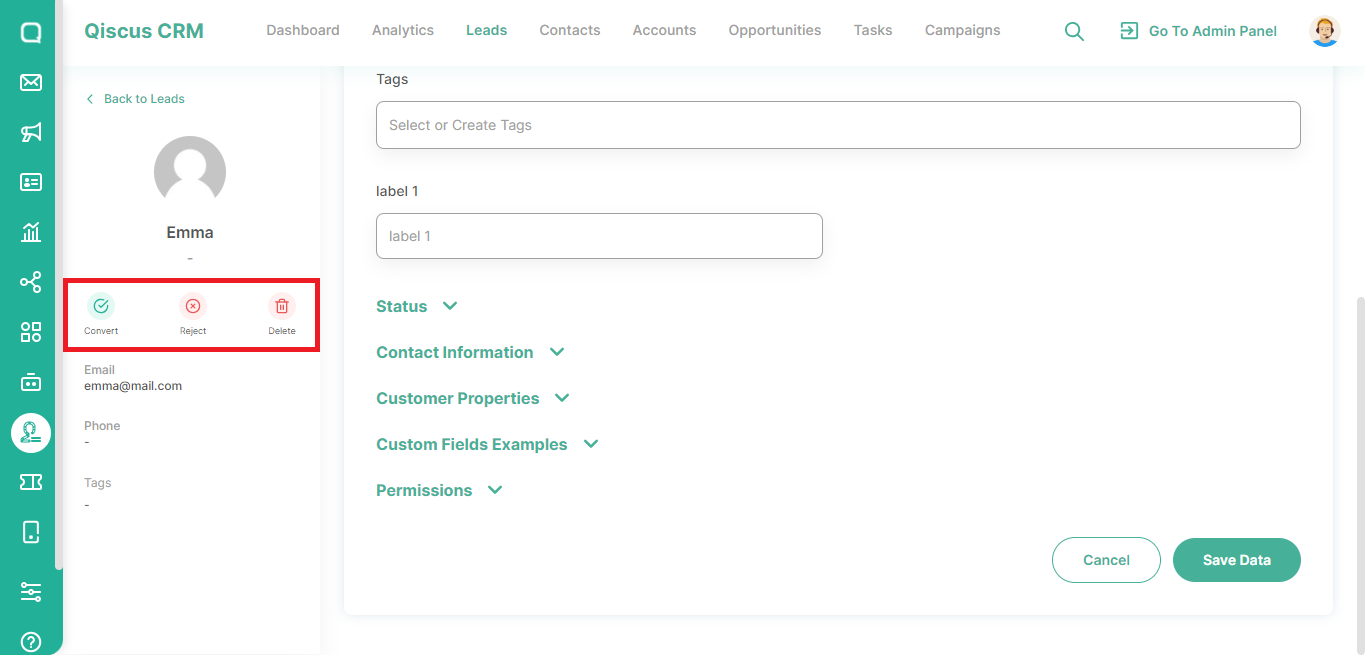
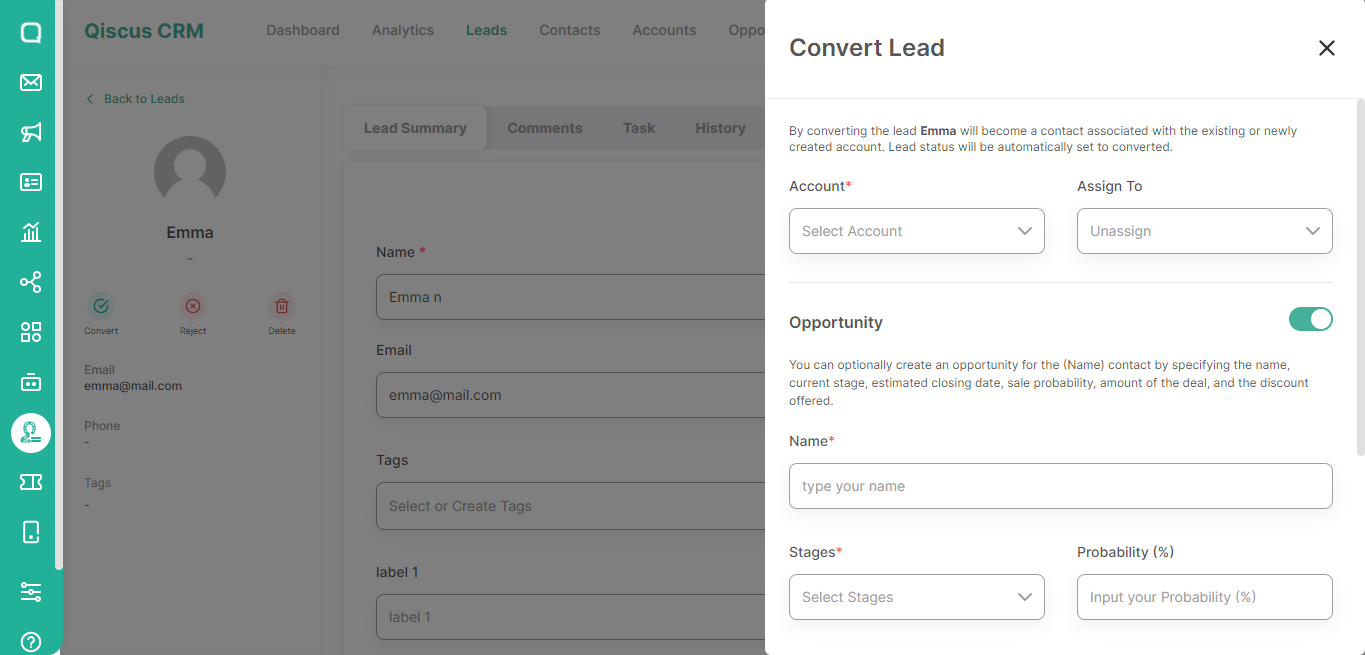
When you convert a lead into a contact, the contact must be linked to an Account and new Opportunity. You can select an existing Account or create a new Account.
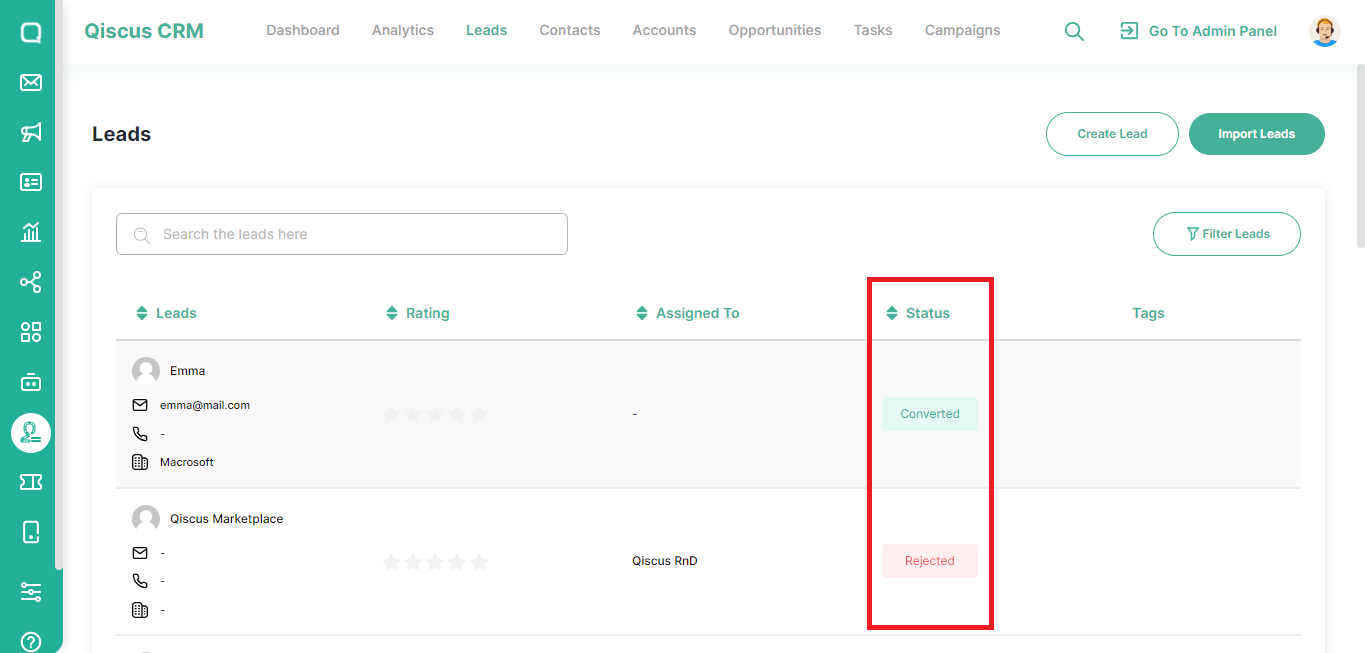
If the lead has been converted, the status will change to Converted. At the same time, if you reject the lead, the status will change to Rejected.
Qiscus Technology