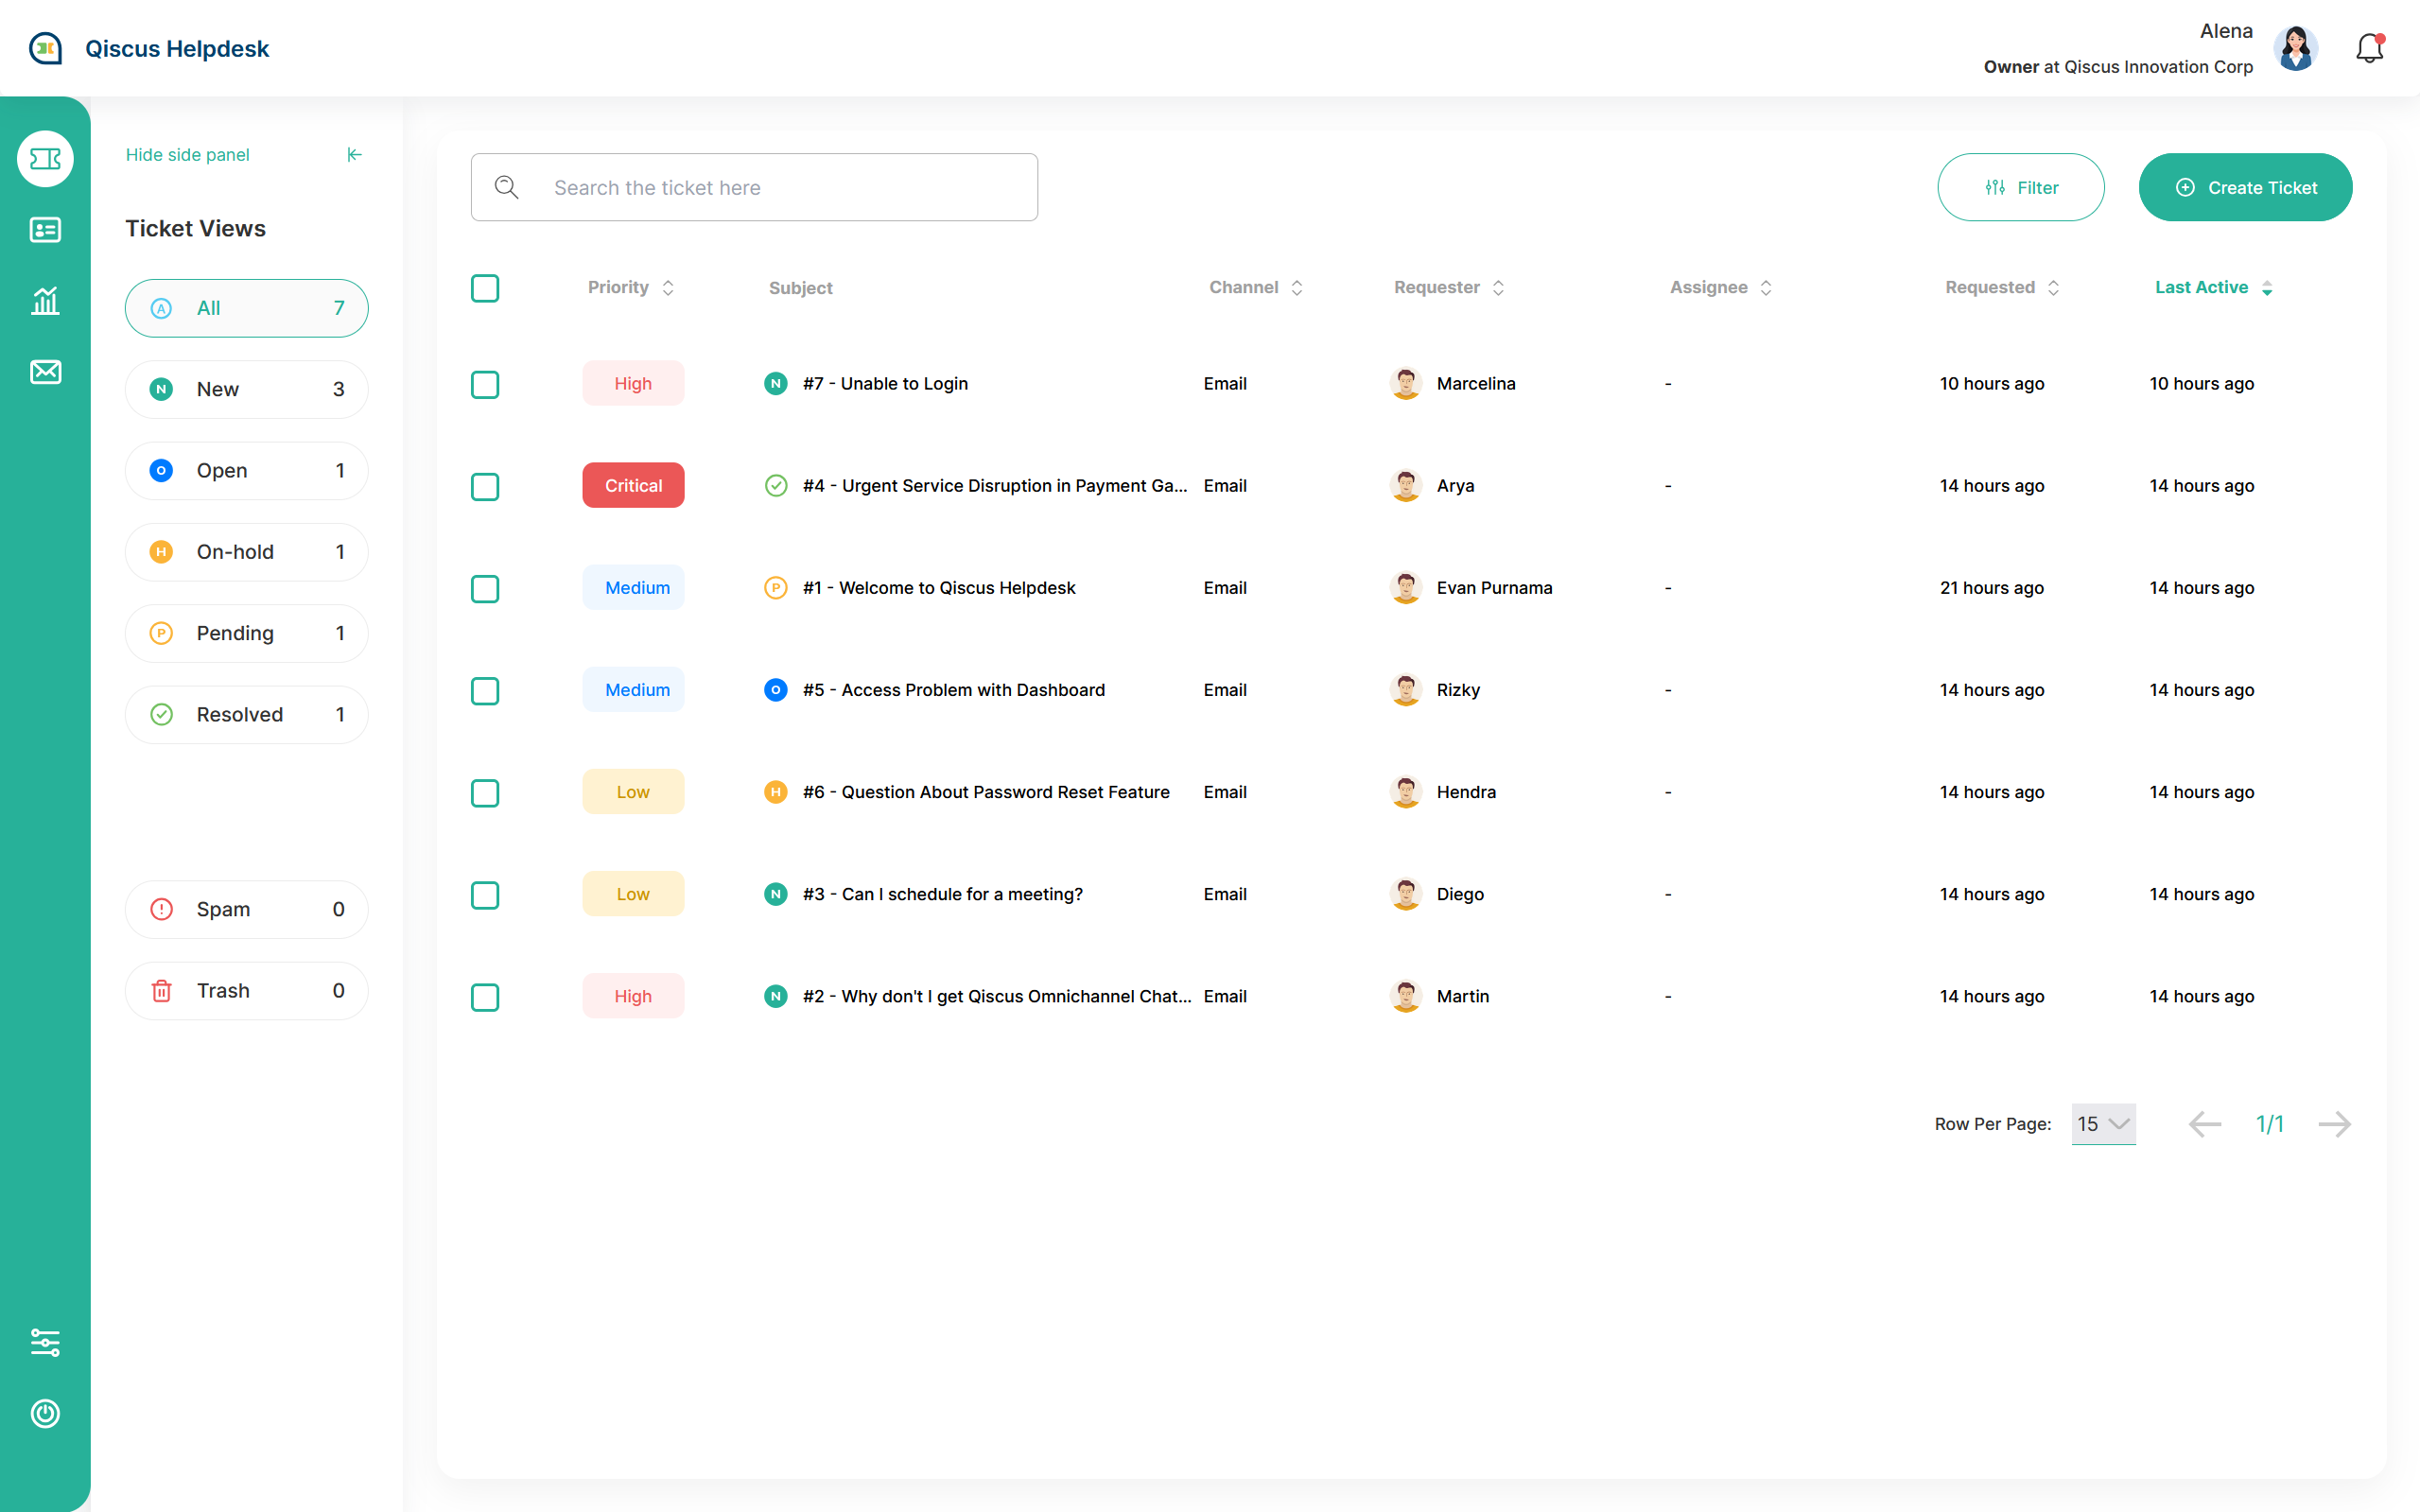
The Tickets menu in Qiscus Helpdesk simplifies the support process, allowing teams to handle tickets efficiently and effectively. It enhances organization and response times, ensuring issues are addressed promptly. The system boosts productivity by providing streamlined ticket management, improved internal communication, and easy access to essential ticket information.
Create New Ticket
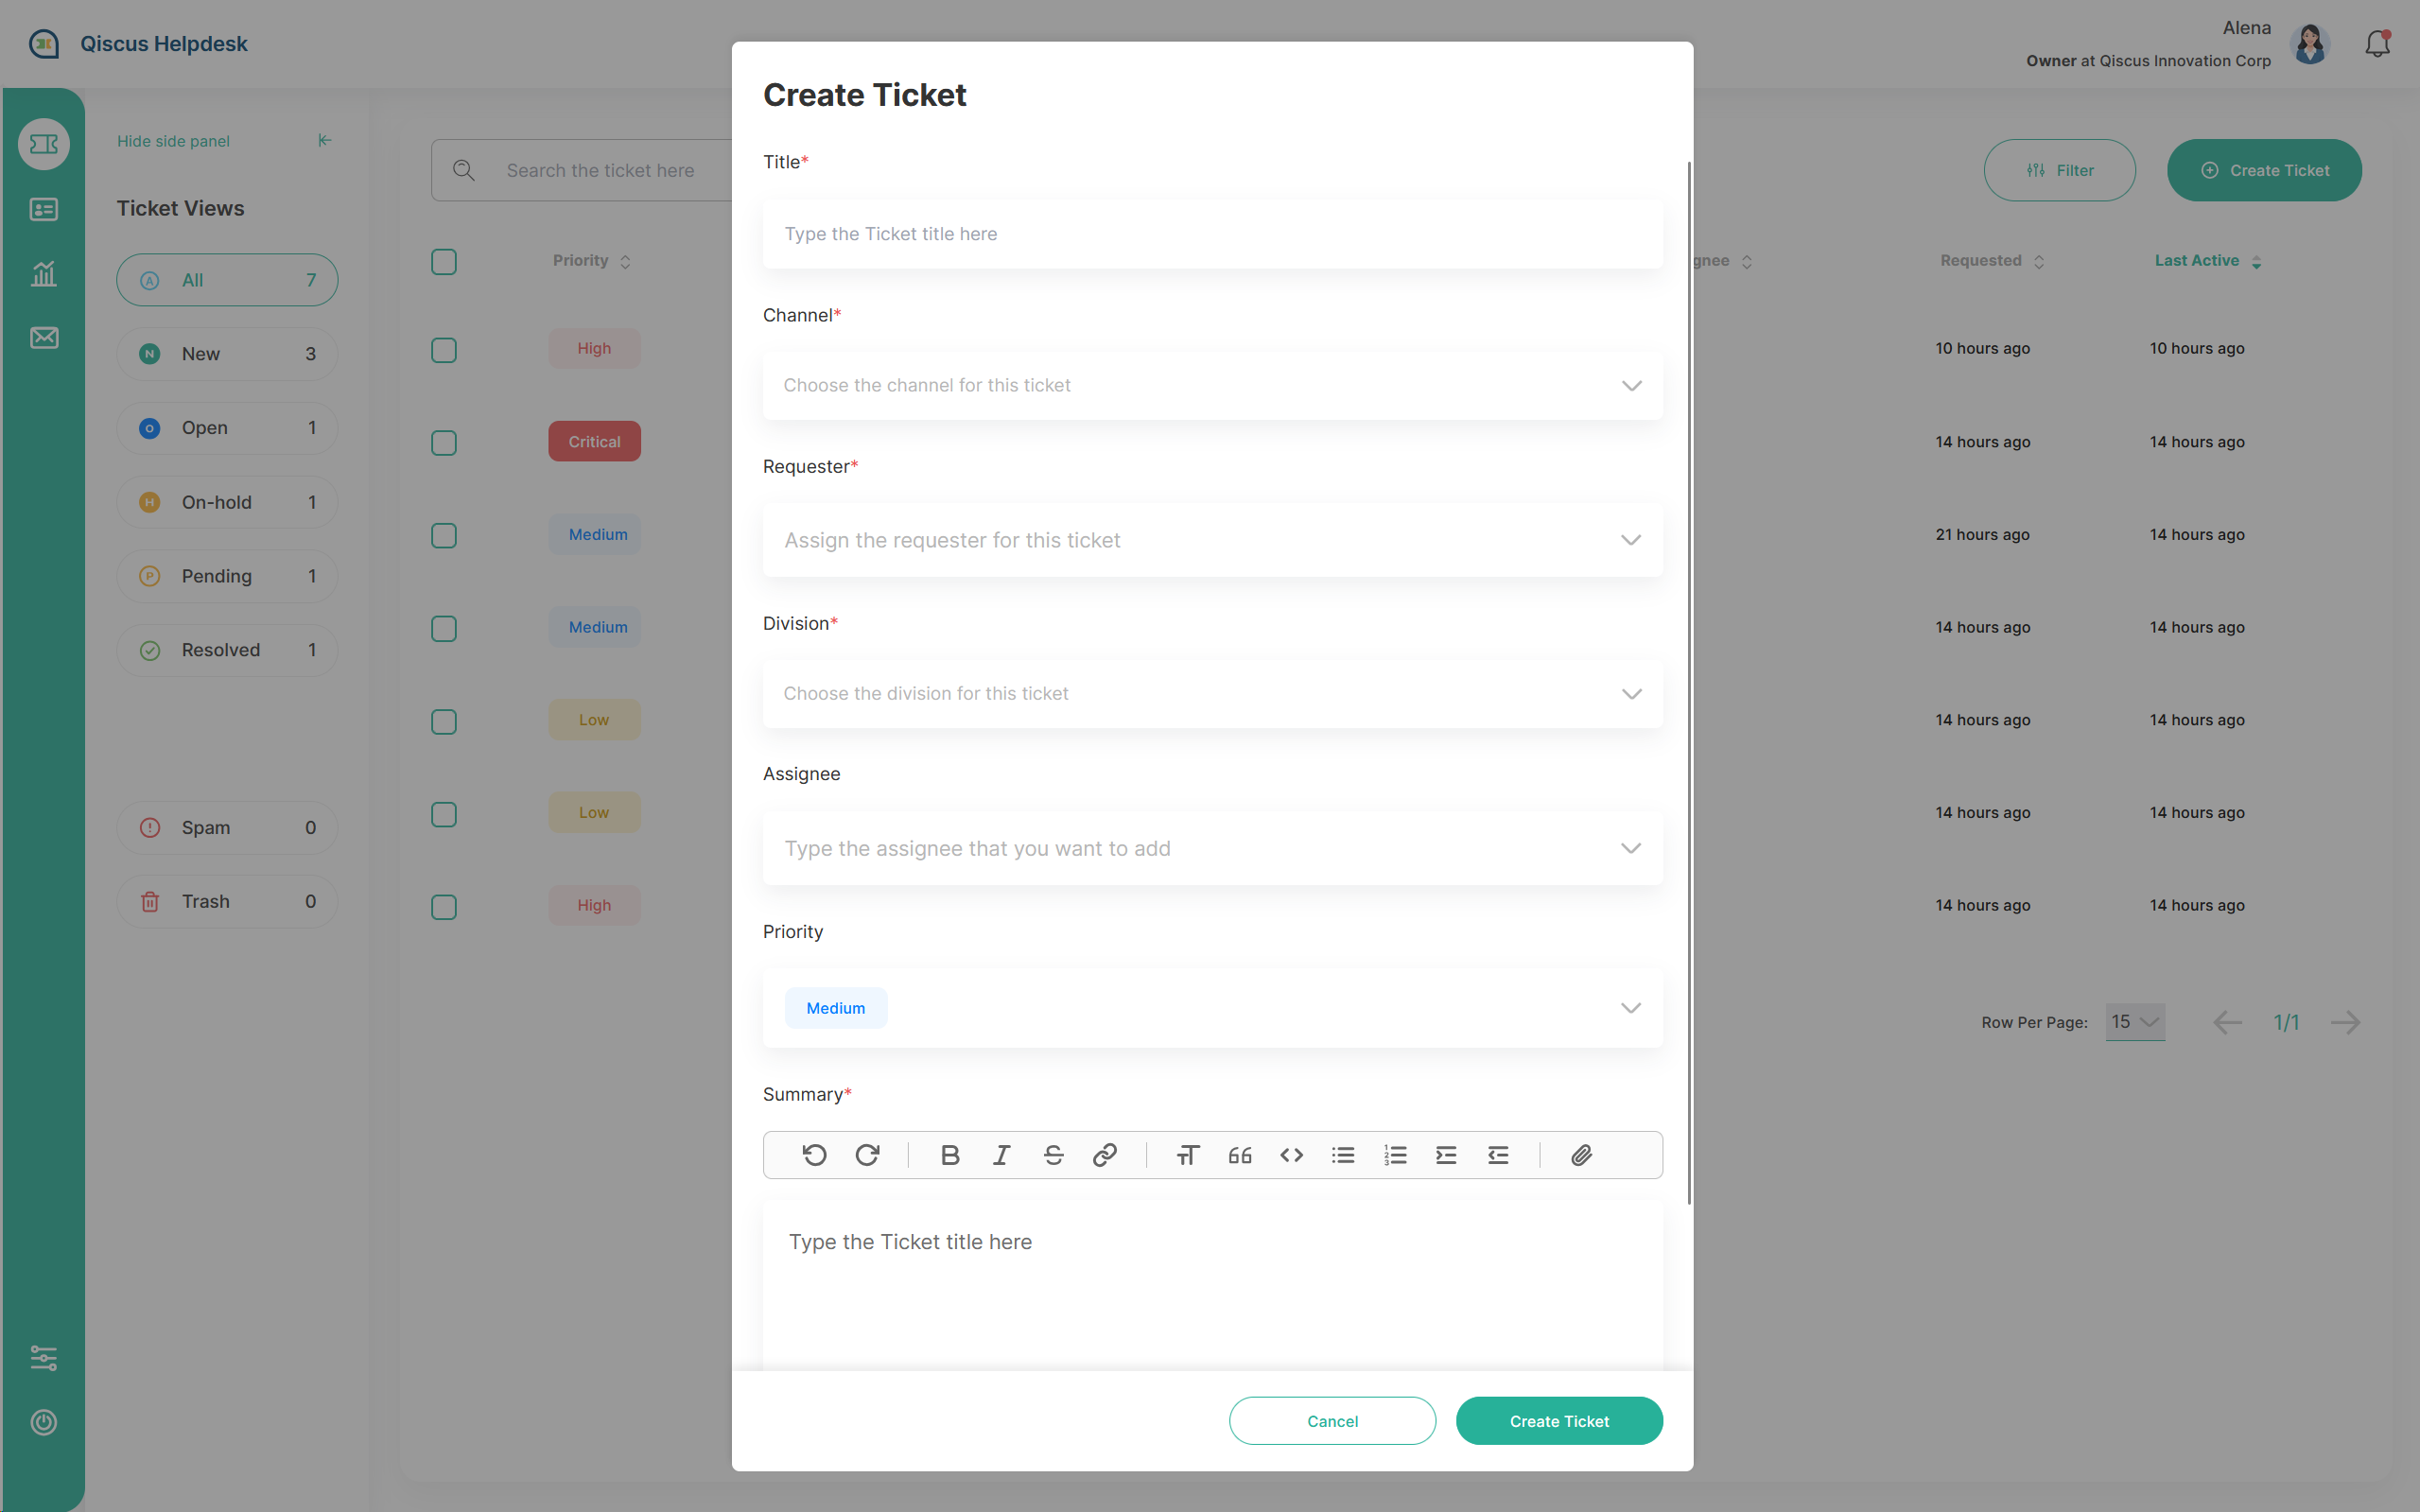
Whenever you have new cases and need to track the progress status, you can create a new ticket with create ticket button. When creating a new ticket, you must fill in the required fields. The following is a list of fields to create a new ticket, the fields marked with an asterisk (*) are required fields.
- Title* (Fill this field with the title of the ticket)
- Channel* (Fill this with the channel that you want to use)
- Requester* (Fill this with the person who requesting the ticket)
- Division* (Fill this with the division that will be assigned to handle this ticket)
- Assignee (Fill this with the agent that will be assigned to handle this ticket)
- Priority* (Fill this with the ticket priority)
- Tags (Fill this with the tag you want to use)
- Summary (Fill this with the ticket summary)
- Your custom field (There’s an option to set it as mandatory or not)
There’s three more method to create ticket in Helpdesk:
- Via Omnichannel Chat with 'Create Ticket' button
- Via configured inbound mail
- Via create ticket API (API Documentation)
- Via 'Create Ticket' button in Helpdesk tickets page
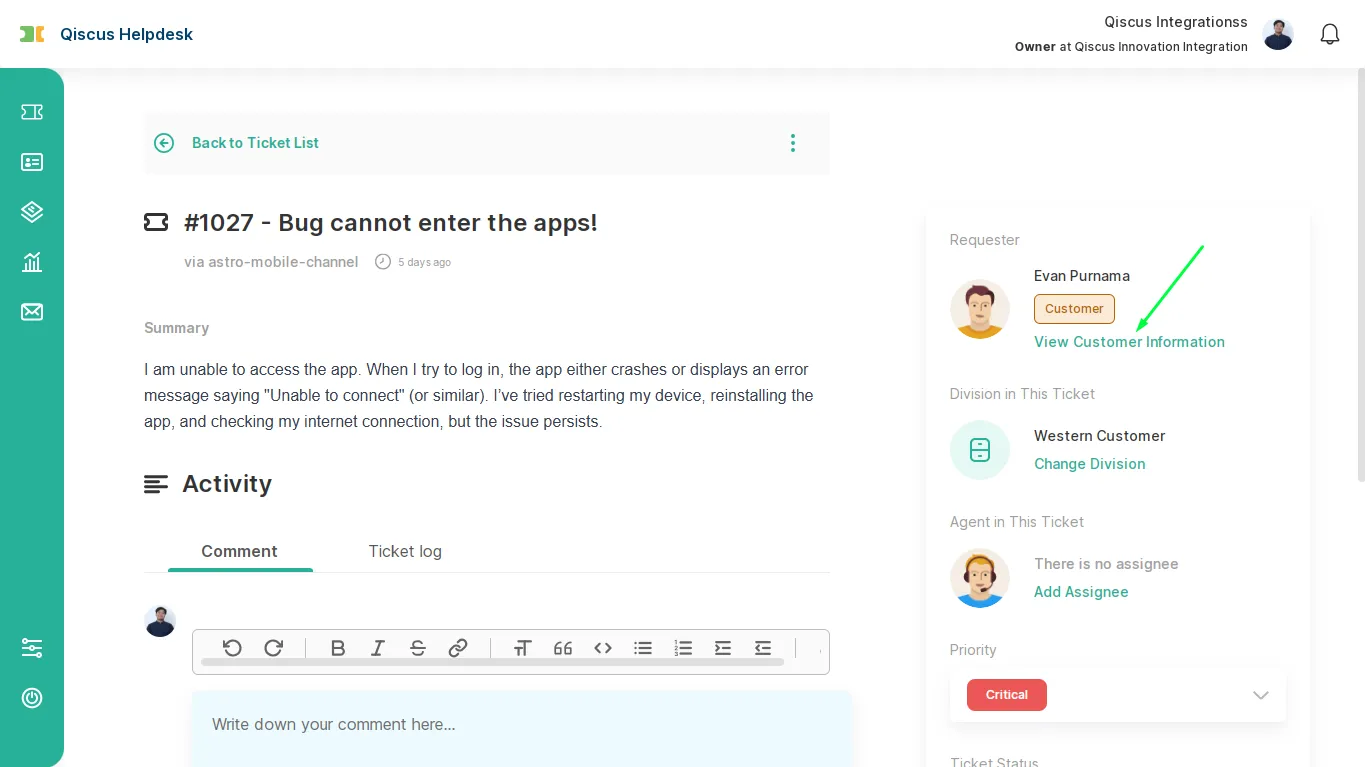
Read Detail Ticket and Change Ticket Information
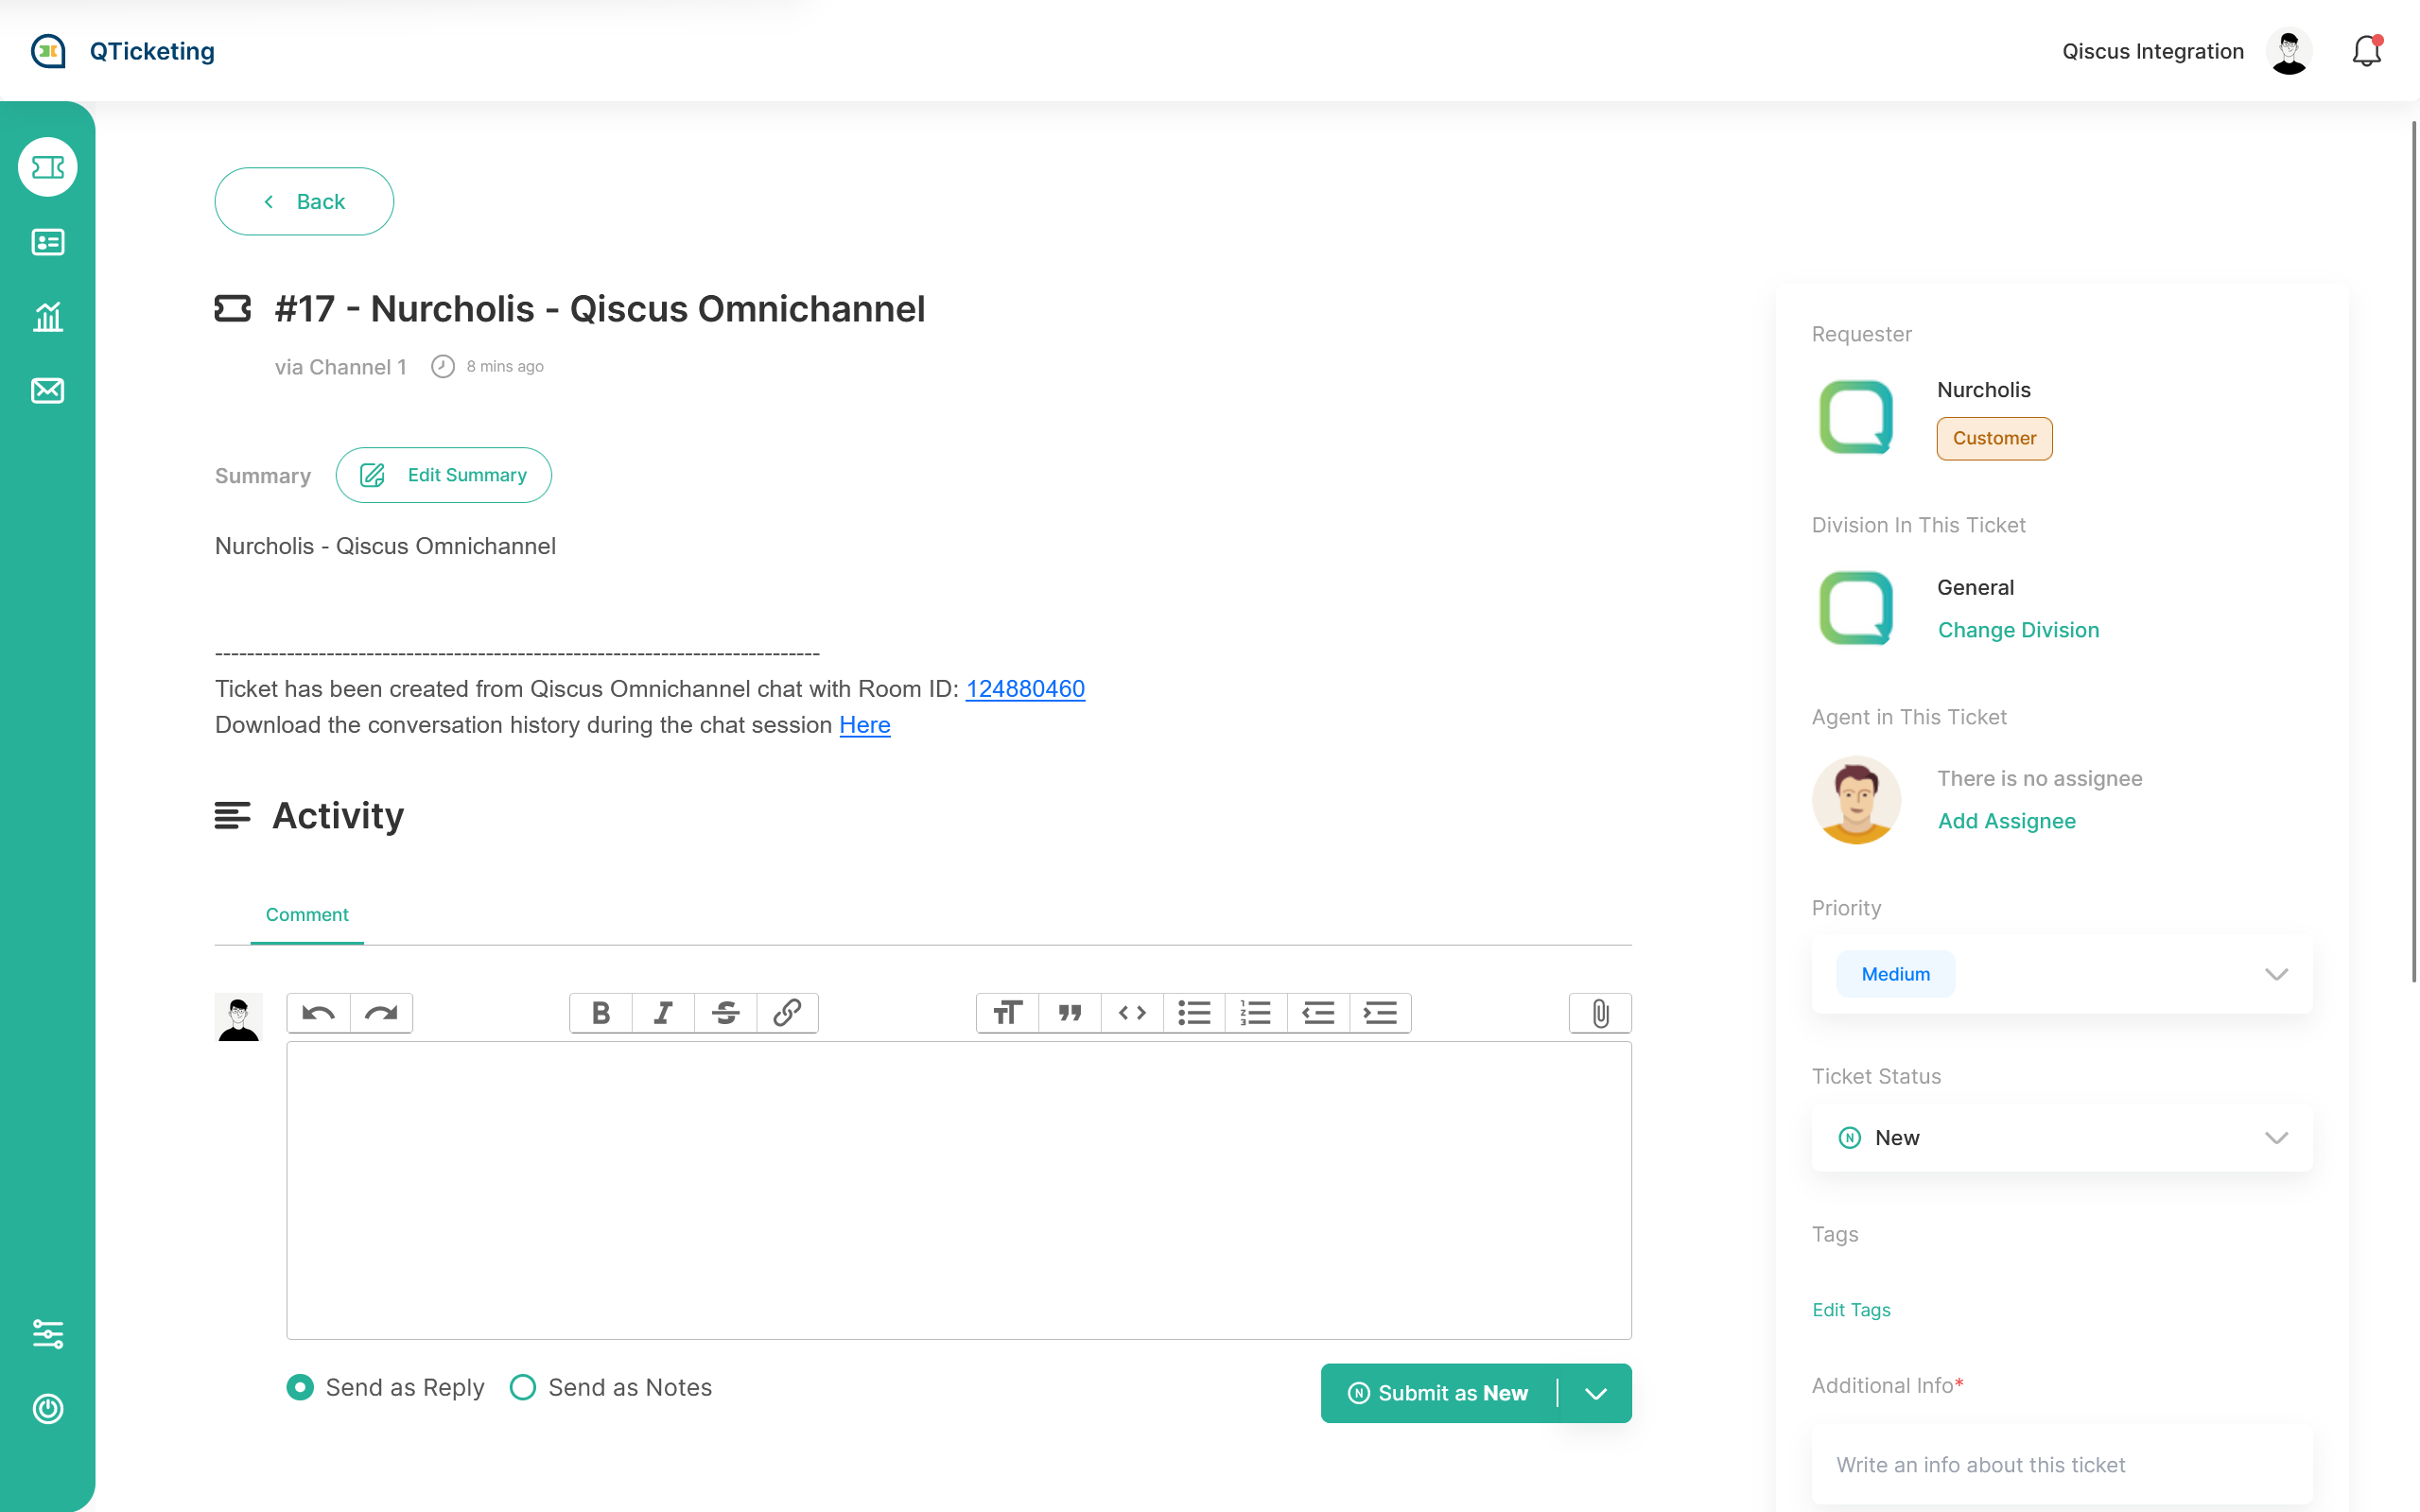
The Ticket details page is a page that makes it easier for you to learn about ticket details and everything related to ticket. Able to changes several details of ticket according to the account roles privilege.
| Action | Owner | Admin | Supervisor | Agent | |
|---|---|---|---|---|---|
| 1. | Update requester data | ✔️ | ✔️ | ✔️ | ✔️ |
| 2. | Assign to other division | ✔️ | ✔️ | ✔️ | ✖️ |
| 3. | Assign ticket to agent in division | ✔️ | ✔️ | ✔️ | Only assign to me |
| 4. | Change priority | ✔️ | ✔️ | ✔️ | ✔️ |
| 5. | Change ticket status | ✔️ | ✔️ | ✔️ | ✔️ |
| 6. | Change tag | ✔️ | ✔️ | ✔️ | ✔️ |
| 7. | Reply ticket | ✔️ | ✔️ | ✔️ | ✔️ |
| 8. | Reply ticket with internal notes | ✔️ | ✔️ | ✔️ | ✔️ |
| 9. | Reply ticket with reply template | ✔️ | ✔️ | ✔️ | ✔️ |
| 10. | Update created custom field | ✔️ | ✔️ | ✔️ | ✔️ |
| 11. | Update ticket title | ✔️ | ✔️ | ✔️ | ✔️ |
| 12. | Update ticket summary | ✔️ | ✔️ | ✔️ | ✔️ |
| 13. | Marks as spam | ✔️ | ✔️ | ✔️ | ✔️ |
| 14. | Delete ticket | ✔️ | ✔️ | ✔️ | ✔️ |
| 15. | Bulk edit in ticket list page | ✔️ | ✔️ | ✔️ | ❌ |
| 16. | Create Forward | ✔️ | ✔️ | ✔️ | ✔️ |
| 17. | Reply to forwarded thread | ✔️ | ✔️ | ✔️ | ✔️ |
| 18. | Update Ticket Follower(s) | ✔️ | ✔️ | ✔️ | ✔️ |
| 19. | Update CC’d user to reply ticket | ✔️ | ✔️ | ✔️ | ✔️ |
Let’s take a look on the image bellow to see the detail feature:
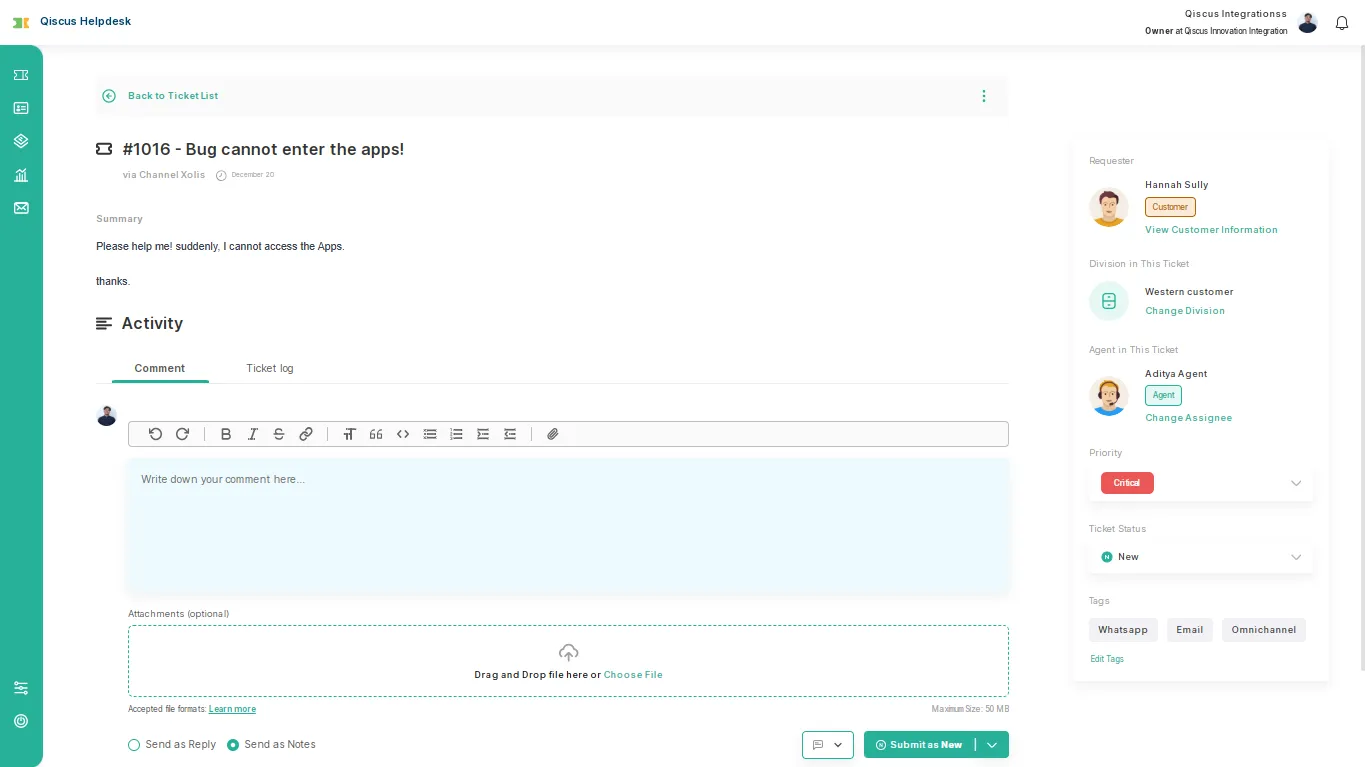
1. Update requester data
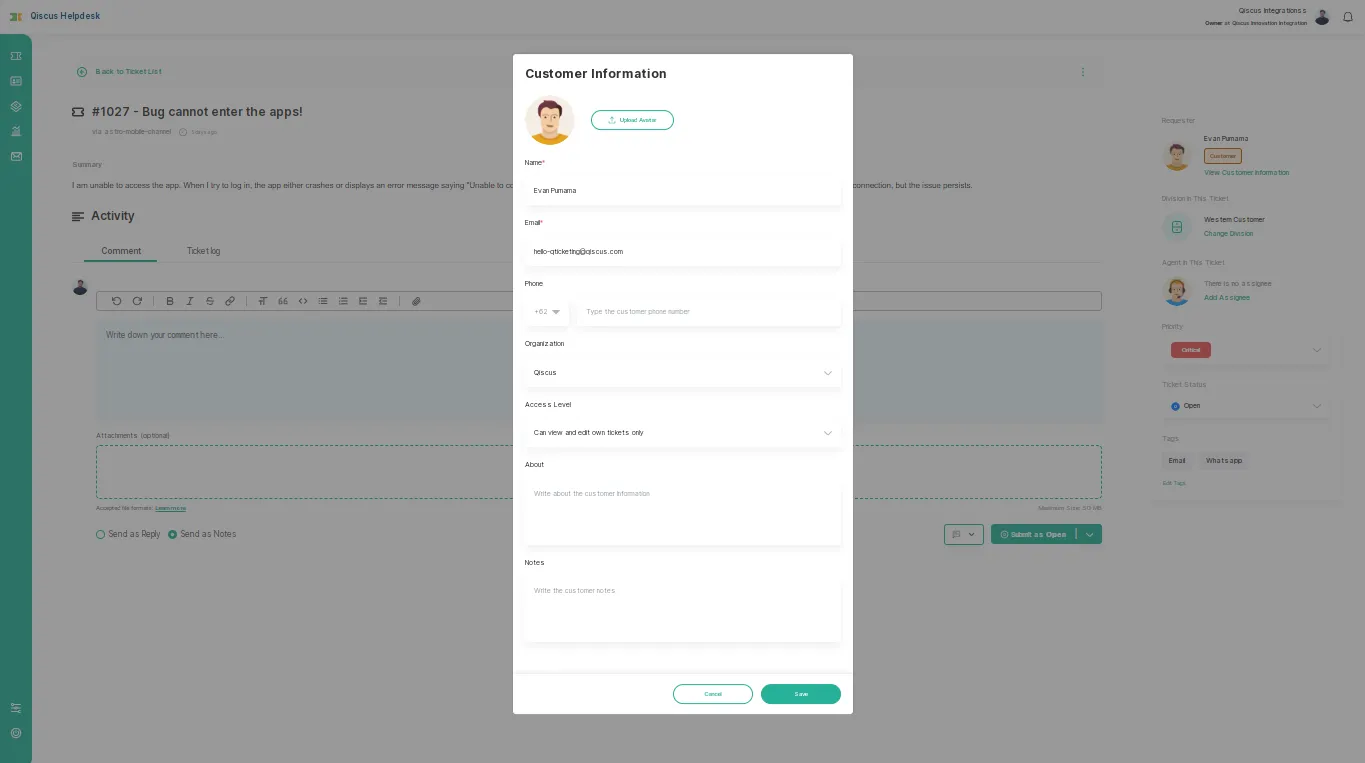
The Update Requester Data feature allows users to modify key information about a ticket’s requester directly from the ticket details page. This ensures that all necessary details about the requester are accurate and up to date, improving communication and record-keeping.
With this feature, users can update the following fields:
- Name: The requester’s full name.
- Email: The requester’s email address.
- Phone: The requester’s phone number.
- Organization: The organization to which the requester belongs.
- Access Level: The requester’s permission or access rights.
- About: Brief information or description about the requester.
- Notes: Additional notes or remarks about the requester.
This feature is essential for maintaining accurate customer records and ensuring a seamless experience for both the support team and the requester.
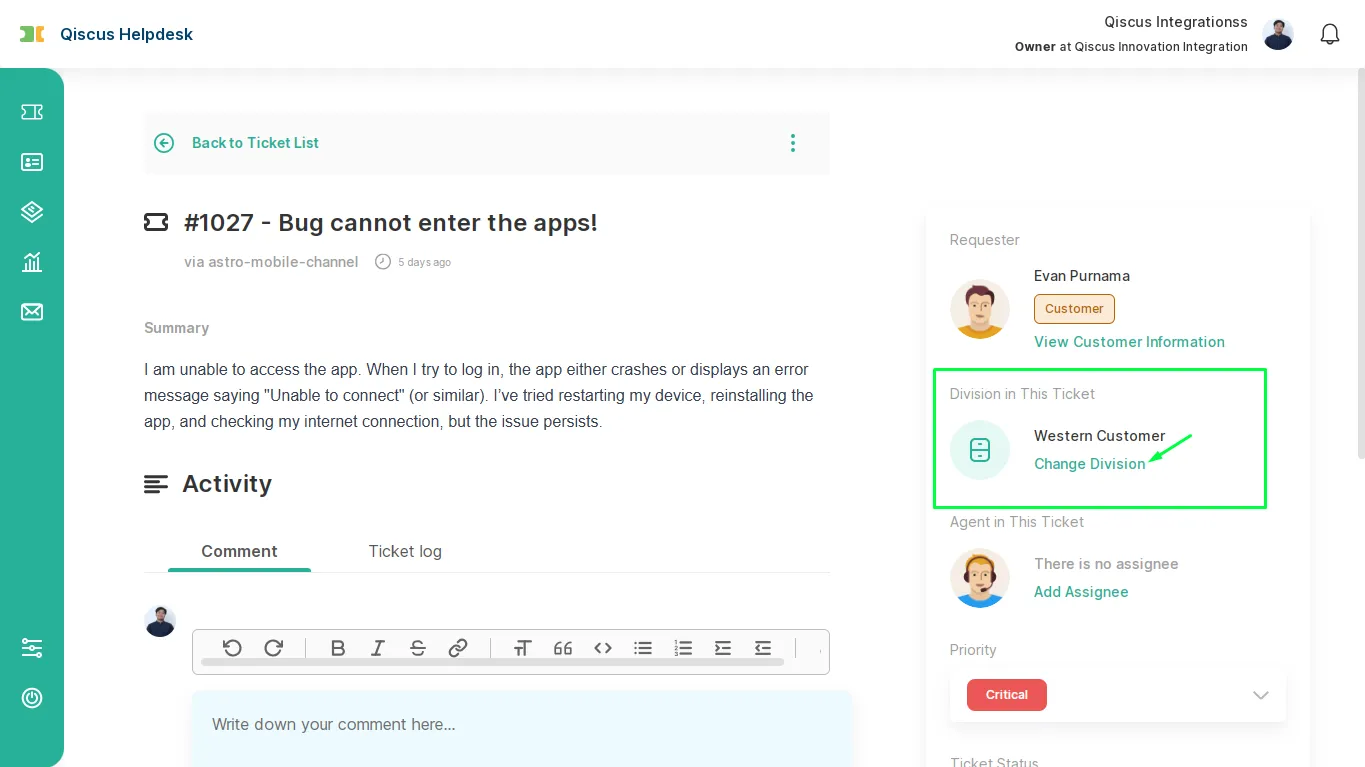
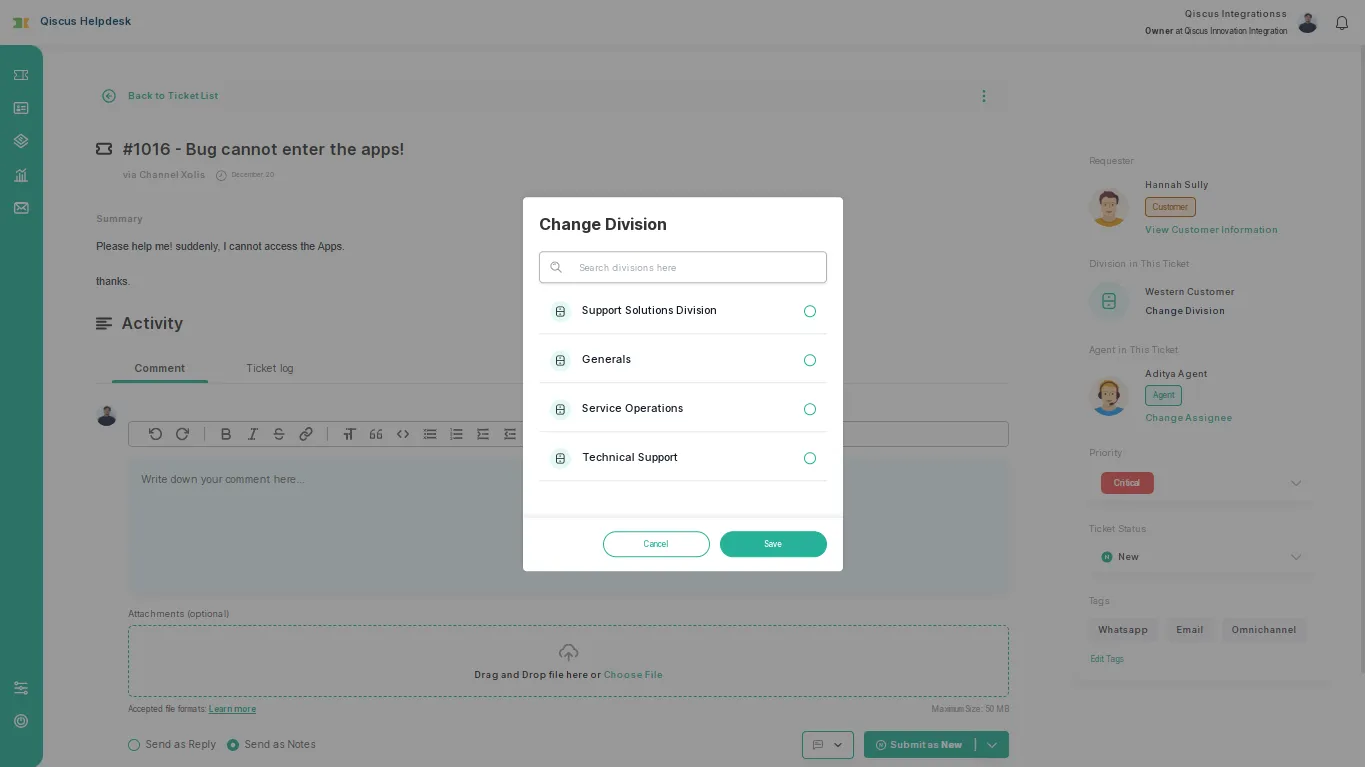
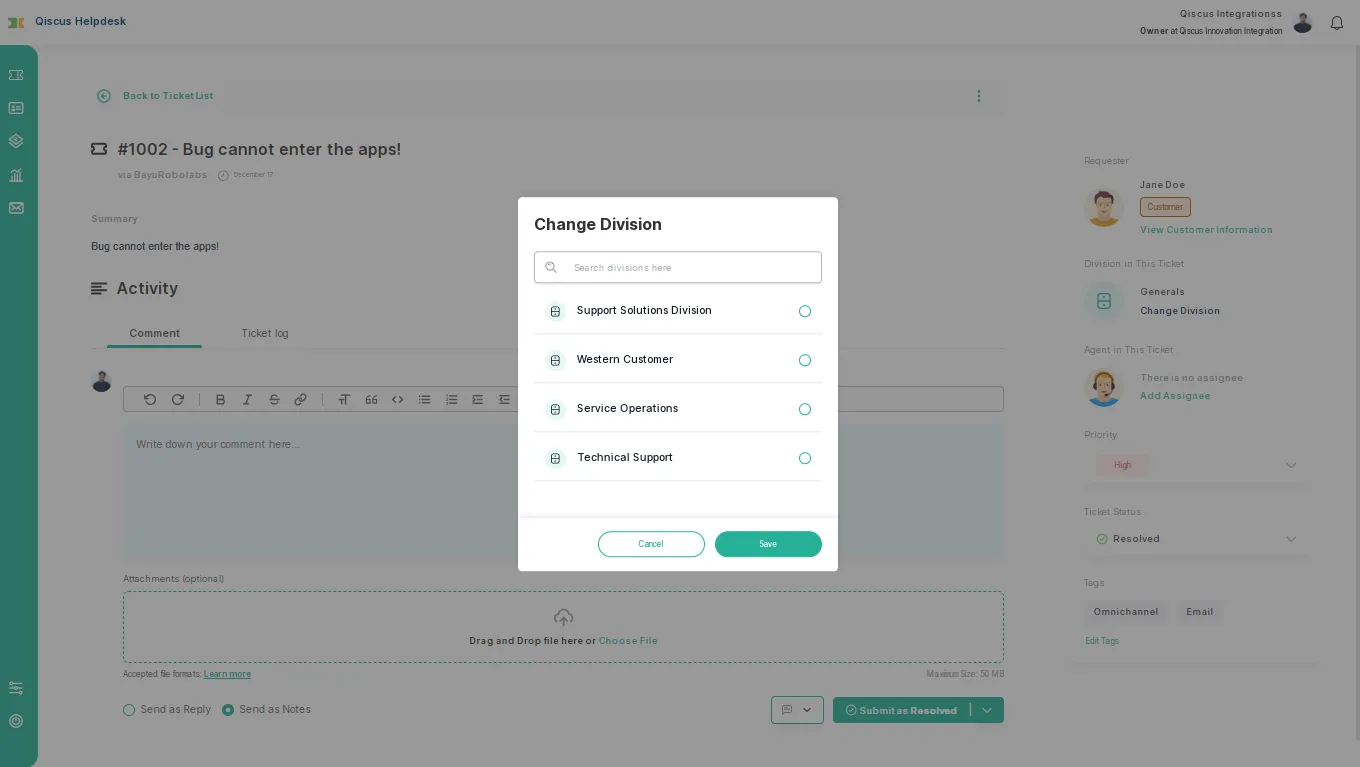
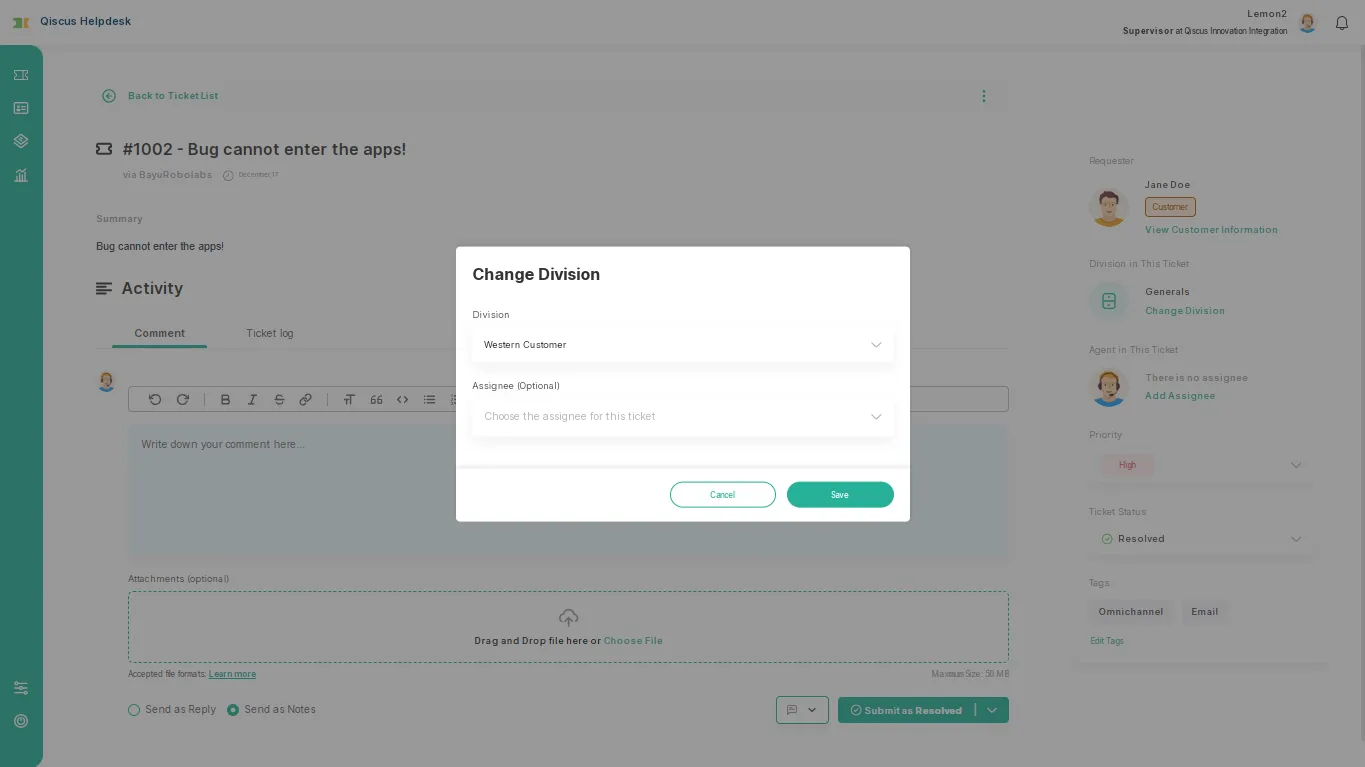
2. Assign to division
The "Assign to Division" feature enables owners, agents and supervisors to allocate tickets to specific divisions, ensuring that each ticket is handled by the most appropriate team. This improves workflow efficiency and ensures faster resolution times.
Users can directly add or update the Division in this detail ticket page. This action ensures that the ticket reaches the right team for handling based on the nature of the issue or request.
There are three handover options to manage agents' and supervisors' capabilities in handing over tickets between divisions. These settings can be managed in the Tenant options -> User access level -> Handover options within the Admin Settings. For detailed instructions, refer to the Handover Options Documentation.
Handover Options
i. Agents not allowed to handover tickets
- Agents are not allowed to hand over tickets under any circumstances.
- Supervisors can only move tickets within their own division.
- Admins have full privileges to move tickets across divisions.
Owner's view
Supervisor’s view and Agent’s view
ii. Can only handover tickets within own division
- Agents can only move tickets to other agents within the same division.
- Supervisors can move tickets only within their division.
- Admins retain the right to move tickets across divisions.
Owner's view
Supervisor’s view and Agent’s view

iii. Can handover tickets to own and other divisions
- Agents and supervisors can hand over tickets to agents either within their own division or to other divisions.
- Admins continue to have full access to move tickets between divisions.
Owner’s view

Supervisor’s view and Agent’s view
3. Assign ticket to agent in division
Admins have the privilege to delegate agents to each existing division. Meanwhile, supervisors can assign agents within their own divisions, and agents can hand over tickets to other agents.
Owner's view, Admin’s view and Supervisor’s view
Agent’s view
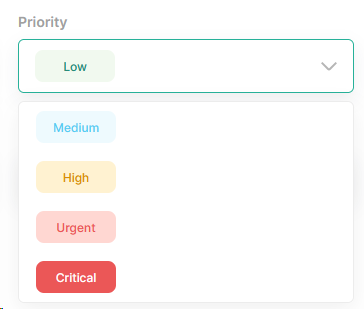
4. Change Ticket Priority
There’s 4 predefined ticket priority level in Qiscus Helpdesk.
- Critical – use this for tickets that must be resolved immediately due to severe impact.
- Urgent – use this for tickets that require rapid attention, but are not at the “critical” severity level.
- High – use this for tickets that must be resolved by today.
- Medium – use this for tickets that can be resolved within a longer timeframe.
- Low – use this for tickets with low impact where it is acceptable to handle them later.
By default, if there is a new priority ticket, it will immediately enter the Medium level.
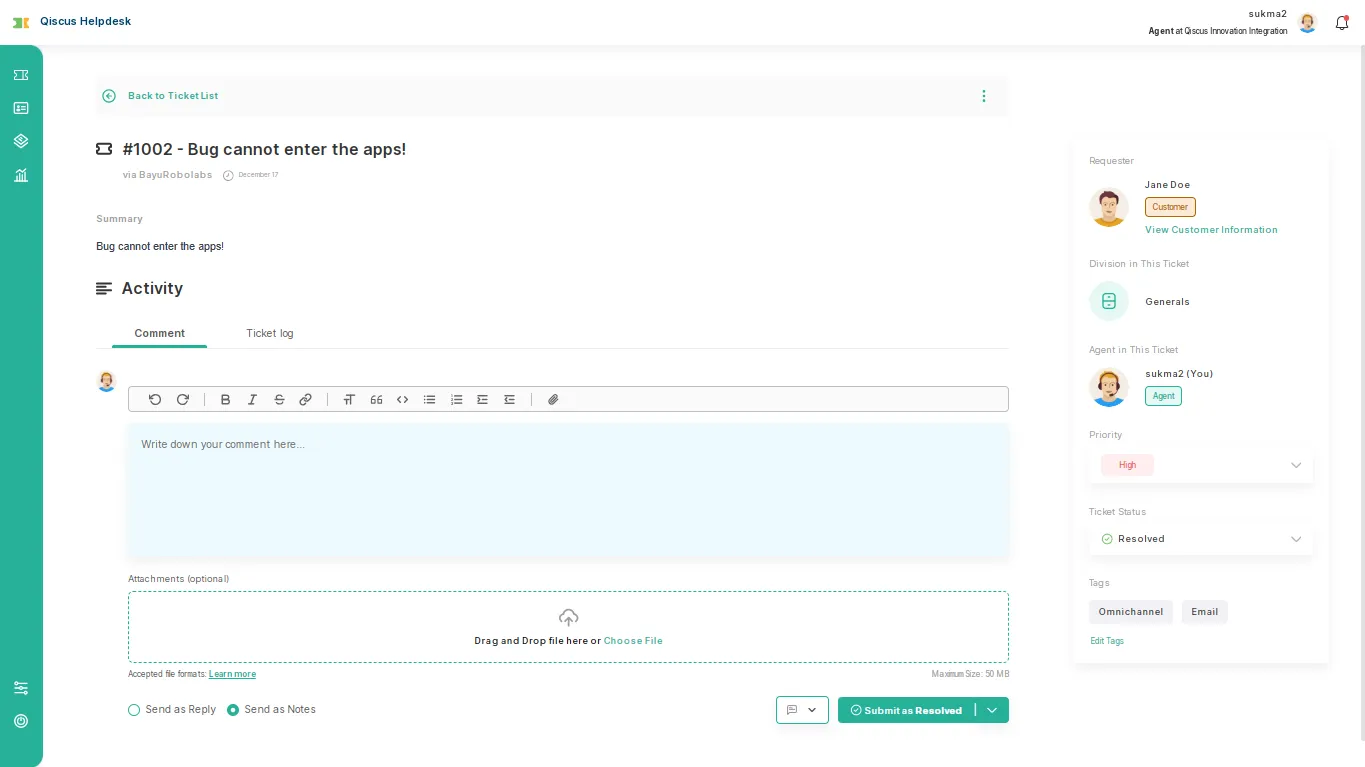
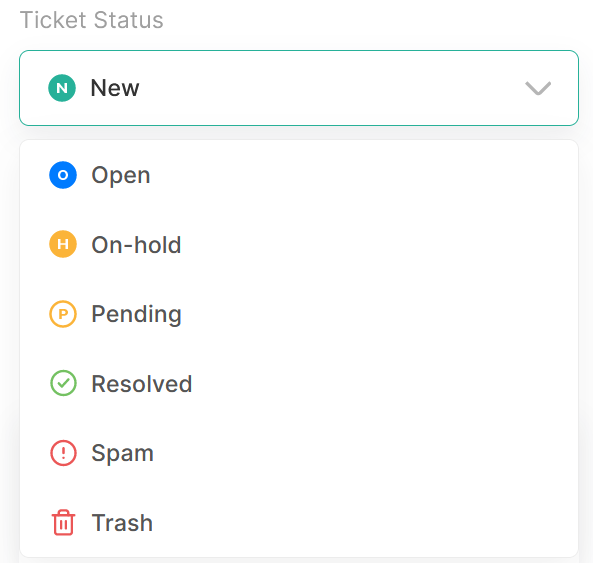
5. Ticket Status
Ticket status are categorized as several category bellow:
- New - Status that can be the default value for any new created ticket.
- Open - Status that can be used for a ticket that already handled but need more action to resolve.
- On-Hold - Status that can be used for a ticket that needed to be checked with another internal team.
- Pending - Status that can be used for a ticket that due to lack of information from the requester.
- Resolved - Status that can be used for a ticket that already solved.
- Spam - Status that can be used for a ticket which have irrelevant or have inappropriate content.
- Delete - Status that can be used for a ticket that you don’t want to see again and will be moved to trash view.
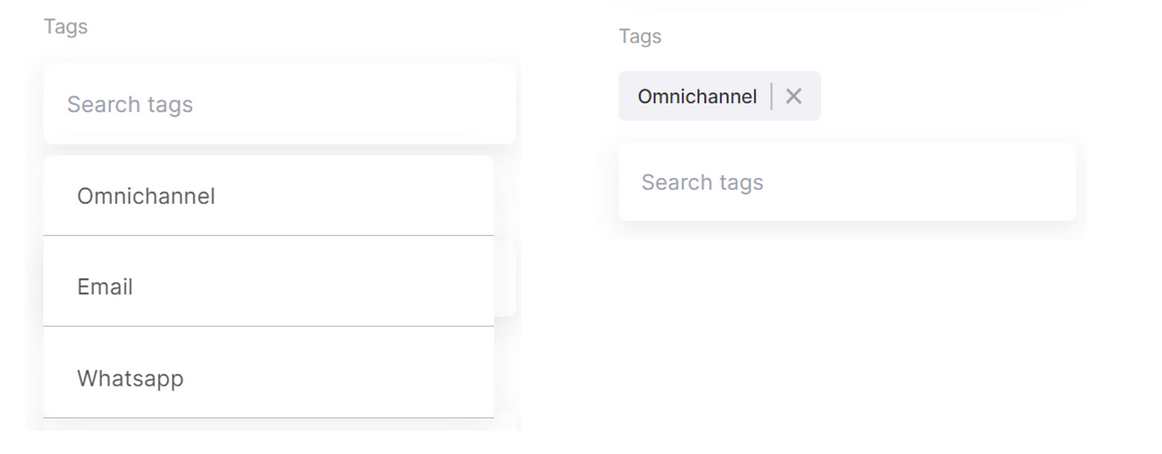
6. Tag
Ticket tag are a tagging system to marking certain ticket are marked as specific tag value or not. The tag value are predefined by Admin. You can using it to create custom analytics regarding how many ticket have specific tag in certain period or also able to be used for categorizing ticket so you can using it on filter ticket feature.
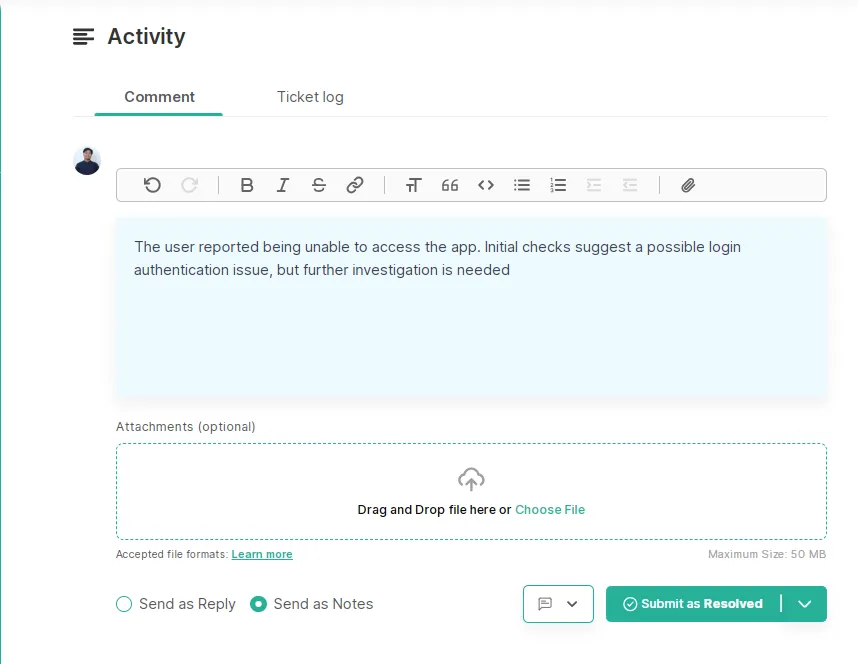
7. Reply Ticket
You can reply created ticket with an email replies for a ticket that has been created with channel that linked with email or just reply to comment section for the unlinked one.
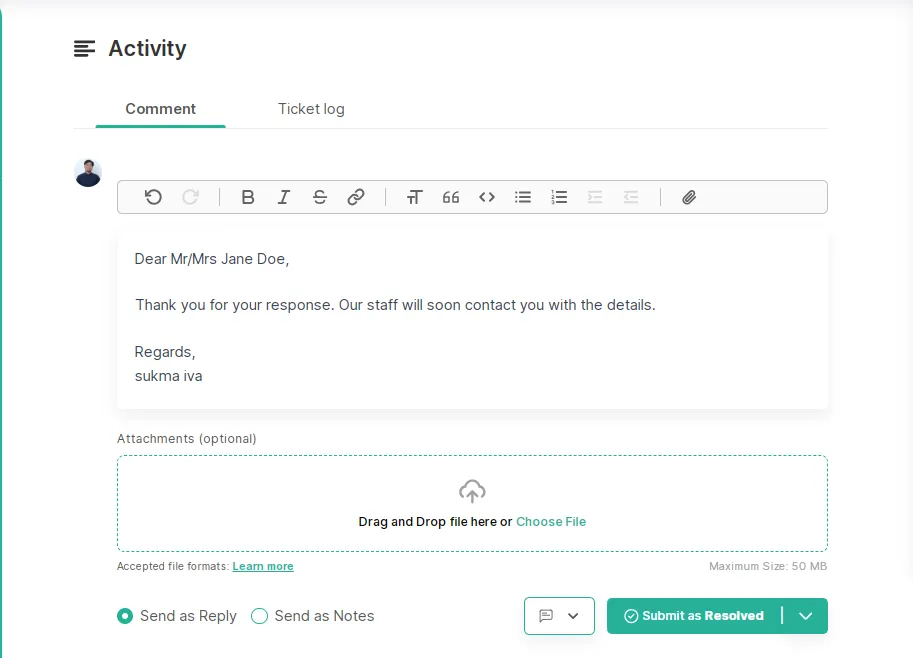
8. Reply Ticket as Internal notes
Reply ticket as internal notes will make the comment/replies are only visible to internal user. It means that this ticket has been created with channel that linked with email will make customer not receiving the comments since it was purposed only for internal.
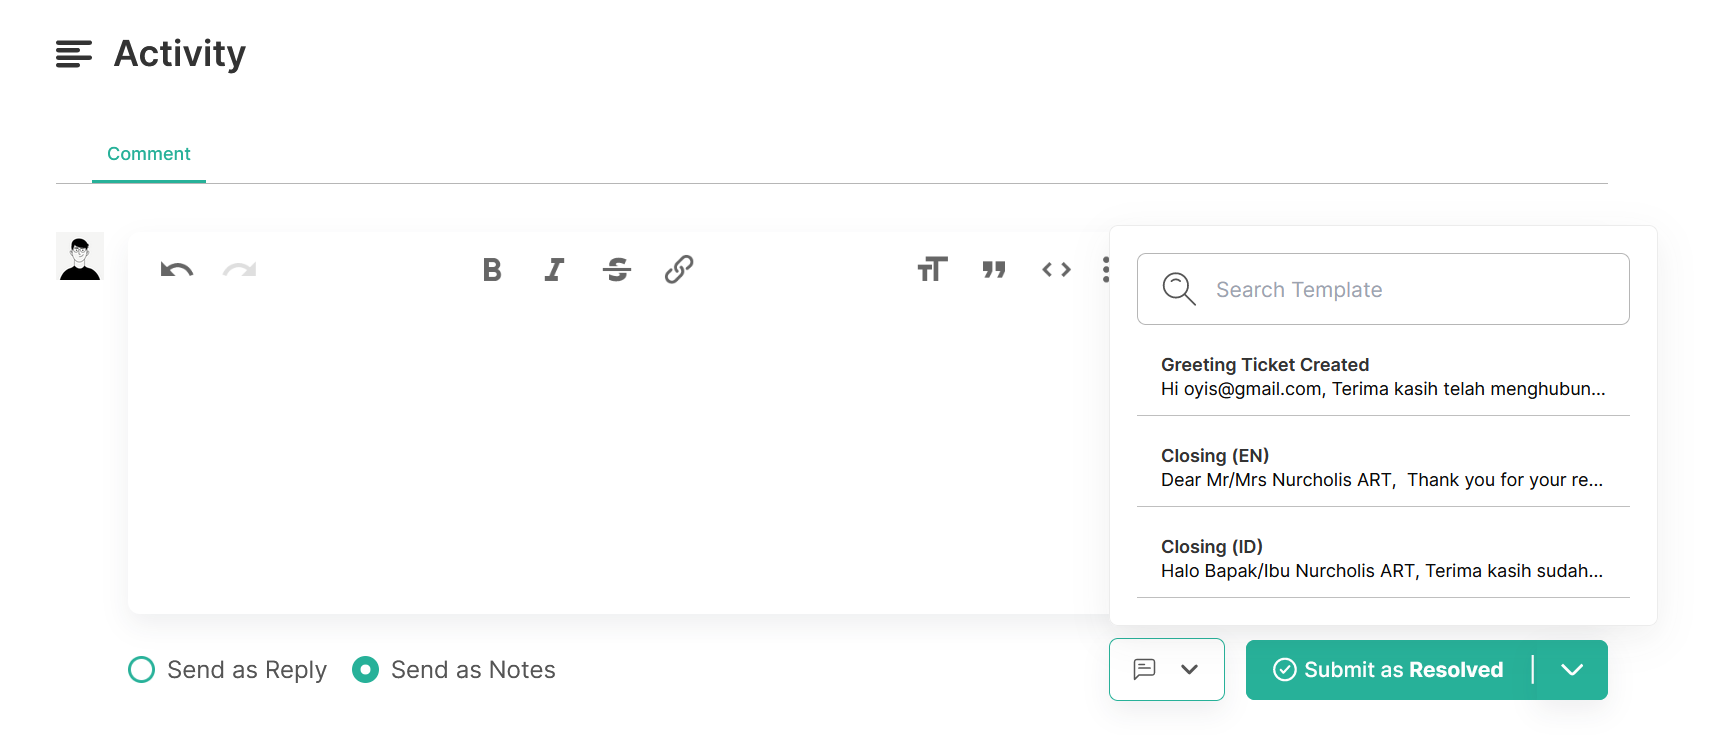
9. Reply ticket with reply template
A reply template is a feature to give user response with predefined template. The template can have a placeholder variable that will be replaced with the relevant value according the ticket's data. There's several data placeholder that can be used in Reply Template like:
- Current logged in user mail
- Current logged in user name
- Ticket ID
- Ticket title
- Ticket priority
- Ticket status
- Ticket assignee mail
- Ticket assignee name
- Ticket requester mail
- Ticket requester name
- Ticket requester organization name
- Ticket requester phone
Qiscus Helpdesk user who can create the template are only Admin and Owner. They can create reply template for specific listed division in order to make it more private.
Each user who joined in the division can using the Reply Template that assigned to their division during responding customer.
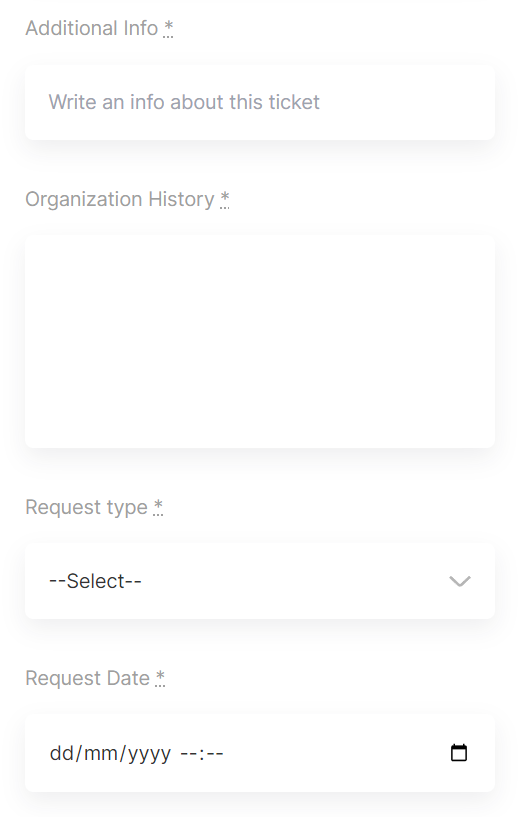
10. Update custom field
Update the custom field according to their type. there’s no save button so the data will be saved automatically.
a. Text
b. Text Area
c. Select/Dropdown
d. Date
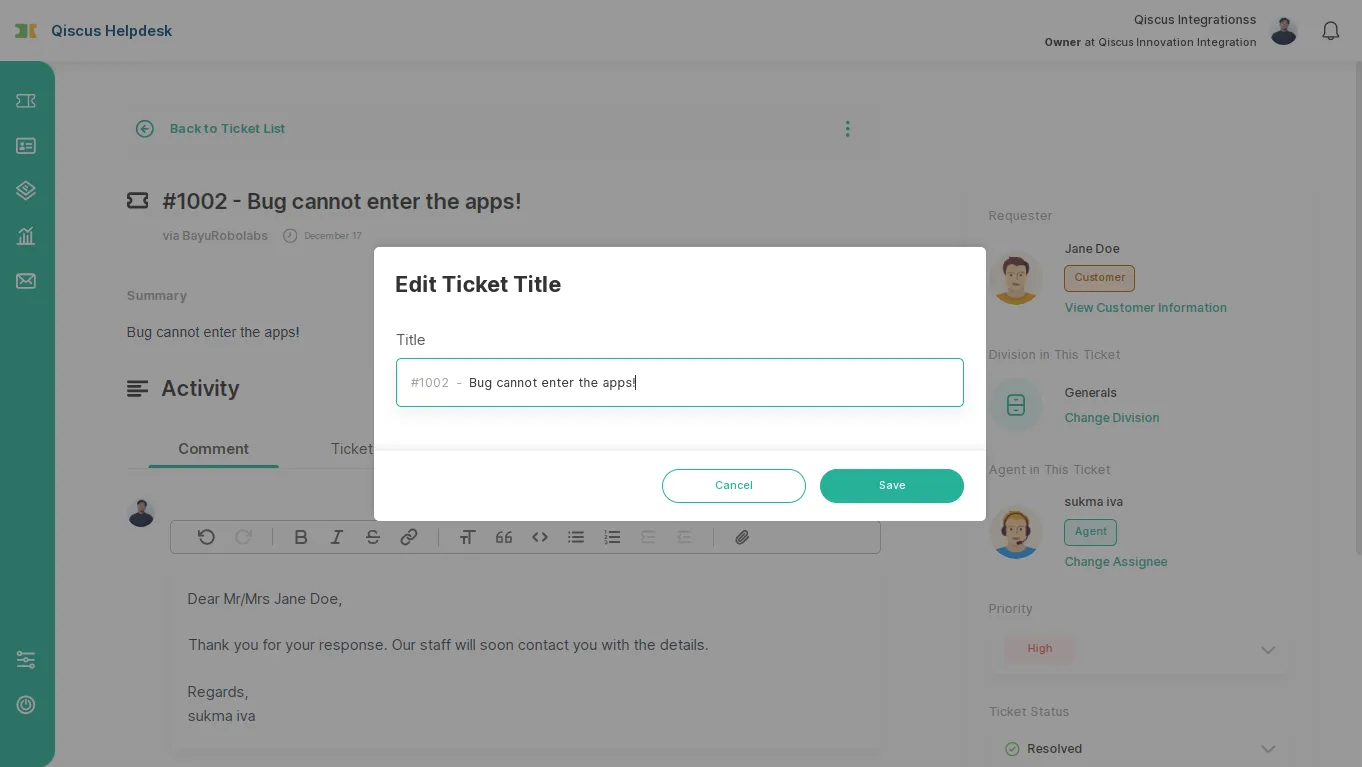
11.Edit Ticket Title
This feature allows users to modify the ticket title to make it more descriptive and relevant to the ticket's context.
Steps to Use
- Open the ticket you want to rename.
- Click the kebab menu (three vertical dots icon) in the top-right corner of the ticket.
- Select Edit Ticket Title.
- Enter the new title in the provided field.
- Click the Save button to apply the changes.
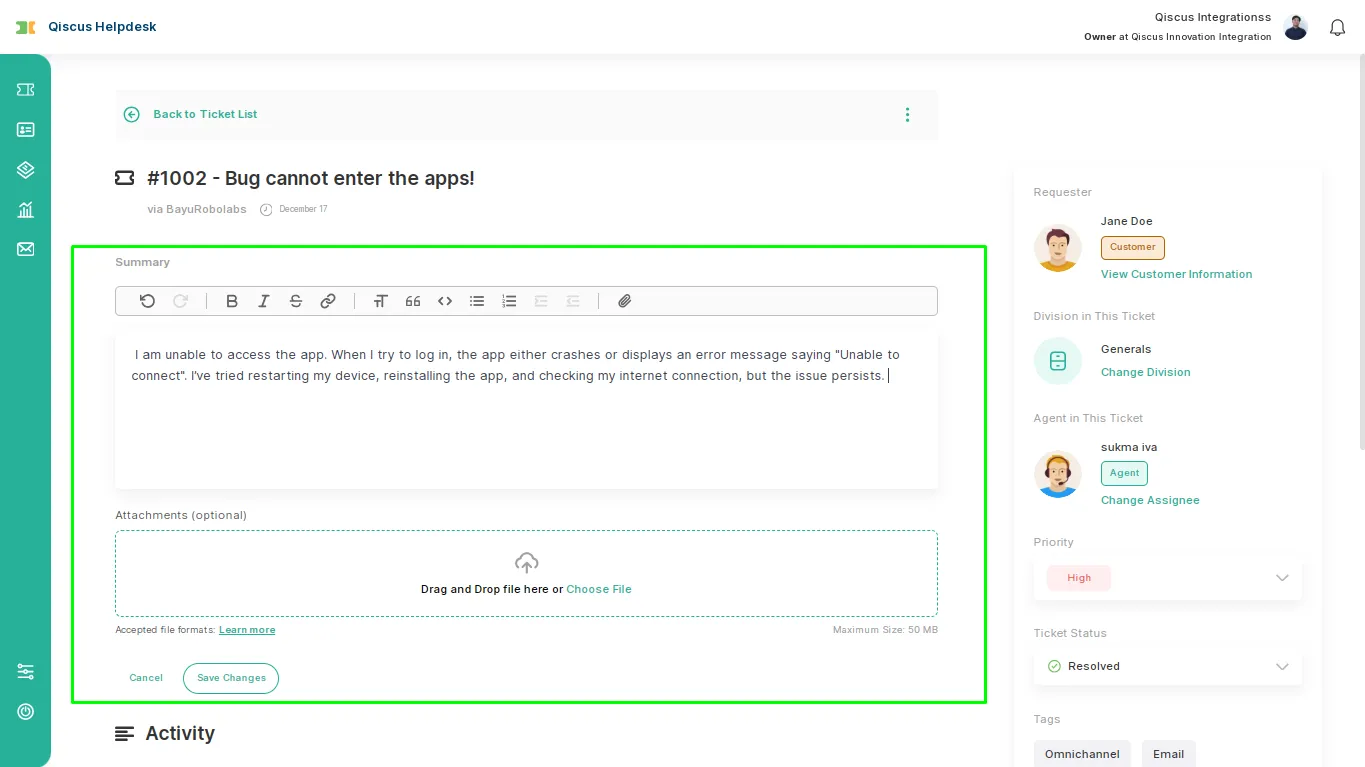
12.Edit Ticket Summary
This feature allows users to update the ticket summary to reflect the latest and most relevant information.
Steps to Use
- Open the ticket you want to update.
- Click the kebab menu (three vertical dots icon) in the top-right corner of the ticket.
- Select Edit Ticket Summary.
- Enter the updated information in the summary field.
- Click the Save button to apply the changes.
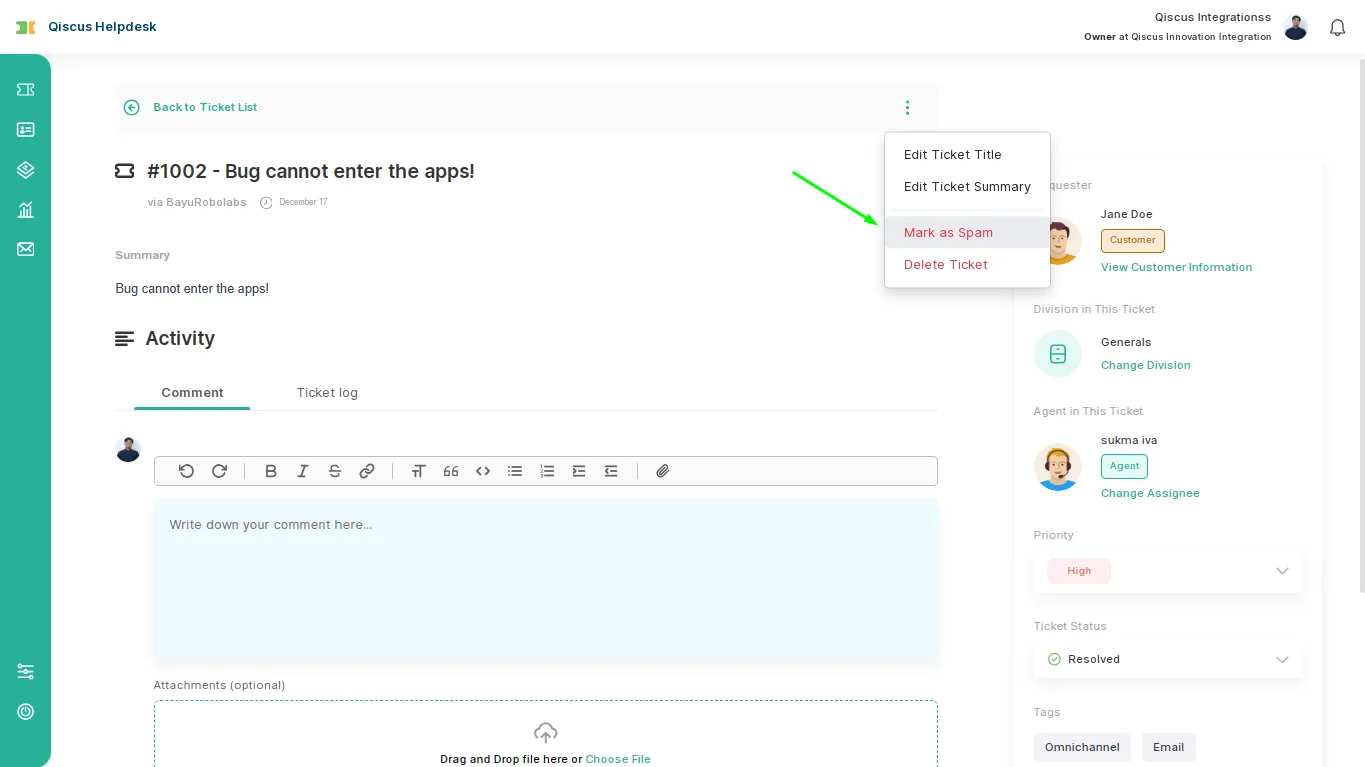
13.Marks as Spam
This feature allows users to classify a ticket as spam, helping to filter out irrelevant or unwanted tickets.
Steps to Use
- Open the ticket you want to mark as spam.
- Click the kebab menu (three vertical dots icon) in the top-right corner of the ticket.
- Select Mark as Spam.
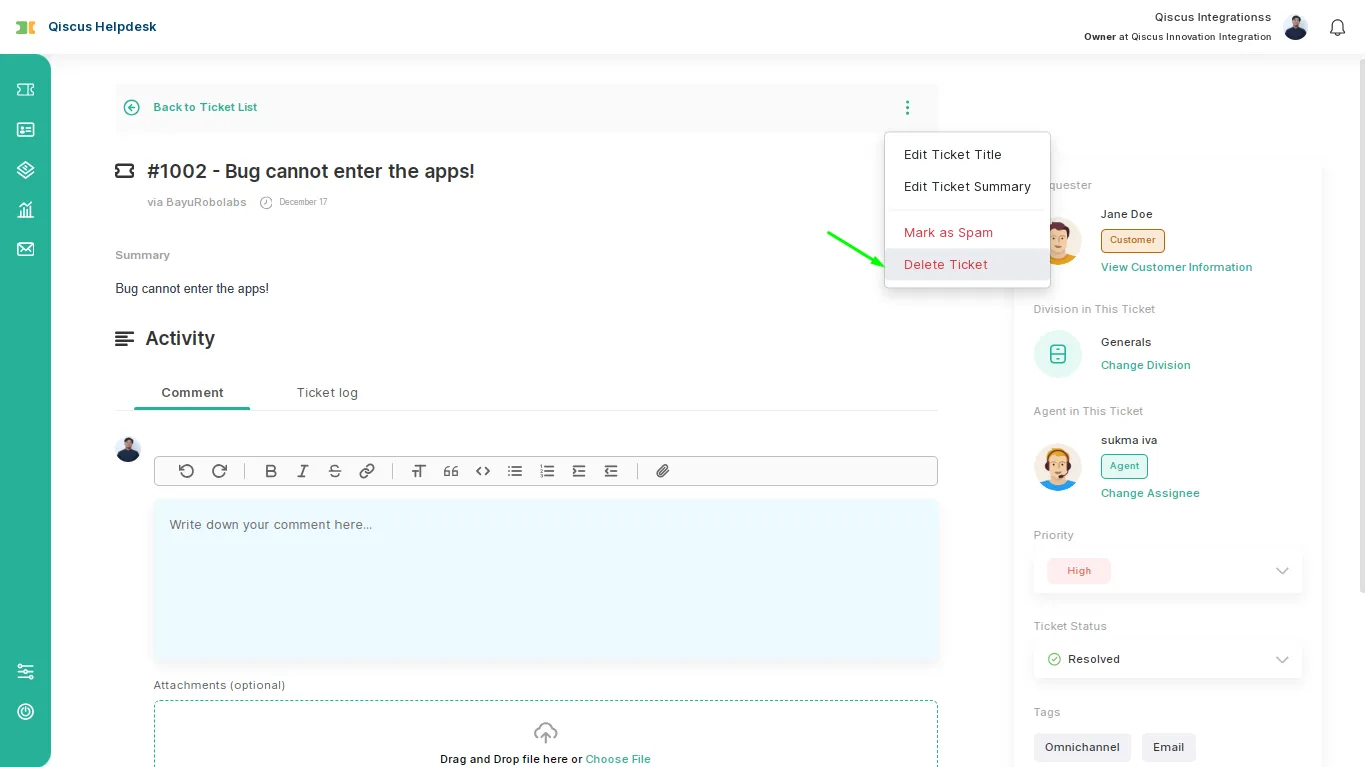
14.Delete Ticket
This feature allows users to delete a ticket. Deleted tickets will be moved to the trash and can be restored if needed.
Steps to Use
- Open the ticket you want to delete.
- Click the kebab menu (three vertical dots icon) in the top-right corner of the ticket.
- Select Delete Ticket.
Ticket History
The Ticket History feature records and displays all changes made to a ticket, ensuring transparency and traceability for every update. These changes are accessible under the Ticket Log tab, located next to the Comment tab. Users can open a ticket and navigate to this tab to review the list of logged changes, including timestamps and details of each update, allowing them to track the ticket's progression efficiently.
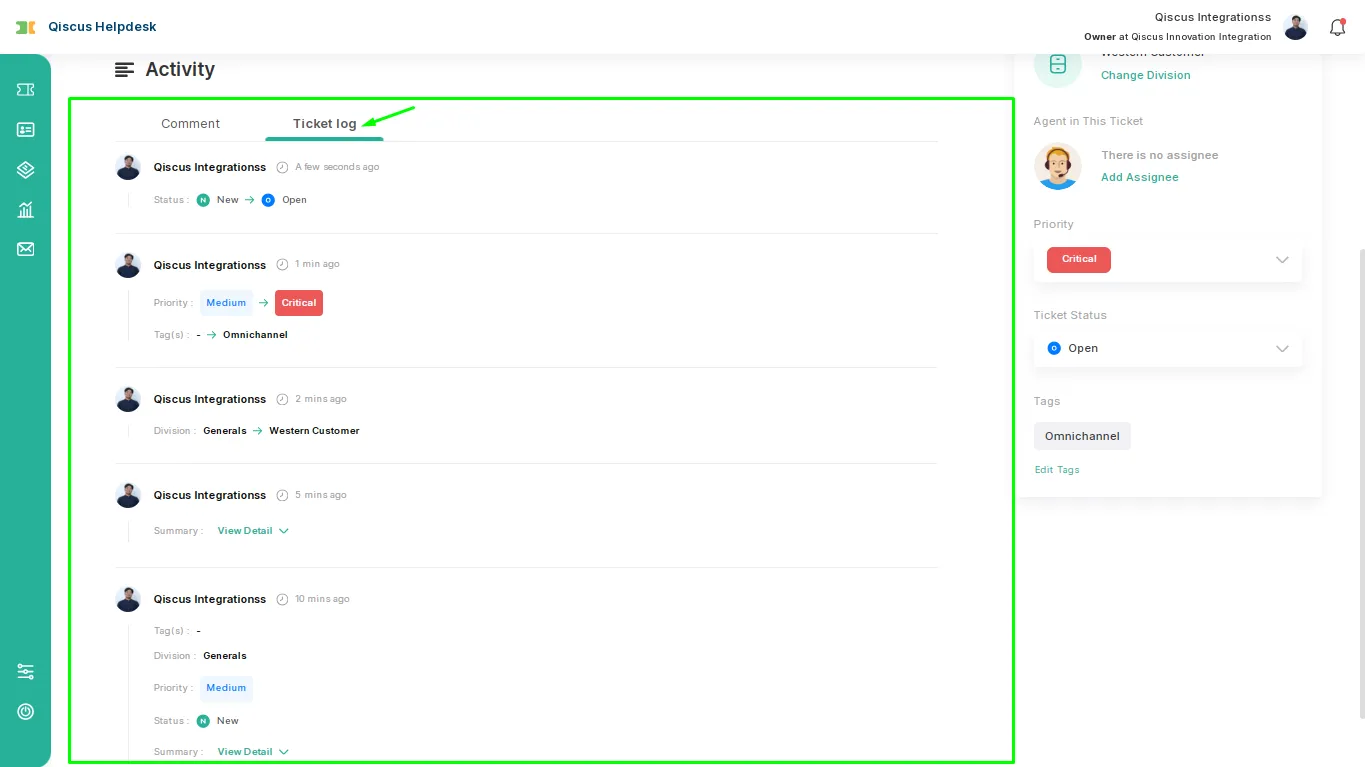
Types of Changes Tracked
| # | Types of Changes Tracked | Description |
|---|---|---|
| 1. | Ticket Status | Displays updates to the ticket's status, such as changes from "New" to "Open". |
| 2. | Ticket Priority | Tracks modifications to the ticket's priority level (e.g., from "Medium" to "Critical"). |
| 3. | Ticket Tags | Shows added or removed tags associated with the ticket. |
| 4. | Ticket Division | Records changes to the assigned division (e.g., from "Generals" to "Western Customer"). |
| 5. | Ticket Summary | Logs updates made to the ticket summary for improved details. |
| 6. | Title changes | Captures any modifications to the ticket title. |
| 7. | New replies & notes | Records all new replies or internal notes added to the ticket. |
| 8. | Ticket assignee updates | Tracks changes in ticket ownership when reassigned to a different agent. |
| 9. | Custom field changes (Short Text, Text Area, Dropdown, Datetime) | Logs updates to custom fields, including Short Text, Text Area, Dropdown, and Datetime fields. |
| 10. | Resolution Time | Measures the total time taken to resolve the ticket from creation to closure. |
| 11. | Resolution Time (excluding Pending & On-hold periods) | Tracks resolution time but excludes periods when the ticket was marked as Pending or On-hold. |
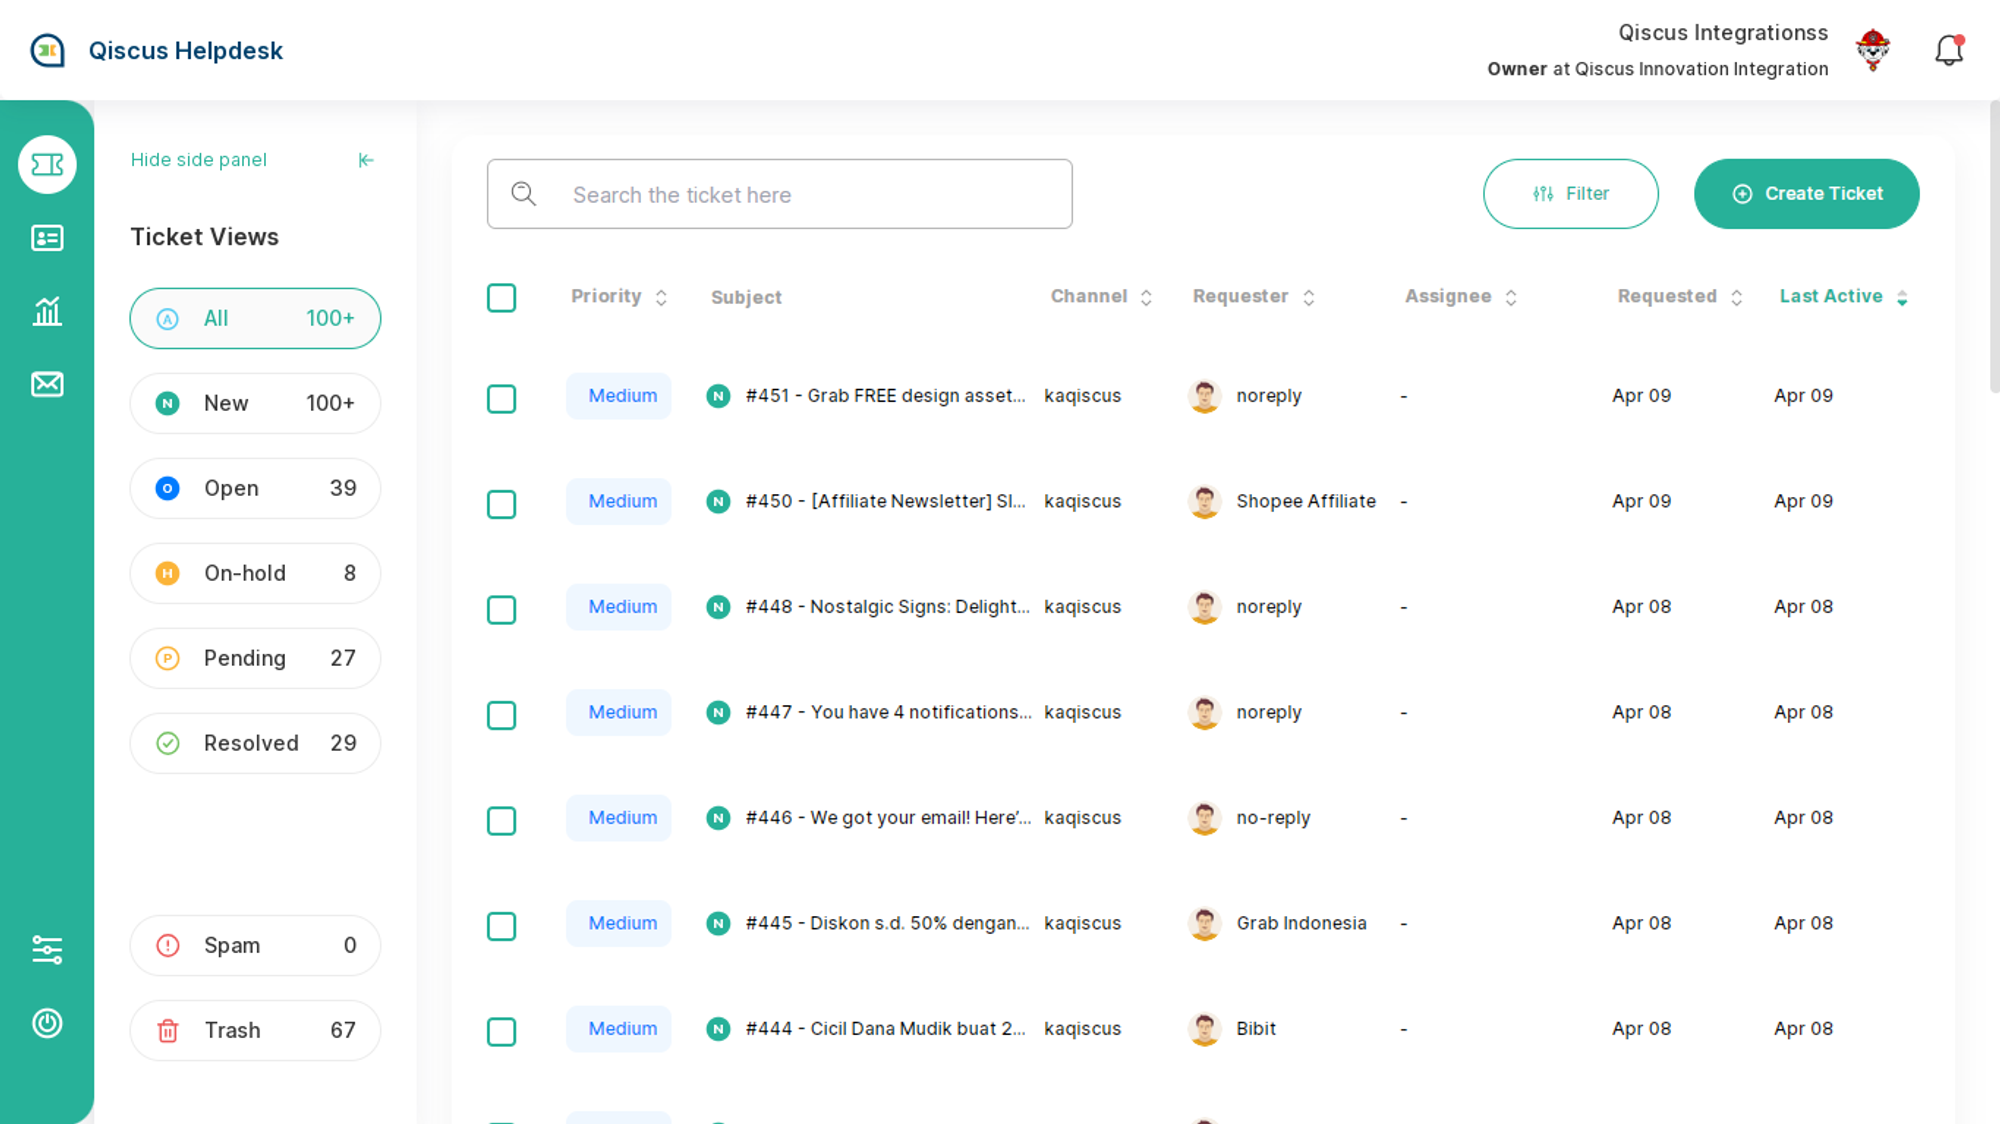
Ticket View Preset
Ticket View Preset are a feature to see preset filter view that categorized by ticket status. There’s 6 ticket view preset type:
- All - It will show all ticket status exclude spam and deleted ticket. the ticket number beside the ticket preset view name are the total of ticket with status New, Open, Pending, and Solved.
- New - It will show all ticket that have new value as the the ticket’s status
- Open - It will show all ticket that have Open value as the the ticket’s status
- Pending - It will show all ticket that have Pending value as the the ticket’s status
- Resolved - It will show all ticket that have Solved value as the the ticket’s status
- Spam - It will show all ticket that have Spam value as the the ticket’s status
- Trash - It will show all ticket that have Delete value as the the ticket’s status
Ticket Filtering and Bulk Edit
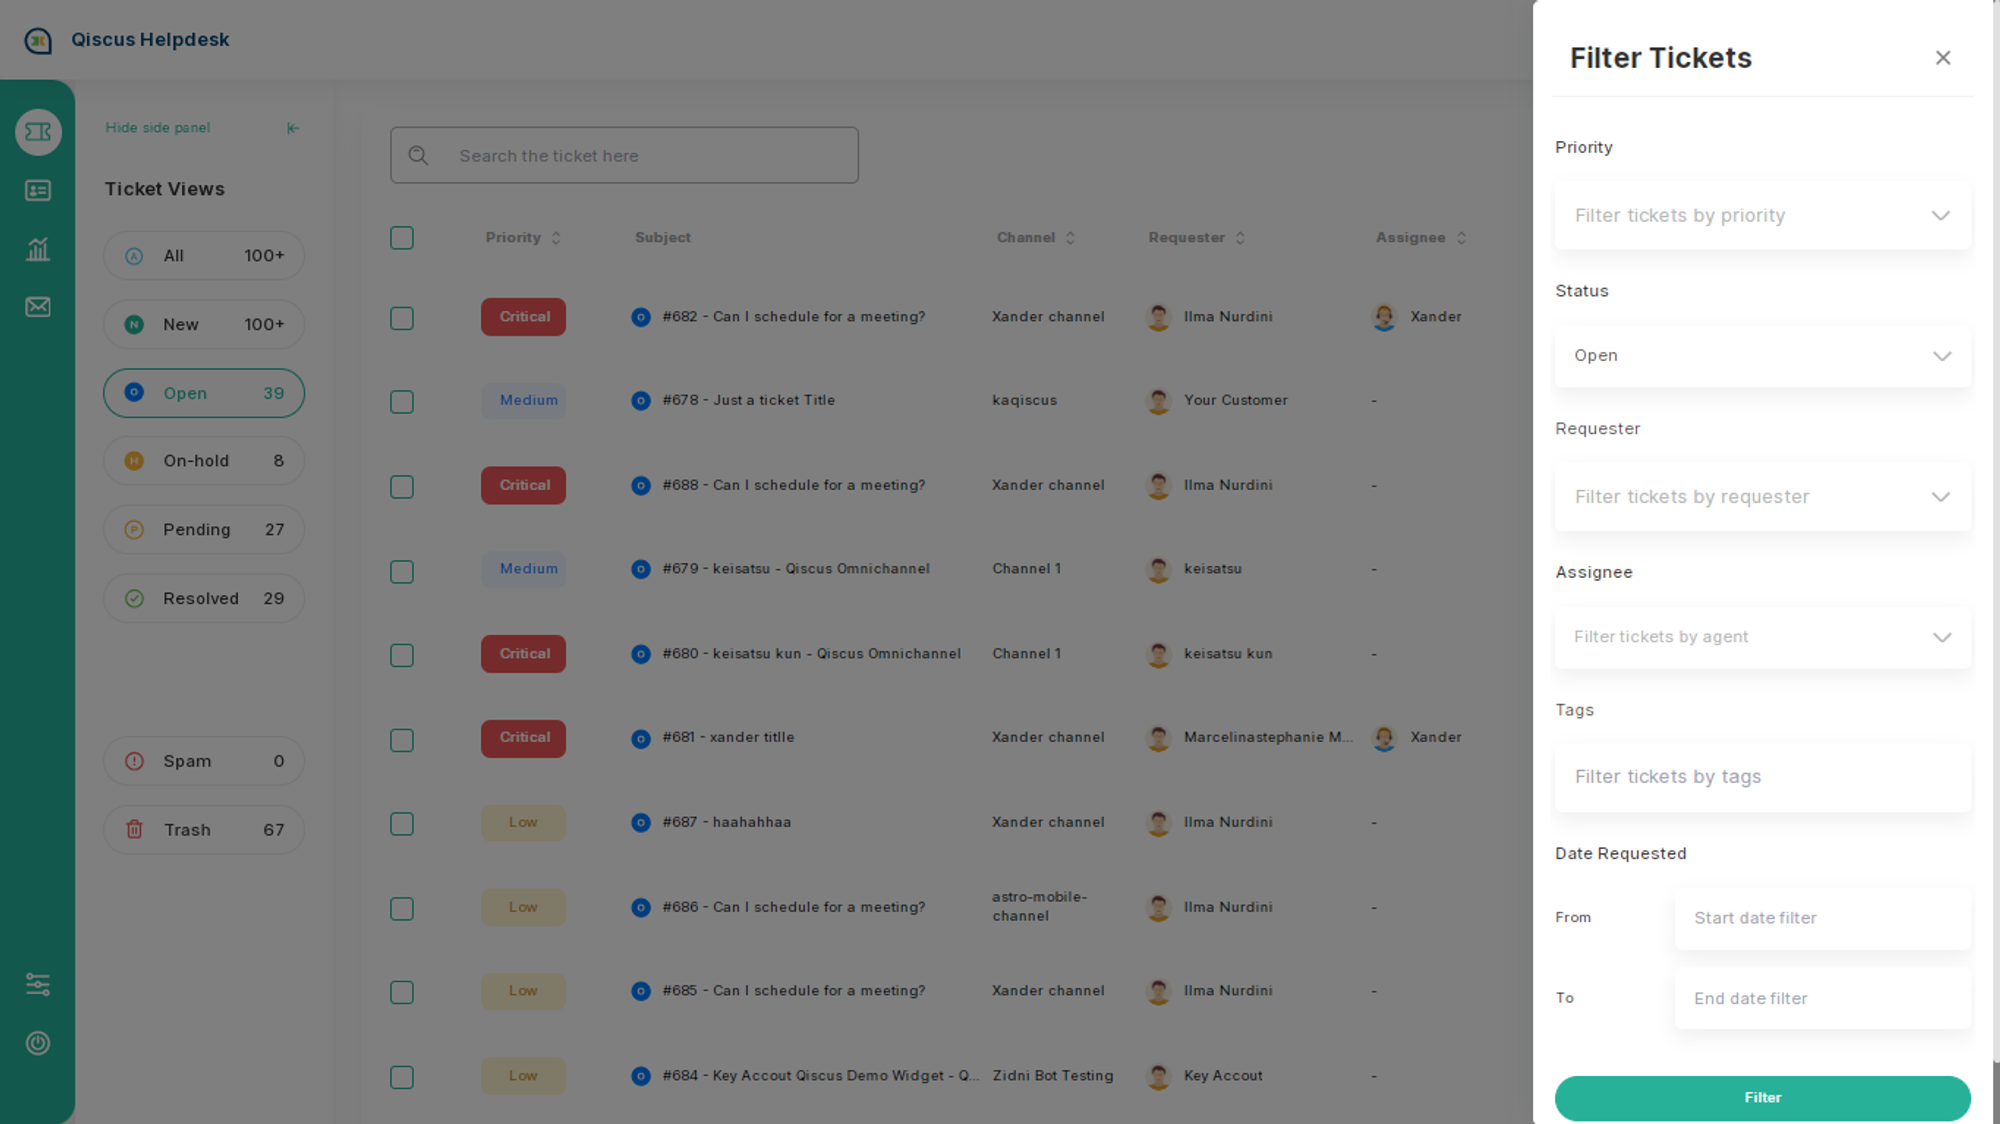
There’s a several field that can be used to filtering the ticket view:
- Priority
- Status
- Channel
- Requester
- Assignee
- Tags
- Date Requested
- Start date from
- To End date
After filtering the ticket you can bulk edit to changes the ticket properties or to add replies or internal notes.
Ticket Search by Ticket Number, Ticket Title or Ticket Summary
Qiscus Helpdesk ticket search supports quick and precise ticket retrieval using either the Ticket Number or the Ticket Title. By simply using '#' followed by the ticket number or entering keywords related to the ticket title, you can find specific tickets efficiently.
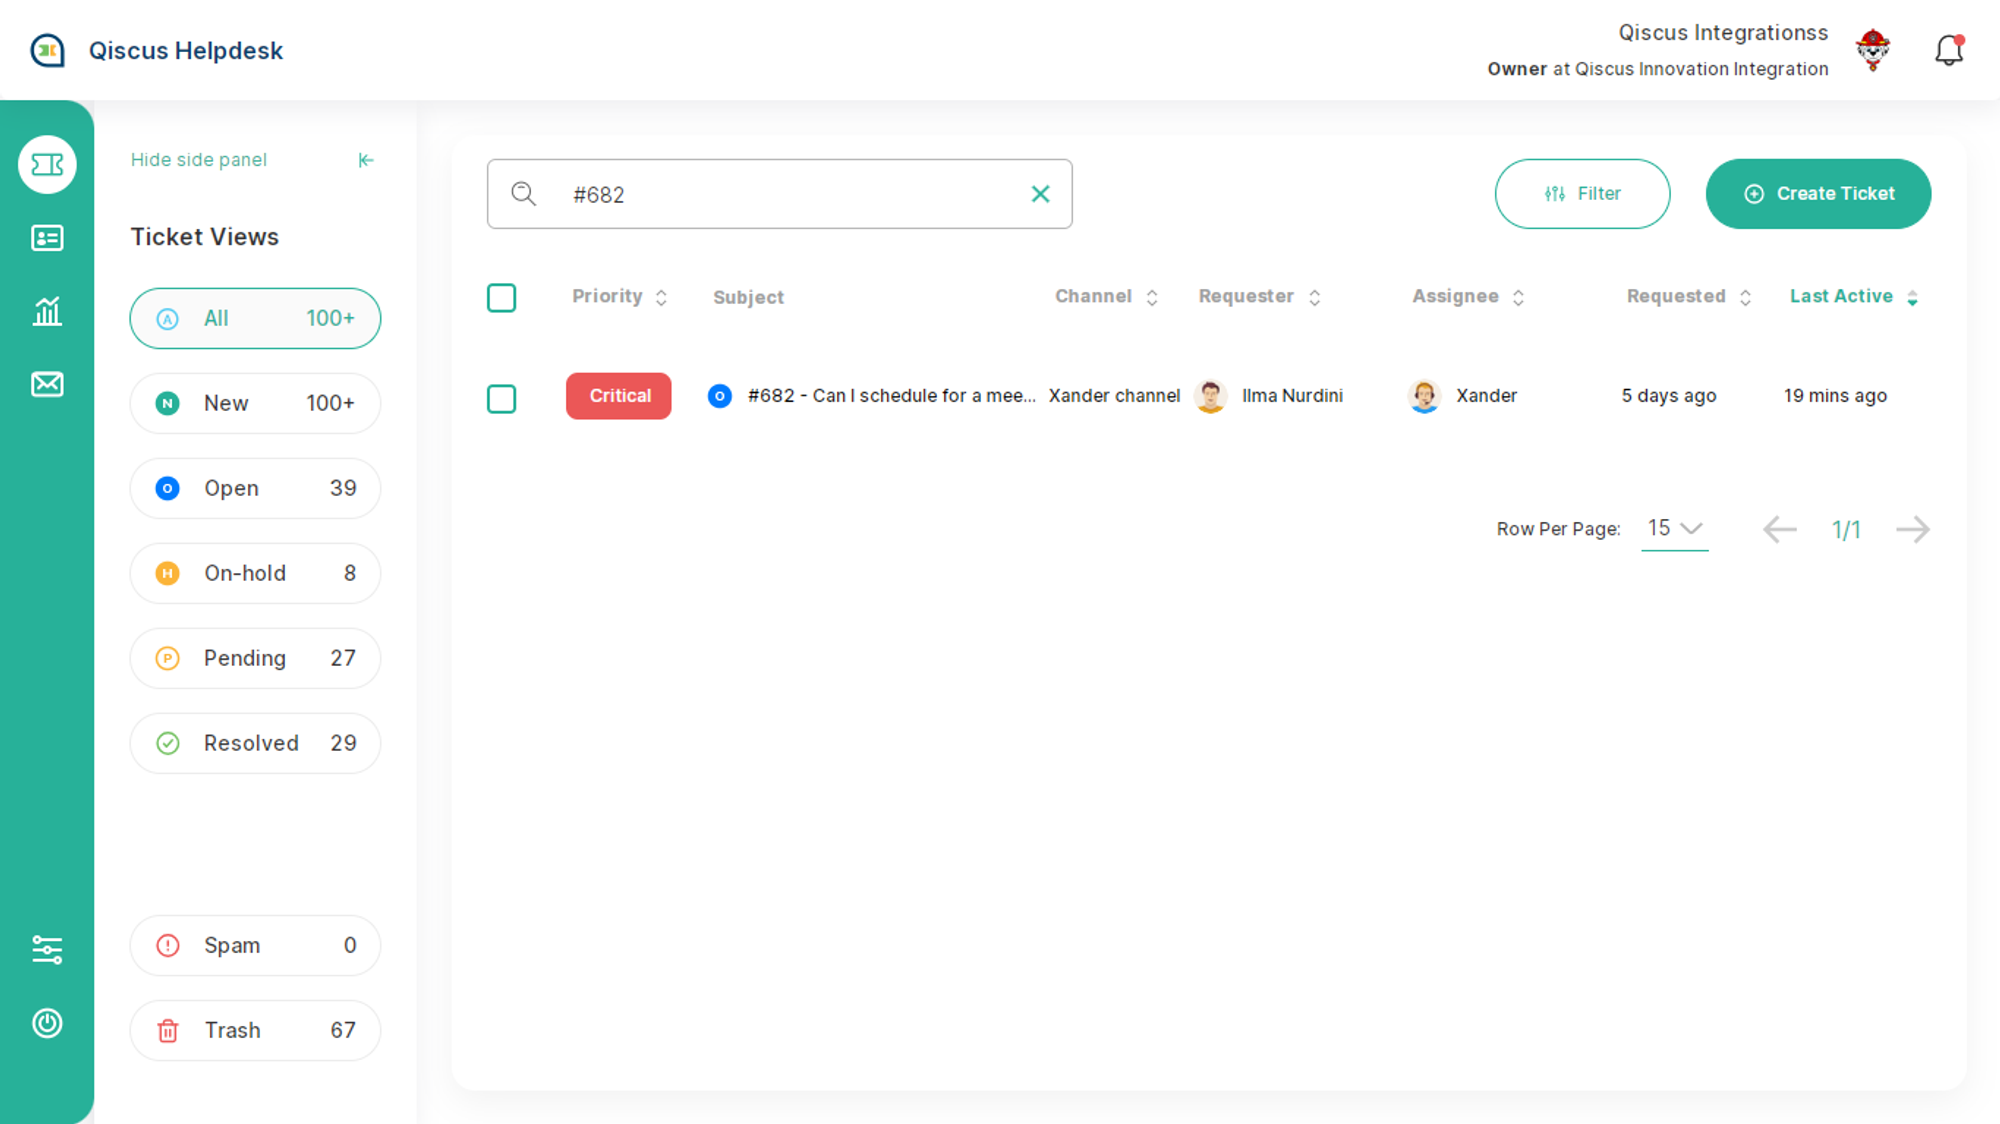
How to Use:
- By Ticket Number: Begin your search with '#' followed by the ticket number (e.g.,
#12345). - By Ticket Title: Enter keywords related to the ticket title.
- By Ticket Summary: Enter keywords related to the ticket summary.
- Search: Enter the query into the search field.
- Results: The system will promptly display the ticket associated with the provided Ticket ID, Title keywords or Summary keywords.