The Qiscus Knowledge Base is a self-service platform that centralizes product-related information, empowering users to find answers independently and efficiently. By consolidating FAQs, product guides, and detailed instructions in a single accessible hub, this knowledge base reduces reliance on live support and enhances the customer experience.
The platform offers robust tools for managing and organizing information, including the ability to create structured categories, sections, and articles. Content managers can easily organize and update these elements to ensure that information remains relevant and accessible. The intuitive search functionality enables users to locate articles quickly, with filters and suggested results that help them find exactly what they need.
To optimize content relevance and usability, the Qiscus Knowledge Base provides analytics on popular searches and frequently accessed articles, giving content managers valuable insights into user needs. This data-driven approach allows the knowledge base to evolve over time, ensuring it remains a reliable and efficient resource for information access.
Getting Started
To start setting up your Qiscus Knowledge Base:
- Accessing the Knowledge Base CMS Content editors can access the Knowledge Base CMS through the Knowledge menu in the Qiscus Helpdesk sidebar. Here, they can manage categories, sections, and articles to structure content for easy navigation.
- Structuring Content: Categories, Sections, and Articles In the Qiscus Knowledge Base, each article belongs to a Section, and each section falls under a Category. This hierarchy helps users find information easily. Start by creating categories to define broad topics, then add sections within each category to organize content further. Finally, populate sections with articles that include titles, content, SEO details, and attachments as needed. Articles can be saved as drafts or published for public access.
- Customizing Article Links and SEO Settings To enhance searchability and user experience, customize article permalinks for clear, memorable URLs that improve sharing and search engine indexing. Configure the meta title and description for the knowledge base home page to align with your branding and highlight key content, which helps increase search visibility and attract more visitors.
- Setting Up Analytics to Track User Engagement Add your Google Analytics (GA) ID in the settings to track user behavior and gather insights. This integration allows you to understand popular searches, frequently accessed articles, and engagement patterns, helping you refine and improve the knowledge base over time.
- User Access and Navigation
Knowledge base users can access the portal via
https://[helpdesk subdomain or your custom domain]/hc/en-us/. The portal includes:- A search bar for quickly finding relevant articles.
- Organized categories and sections for easy browsing.
- A Contact Us option for submitting support requests.
- A header that displays the organization’s logo, custom navbar links, a Submit Request button, and login/logout options. Logged-in users can also view their previous requests in the My Requests page in their profile dropdown.
- A footer customizable with your logo and links to social media platforms like X, Facebook, LinkedIn, Instagram, and YouTube.
With this structured setup, SEO optimizations, and user analytics, the Qiscus Knowledge Base creates an efficient, user-friendly experience that meets both user needs and business goals.
Content Creation and Management
In Qiscus Knowledge Base, all content is organized in a structured hierarchy where each Article belongs to a Section, and each section is part of a Category. This setup keeps information organized and easy for users to navigate. Before creating an article, ensure the necessary category and section are already in place.
Creating Content
- Create a New Category
Categories act as top-level groupings for related content. To create a category:
- Access Knowledge Base CMS and navigate to "Category & Section".
- Click "Create New" and select New Category.
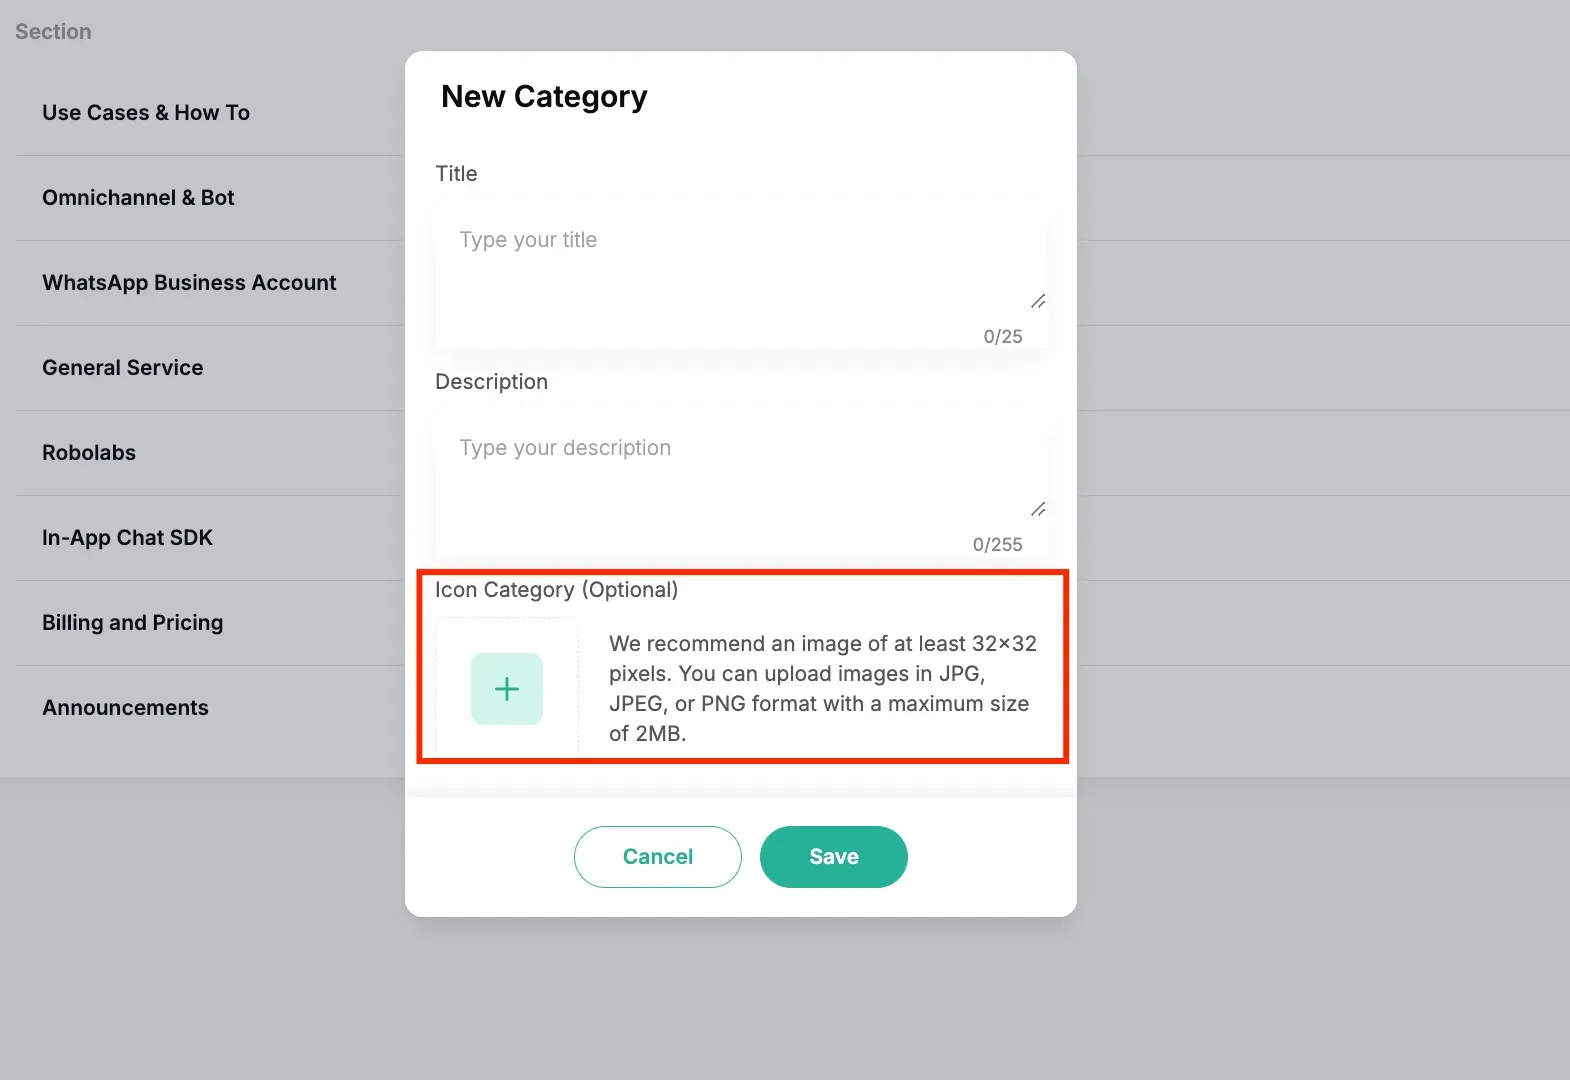
- Fill in the Title (up to 25 characters), Description (up to 225 characters), and optionally, upload an Icon (supports JPG, JPEG, PNG up to 2 MB).
- Click "Save" to finalize the category, which now serves as the main grouping for related sections and articles.
- Create a New Section Sections further organize content within categories. To create a section:
- In Knowledge Base CMS, go to "Category & Section".
- Click "Create New" and select New Section.
- Choose the Category where this section will reside and add a Section Name (up to 25 characters).
- Click "Save" to complete the setup. Sections are now ready to hold relevant articles.

- Create a New Article Articles contain detailed information that users seek, like guides, FAQs, or tutorials. To create an article:
- Open Knowledge Base CMS and select "Articles" from the sidebar.
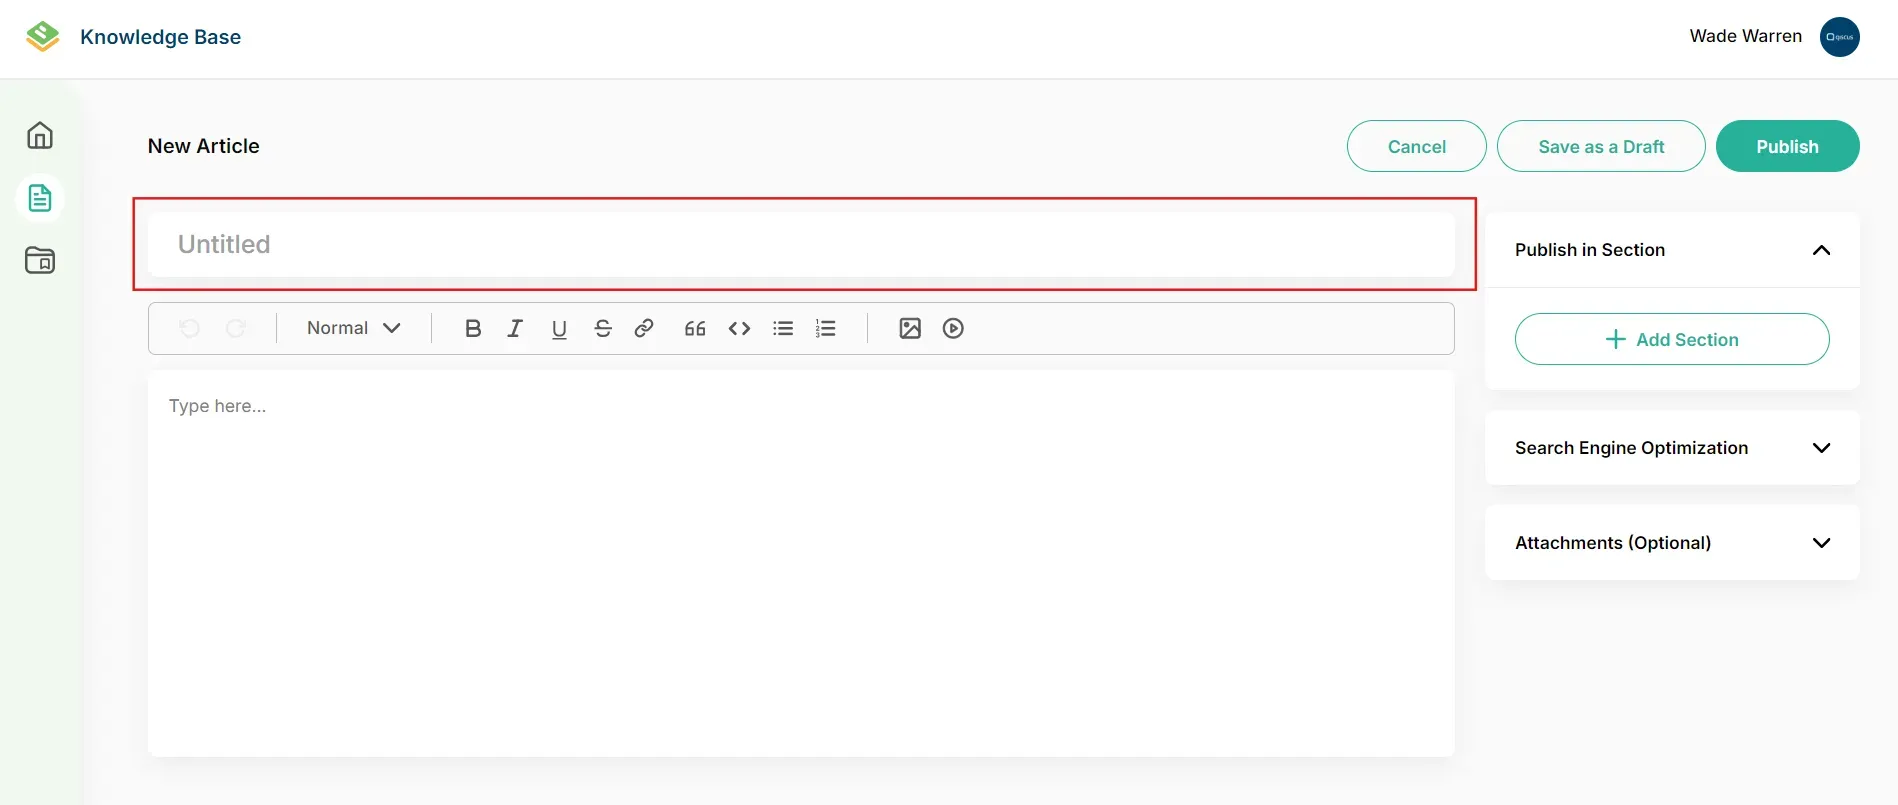
- Click "Create Article" and fill in the Title and Content. You may embed images or videos, or add attachments (refer to the Attachment Guidelines below).
- Select the appropriate Section where the article should be stored.
- Optionally, configure SEO settings (Title, Keyword, Description, Image) to optimize the article for search engines.
- Once finished, you can choose to Save as Draft (for internal review) or Publish for public access.
Attachment Guidelines
Attachments can enhance article content by providing visual aids or additional resources. Follow these specifications to ensure compatibility:
| Attachment Type | Purpose | Supported Formats | Max File Size |
|---|---|---|---|
| Inline Image | Displays images directly in the article | JPG, JPEG, PNG | 50 MB |
| Inline Video | Embeds videos within the article | MP4 | 50 MB |
| Outline Attachment | Adds supplementary resources for download | Images: JPG, JPEG, PNG Videos: MP4 Audio: MP3 Documents: PDF, DOC, DOCX, PPT, PPTX, XLS, XLSX | 50 MB |
Editing Content
After creating categories, sections, or articles, you may edit them to keep information current.
Edit Options:
- Edit a Category: Update the title, description, or icon.
- Edit a Section: Change the name or reassign it to a different category.
- Edit an Article: Modify the title, content, attachments, or SEO settings.
Follow these steps to update content as needed:
- Navigate to Category & Section or Articles in the CMS.
- Find the item to edit, click the ellipsis menu, and select Edit.
- Make the necessary updates and click "Save" to apply changes.
Additional Content Management Options
In Qiscus Knowledge Base, you can also manage article statuses, archive articles, and reorder categories and sections for optimal organization. Articles can be moved between Draft, Published, and Archived states as needed. Drafts are useful for in-progress articles that aren’t yet ready for public viewing, while archiving allows you to store articles that are no longer publicly visible but may be referenced internally or republished in the future.
You can also reorder categories and sections within the CMS to control the arrangement of content as priorities change. This reordering functionality helps ensure that the most relevant topics are easy to find, maintaining a user-centered organization of information.
Deleting Content
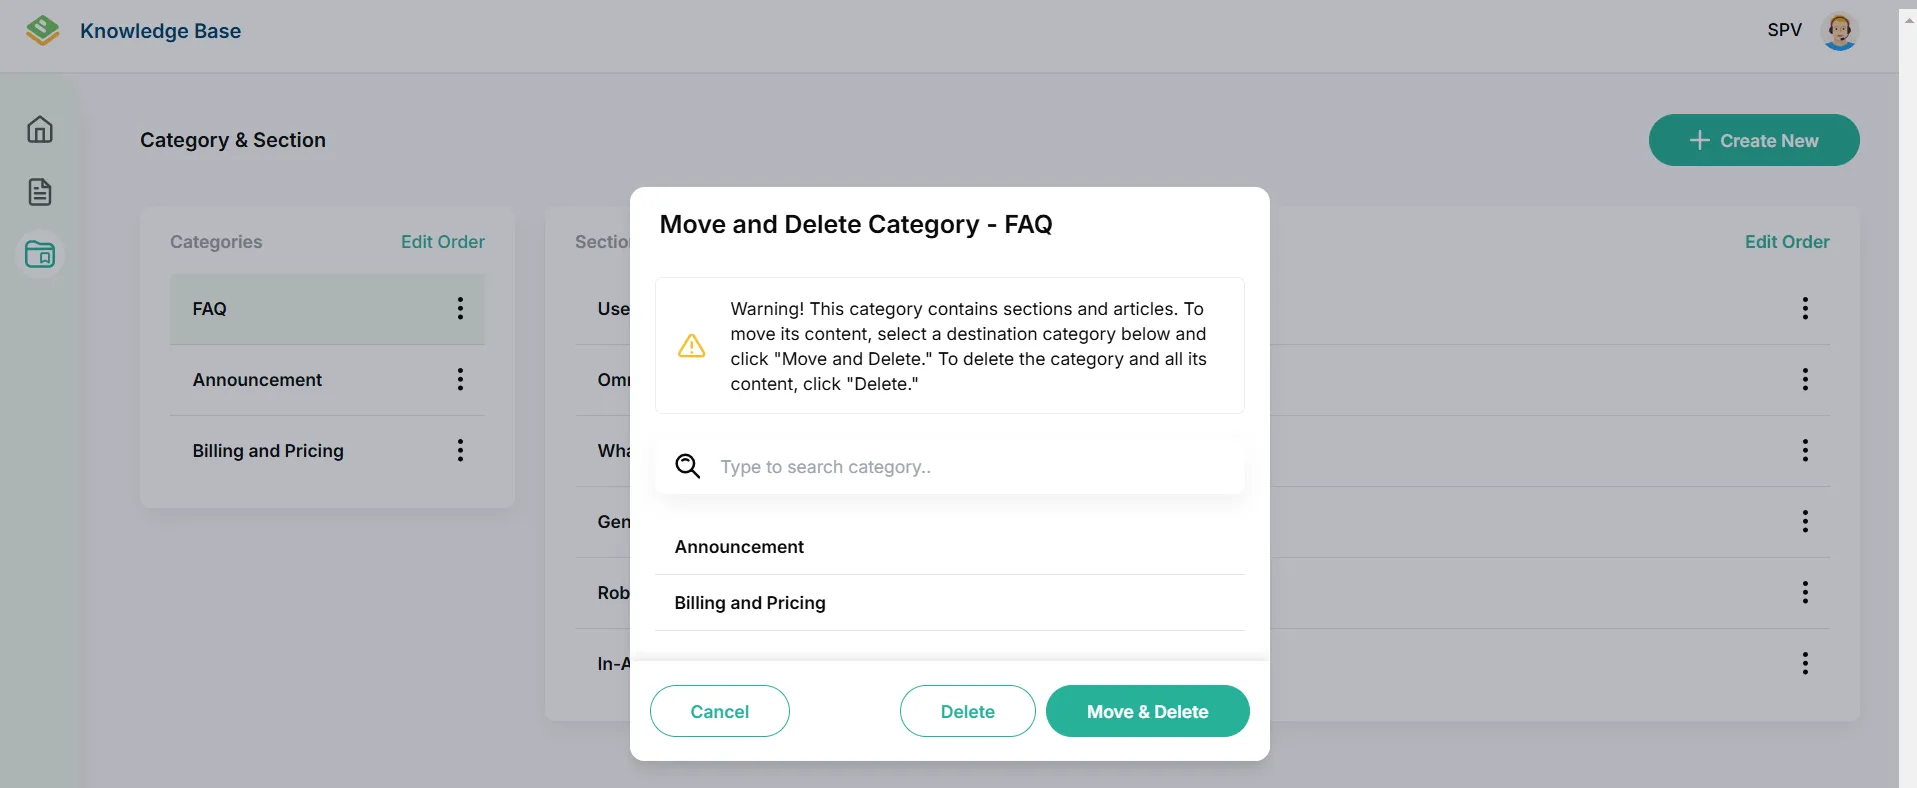
Deleting content removes it from the knowledge base. If a category or section contains items, you can choose to move the content before deletion. However, if it is empty, only the delete option will be available.
- Delete a Category
- If it contains sections: You can reassign sections to another category or delete them along with the category. Else, you can directly delete it.
- Delete a Section
- If it contains articles: Move the articles to another section or delete them with the section. Else, you can directly delete it.

Steps to Delete:
- Open Category & Section or Articles in the CMS.
- Locate the item to delete, click the ellipsis menu, and select Delete.
- Follow prompts to confirm deletion or relocate content as necessary.
By following these steps, you can effectively create, manage, and organize content in the Qiscus Knowledge Base, ensuring that users have easy access to relevant information.
Knowledge Base Customization
The Qiscus Knowledge Base CMS offers several customization options to tailor your knowledge base’s appearance, improve user navigation, and enhance SEO visibility. Here’s how to access and configure these settings.
Settings Overview
To access customization options, navigate to Settings in the Knowledge Base CMS sidebar menu. Here, you’ll find options to adjust the permalink structure, header, footer, and SEO meta title and description.
Permalink Structure
The Permalink setting allows you to define the URL structure for articles, which can improve SEO and make URLs more readable. To configure:
Go to Settings and select Permalink.
Choose from three options:
- Plain: Uses a basic URL format, e.g.,
https://qiscus.support.com/hc/en-us/articles?p=123. - Post Name: Incorporates the article title in the URL, e.g.,
https://qiscus.support.com/hc/en-us/articles/sample-post. - Custom: Allows for a personalized structure using tags like
:year,:month,:day,:category,:section, and:slug. For example,https://qiscus.support.com/hc/en-us/articles/:year/:month/:slug.
- Plain: Uses a basic URL format, e.g.,
After selecting a structure, click Save to apply your changes.
Header Customization
The Header settings enable you to edit the title, add navigation links, and control the header’s visibility on the Knowledge Base portal.
- In Settings, go to Header.
- Adjust the Title Header and toggle its visibility:
- Enable : Displays the title on the Knowledge Base Web View.
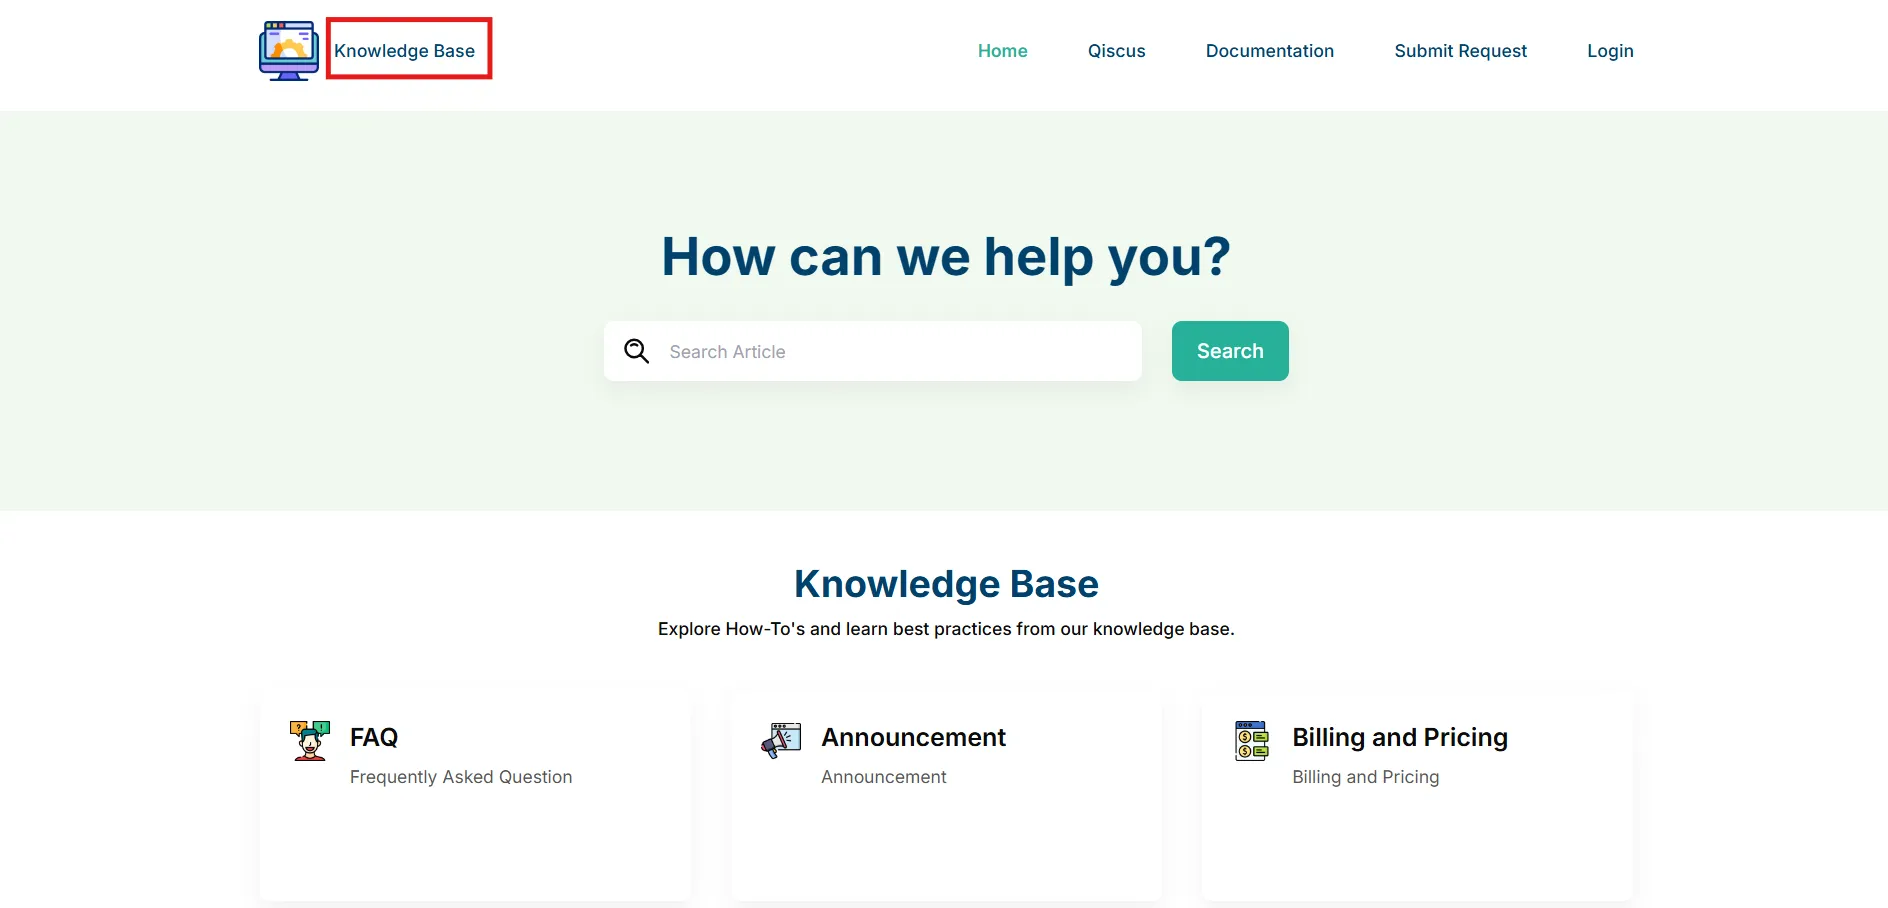
- Disable: Hides the title from the Knowledge Base Web View.
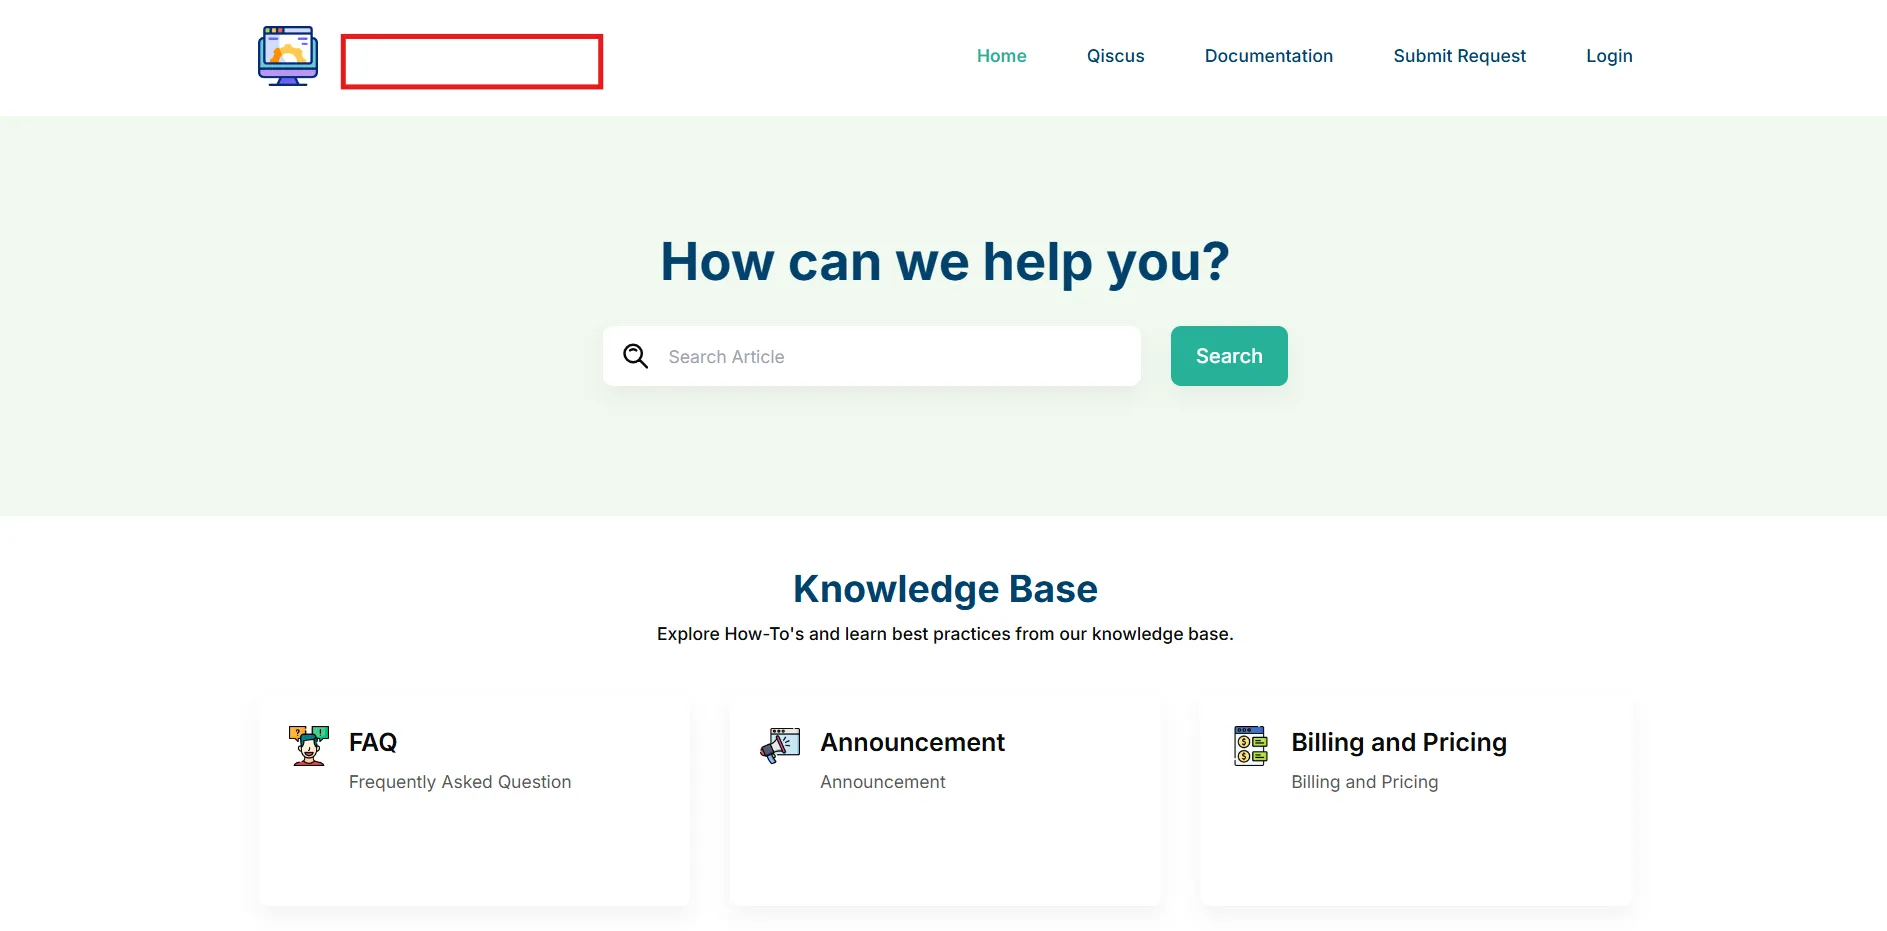
- To add navigation links, click Add Header Menu (up to five links). Enter the Header Link Text (the visible text) and Header Link URL (the destination URL).
- Click Save to update your settings.
Footer Customization
The Footer section allows you to add links to social media platforms, helping users connect with your brand. Supported platforms include Instagram, LinkedIn, YouTube, Facebook, and X (Twitter). Simply enable each social media link and enter the URL. If left unchecked, the link will not appear in the footer.
Meta Title & Description
The Meta Title & Description settings allow you to control how your Knowledge Base appears in search engine results, enhancing visibility and engagement.
Go to Settings and select Meta Title & Description.
Complete the following fields:
- Meta Title: A brief SEO title, up to 25 characters.
- Meta Keywords: Keywords relevant to your Knowledge Base, up to 25 characters.
- Meta Description: A description for search engines, up to 225 characters.
- Image: Upload an image (JPG, JPEG, PNG, up to 2 MB) to appear in search previews.
Click Save to apply these settings.
By configuring these settings, the Qiscus Knowledge Base becomes a highly adaptable, brand-aligned resource that enhances user experience and content discoverability on search engines.
Preview of SEO Settings Impact:
Below are examples of how the Knowledge Base may appear in search engine results with and without custom Meta Title & Description settings applied. These comparisons illustrate the impact on visibility and branding:
- With Meta Title & Description:
This example shows a custom title, description, and image, creating a more professional and recognizable search result.
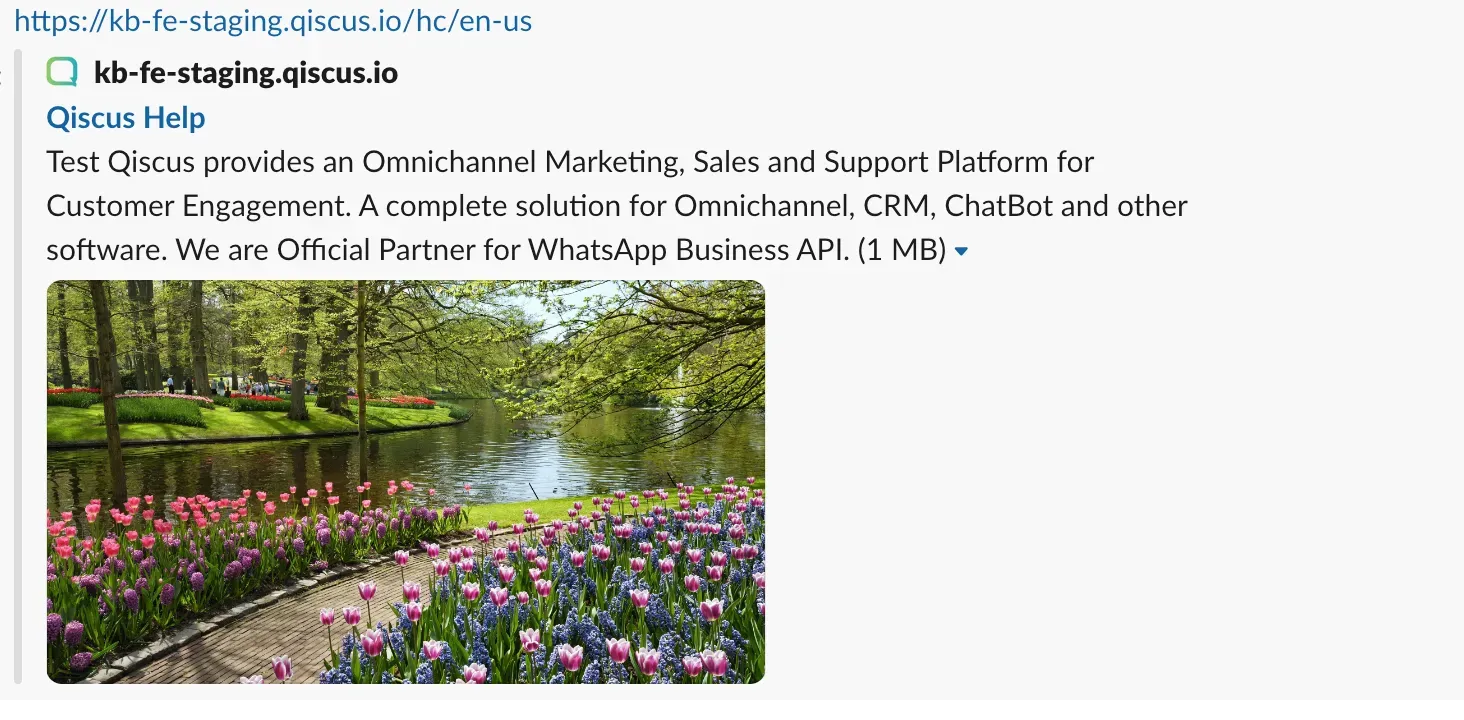
- Without Meta Title & Description
Without a customized Meta Description, the system will apply default values, which may affect the visibility and relevance of your Knowledge Base in search engine results.

Integration
The Qiscus Knowledge Base CMS allows you to integrate Google Analytics, providing insights into how users interact with your knowledge base. By adding your Google Analytics ID, you can track page views, user behavior, and engagement metrics directly through your Google Analytics account, helping you make data-driven improvements.
Google Analytics Integration
To set up Google Analytics integration:
- Open the Knowledge Base CMS.
- In the sidebar menu, navigate to Settings.
- Select Google Analytics from the options.
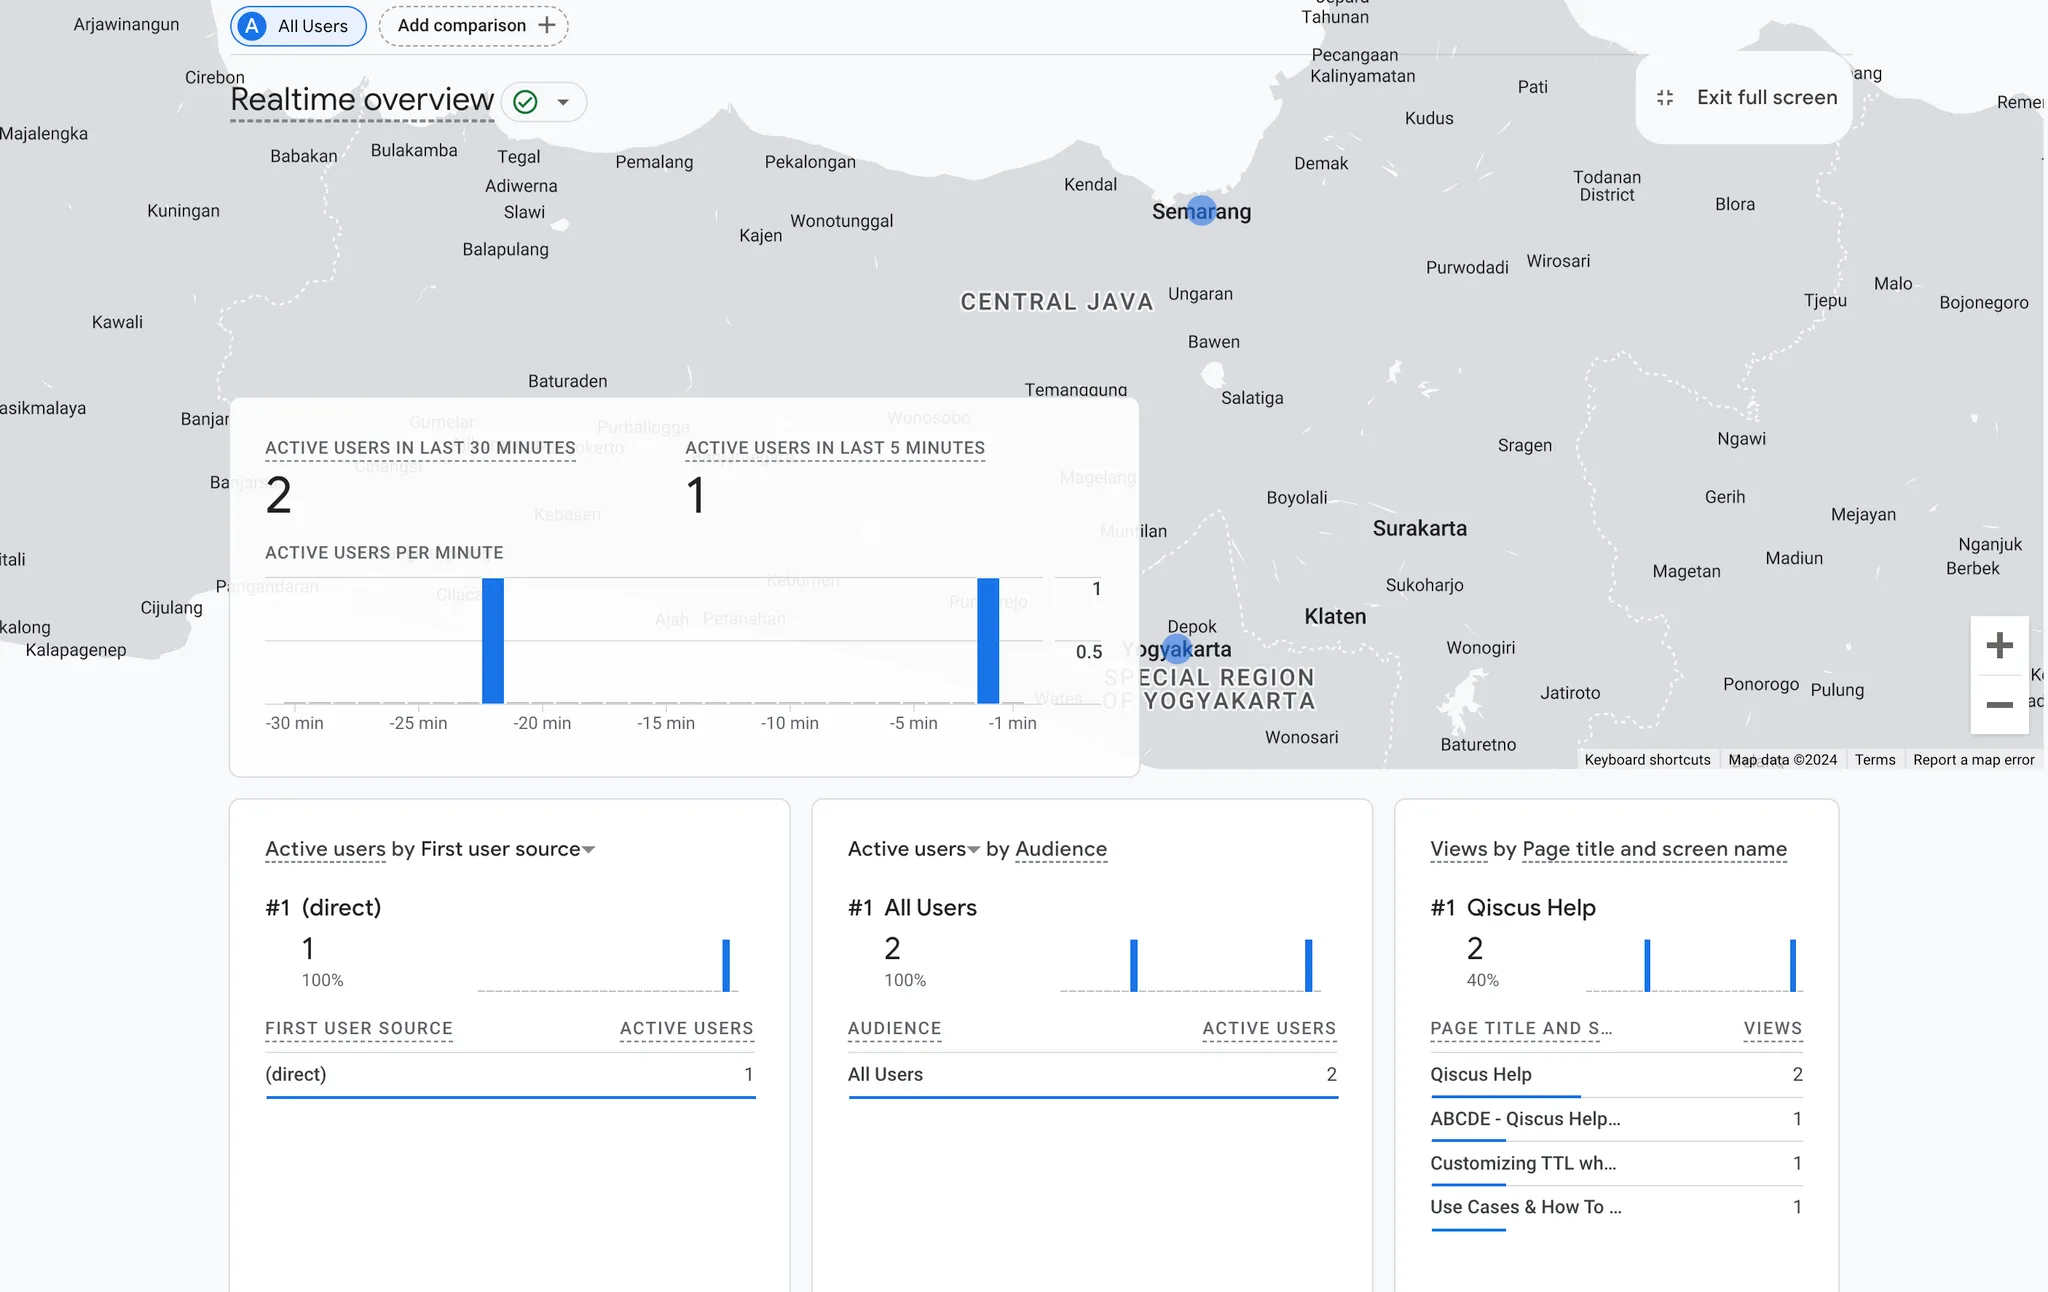
- Enter your Google Analytics ID. This ID typically follows a format like
UA-XXXXXX-XorG-XXXXXXXX. - Click the Save button to apply your changes.
Once saved, your Google Analytics account will begin collecting data from your knowledge base, allowing you to view metrics such as total views, unique visitors and popular articles. This integration helps you understand user engagement, optimize content, and make improvements based on real user behavior.
By monitoring these insights, you can ensure your knowledge base remains a valuable and efficient resource for your users.