Qiscus Helpdesk provides a dynamic Form Builder to collect structured data from users at the point of ticket creation. To improve efficiency and data relevance, Qiscus supports Field Conditions, allowing fields to appear based on specific dropdown selections made by the user.
This functionality enables teams to customize the ticket intake experience, reducing clutter and ensuring only relevant fields are displayed.
What is a Form?
A Form is a structured collection of input fields shown to users when they submit a ticket. Forms can be tailored to various business needs, such as technical issues, product feedback, or account-related requests.
Key Components
Component | Description |
|---|---|
Form Name | The title used to identify the form within the admin panel |
Description | Notes to describe the purpose of the form |
Fields | Input elements such as text, number, or dropdown used to gather information |
Conditions | Logic applied to control the visibility of specific fields based on dropdown selections |
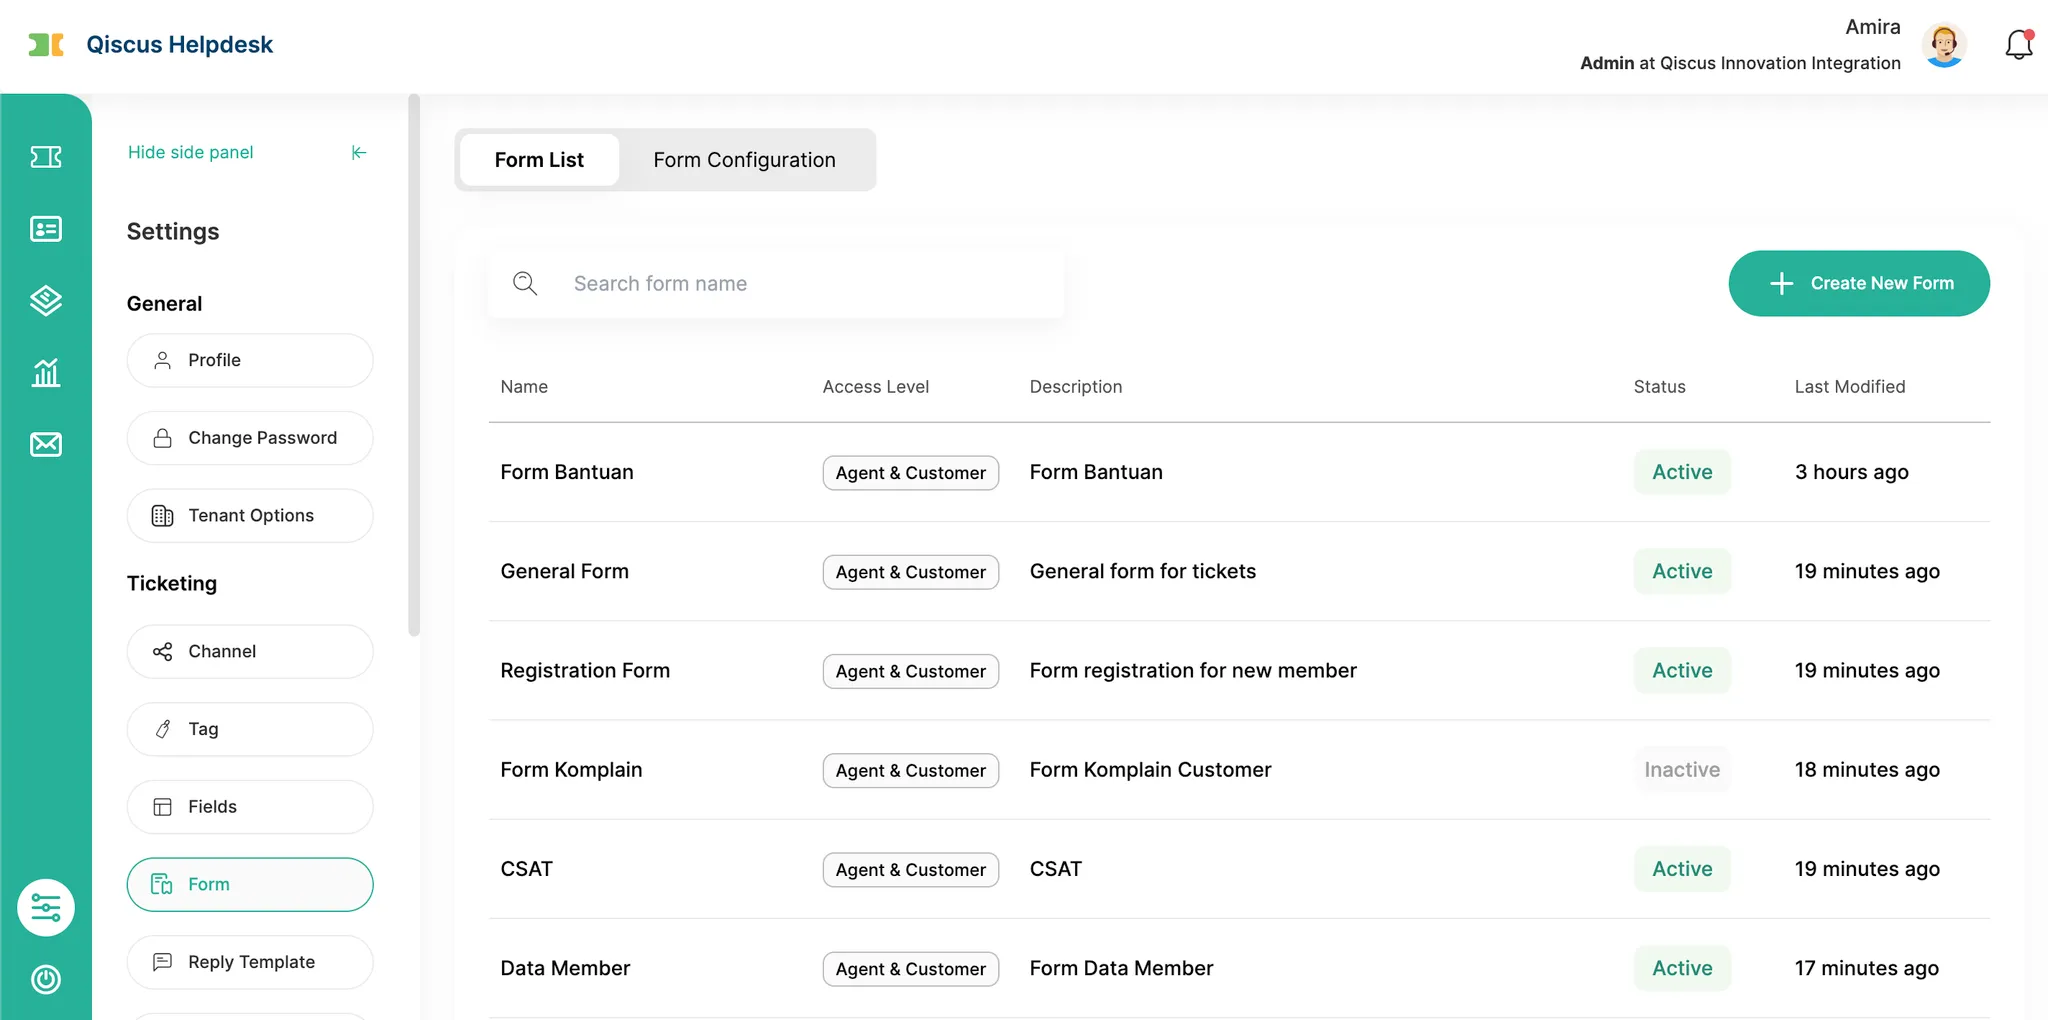
Forms can be created and managed via:
Settings → Form
What is a Field Condition?
A Field Condition is a rule that determines whether a specific field should be visible on the form. Conditions are used to streamline the ticket creation process by hiding fields unless they are relevant based on the user’s selection in a dropdown field.
Example Use Case
If a user selects “Complaint” from a “Request Type” dropdown, the form can be configured to show an additional field such as “Order Number.”
Behavior and Limitations
Field Conditions follow a simple rule structure:
Conditions are triggered only by dropdown fields.
A field will be shown only when a specific value is selected from the triggering dropdown.
If the condition is not met, the field will remain hidden and its value will not be submitted with the ticket.
How to Create a Form with Conditions
Step 1: Create or Prepare the Fields
Before creating a form, ensure that the fields you want to include already exist:
Navigate to Settings → Fields
Create any necessary custom fields in advance
You may also use the available default fields
Step 2: Create a New Form
Go to Settings → Form
Click Create Form
Fill in the following:
Form Name
Description
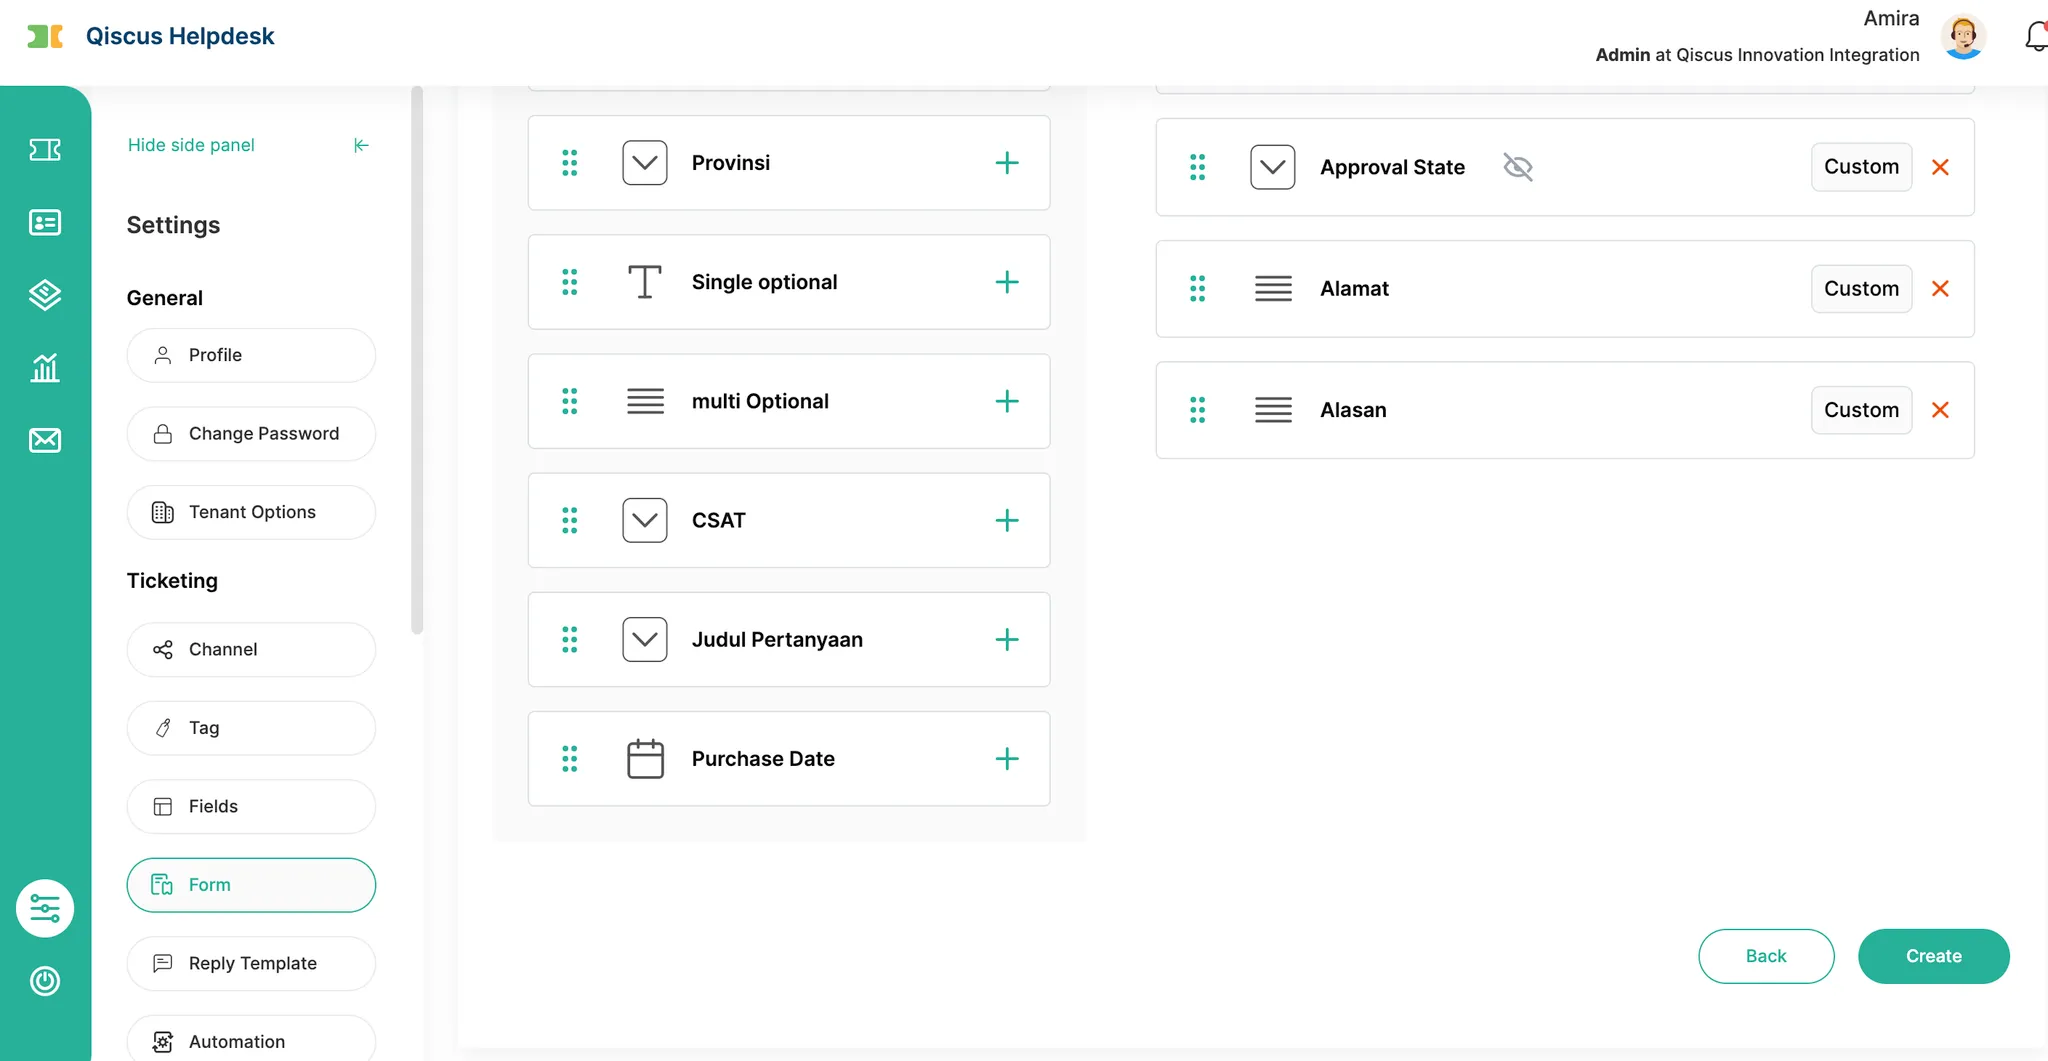
Select fields from the existing list:
You can search and pick both custom and default fields
Rearrange fields as needed
Click Save to finalize the form
Note: At this stage, you are only assembling the structure of the form. Conditions are configured separately after saving.
Step 3: Review the Form Structure
After the form is created, take a moment to review the arrangement and logic. Consider:
Which fields should be visible at all times
Which fields should be shown conditionally
Which dropdown fields will act as condition triggers
Proper review ensures cleaner logic and a better experience for end users.
Step 4: Configure Field Conditions
After a form has been created, you can define conditions to make specific fields appear based on user selection in a dropdown field.
For Agent-Side Forms
Open the form you’ve created via Settings → Form
Navigate to the Conditions tab and click Create Condition
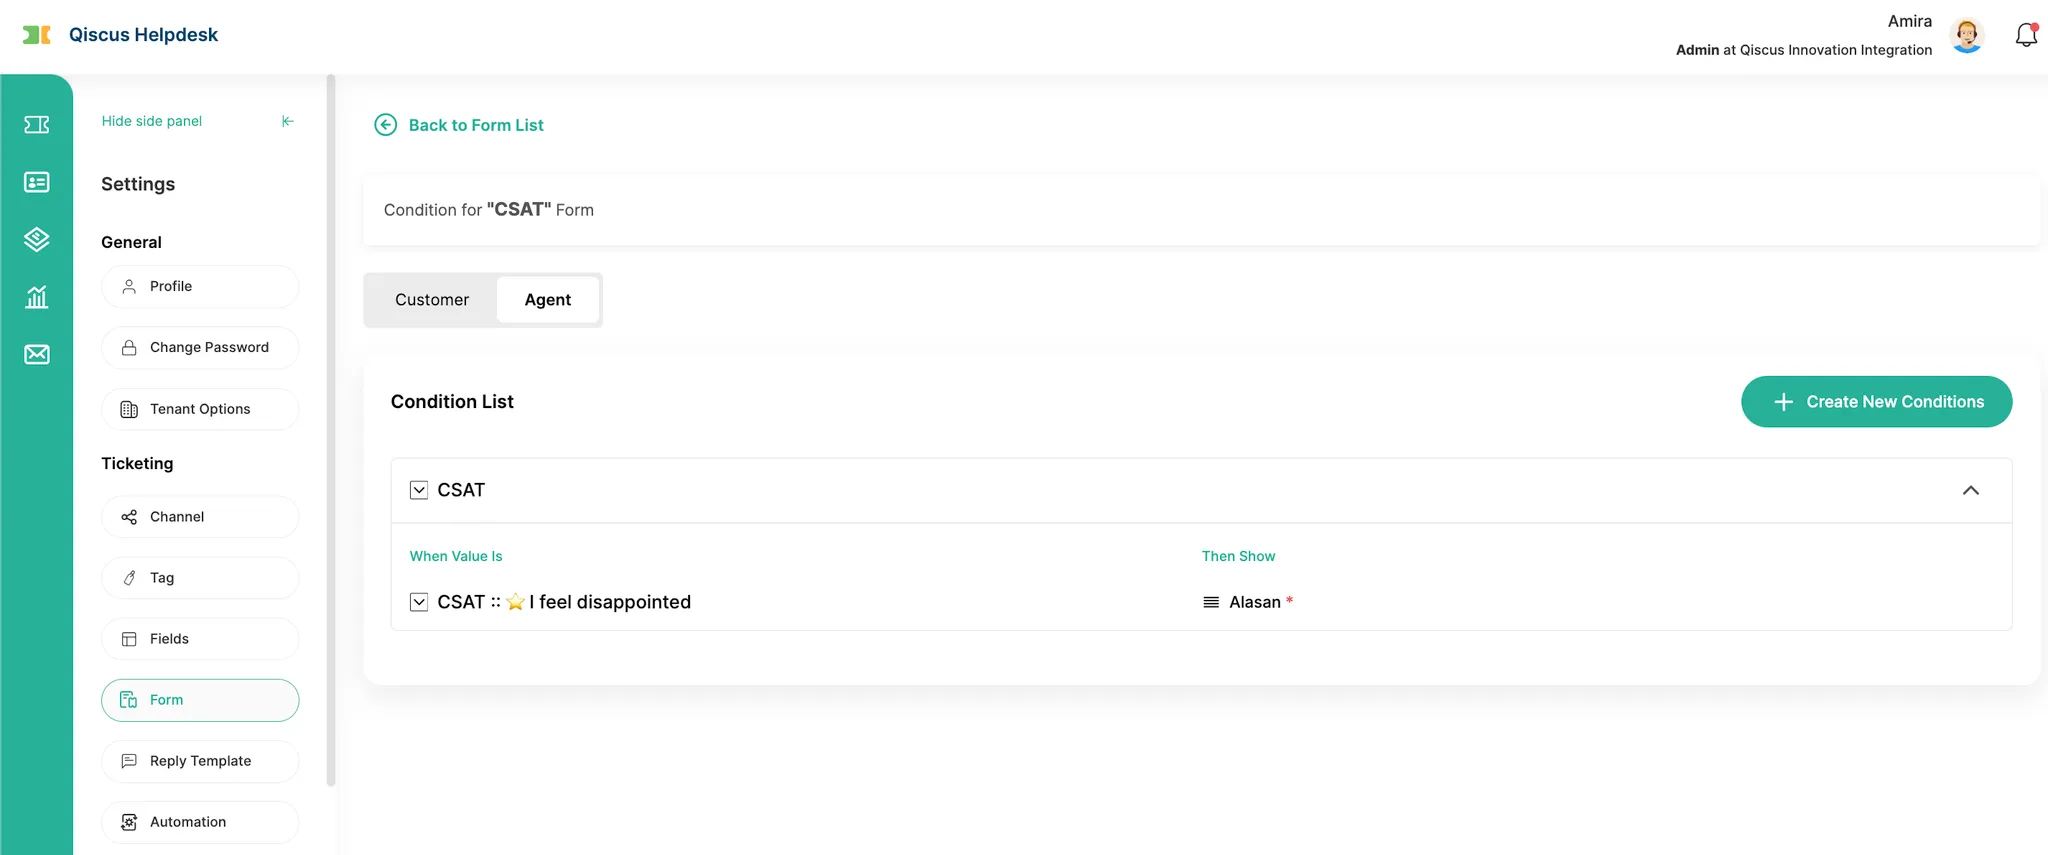
Define the condition:
Trigger Field: Select the dropdown field used to trigger the condition (e.g., Type of Complaints)
Trigger Value: Select the dropdown value that activates the condition (e.g., Return Product)
Target Field(s): Select the field(s) to be shown when the condition is met (e.g., Status)
Set Required Rule by Ticket Status:
For each target field, you can define when the field should be required, based on the ticket status.
Options include:
Always: The field is required in all ticket statuses
Never: The field is never required
Custom: Required only in specific statuses (e.g., New, Open, Pending, Resolved)
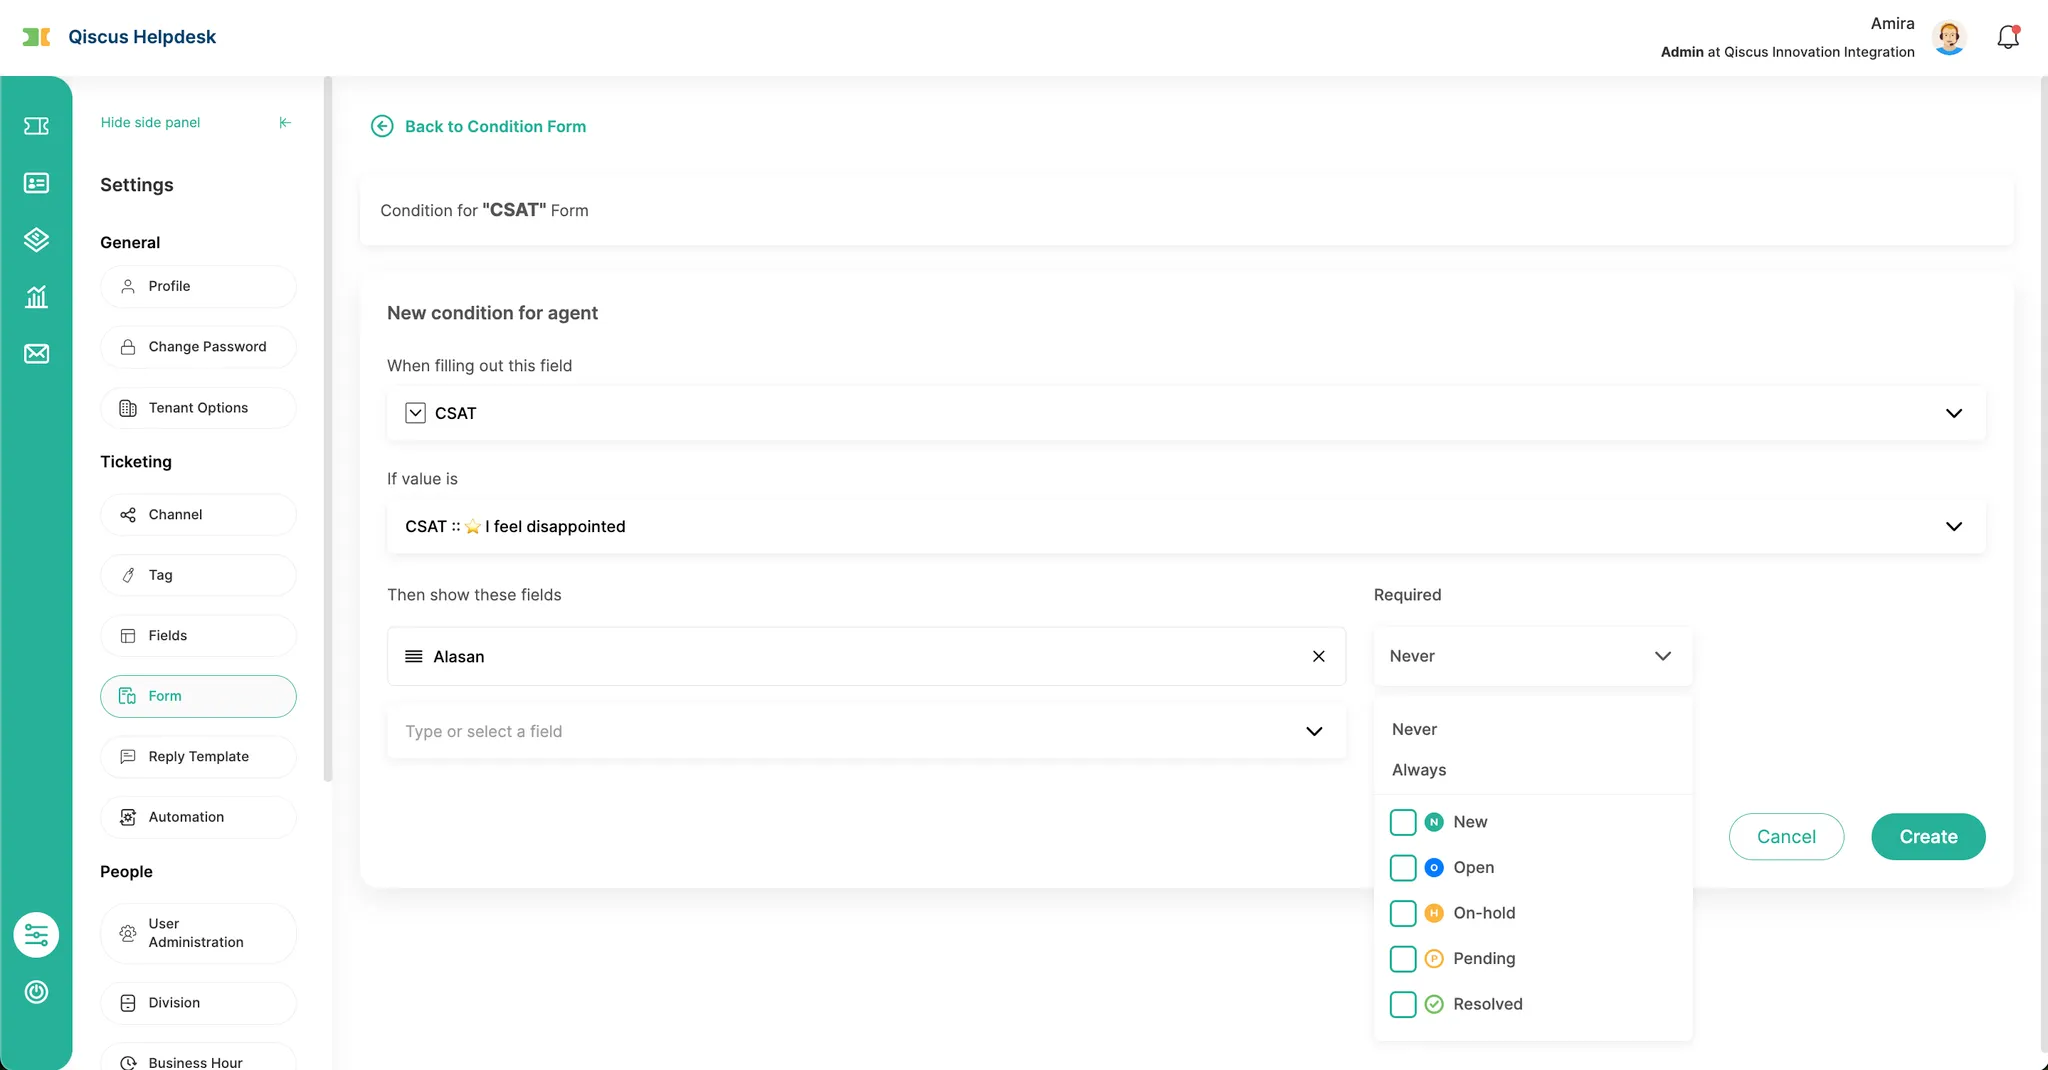
This allows you to enforce data entry for specific fields depending on the stage of the ticket lifecycle, improving accuracy and operational flexibility.
For Customer-Side Forms
For customer-facing forms, required rules are simplified:
When a condition is met (based on a dropdown selection), the field can be either:
Required
Optional
Unlike the agent-side configuration, customer-side forms do not support conditional requirement based on ticket status. The required rule applies uniformly at the time the form is filled by the customer.
This ensures a straightforward experience for customers while still enabling conditional logic.
Real-World Examples
Example 1: Category-Specific Fields
Field | Type | Condition |
|---|---|---|
Product Category | Dropdown | (No condition applied) |
Model Number | Text | Show only if Product Category = “Gadget” |
Serial Number | Text | Show only if Product Category = “Electronics” |
Example 2: Request Type and Additional Details
Field | Type | Condition |
|---|---|---|
Request Type | Dropdown | (No condition applied) |
Order Number | Text | Show if Request Type = “Complaint” |
Delivery Date | Date | Show if Request Type = “Late Delivery” |
System Rules and Restrictions
Only Dropdown fields can act as condition triggers.
Each dropdown value can only be used once as a condition trigger within a form.
A dropdown field cannot be deleted if it is referenced in any condition.
Summary
The Form and Field Condition features in Qiscus Helpdesk provide a flexible and scalable way to collect relevant data at the time of ticket creation. By leveraging conditional field visibility, teams can simplify the user experience, reduce unnecessary input fields, and ensure agents receive structured and useful information.
This functionality is ideal for businesses that manage multiple request types and need customized intake flows tailored to each scenario.