In the Subscriber menu, you can create groups to combine many contact lists. With this subscriber list, you can broadcast messages to the target groups more easily.
Create Subscriber List
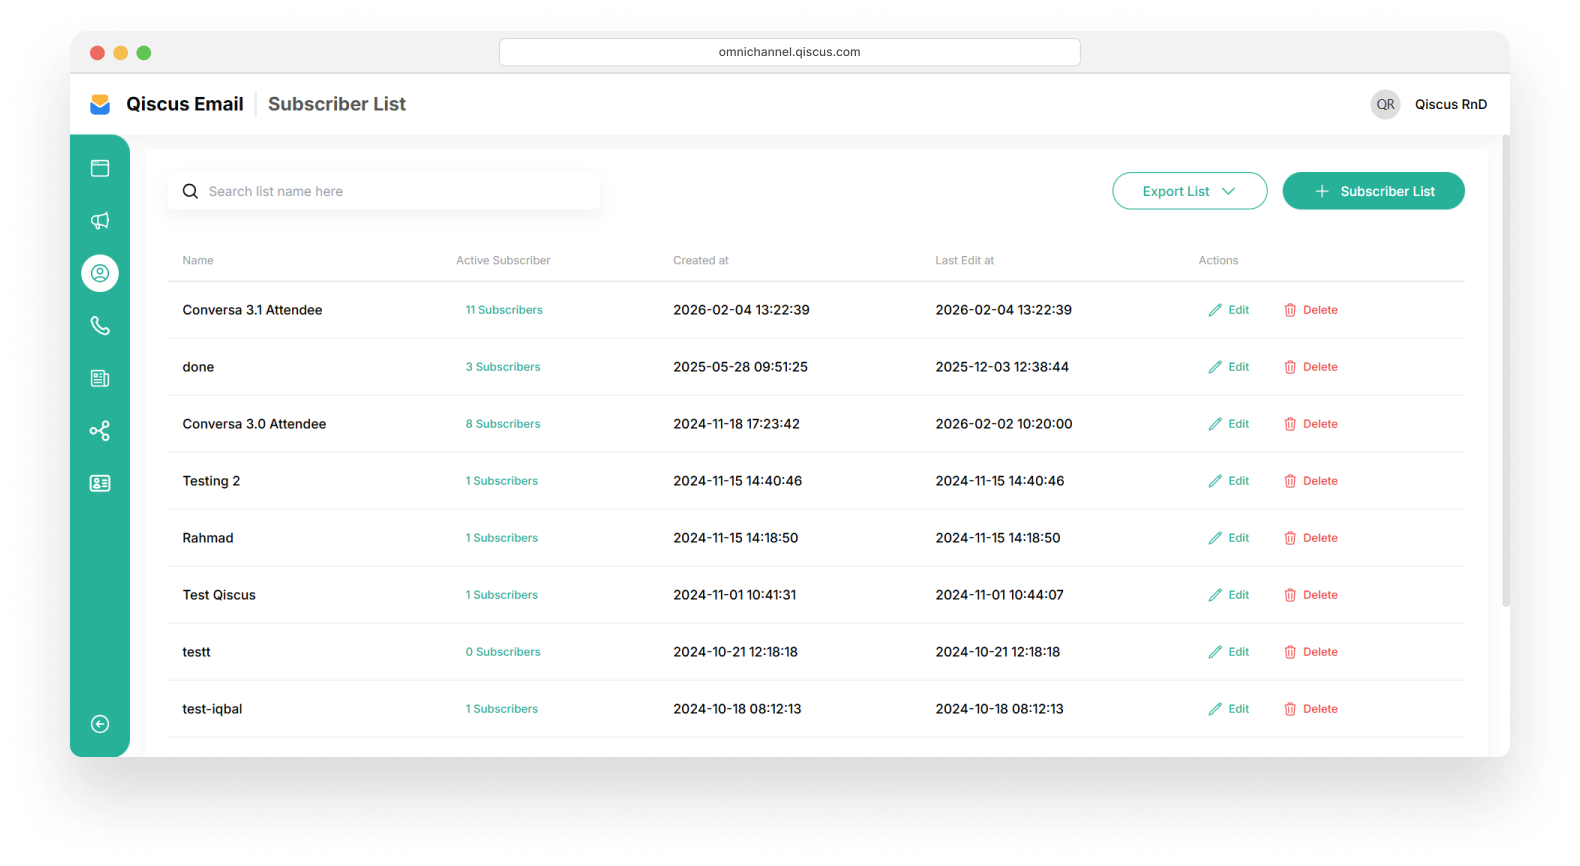
When you have a large contact list and want to divide it into subscriber groups, you can create a subscriber list. Follow these steps to create a new subscriber list:
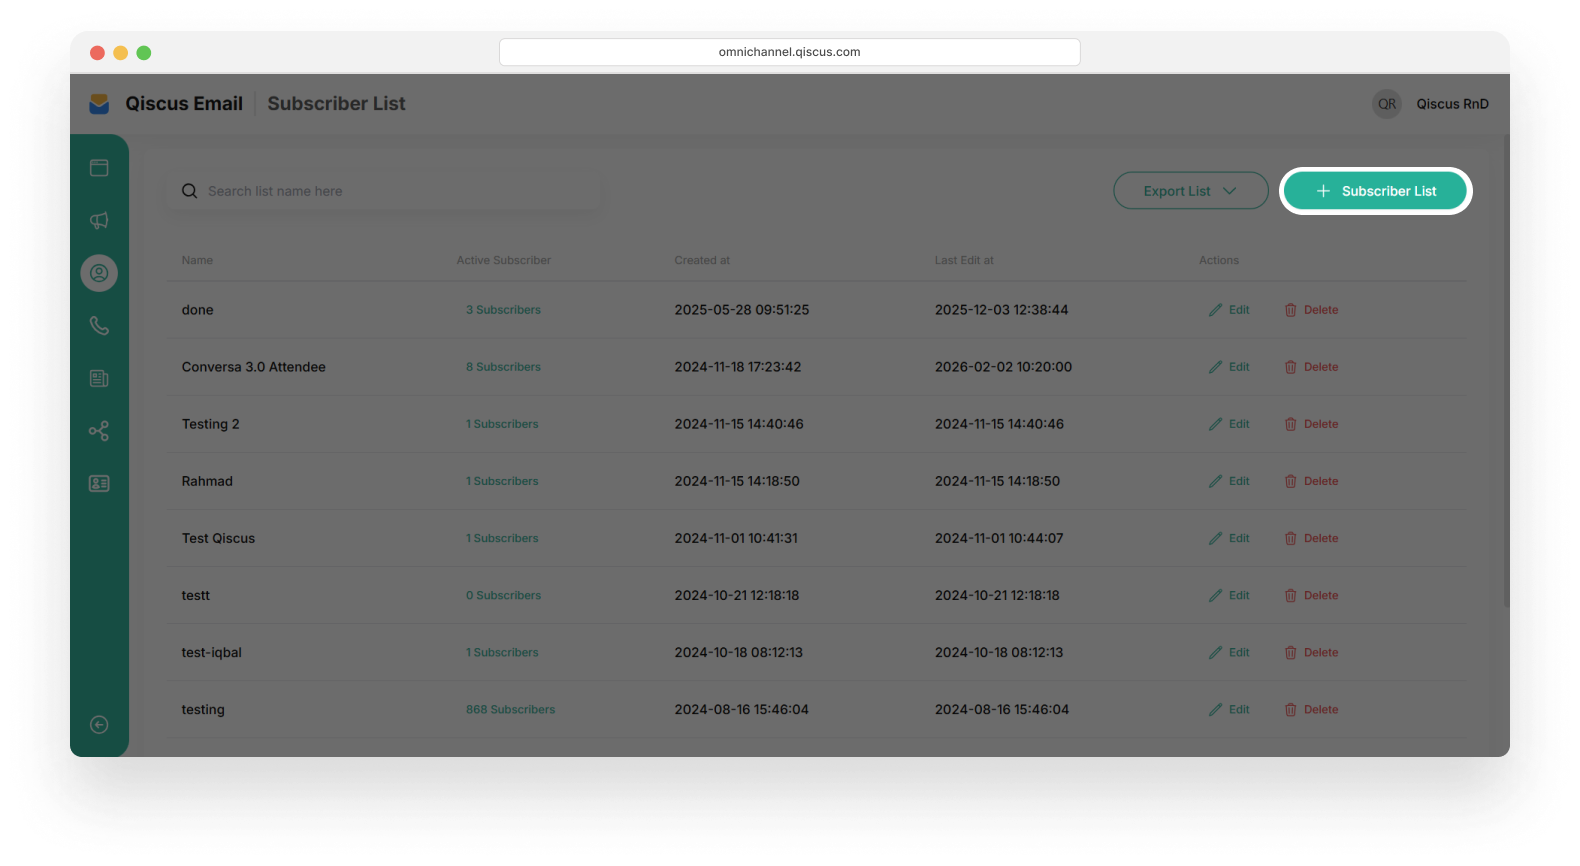
Go to the Subscriber menu.

Click the + Subscriber List button.
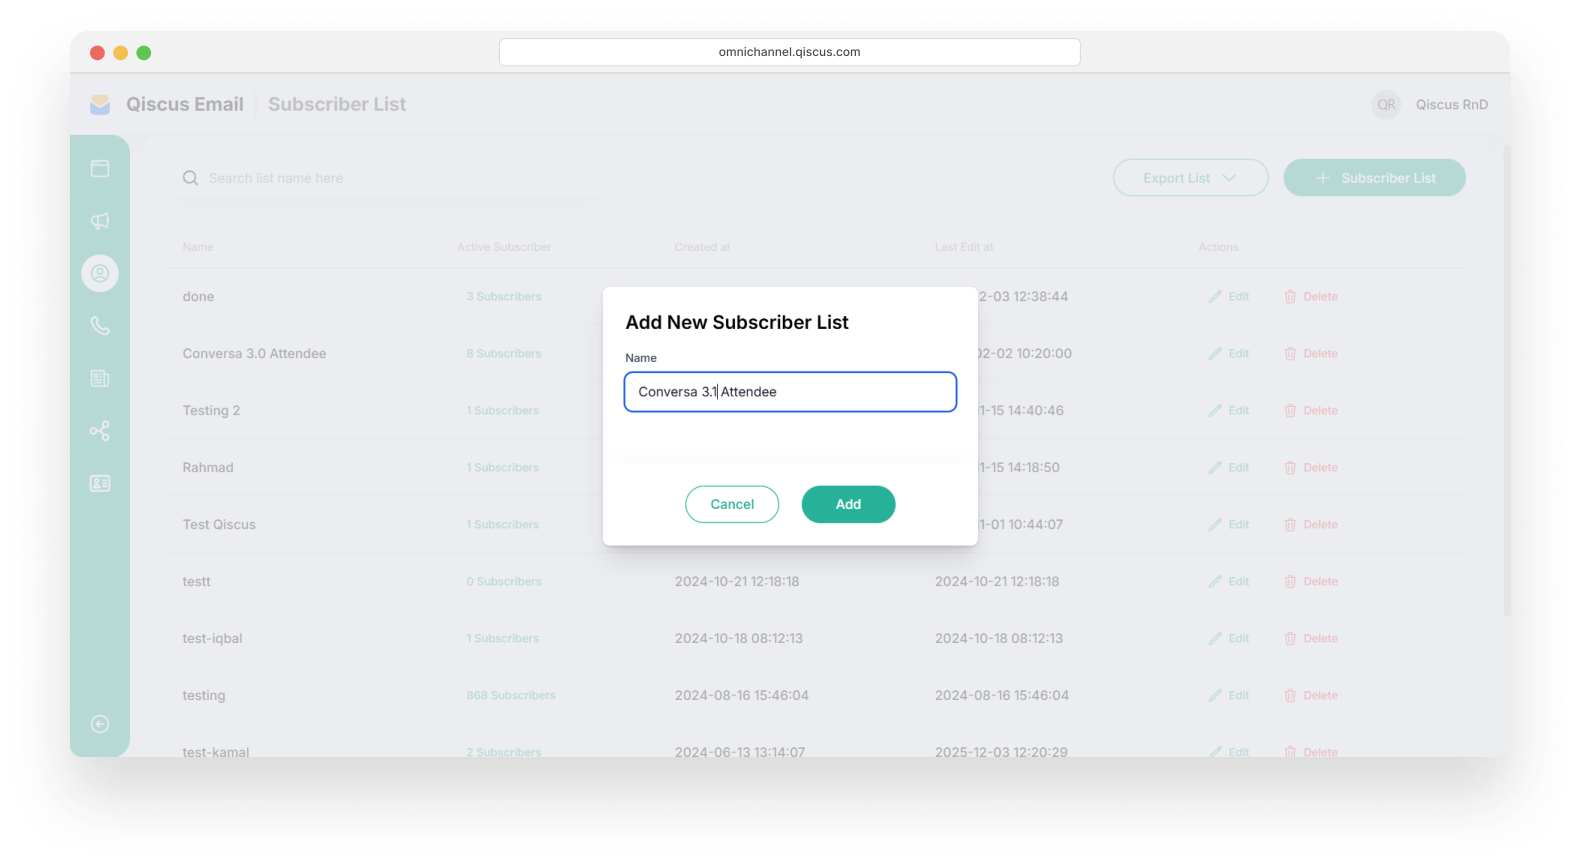
The Add New Subscriber List form will appear. Fill it in with the name you want to use. Click Add to save the subscriber group list.
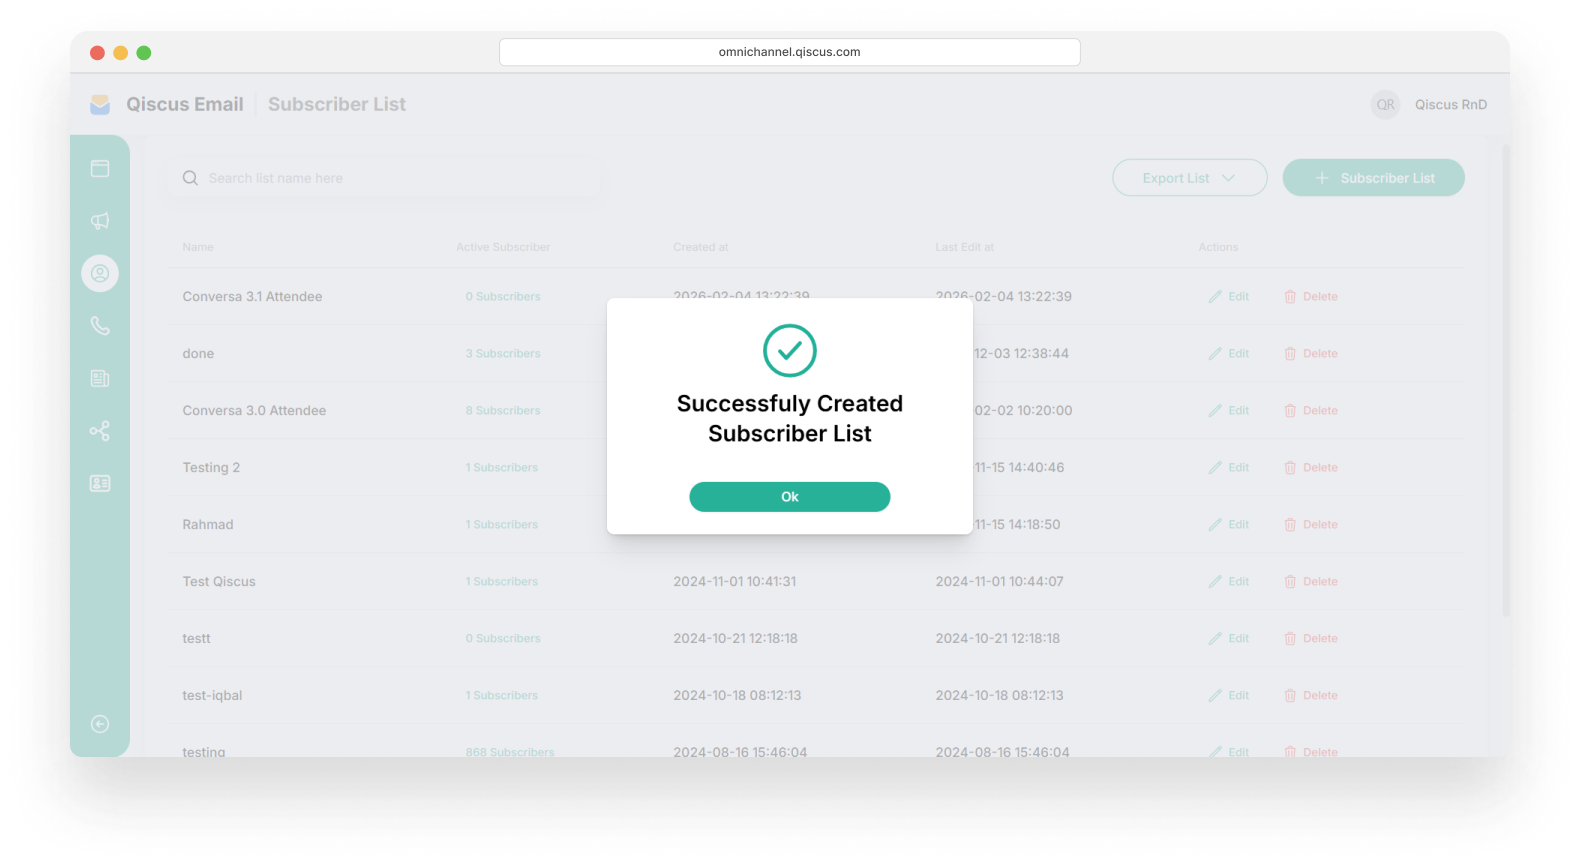
Successfully created a Subscriber List. Click Ok to close the pop-up
How to Add Contact to Subscriber List
Once you have created a subscriber list, you can add multiple contacts to it. This makes it easier to group customers or other categories when sending broadcast messages.
We provide two methods for adding subscribers: importing subscriber data using the Import File feature, or adding subscribers manually using the Add from Scratch or Add from Contacts options.
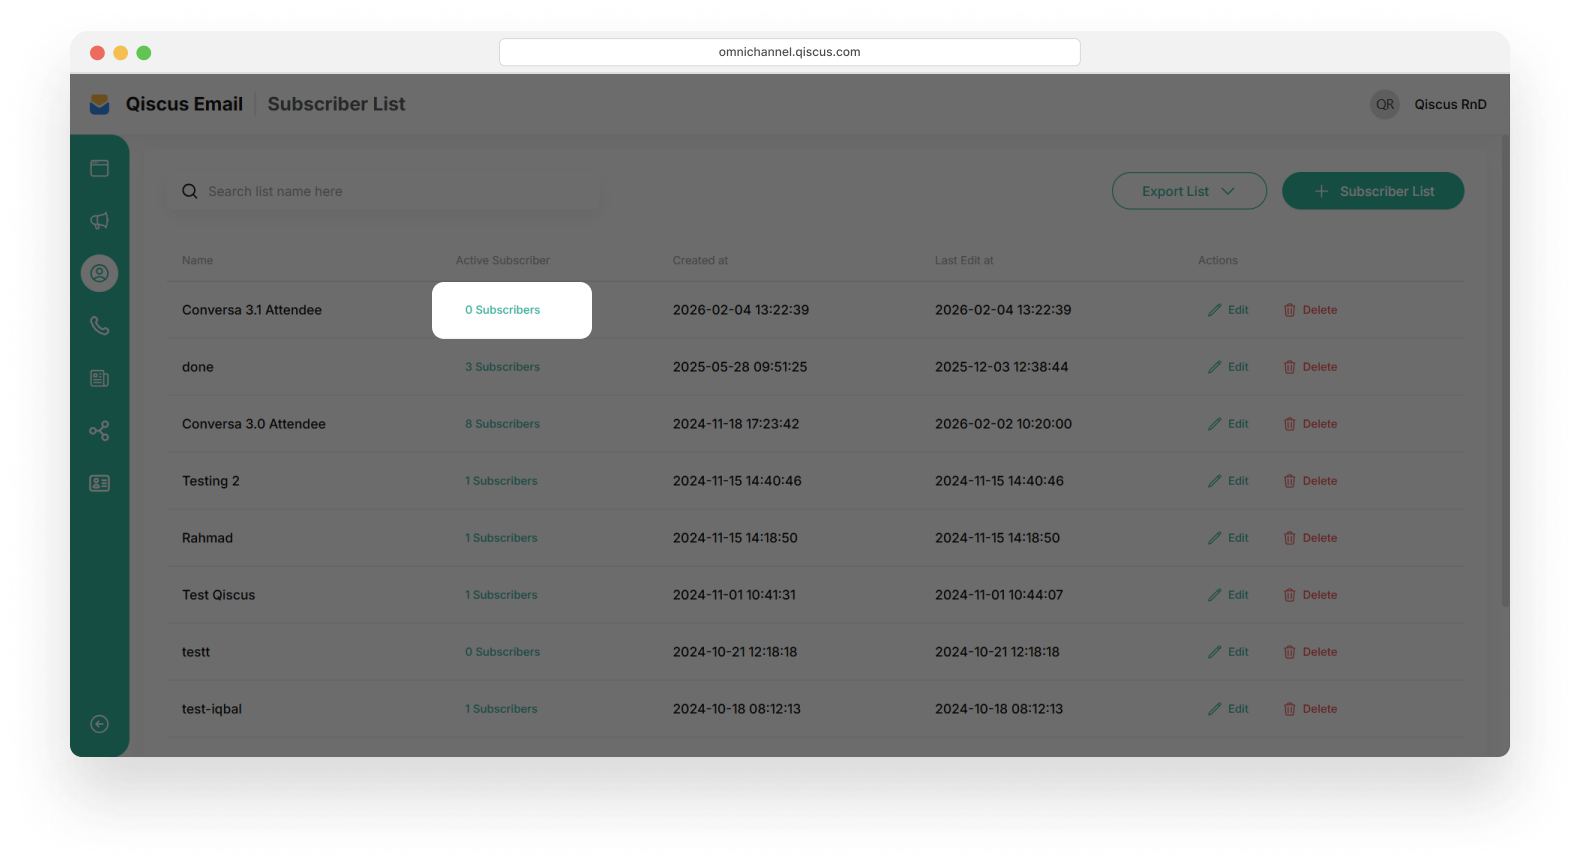
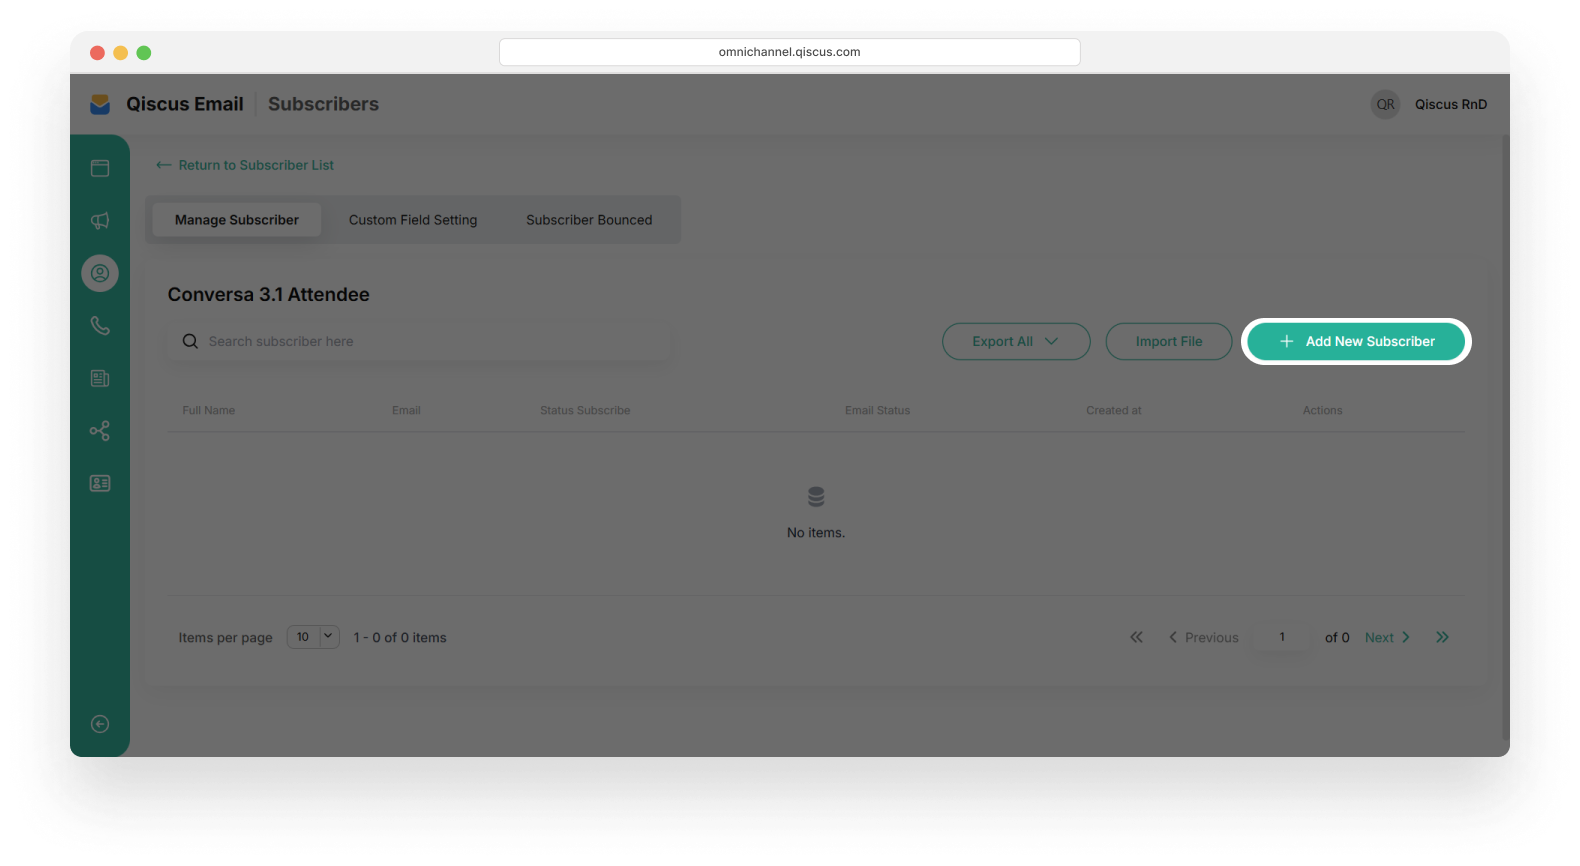
If you would like to add subscribers, click the subscriber count in the subscriber list to access the subscriber management page.
To add contacts to subscribers, click on the + Add New Subscriber button.
Add from Contacts
Add from Contact feature used if you want to add subscribers whose contacts you have added first in the Contact menu.
On the Add Subscriber option, choose Add from Contacts.
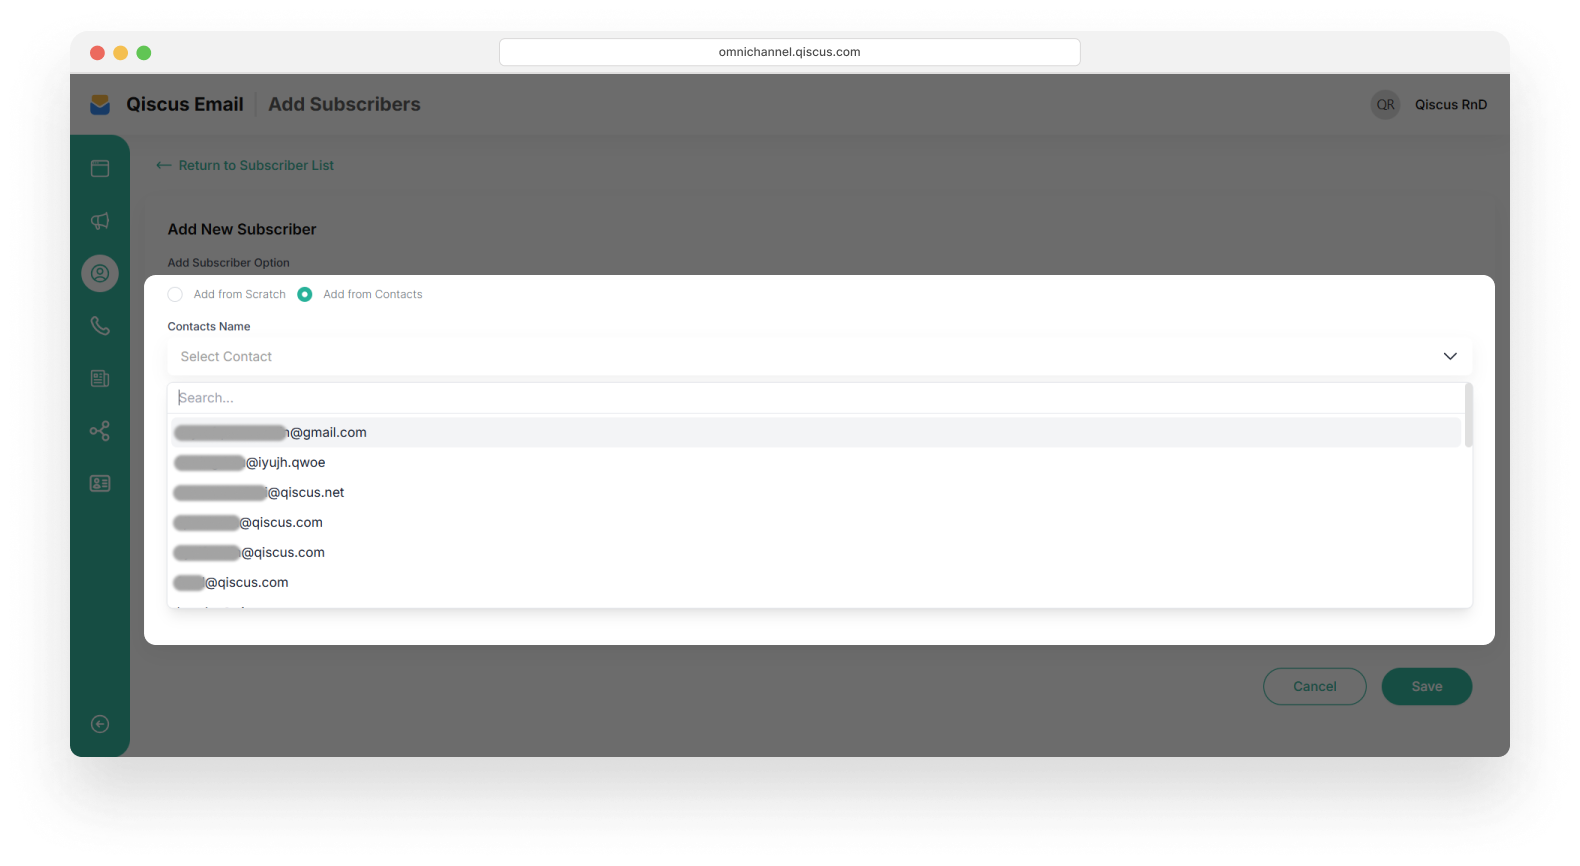
After that, you can search for or select a Contact Name, then add it by clicking on the name. You can add multiple contact names at once. Click Save to add subscriber.
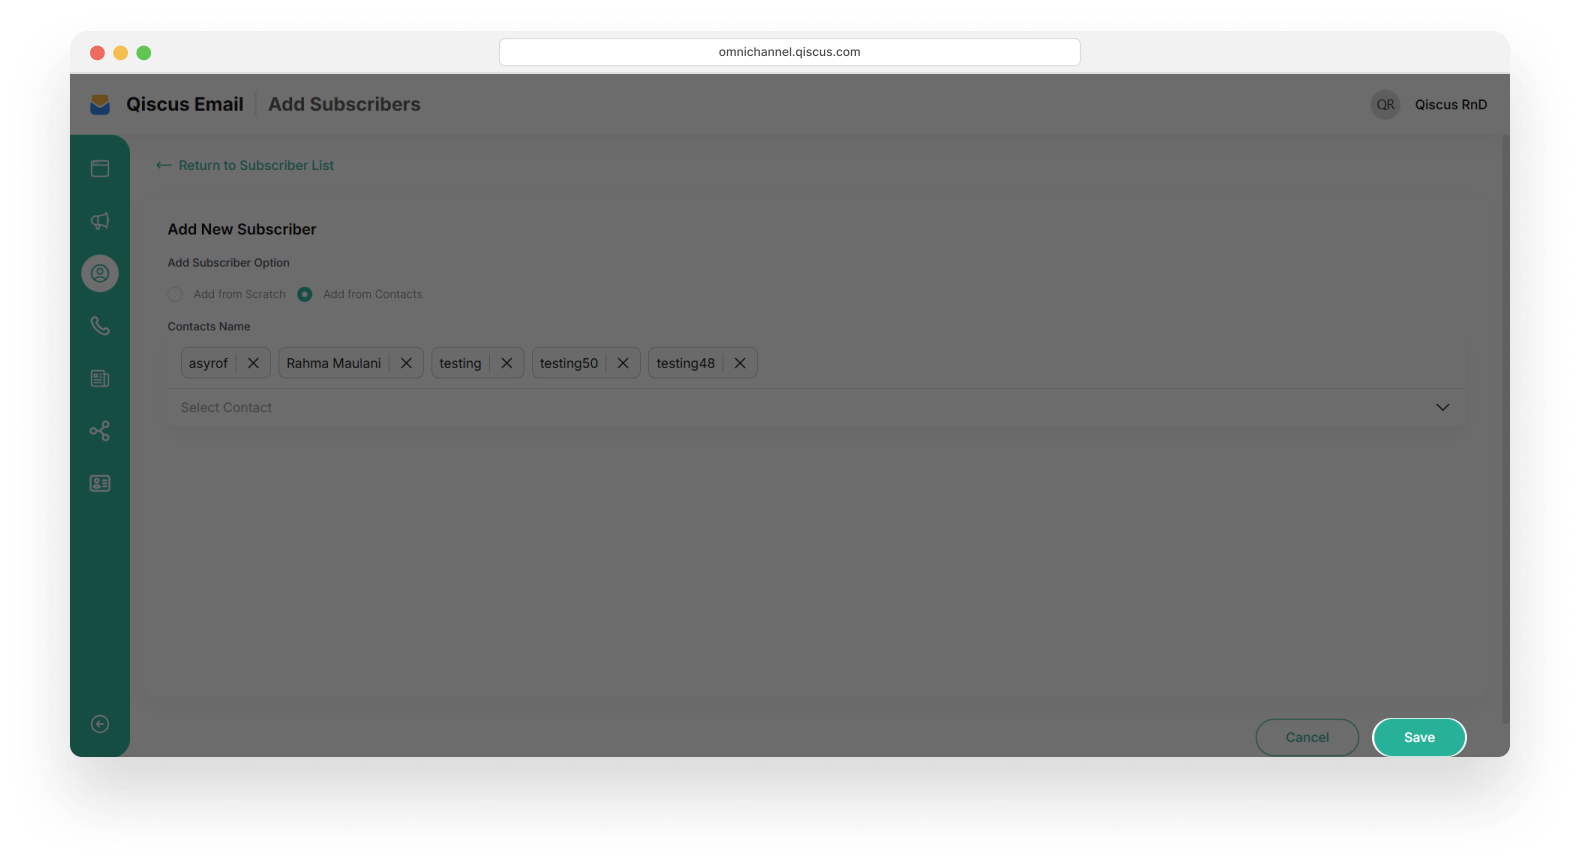
The contact list was successfully added to the Conversa 3.1 Attendee subscriber list.
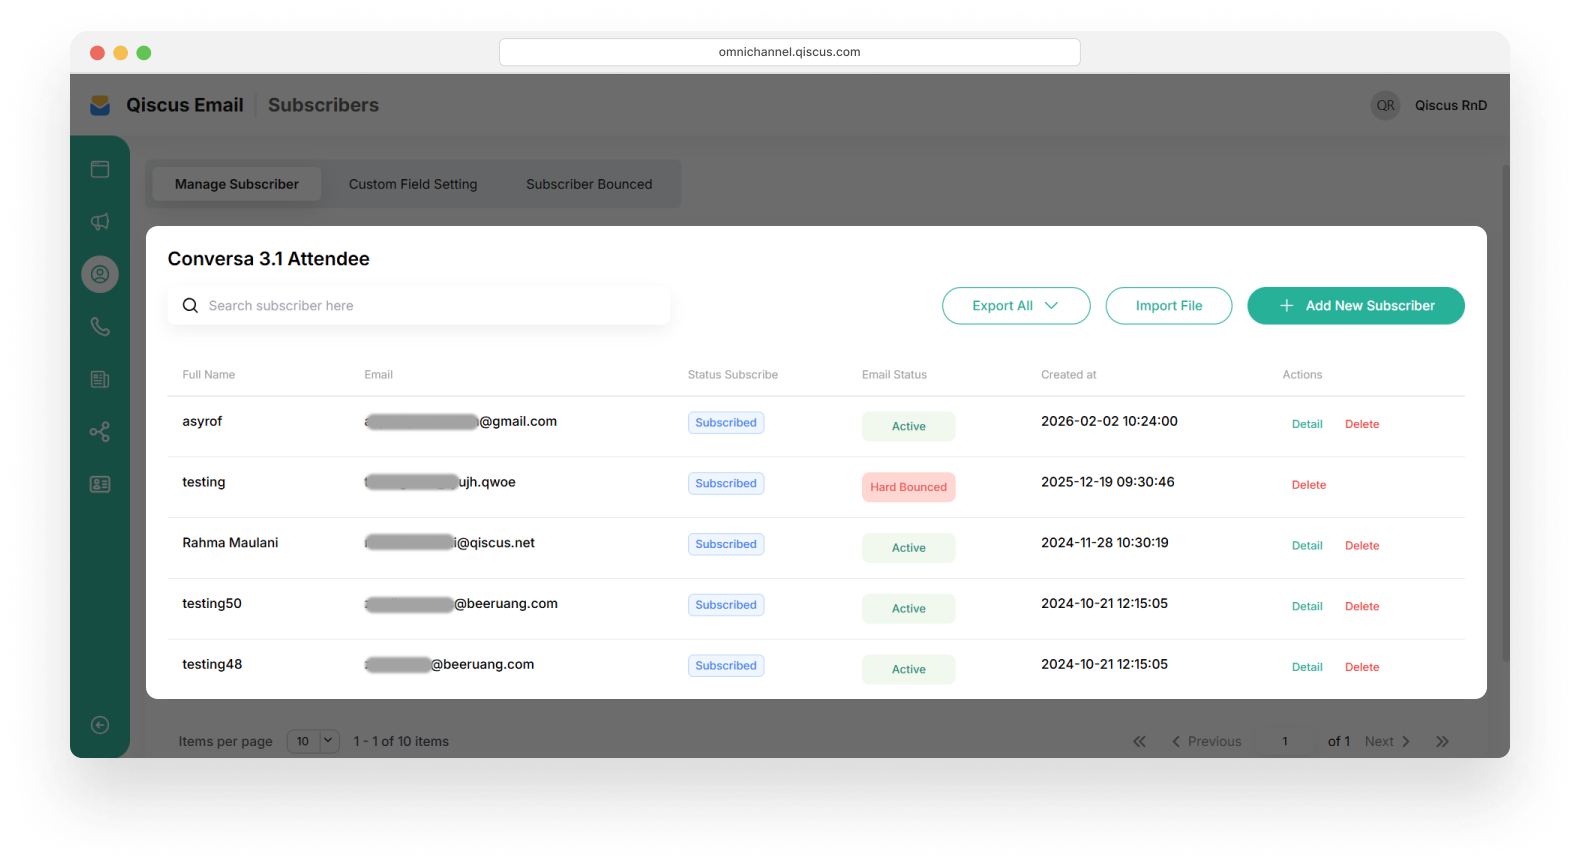
The subscription list provides details on active and inactive email addresses. You can open details or remove email addresses from the list.

Email statuses include Active, Soft Bounced, and Hard Bounced, indicating valid, undelivered, and deactivated email addresses
Add form Scratch
To add a new subscriber that does not exist in the Contact menu, use the Add from Scratch feature. Please follow the steps below.
Ensure that The Subscription List you choose is correct. Then Choose Add from Scratch.
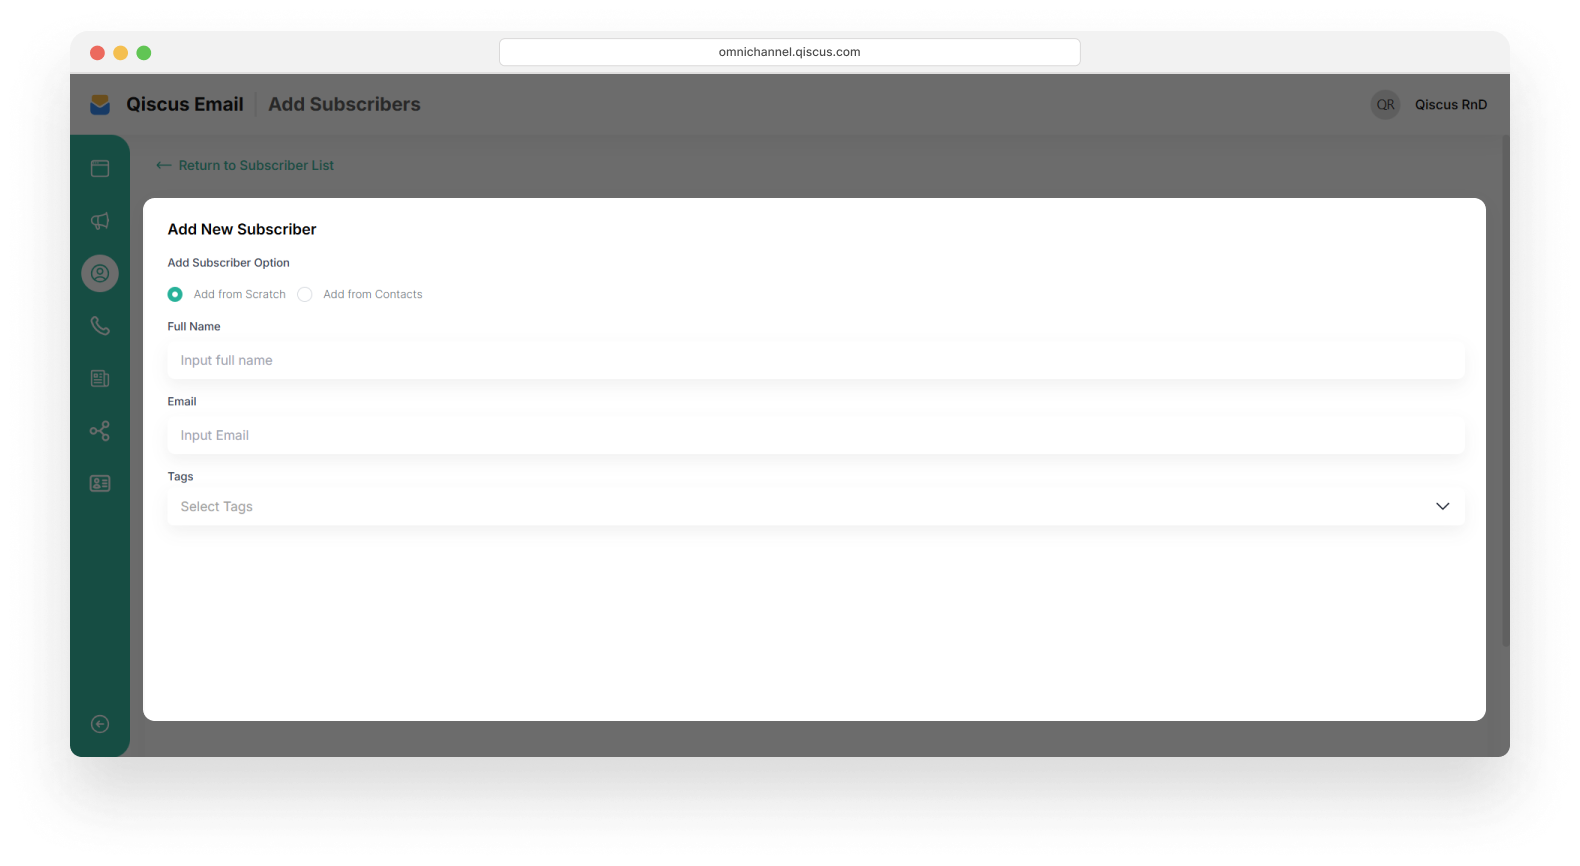
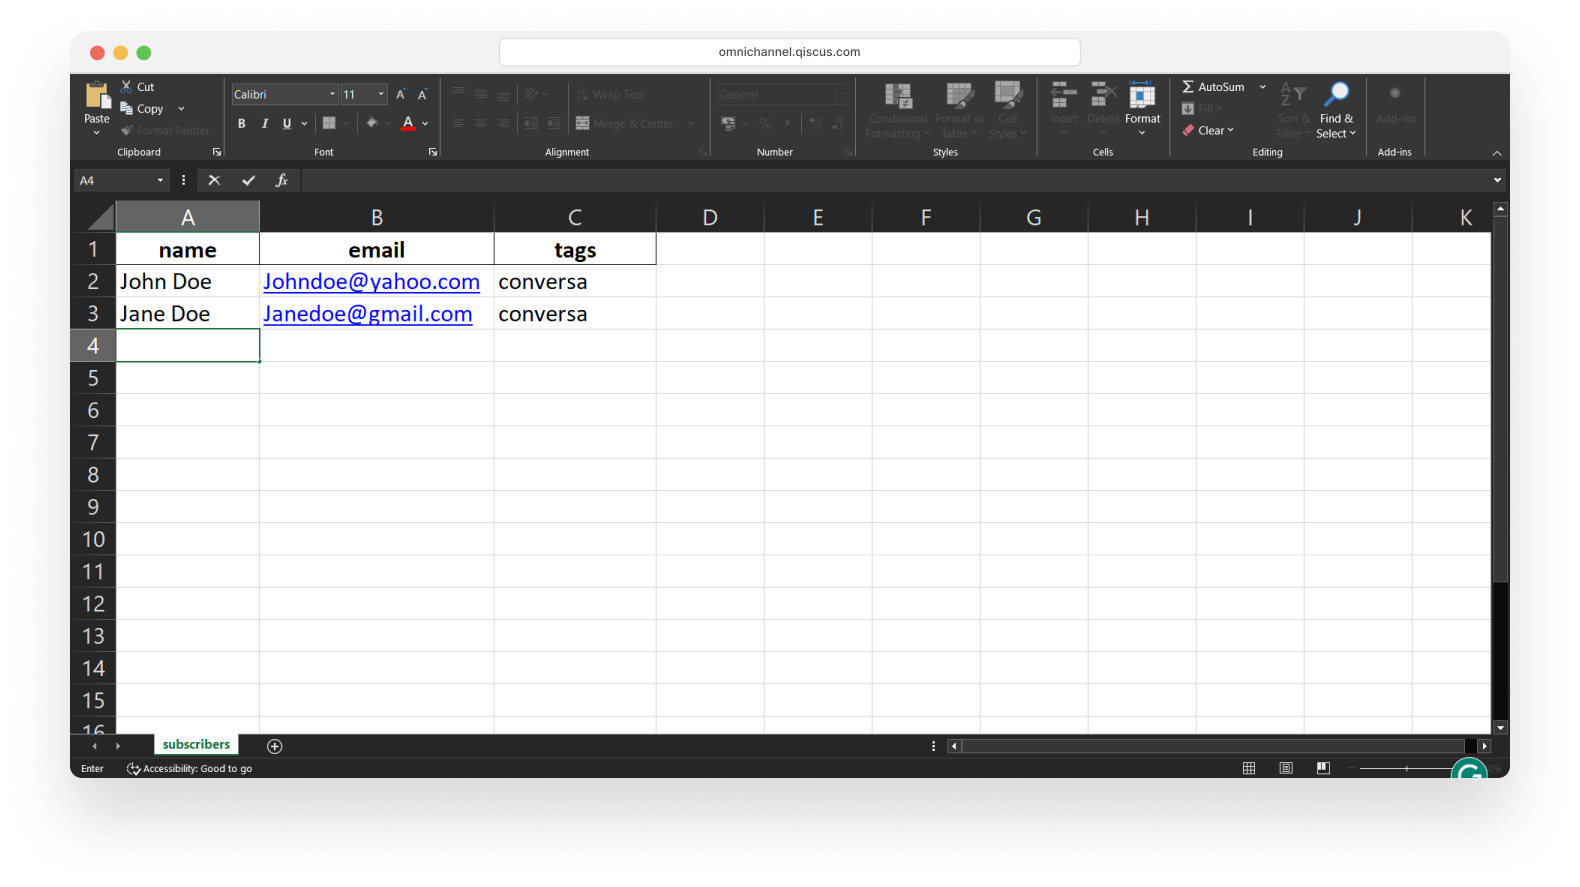
Fill in the contact Name, Email and Tag.
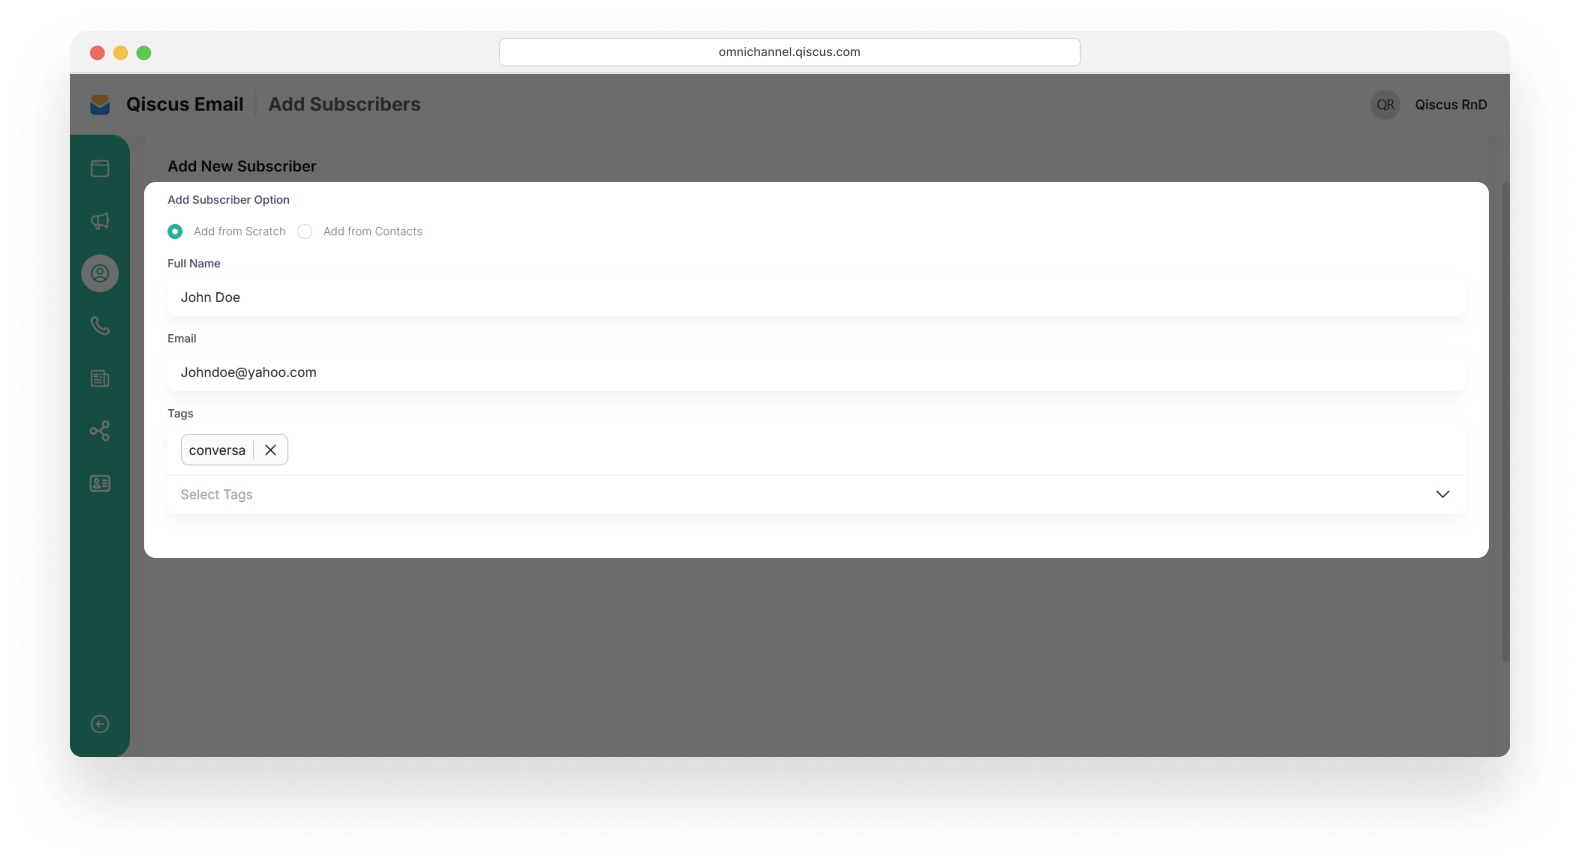
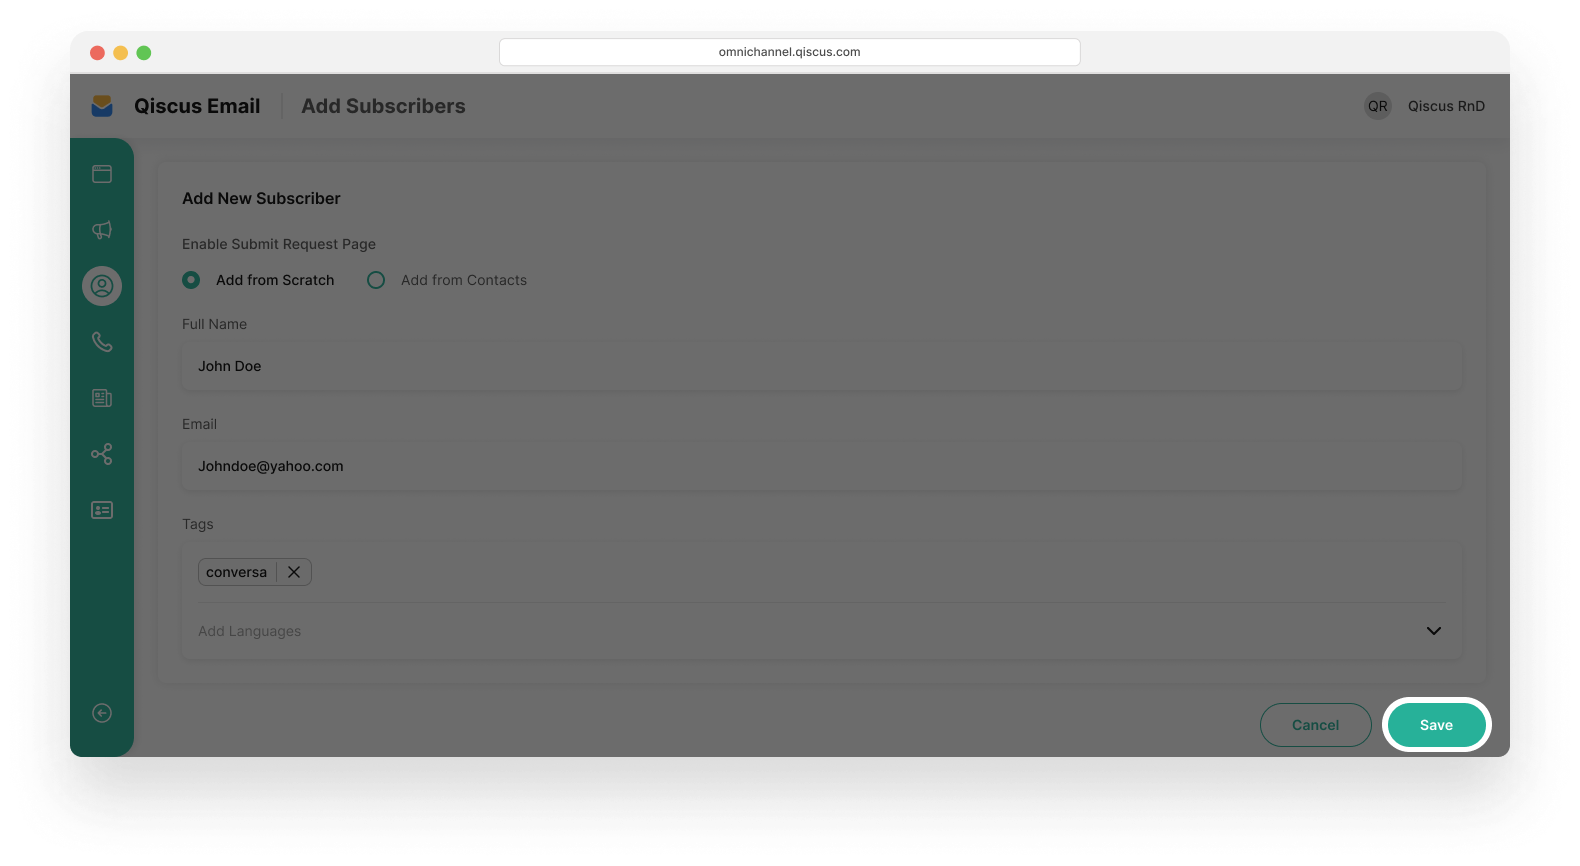
Click Save to add subscriber..
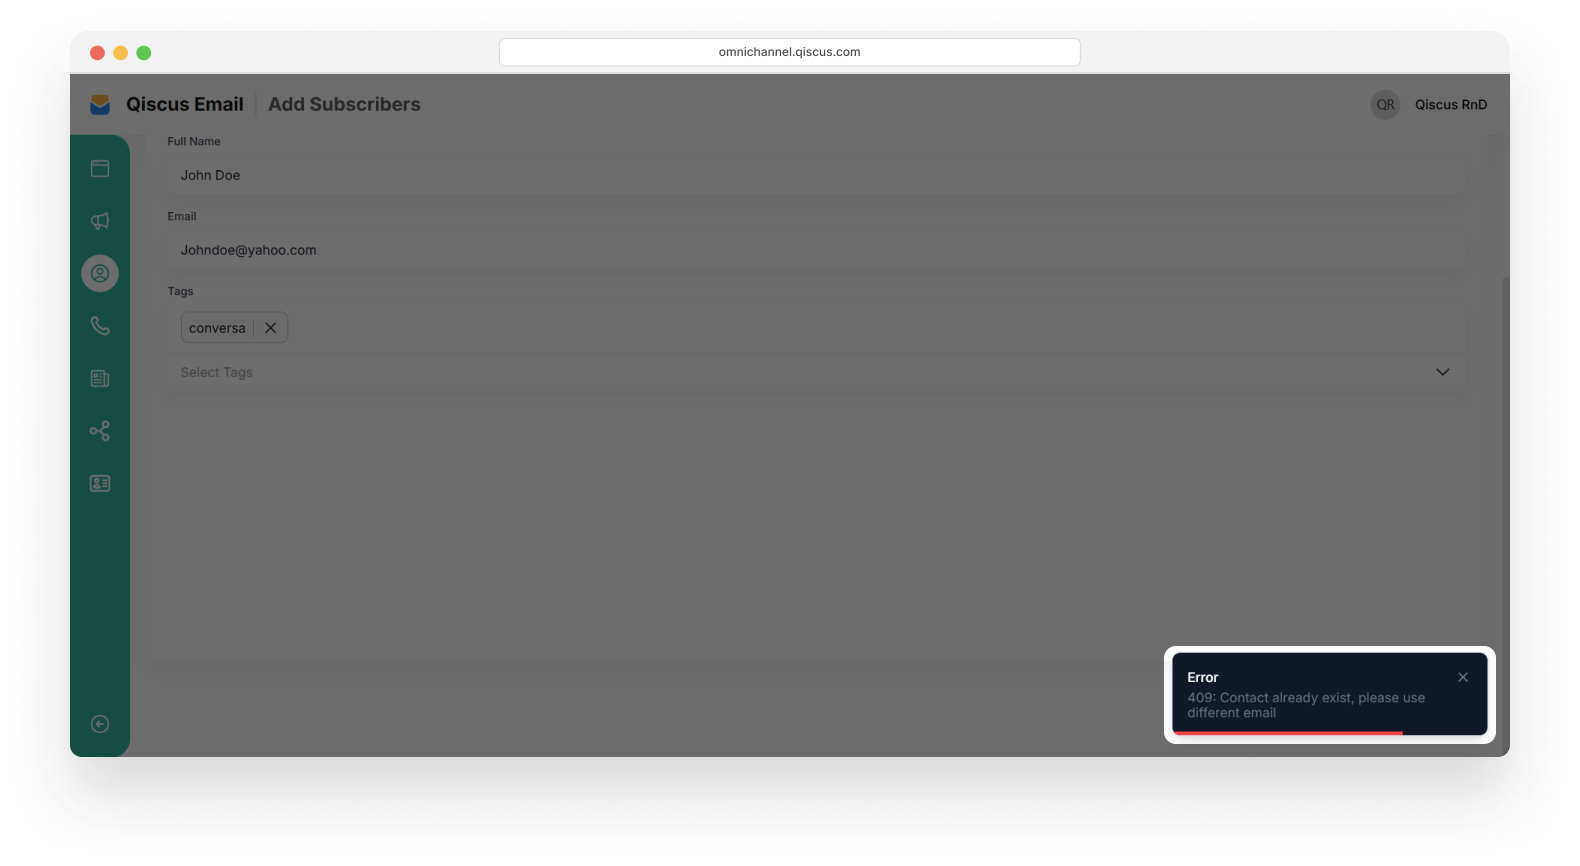
A notification will appear if the email address has already been registered.
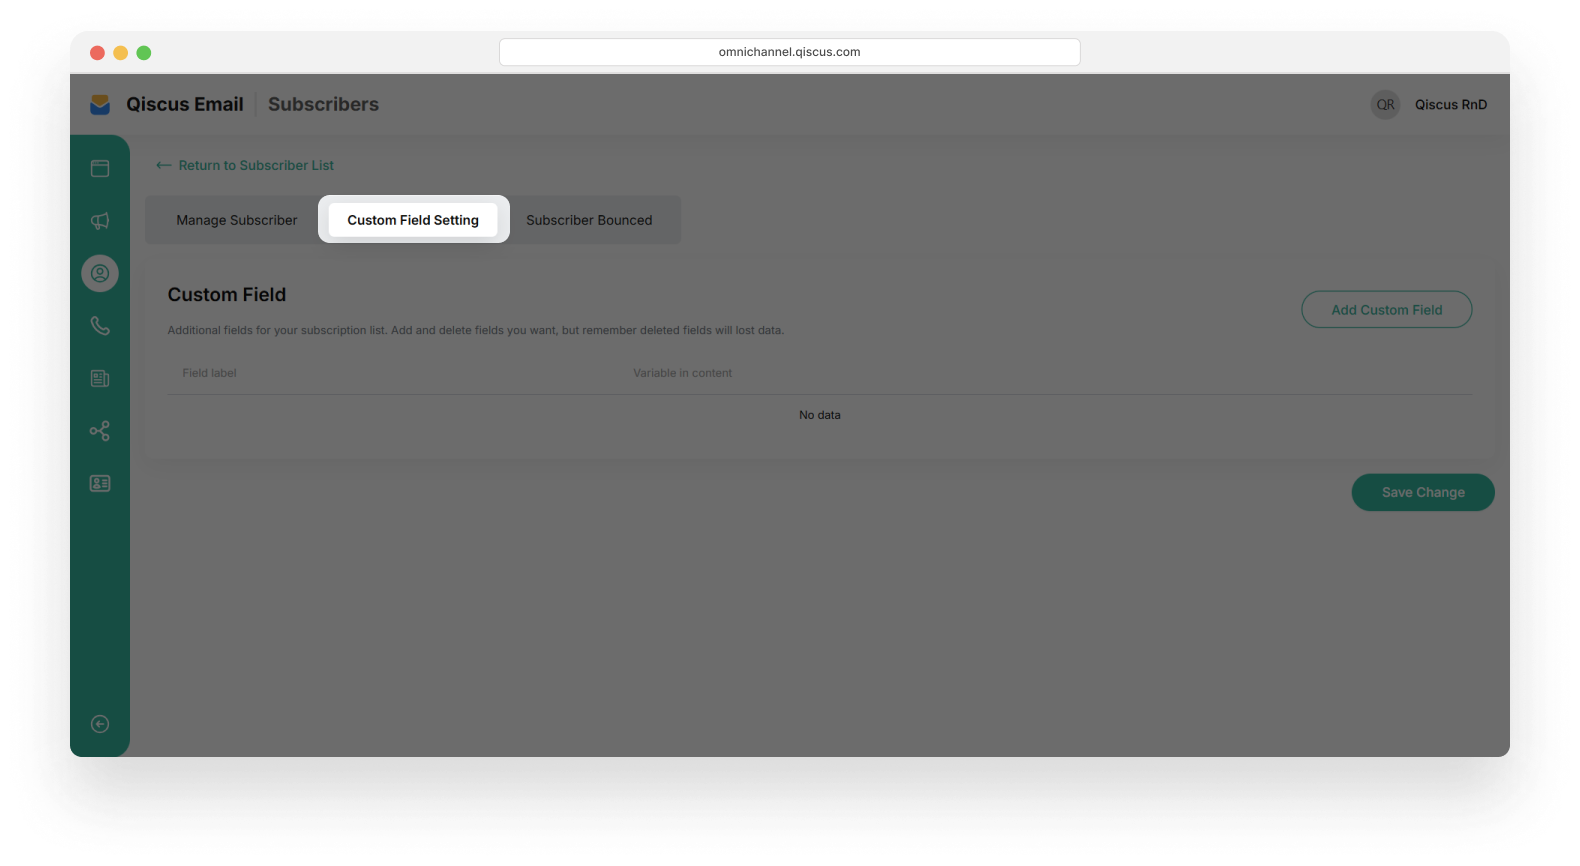
Custom Field Setting
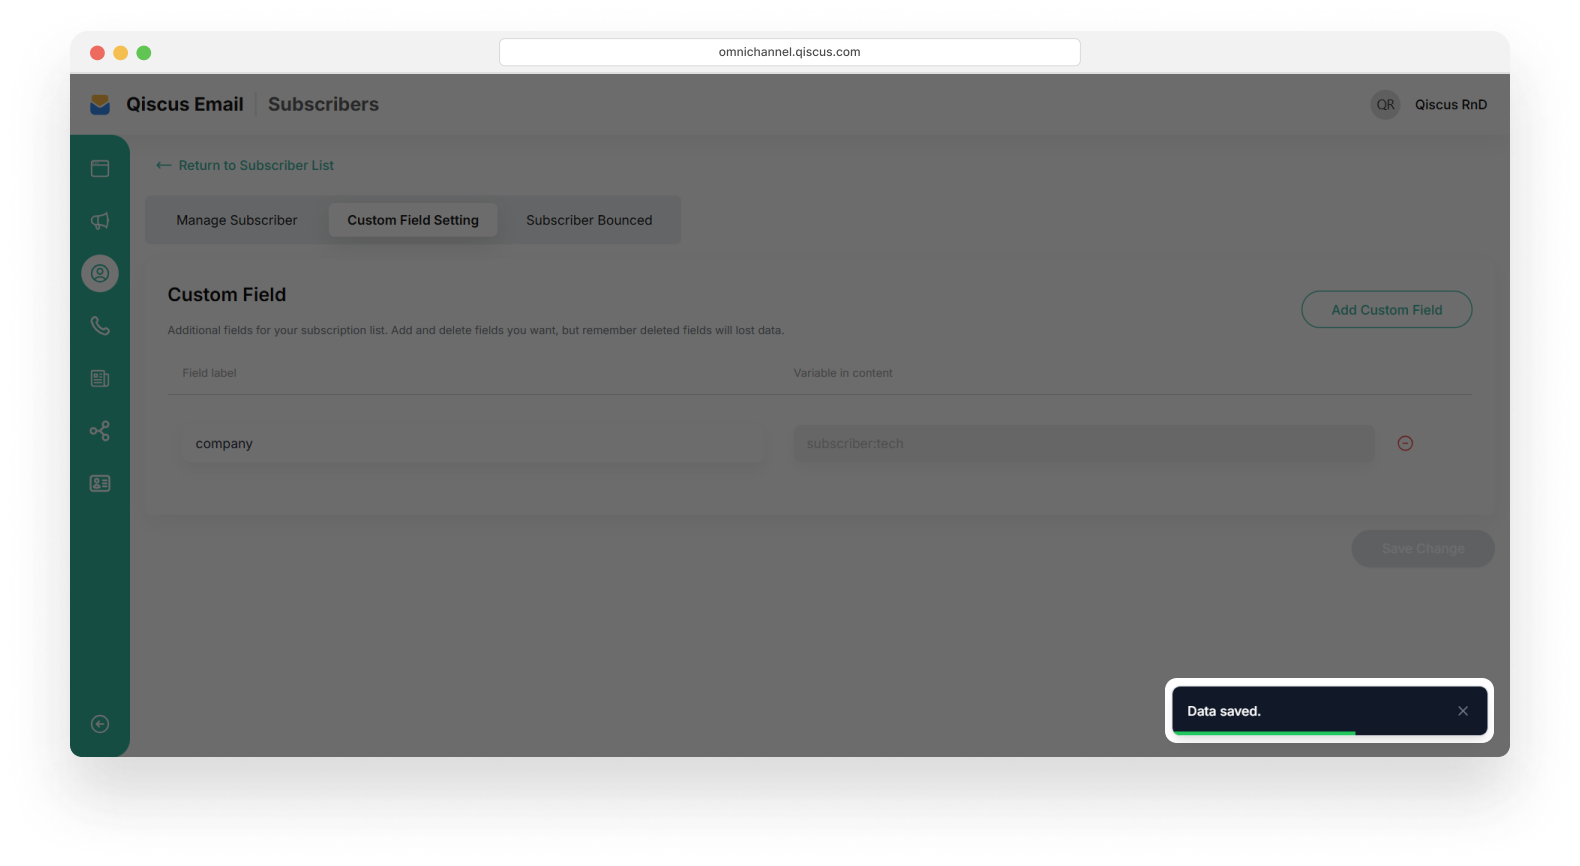
Custom fields are used to provide flexibility for your needs by allowing additional information to be included in broadcast messages. Follow the steps below to create a custom field:
Navigate to Custom Field Settings next to the Manage Subscriber menu.
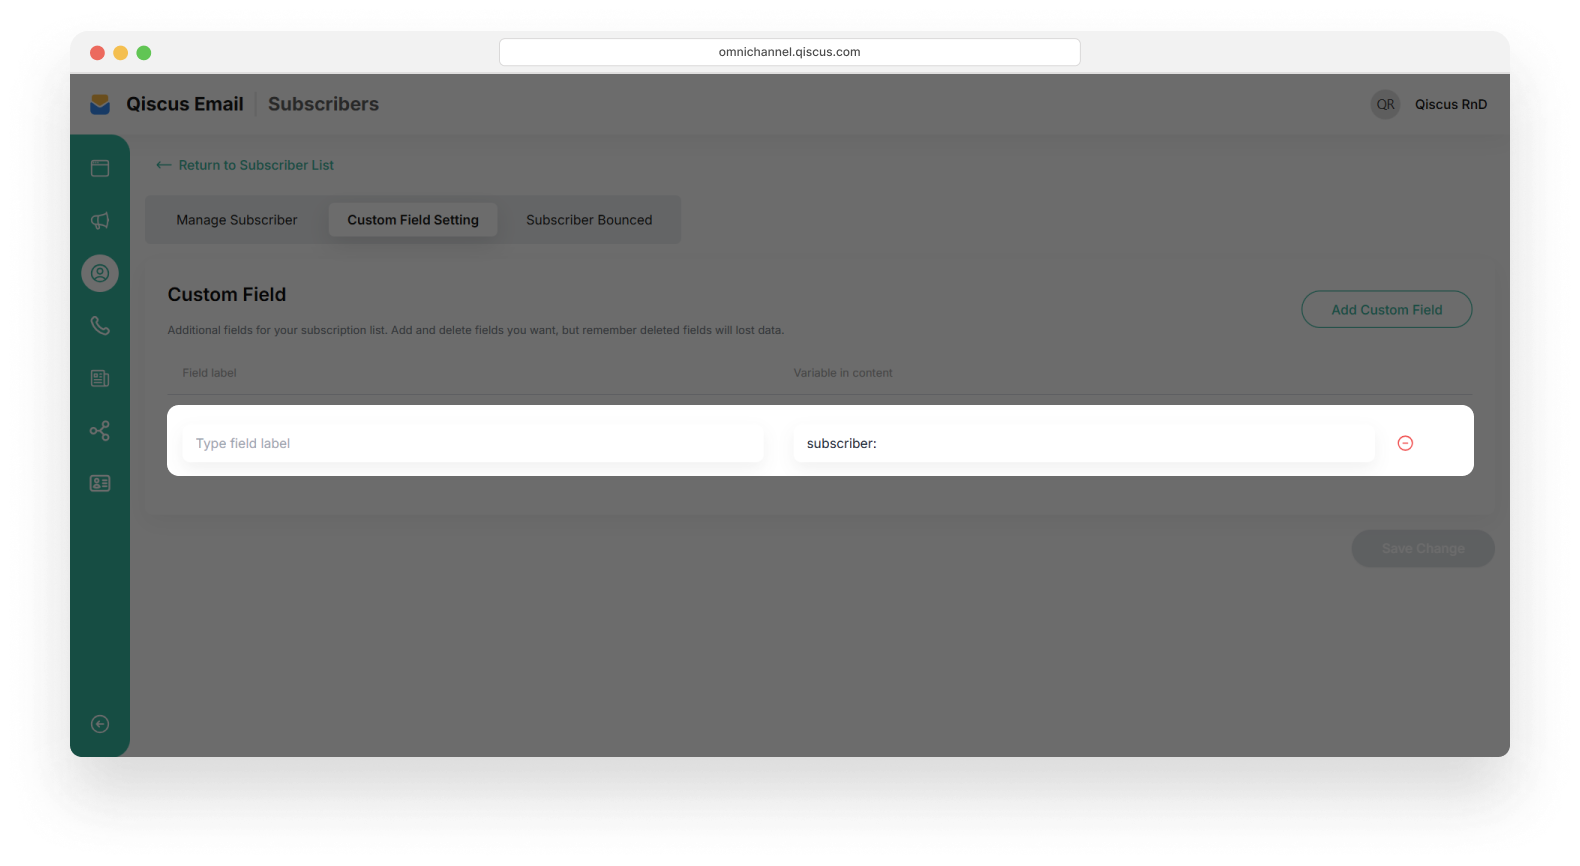
Select Add Custom Field.
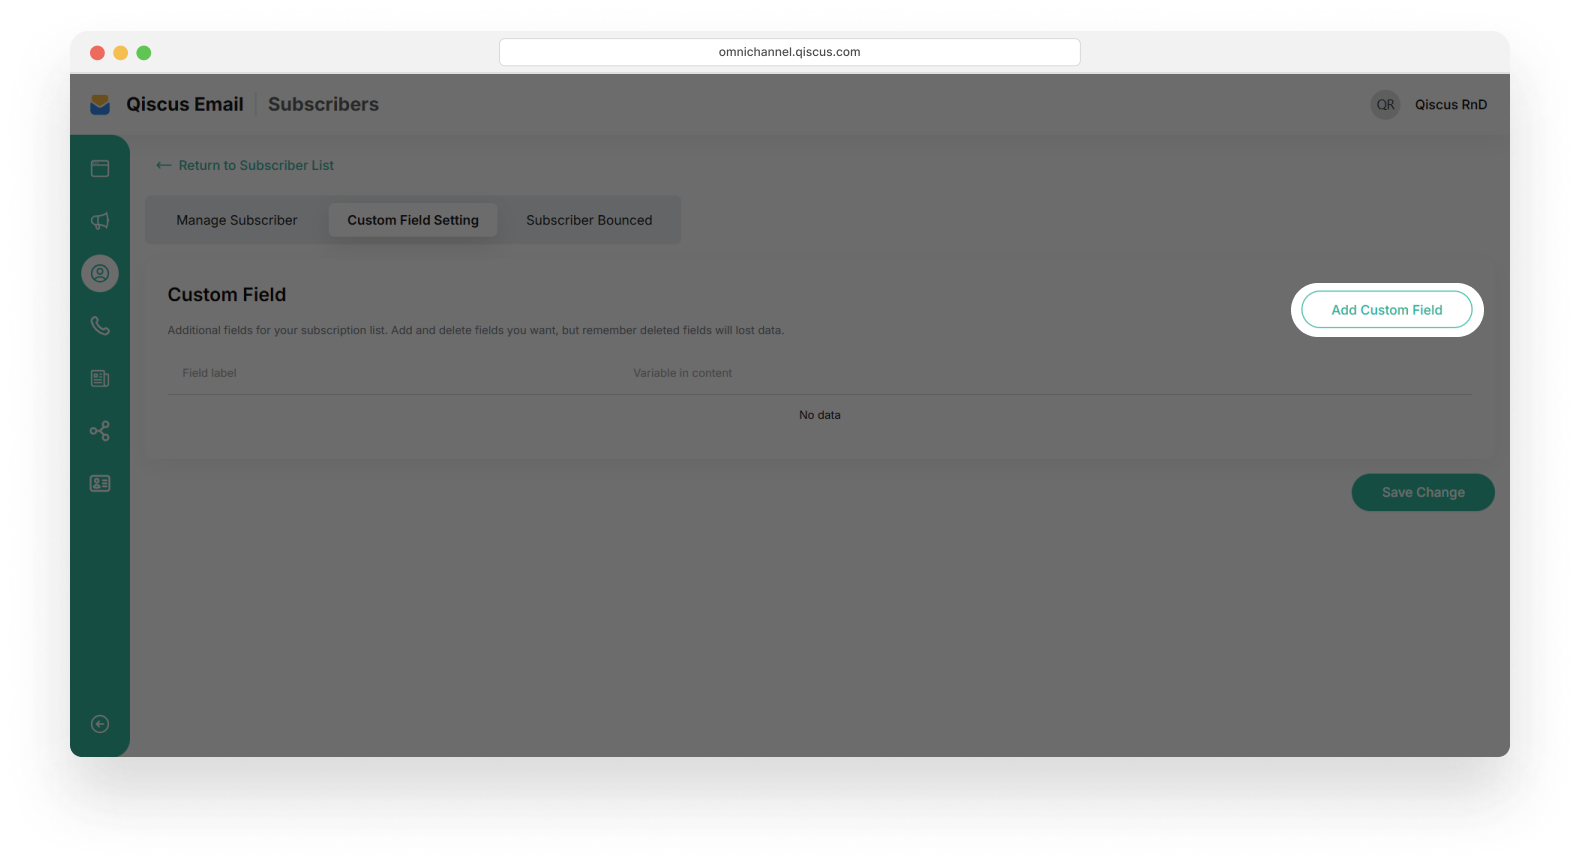
Enter the required information and ensure that both the Field Label and Variable fields are completed.
Click Save to save the custom field.
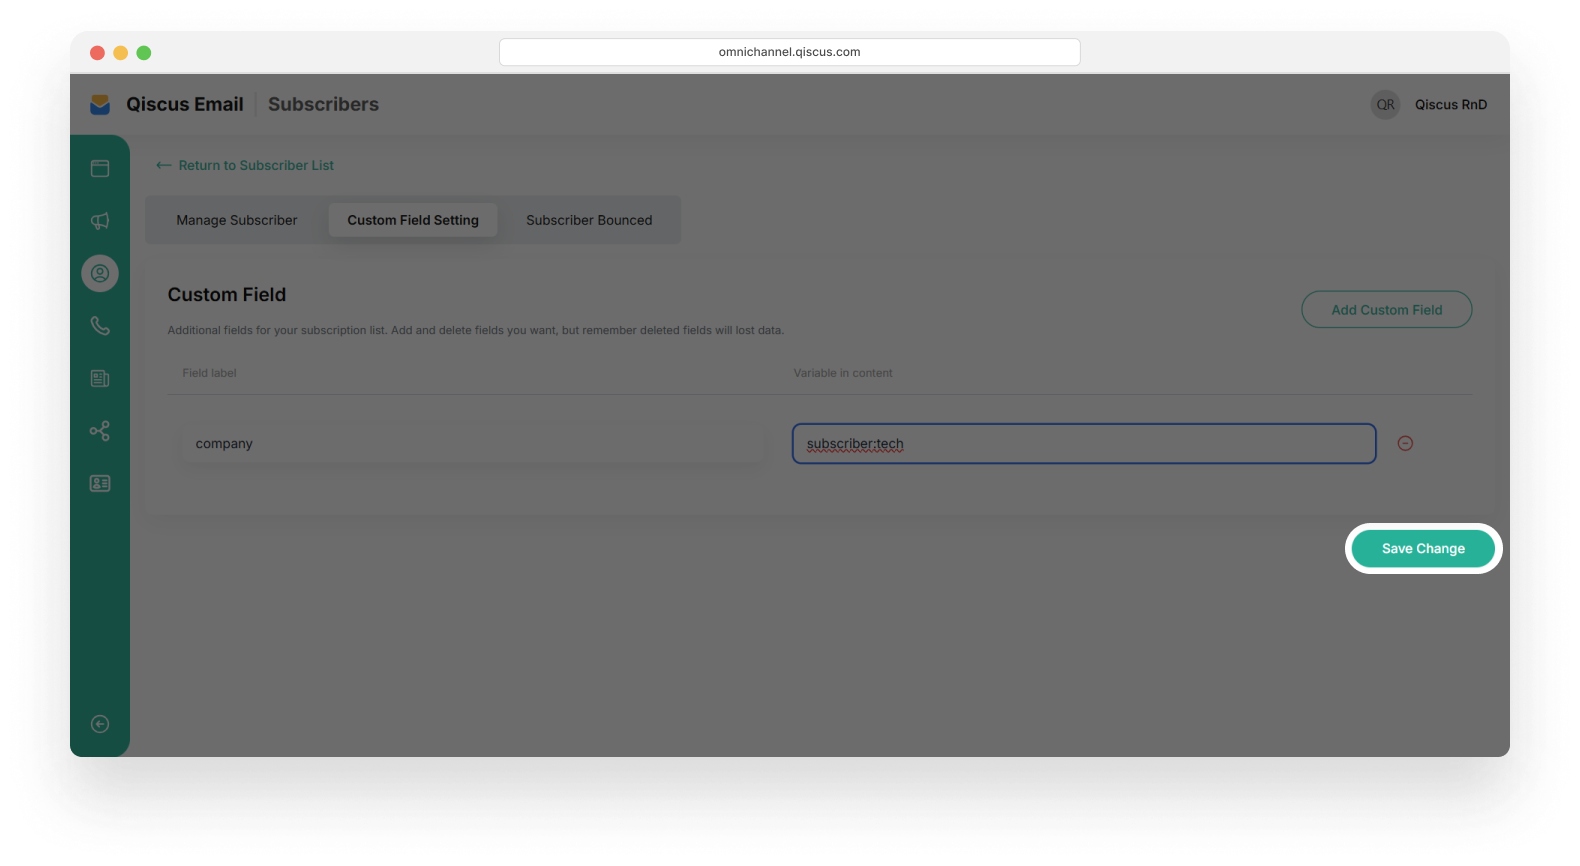
The system will display a success notification when all required fields have been filled in and saved.
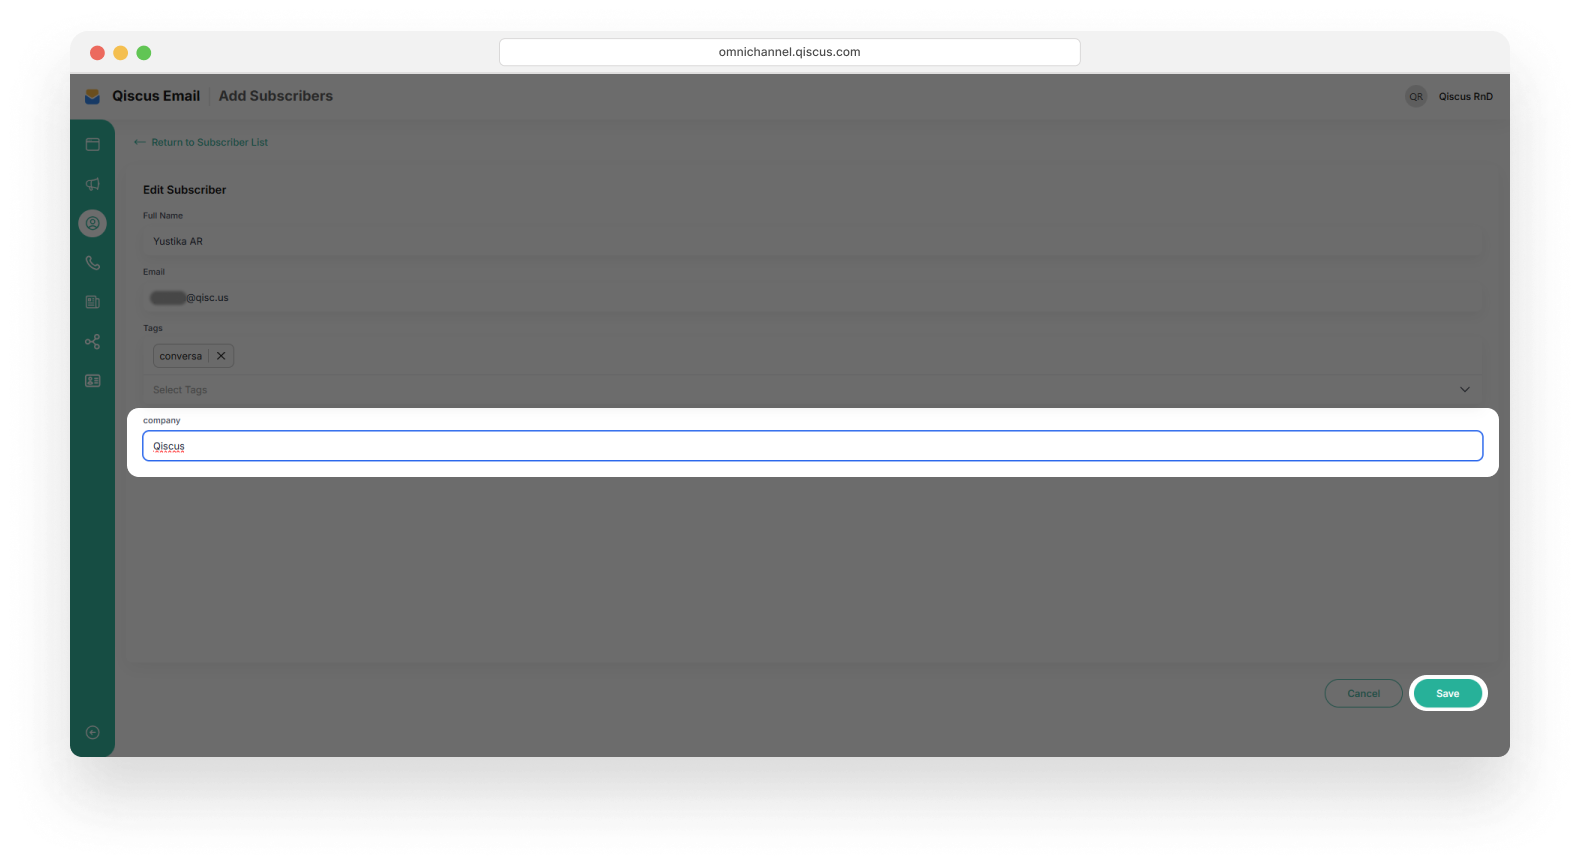
After saving the custom field data, go back to the Manage Subscriber page. The custom field appears as a new column on the Manage Subscriber page after it is saved. Click the Detail to open more information
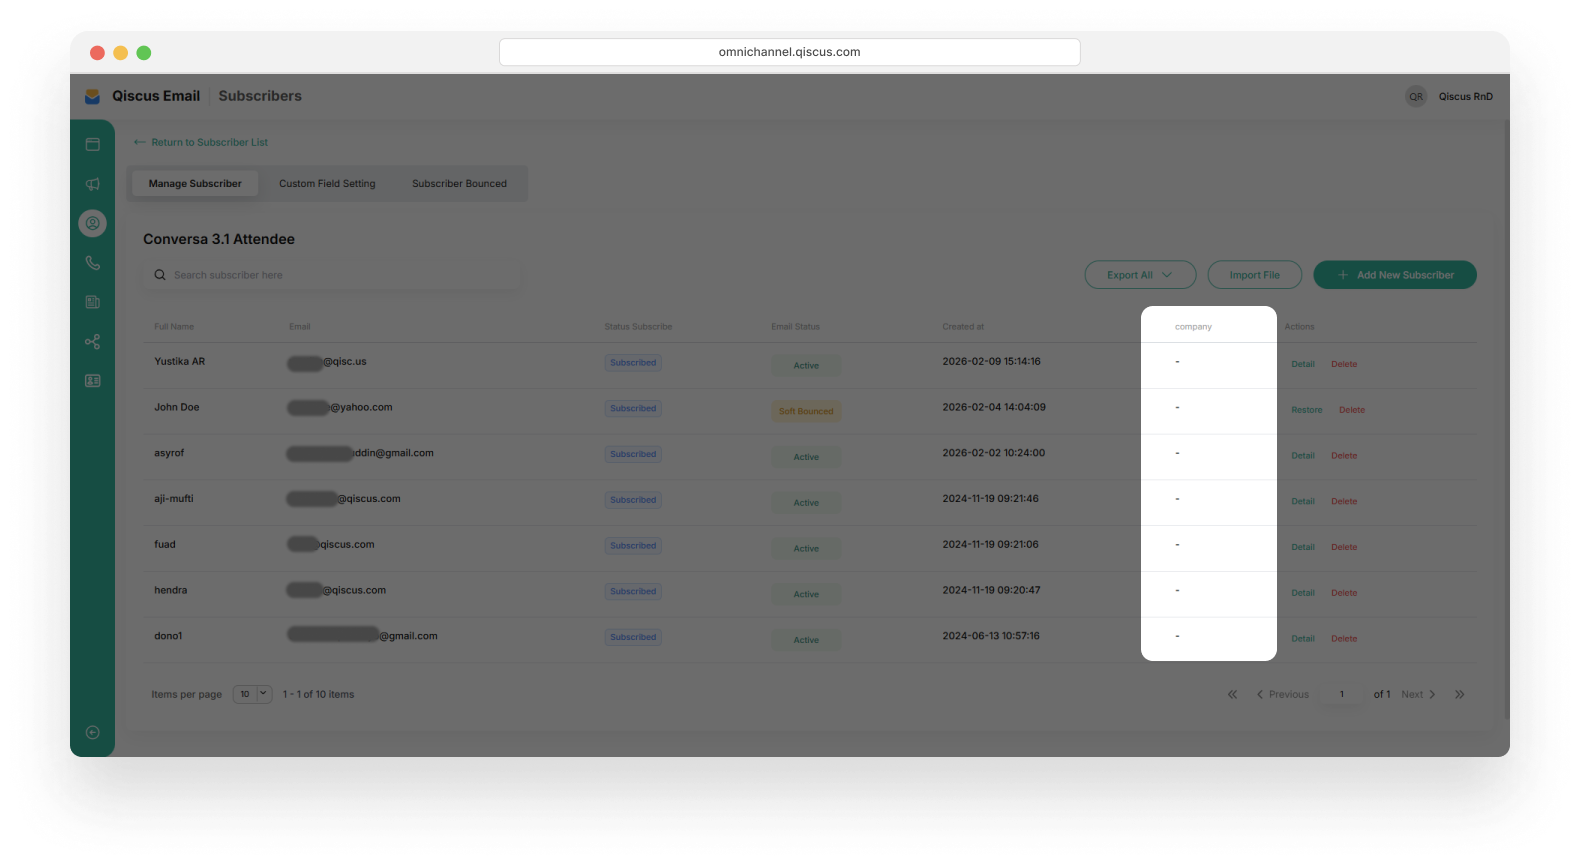
The custom field adds a new column for each subscriber. Fill in the column with the required information then click Save to apply the changes.
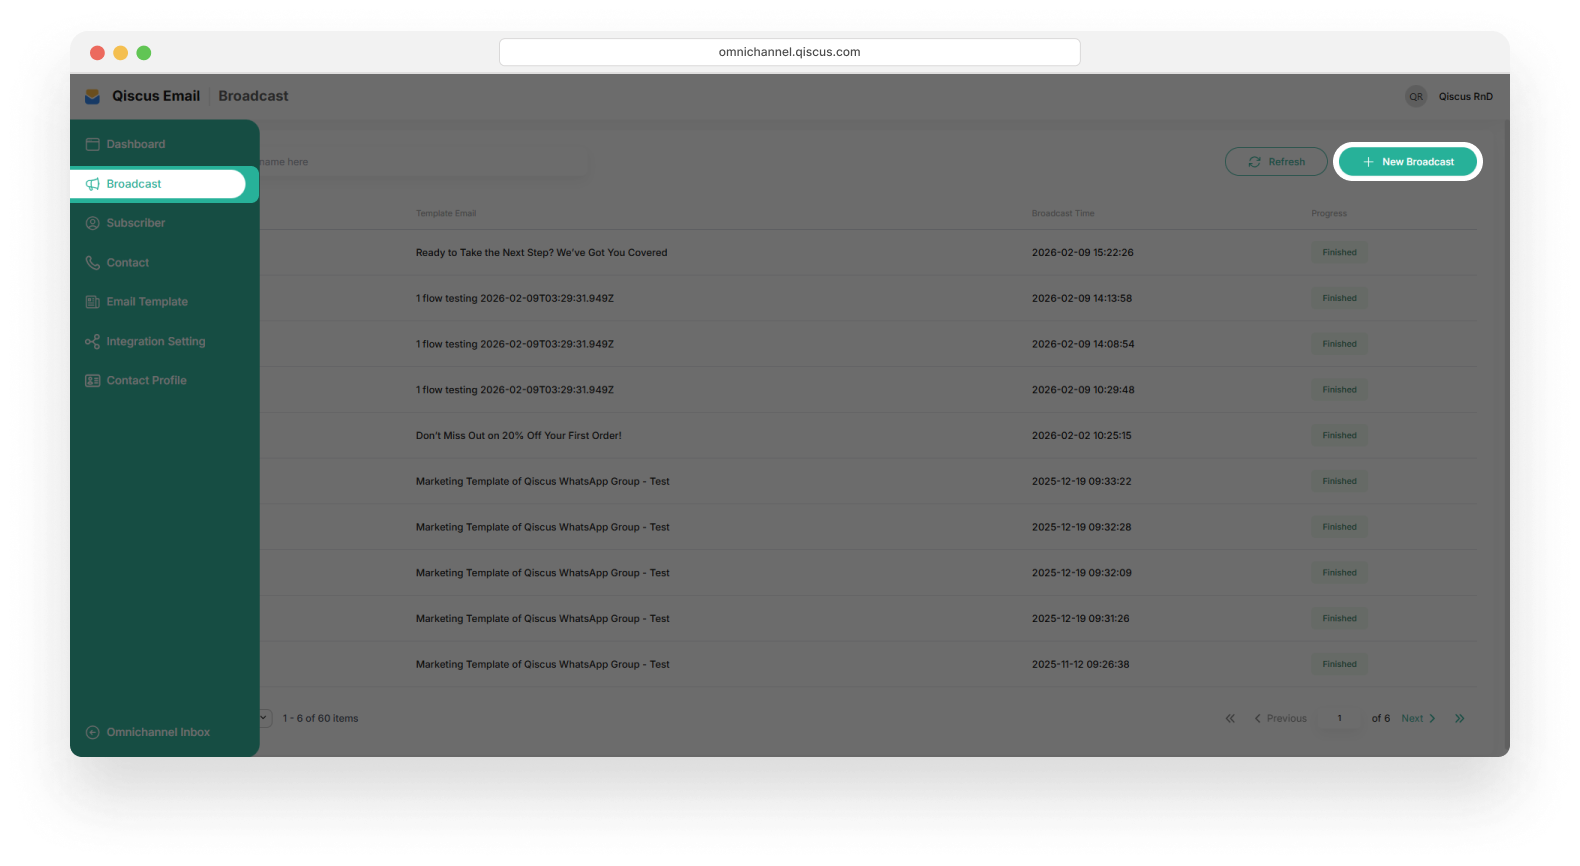
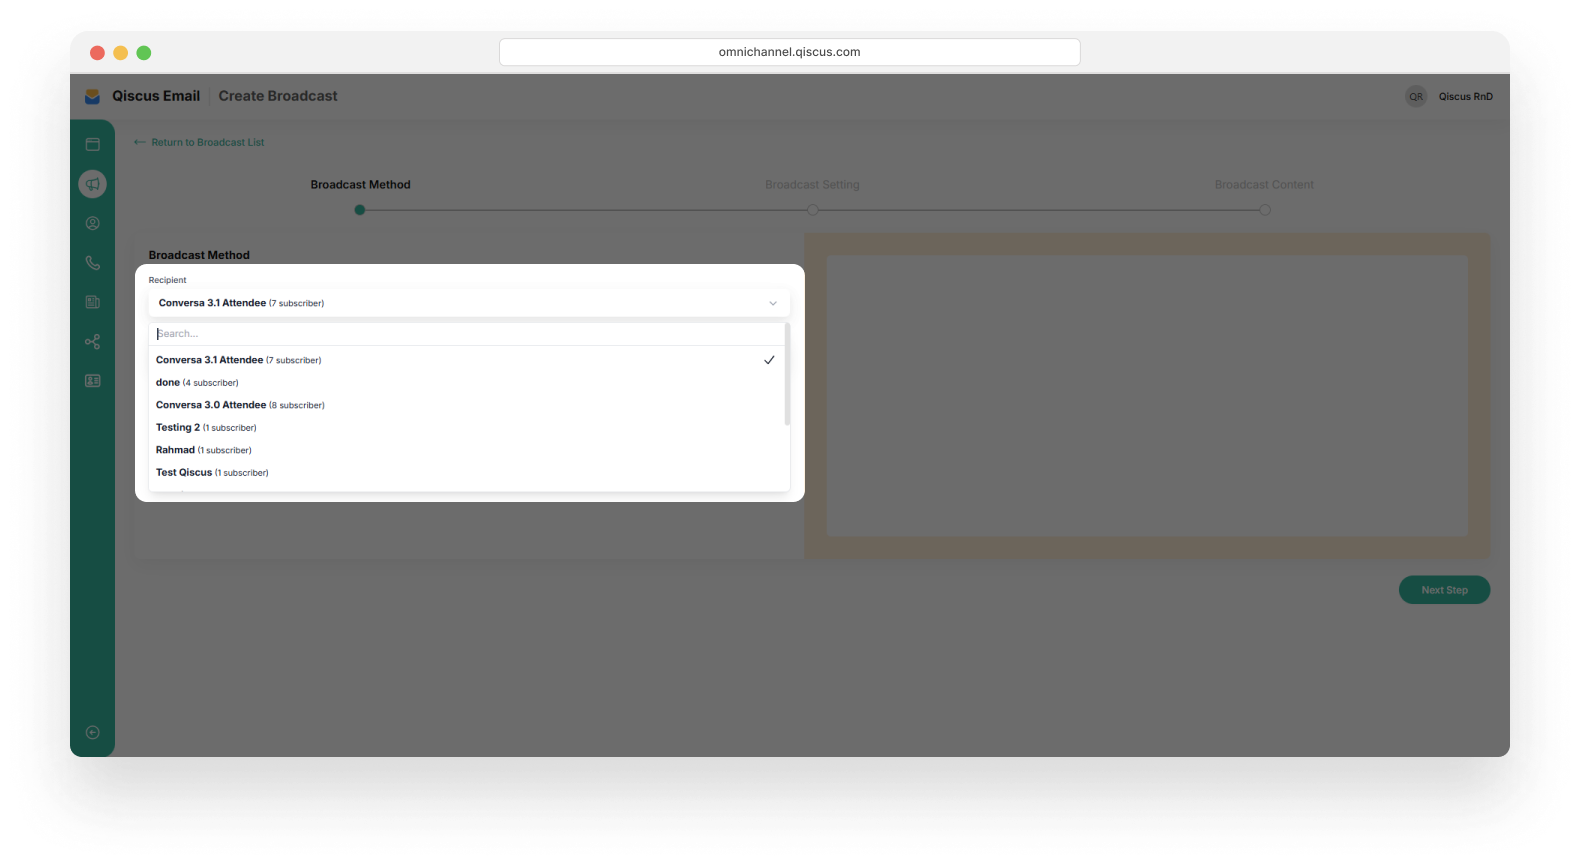
Navigate to the Broadcast menu and click on the + New Broadcast button
Fill in the Sender Type field and select the subscriber list you want to broadcast to.
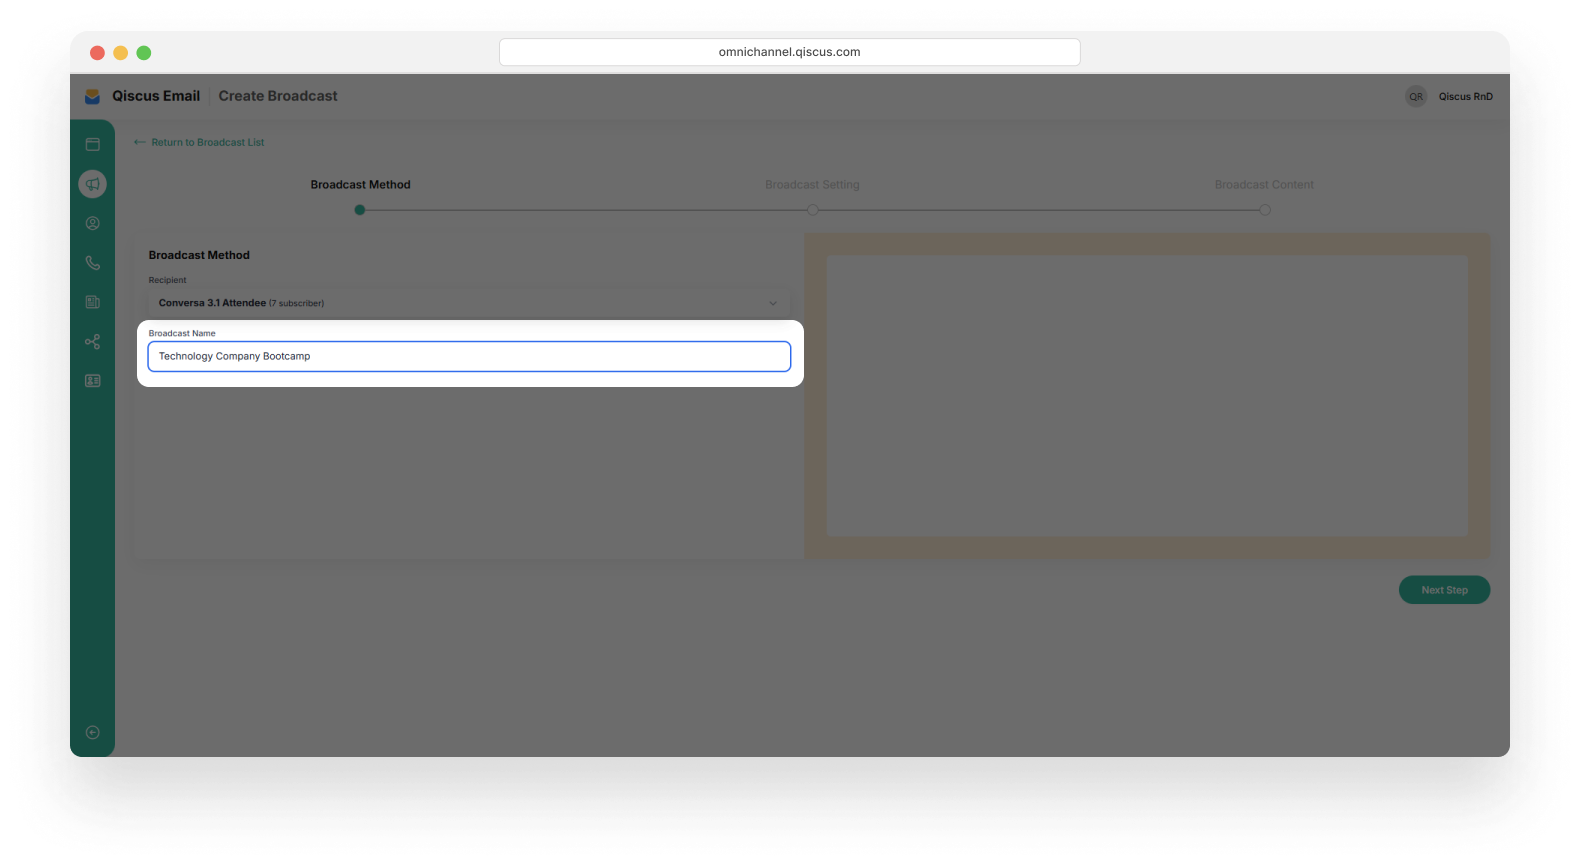
Enter a name for the broadcast theme then select Next Step to continue.
Broadcast Setting Method
We provide two broadcast methods: Using Domain Email and using Single Email. If you have email addresses with different domains, select Using Domain Email as the broadcast method. If you only have email addresses from a single domain, use the Using Single Email method.
Using Domain Email
Select the Using Domain Email broadcast method
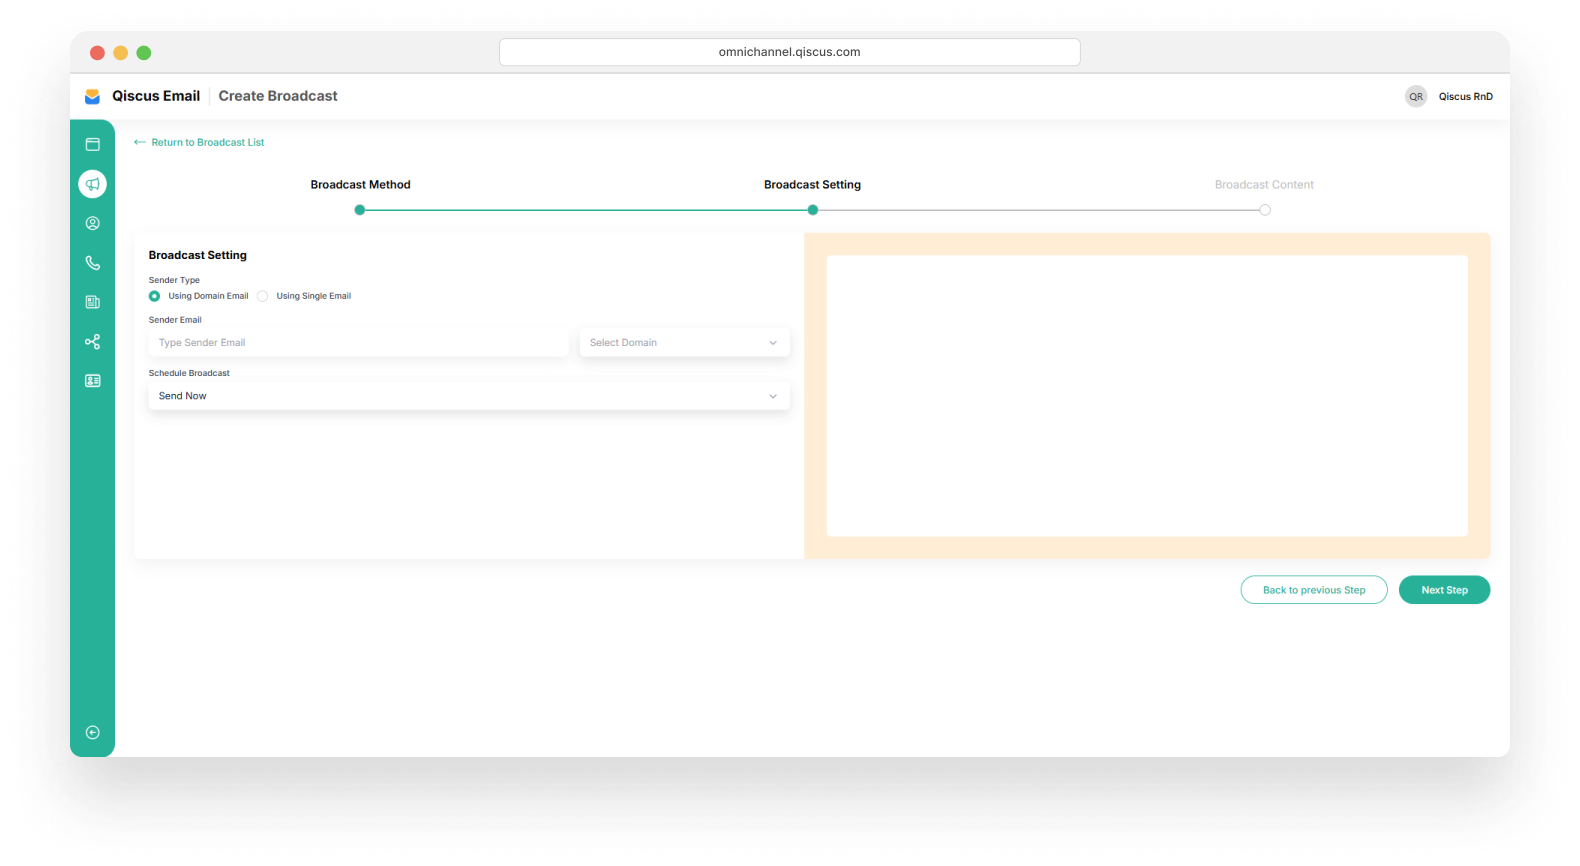
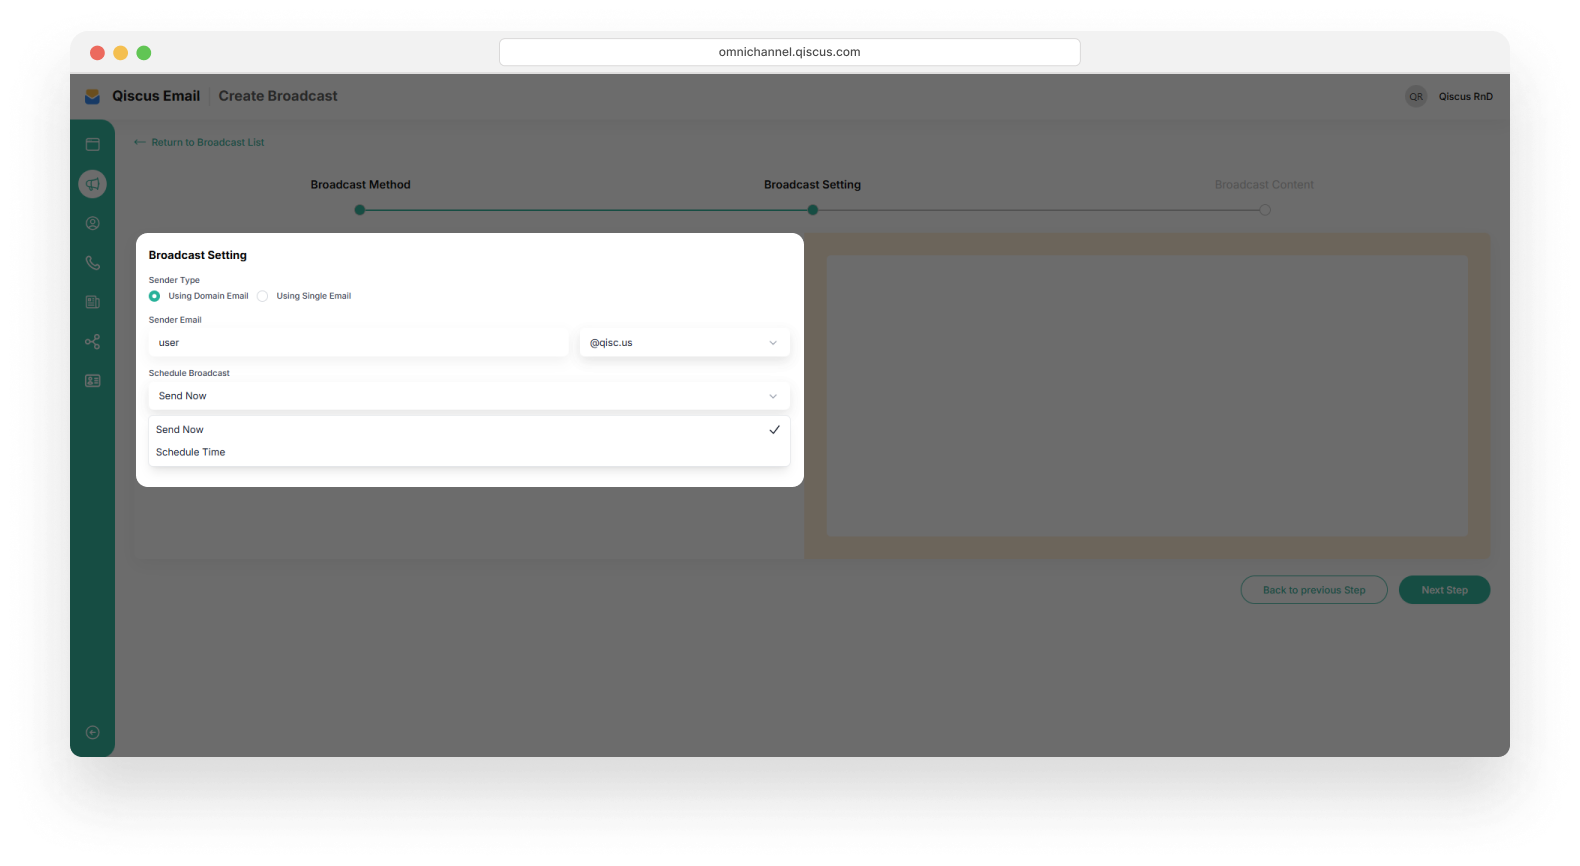
Enter the email name and select a domain in the Domain field and set the broadcast message delivery time by selecting the delivery Schedule Broadcast.
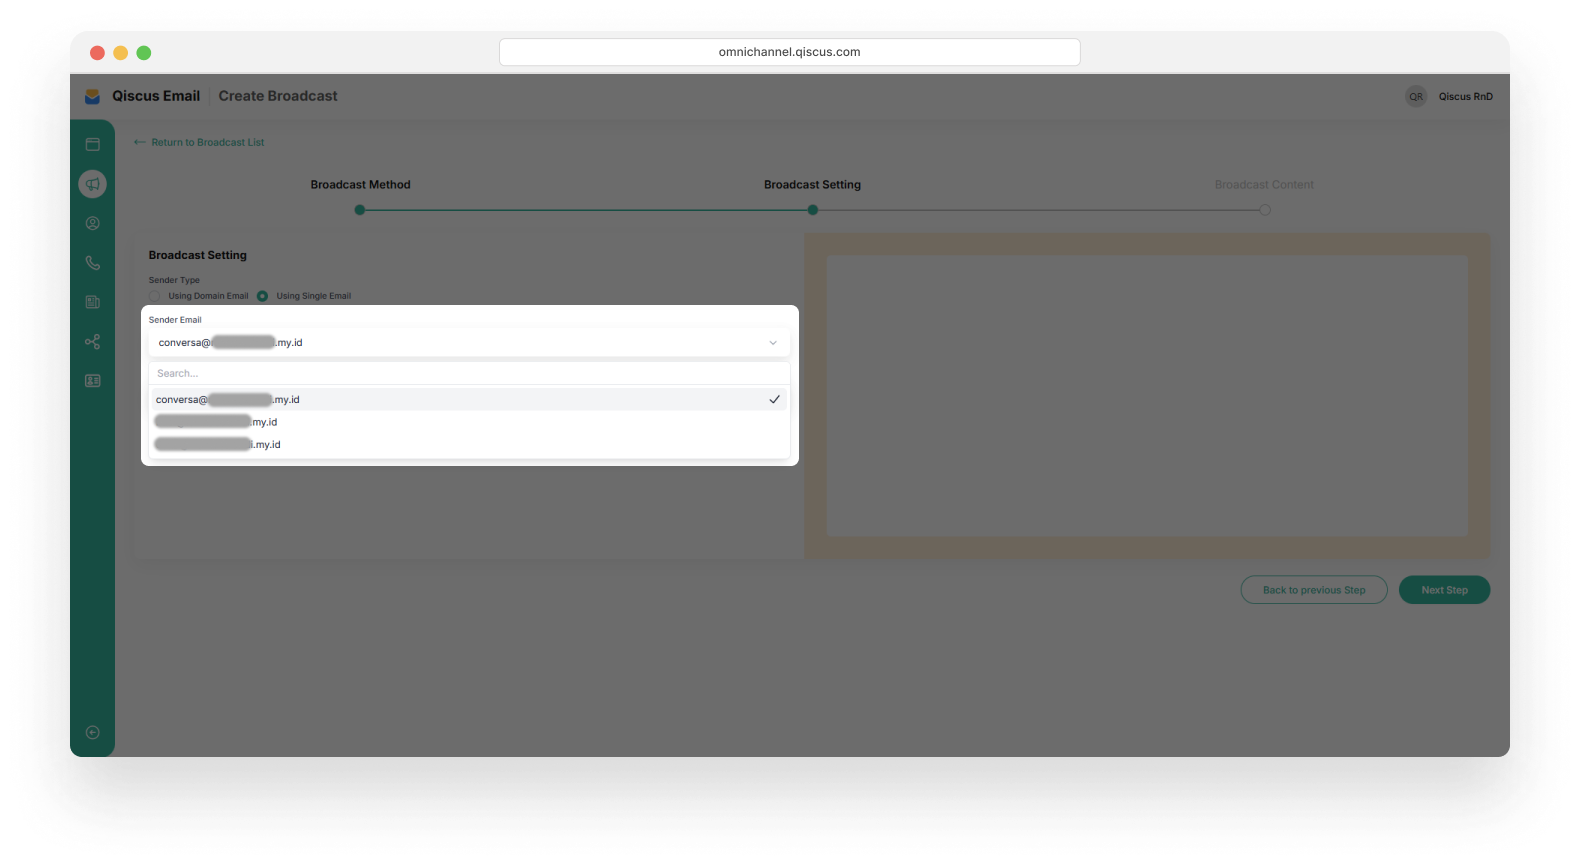
Using Single Email
Select the Using Single Email broadcast method
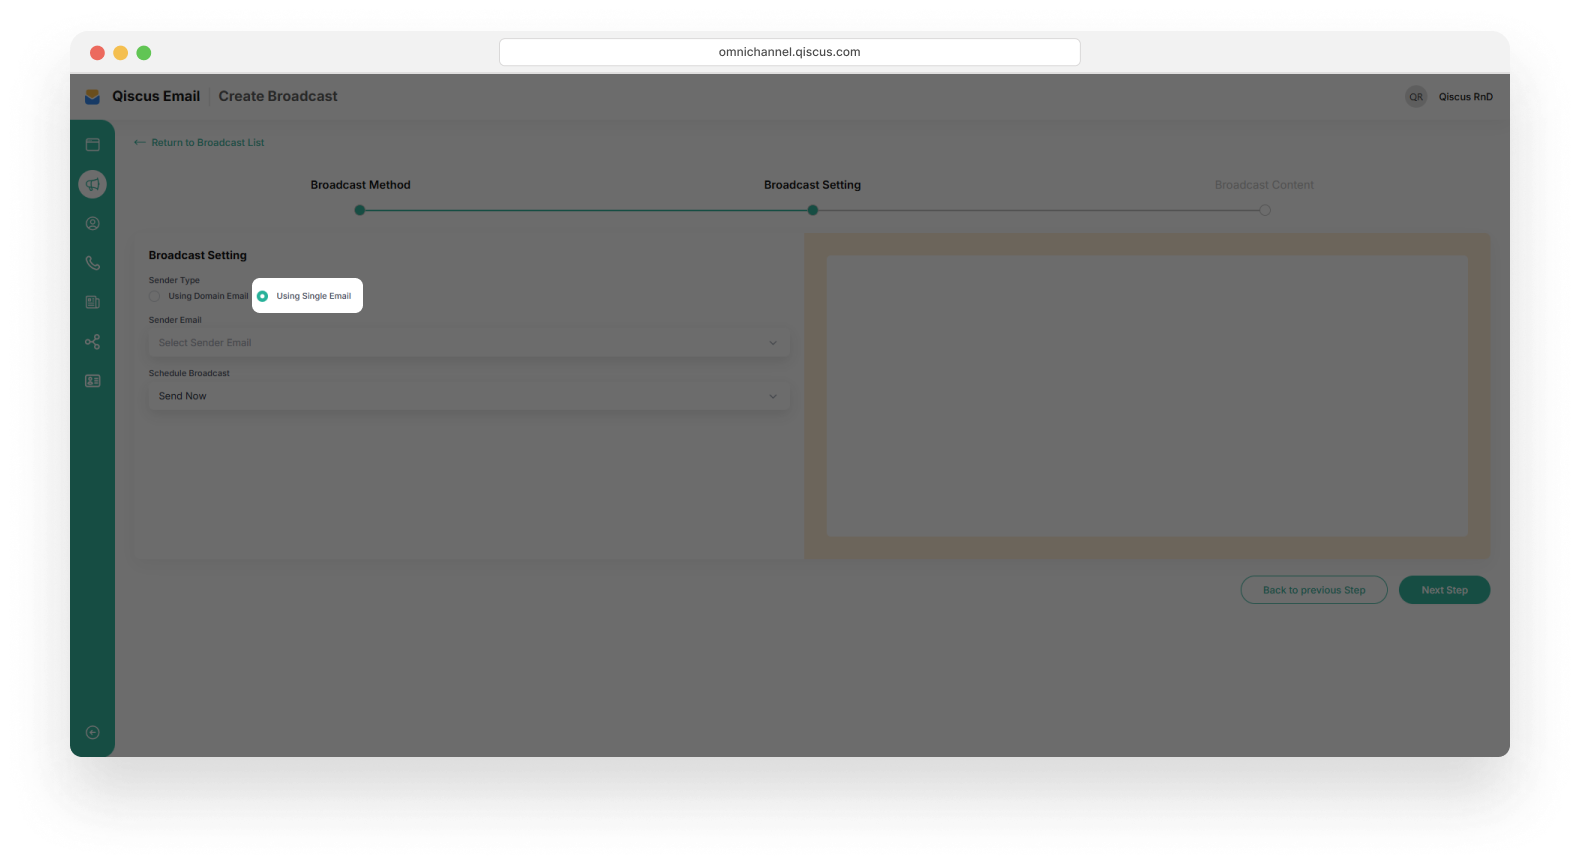
Select the sender email from the Sender Email field.
Broadcast Content
The broadcast content feature offers two options: Start from Scratch to create a custom email template, or Use Email Template to select from predefined templates for faster setup.
Start from Scratch
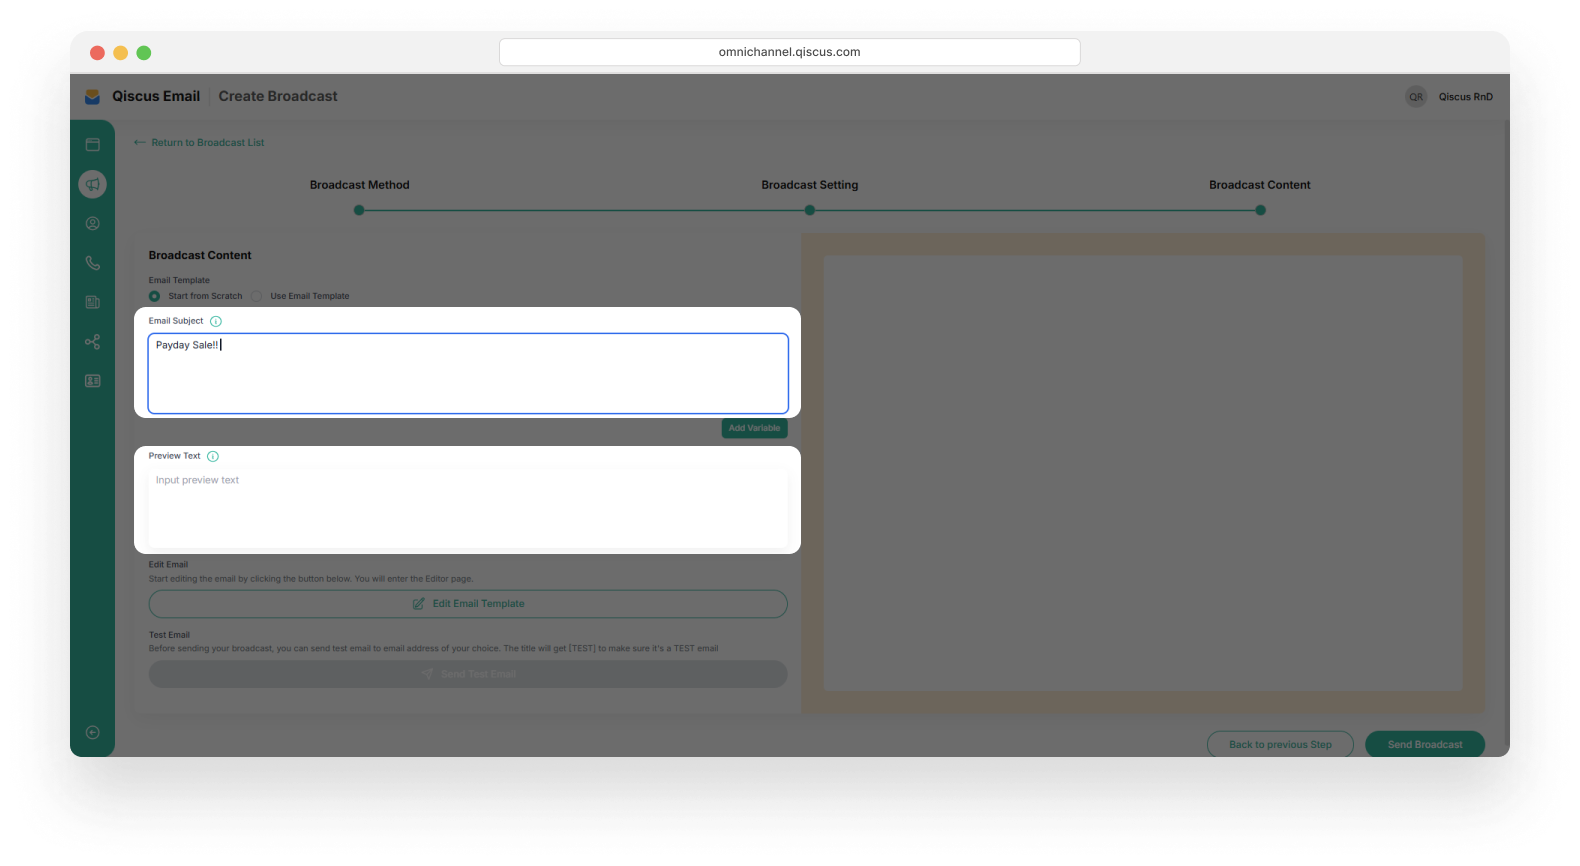
Select Start from Scratch to create a custom email
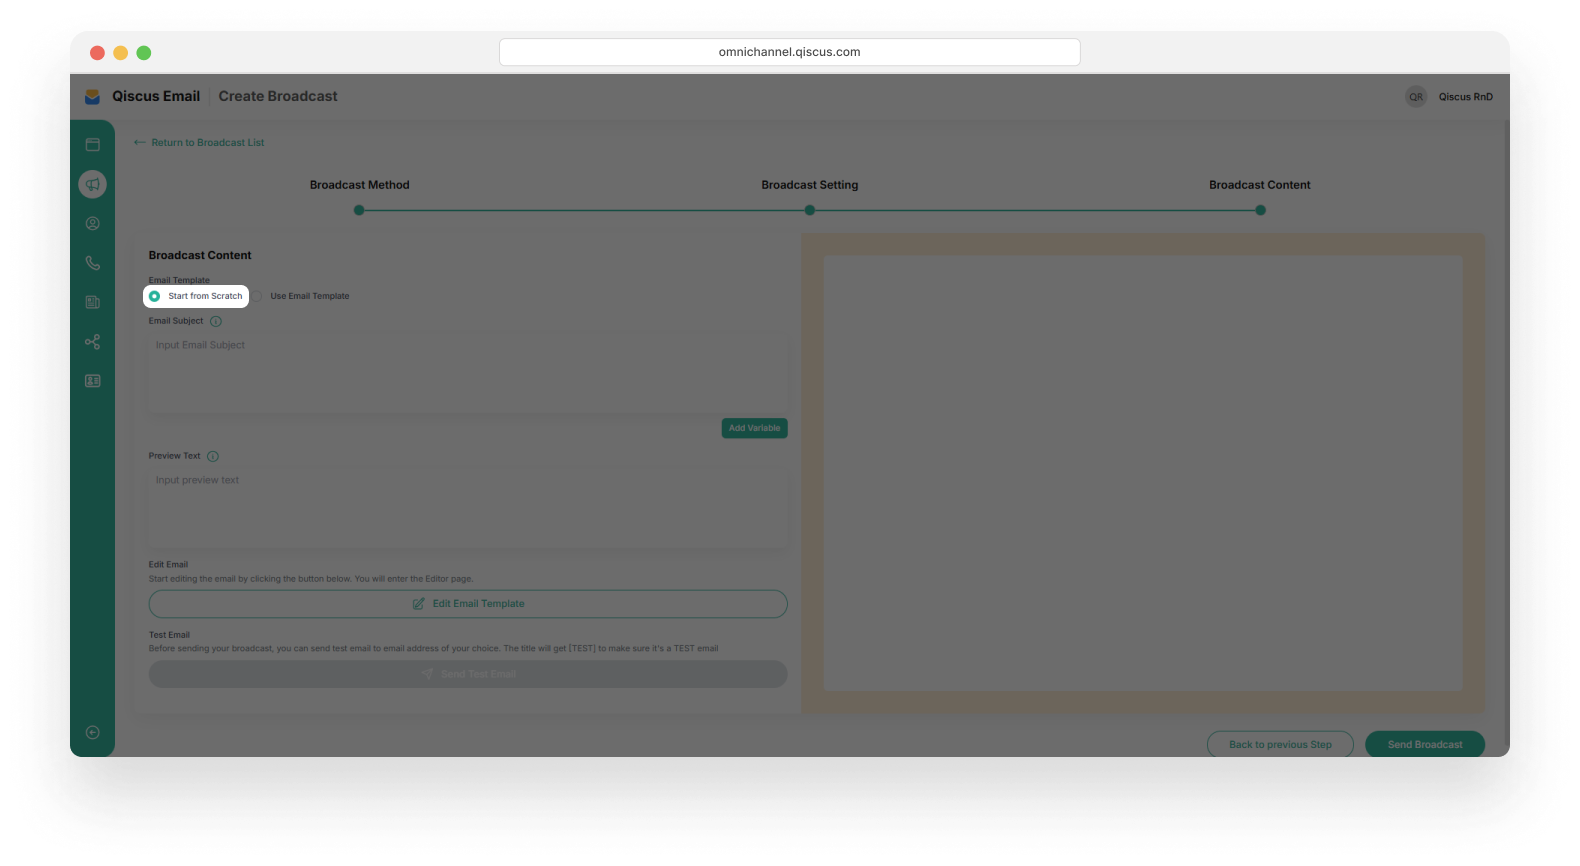
Enter the email subject and preview text.
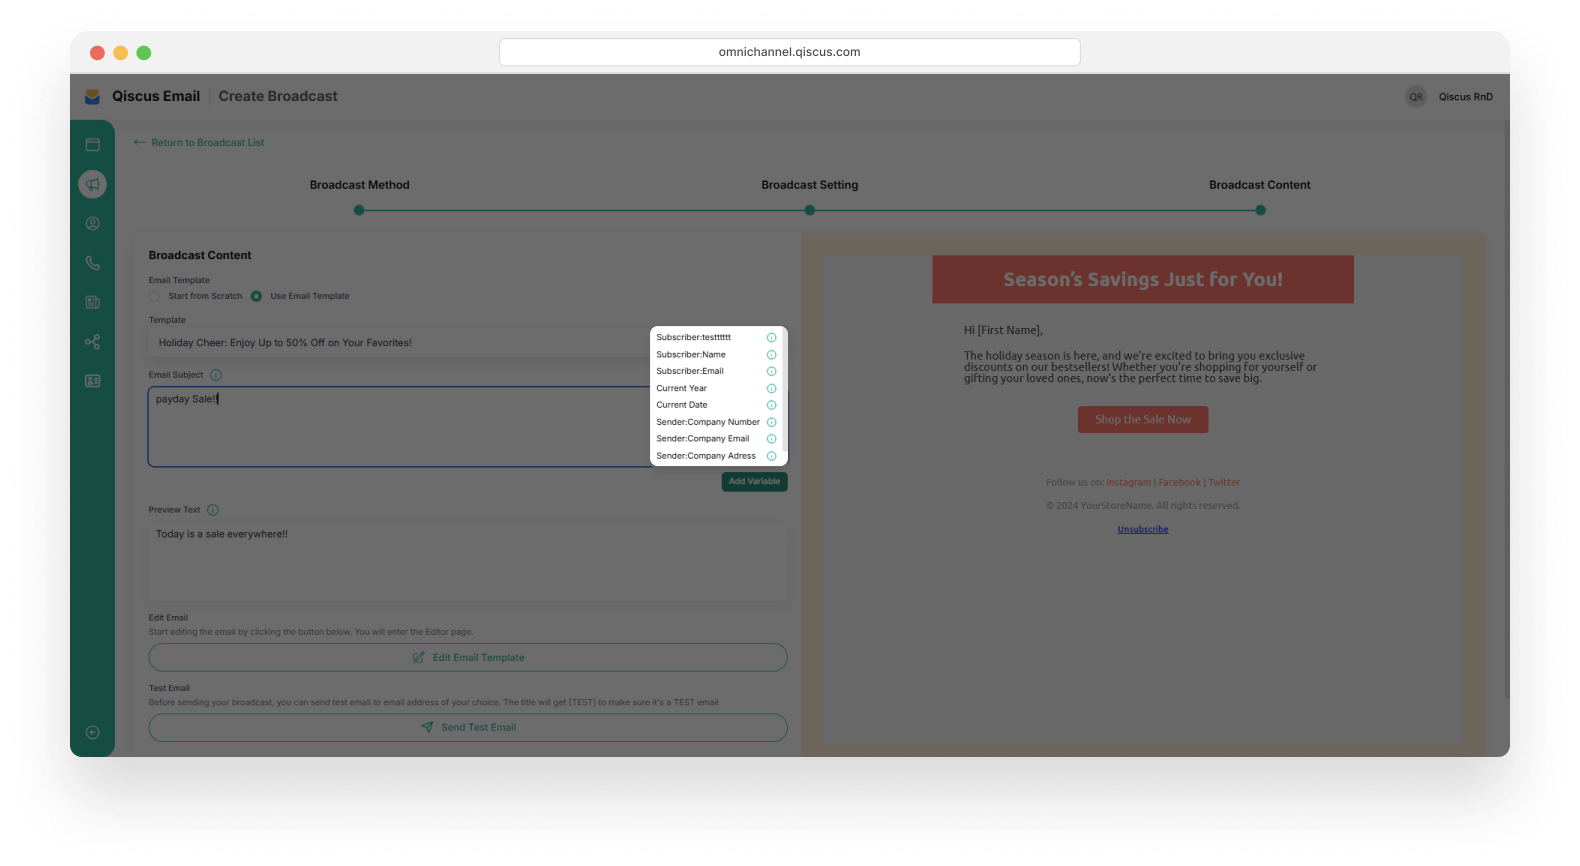
If you want to use custom fields, click the Add Variable button to include them as flexible and additional information in the broadcast message.
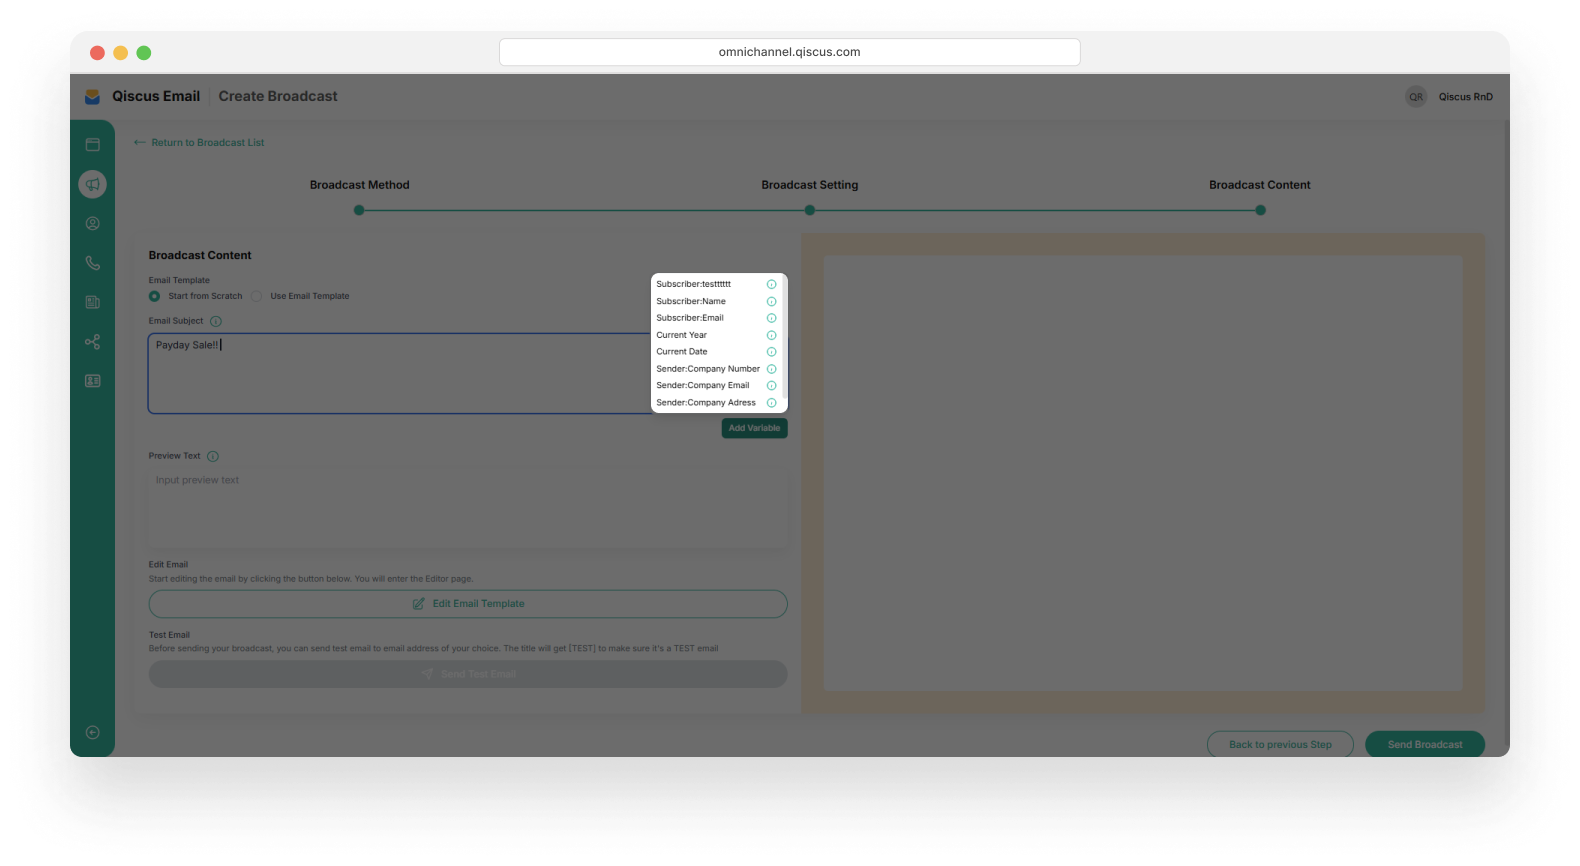
Click the Edit Email Template to design your broadcast template
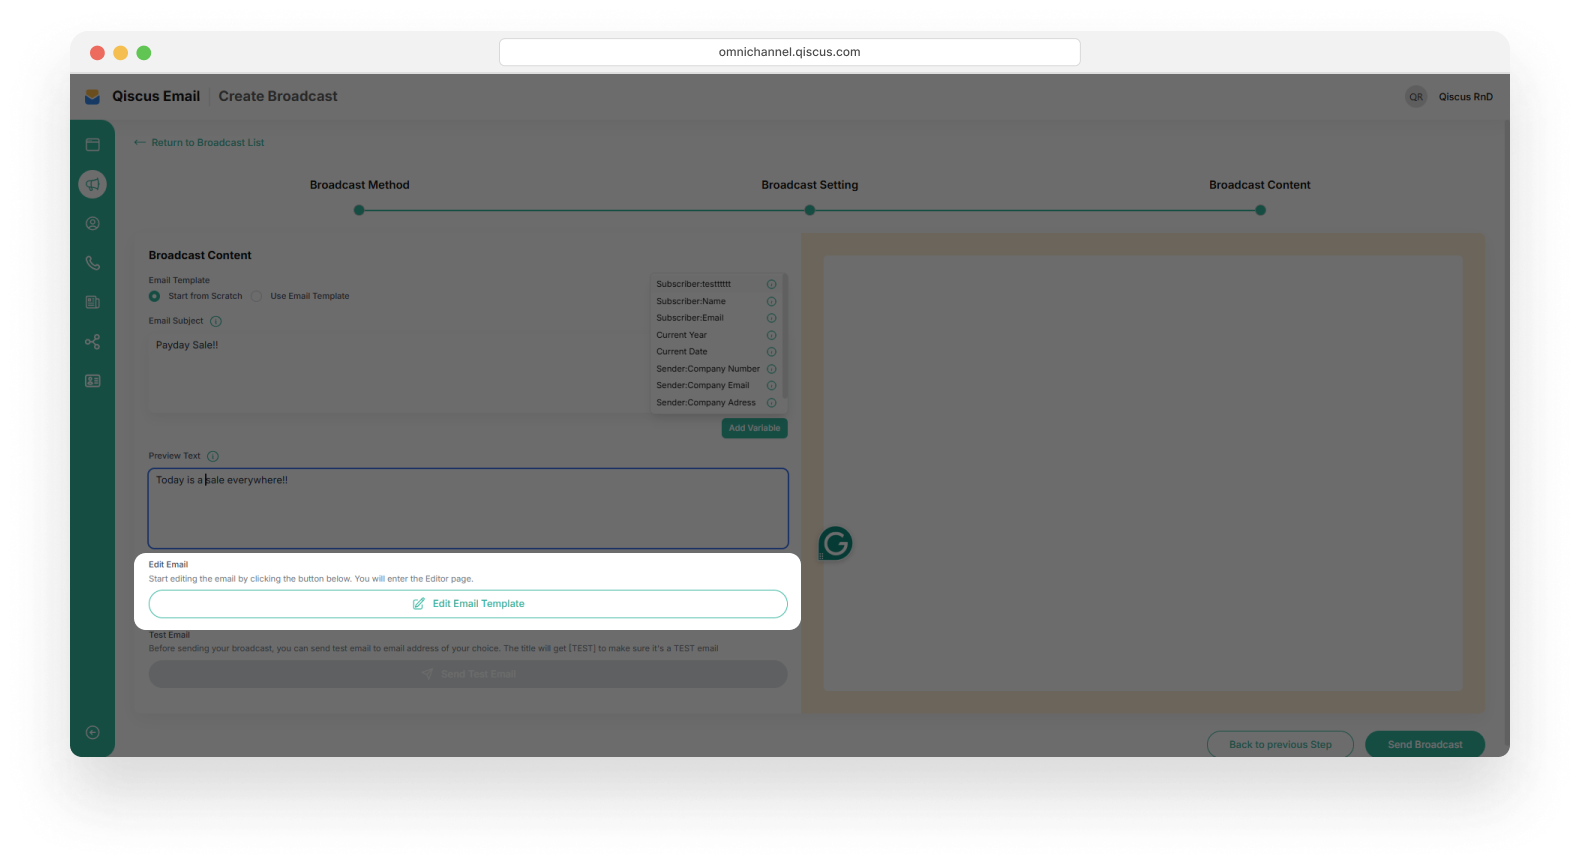
A custom field can be attached to the email subject or included in your broadcast email template.
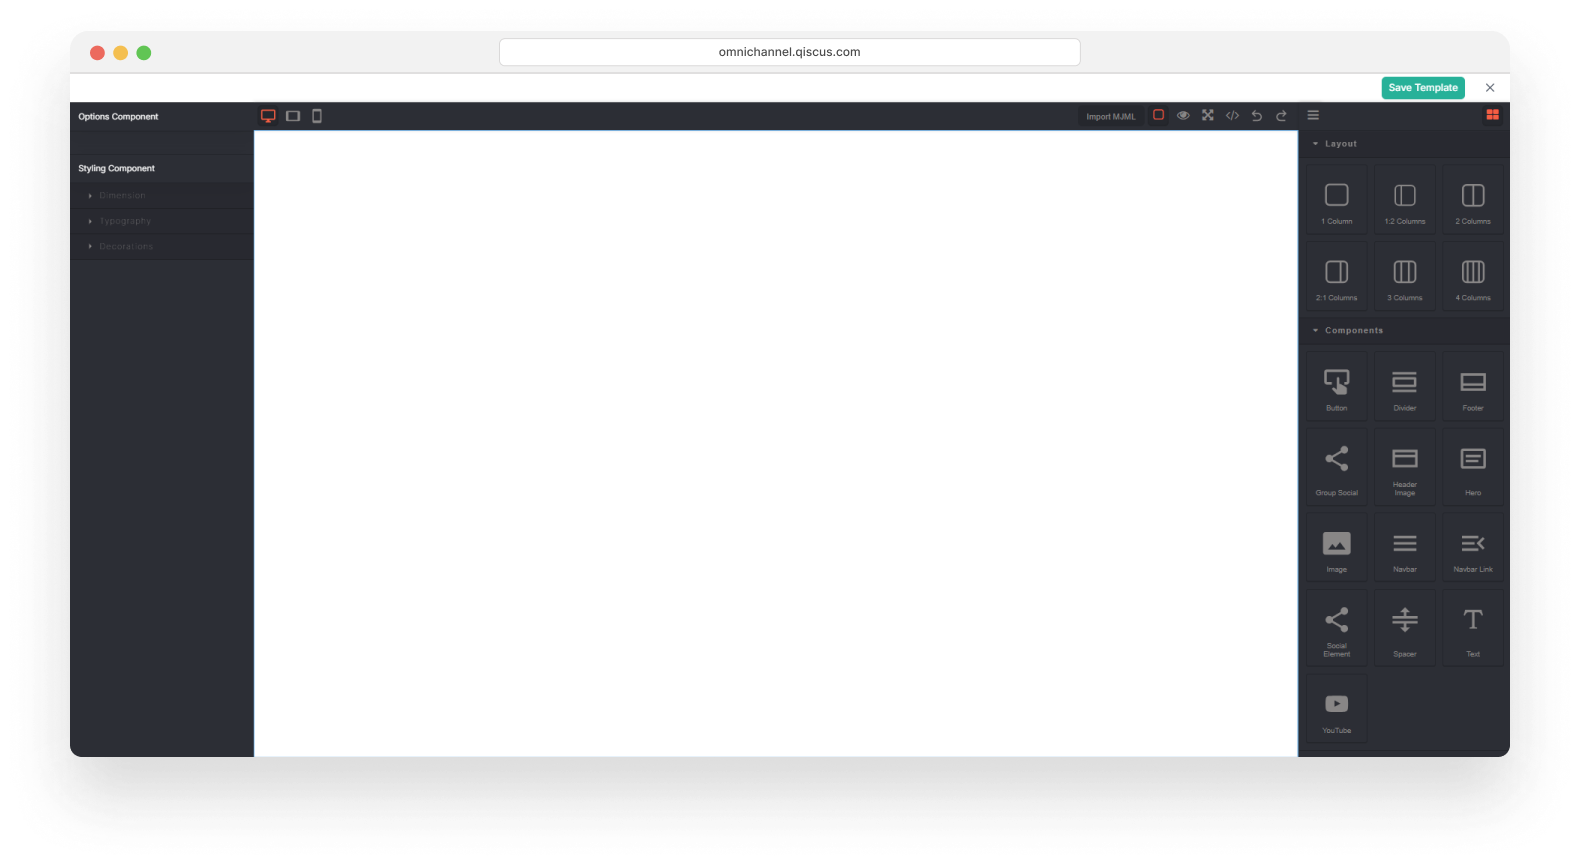
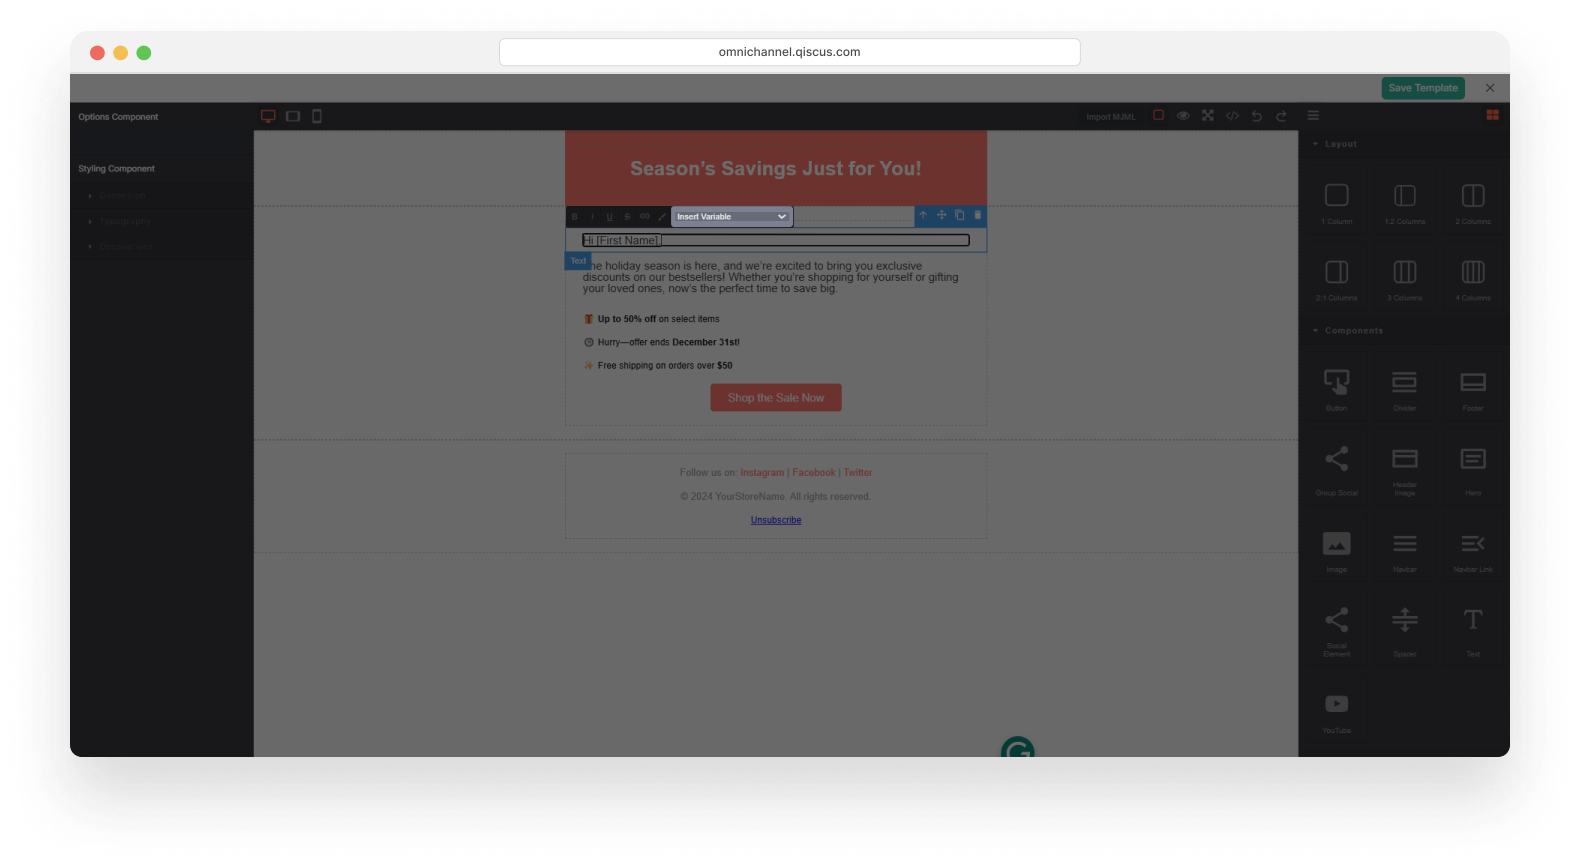
The template edit page allows you to choose the required layout and styling components. Drag and drop the selected layout or components onto the canvas.
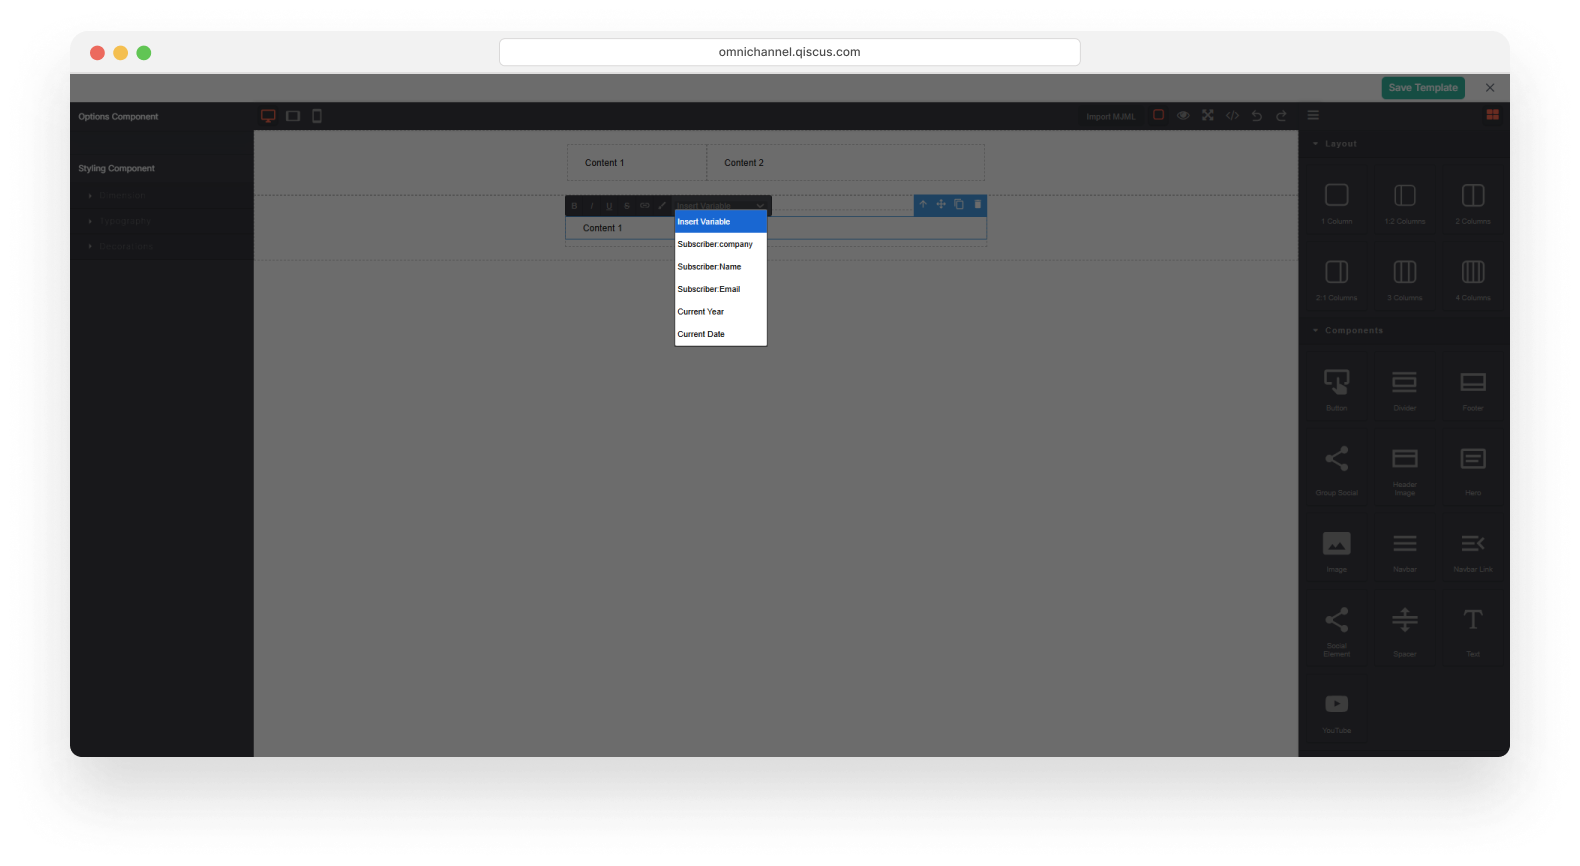
Enter the broadcast content into the layout. To add a custom field, right-click on the canvas and select Insert Variable, then choose the custom field 'Subscriber'.
Use Email Template
Select the Use Email Template to use a predefined template
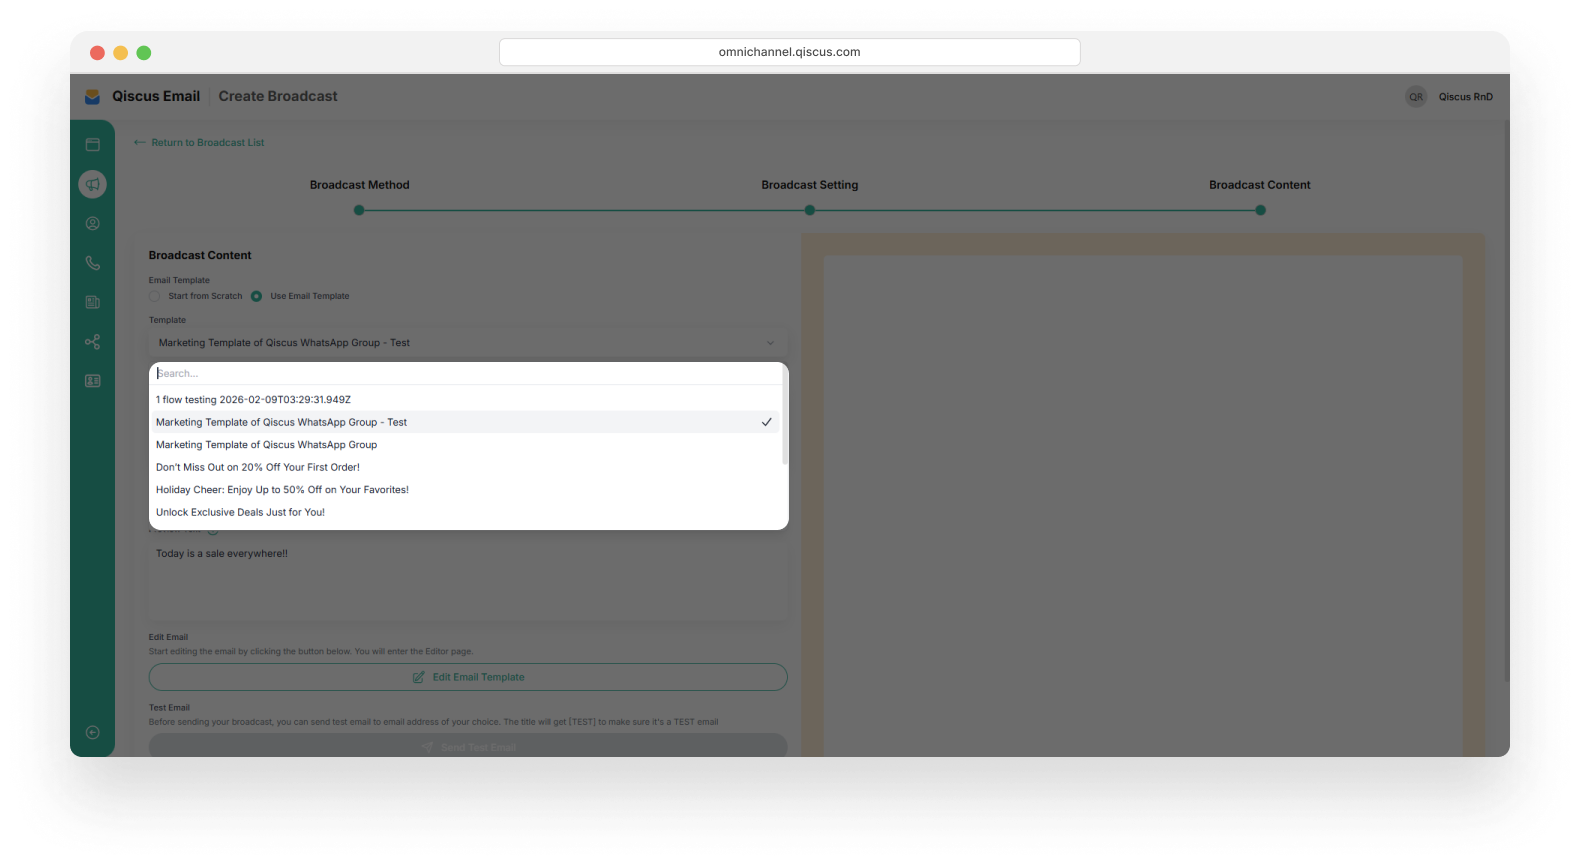
Enter the email subject and preview text.
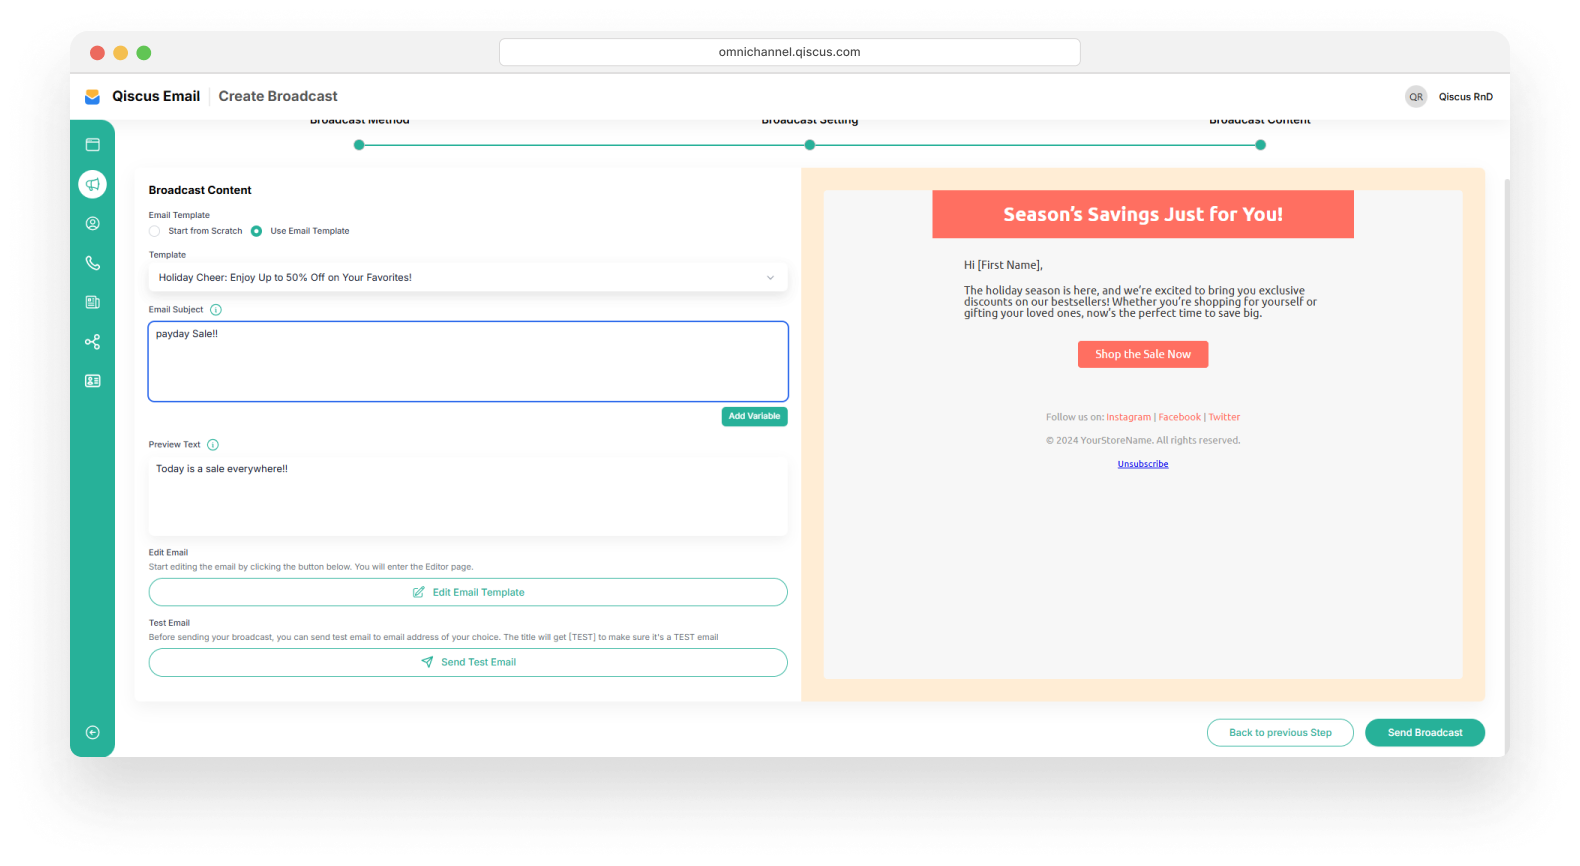
If you want to use custom fields, click the Add Variable button to include them as flexible and additional information in the broadcast message.
If needed, you be able to edit template to design your broadcast template. Enter the broadcast content into the layout. To add a custom field, right-click on the canvas and select Insert Variable, then choose the custom field.
Subscriber Bounced
Details of email delivery status are shown in the Subscriber Bounced section, including the reasons for any delivery failures.
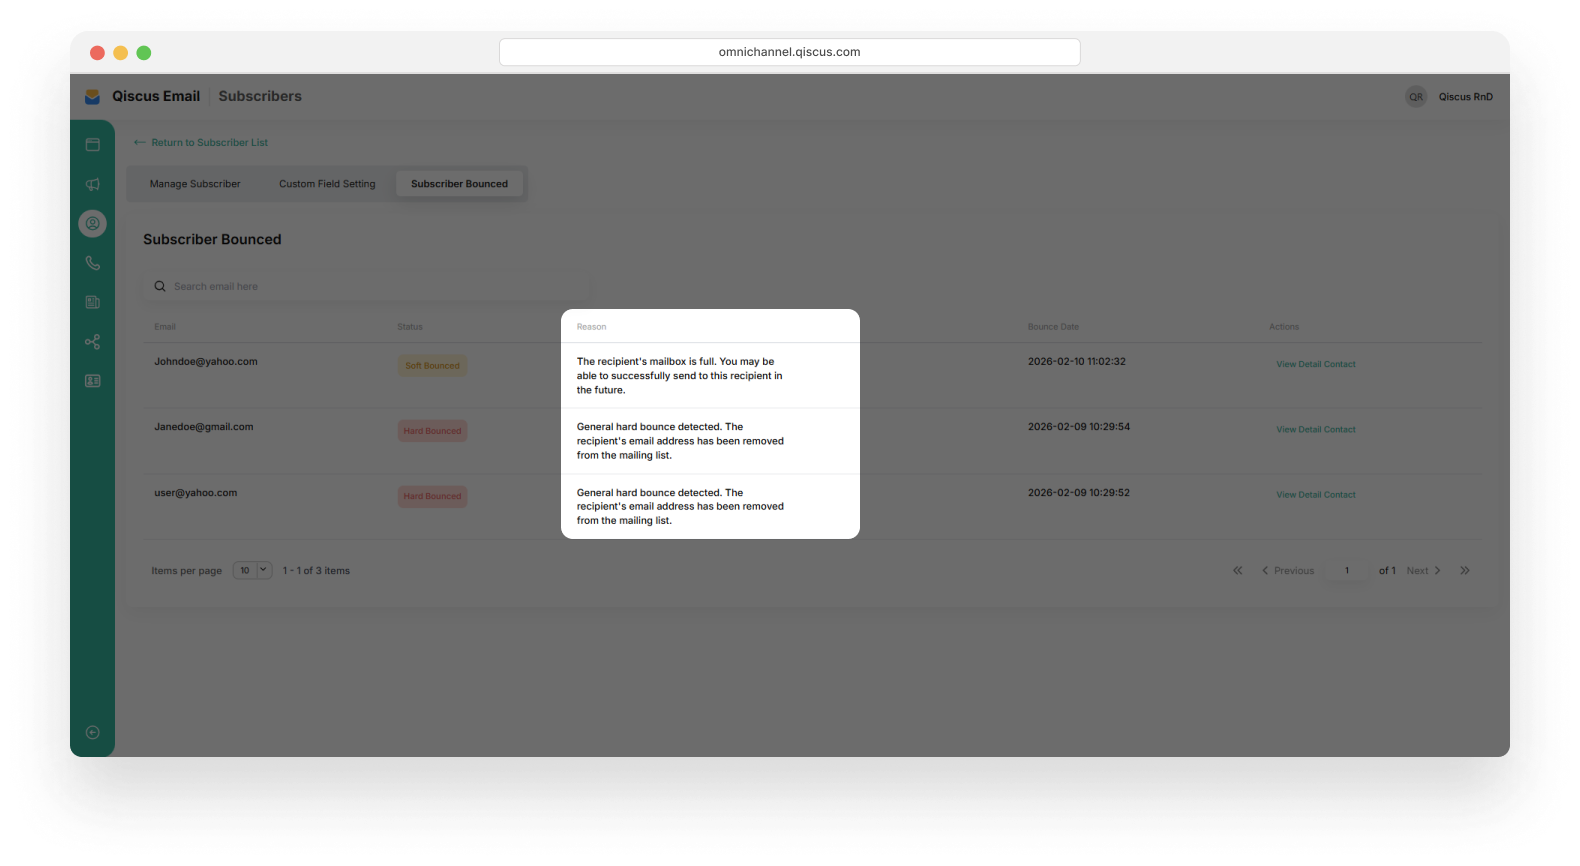
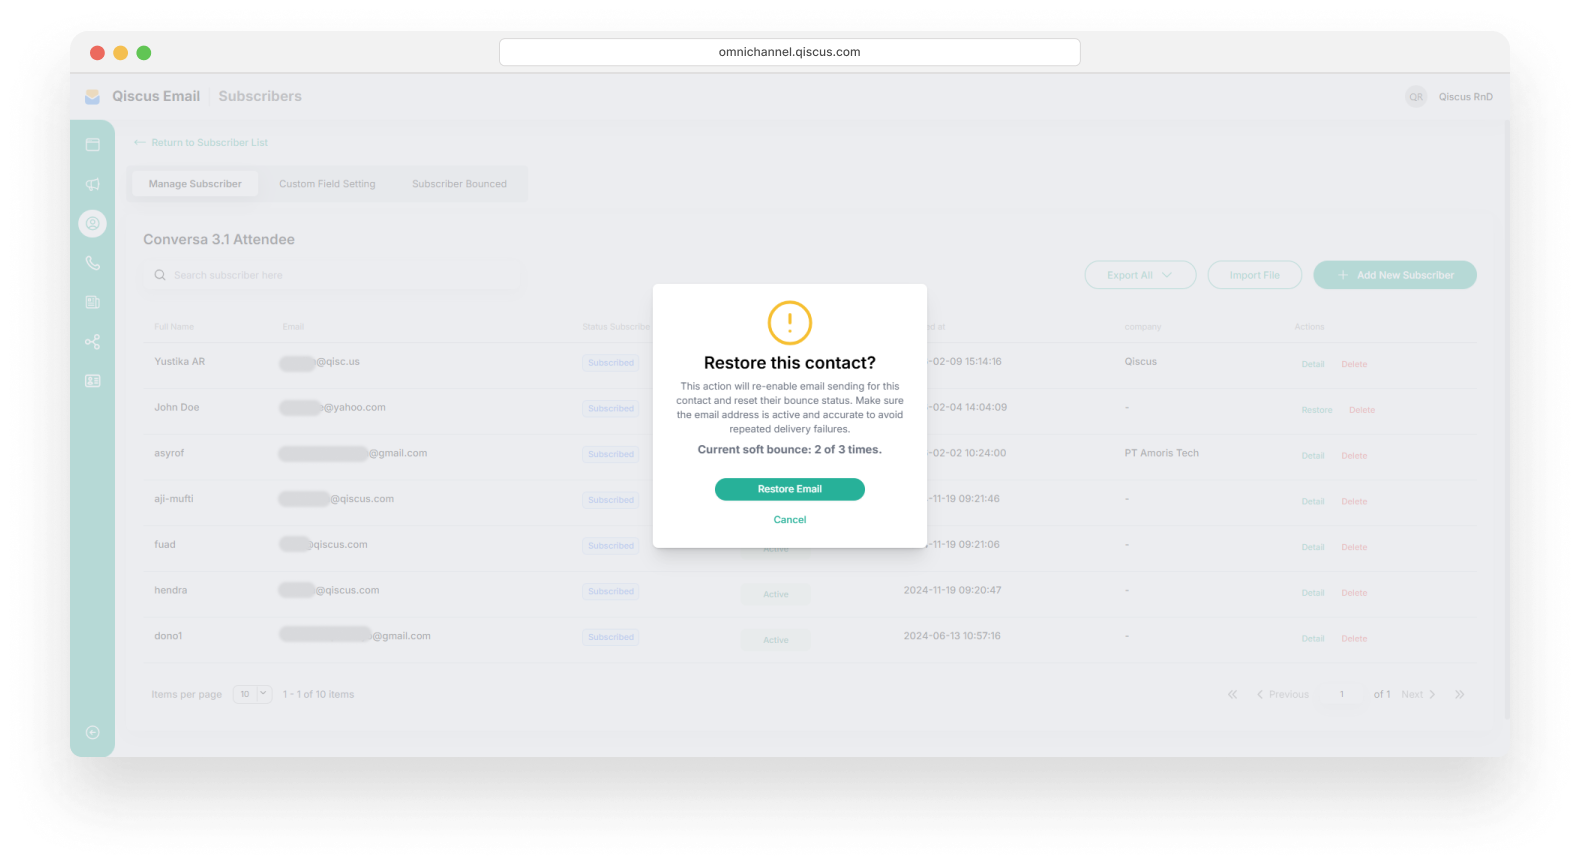
Soft-bounced emails can be restored a maximum of 3 times__.
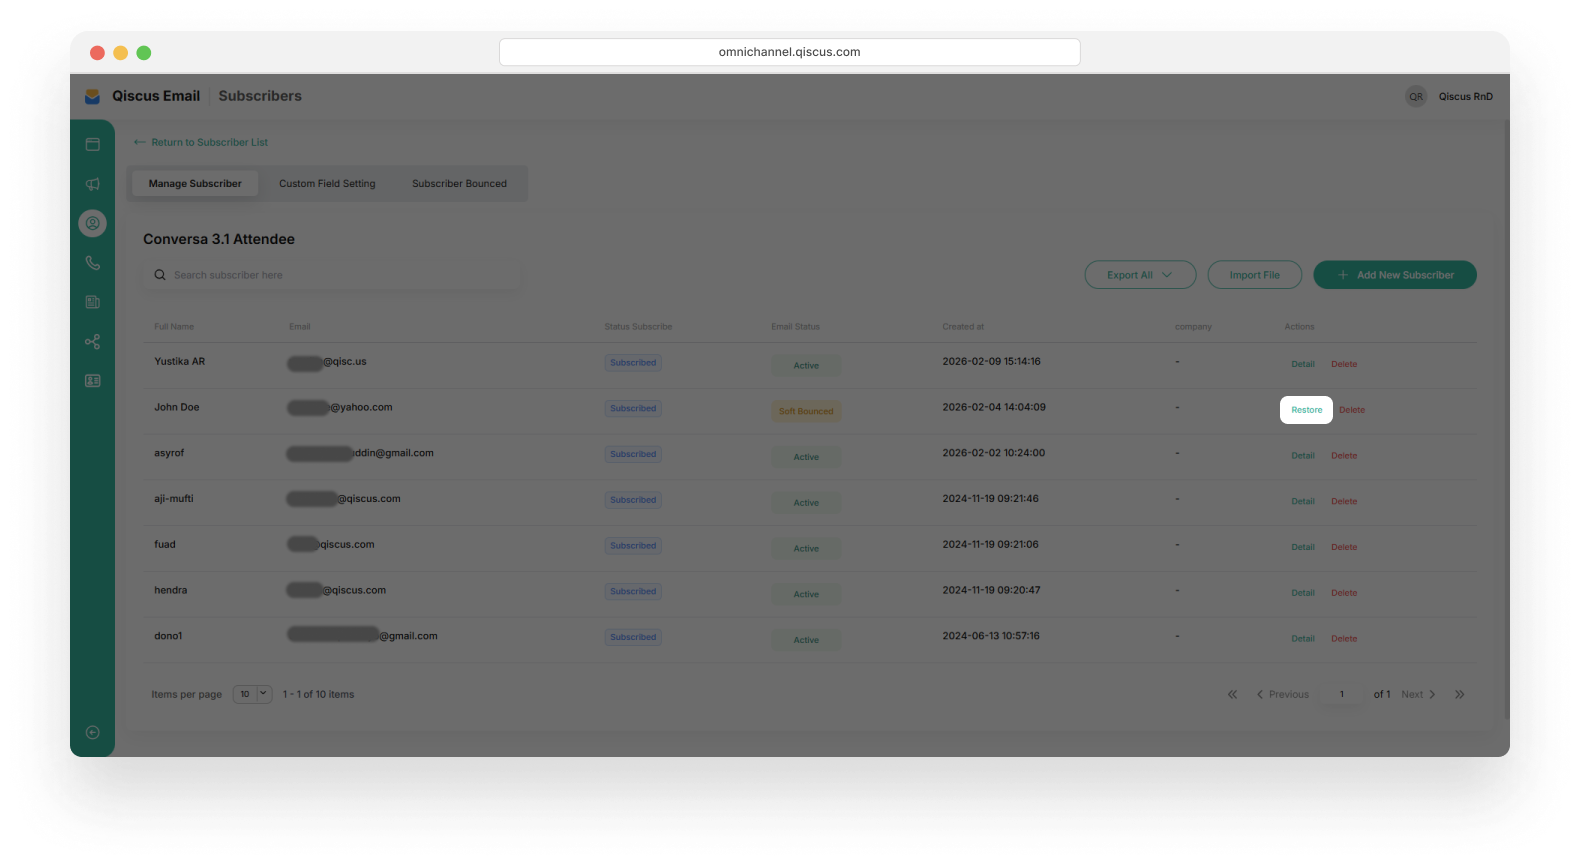
Restore Soft-bounced emails
Soft-bounced email addresses may be restored on the Manage Subscriber page. Once the maximum of three restore attempts is reached, the email status will be updated to 'Hard Bounced'.
Navigate to the Manage Subscriber page. Click the Restore button.
A Restore Email pop-up will appear. Click Restore Email to confirm.
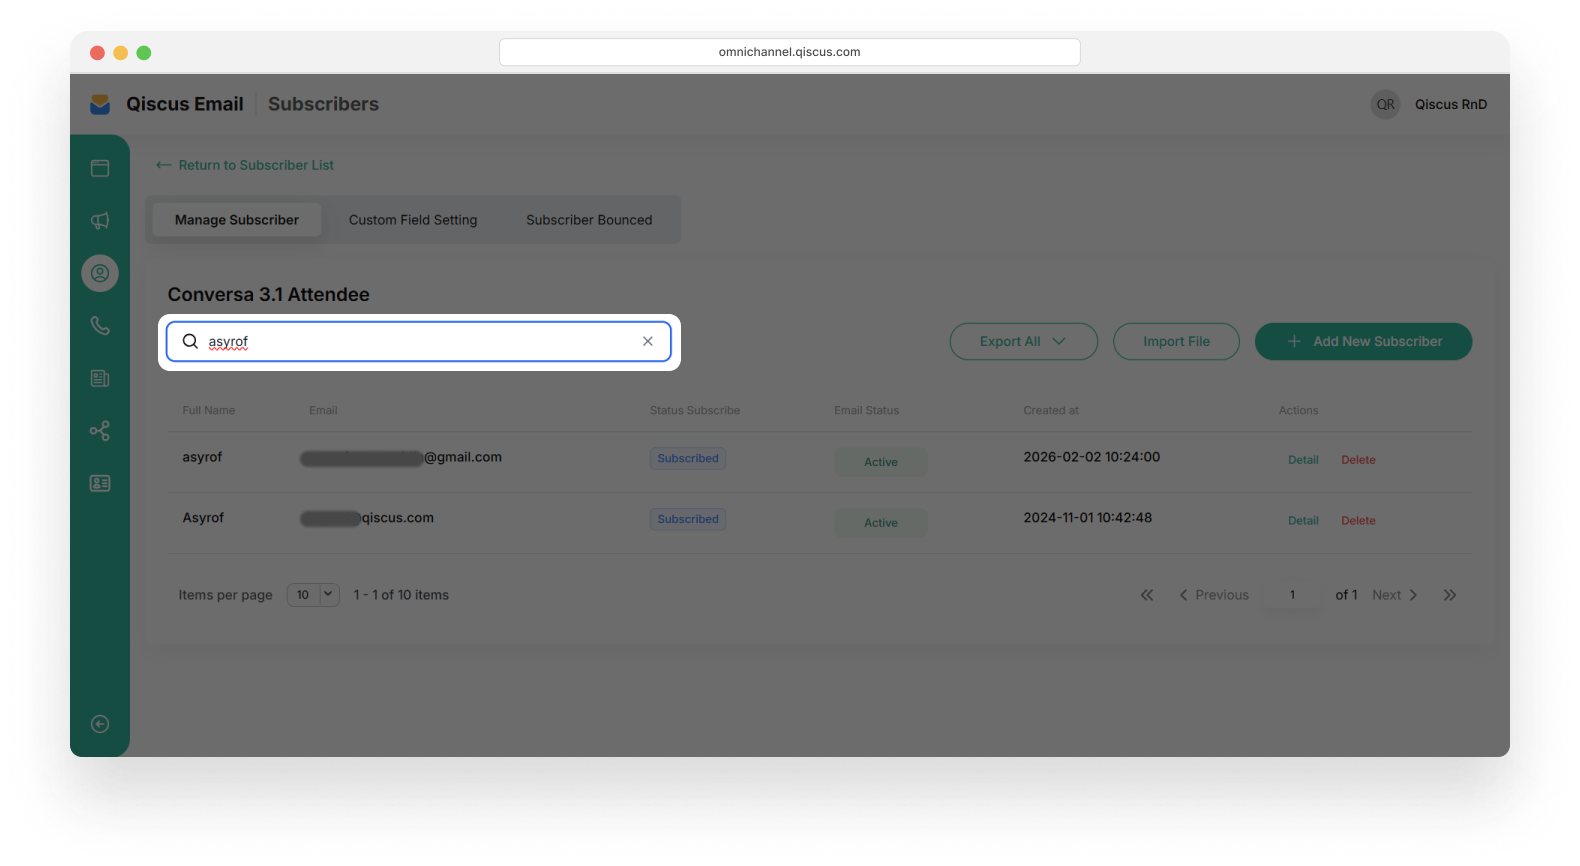
Searching for Subscriber
The Subscriber page provides a search feature that allows to search for subscribers by name. The list updates automatically as keywords are entered in the search field.
Export and Import Subscribers
If you want to have subscriber data, you can use the export feature. You have two options: export files as .csv or .xlsx.
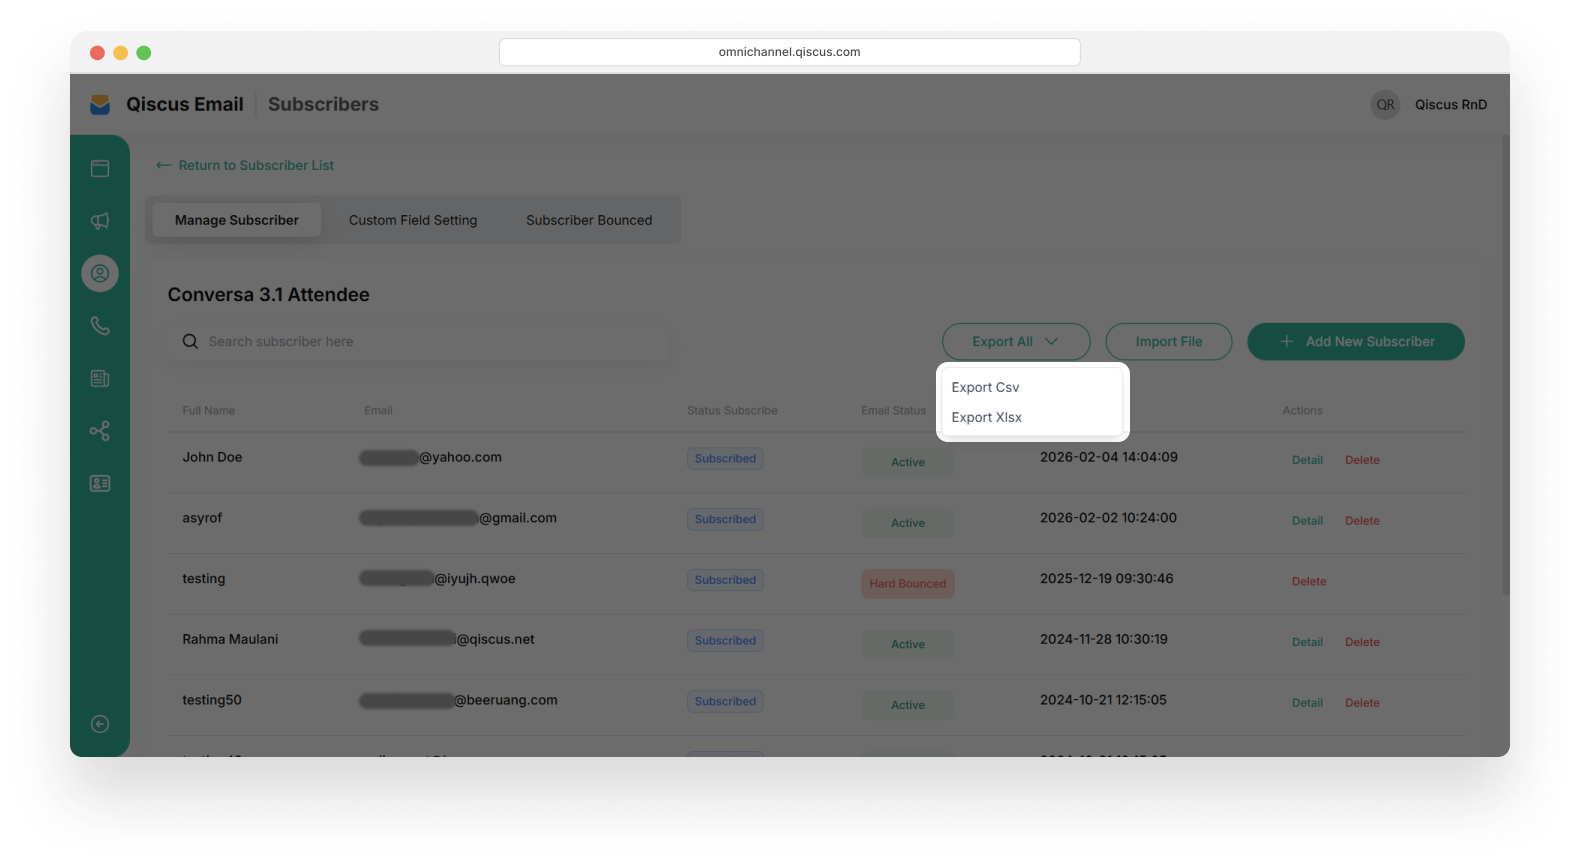
Export Subscribers in CSV or Xlsx
Click on the “Export List” button, and it will display the option. There are two options: you can export a CSV file or an XLSX file by clicking on one of them.
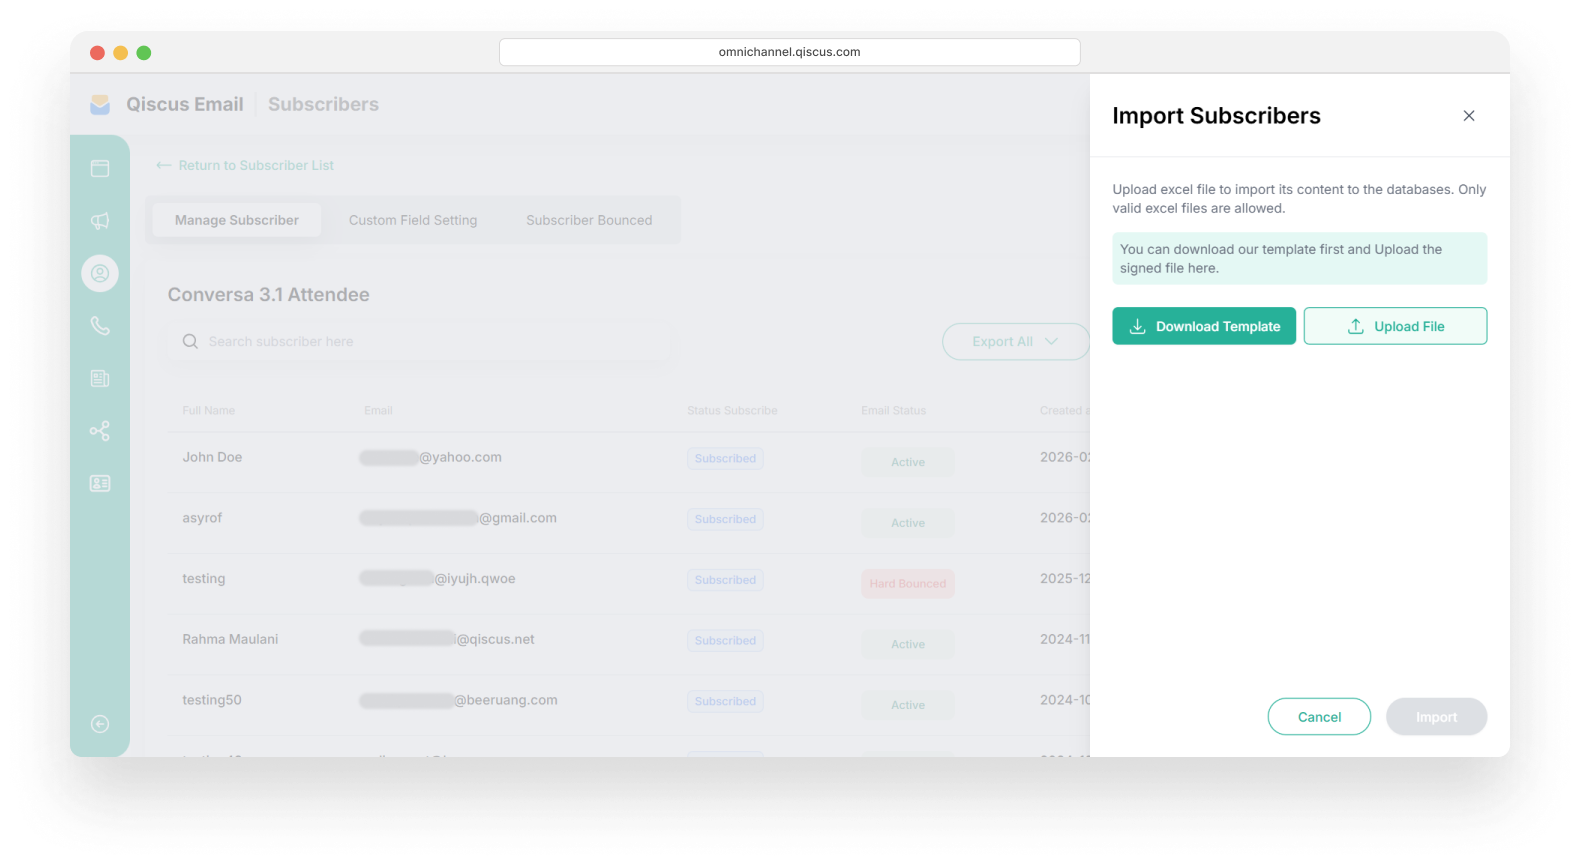
Import Subscribers
The Import File feature is used to add subscriber data in bulk. Users must upload a file that complies with the provided template. After the upload process is completed, the subscriber data will be added to the subscriber list automatically.
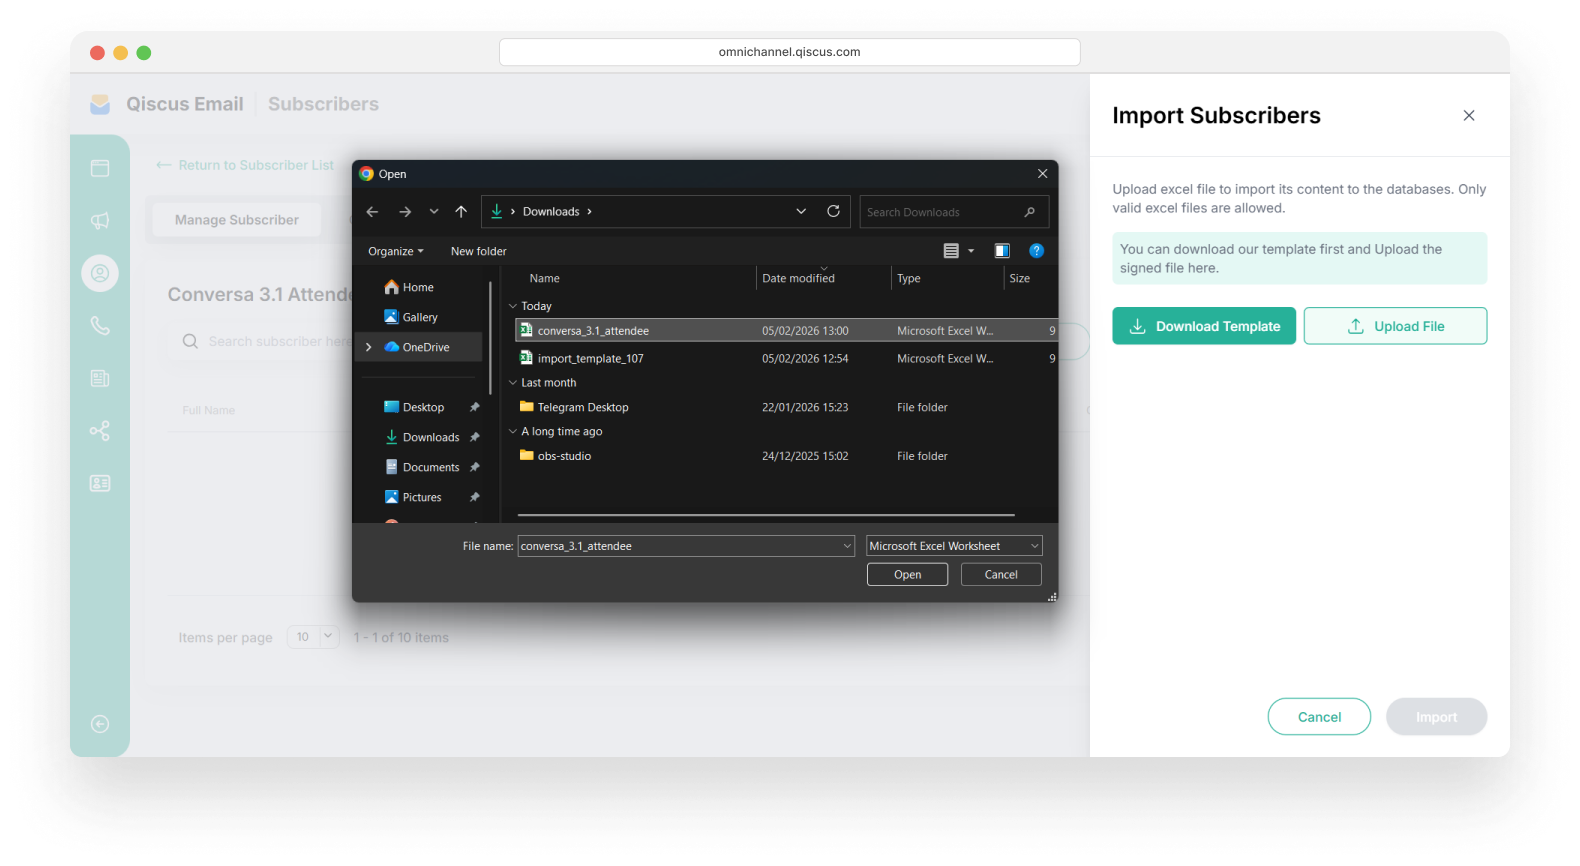
First, click the Import File button
After that, you must download the template that we have provided by clicking Download Template.
Prepare an Excel file by filling in customer data as in the example provided, and then save the file.
Upload the Excel file by clicking Upload File.
Select your Excel file.
Ensure the file is attached, then click Import.
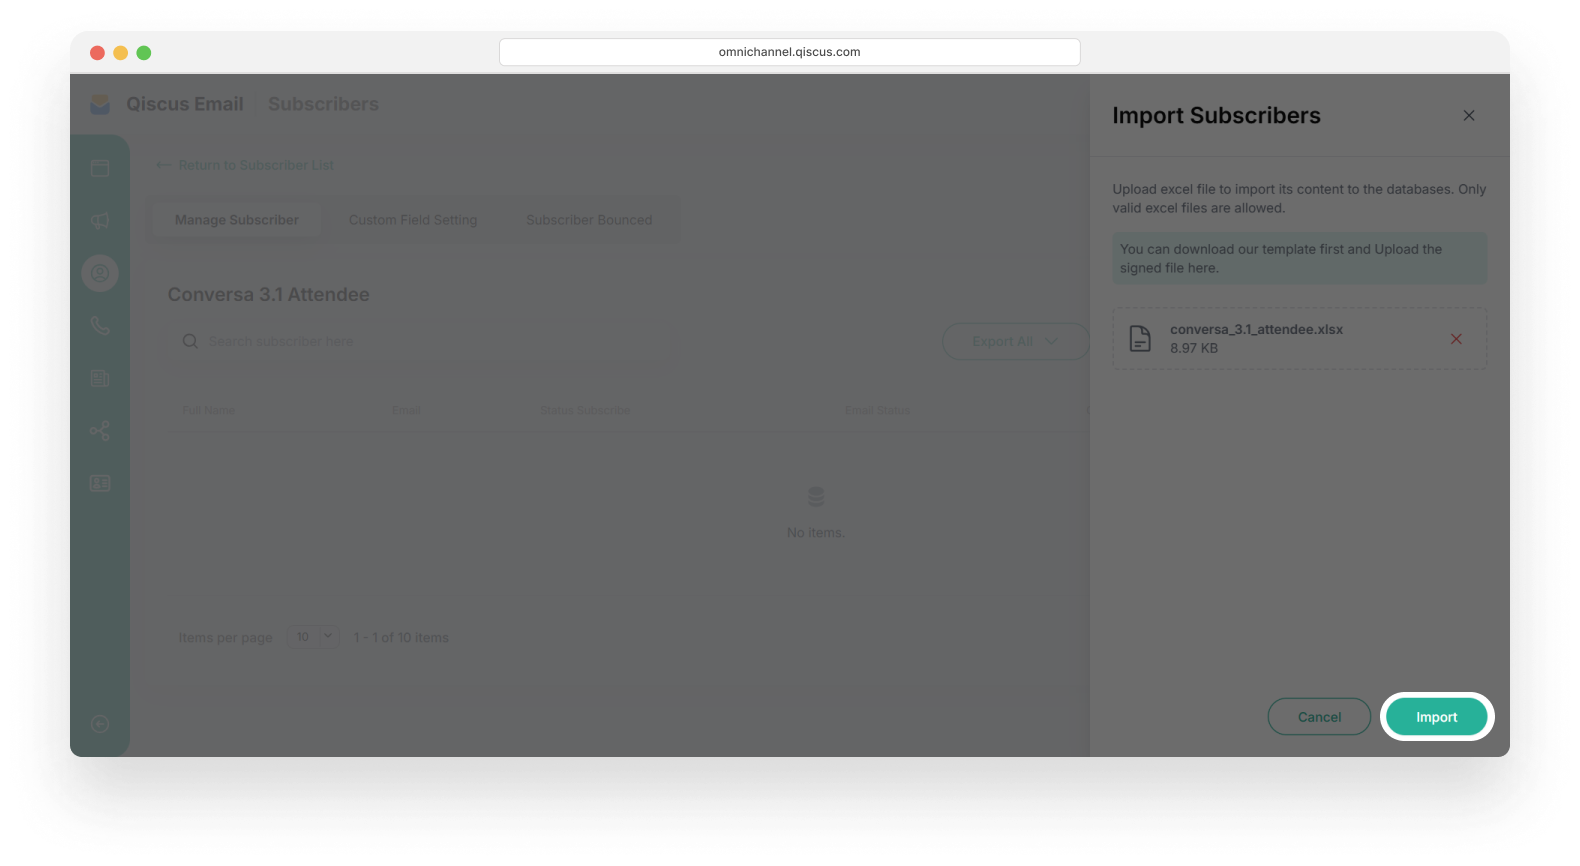
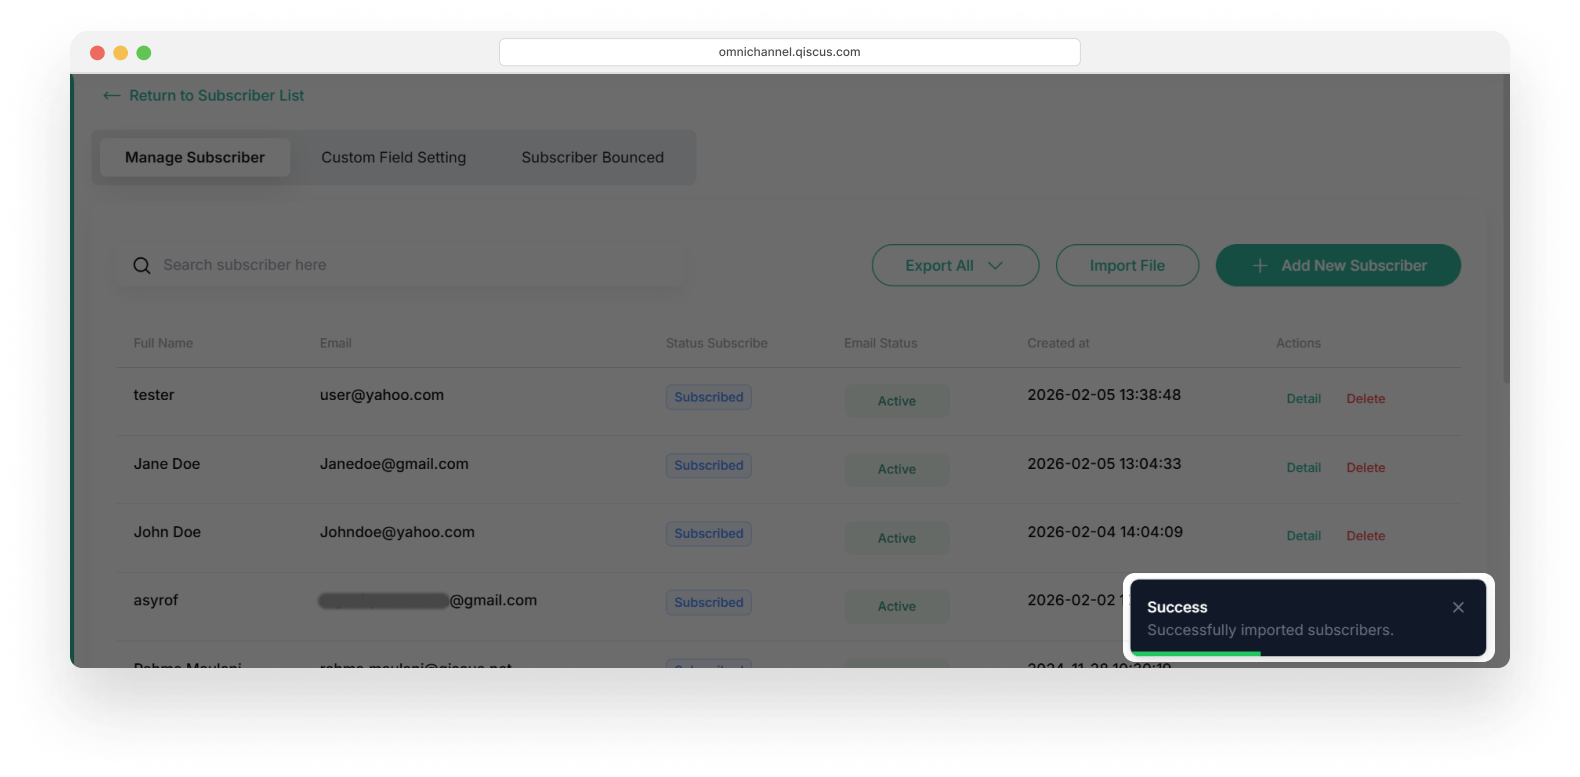
If the file is imported successfully, a notification alert will appear, and the subscriber data will be successfully added.

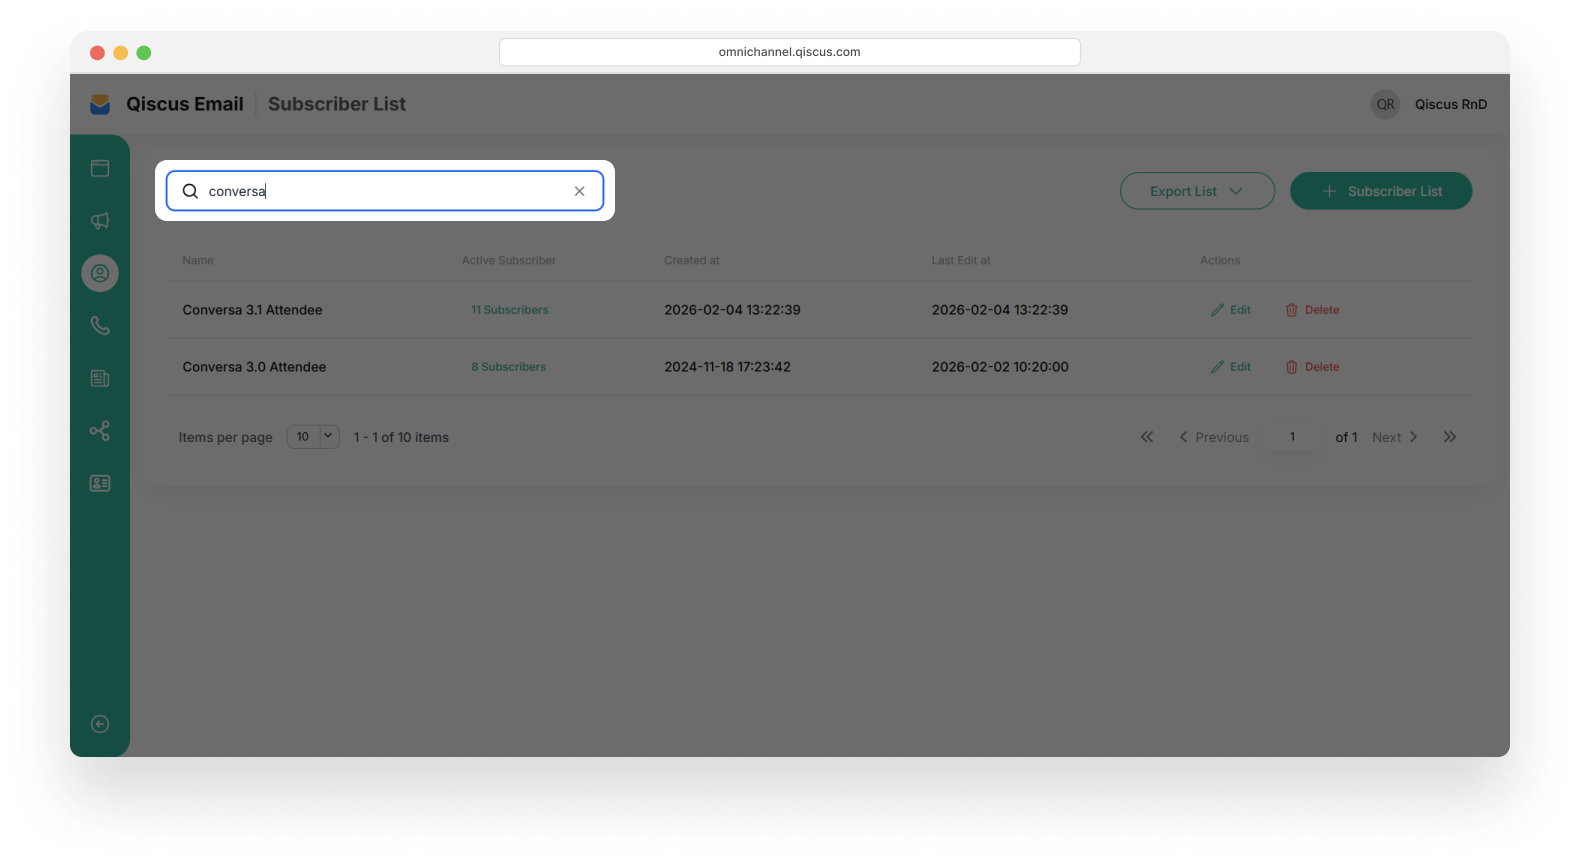
Searching for Subscriber List
In the Subscriber List tab, you'll find a search feature to look up subscriber lists by their names. Enter keywords in the search field, and the list will automatically change according to your input.
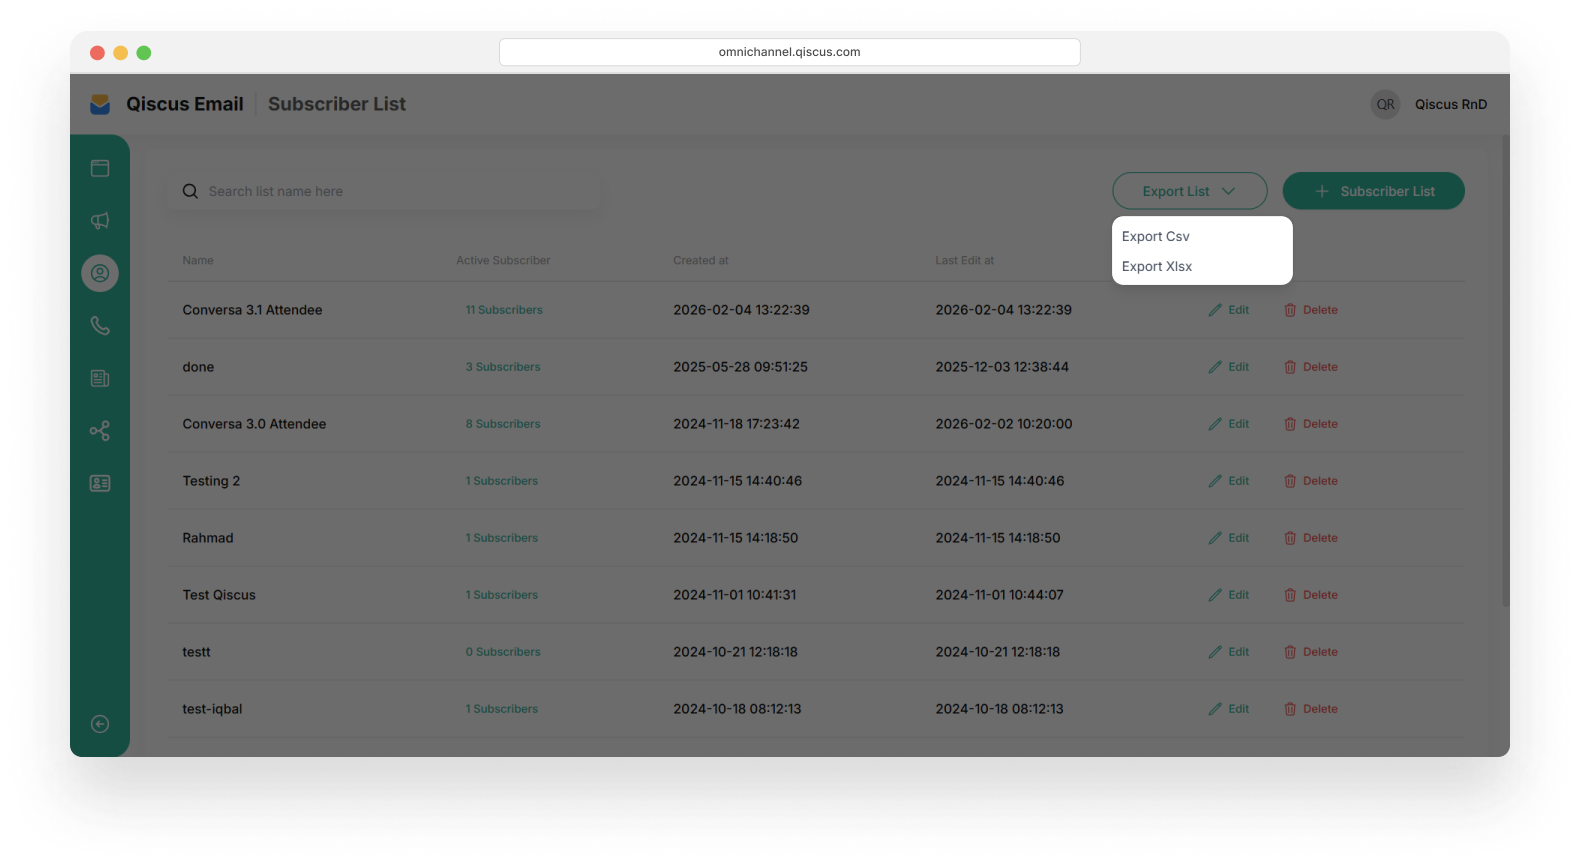
Export Subscriber List in CSV or XLSX
Click the Export List button, and it will display the options.
There are two options: you can export a CSV file or an XLSX file by clicking on one of them.
