Shopee is the leading e-commerce platform in Southeast Asia and Taiwan. Launched in 2015, it is a platform tailored for the region, providing customers with an easy, secure and fast online shopping experience through strong payment and fulfillment support. Shopee is available in 7 countries, including Singapore, Malaysia, Indonesia, Thailand, Taiwan, Vietnam and Philippines.
To be able to reach more conversational channels that can be integrated into Qiscus Omnichannel, App Center releases a Shopee Chat Add-on, so that they can use it as a liaison/reach media between customers and their business owners on Qiscus Omnichannel.
Types of messages that can be read from Shopee Chat include text, stickers, images, video, product and invoice. Then, type of messages that can be sent from Qiscus Omnichannel only text and image.
To be able to integrate Shopee Chat into the Qiscus App Center, you must first create a Shopee Developer Account (Shopee Open Platform).
Activation
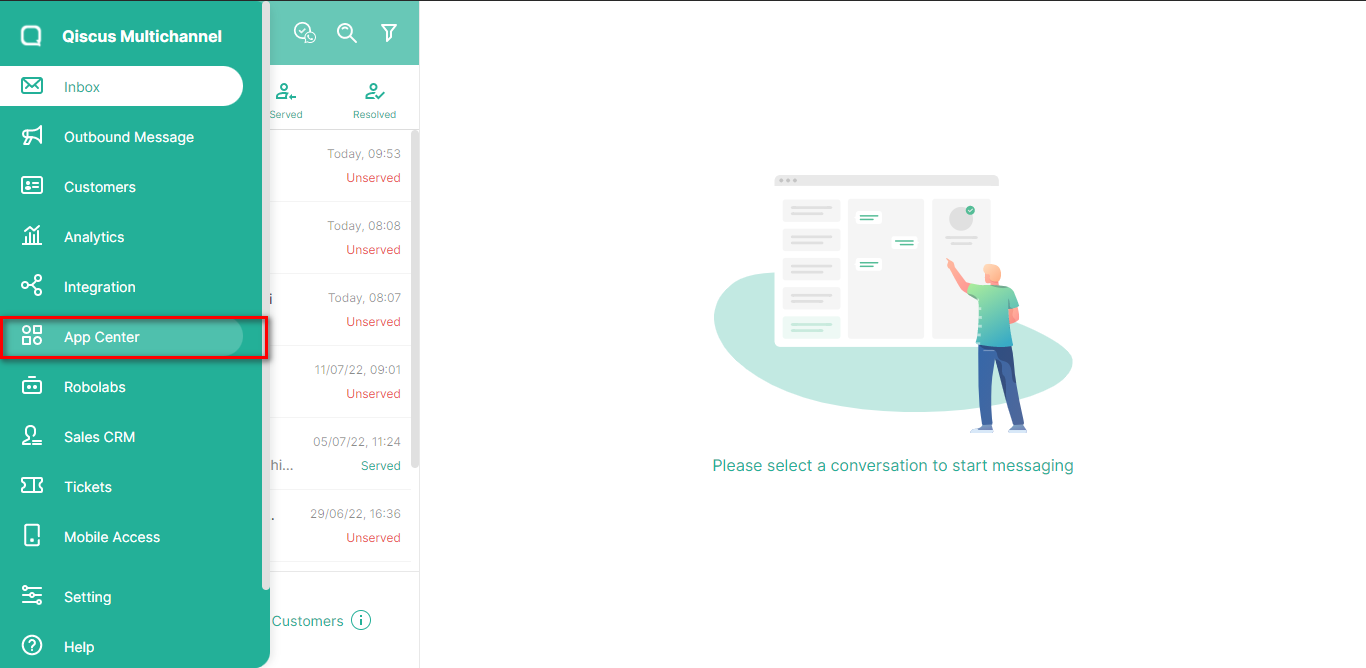
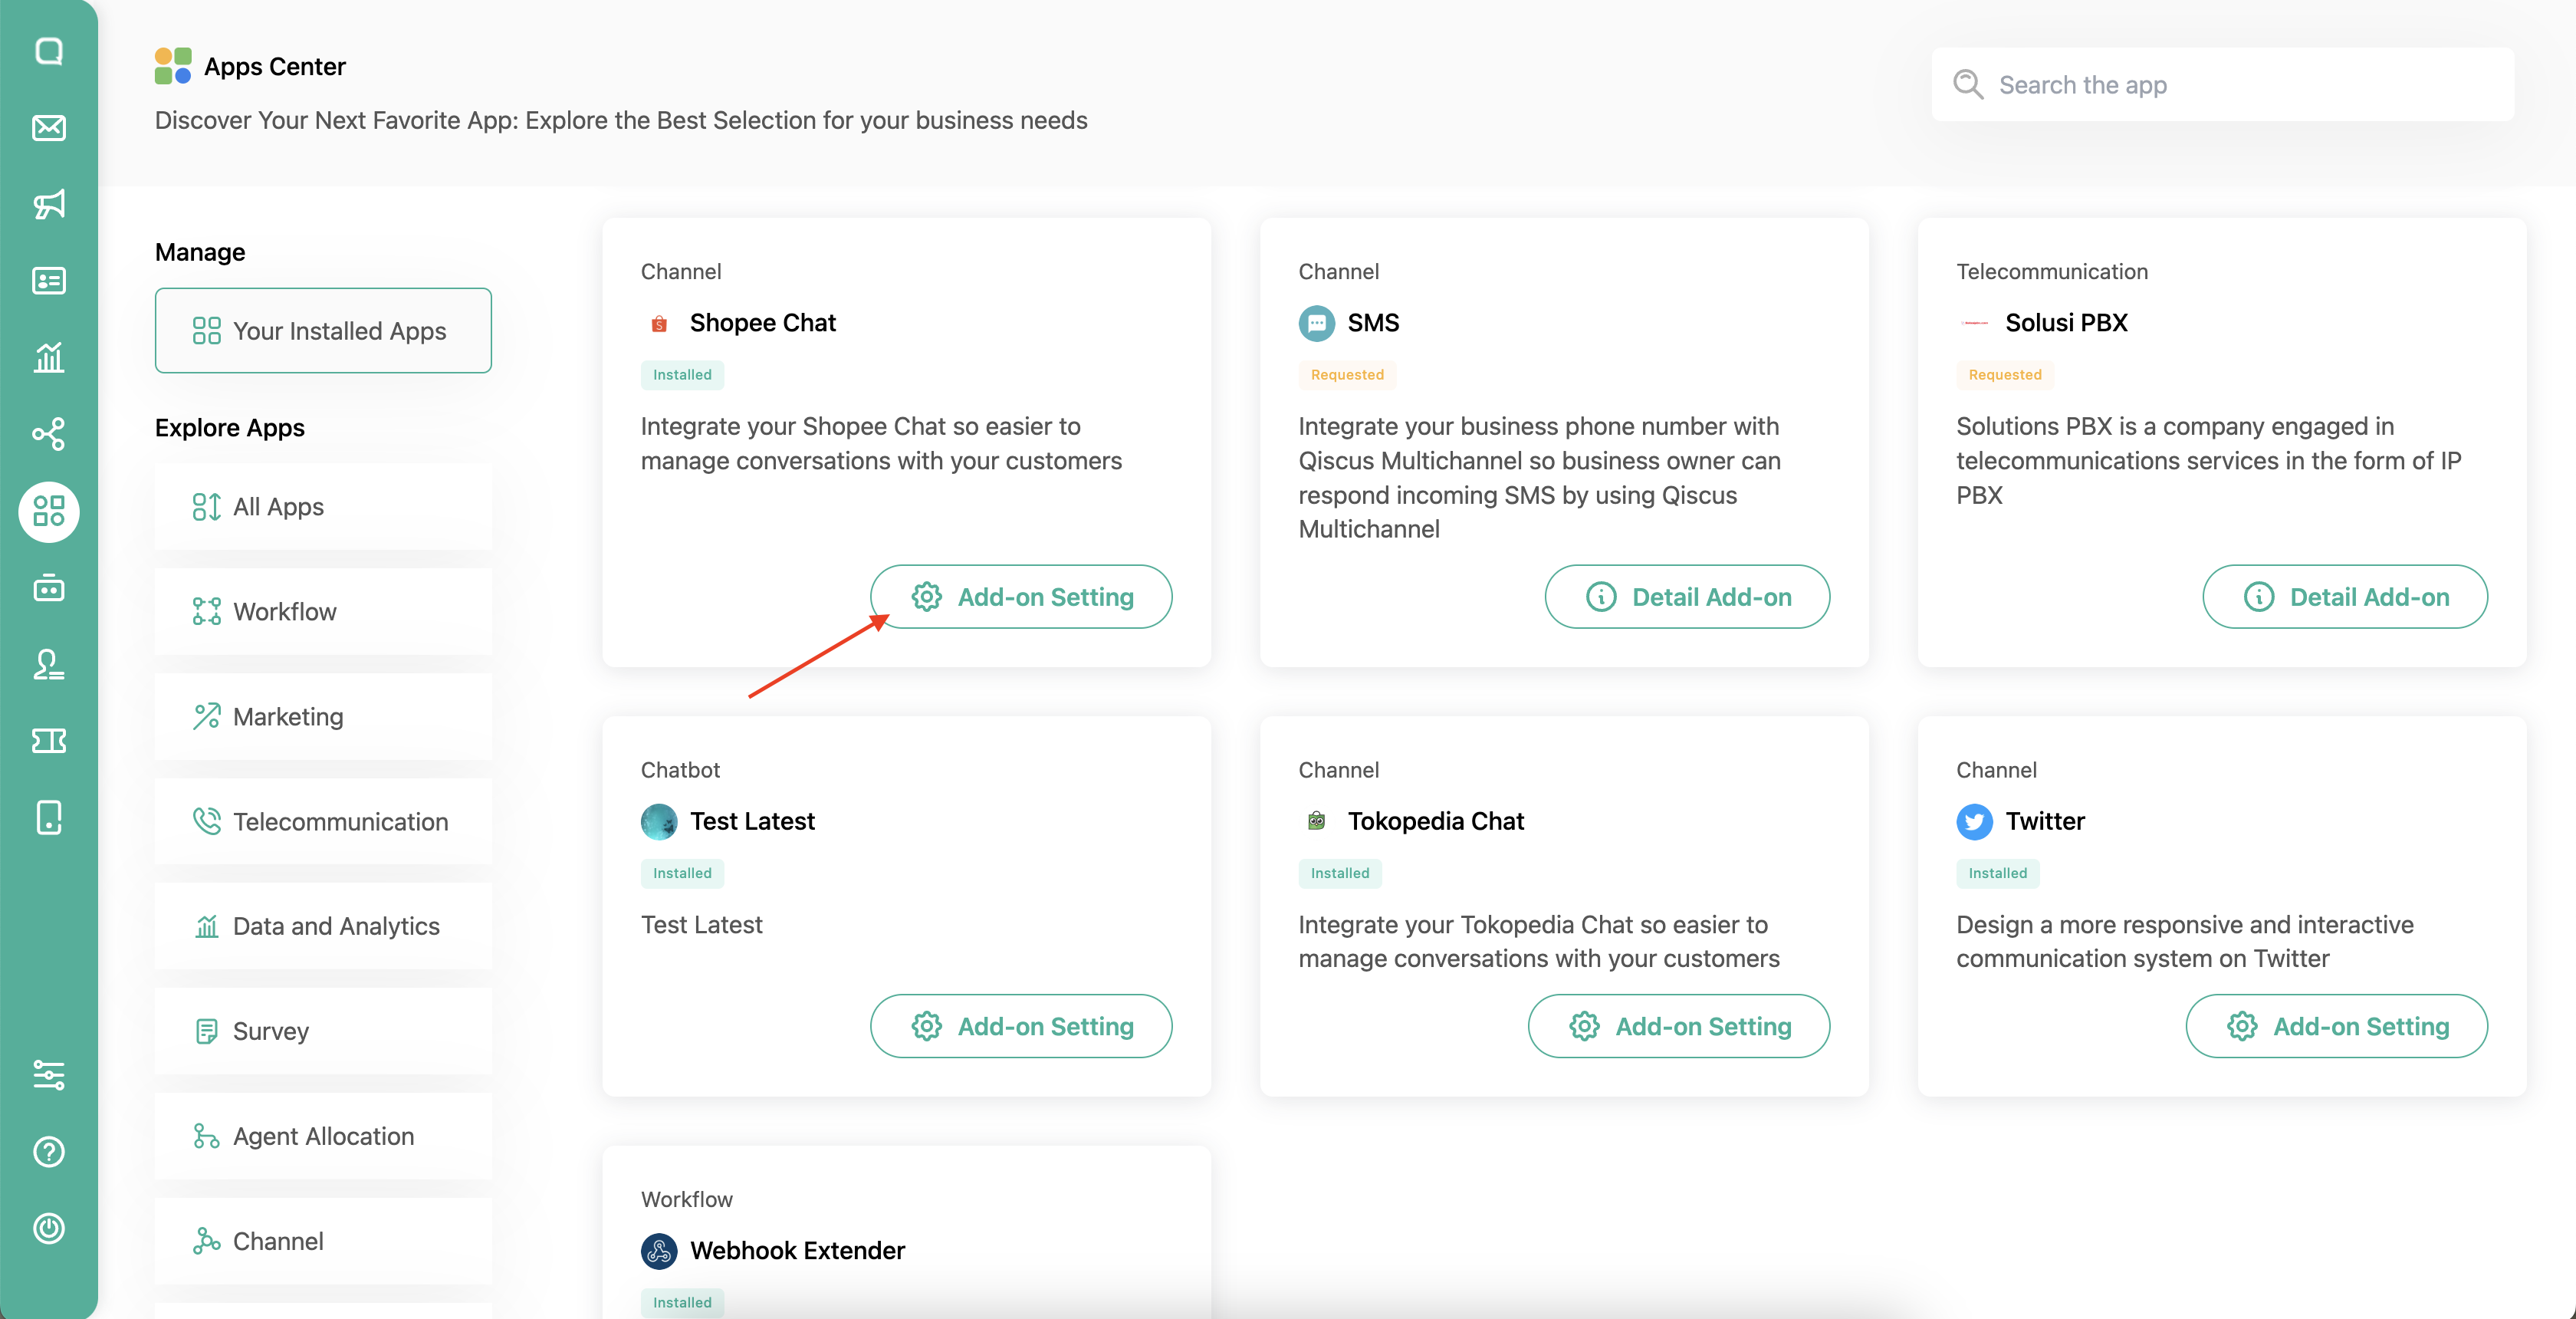
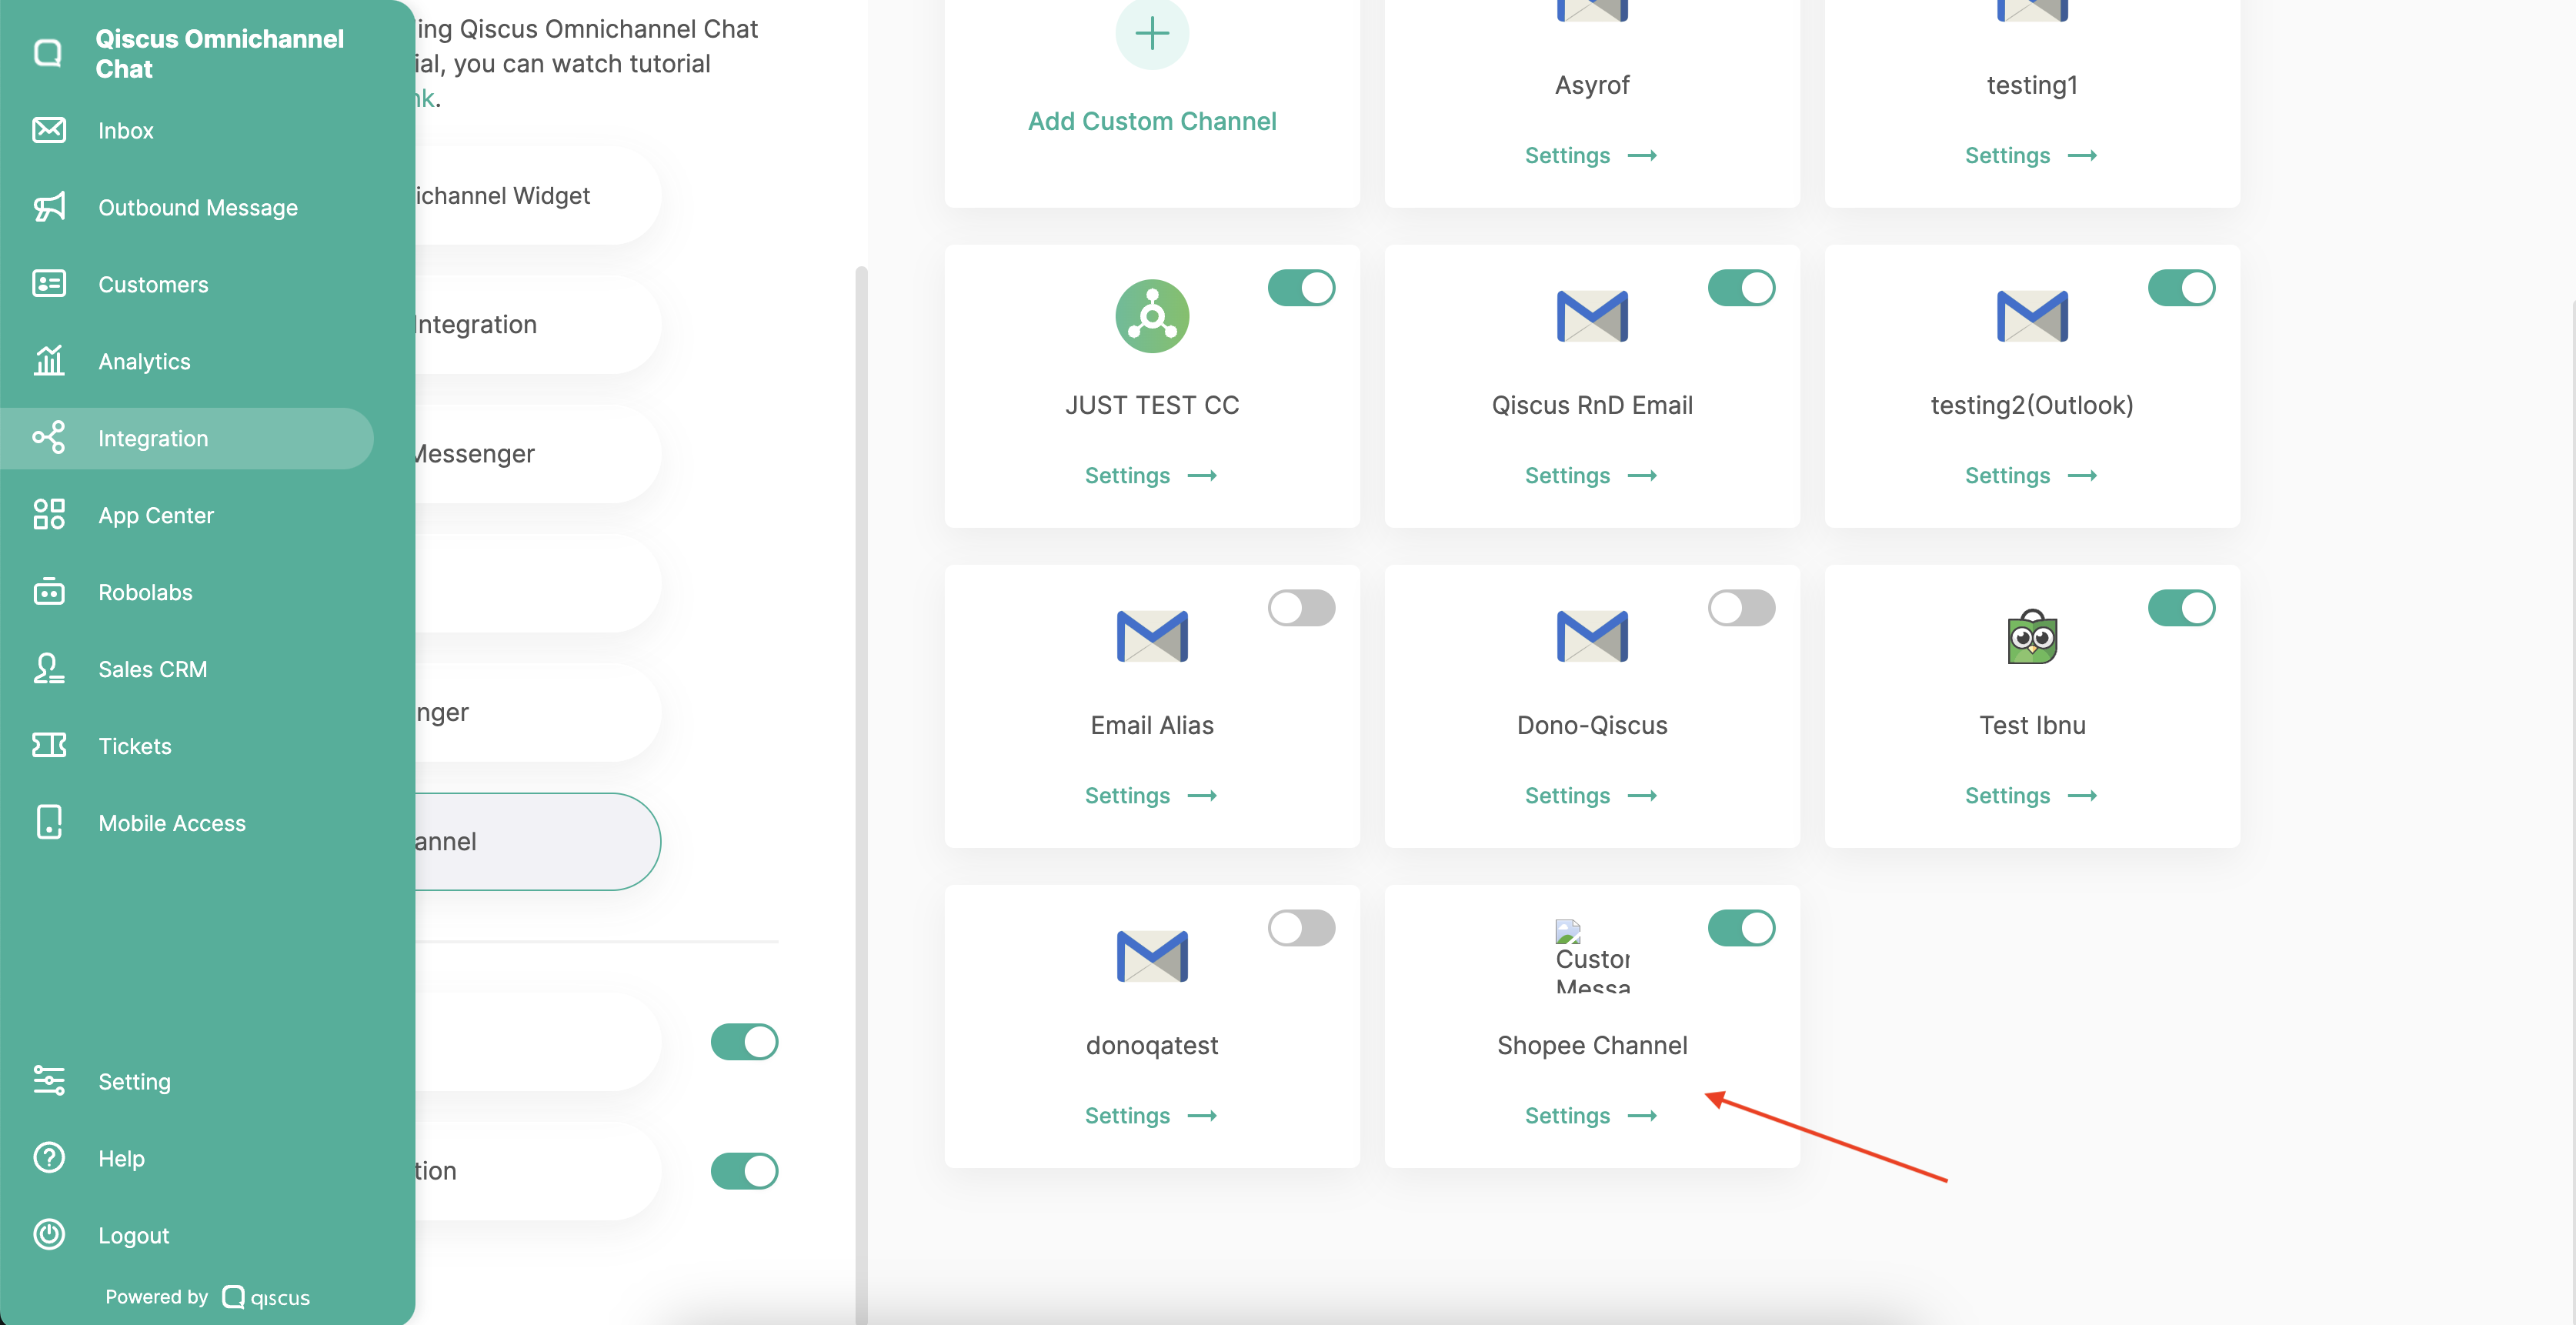
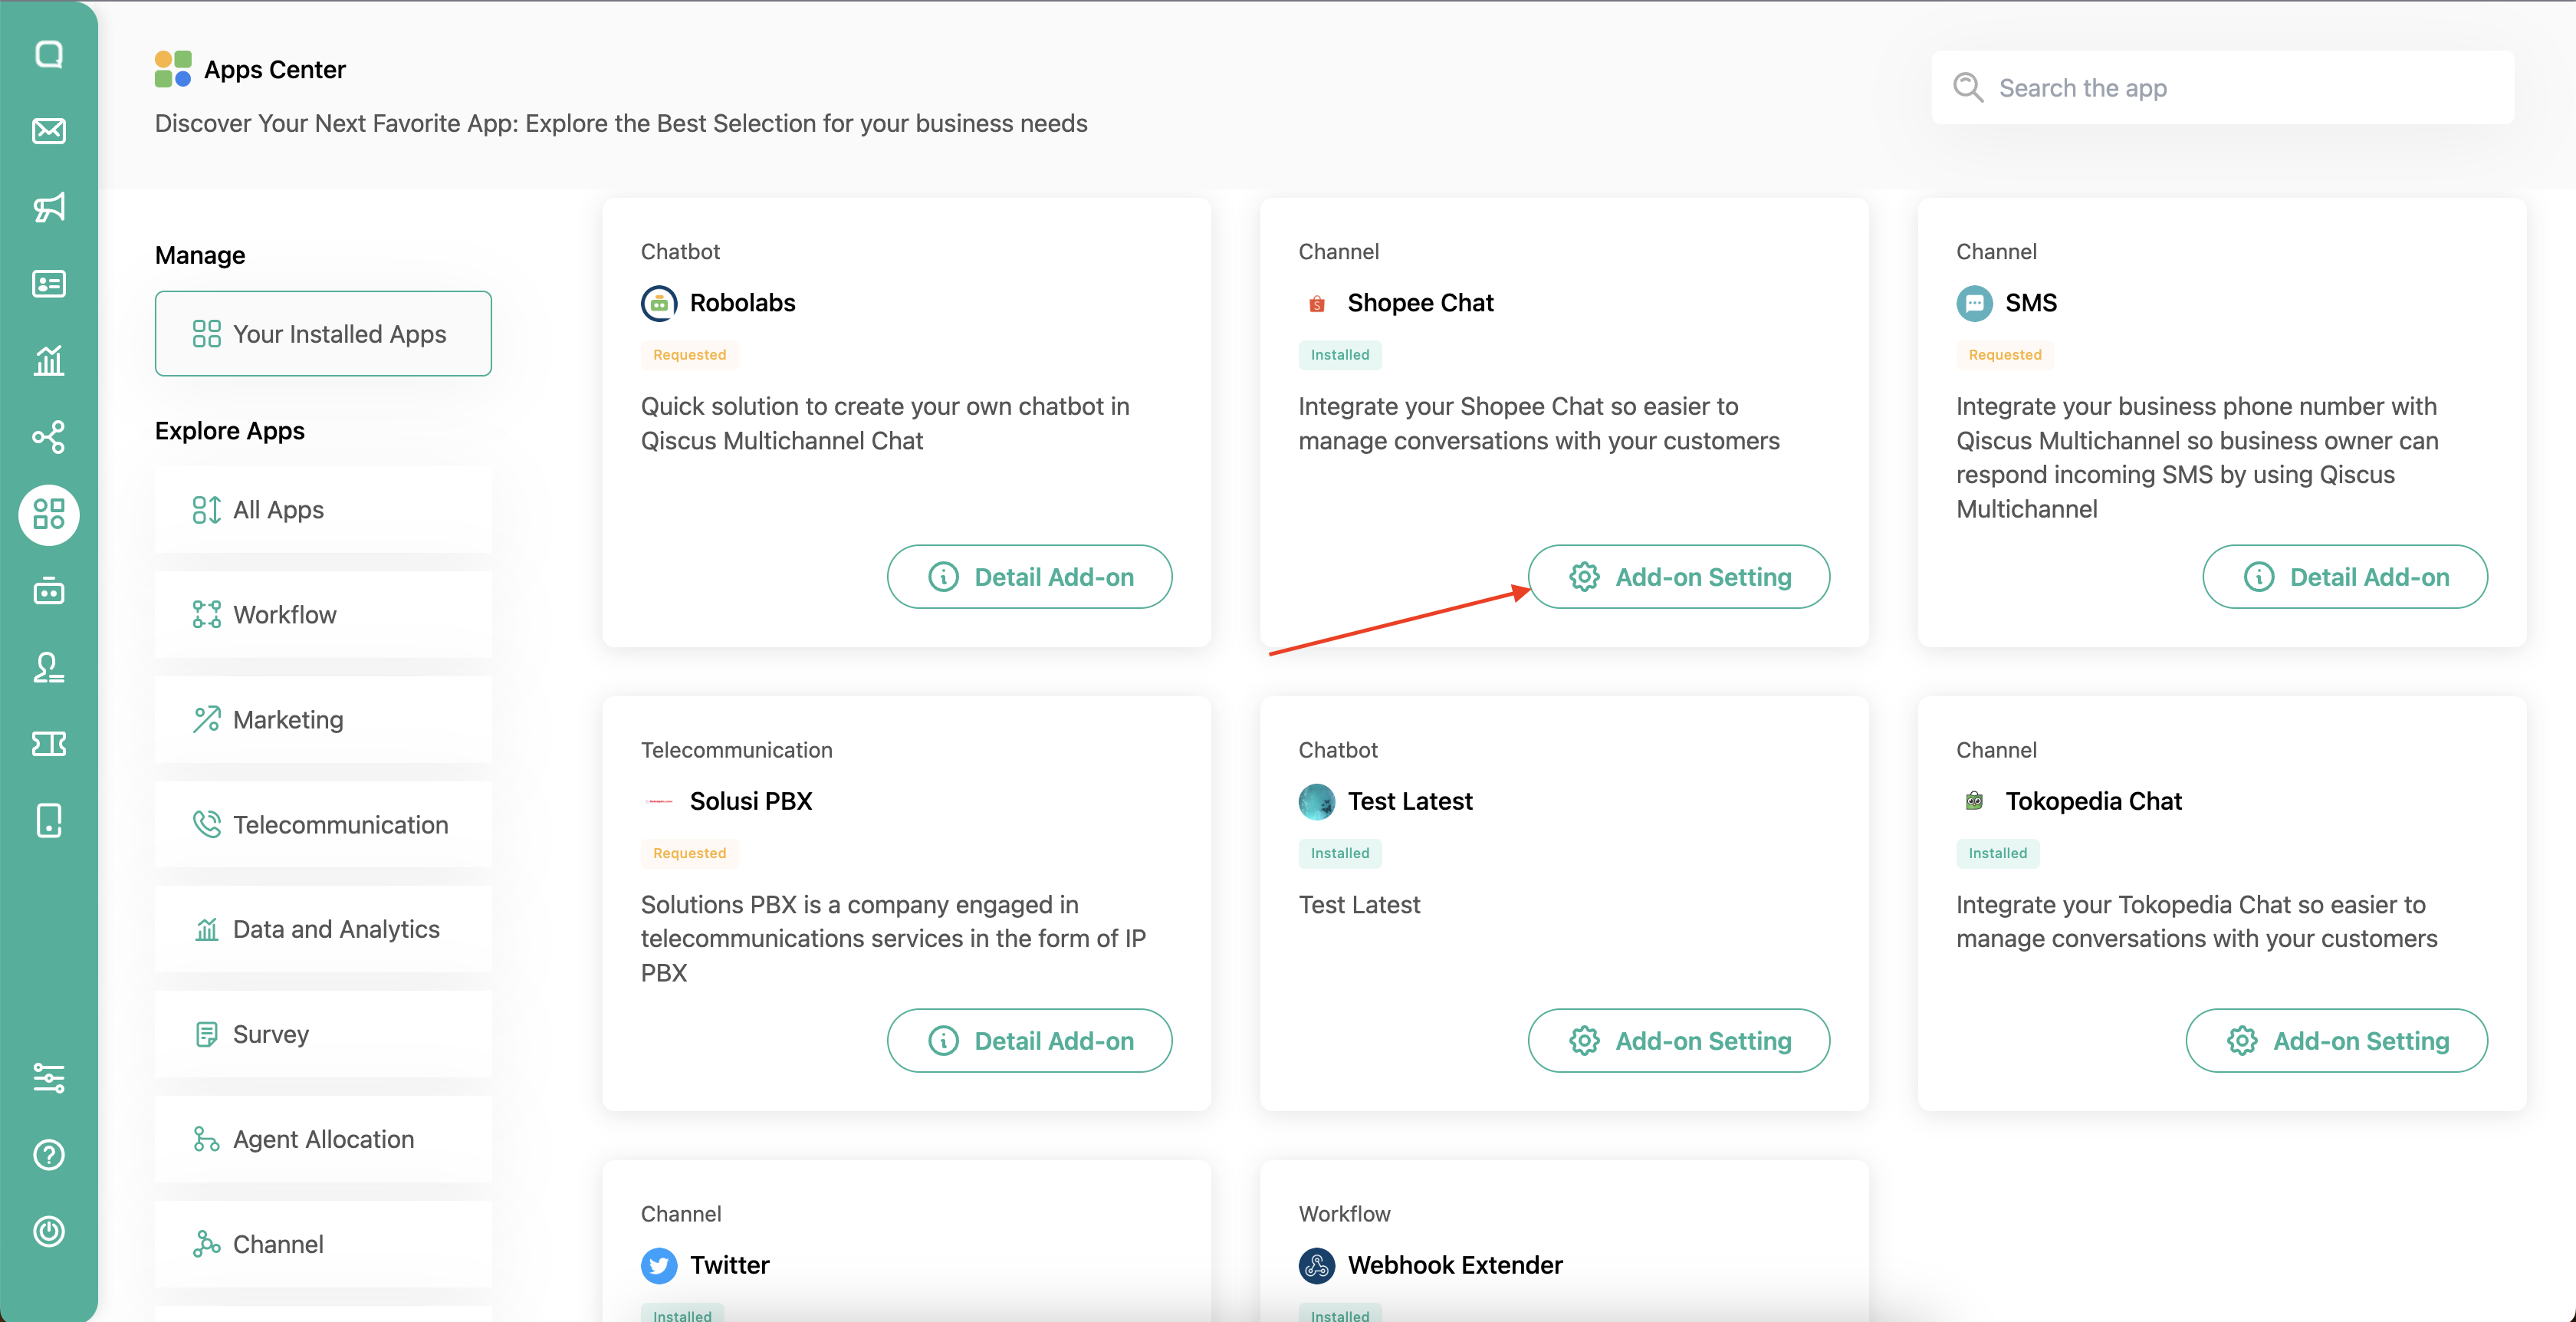
To activate the Shopee Chat add-on, you can access through App Center menu from the sidebar menu.
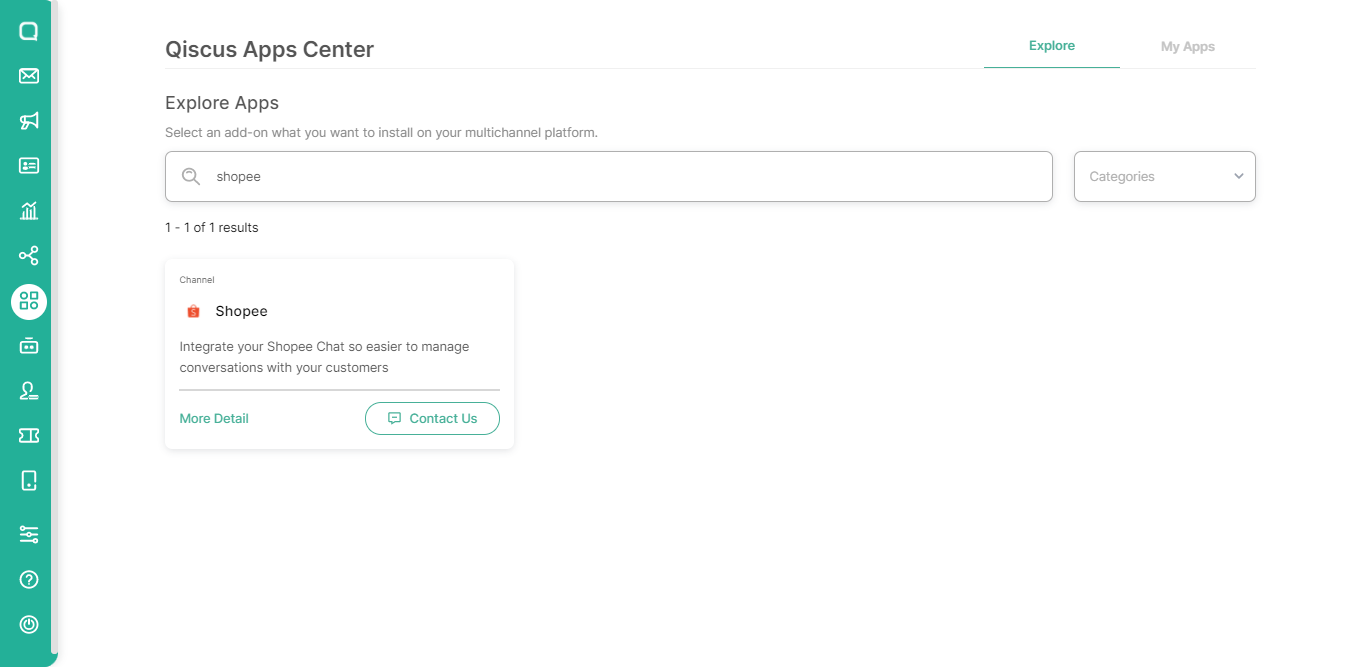
You can search for Shopee by using searching field from the Explore page
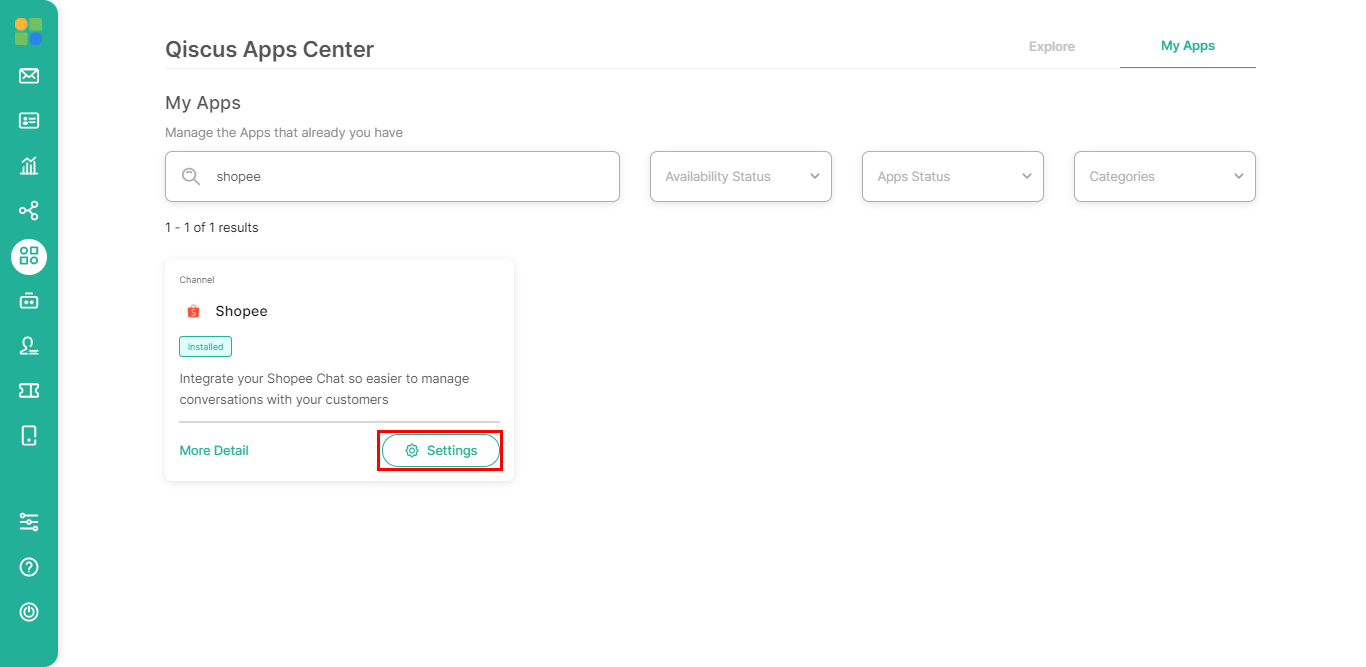
Follow the activation process as described here. Once the add-on has already activated, it will showed up in the My Apps tab. You can click settings button to configure the Shopee Chat Add-on.
How to Create Shopee Developer Account
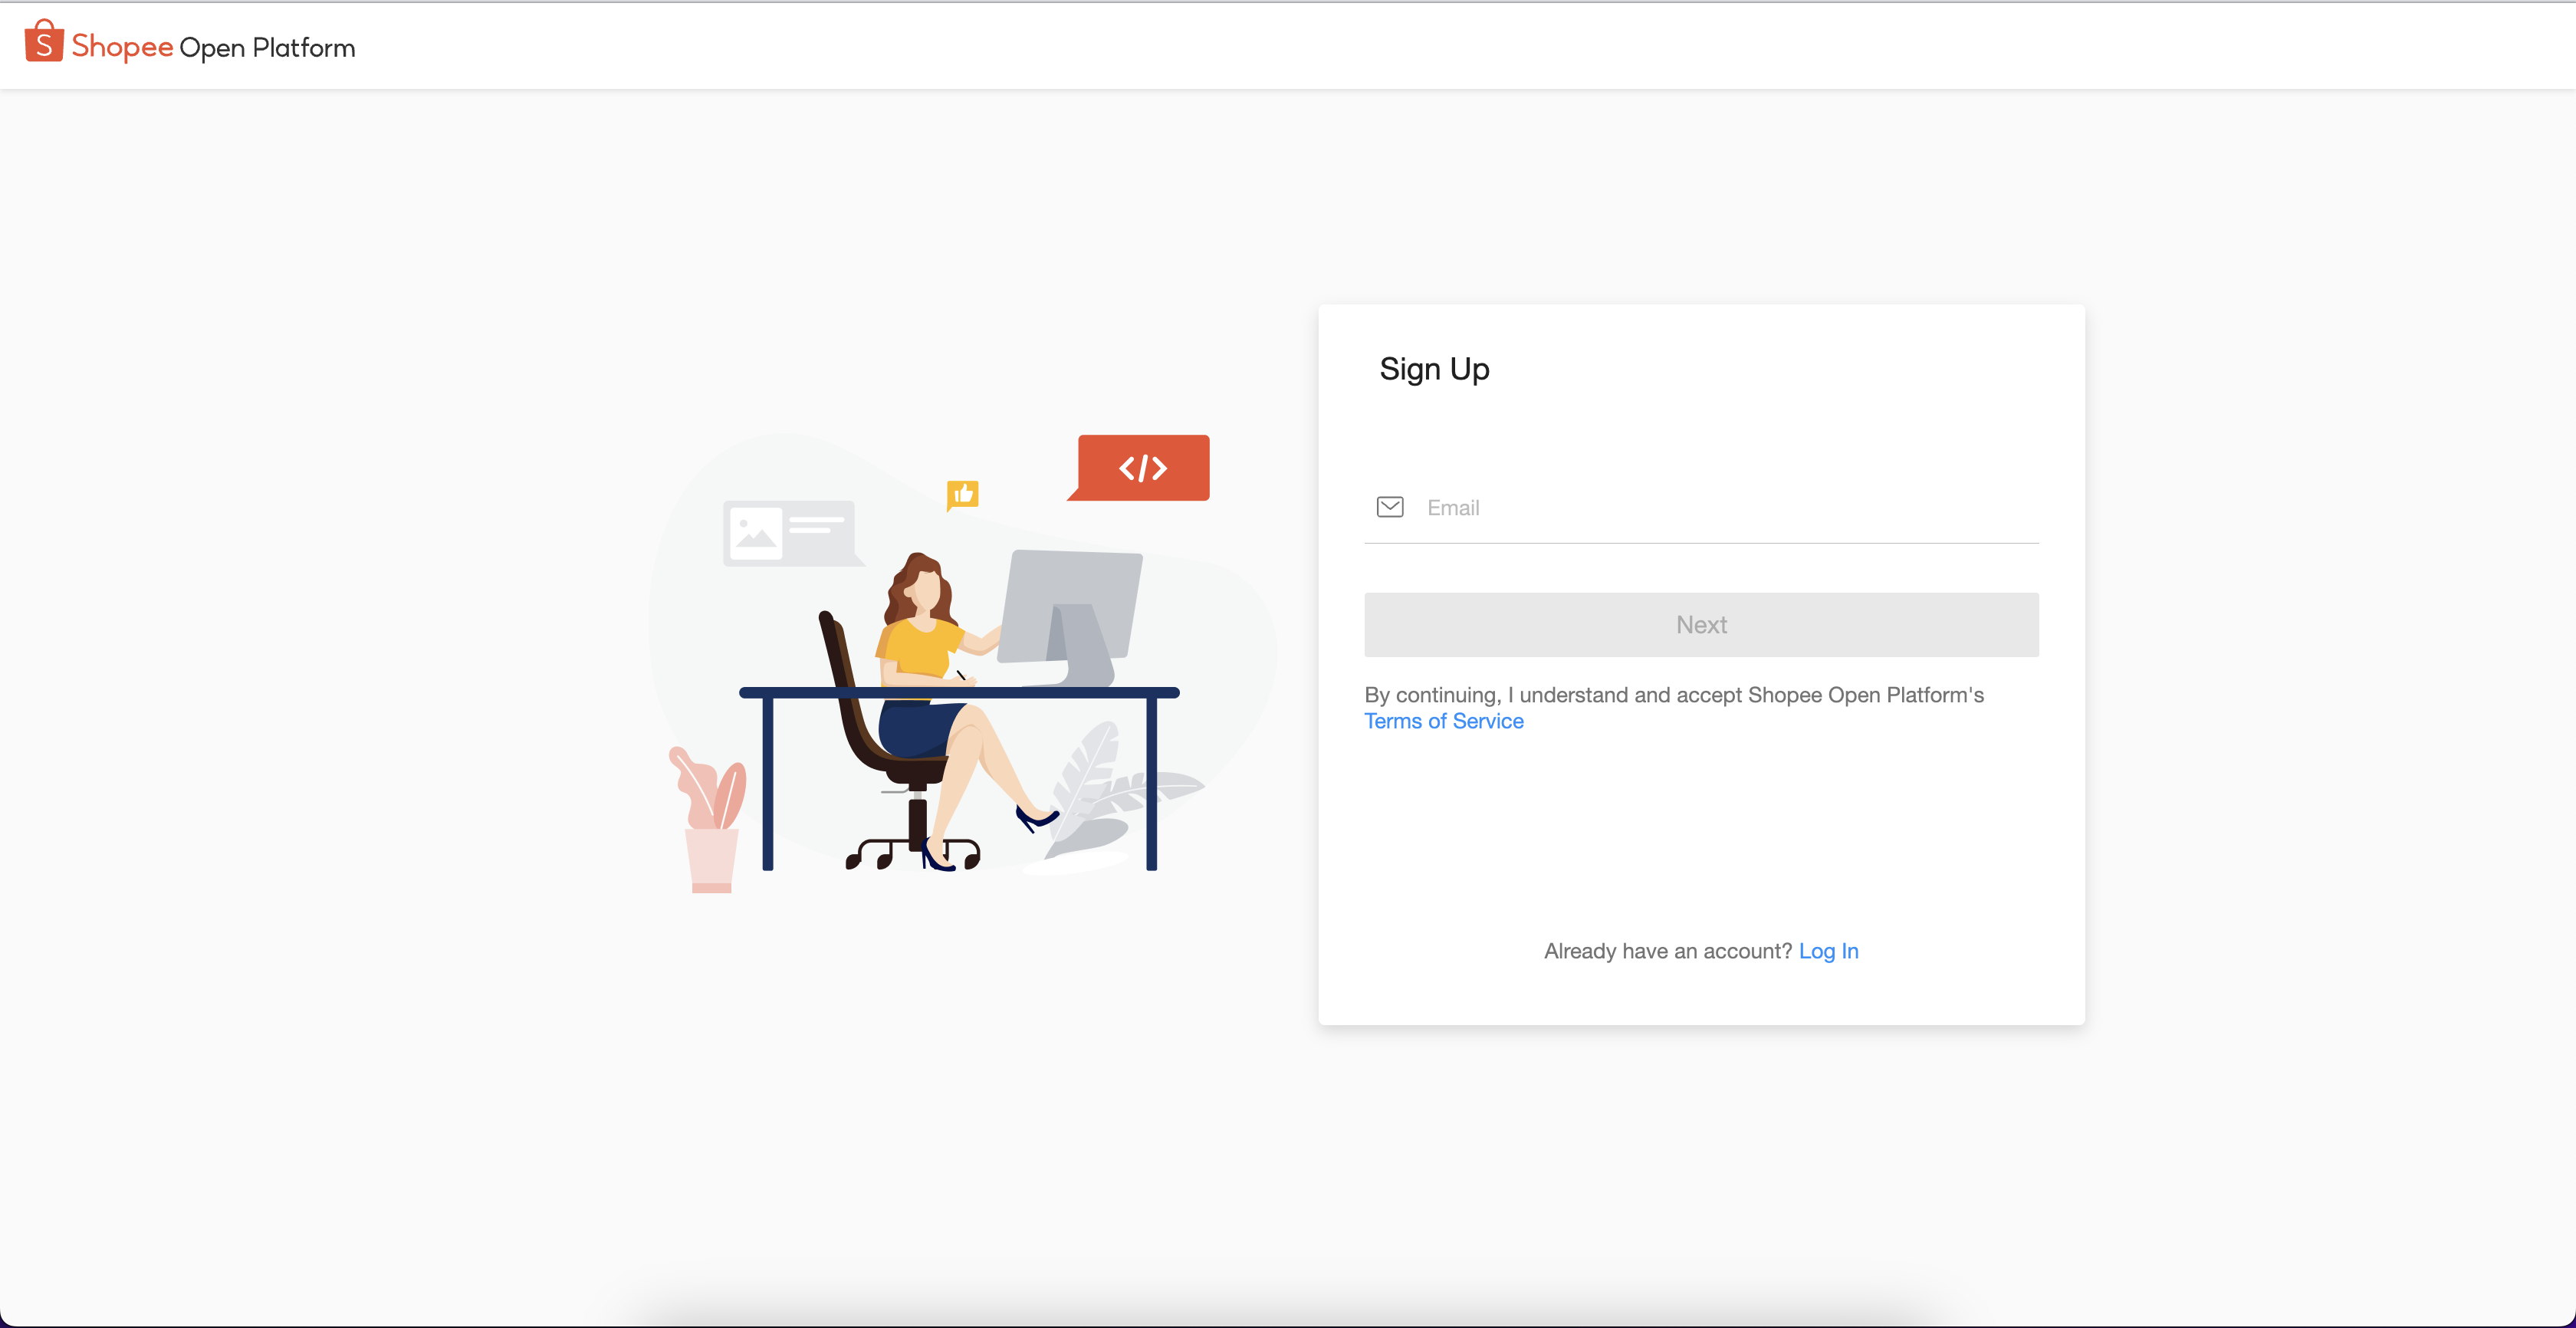
Go to the Shopee Open Platform page https://open.shopee.com/ then click Get Access (Now).

Enter your email to create a Shopee Open Platform account (Developer Account).
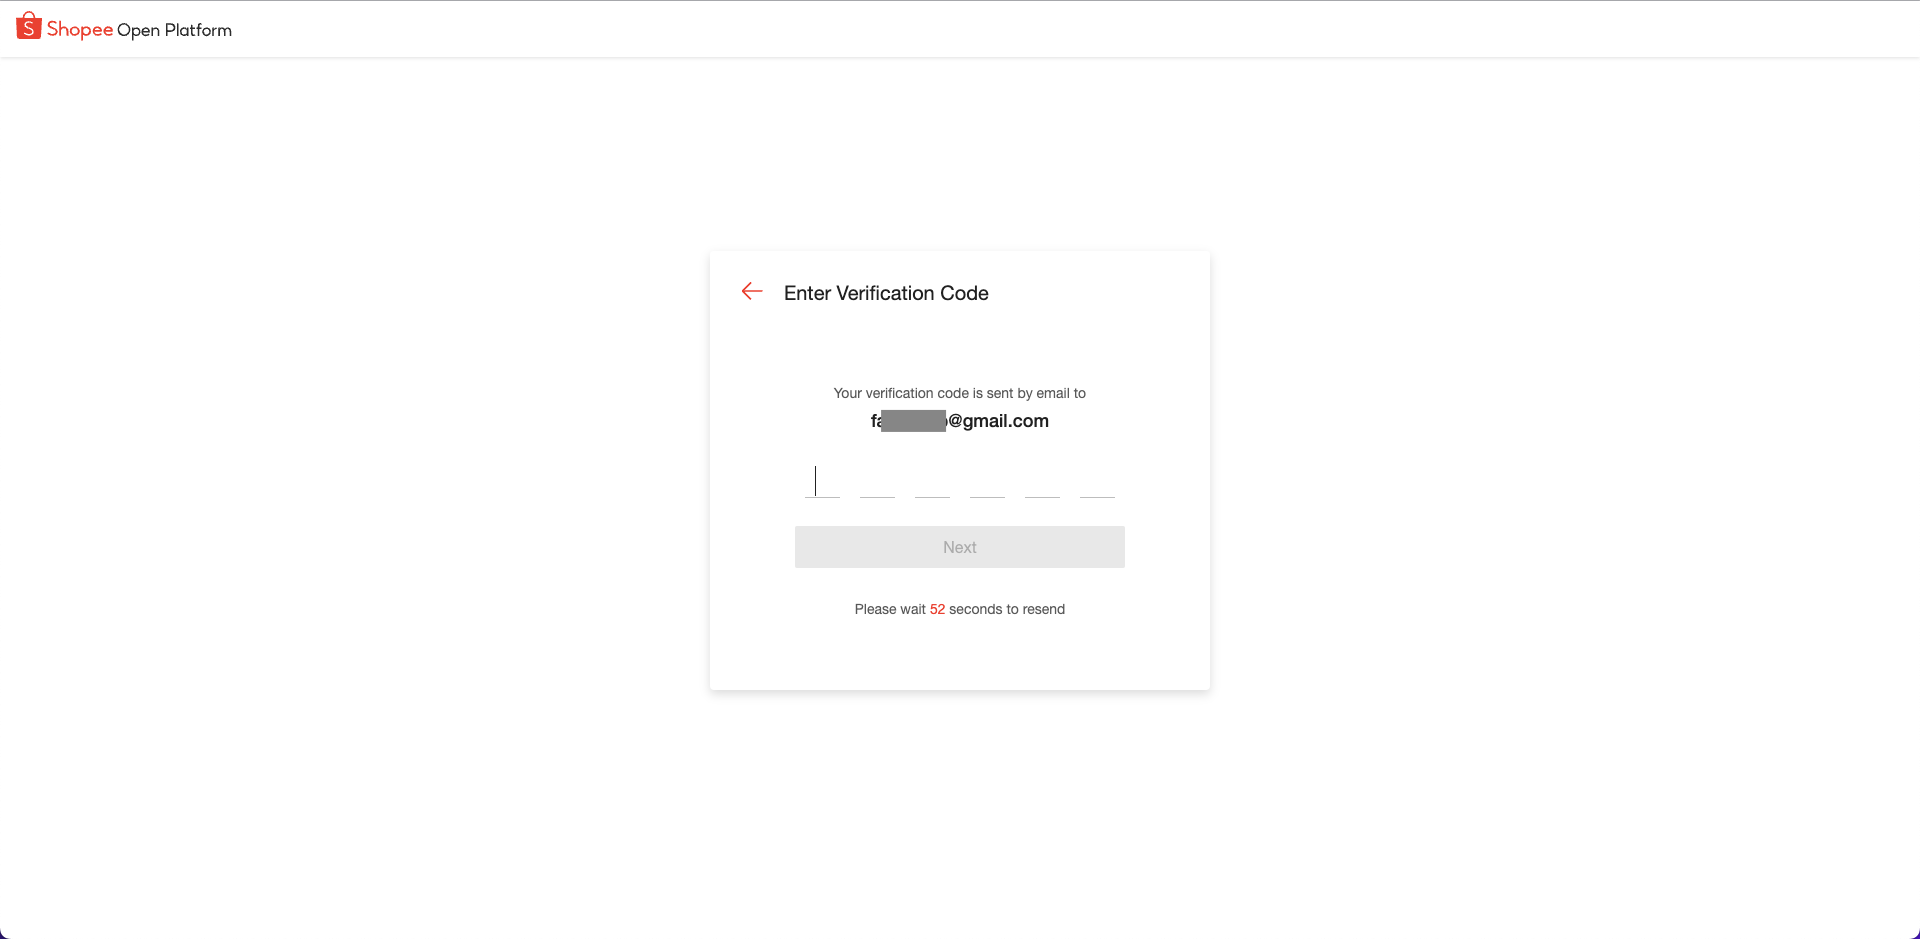
OTP will be sent to your email, enter the OTP on the following page.
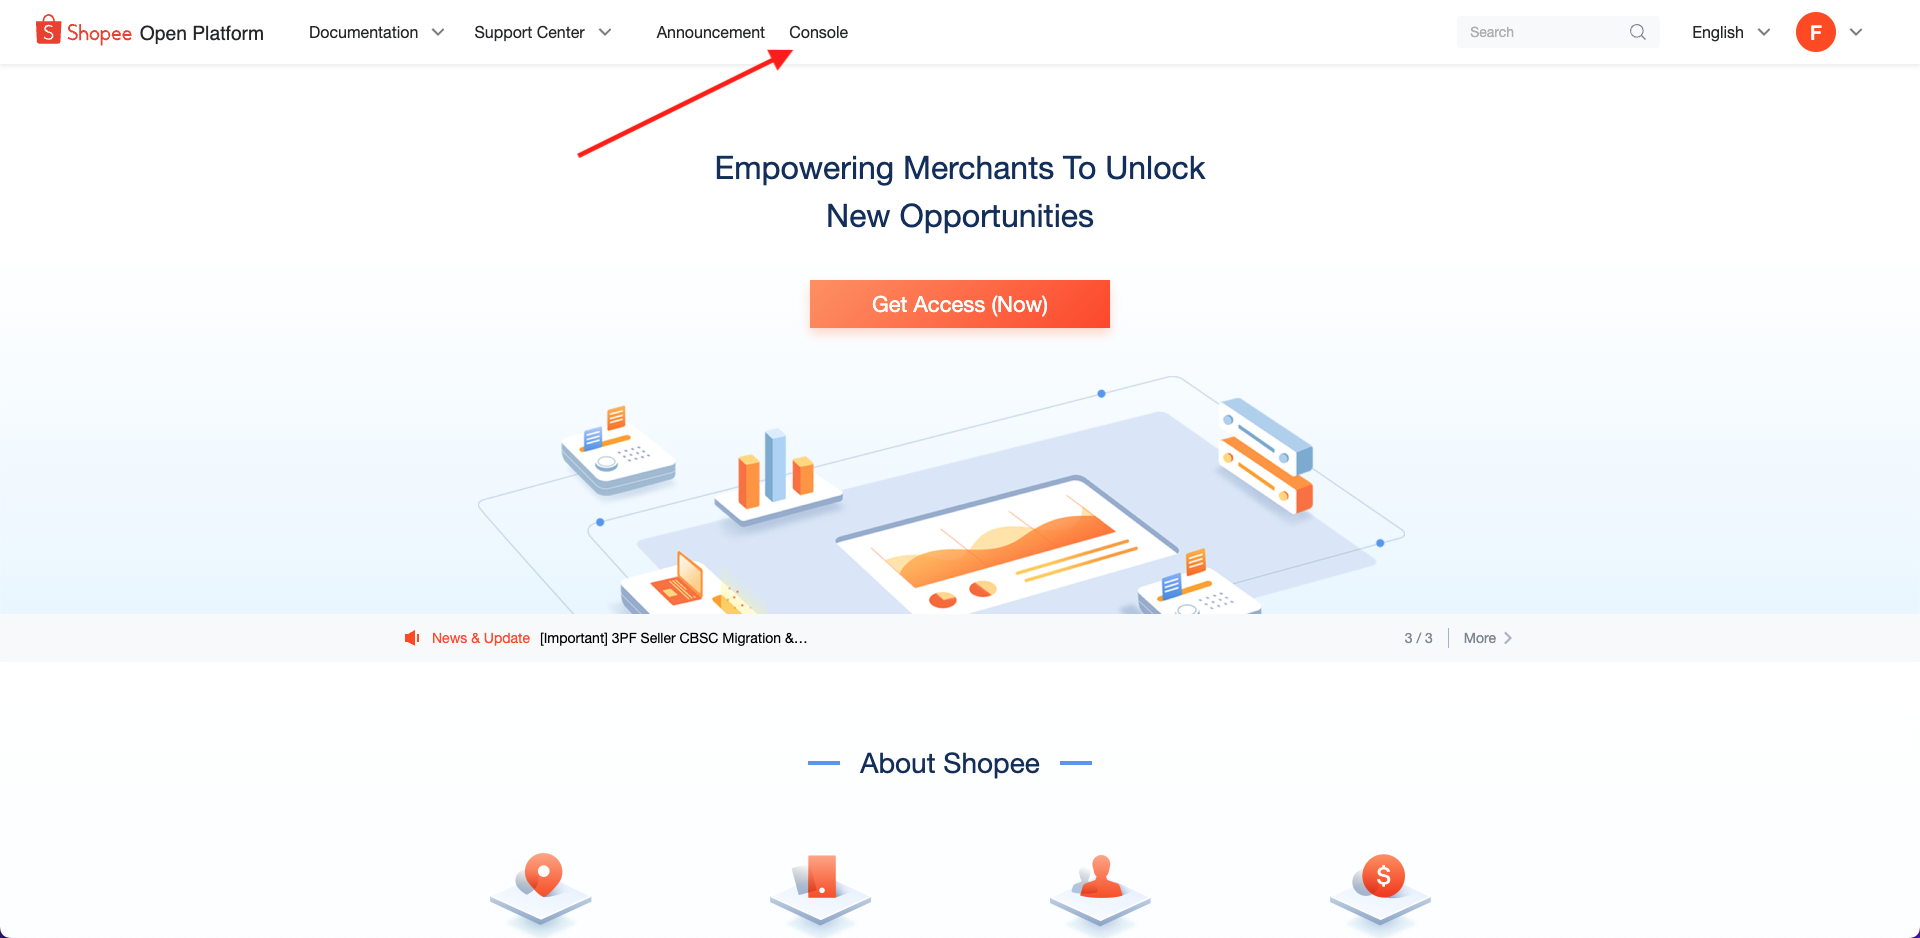
After registering on the Shopee Open Platform, go to the main page at https://open.shopee.com/ then click Console in the menu bar at the top.
Select the desired country/area.
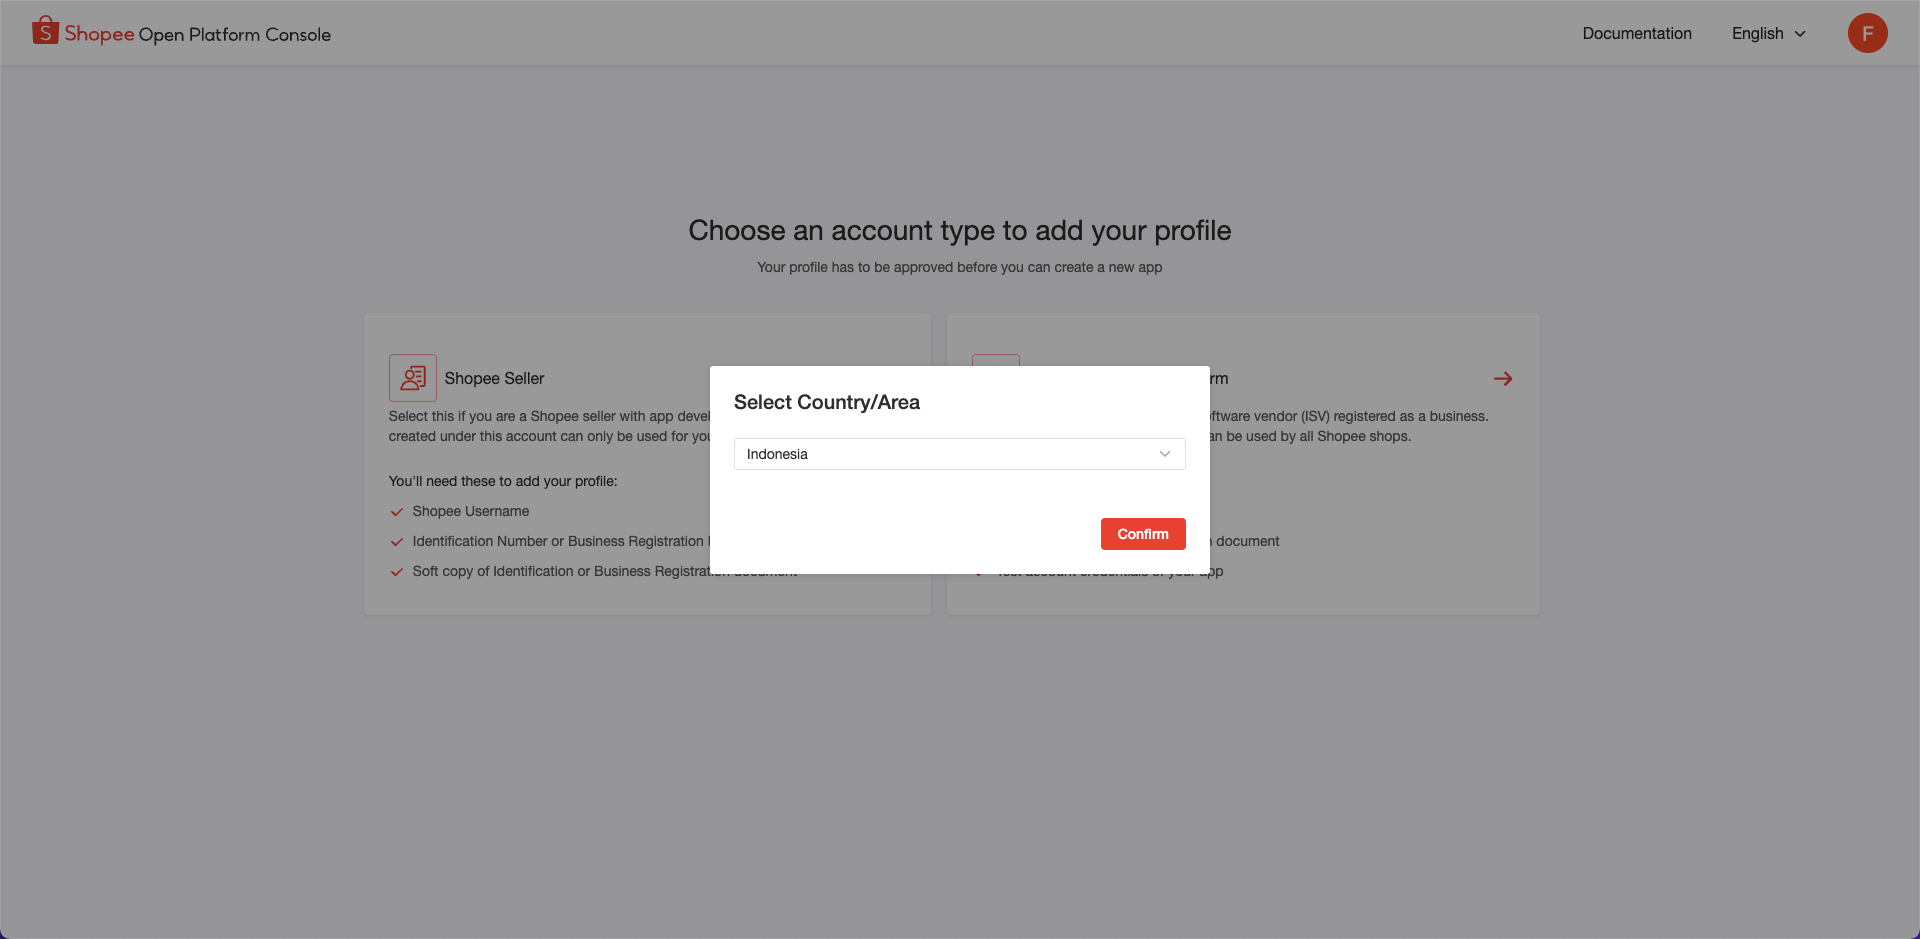
Select the Shopee Seller account type.

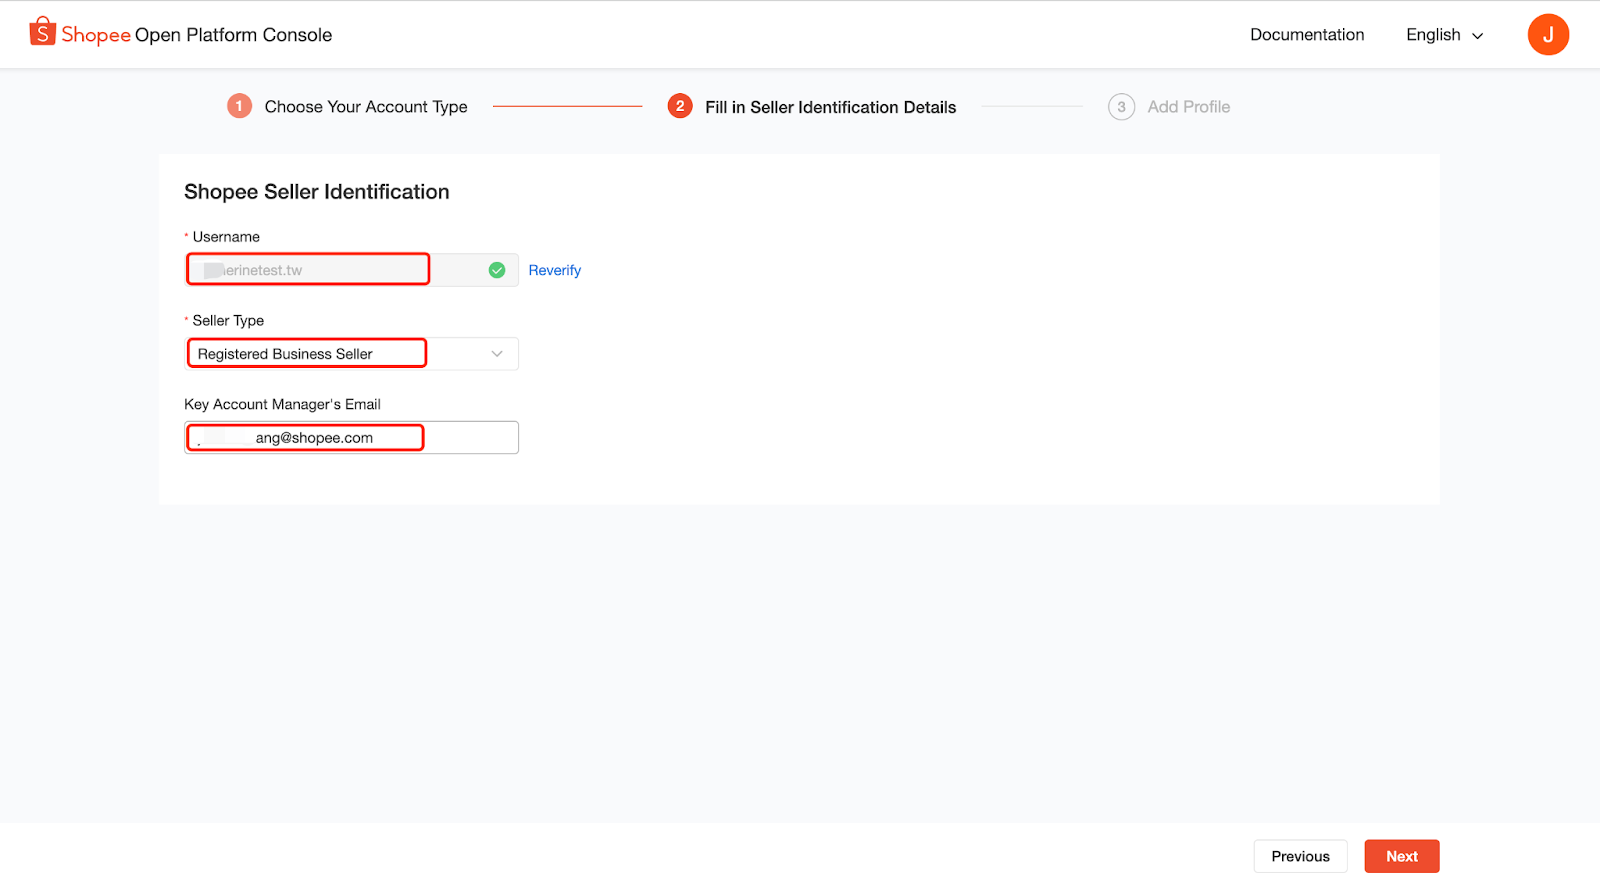
If your seller account verification is successful, you can continue to fill in other Shopee Seller Identification details. Select Registered Business Seller from the Seller Type dropdown menu > fill in your Key Account Manager’s Email > select Next.
Key Account Manager's Email should be a valid Shopee email (ends with @shopee.com). If there is no Key Account Manager's Email, please leave it blank.
Then complete all required fields on the step 2
Please fill out all the following sections accurately:
Business Information
Company name
Business registration number
Business registration document
Enterprise Address
City/Town
Address
Postal Code
Other Information
Country/Area
Phone number
First name
Last name
Registered contact email
Secondary contact email
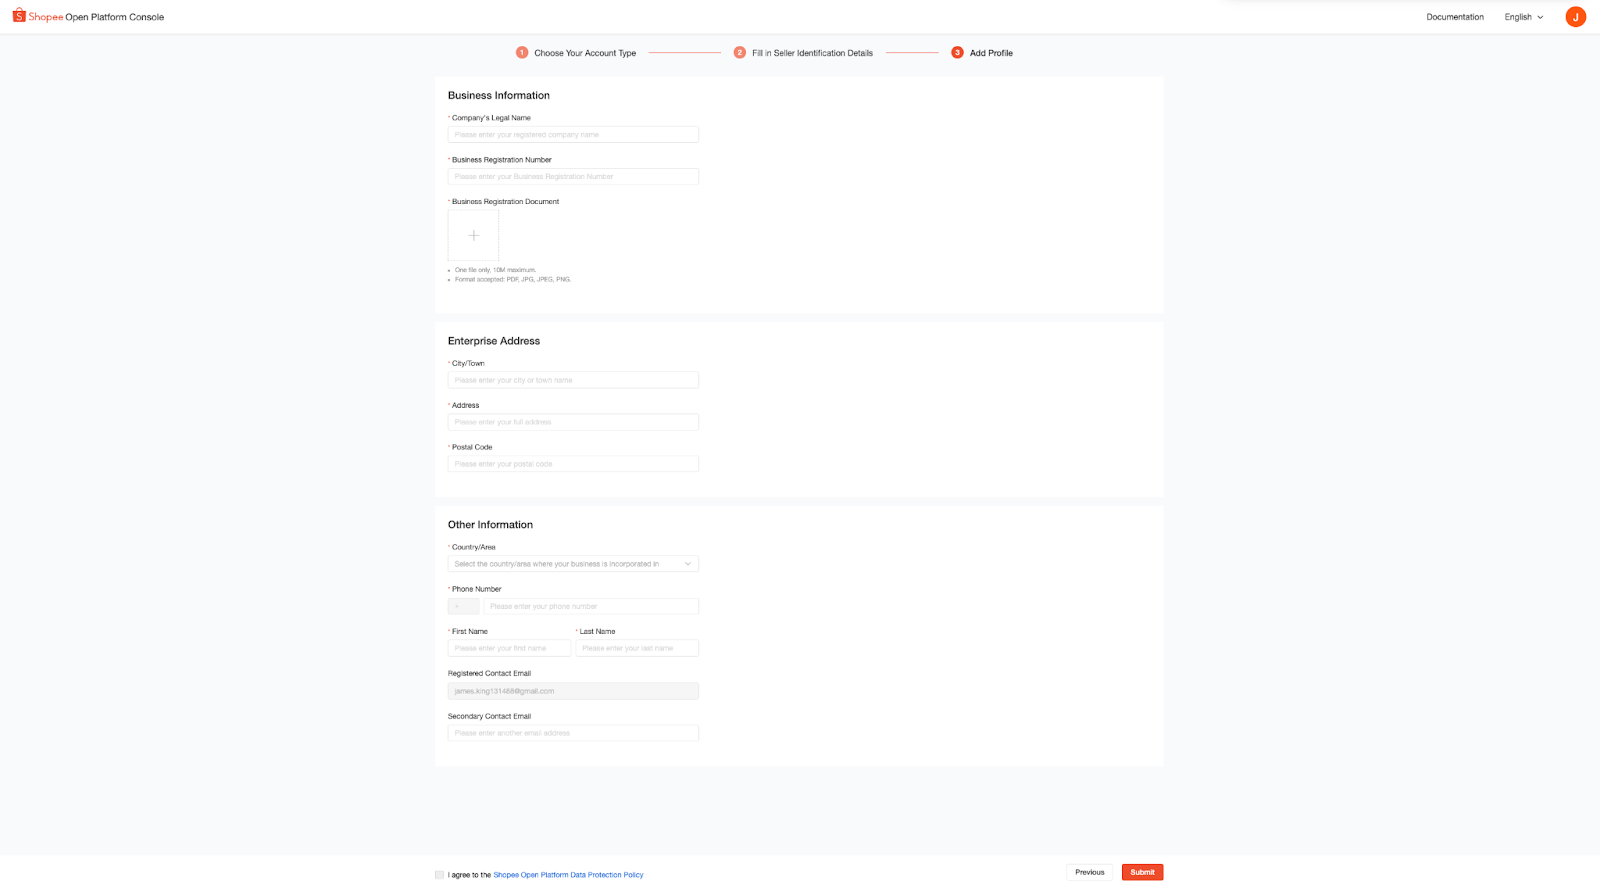
After fulfilled the field then click Submit and wait for your account to be verified by Shopee. The status is that your profile is under review. Wait for your profile to be approved by Shopee. Once your application is approved, you will receive a notification email via your submitted email address.
Shopee Seller applications will be processed by Shopee in 3 working days.

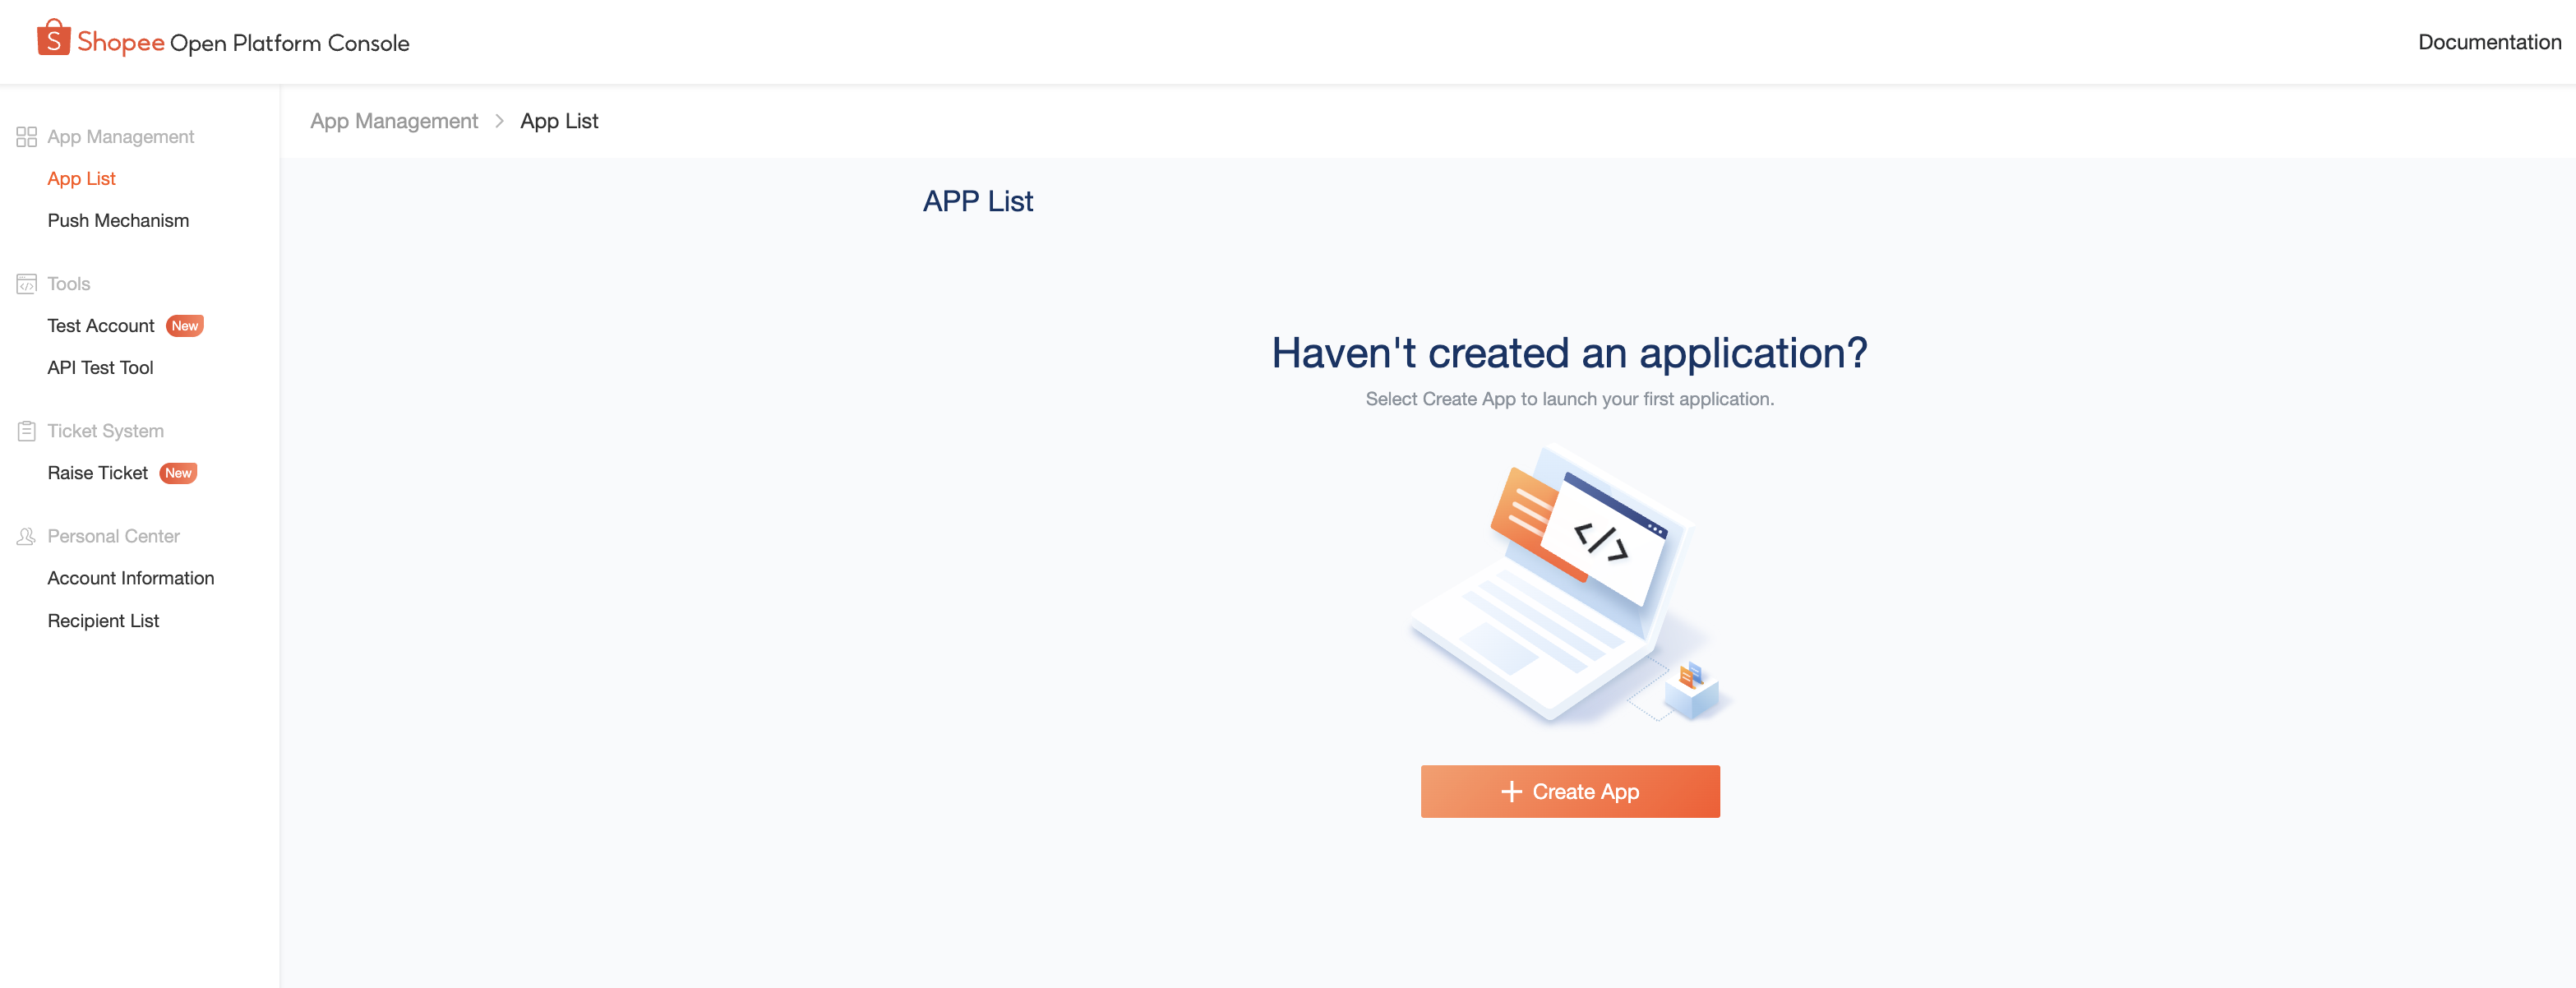
Once your developer account is approved, you can create new Apps in the Shopee Open Platform Console Create App page. After that click + Create App.
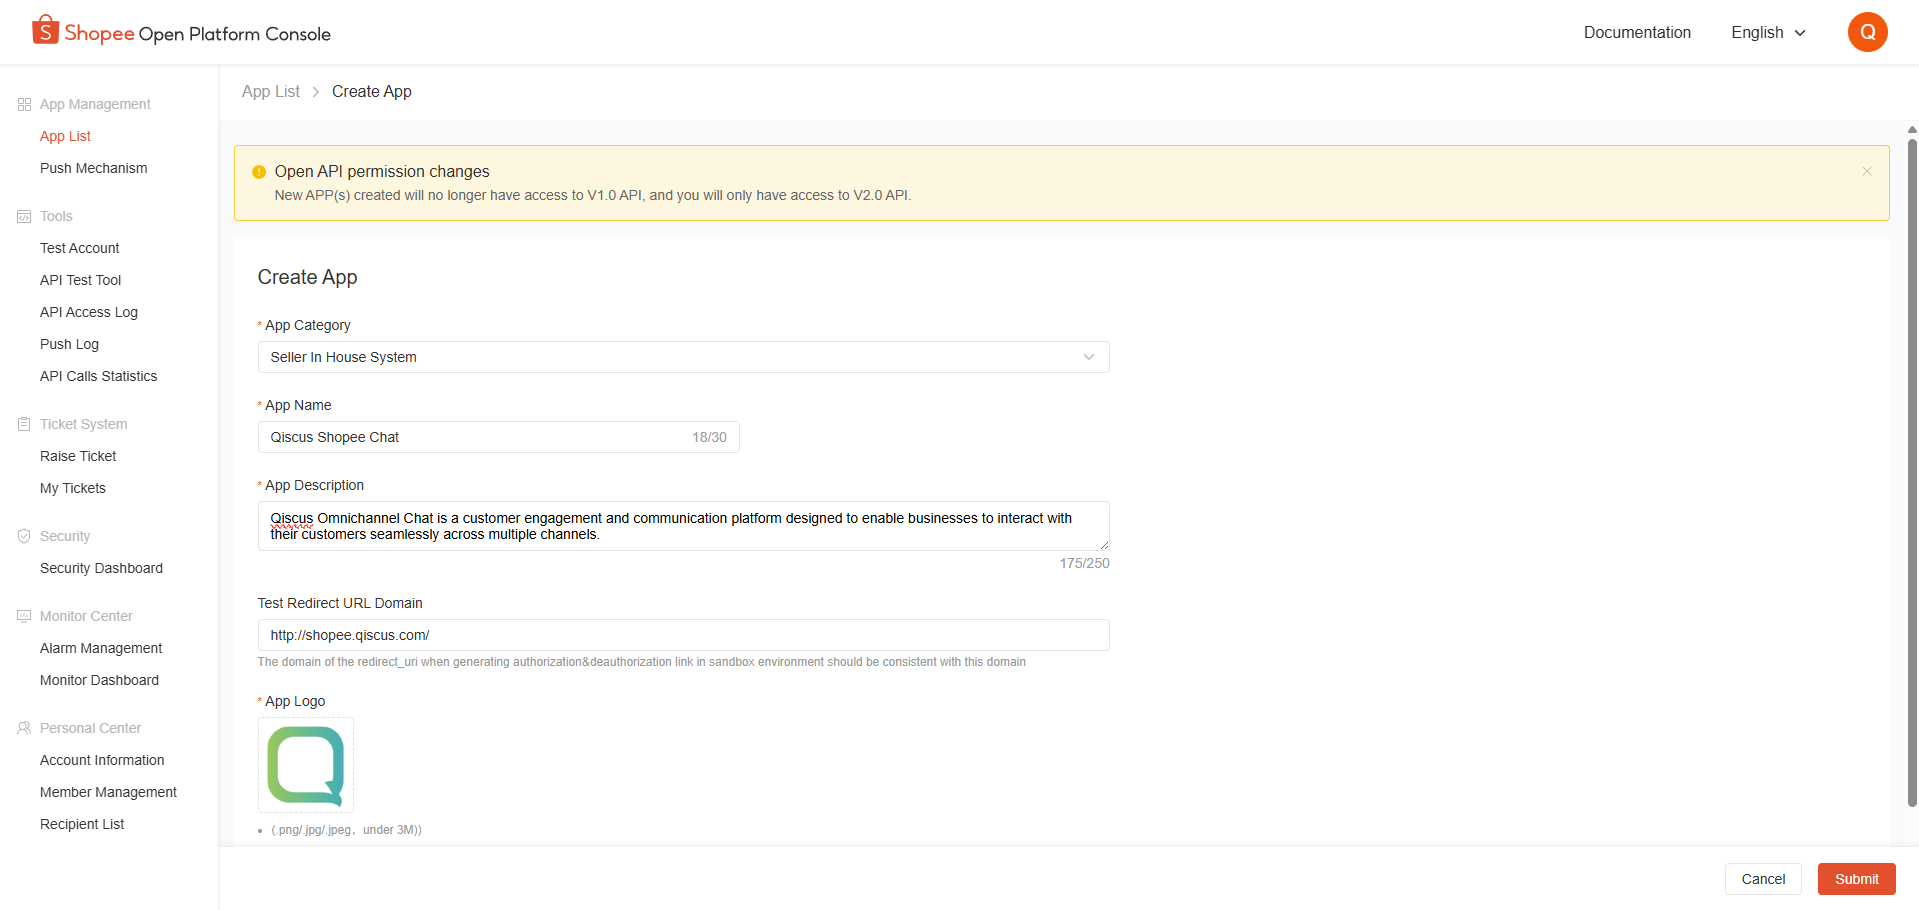
On the Create App page, in the App Category form you must select Seller In House System. Then fill in the App Name according to your needs, you can also give the App Name and Description Qiscus as in the following example:
*App Description * : Qiscus Omnichannel Chat is a customer engagement and communication platform designed to enable businesses to interact with their customers seamlessly across multiple channels.
Test Redirect URL Domain : http://shopee.qiscus.com/
Then click Upload App Logo and click submit.
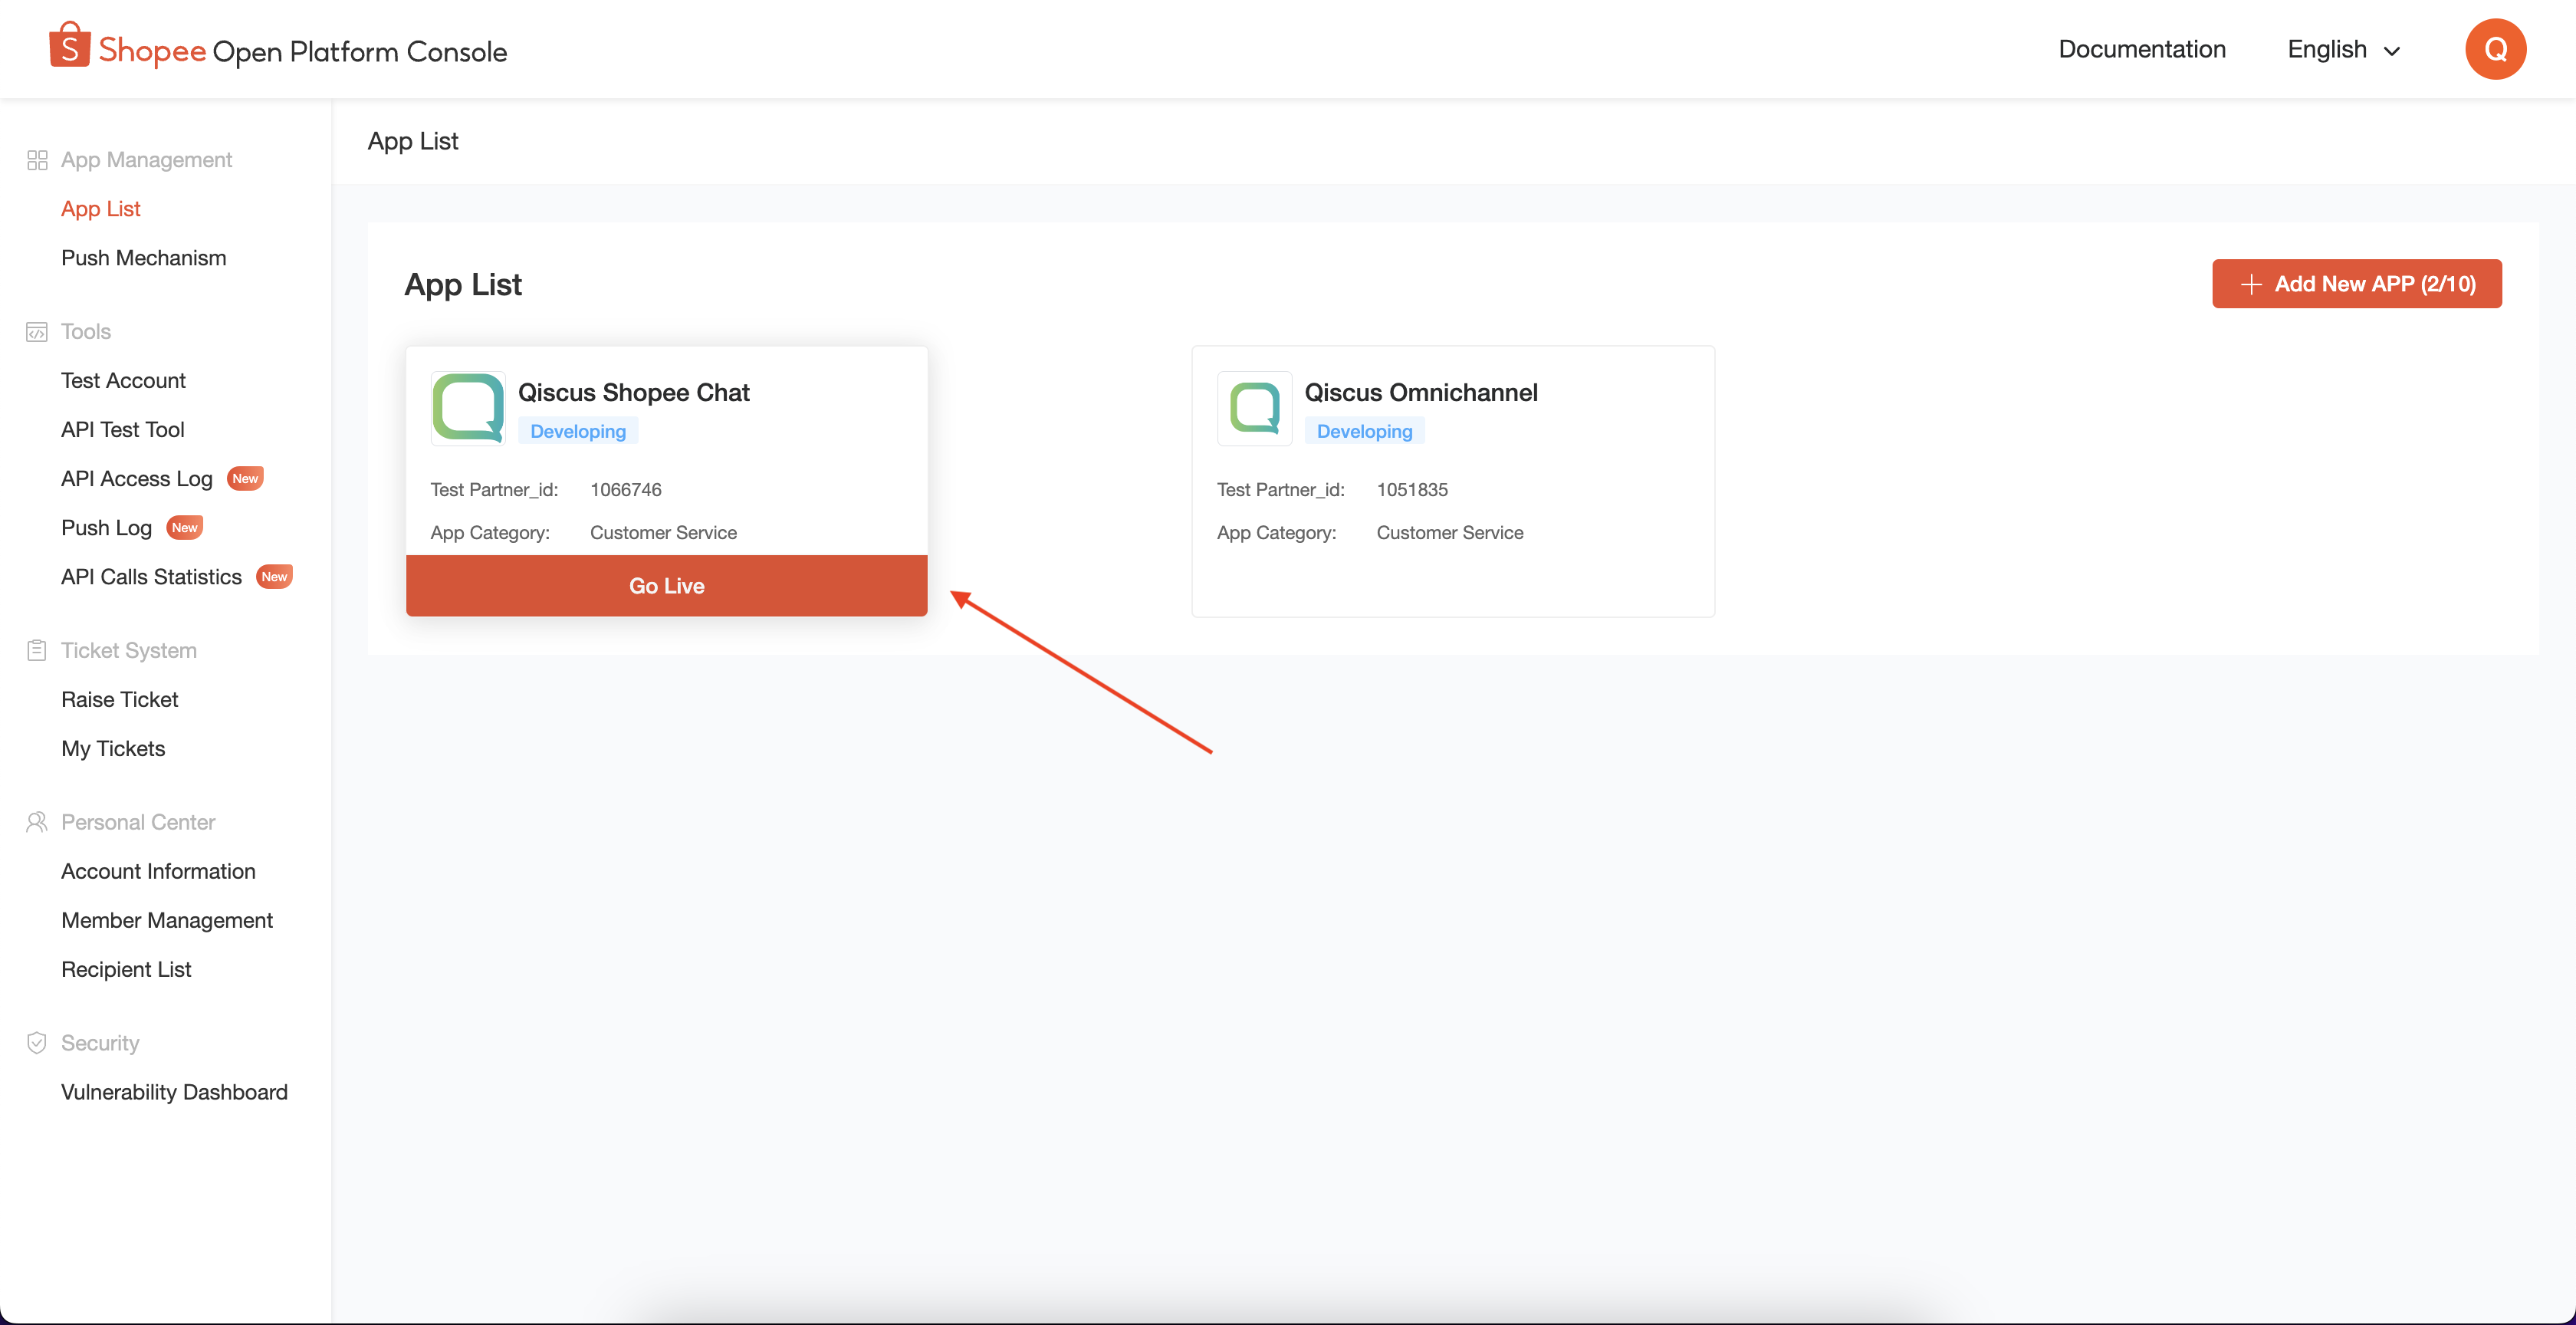
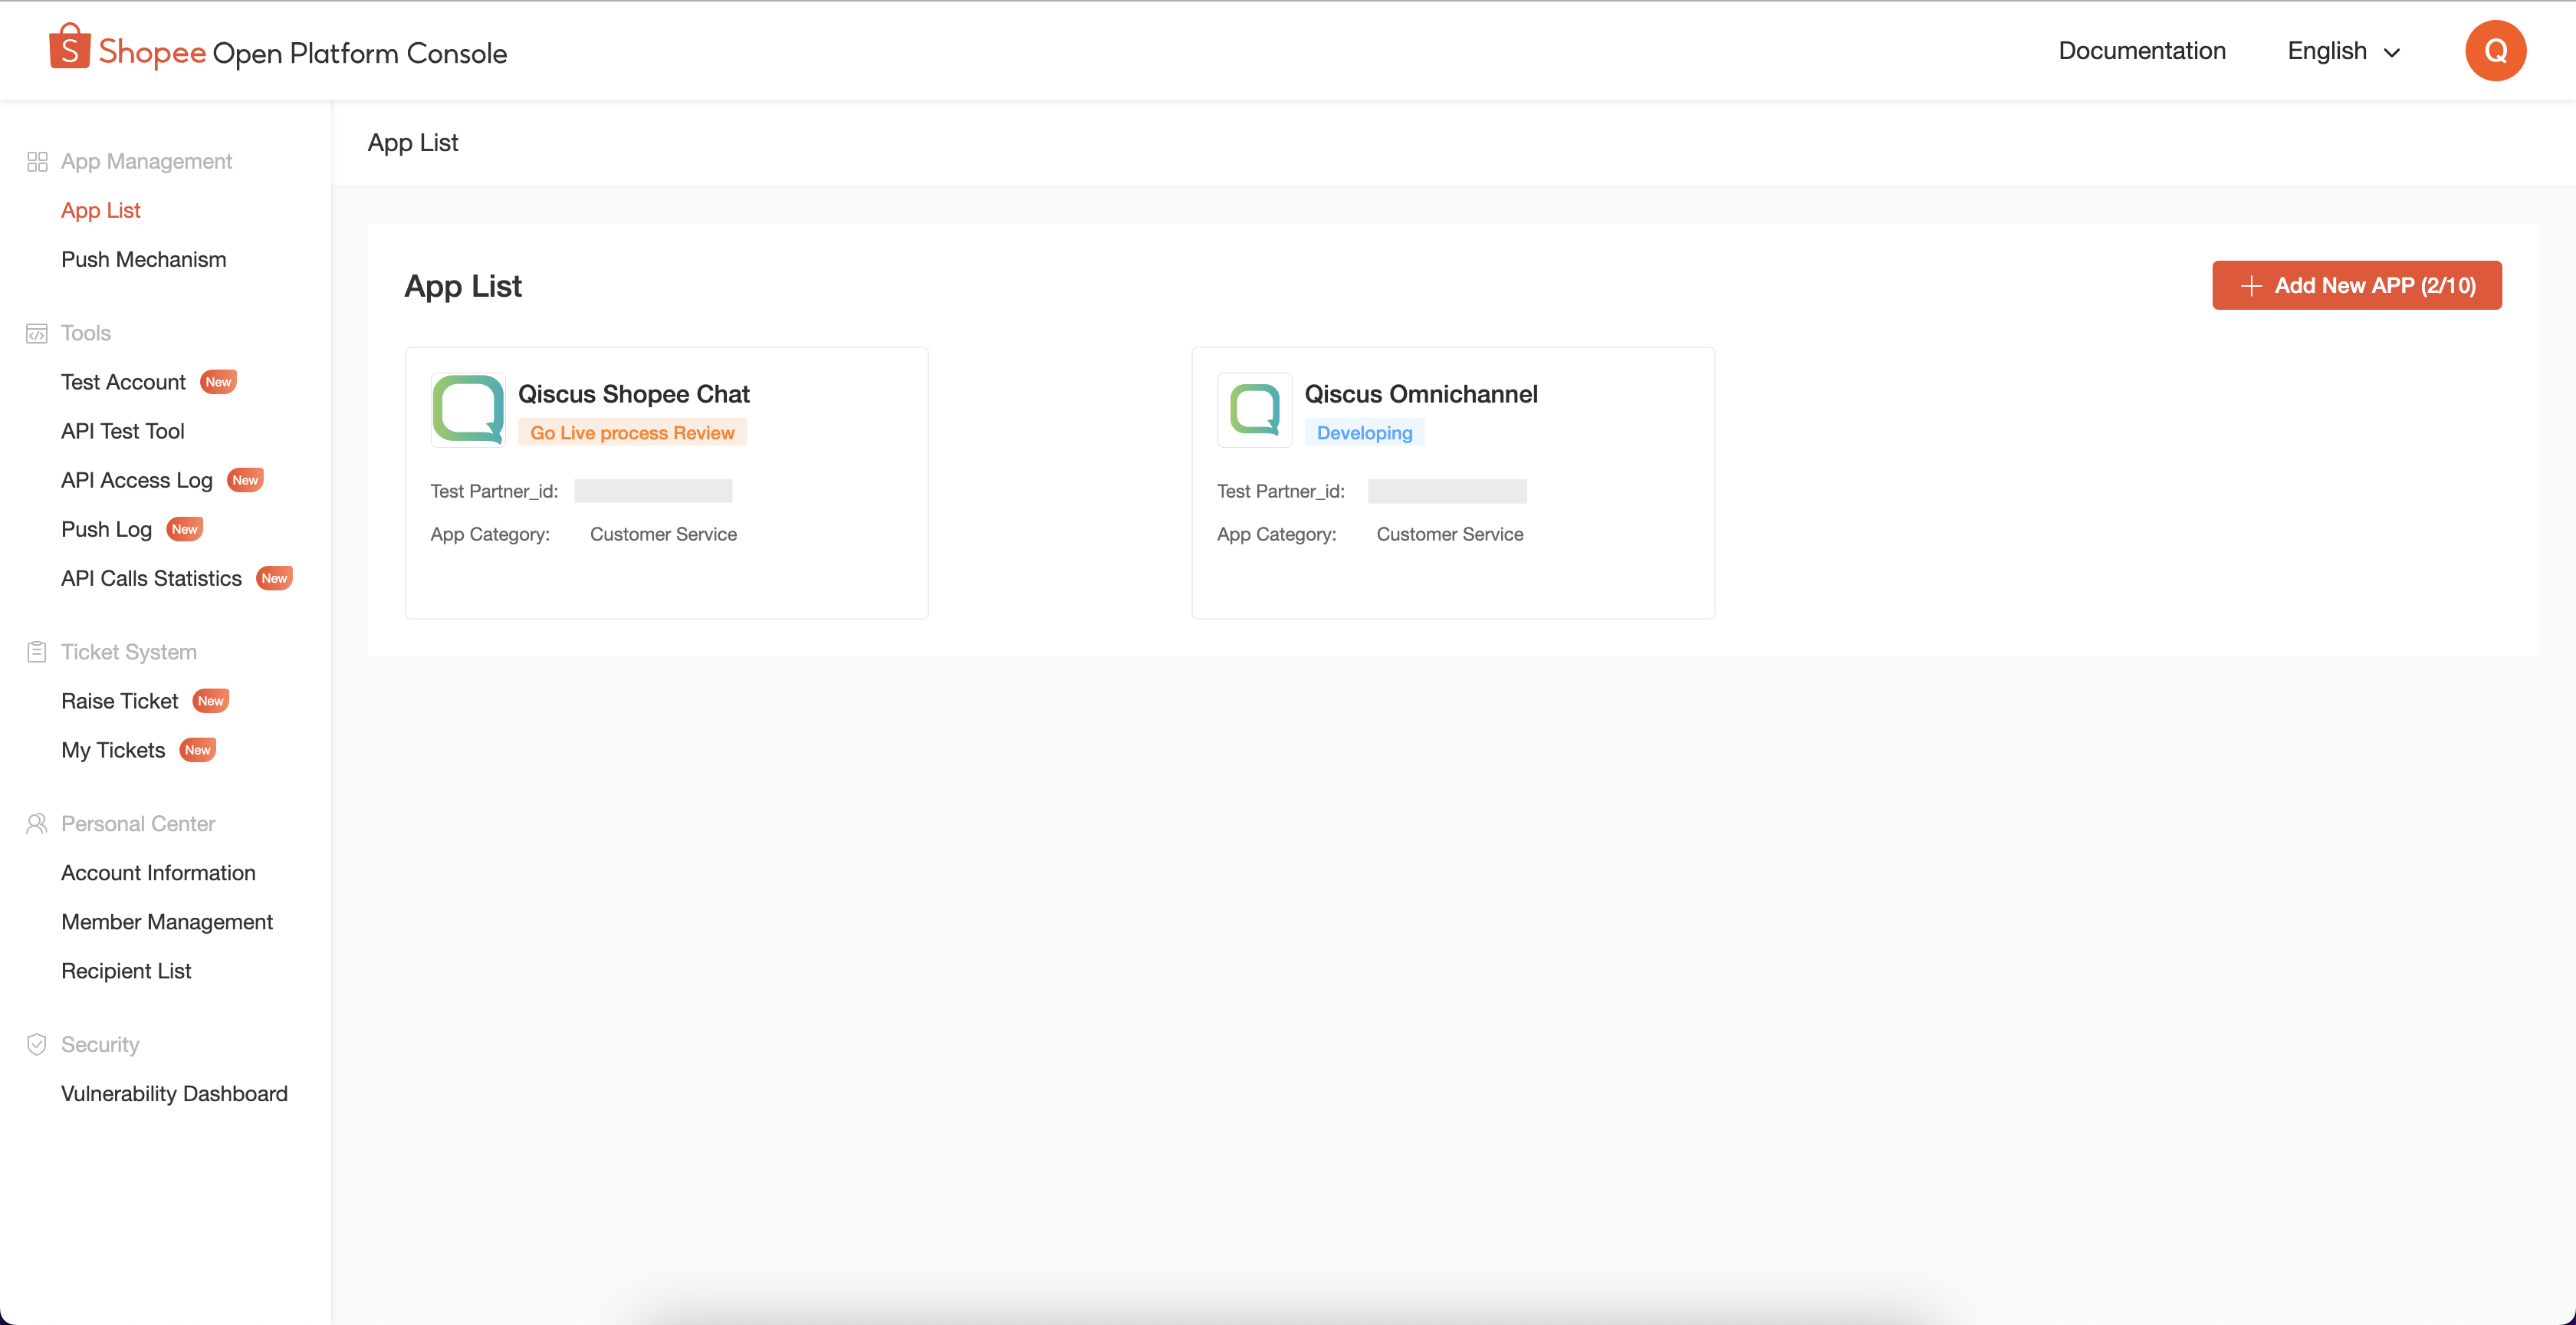
After the app is submitted, the app will appear on the App List page. Then select the app you have chosen, and hover over the app. Then the Go Live button will appear. Click Go Live in the app.
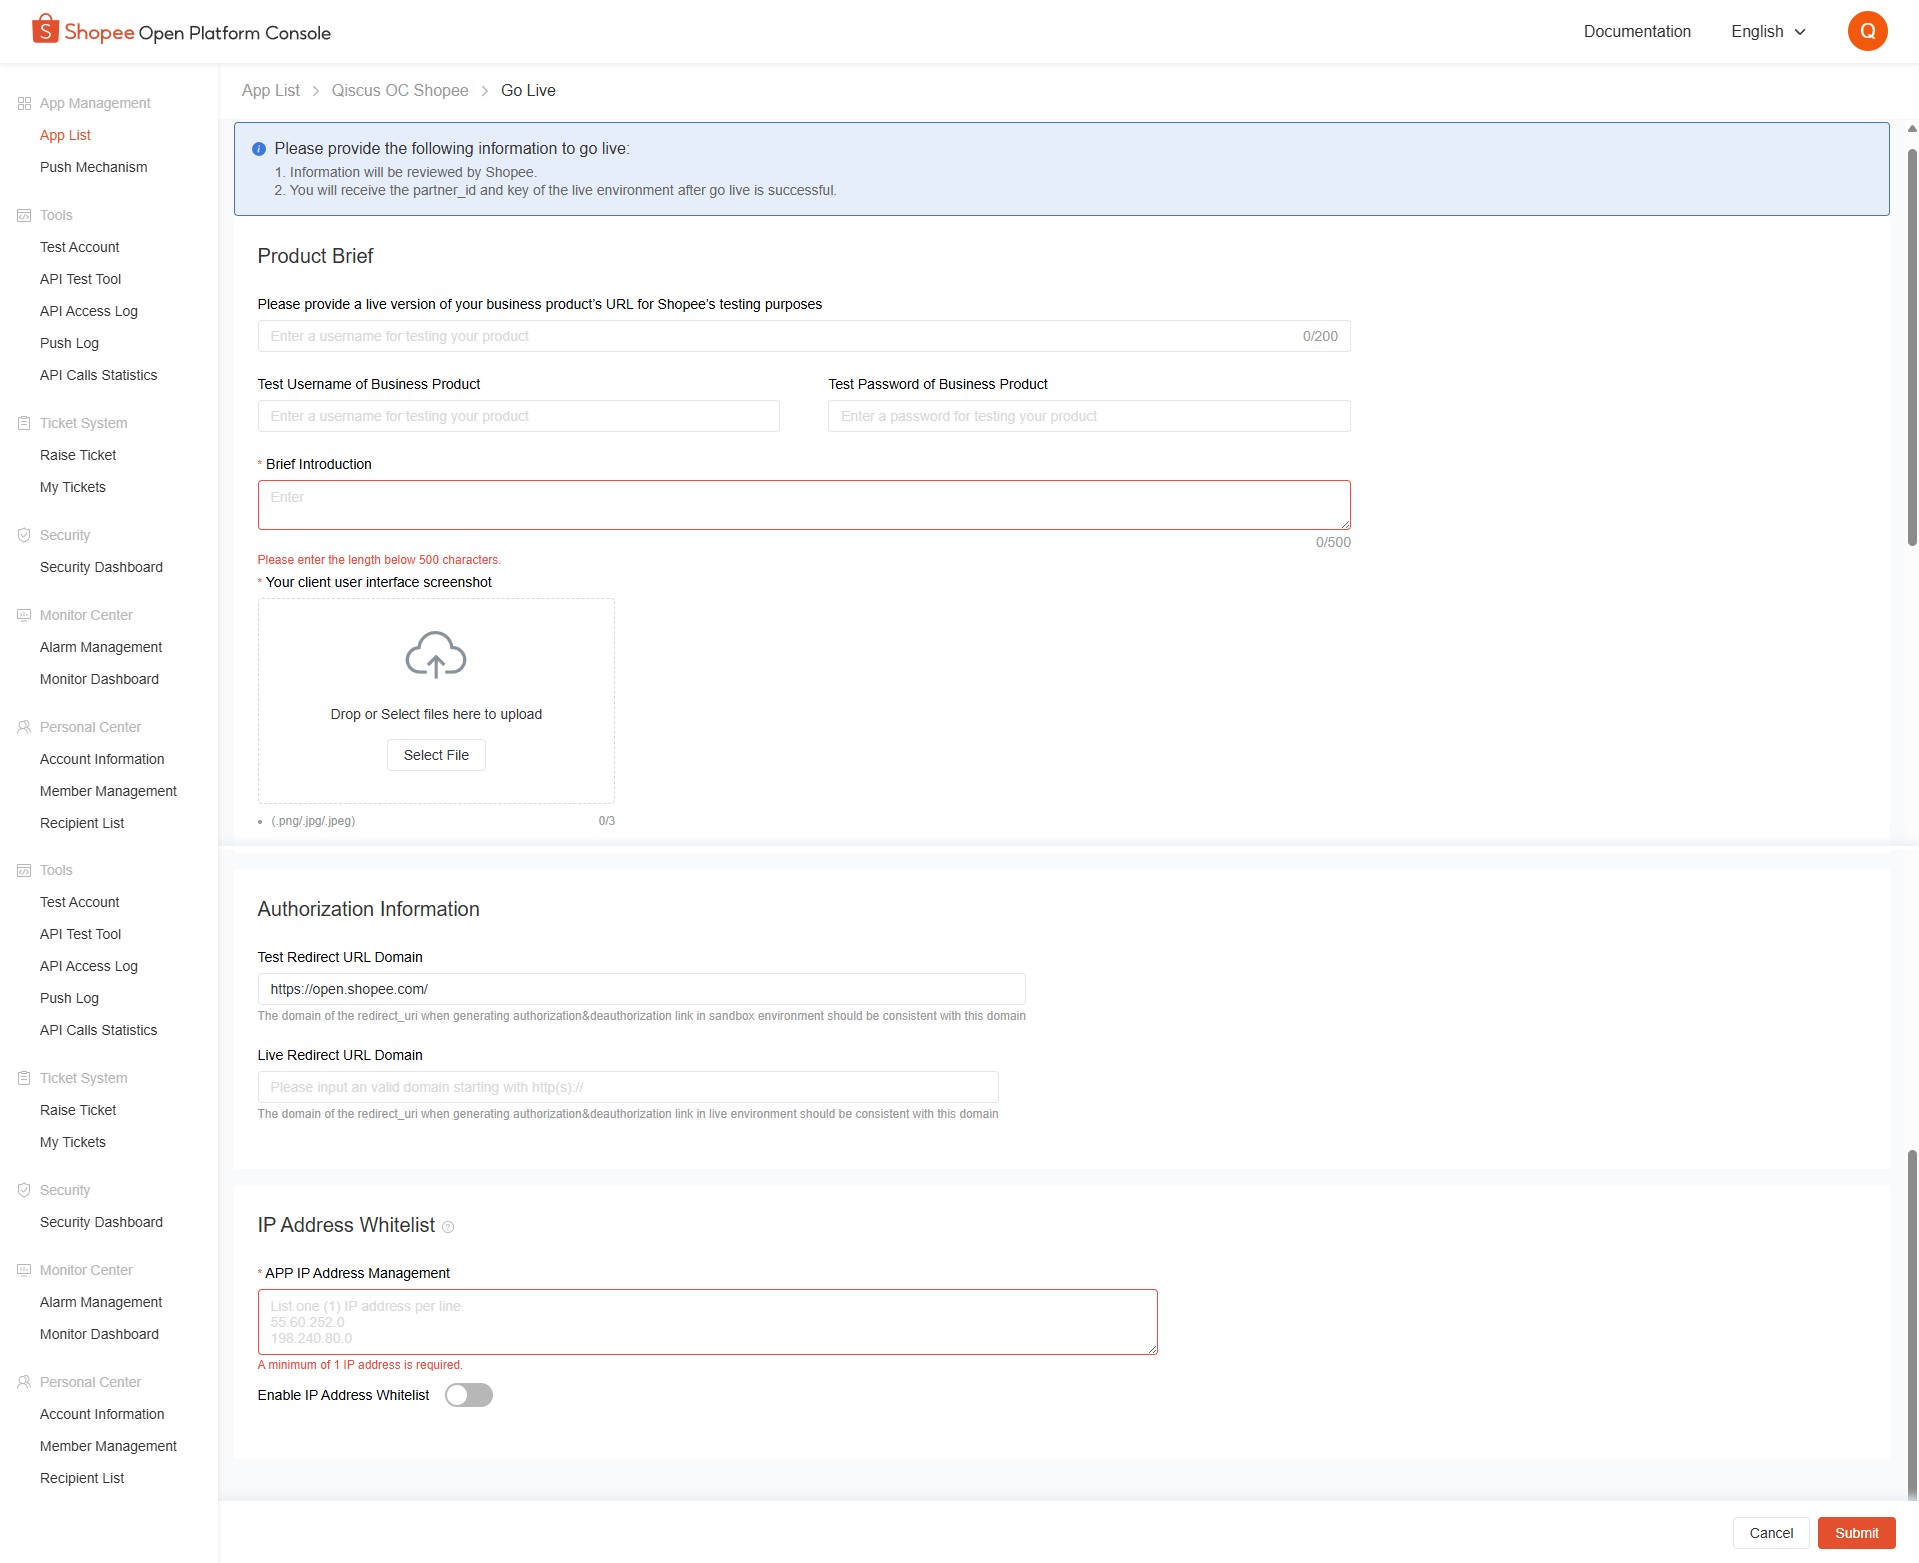
On the Go Live page, you need to enter several forms in the Product Brief and Declaration of IT Assets:
Live Version of Business Product: You need to enter your testing account credentials like Business Product's URL, Test Username and Test Password for use by Shopee. You can contact us at https://support.qiscus.com or our AM to get username and password testing account credentials.
Brief Introduction: You can fill in as needed, or use the example brief introduction from Qiscus, “Qiscus Omnichannel Chat is a customer engagement and communication platform designed to enable businesses to interact with their customers seamlessly across multiple channels.”
Client User Interface: Enter a screenshot of the Qiscus Omnichannel Chat display.
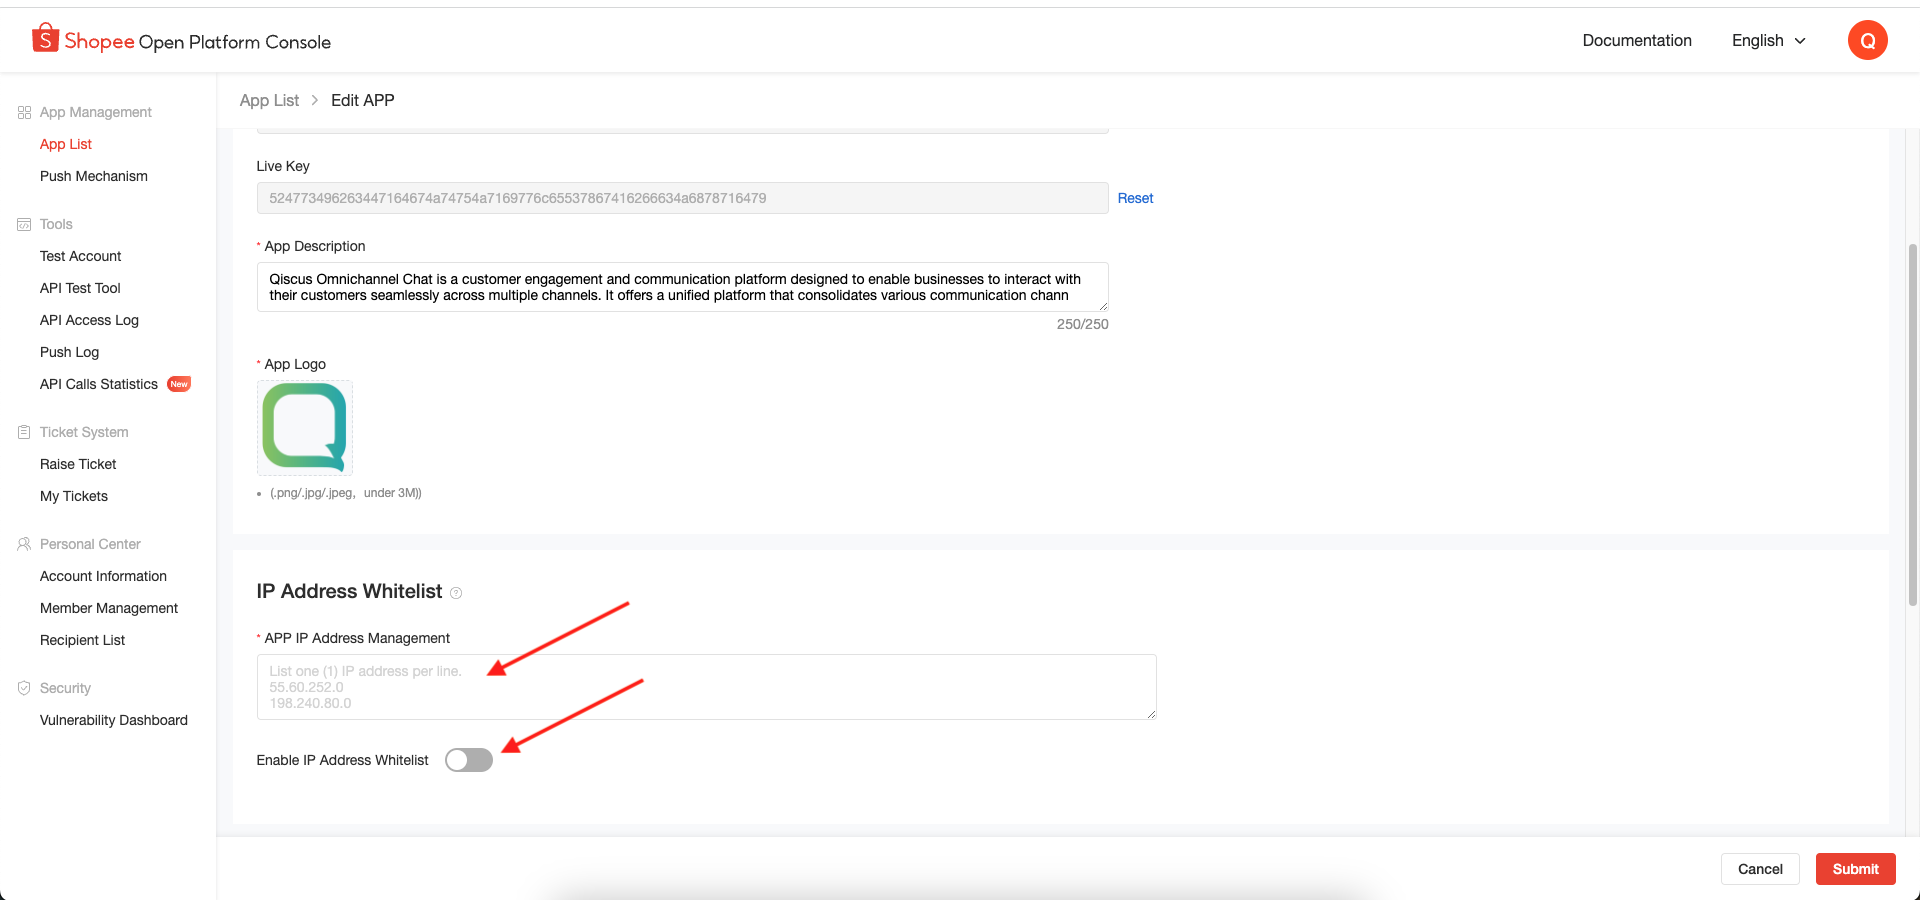
IP Address Whitelist: You need to enter the IP that has been whitelisted by Qiscus, to find out the IP Whitelist from Qiscus you need to contact our AM or visit https://www.qiscus.com/id/contact. Don’t forget to activate the Enable IP Address Whitelist toggle.
Click submit.
After submission, the app must be reviewed again by Shopee. Wait for this process until Shopee approves the app. Your App will be reviewed 24 hours after submission.
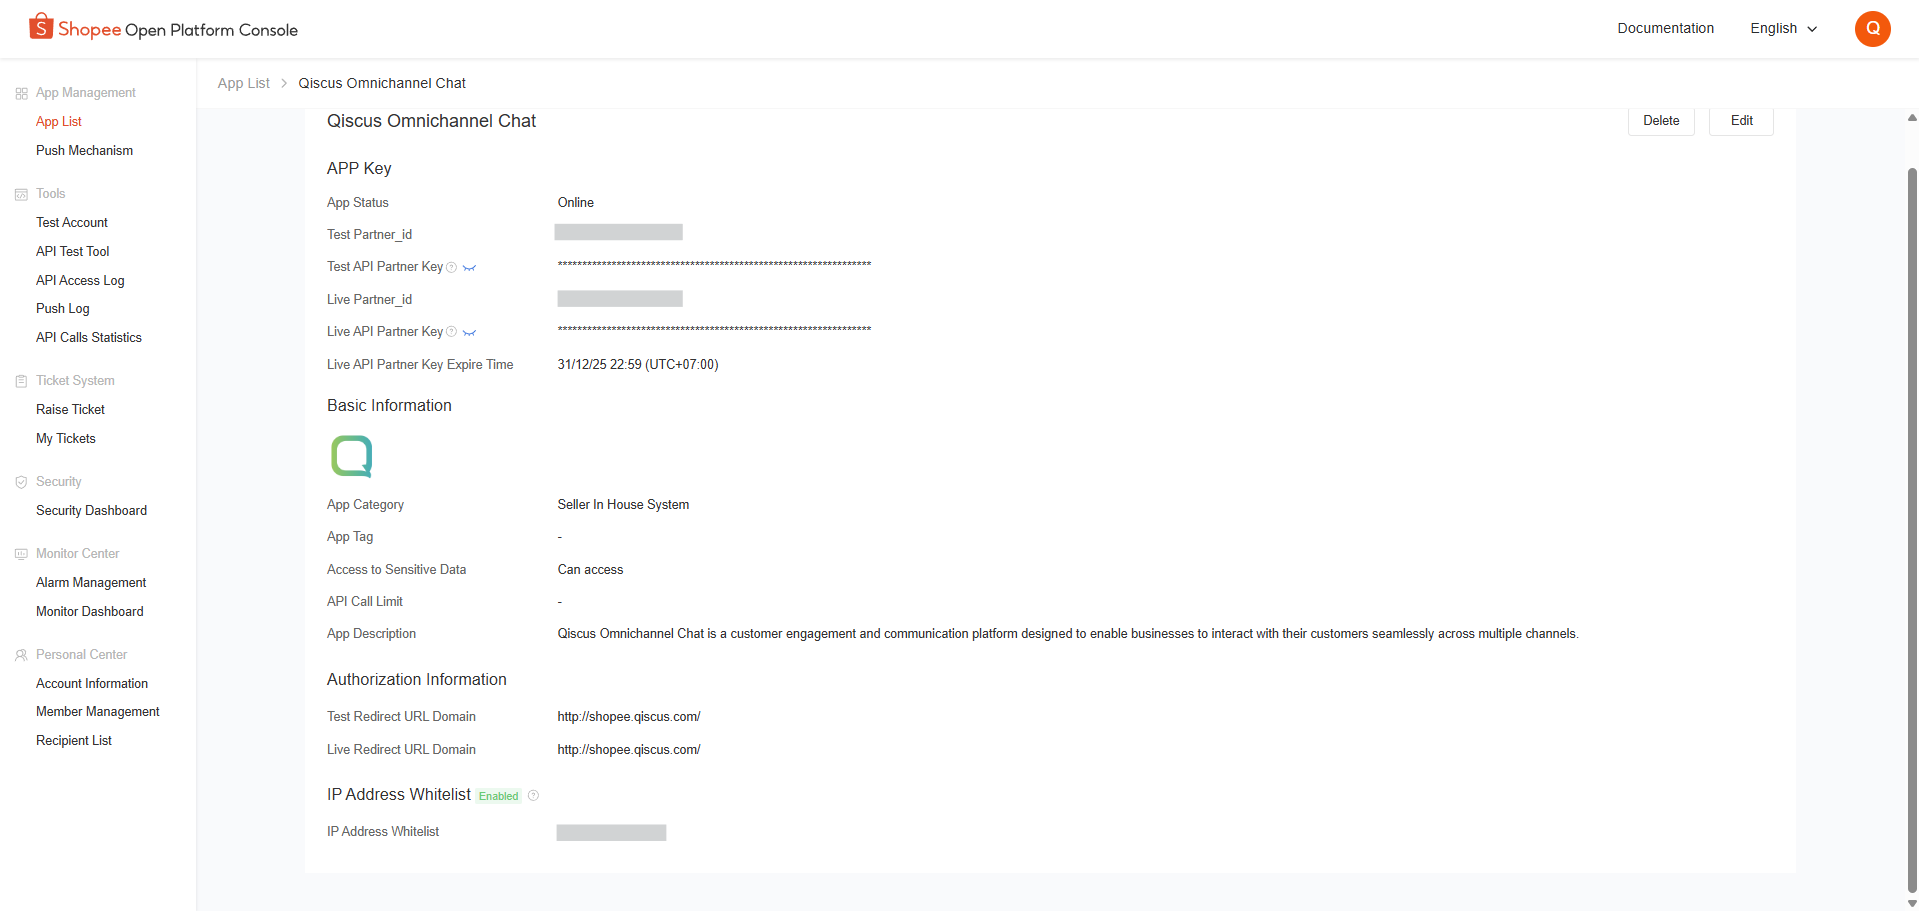
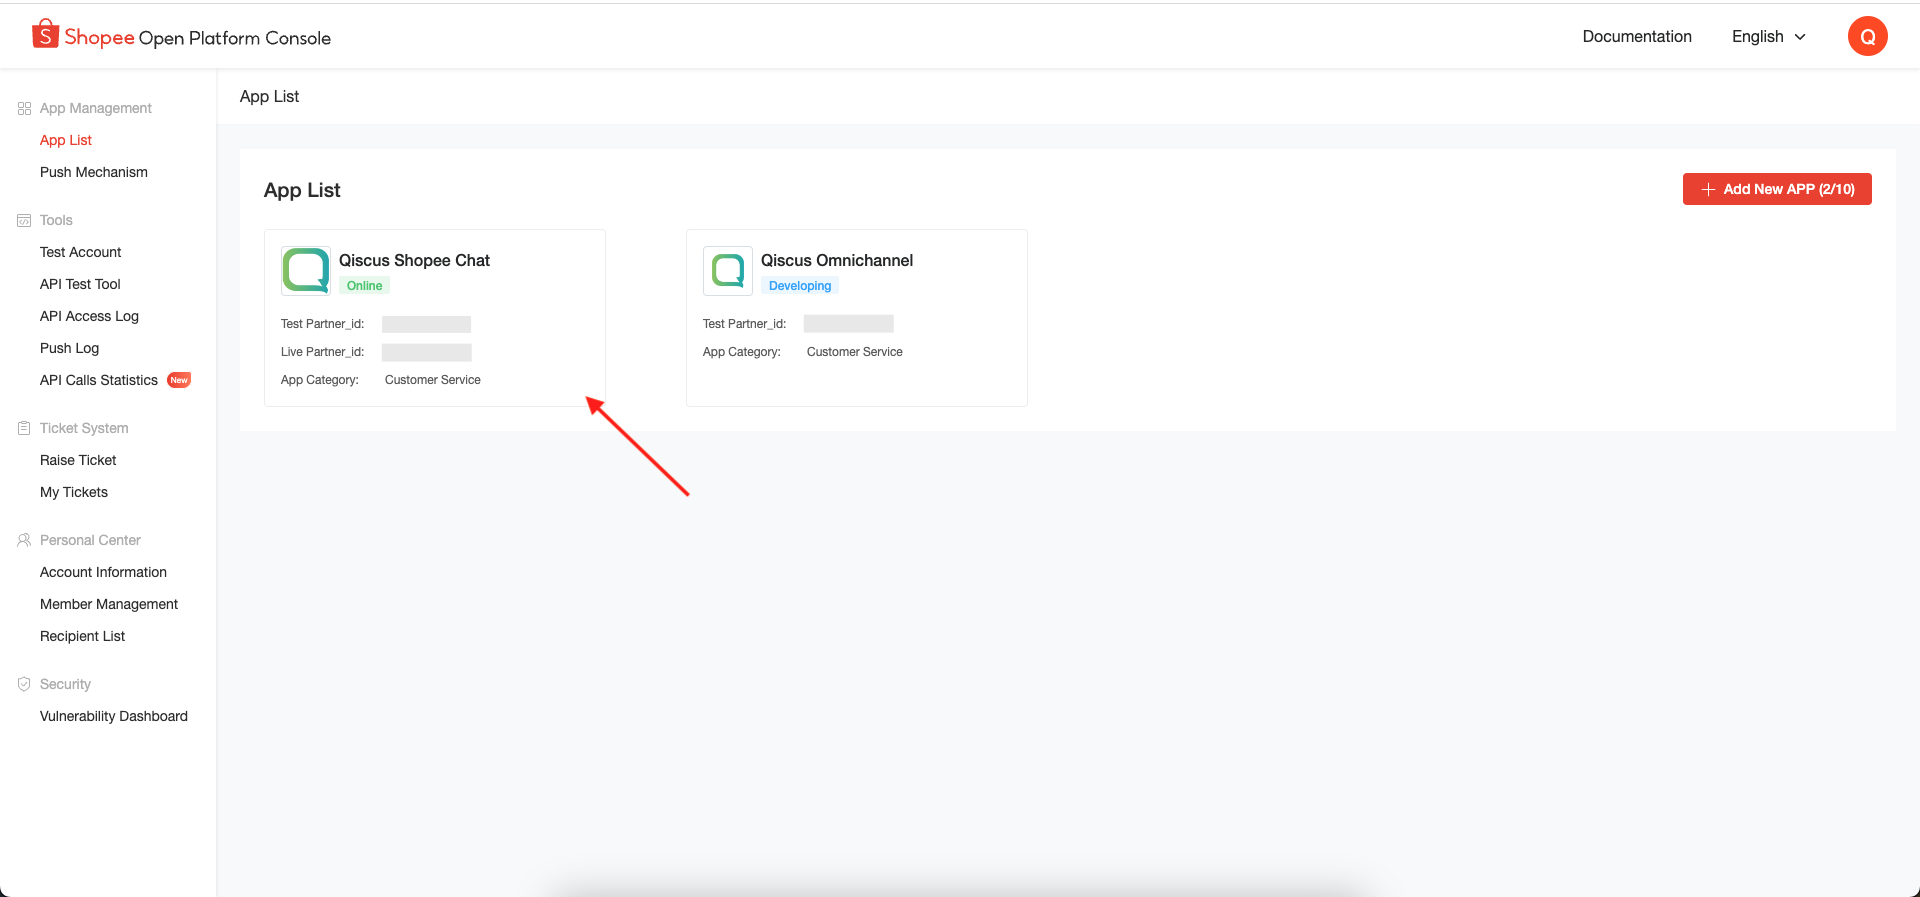
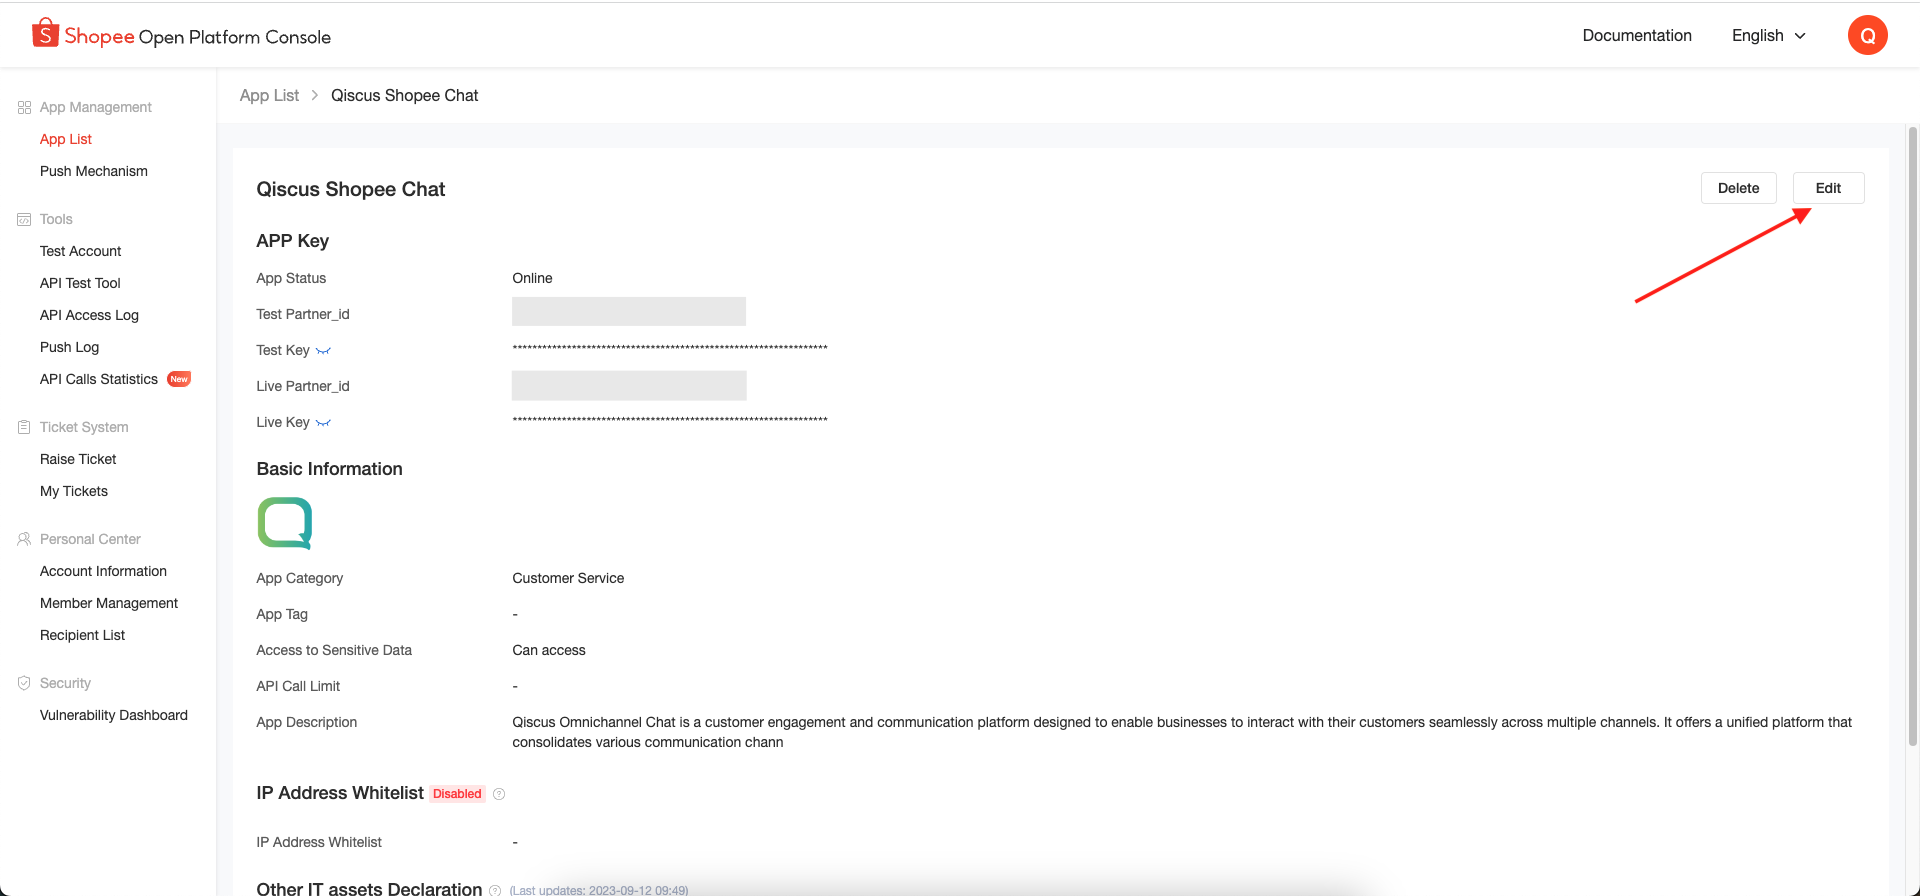
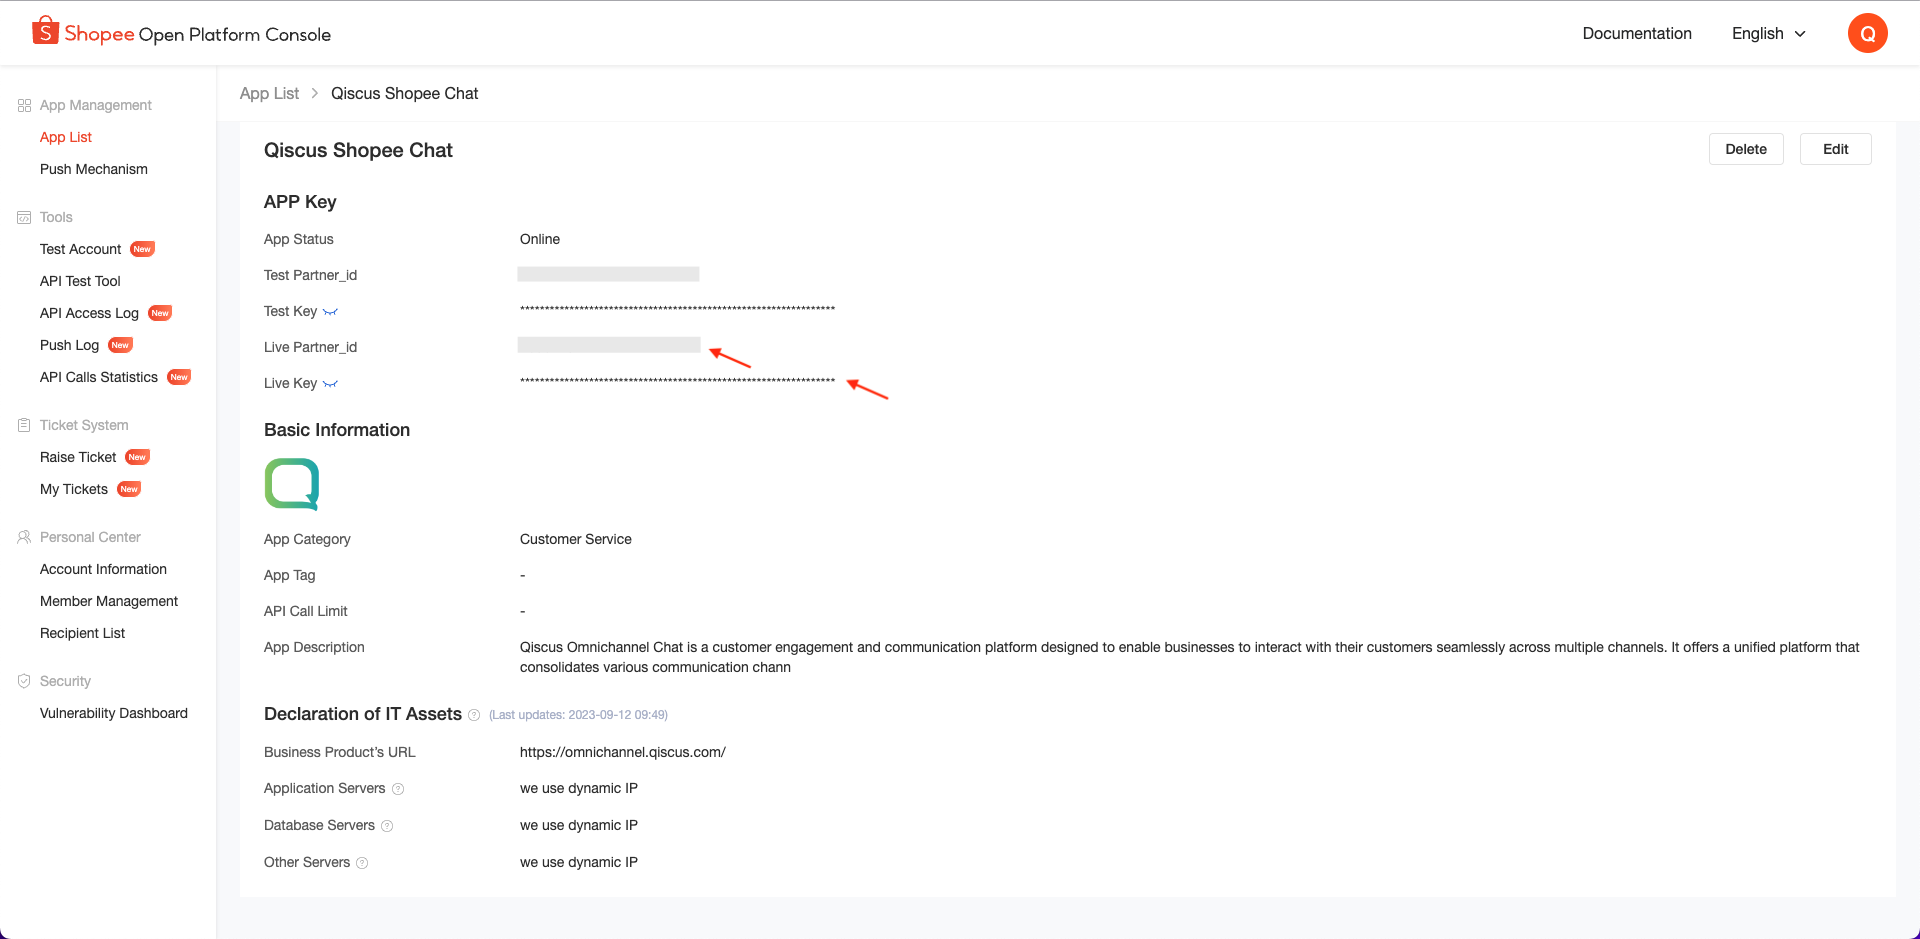
After your App has been approved, the status changes to Online. Then you can click on the app to get the live partner ID and live partner key.

The following is a detailed display of the app, you can copy the live partner ID and live partner key into the Qiscus App Center - Shopee App Integration.
How to Input IP Whitelist in Existing Shopee App
Skip this step if you have entered the IP Whitelist in your Shopee App.
Enter the Shopee Open Platform Console at https://open.shopee.com/console/app, then select the app you are using.
Then click Edit.
Enter the IP Whitelist from Qiscus in the following section, and don't forget to activate the Enable IP Address Whitelist toggle. Click Submit.
Integrate Shopee Developer Account to Qiscus App Center
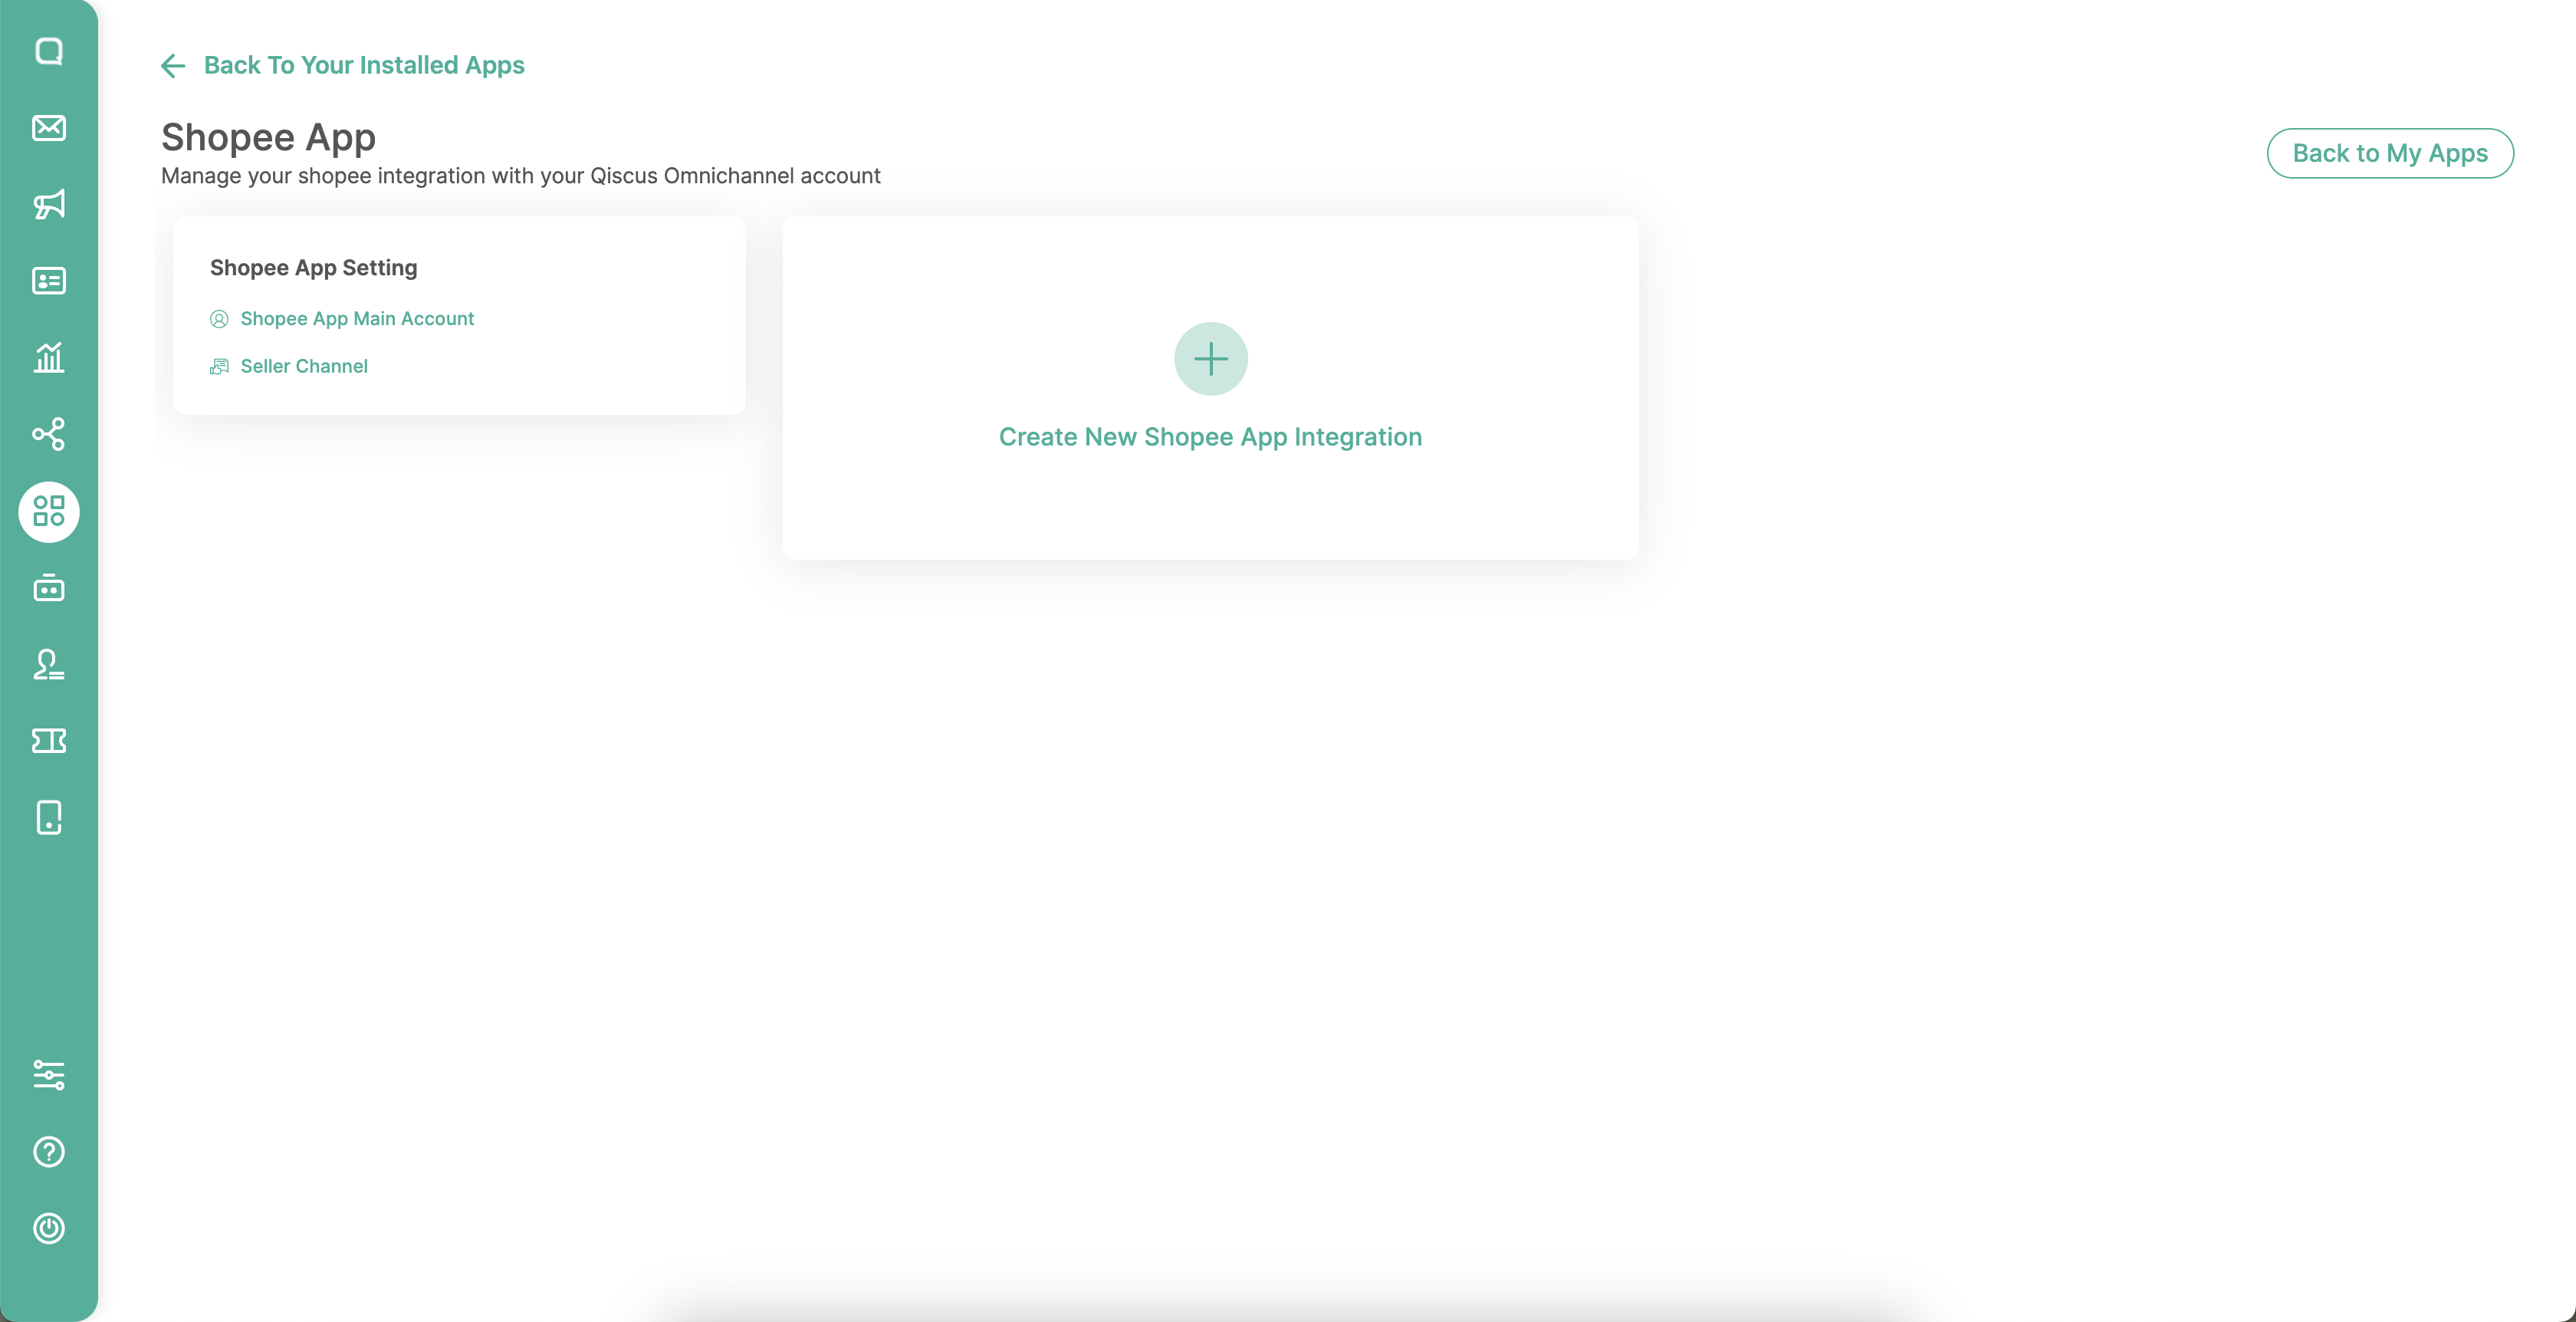
Enter the Qiscus App Center, after the Shopee Chat add-on has been activated you can enter the Shopee Chat add-on settings.
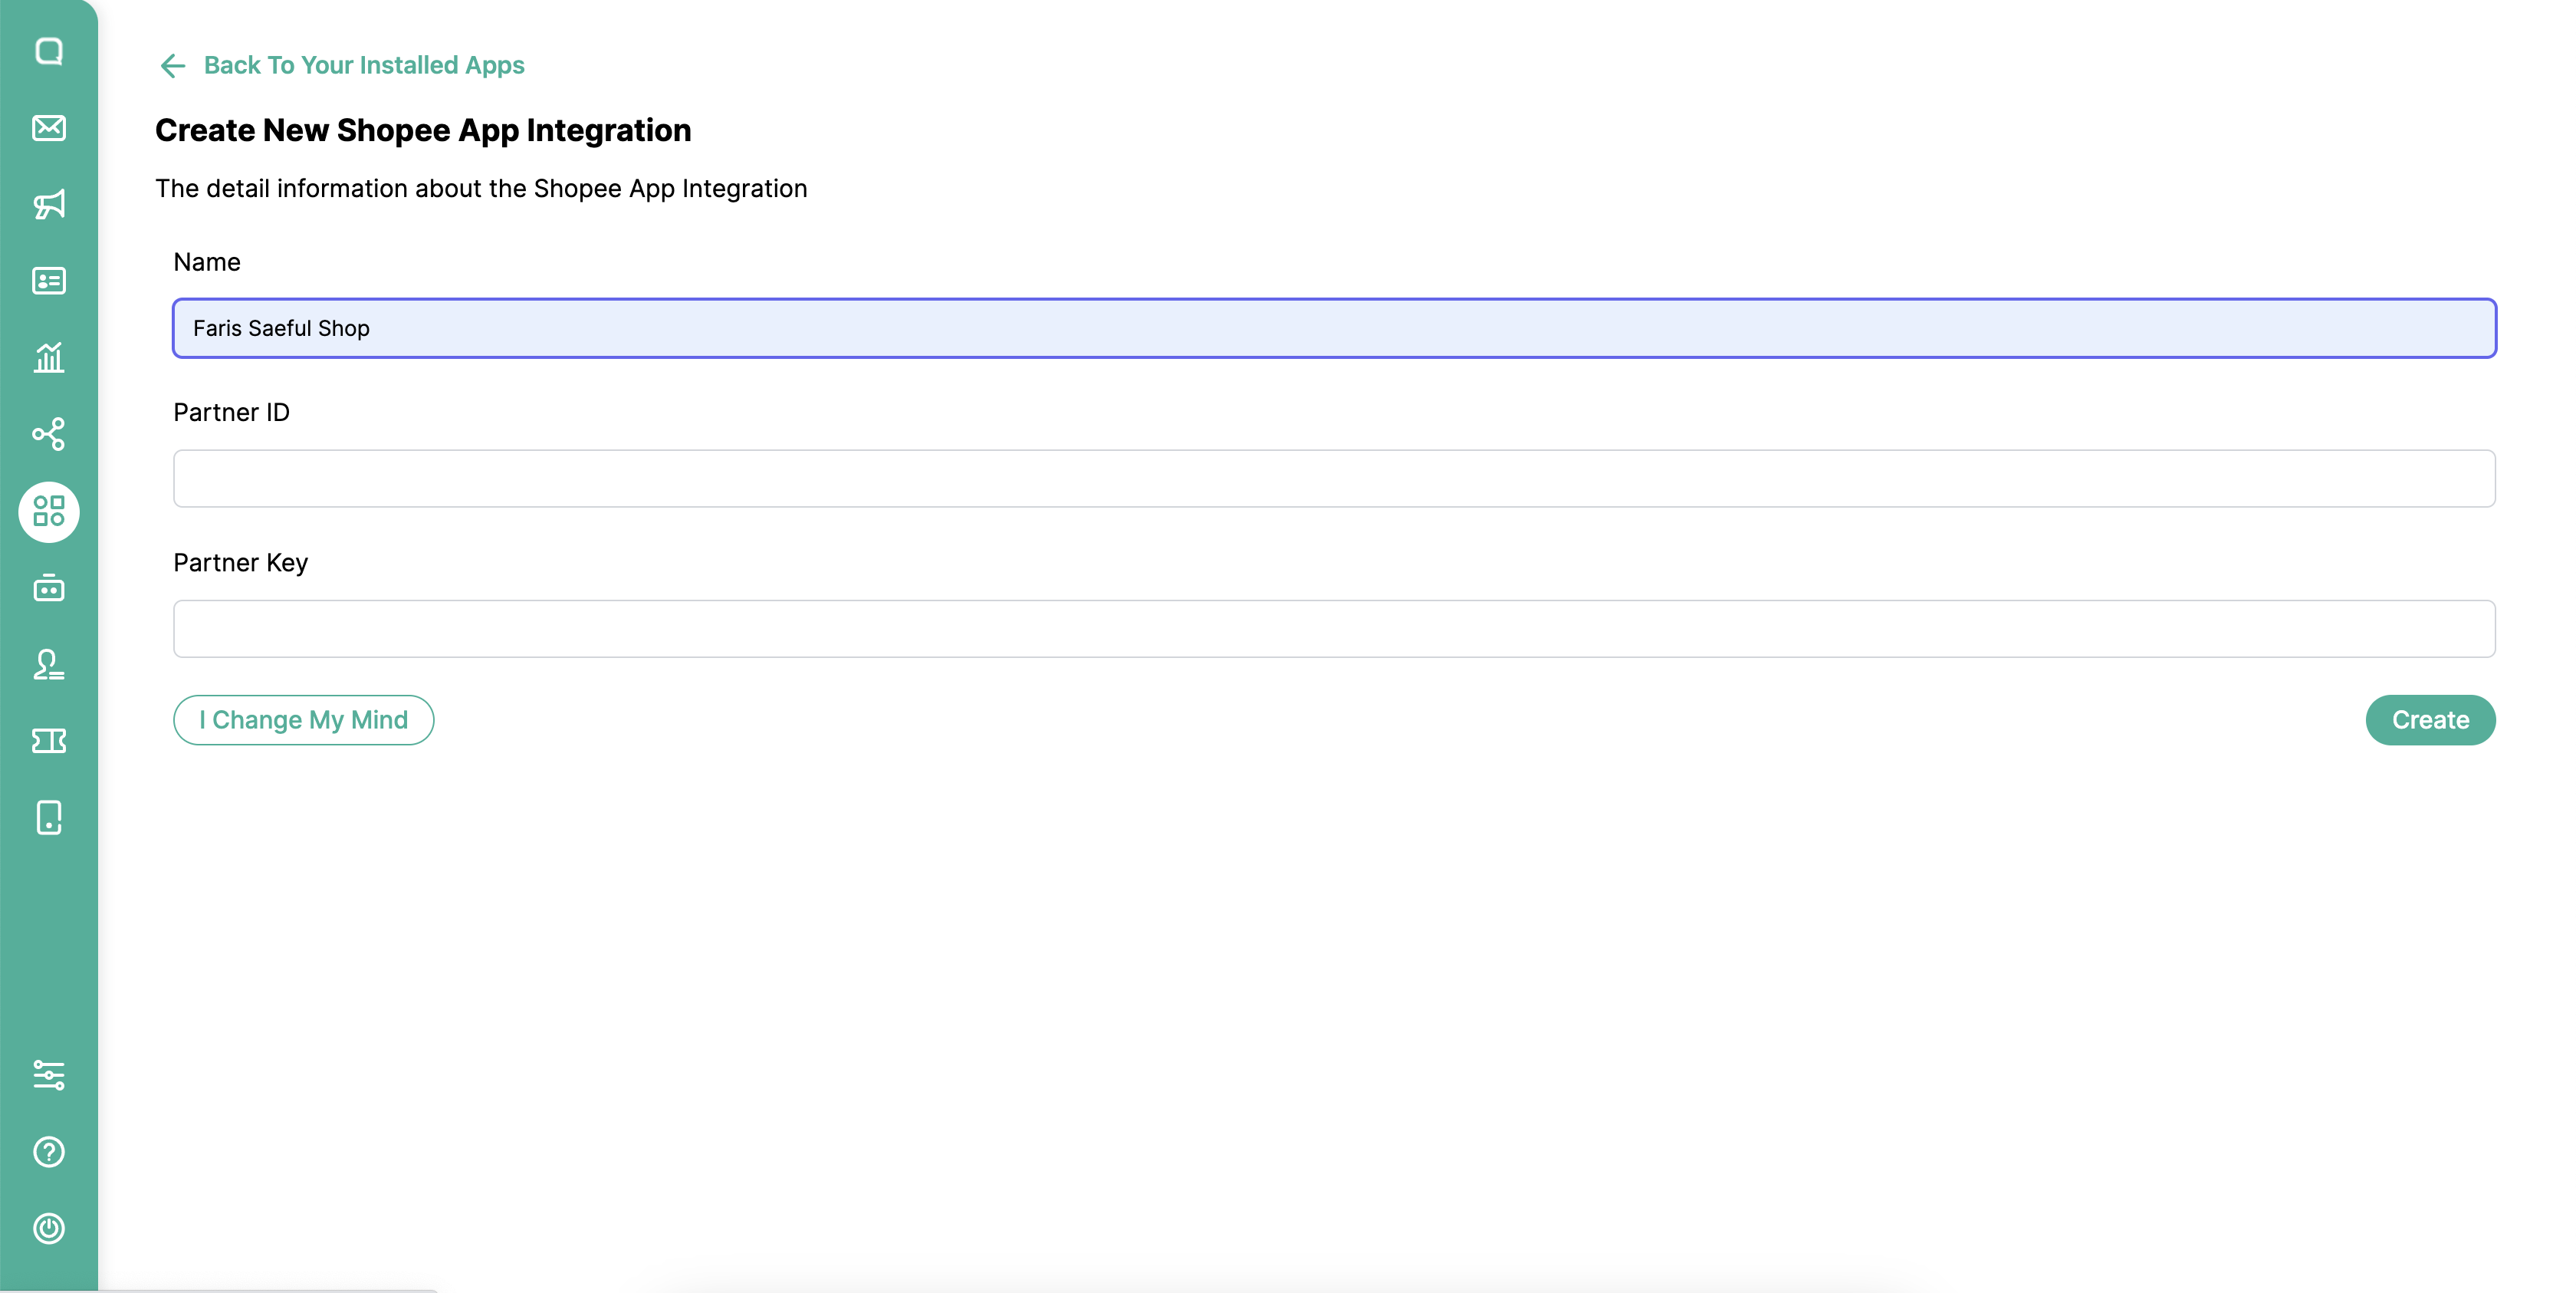
After entering add-on settings, click Shopee App integration.
Then enter the name of the channel you want to use, then enter the Partner ID (Live Partner_id) and Partner Key (Live Key) contained in the Shopee Open Platform.
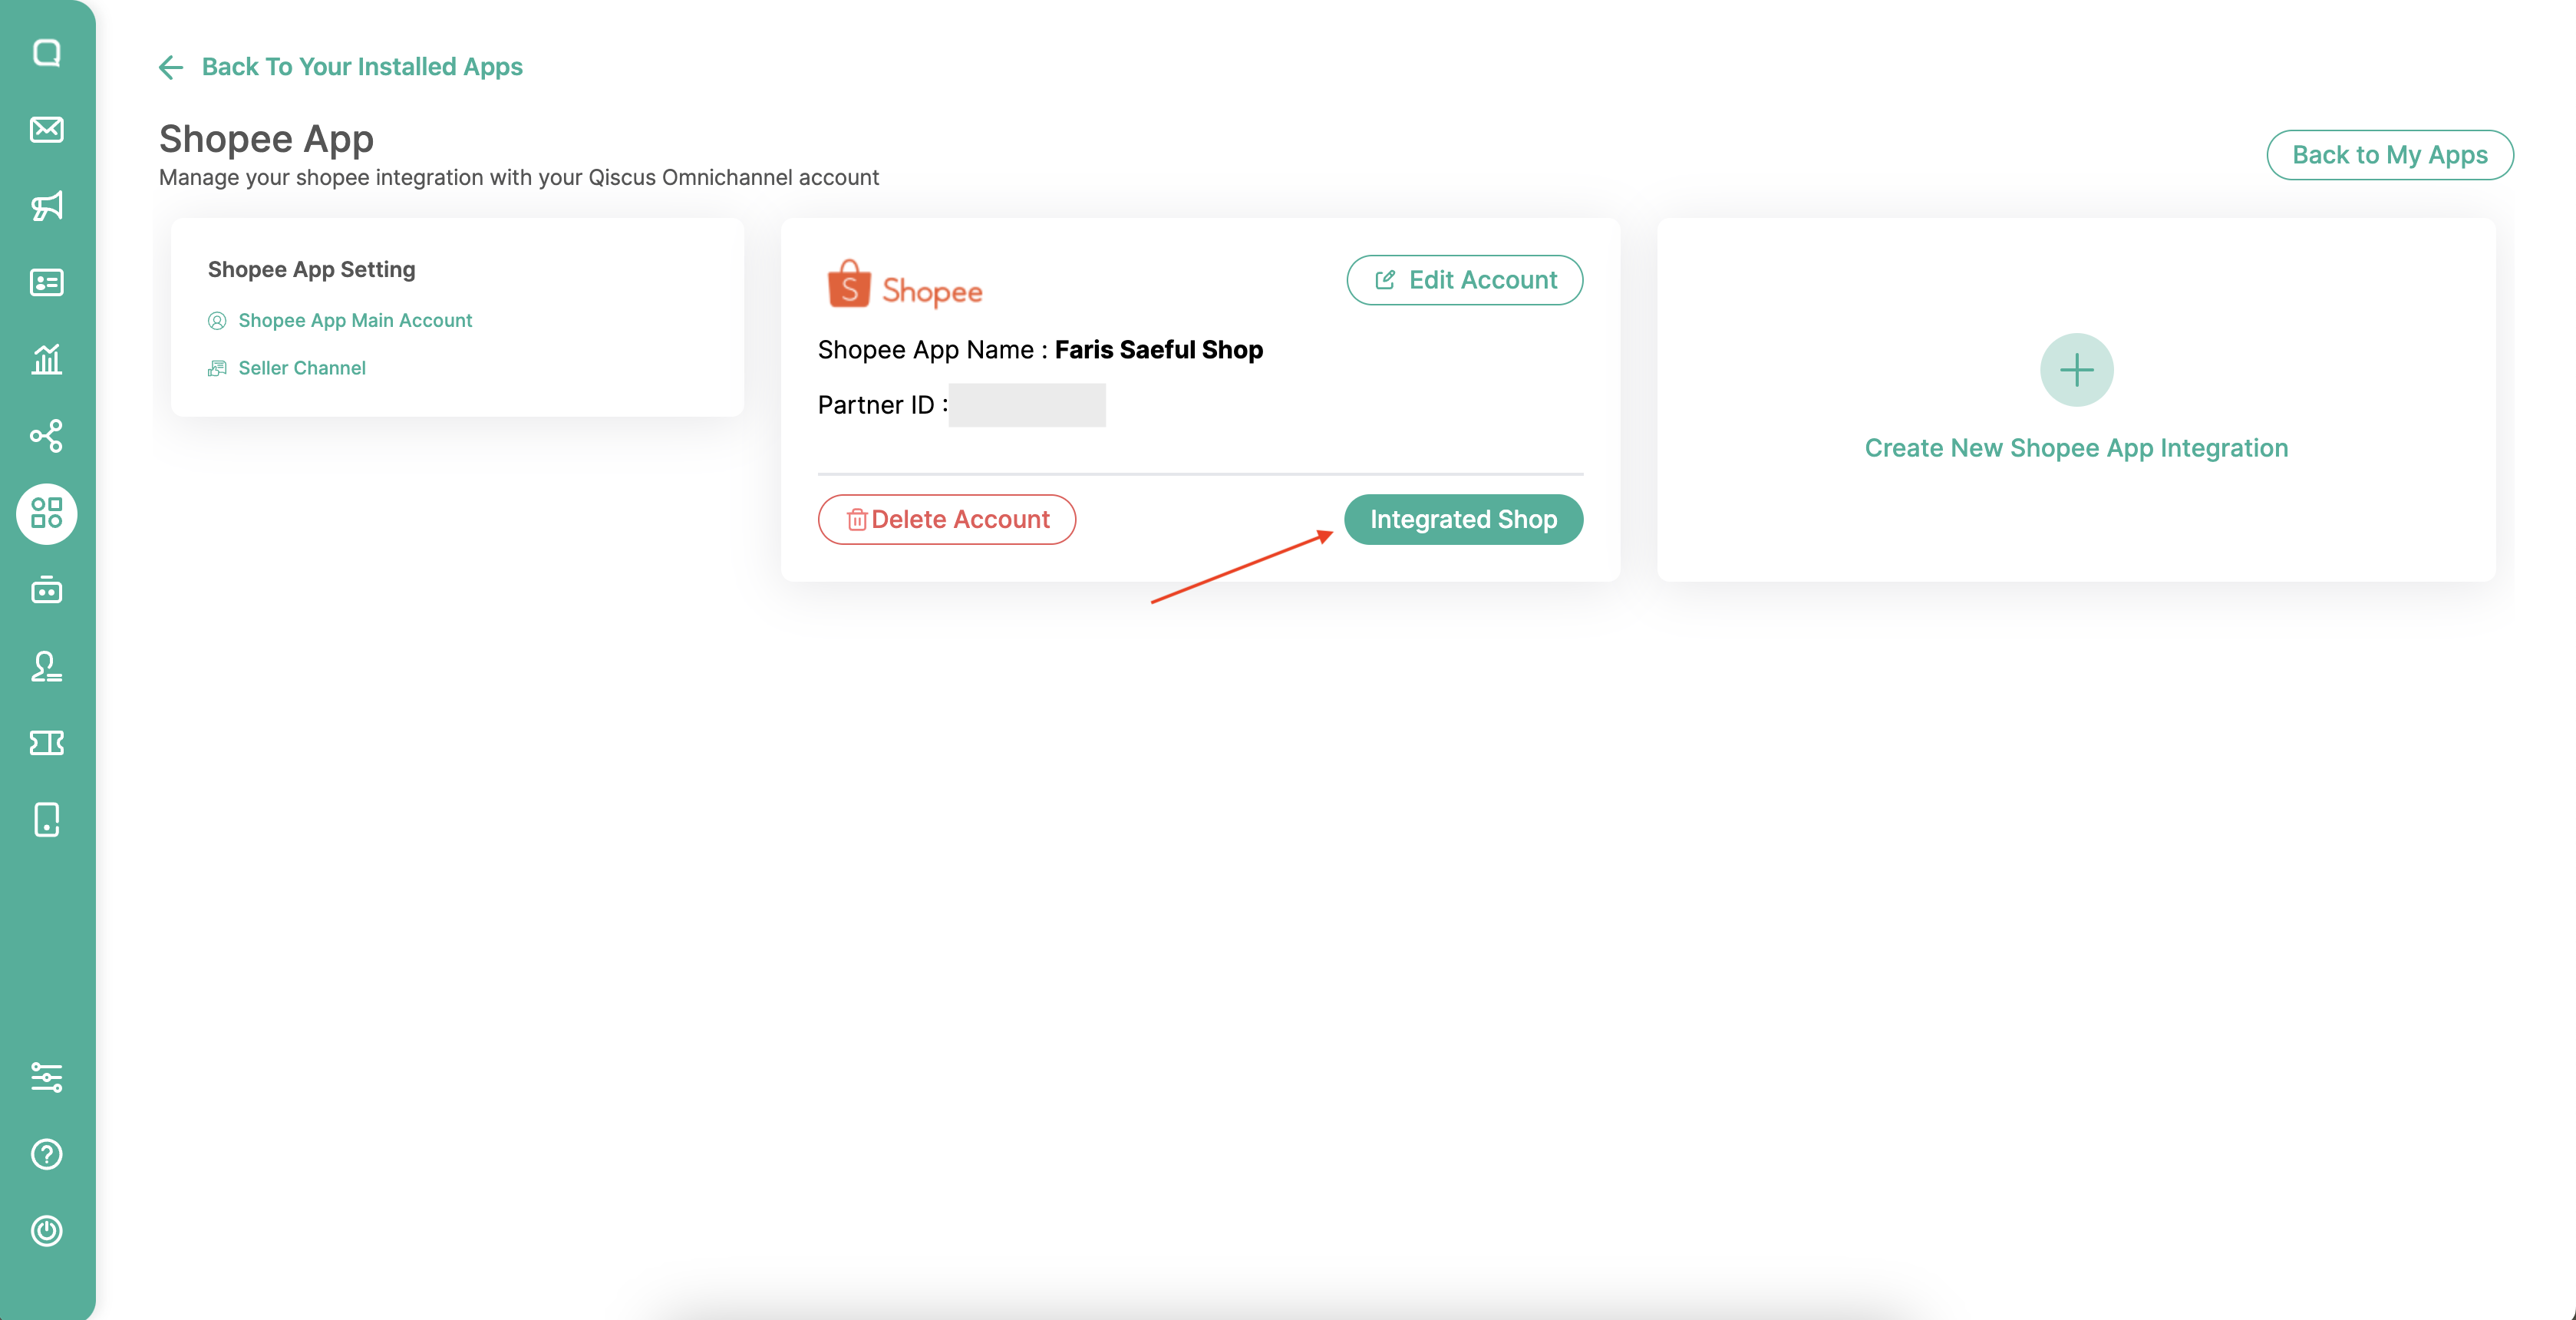
After entering the Partner ID and Partner Key, you need to integrate with the Shopee Shop in your seller center. Click Integrated Shop to integrate with your Shopee Seller Center account.

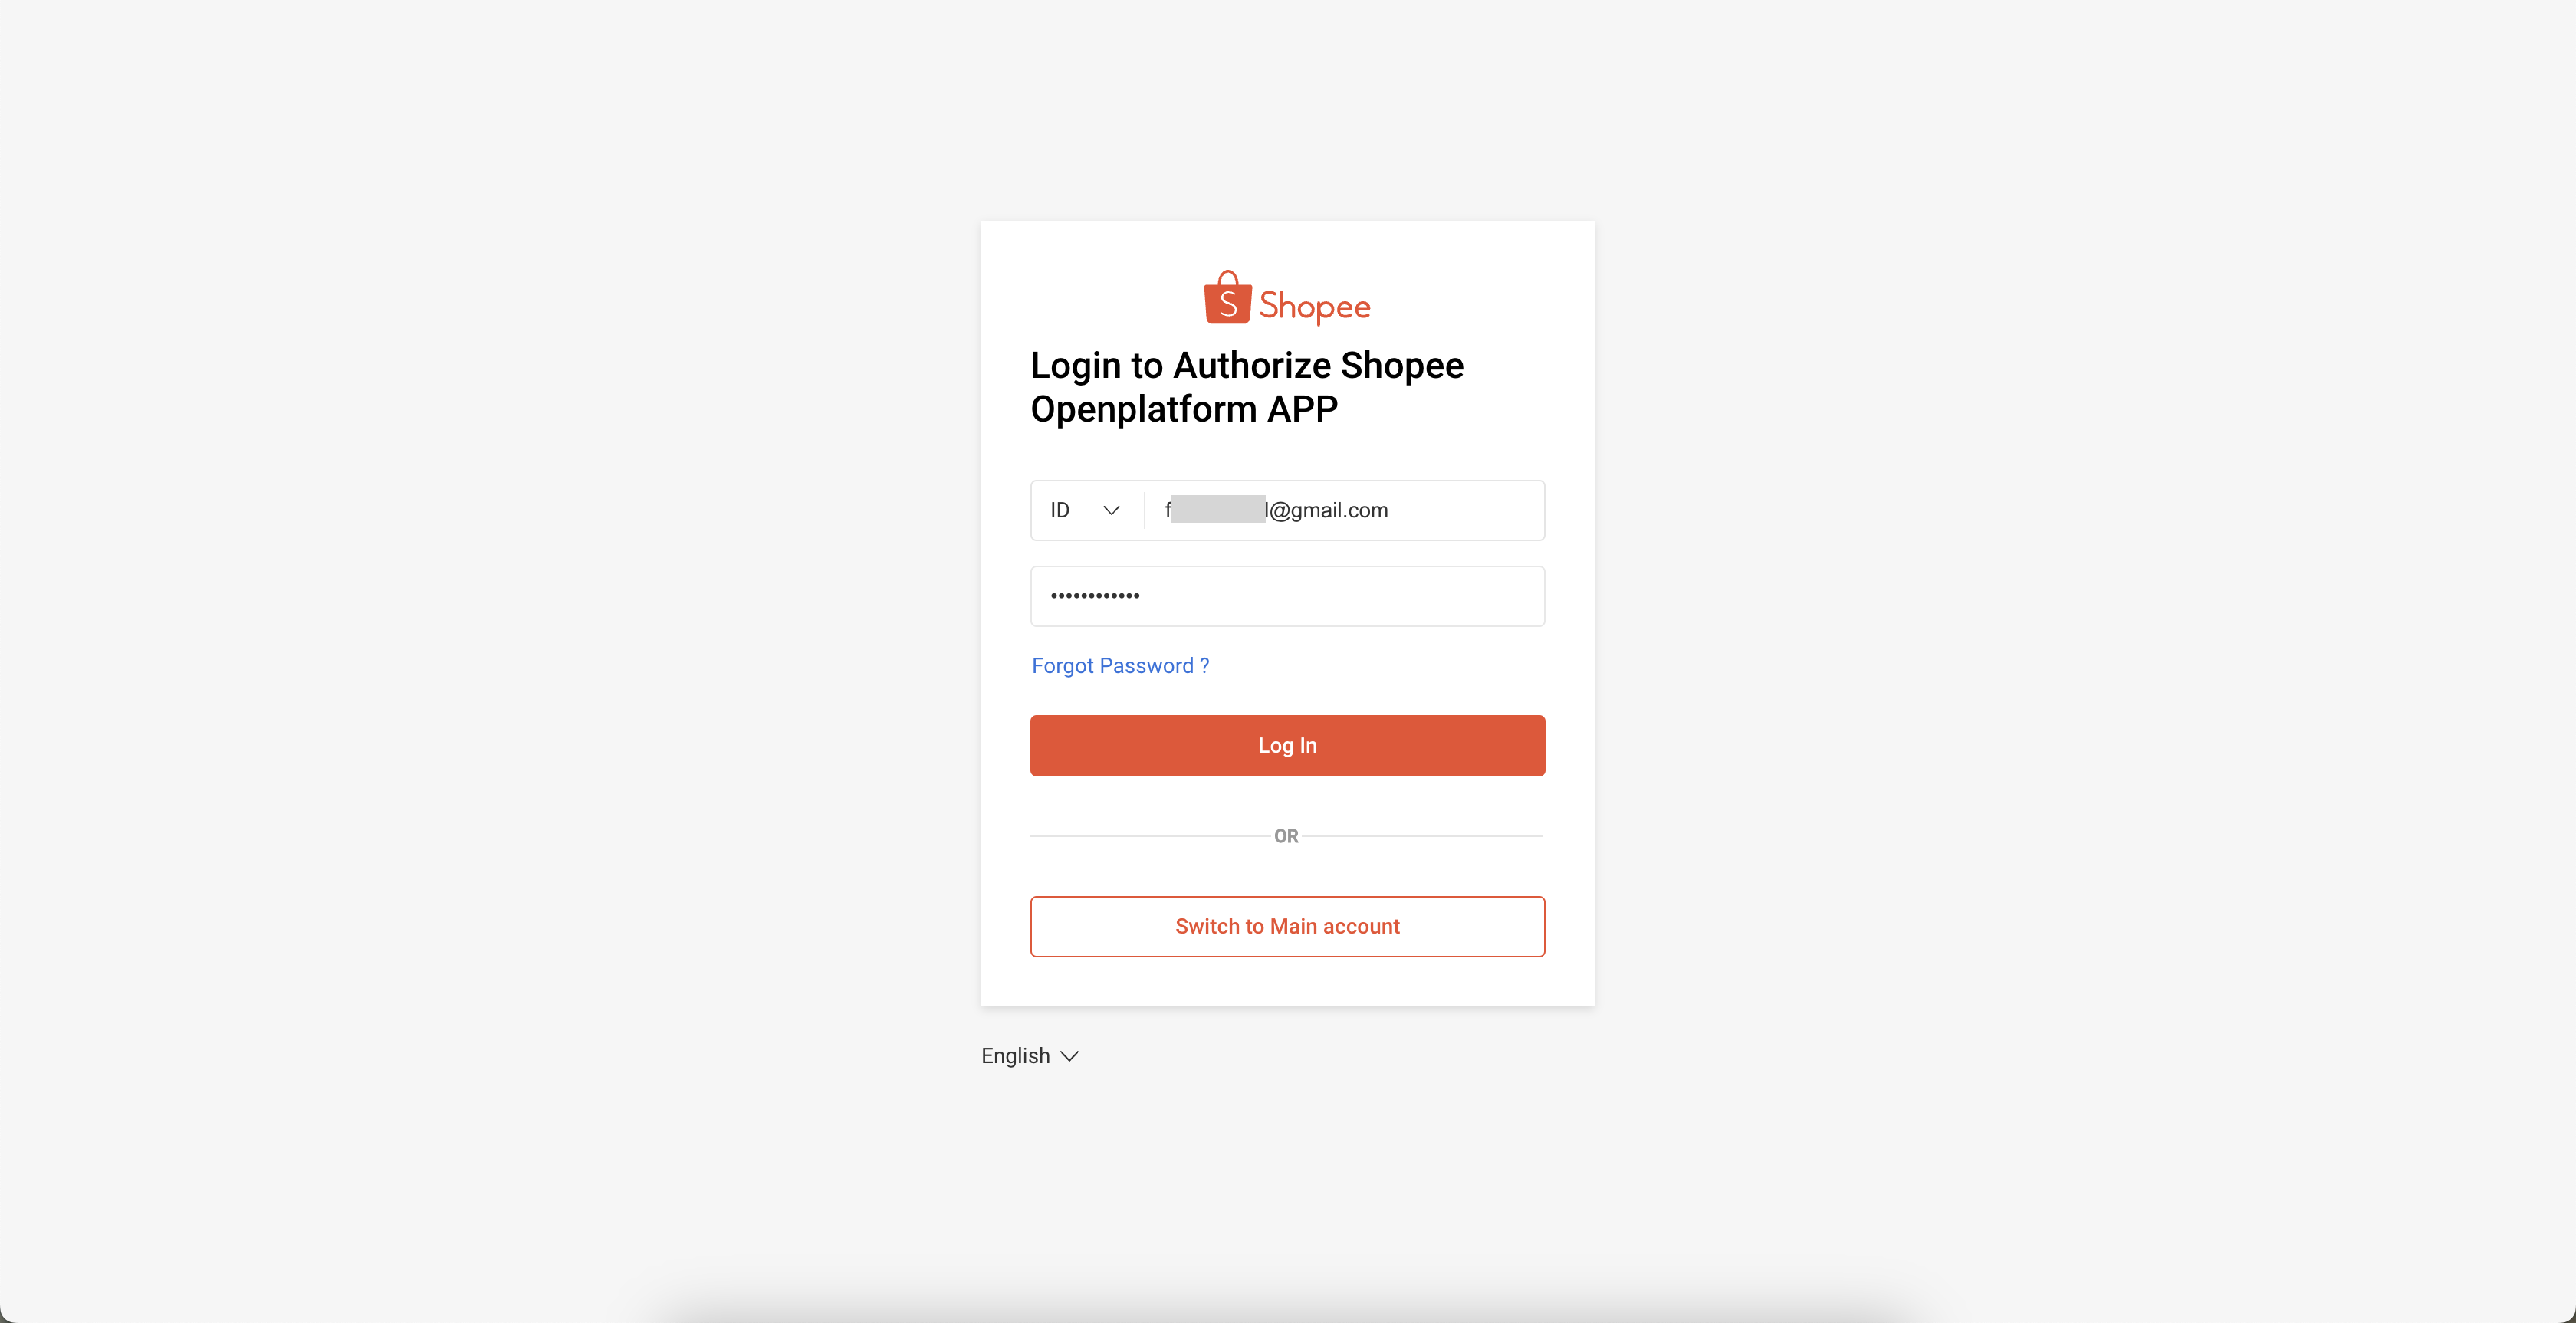
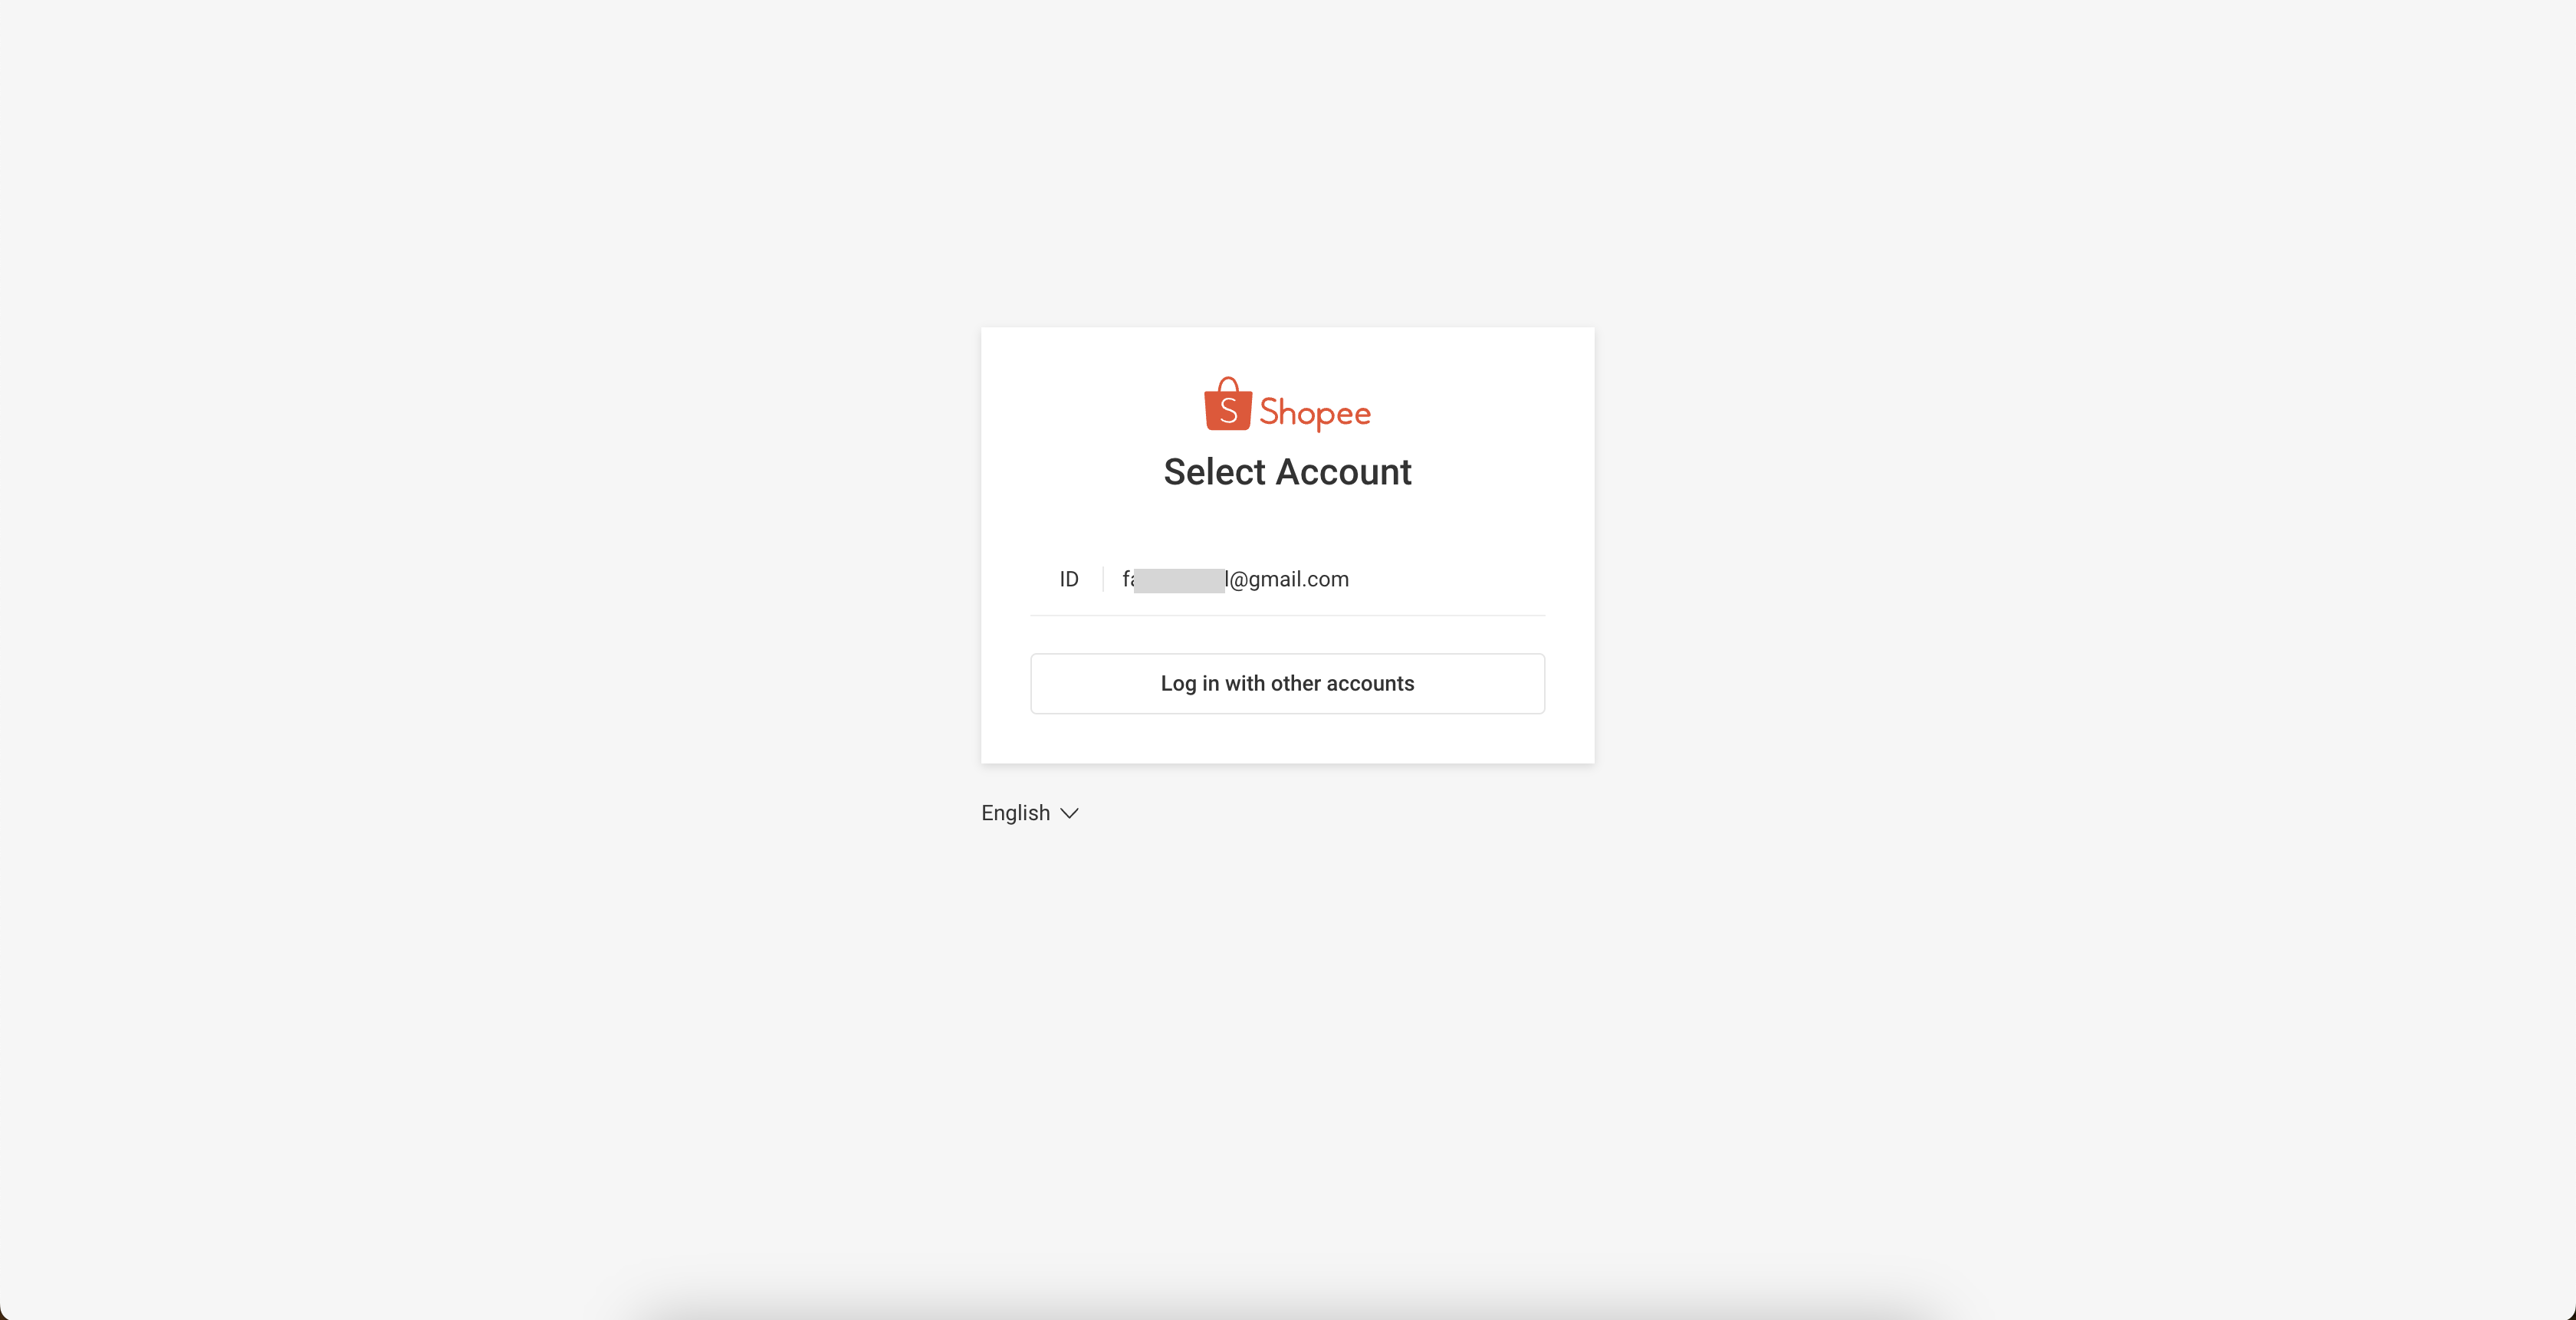
After that, you need to log in to your Shopee seller center account. After that click log in
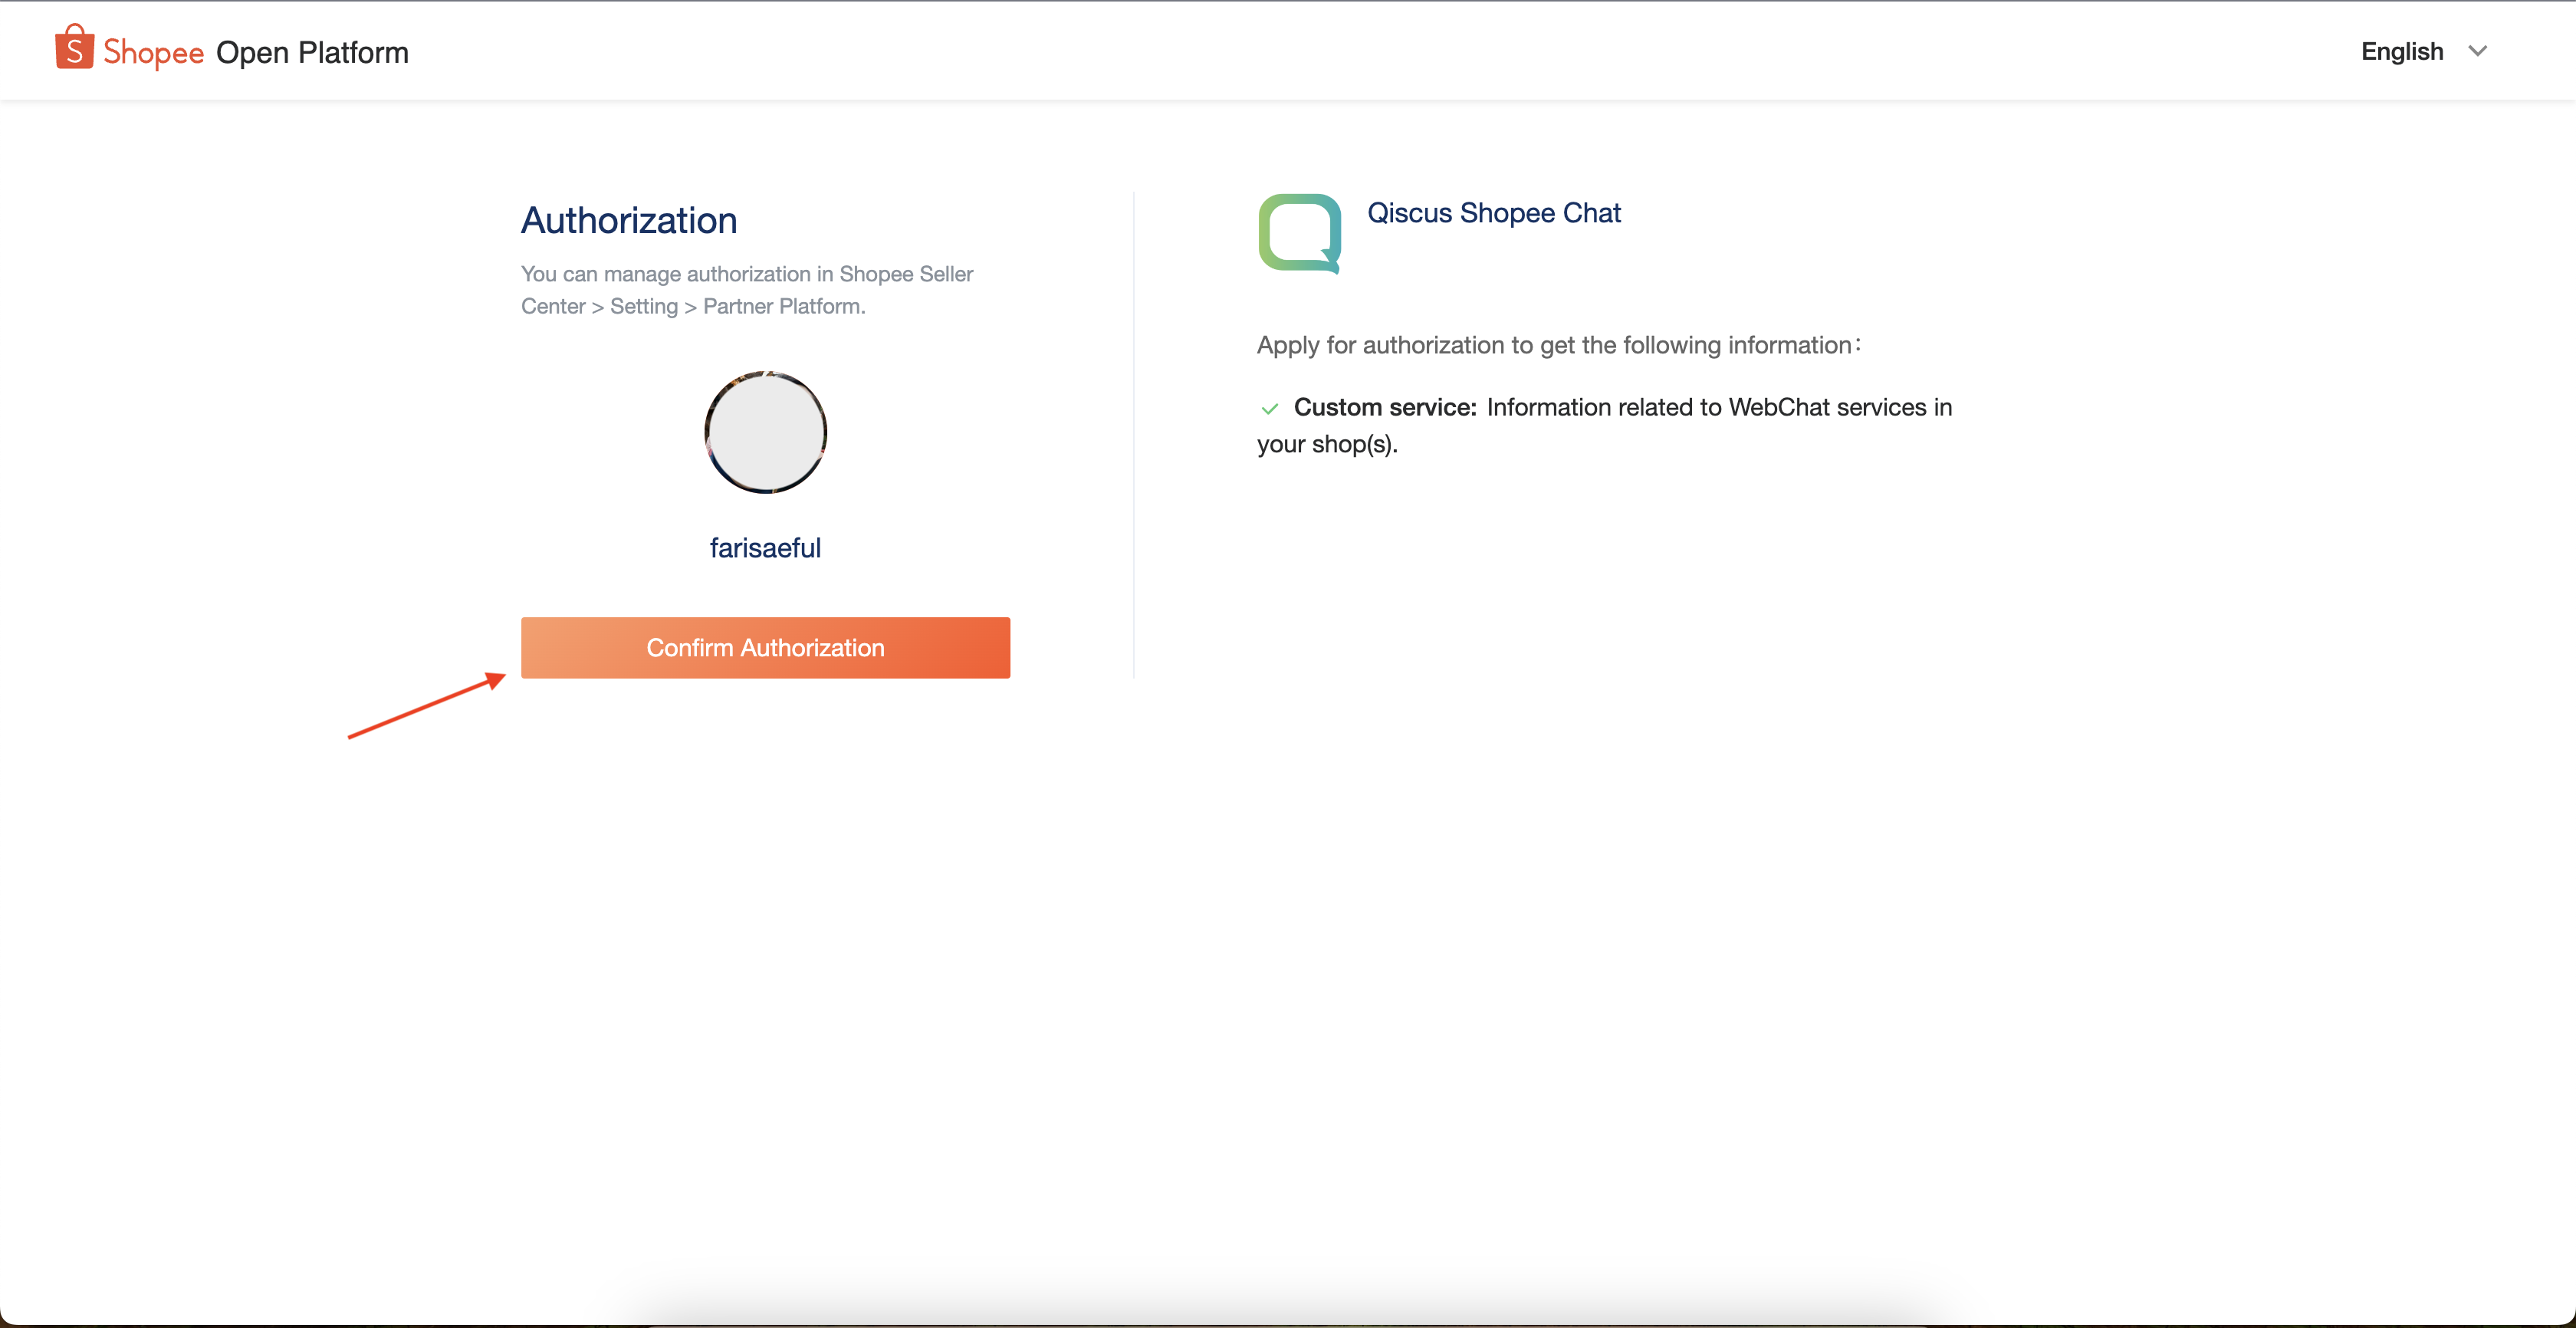
After logging in to your seller account, then carry out authorization. Click the Confirm Authorization button on the page.
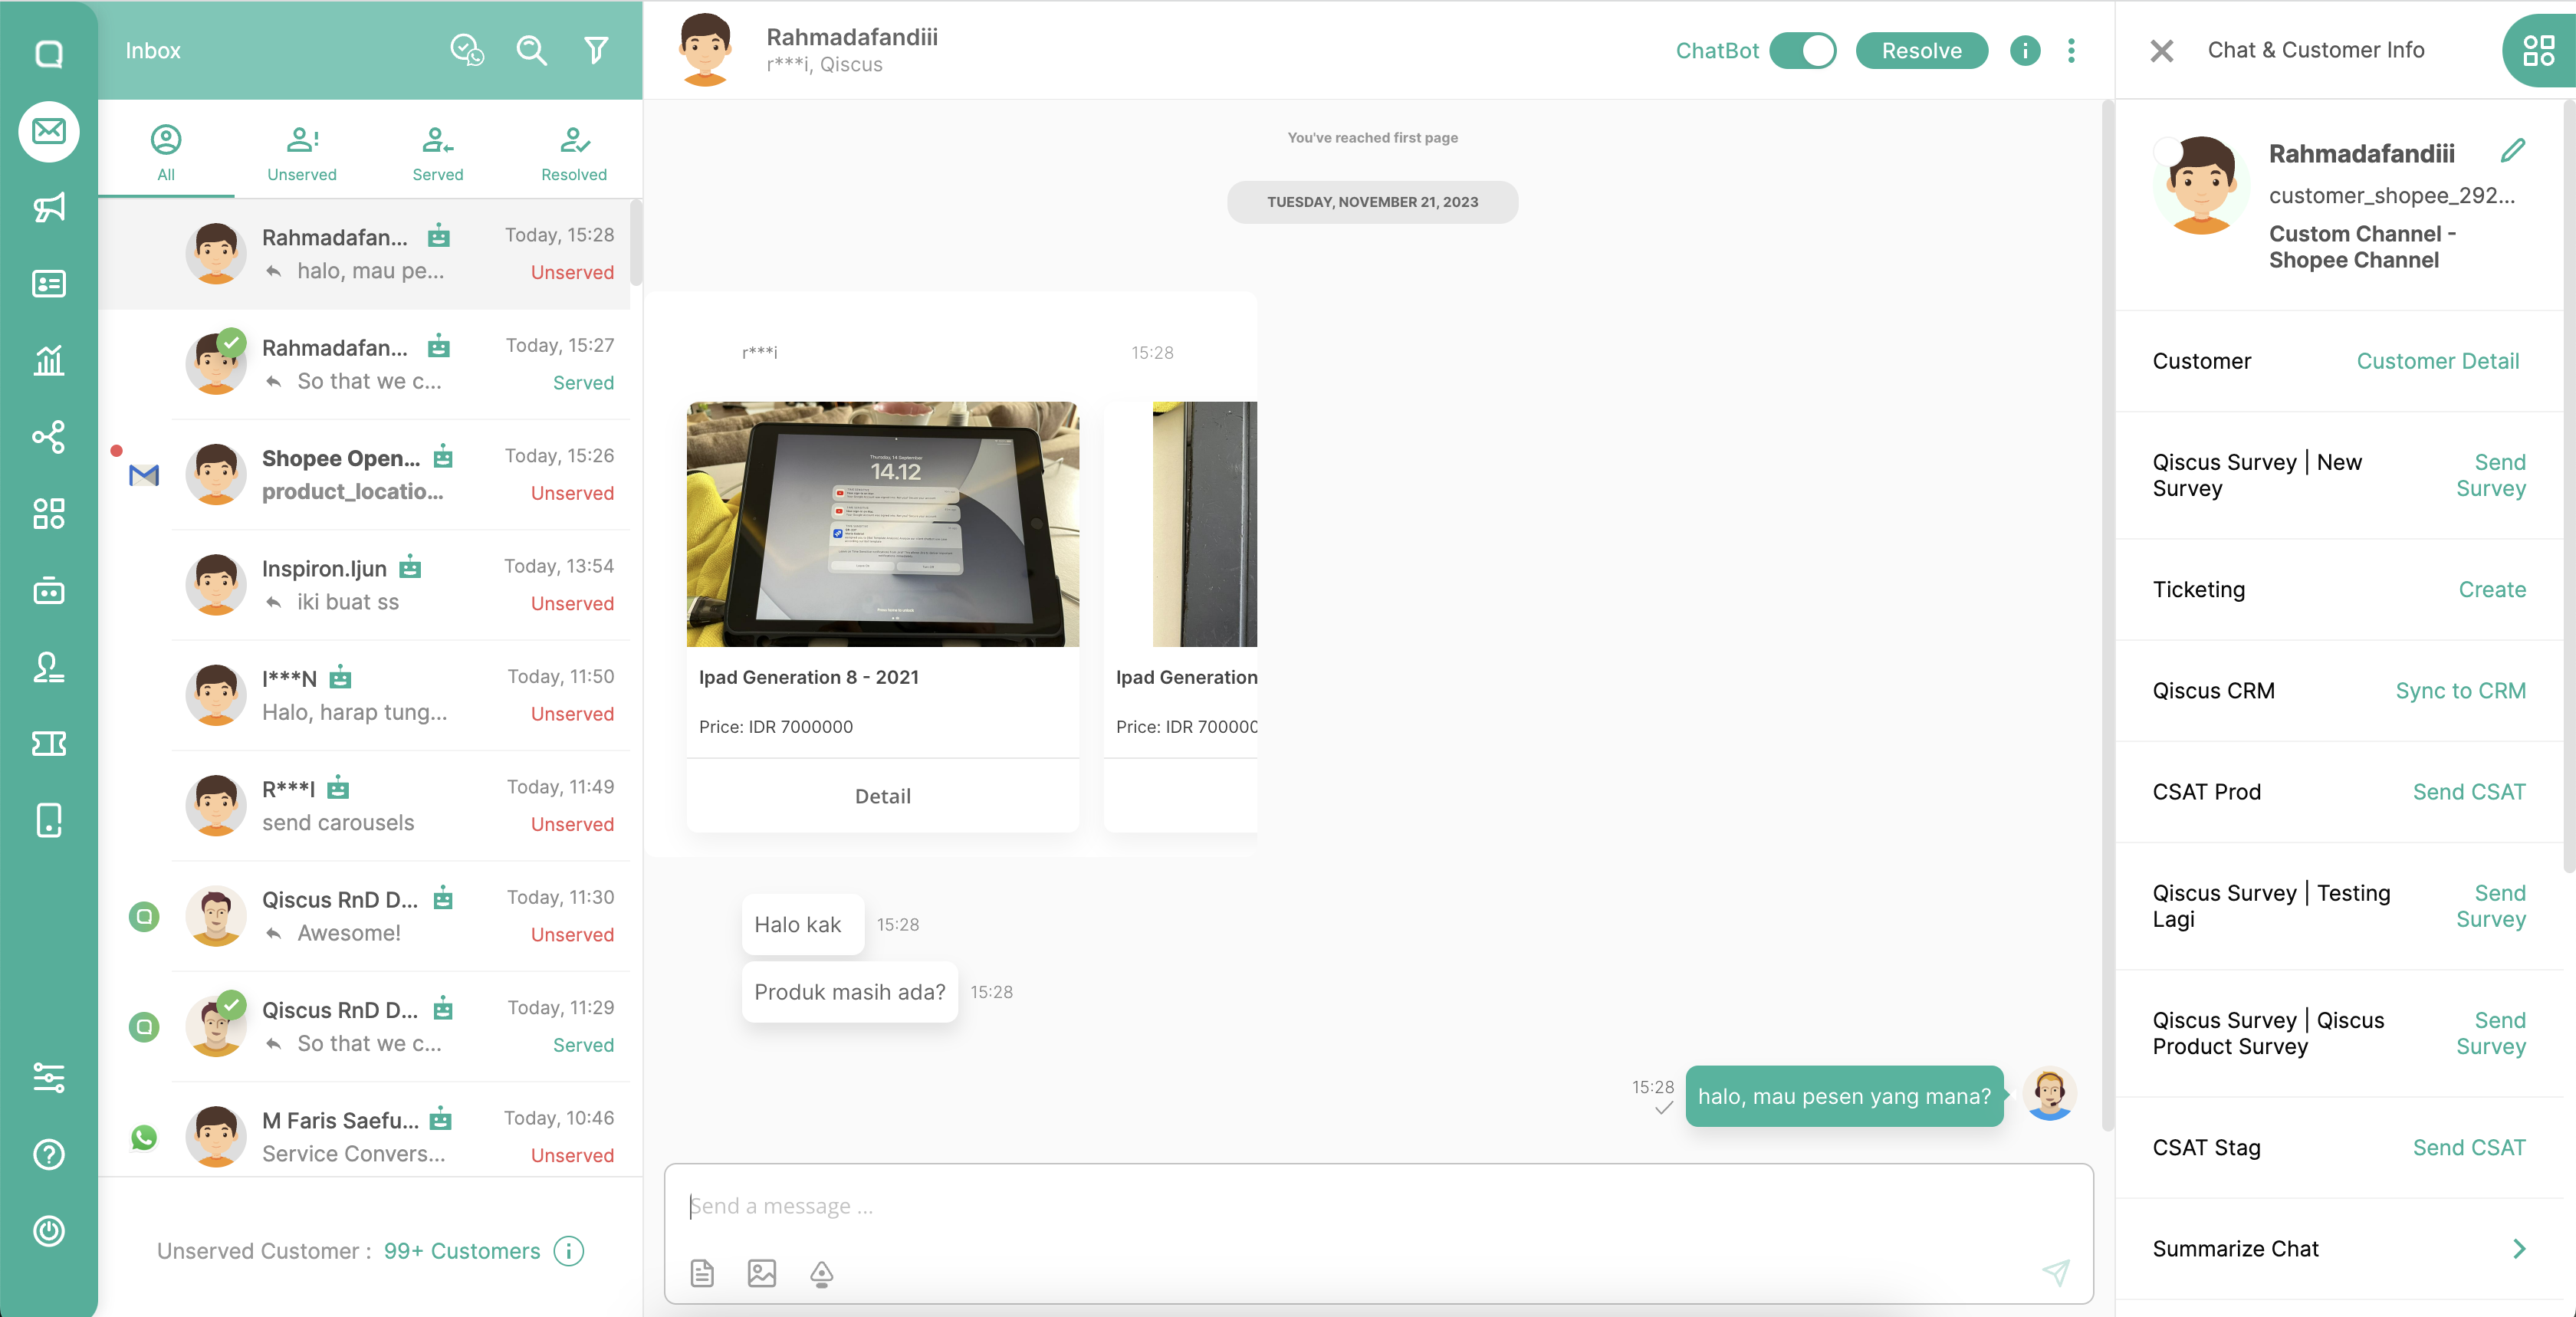
Succeed. Your Shopee seller center account has been integrated with the Qiscus App Center. You can check the integrated seller account in the Seller Center menu in the Shopee Chat Addon. And you can also check the Integration menu in Qiscus Omnichannel Chat as a Custom Channel.

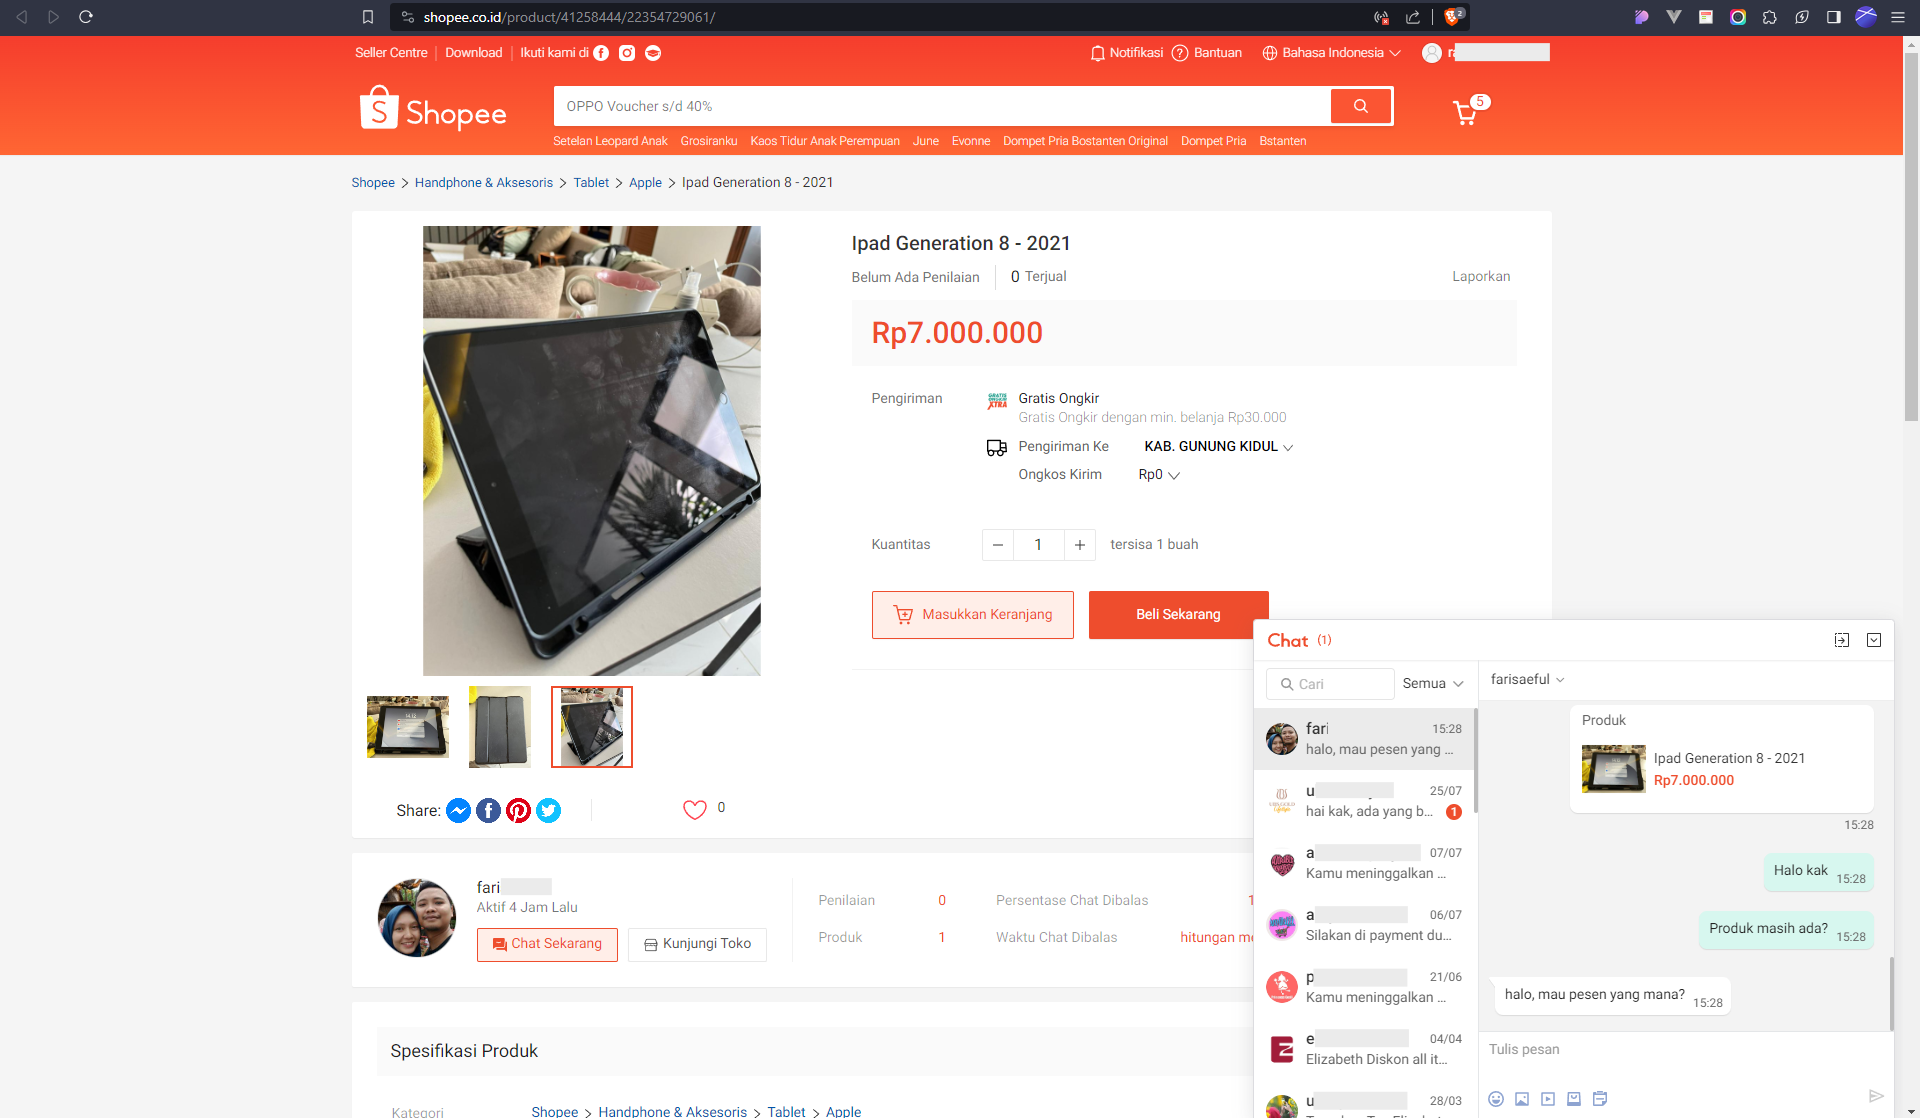
You can also test to chat on products in your Shopee seller account.
Permission Period
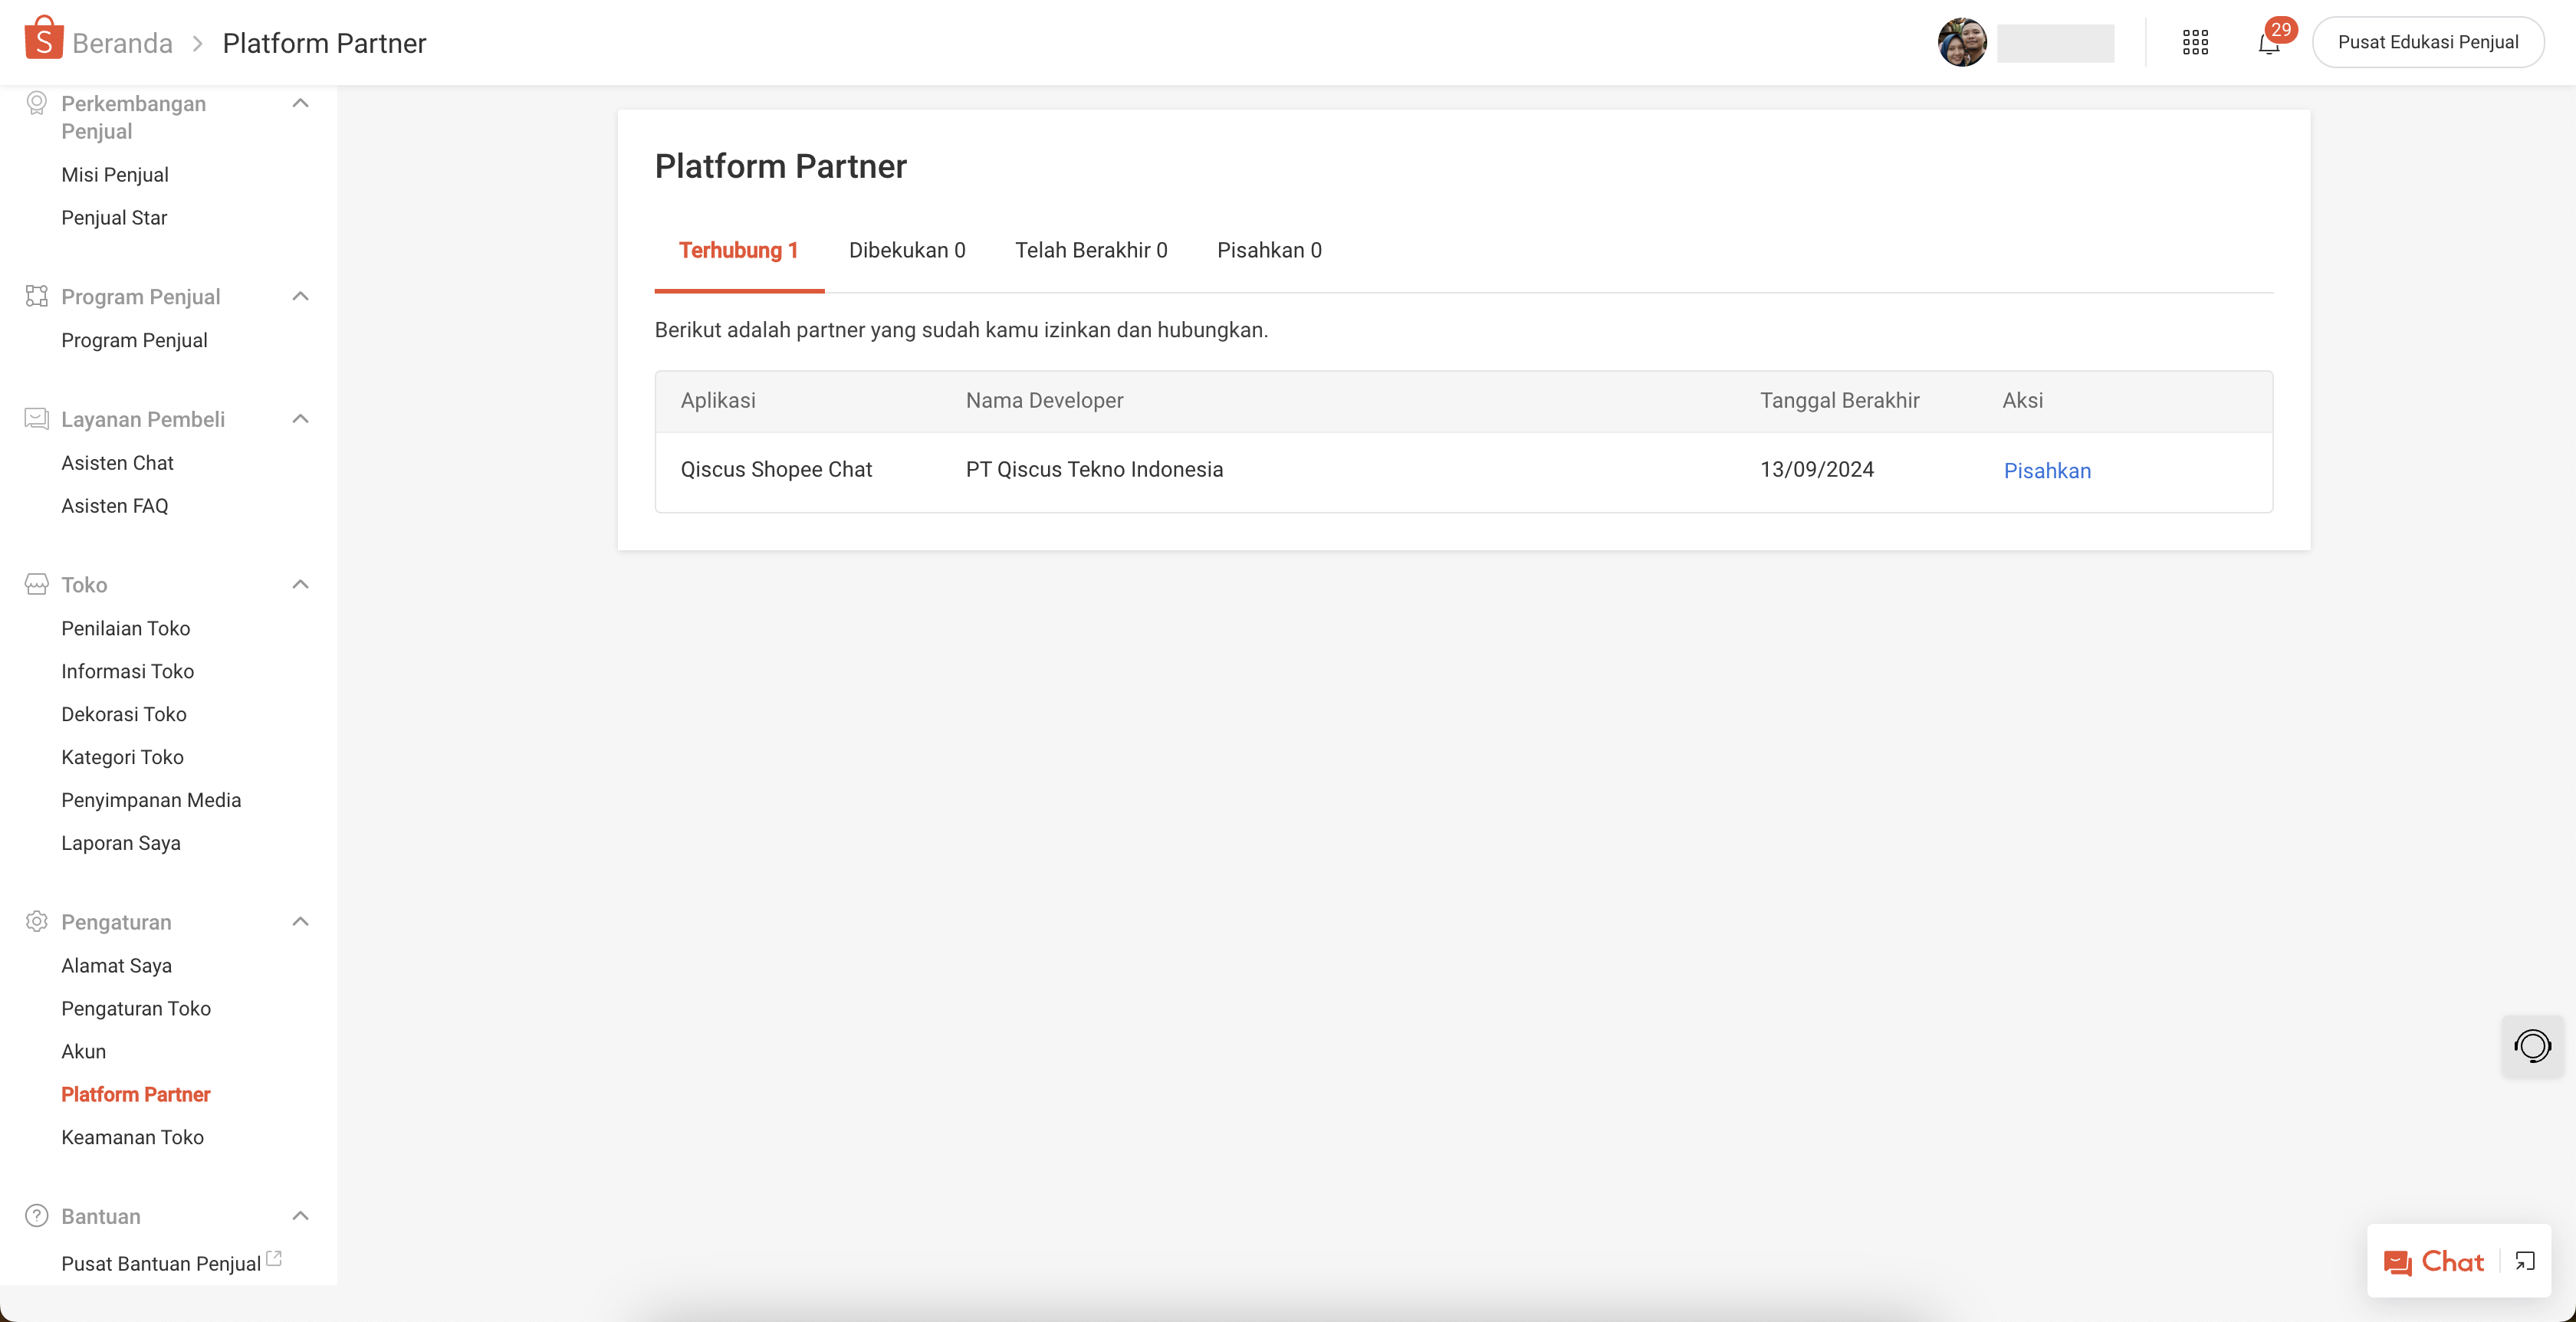
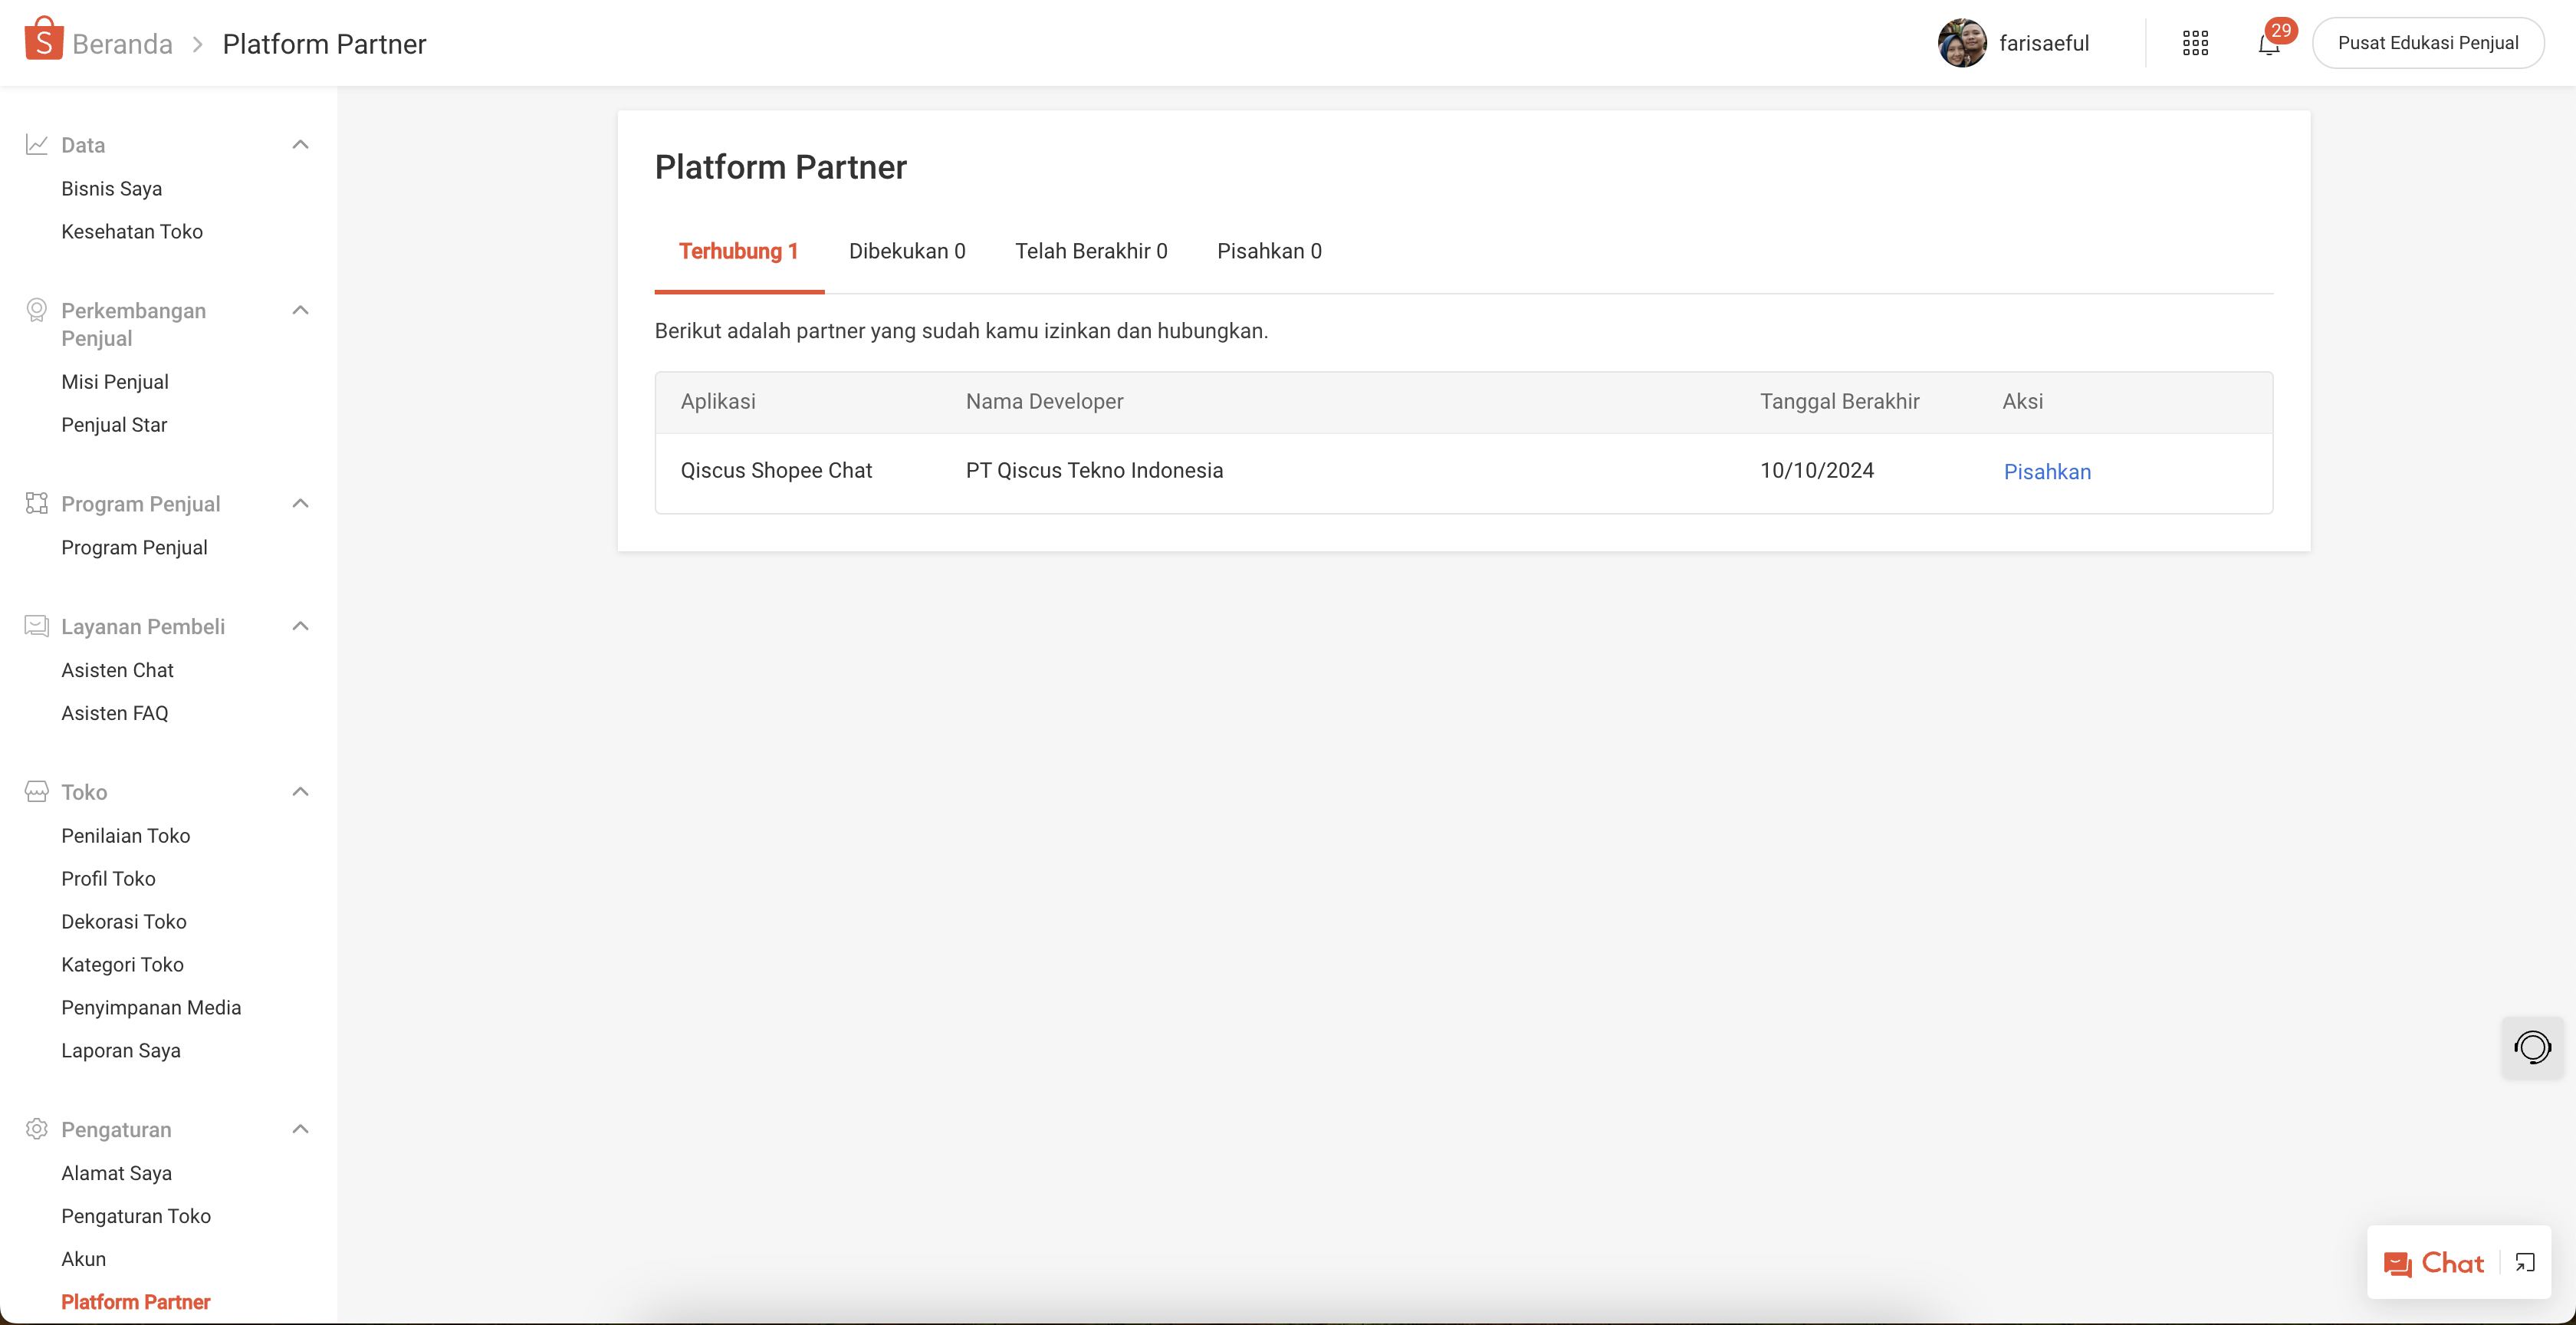
When integrating via a third party platform on Shopee, there is a permission period of 1 year. So if the permit has expired, you need to re-authorize your shop via the Qiscus App Center. To check the permission period, you can go to the Shopee Seller Center page, or click the following link https://seller.shopee.co.id/portal/partner-platform/shop
Go to https://seller.shopee.co.id/ then select the Partner Settings menu in the Settings menu. Then there is the Expiration Date of the permit. If the expiration date has expired, you can re-authorize it in the Qiscus App Center
Re-Authorization
Enter the Qiscus App Center, then select Shopee Chat and click Add-on Settings.
Then click Integrated Shop in the Shopee App Name used.
After that, enter the email address according to the Shopee Seller Center account used, then log in.
After that, click the Confirm Authorization button, and you have finished re-authorizing your shop account.

To ensure the permission period has been extended, you can re-enter your Shopee Seller Center, or click the following URL https://seller.shopee.co.id/portal/partner-platform/shop. Then the end date will be updated 1 year after you carry out re-authorization. Re-authorize again a year after the permission period ends.
Shopee App Center Widget
The Shopee App Center Widget aims to allow agents to quickly search and send product, order, or voucher details directly from the Omnichannel chat interface, enhancing response efficiency and customer satisfaction.
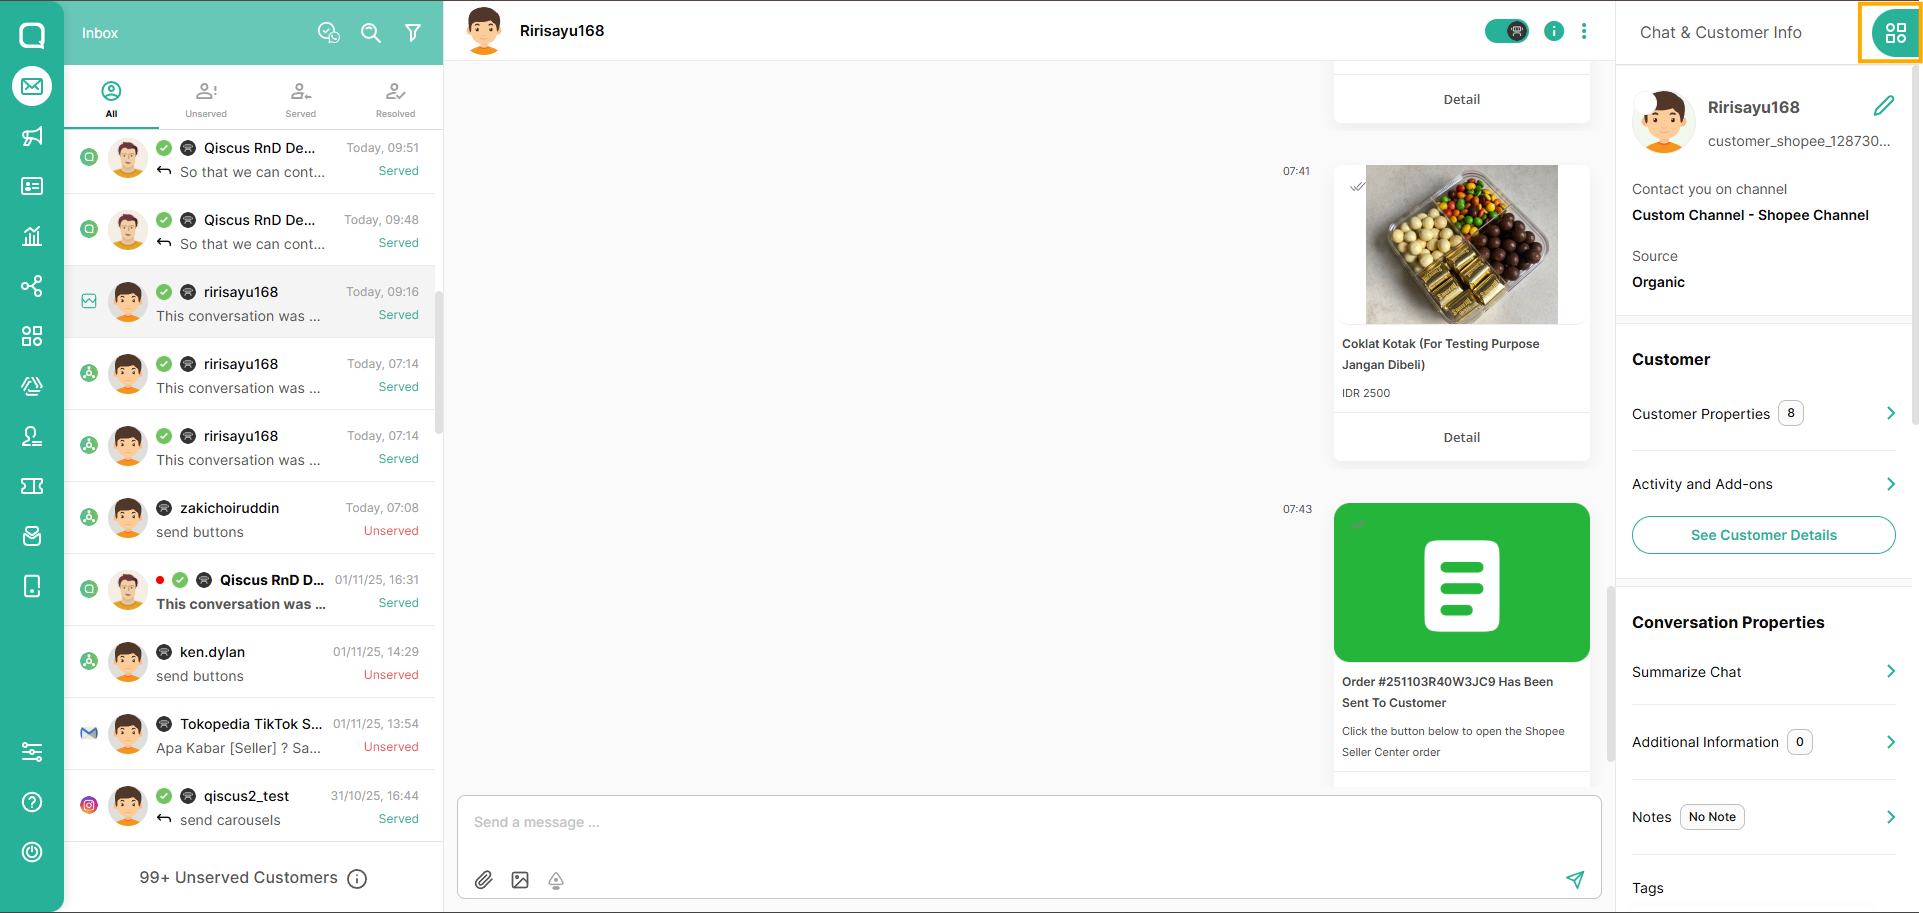
Add a Shopee App Center Widget on the top right panel of the Omnichannel chat interface.

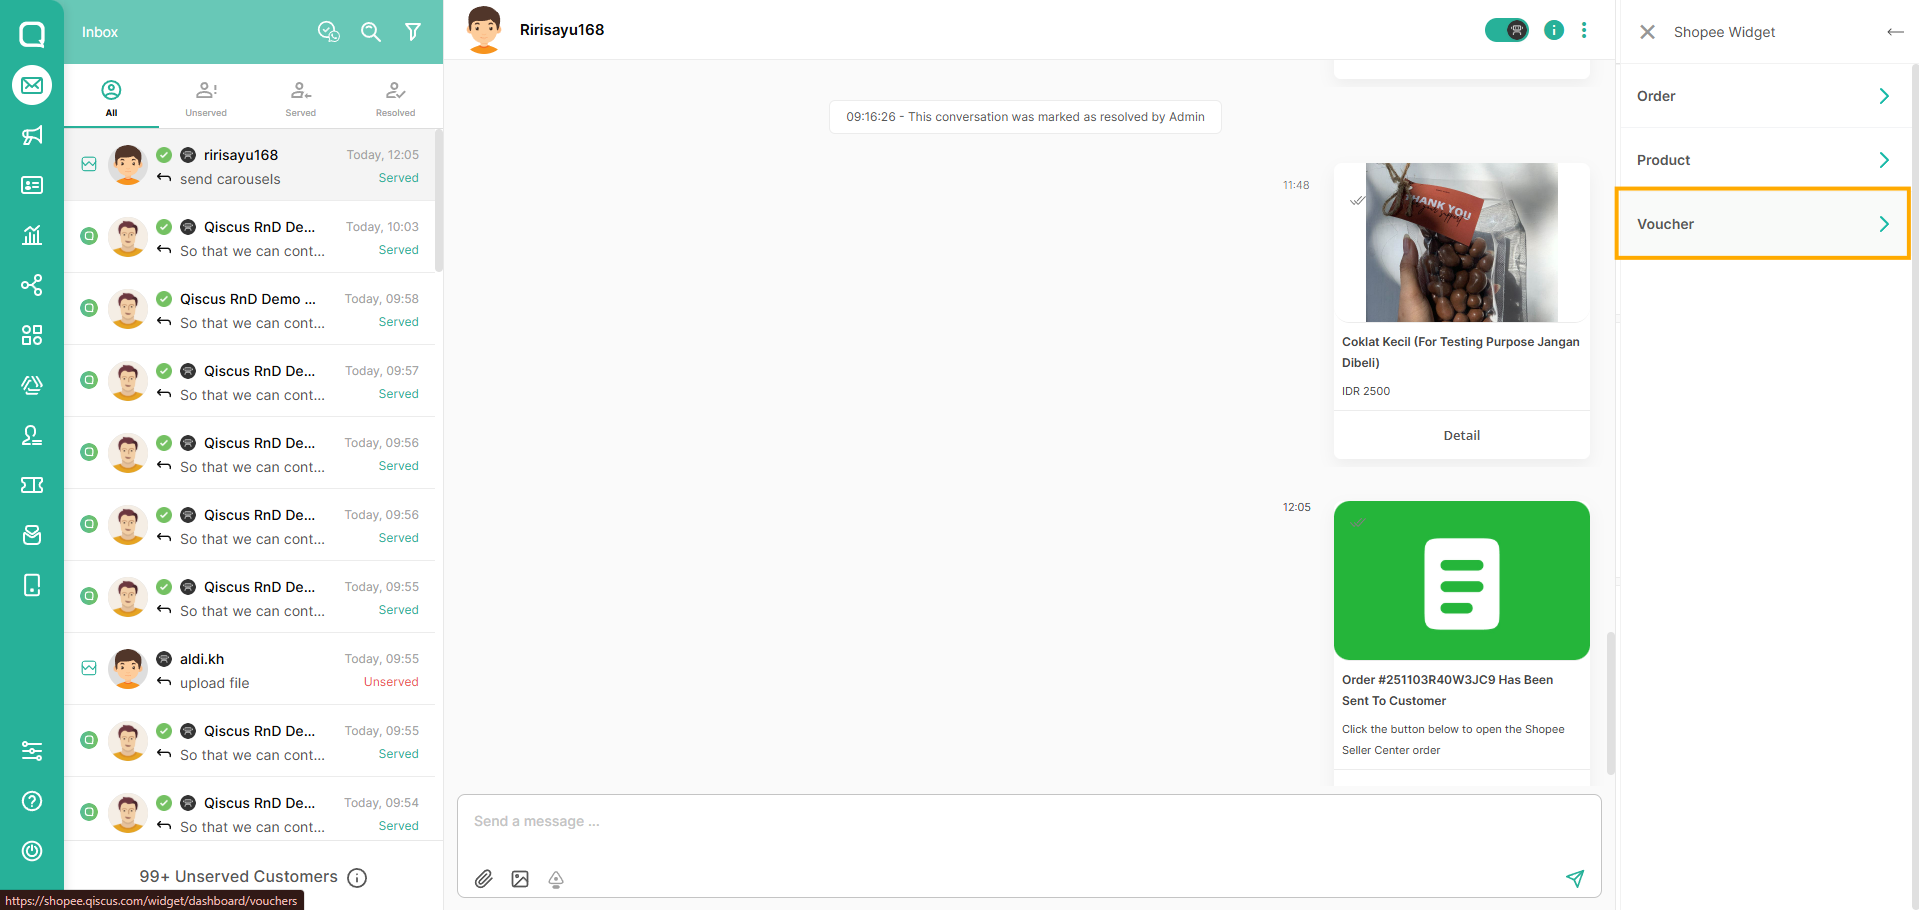
The widget consists of three main tabs:
Product
Order
Voucher
For Integrated User
If you already integrate your Shopee Seller to our Omnichannel, you need to update your integrated apps first from our App Center.
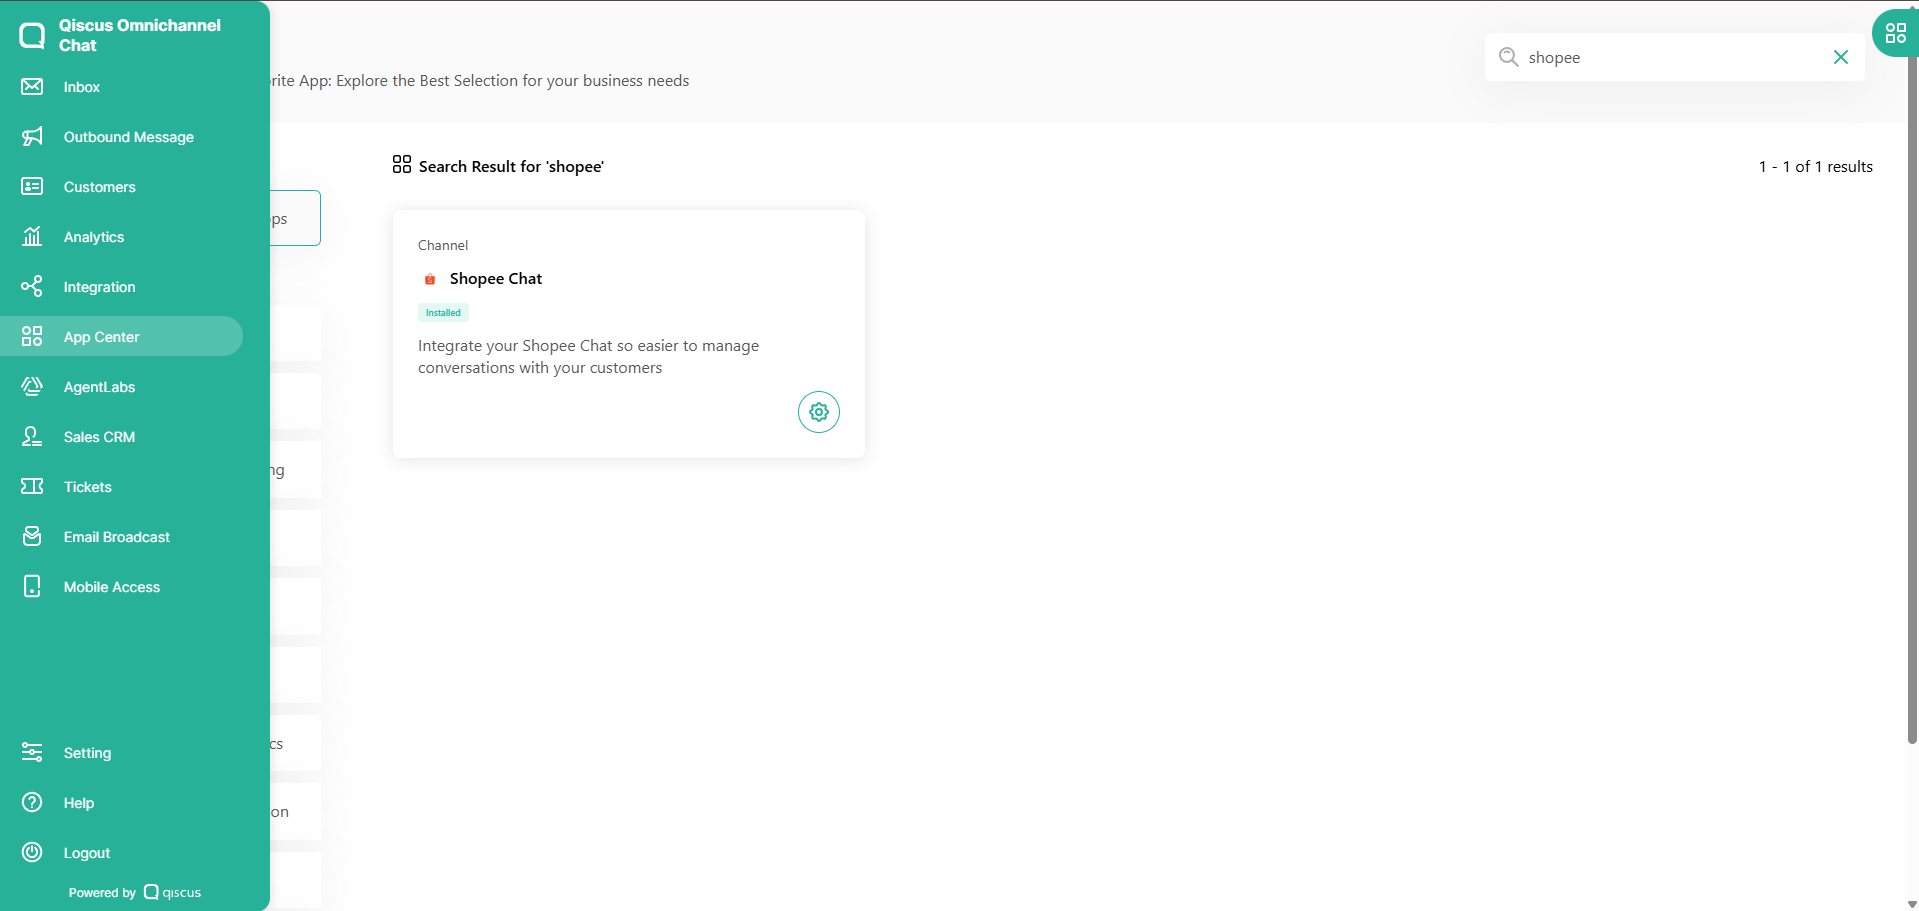
First, go to the App Center and located the Shopee
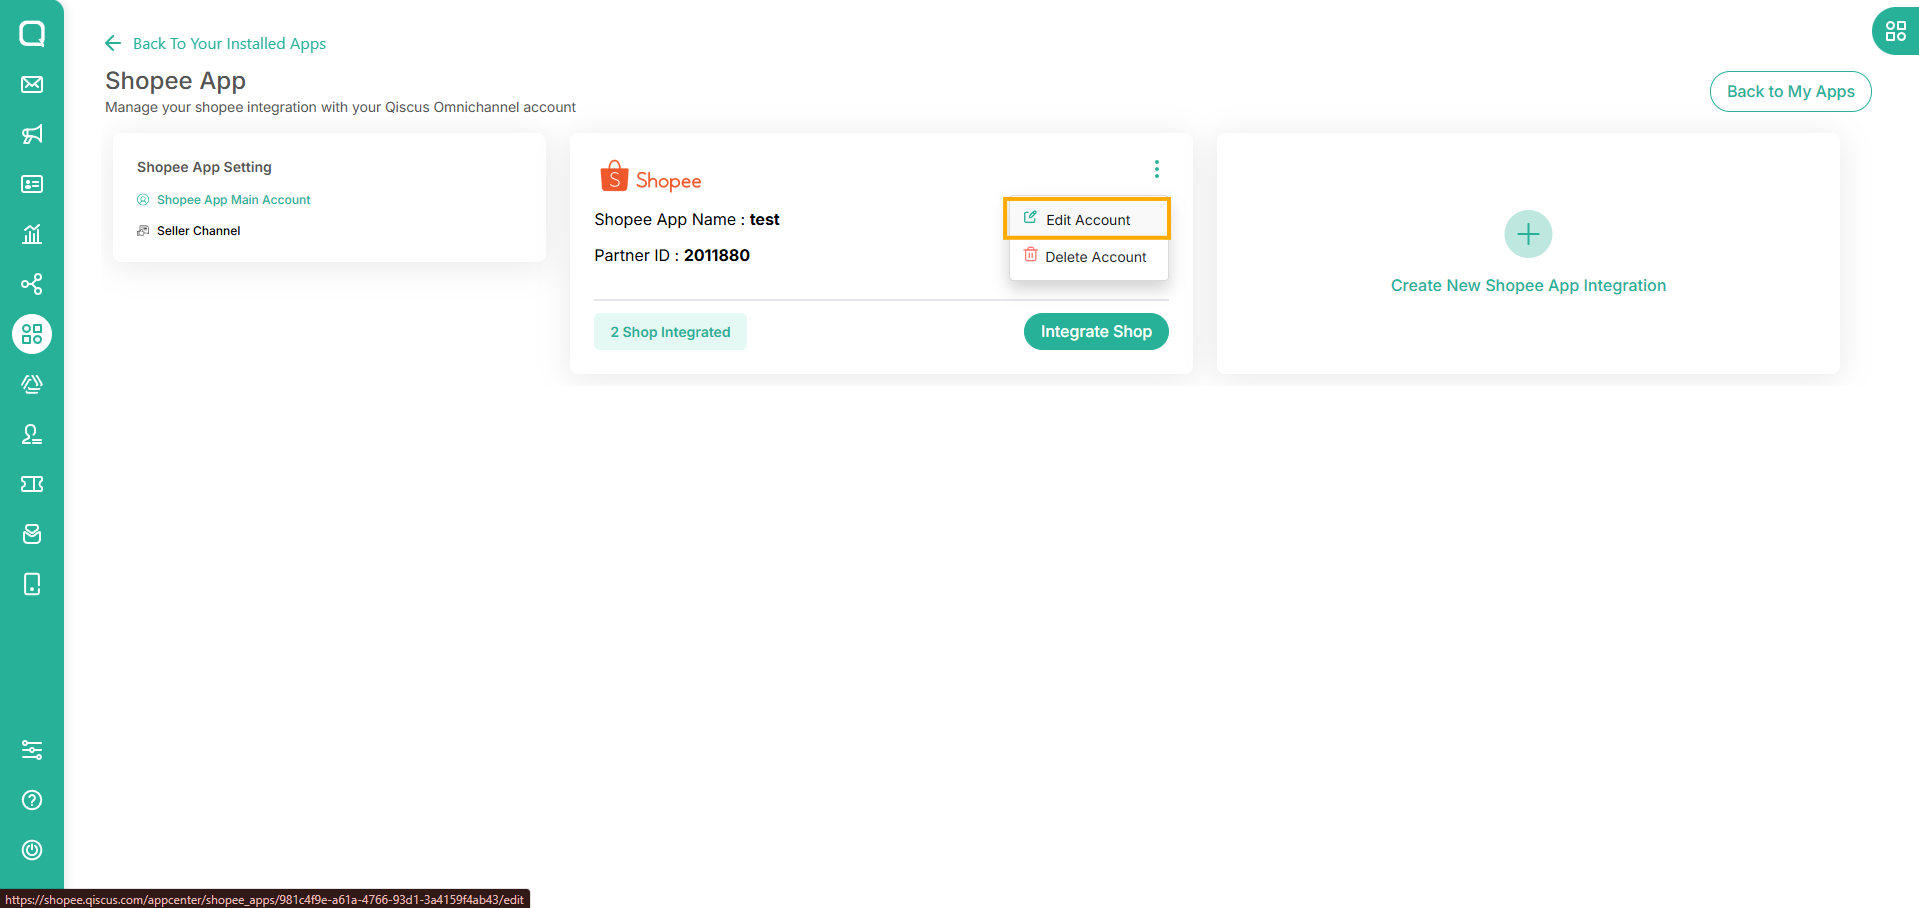
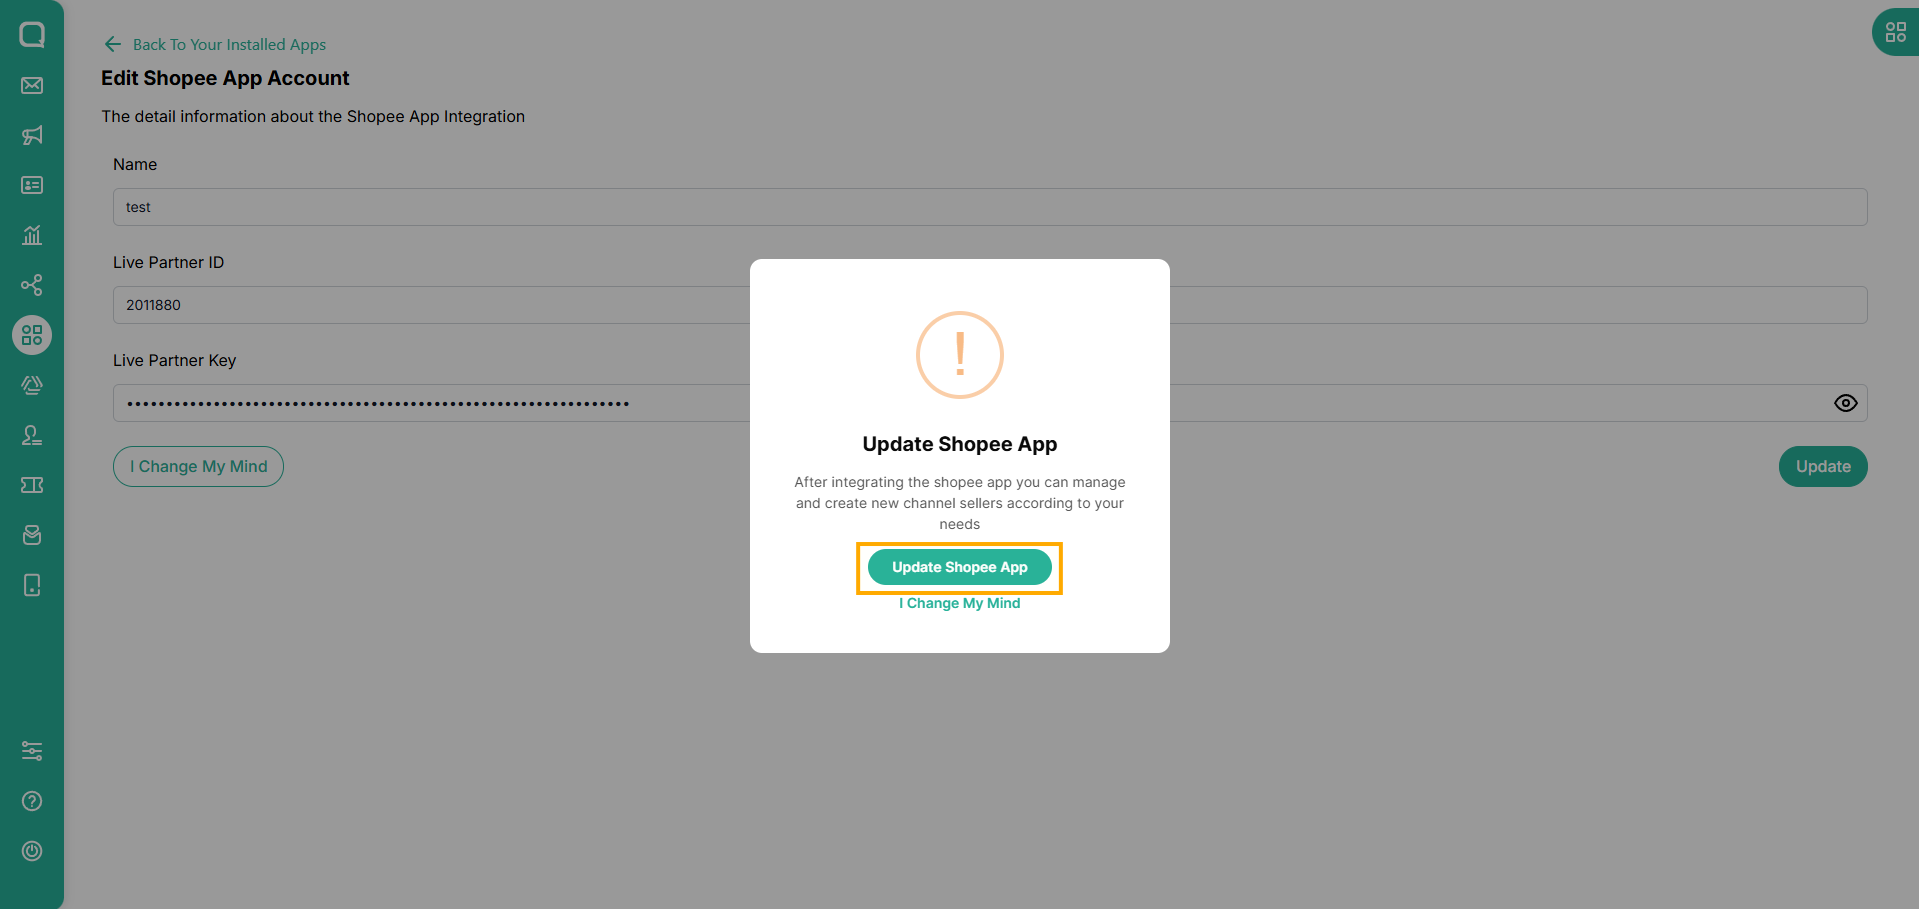
Then, go to Edit Account on your selected Shopee App Main Account
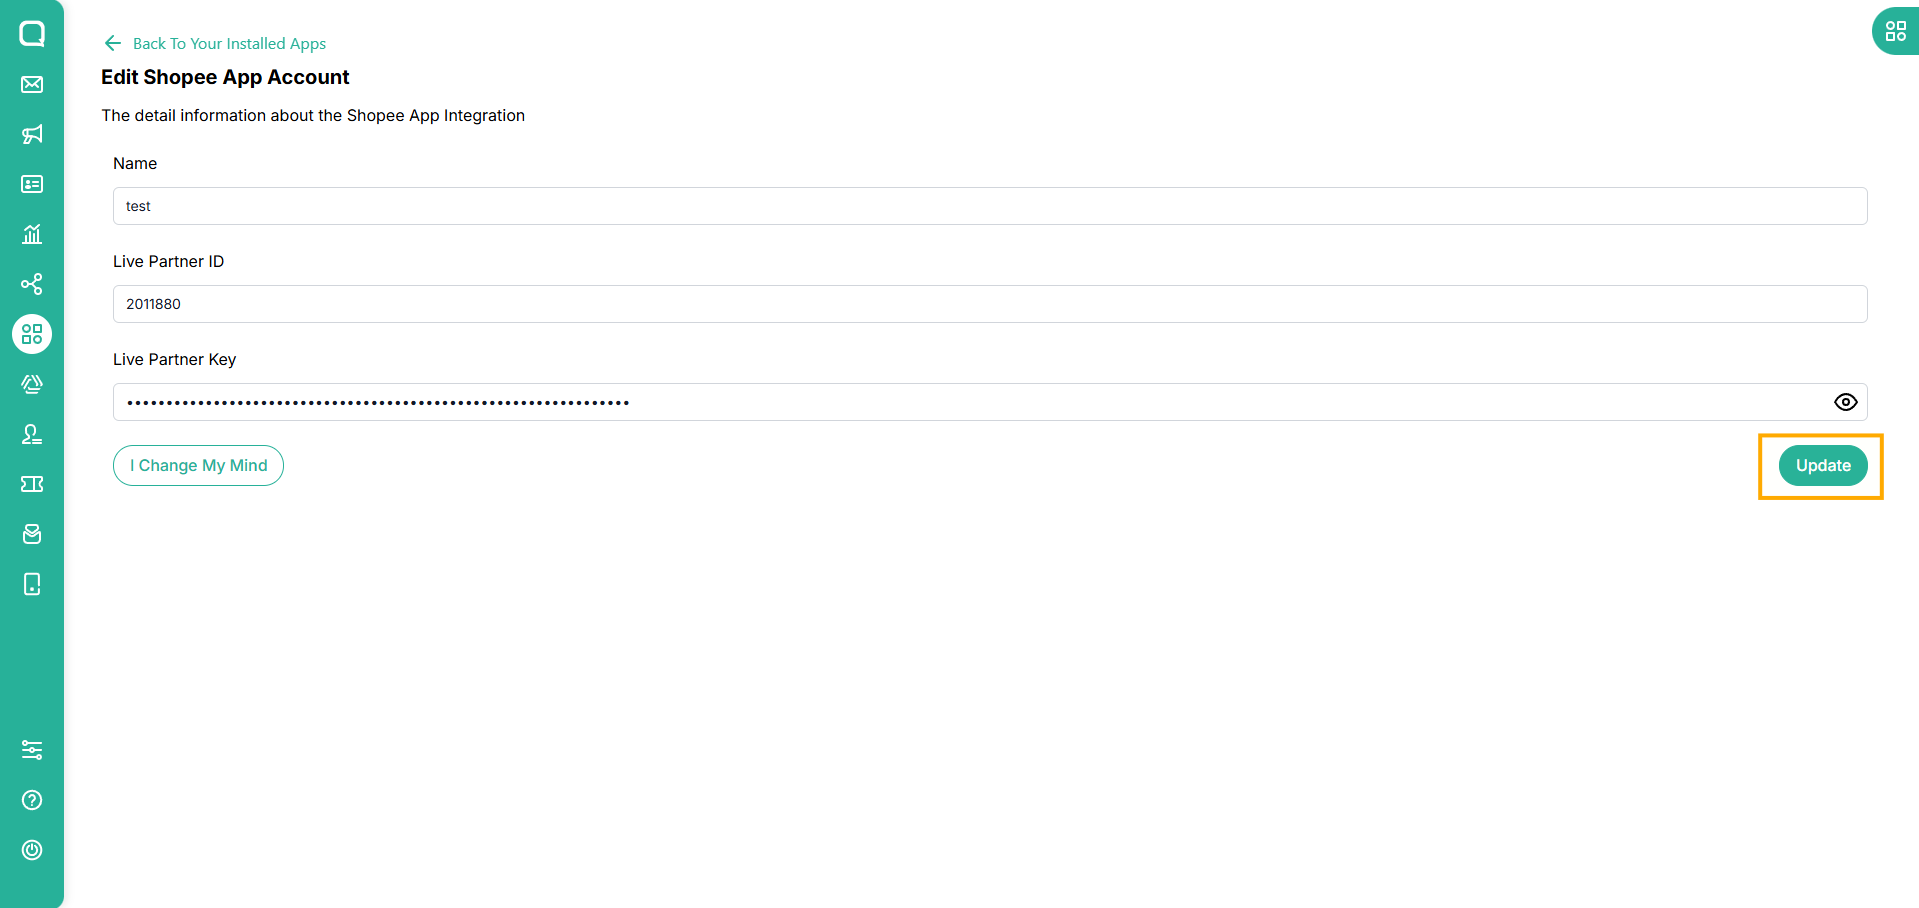
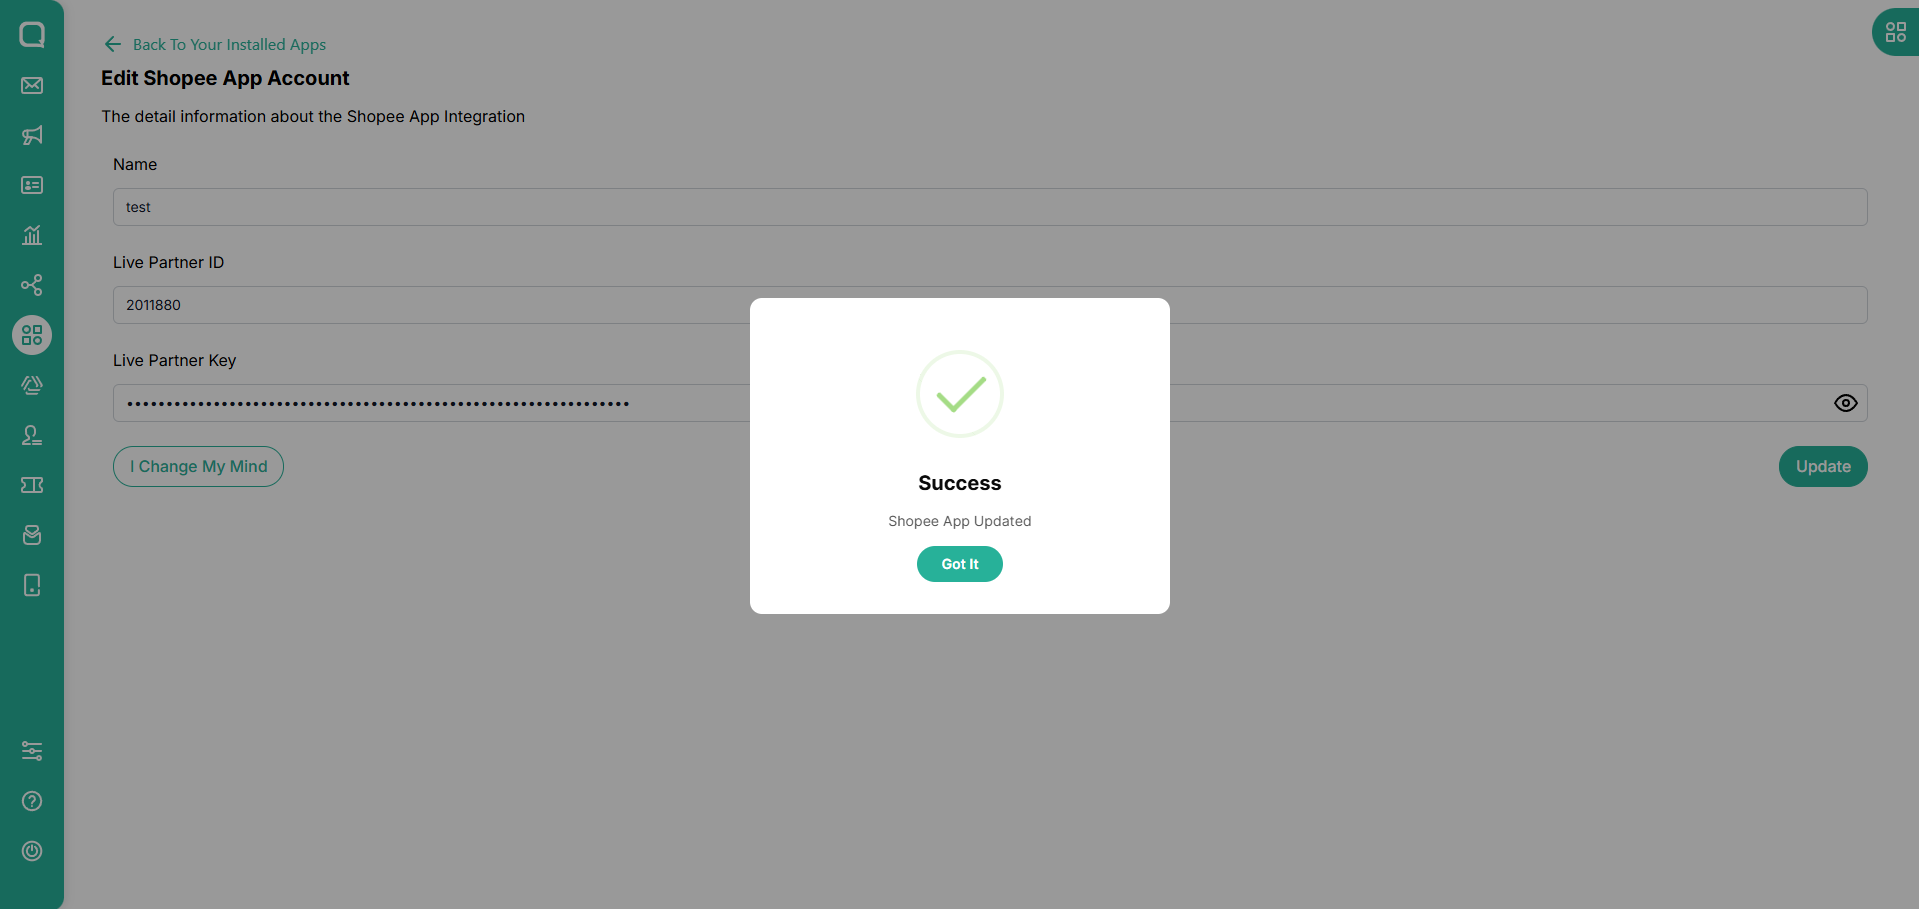
Click "Update" button
After that, you need to re-integrated your seller channel account by clicking Integrate Shop button on the Shopee App page
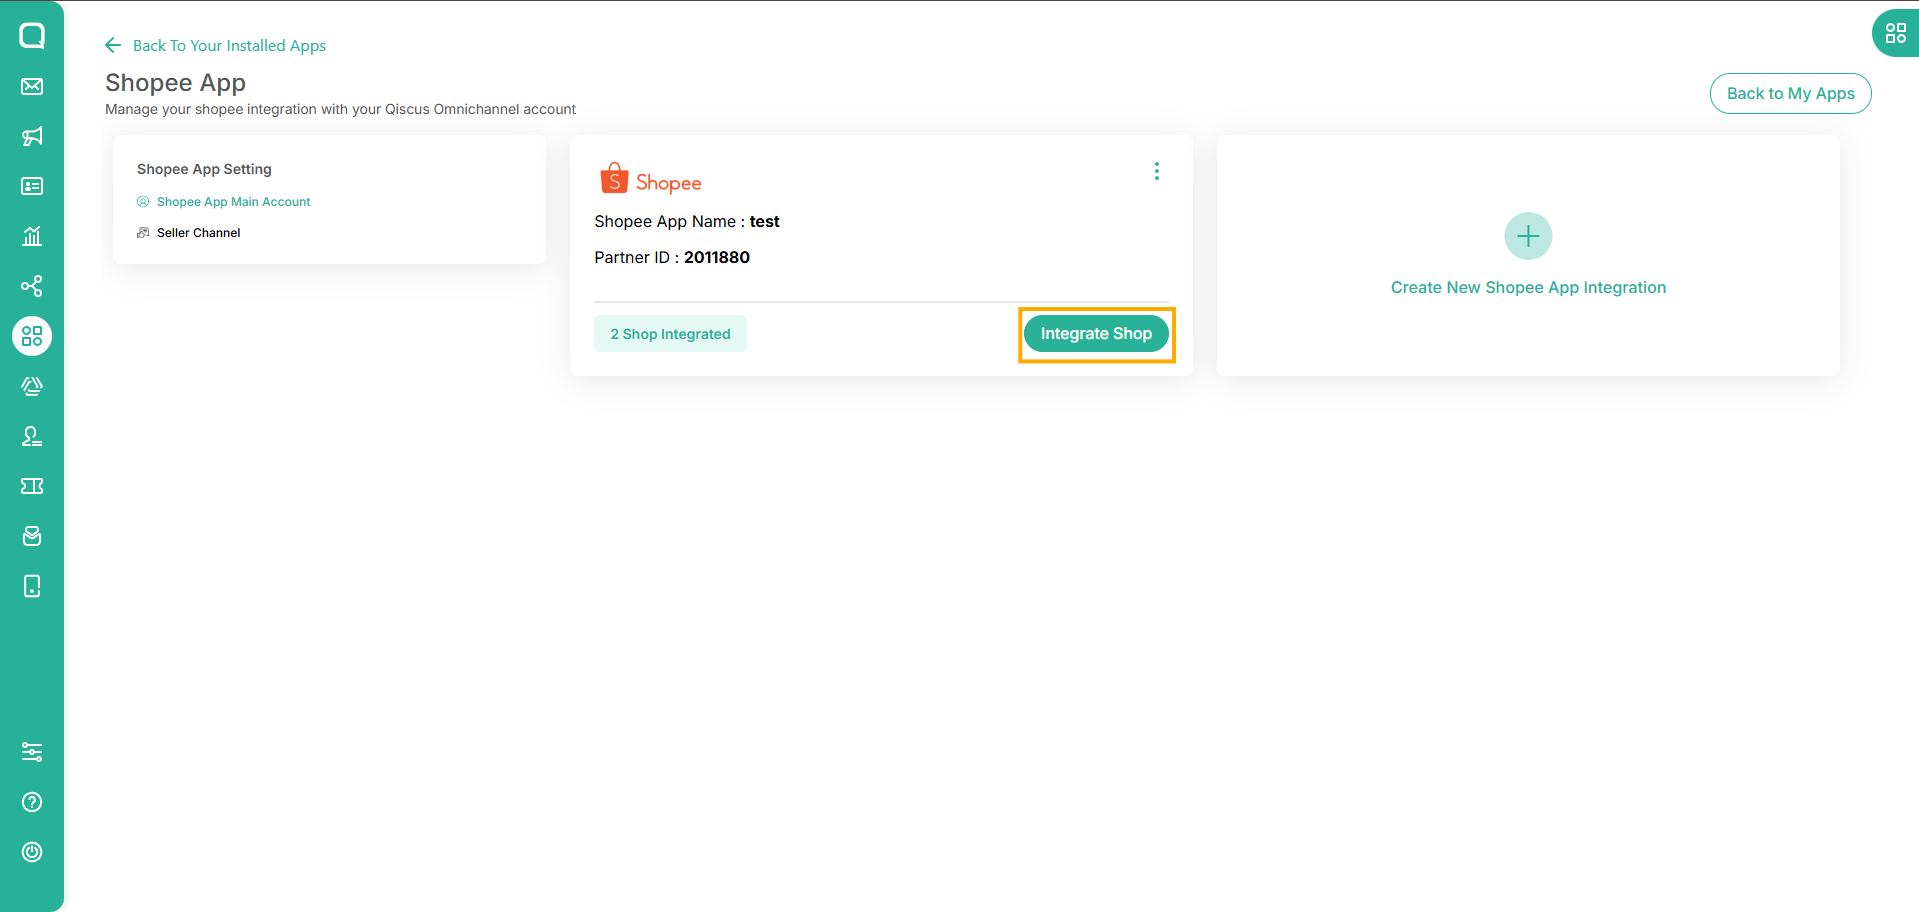
Finish!
Send Product Message
The product list will display the products from the store that the customer is currently chatting with.
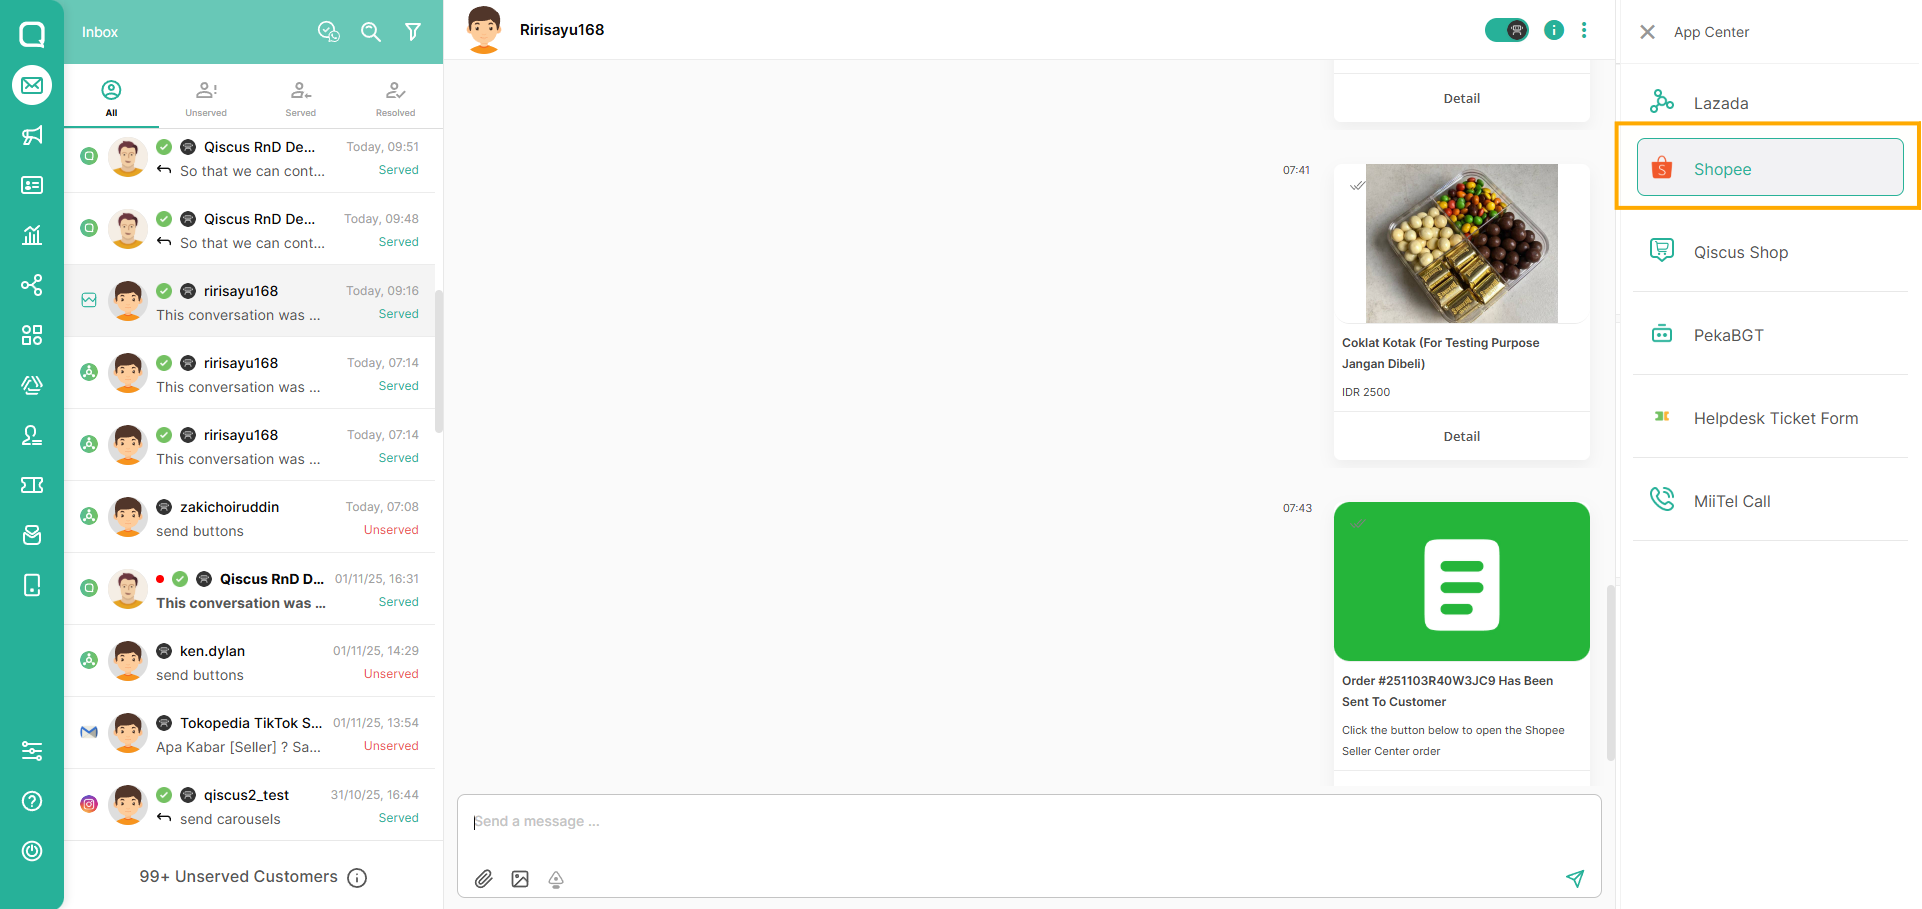
Open a Shopee chat session in Omnichannel and click the App Center Widget button
Click Shopee button on the ACW
Select Product

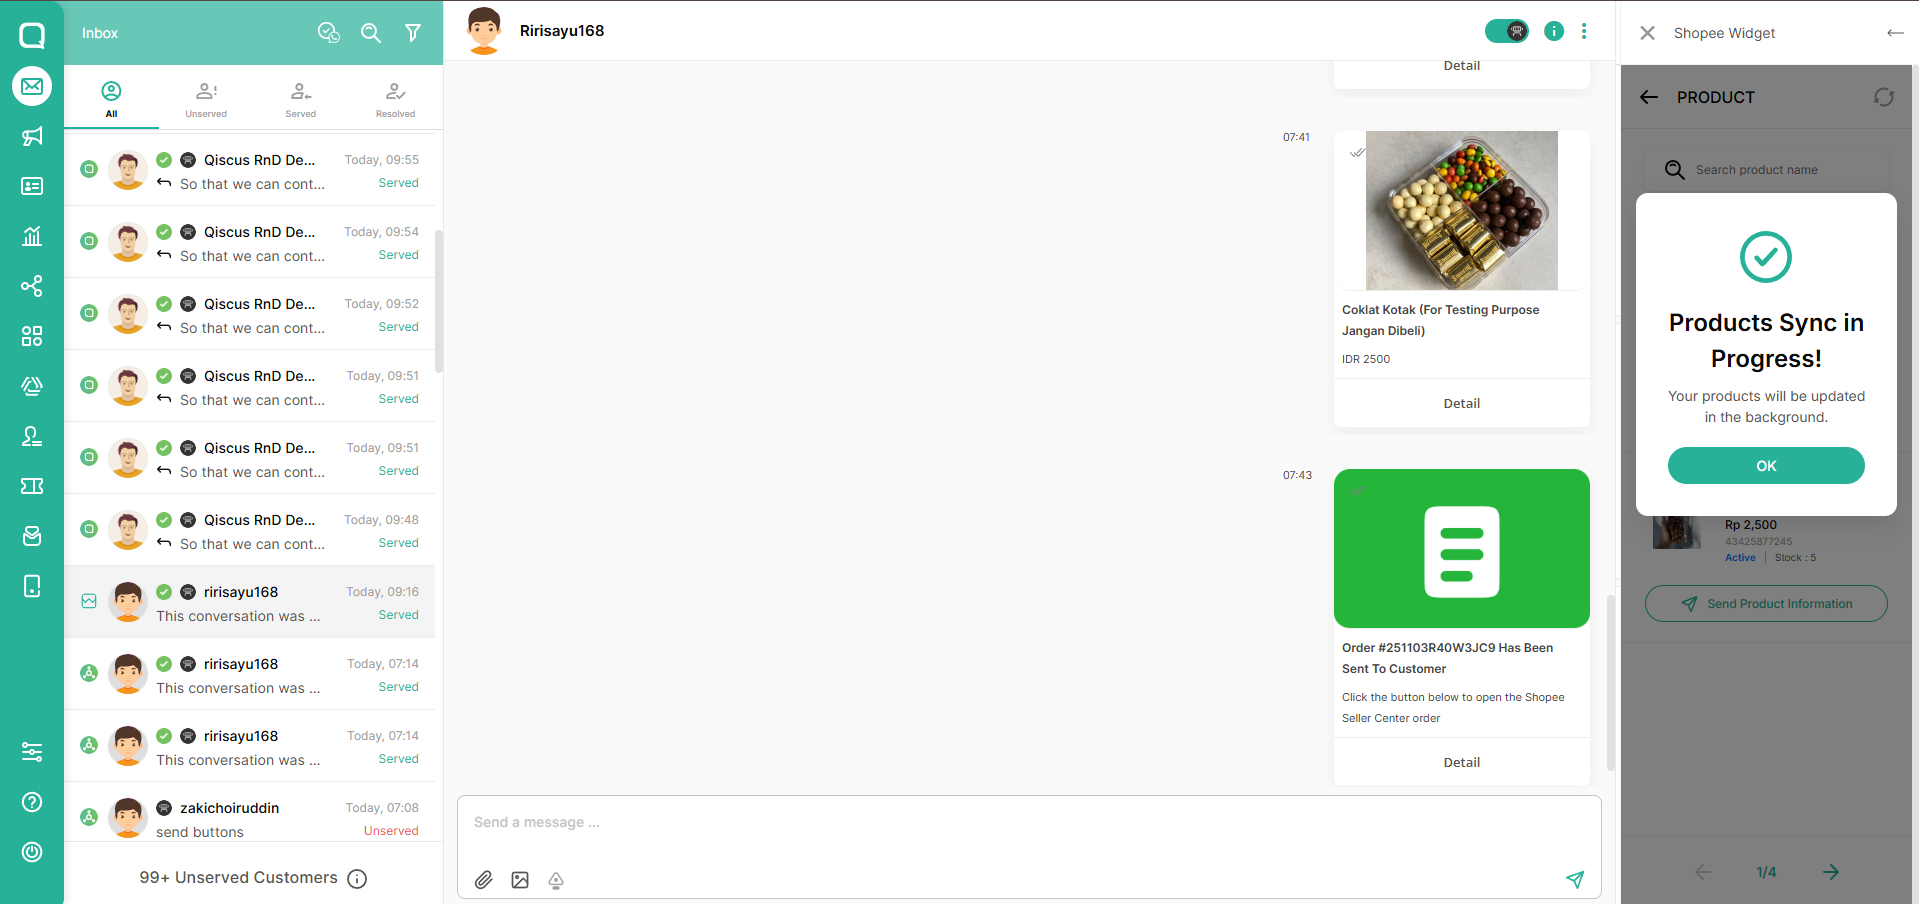
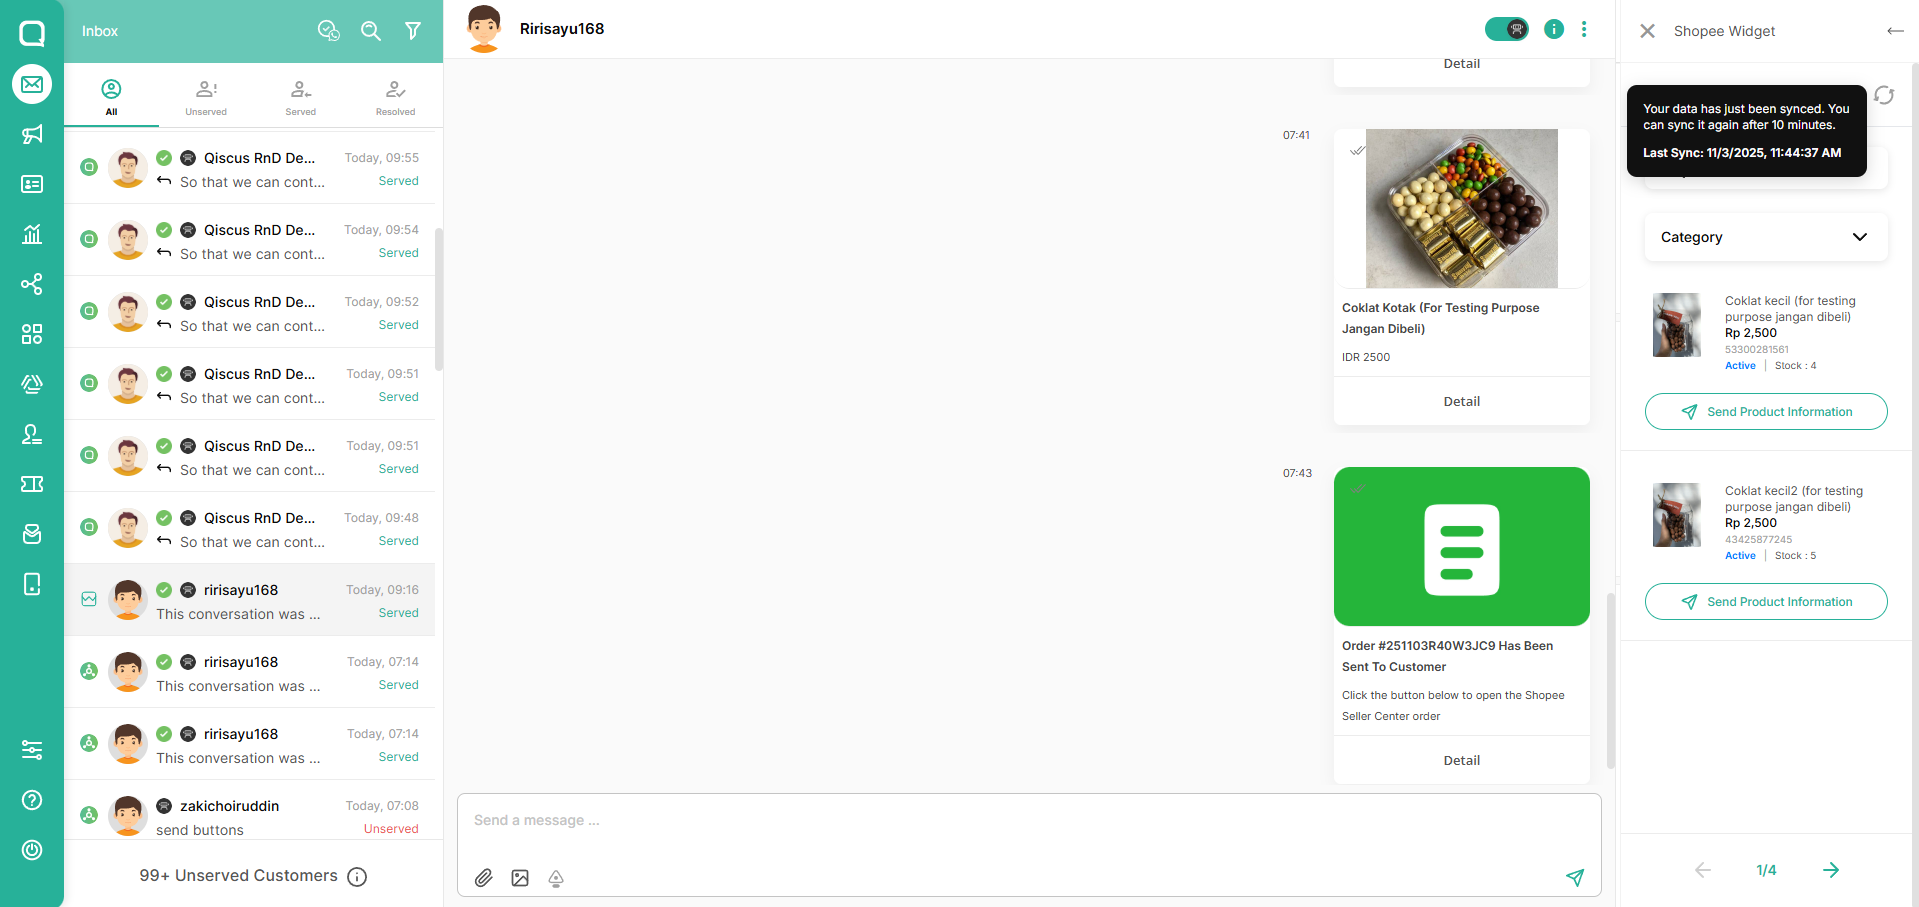
In the Product section, you can sync your products by clicking this button. Product synchronization can be performed once every 10 minutes to avoid API limitations from third-party platforms.
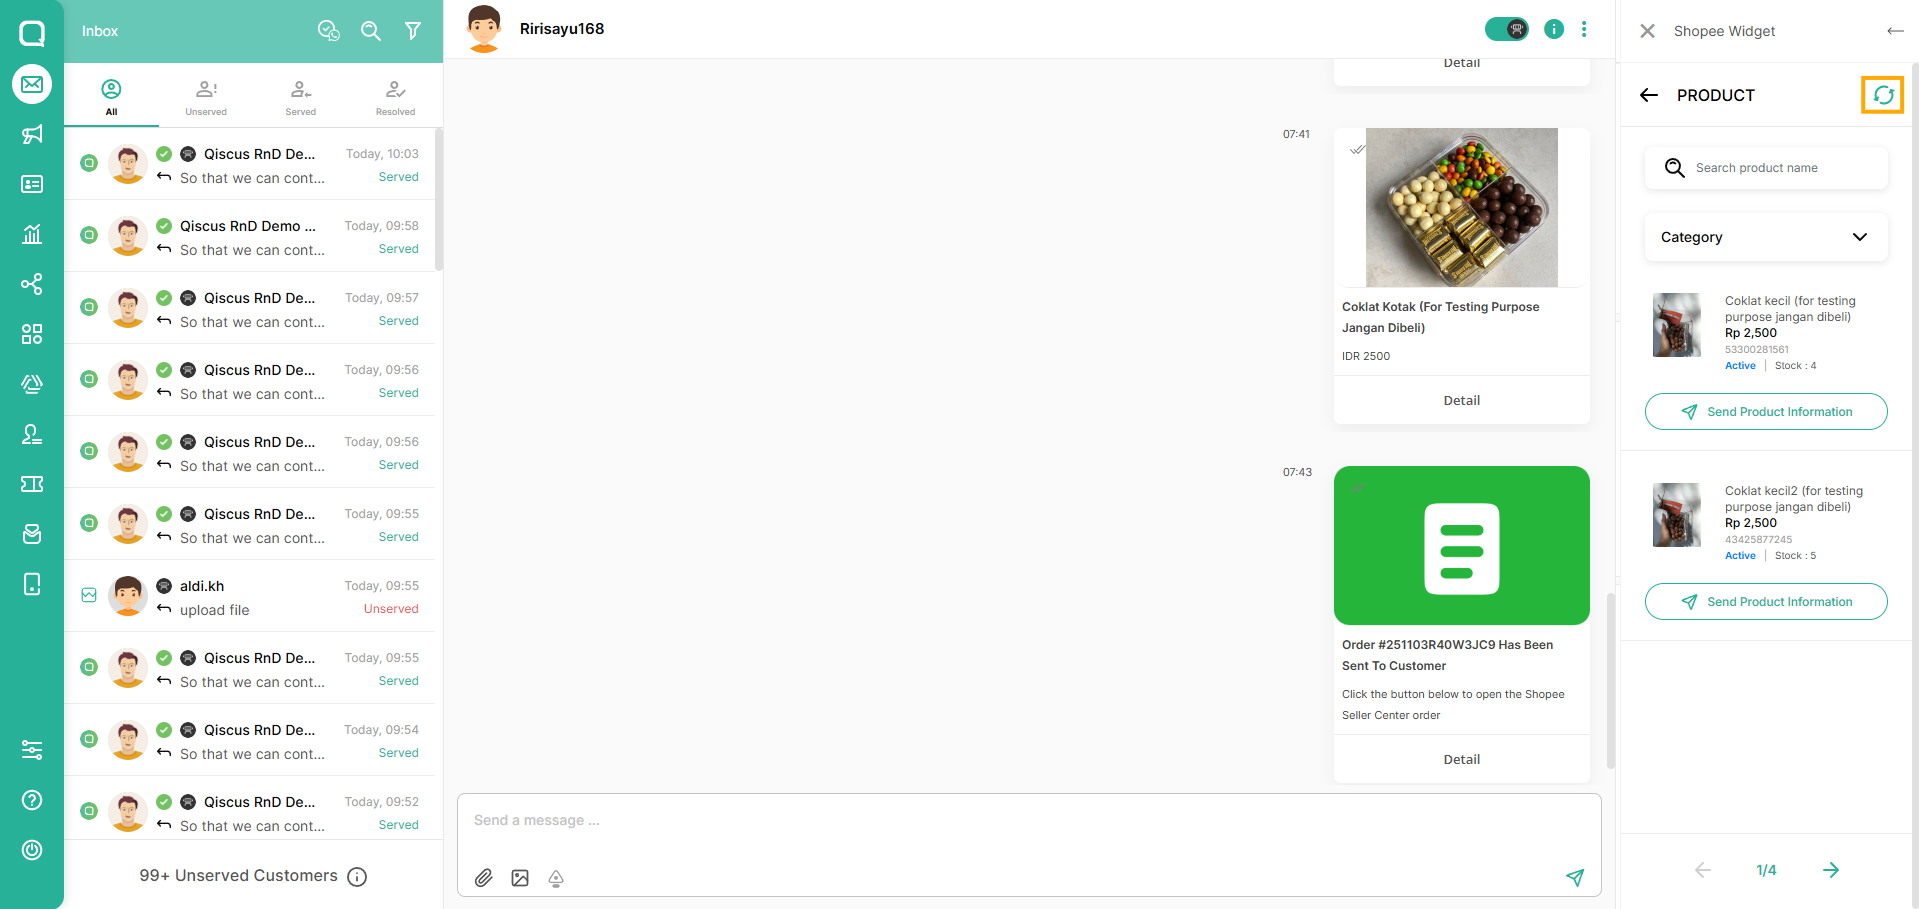
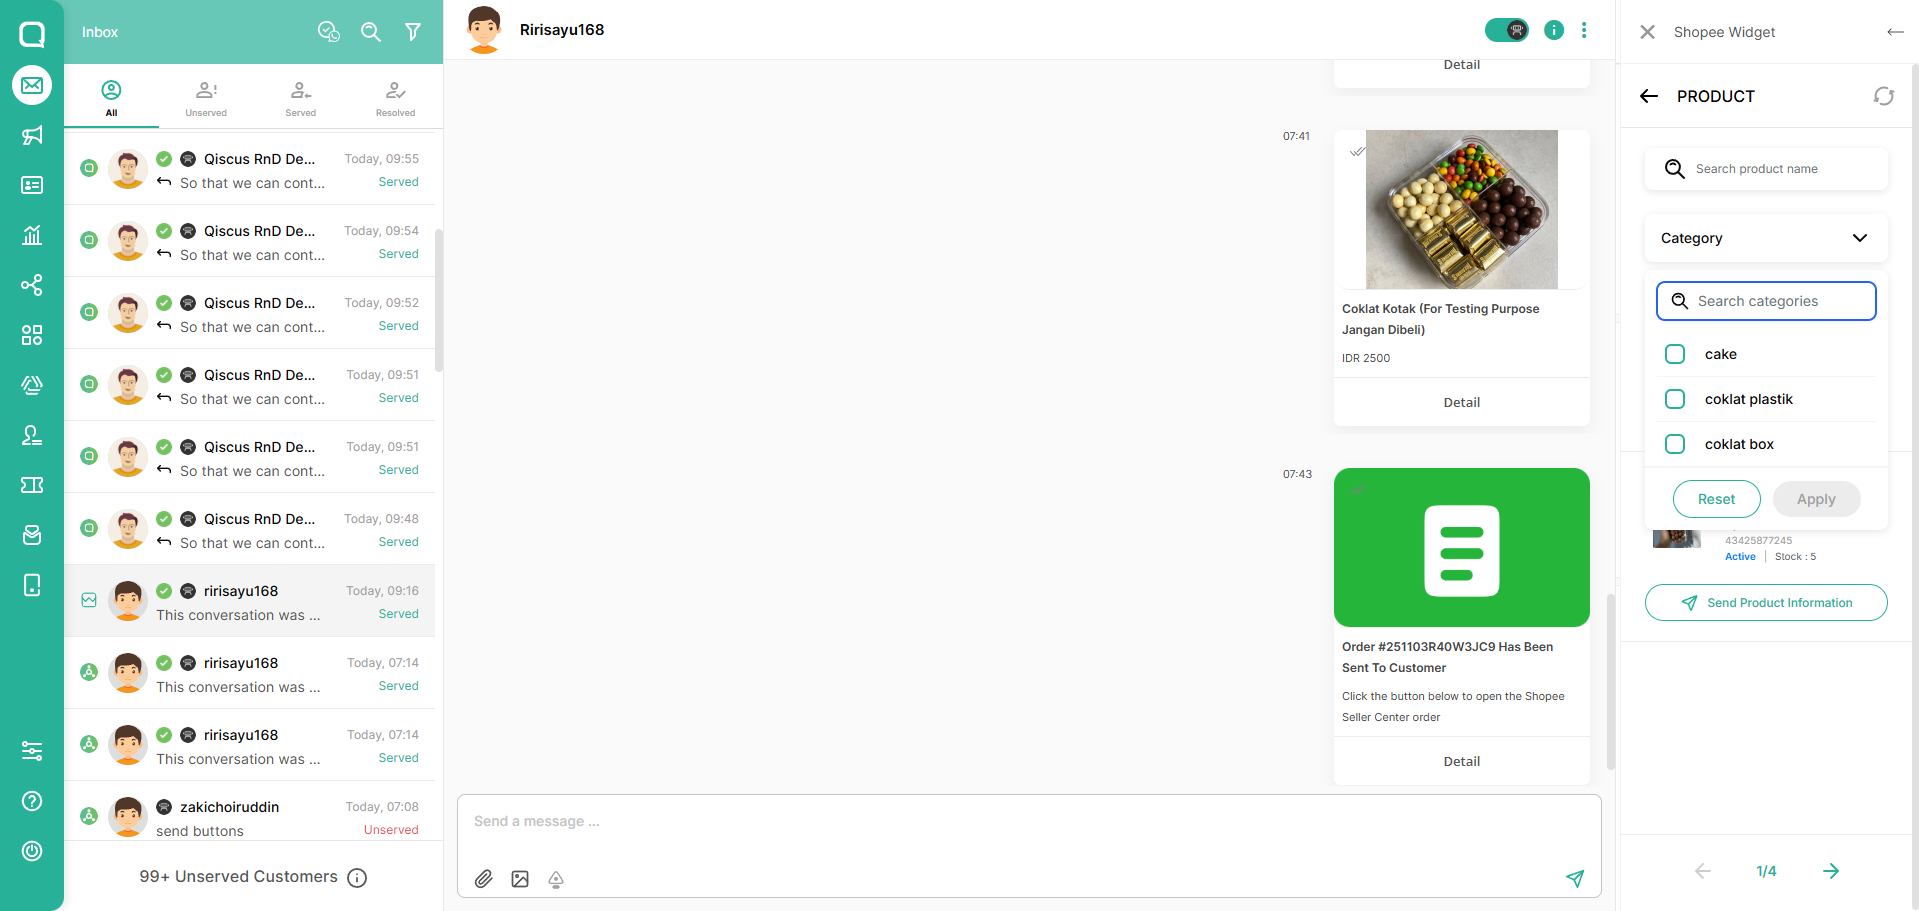
You also can Filter the Product by your shop category list
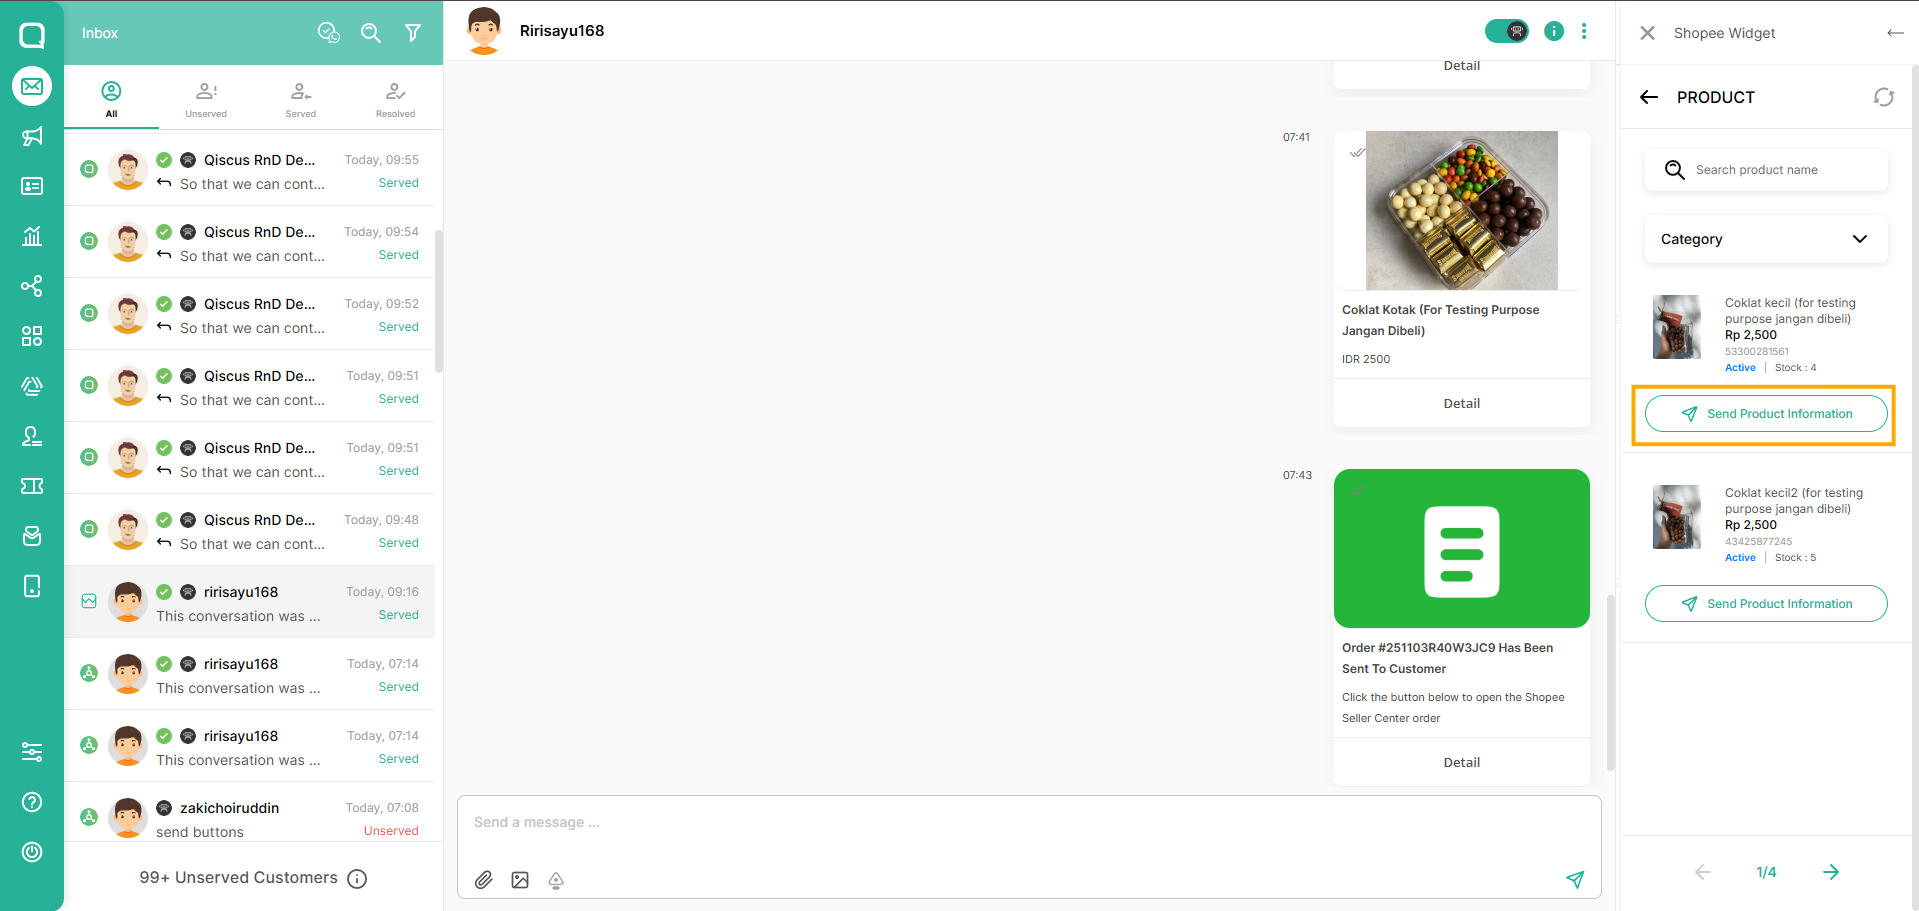
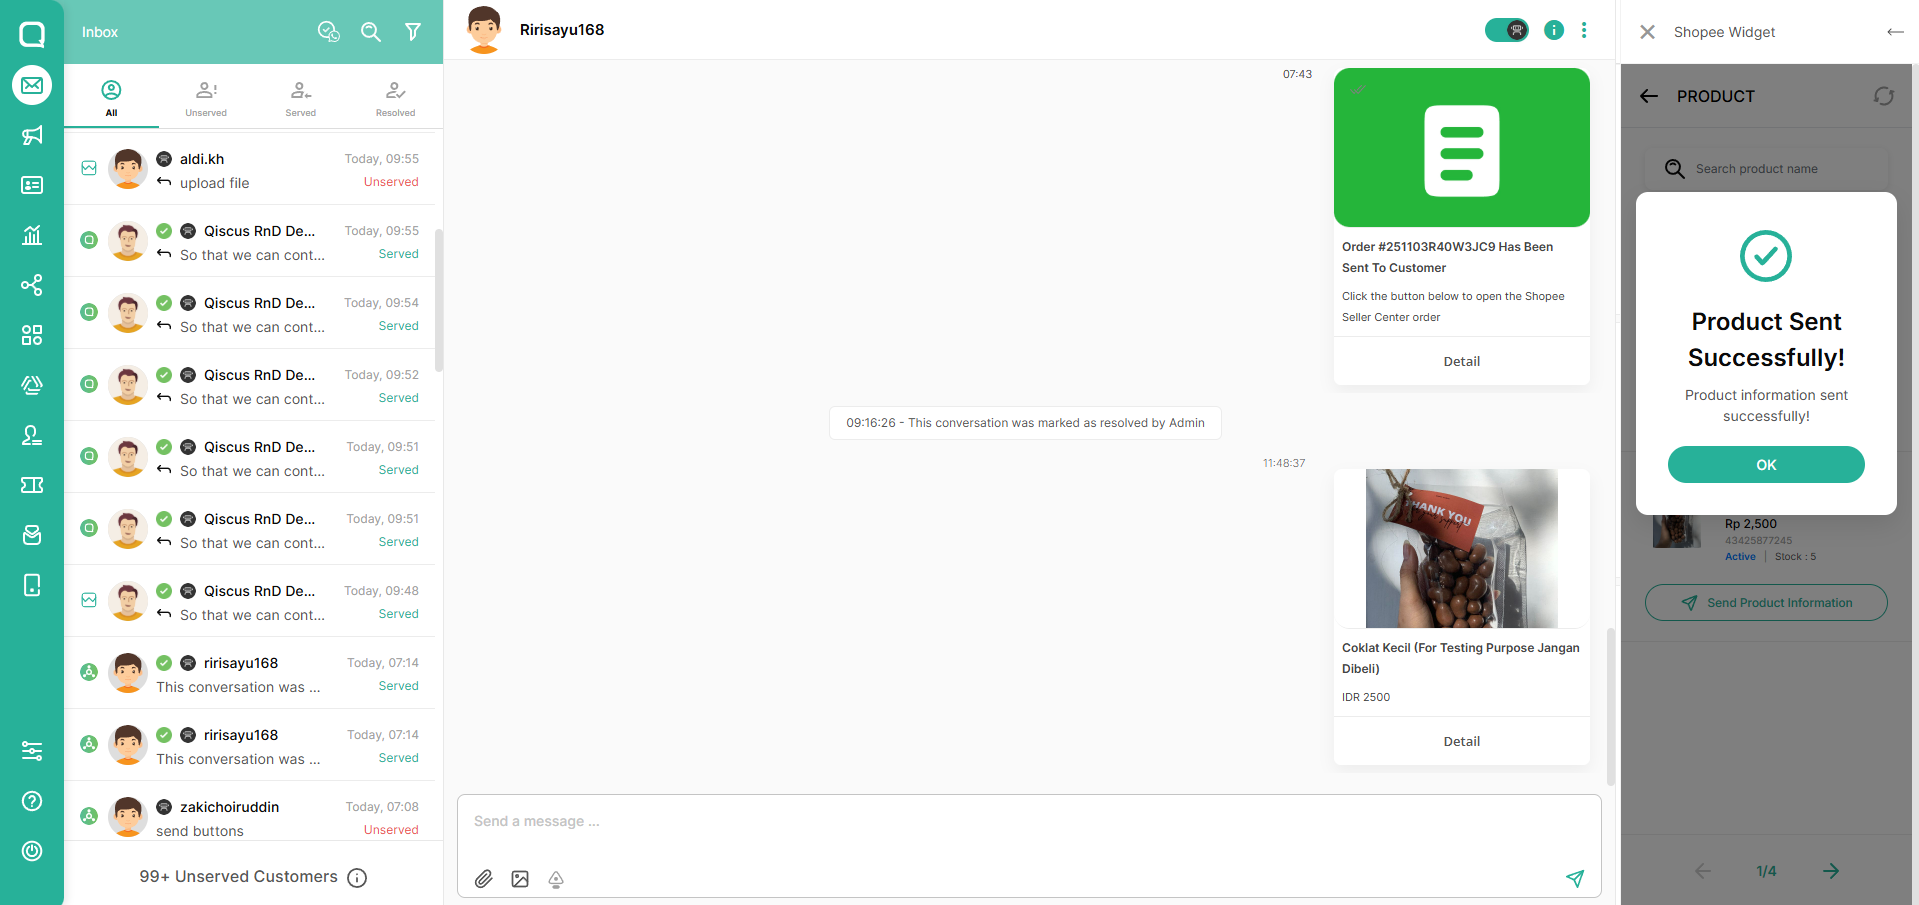
To send the product, select product you want to send to customer and click button "Send Product Information"
Send Order Message
The order list will be automatically filtered based on the customer.
Open a Shopee chat session in Omnichannel and click the App Center Widget button
Click Shopee button on the ACW
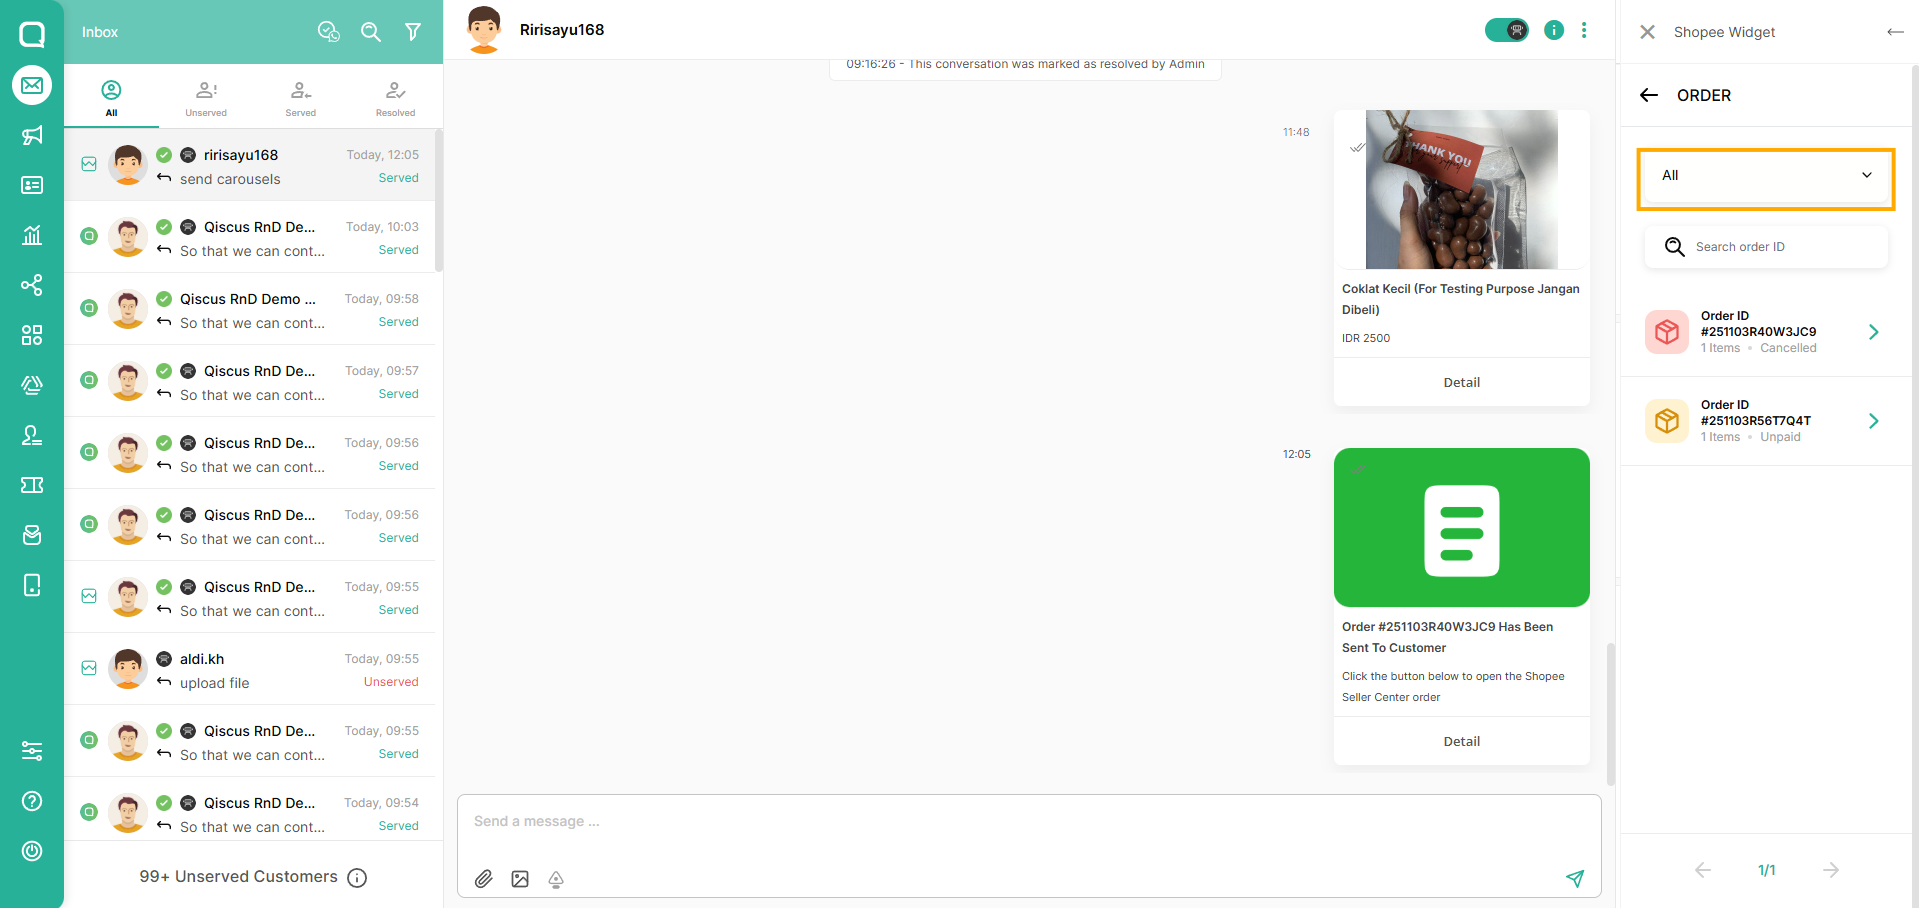
Select Order

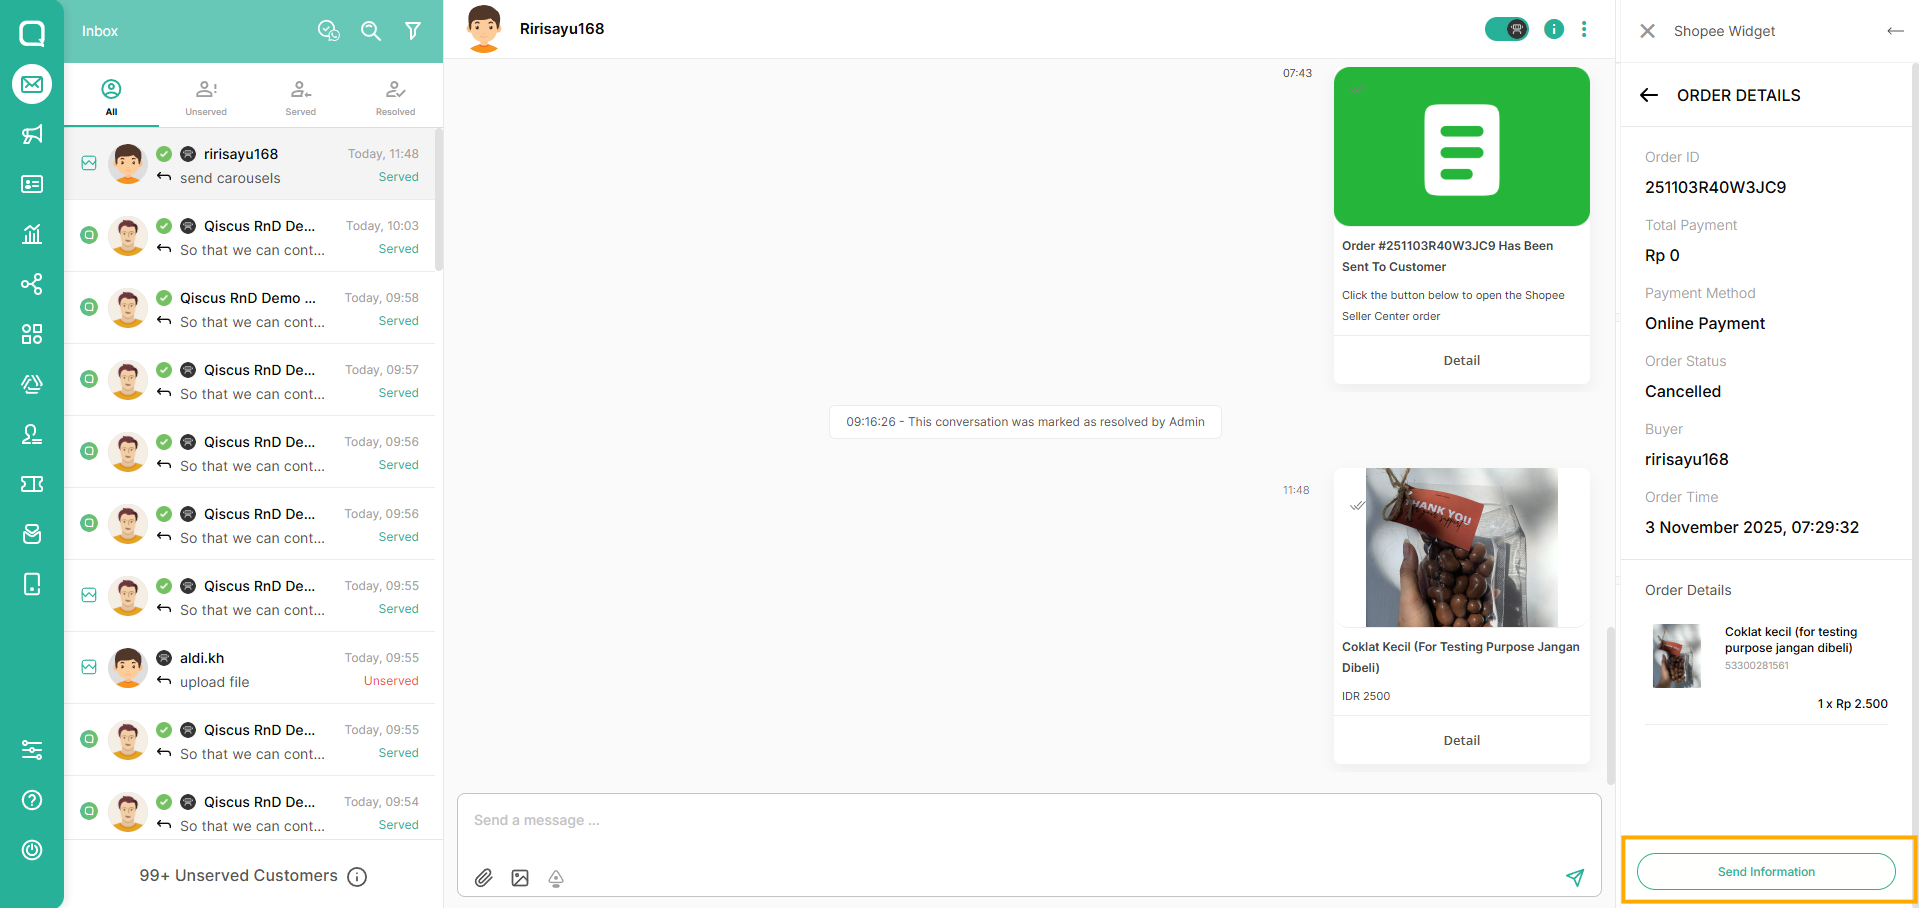
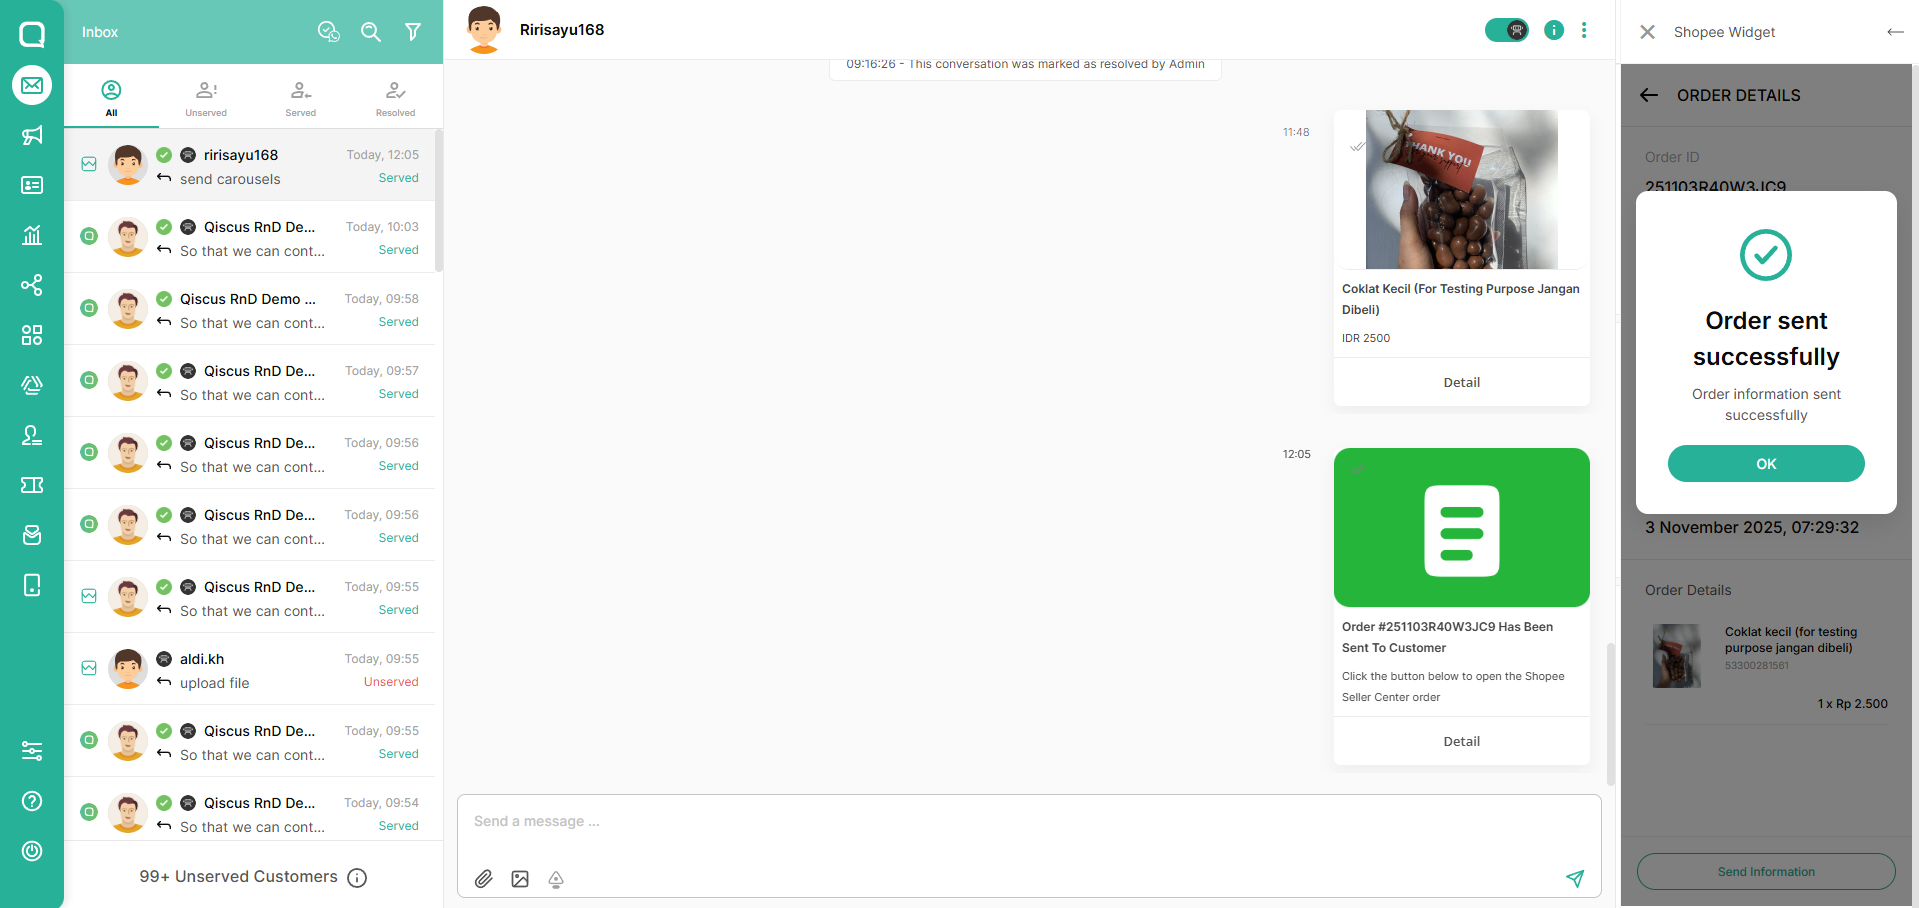
You can view and send the order details to customer by selecting an order.
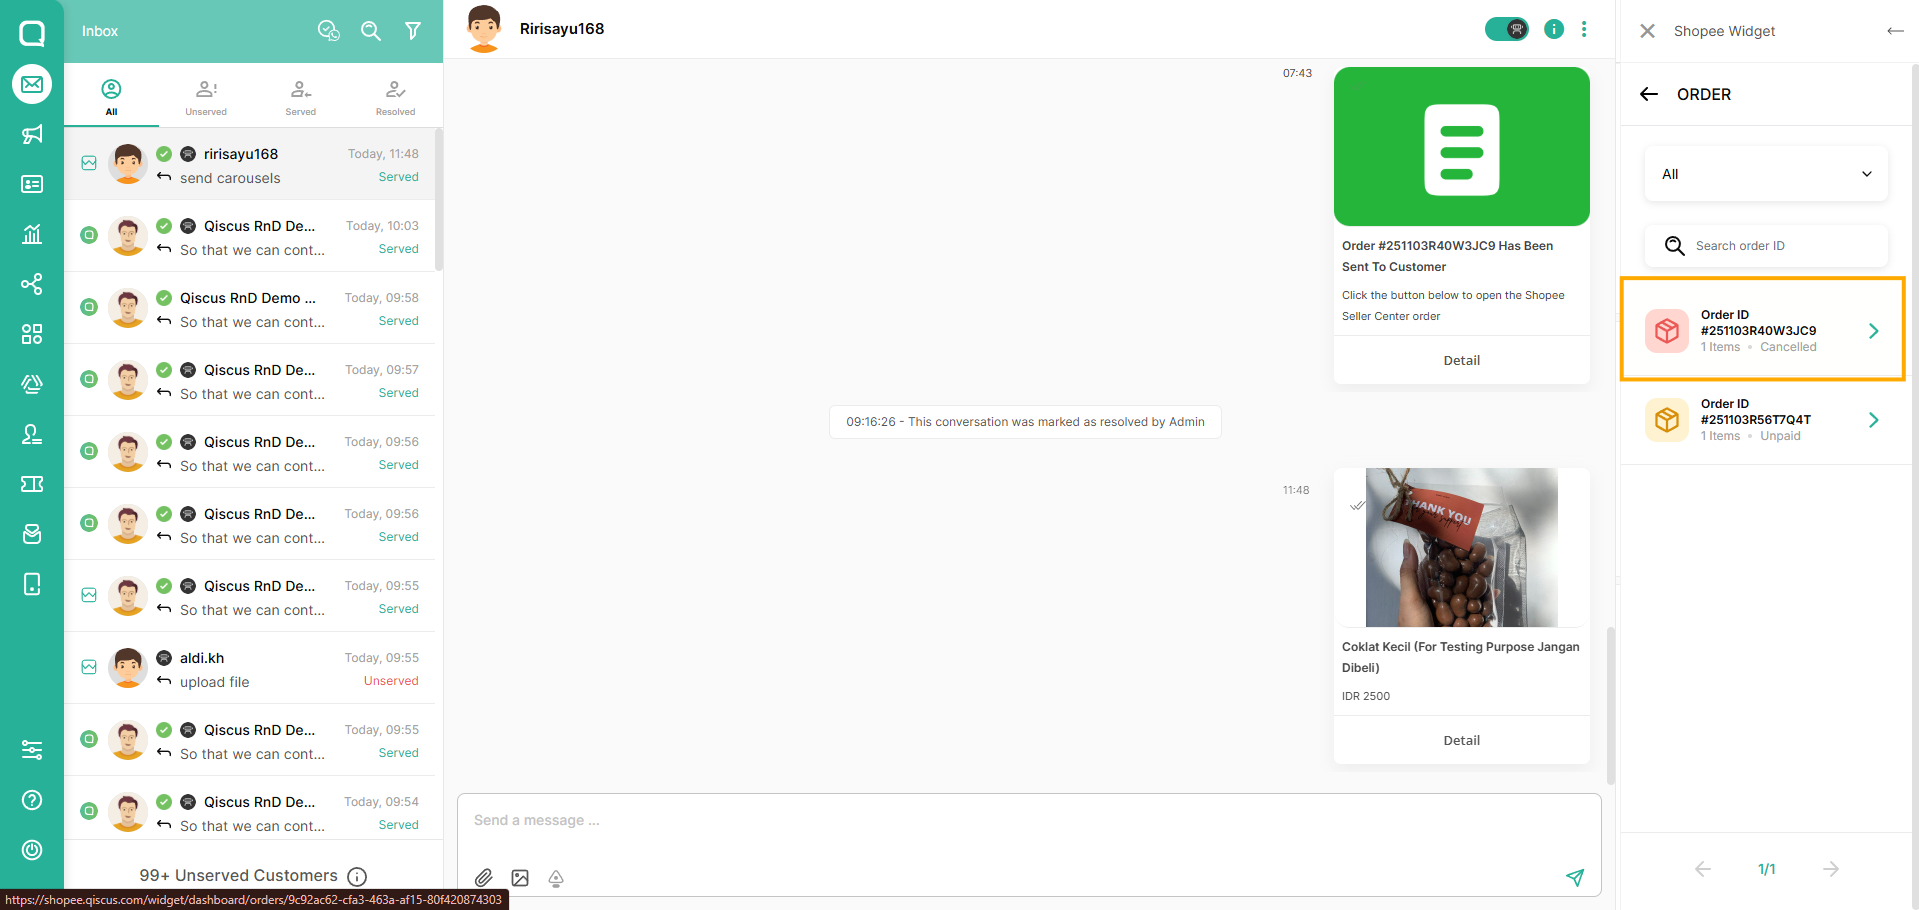
In the Order menu, you can also filter orders by their status.
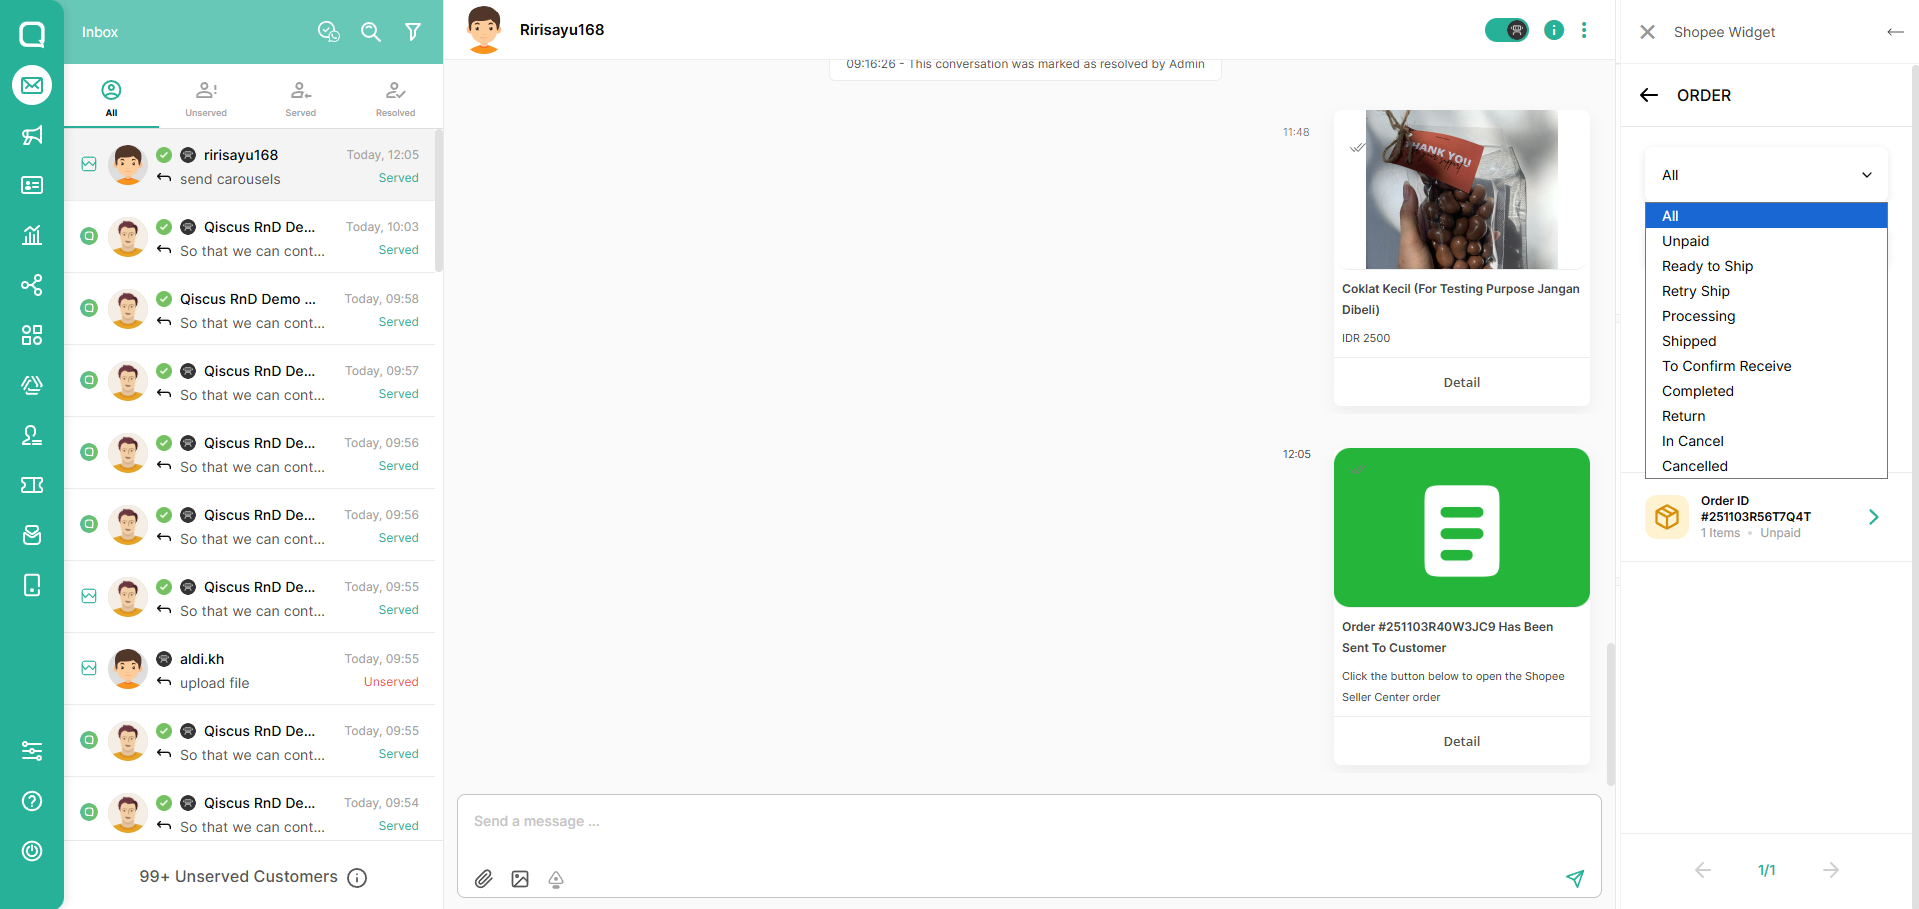
Here is the explanation for the order status
Status Name | Explanation |
|---|---|
UNPAID | Unpaid |
READY TO SHIP | Order status updates to READY TO SHIP after the order payment is verified. |
RETRY SHIP | If something goes wrong when the courier attempts to collect the parcel and needs to re-collect, order status will update to RETRY SHIP. |
IN CANCEL | In some cases, buyer cancellation requests need the seller’s approval — the order status will enter IN CANCEL. If the seller rejects, the order goes back to the previous status. If the seller approves, the order updates to CANCELLED. |
CANCELLED | Order status updates directly to CANCELLED when buyer or seller cancels the order. Buyer can cancel the order without seller approval based on different market policies before order status updates to SHIPPED. |
PROCESSED | After the seller arranges shipment, order status updates to PROCESSED, even if the tracking number is not generated yet. |
SHIPPED | After the seller arranges shipment and the courier scans the shipping document, order status updates to SHIPPED. If the package is lost during delivery, Shopee will change the order status to CANCELLED. |
RETURN | Order status updates to TO RETURN after the buyer requests to return the product. After the return is confirmed by the seller, status becomes COMPLETED. If the return is disputed, there will be arbitration. |
TO CONFIRM RECEIVE | Shipped |
COMPLETED | Completed |
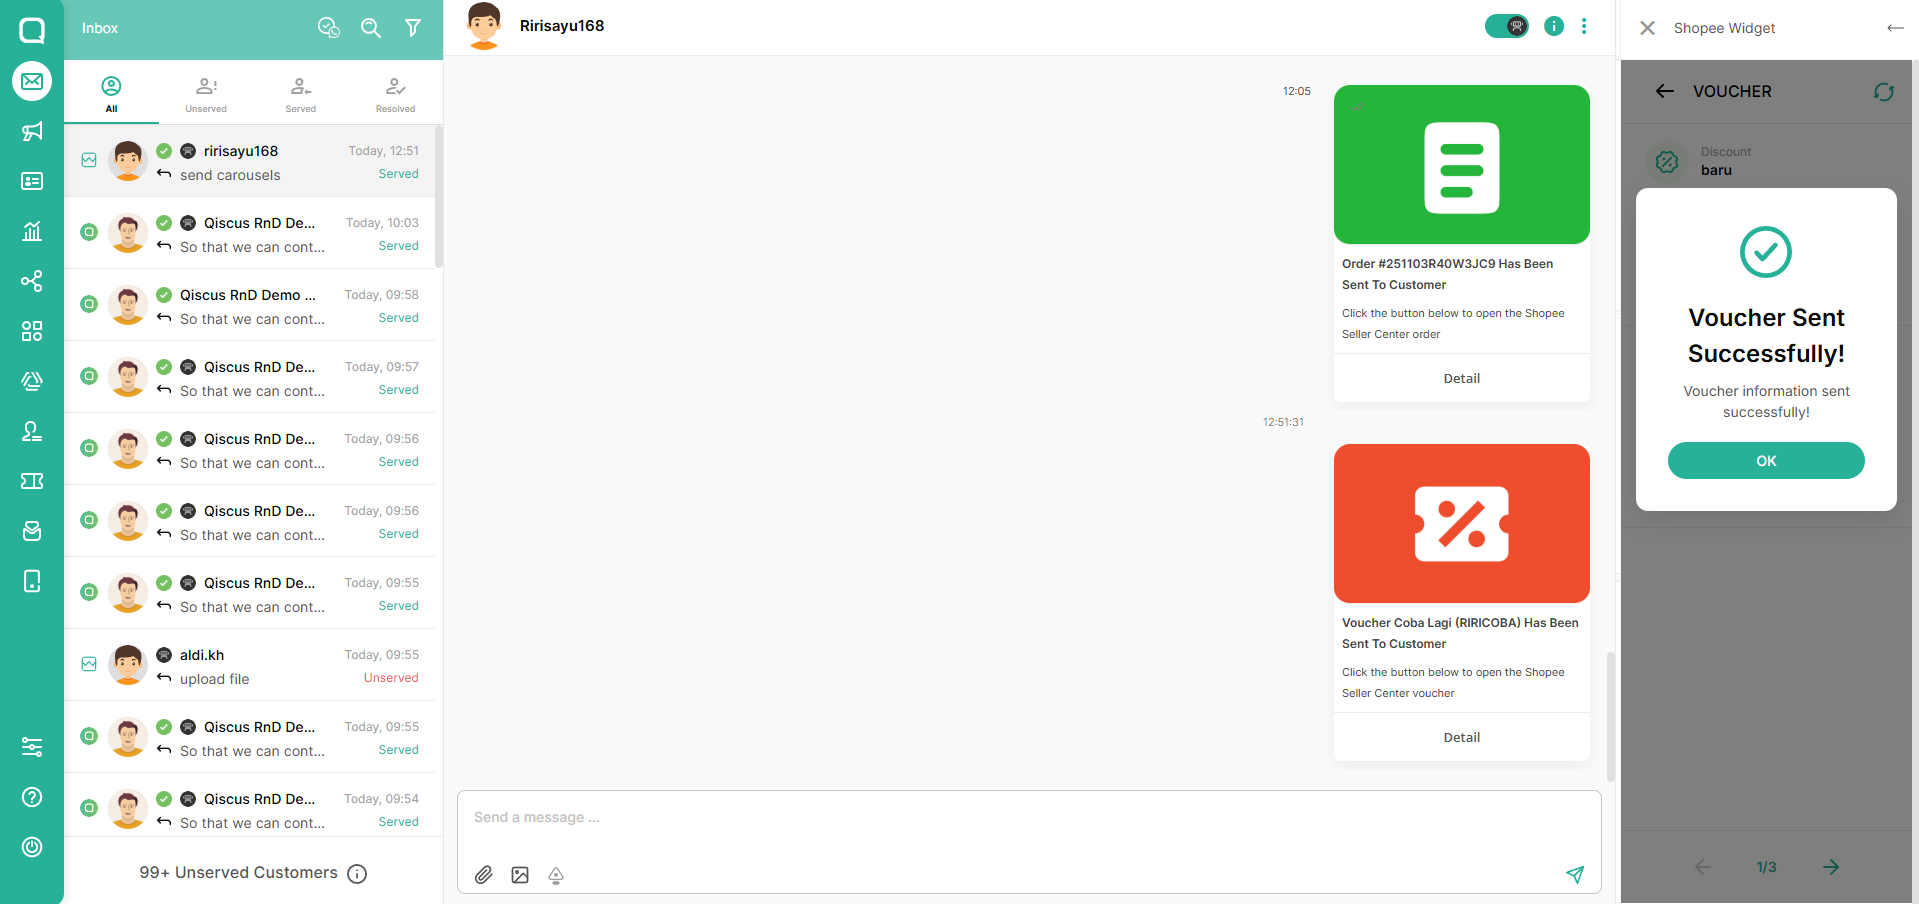
Send Voucher Message
The voucher list will display the vouchers from the store that the customer is currently chatting with.
Open a Shopee chat session in Omnichannel and click the App Center Widget button
Click Shopee button on the ACW

Select Voucher
Click "Kirim Voucher" to send it to customer

In the Voucher section, you can sync your products by clicking this button.
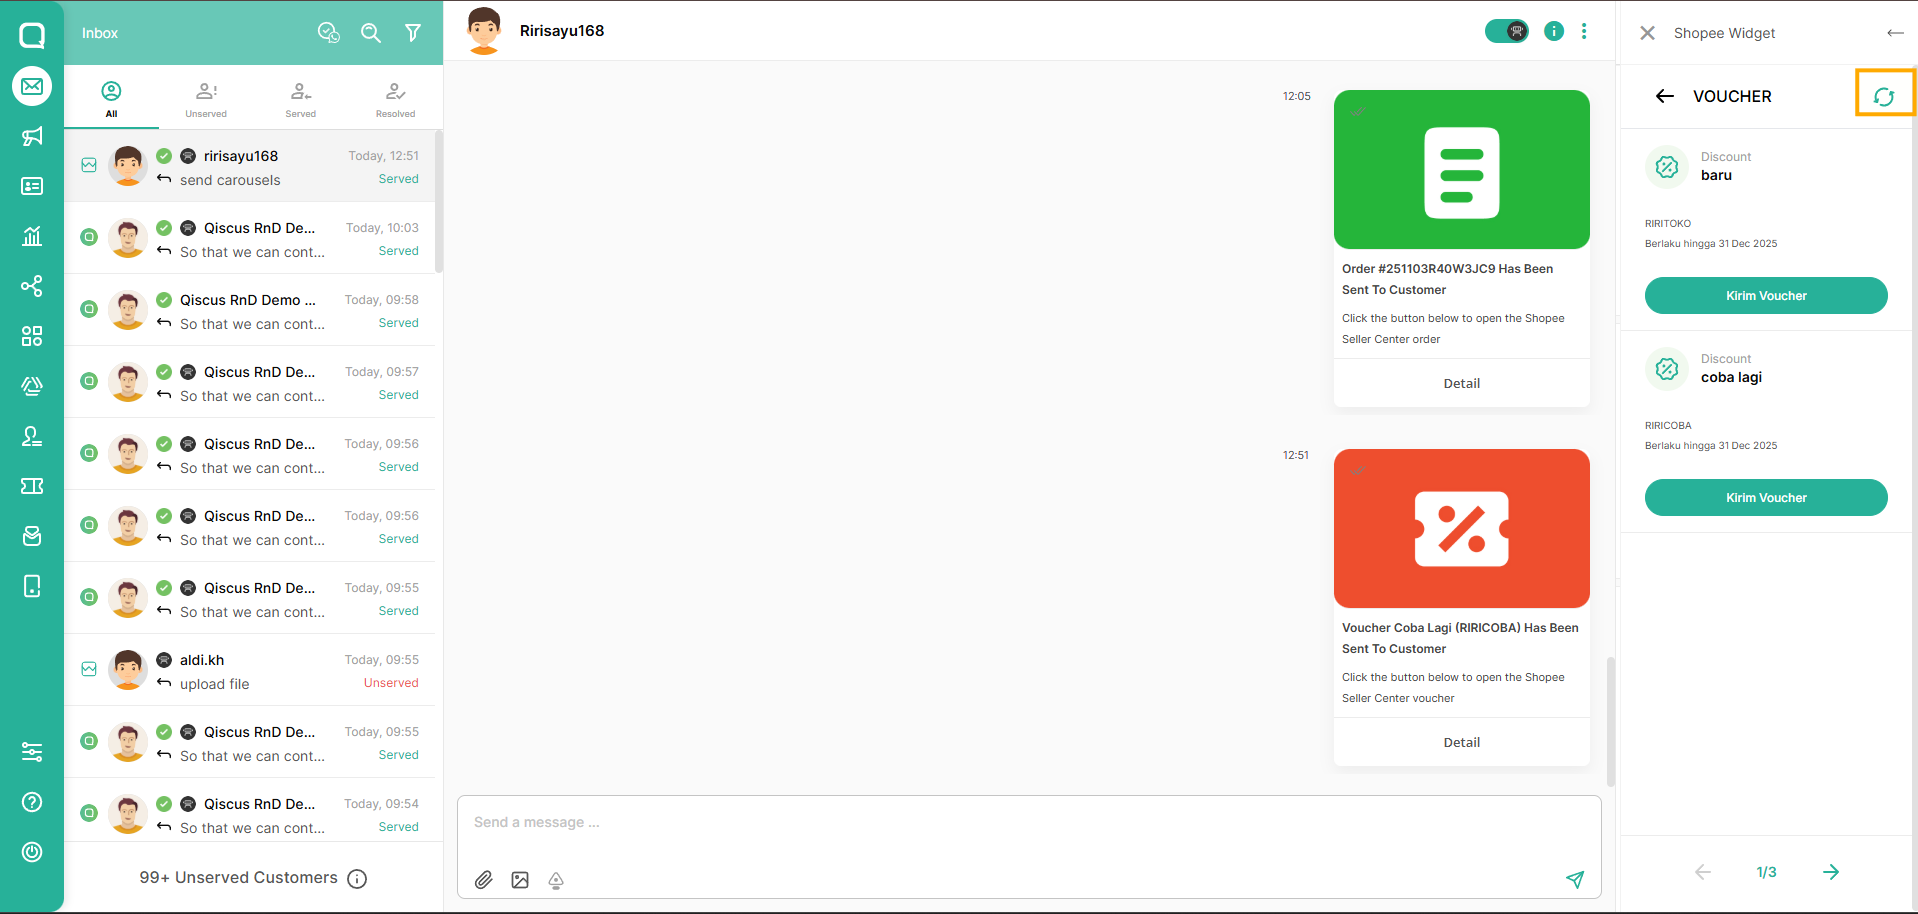
Voucher synchronization can be performed once every 10 minutes to avoid API limitations from third-party platforms.