Qiscus App Center has an Add-On that allows you to receive and reply directly to every user’s review received to your app that is listed on Google Play Store, via Qiscus Omnichannel dashboard. This add-on enables to directly communicate with their users and resolve any concerns, suggestions, or complaints that they may have. By responding to user's feedback, you can showing your commitment to providing quality customer service, and improving the app based on their feedback.
Activation
Follow the steps on Getting Started pages and try to activate Play Store Review Add-on.
Set Up Play Store Review integration with Qiscus App Center
There will be several stages that must be completed:
I. Get the application package id
Application package id is the identifier of the application that you have on the Google Play Store side. To be able to get it, you can simply ask your android developer or visit your application page on Google Play Store.
For example, you can look at the following play store apps URL, the com.qiscus.qismo.chat is your package id’ id.
https://play.google.com/store/apps/details?id=com.qiscus.qismo.chat
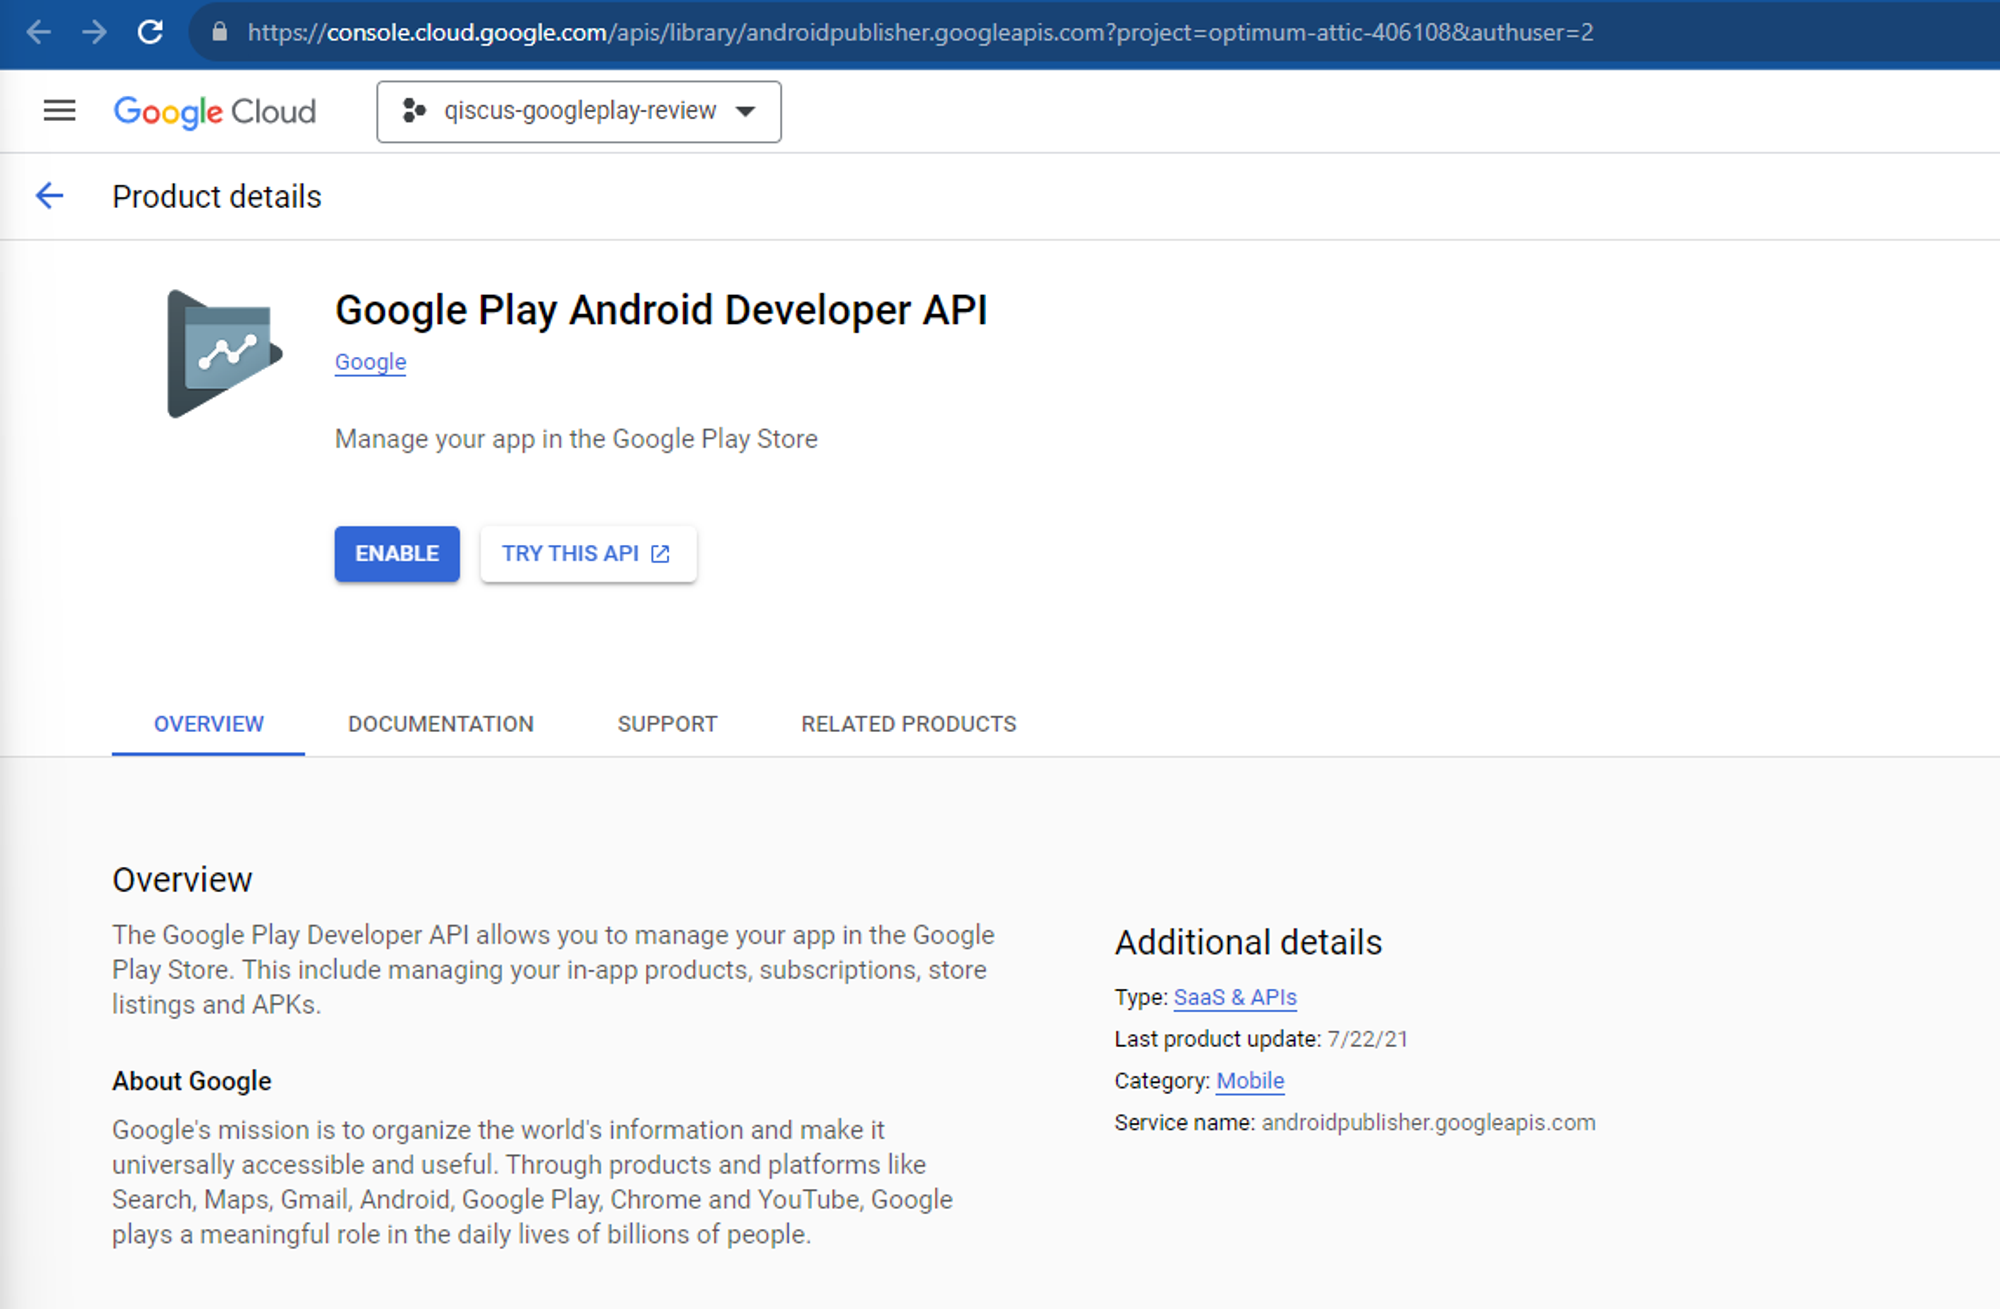
II. Authorize the service account in Google Play Console
- Visit the Google Cloud Console page then create a new project or select an existing one
- In the Cloud Console, go to the "APIs & Services" > "Library" section and search for "Google Play Console API." Alternatively, you can use this Google Play Developer API link.
- Enable the Google Play Android Developer API by clicking the “Enable” button.
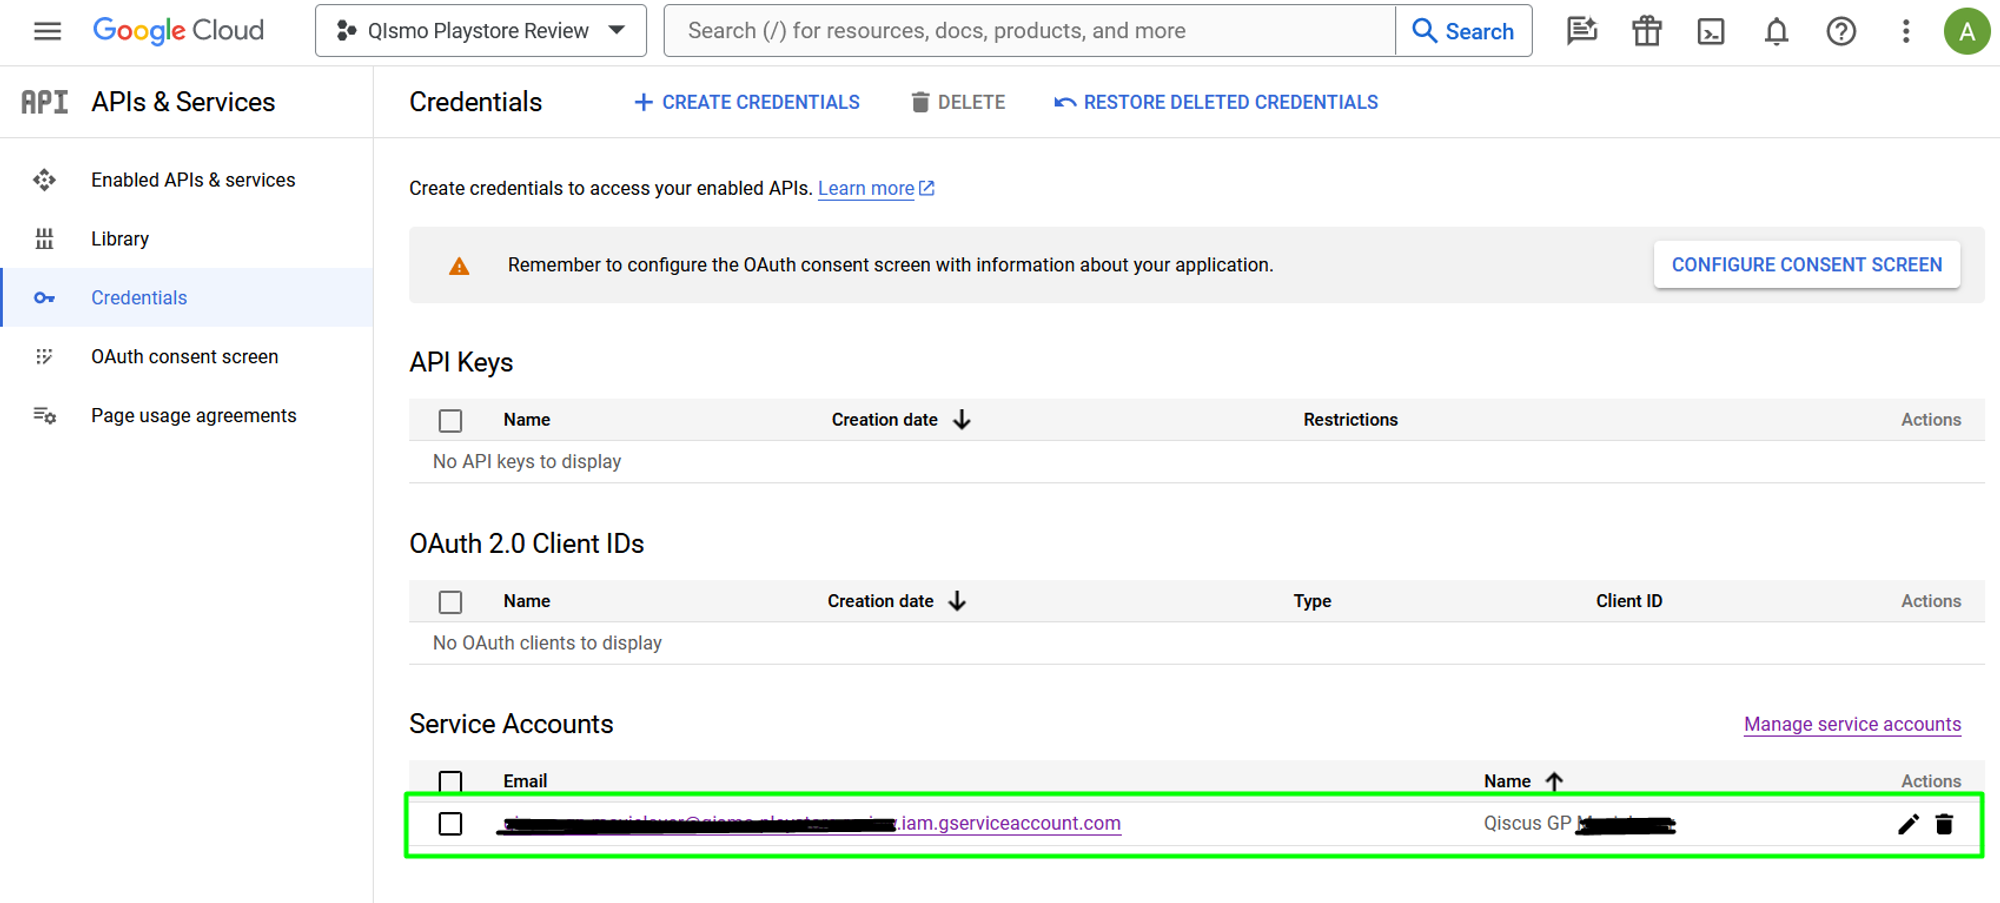
- Navigate to the Credential page by clicking the “hamburger” button > selecting "APIs & Services" > then "Credentials."

- Create a service account by clicking the “Create Credentials” button > select “Service Account.”

- Fill the Form and click “Done” button

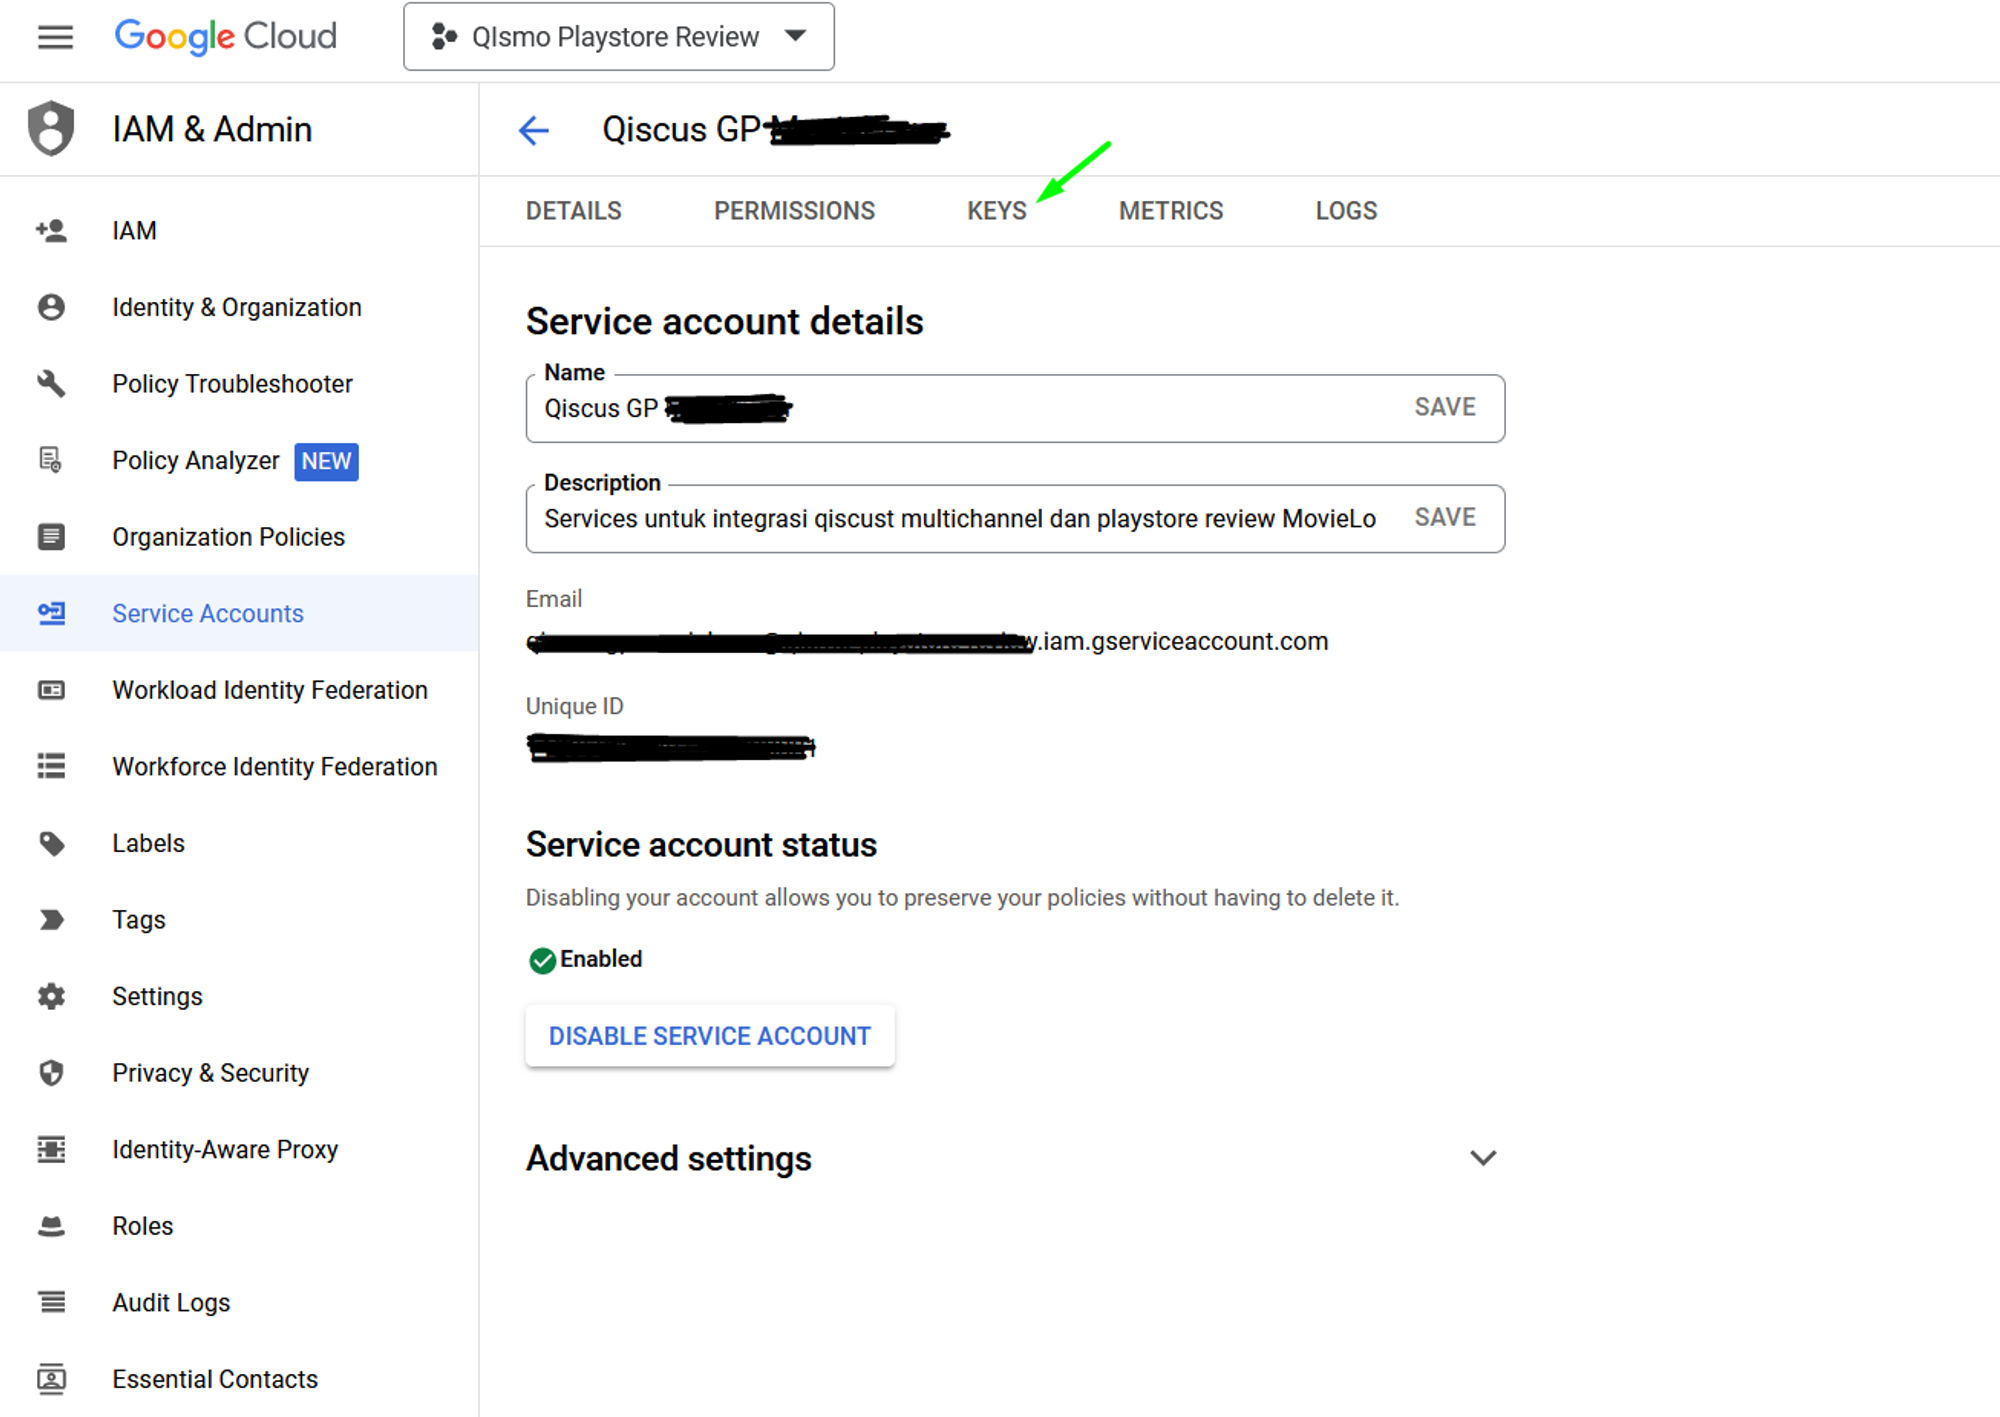
- The created service account will appear in the “Service Accounts” section. Click the “Created service account email” to open the service account pages.
- Once on the created service account details page, navigate to the “Keys” tab.
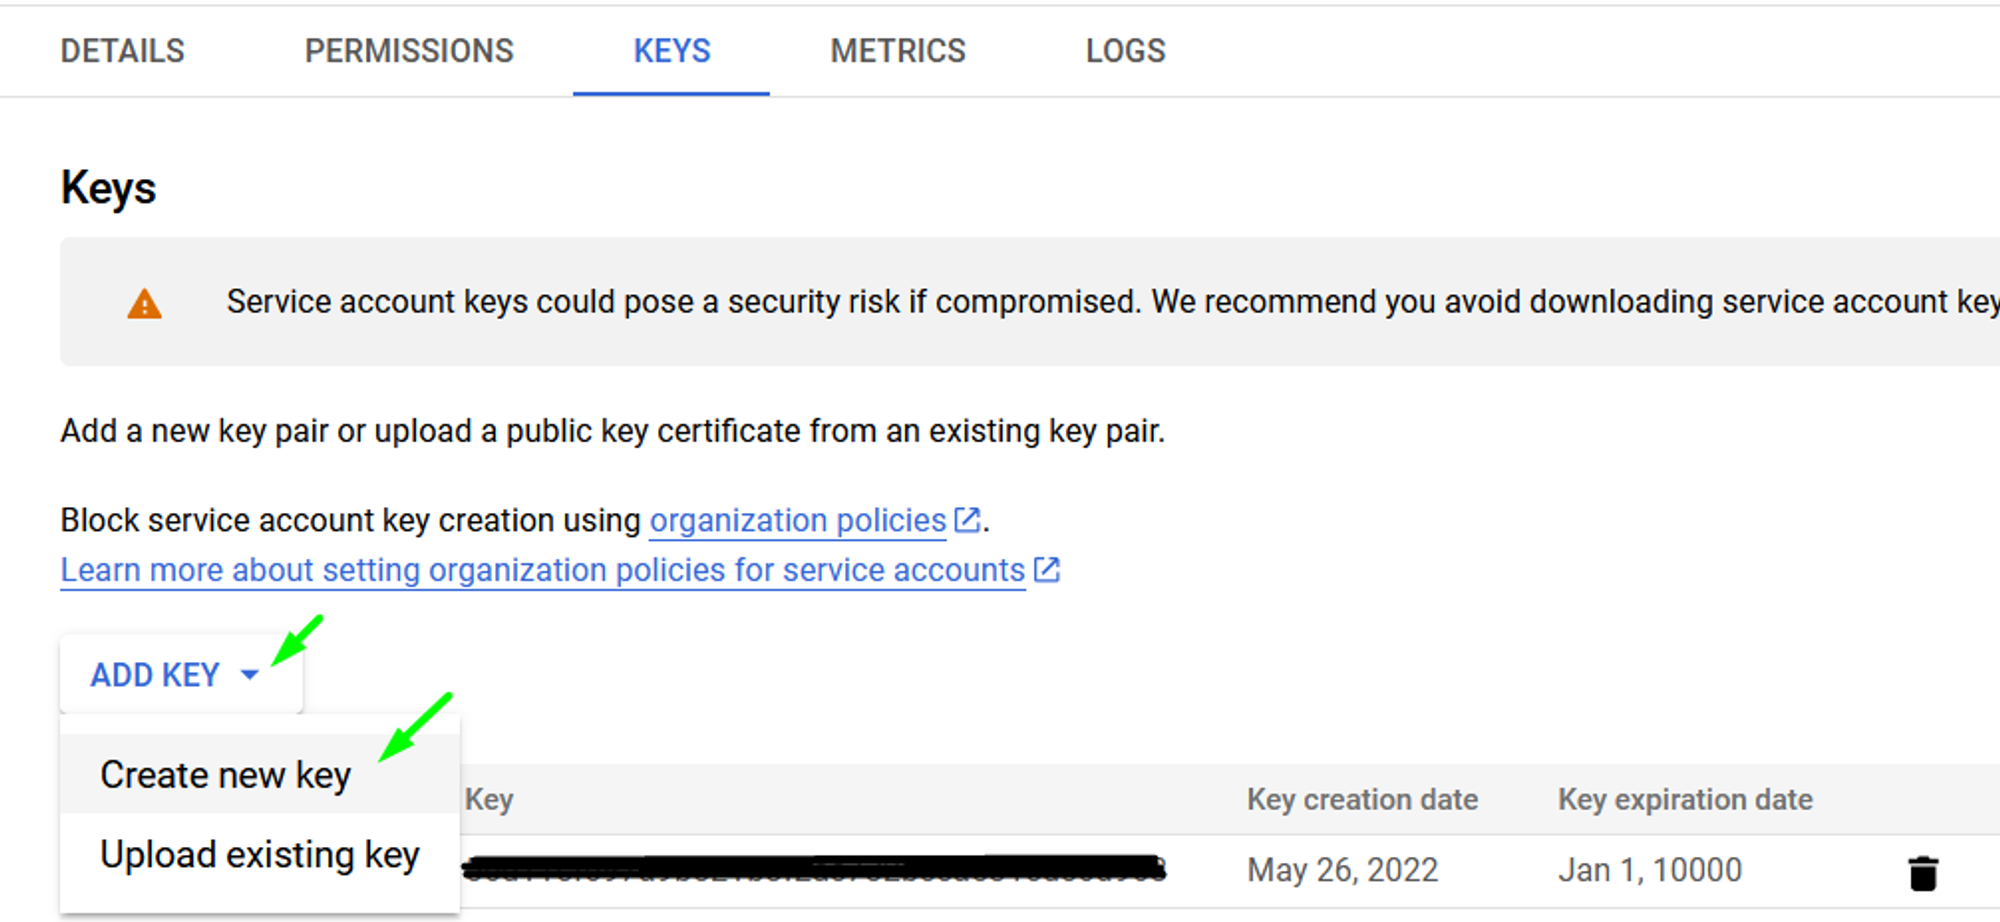
- Click the “Add key” button and select “Create new key."
- Select JSON and create the key by click the "Create" button.
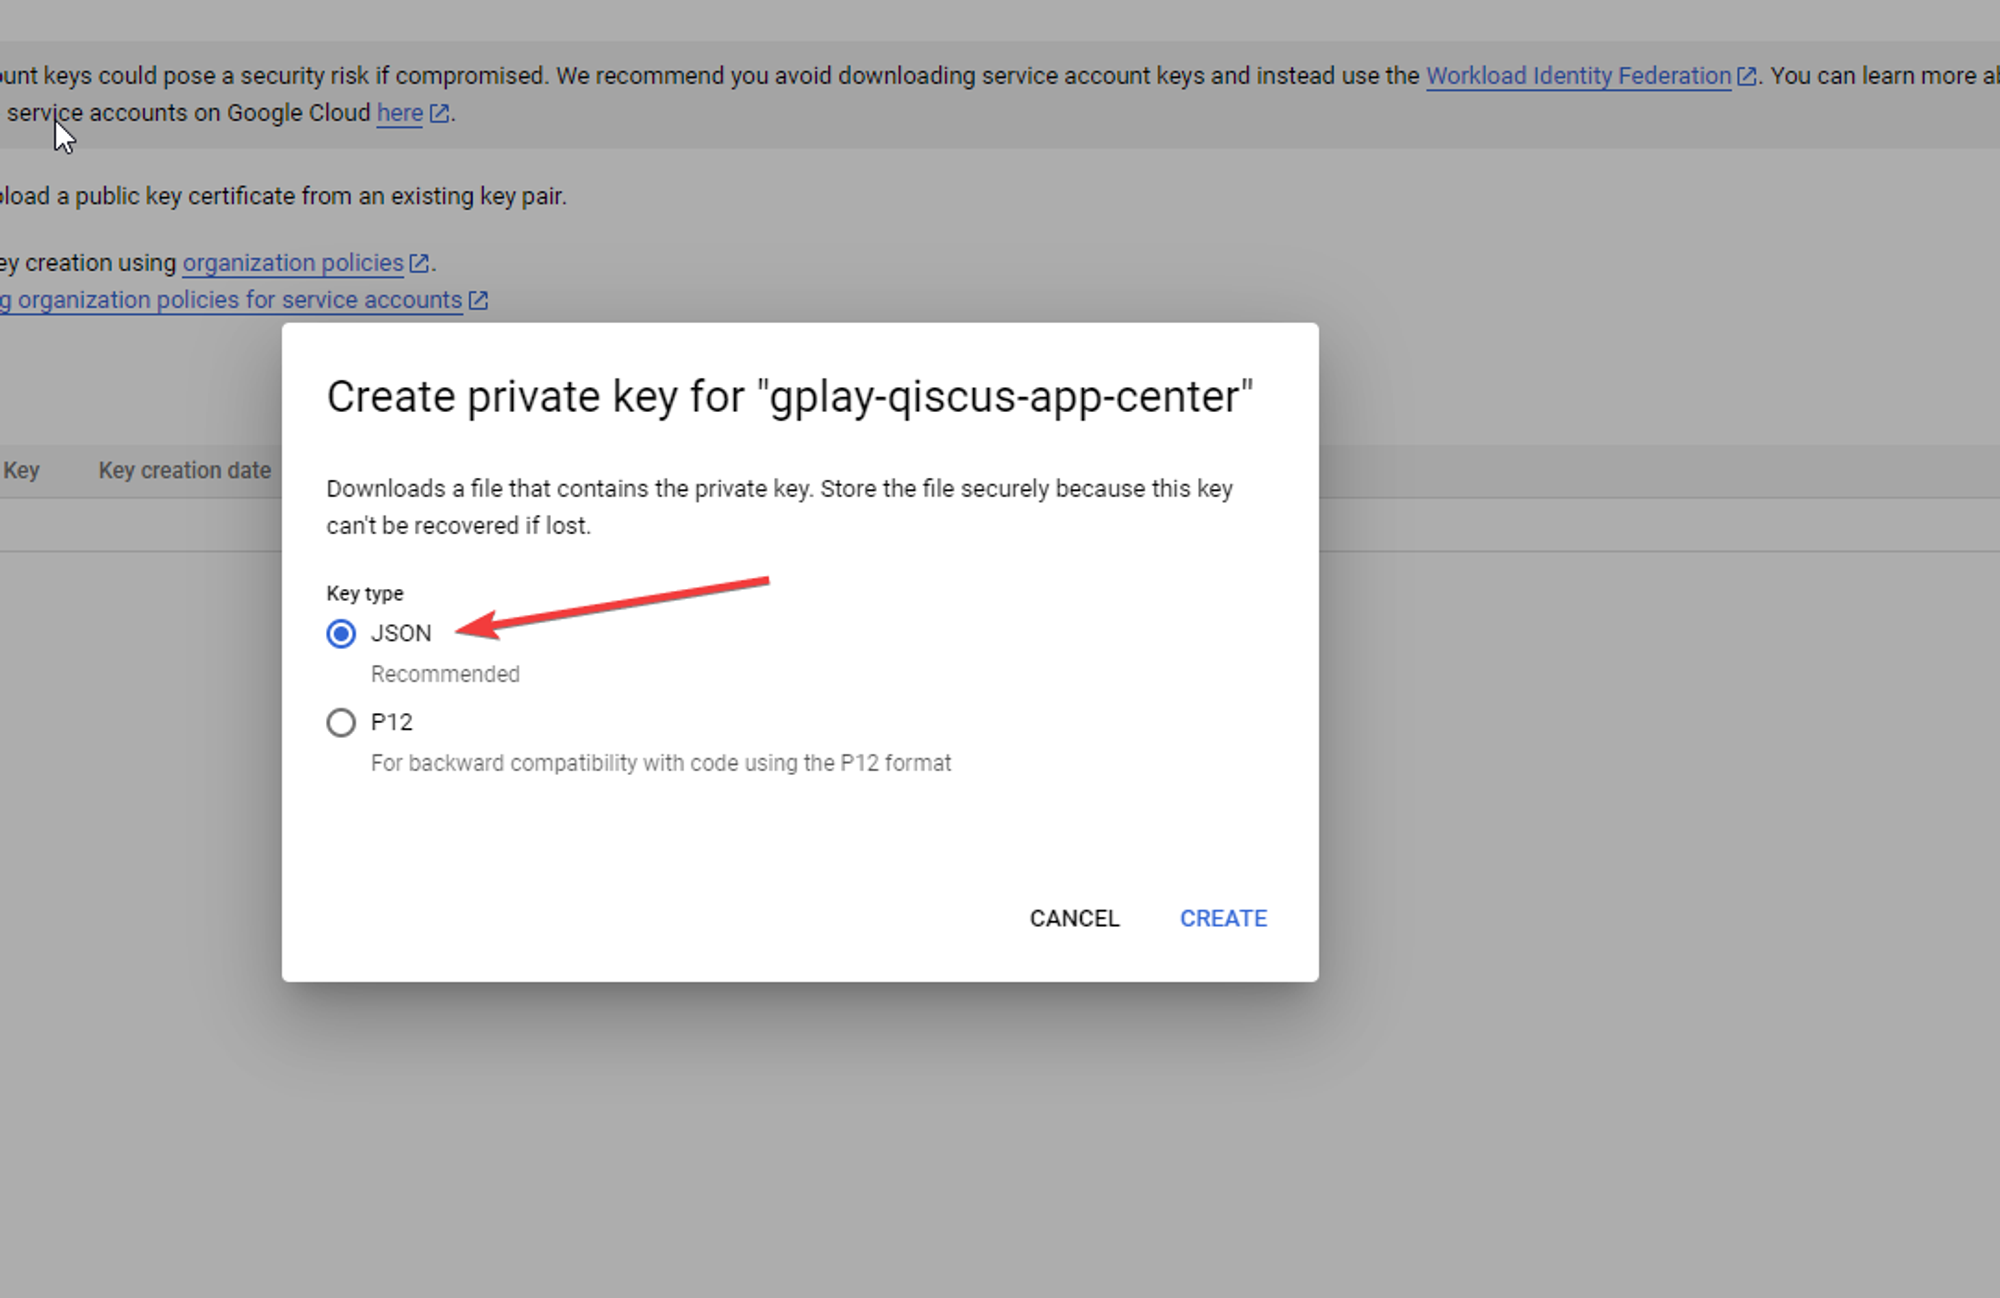
- Once created successfully, a file with the *.JSON extension will be downloaded and will be used in the next step.
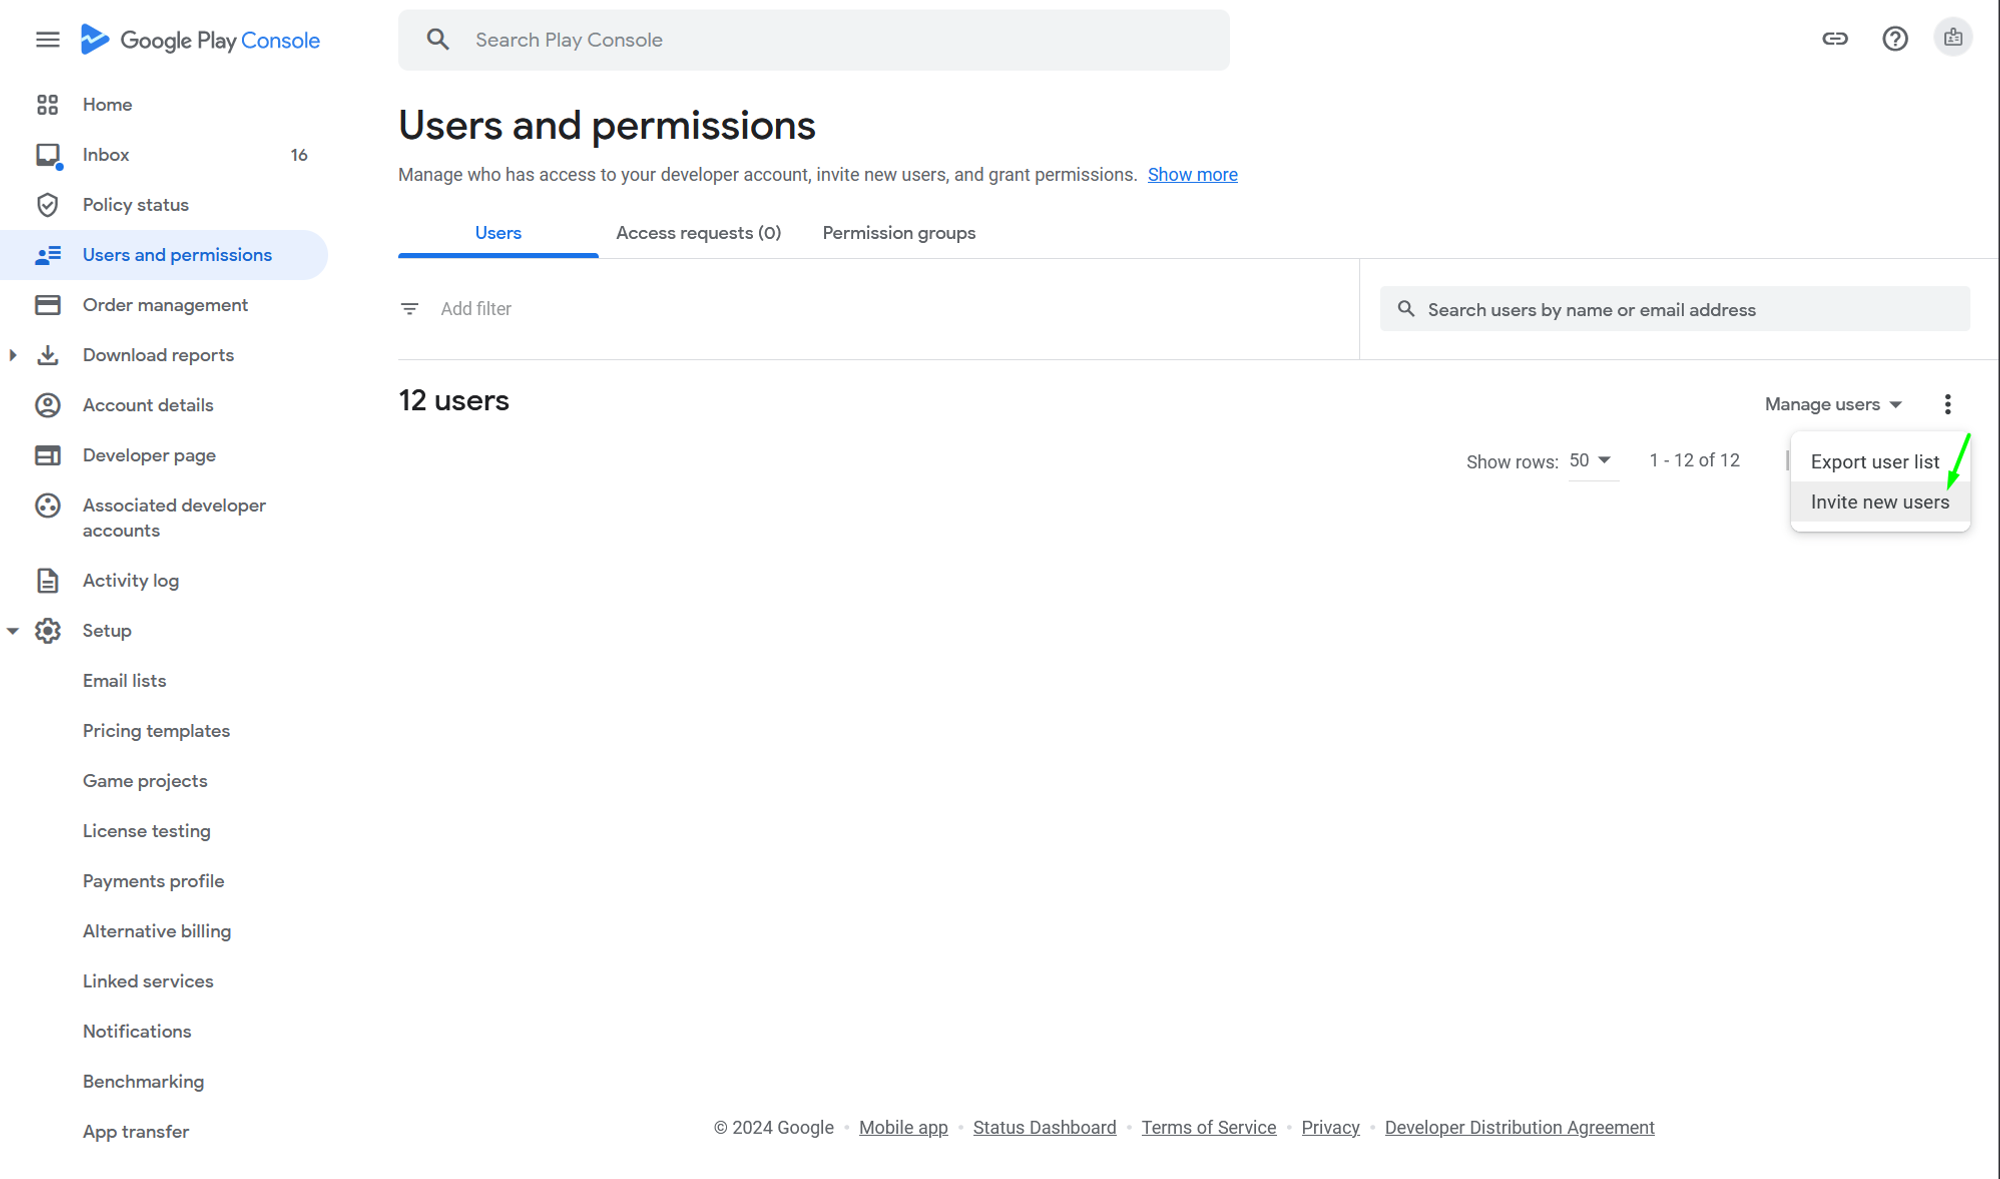
{ "type": "service_account", "project_id": "{Your Project ID}", "private_key_id": "{Your Private Key ID}", "private_key": "-----BEGIN PRIVATE KEY-----\\nPrivate Key\\n-----END PRIVATE KEY-----\\n", "client_email": "[email protected]", "client_id": "Your Client ID", "auth_uri": "<https://accounts.google.com/o/oauth2/auth>", "token_uri": "<https://oauth2.googleapis.com/token>", "auth_provider_x509_cert_url": "<https://www.googleapis.com/oauth2/v1/certs>", "client_x509_cert_url": "<https://www.googleapis.com/robot/v1/metadata/{Your google cert}.iam.gserviceaccount.com>" }- Go to the Users & Permissions section in the Google Play Console and click the “Invite new users” button.
- Enter the email address of the created service account. In the App Permission section, click the “Add app” button to integrate the desired application. Then click the “Apply” button.
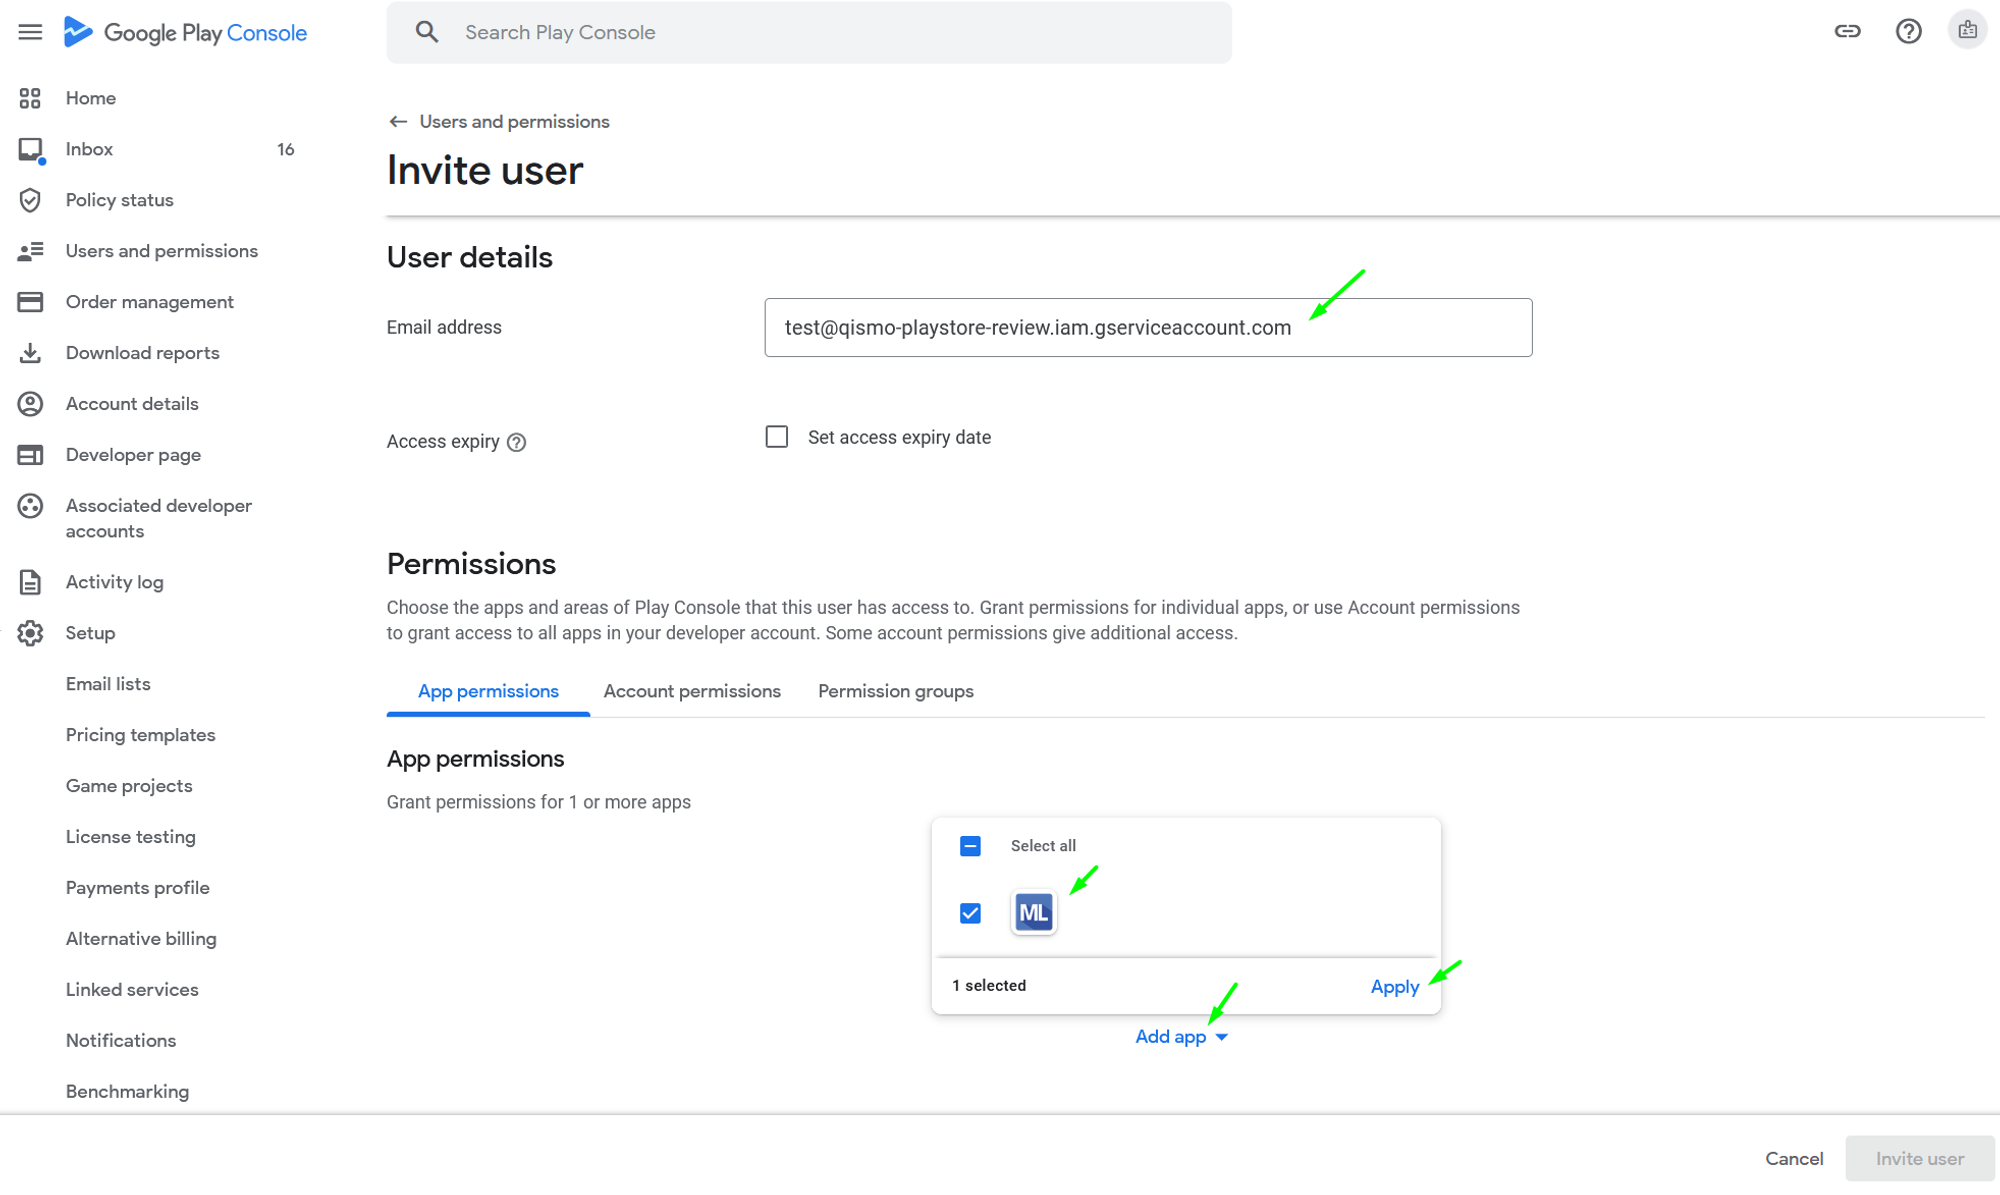
- A permission list pop-up will appear. Give admin access to this service account and click the “Apply” button.

- Finish the invitation configuration by clicking the “Invite user” button.
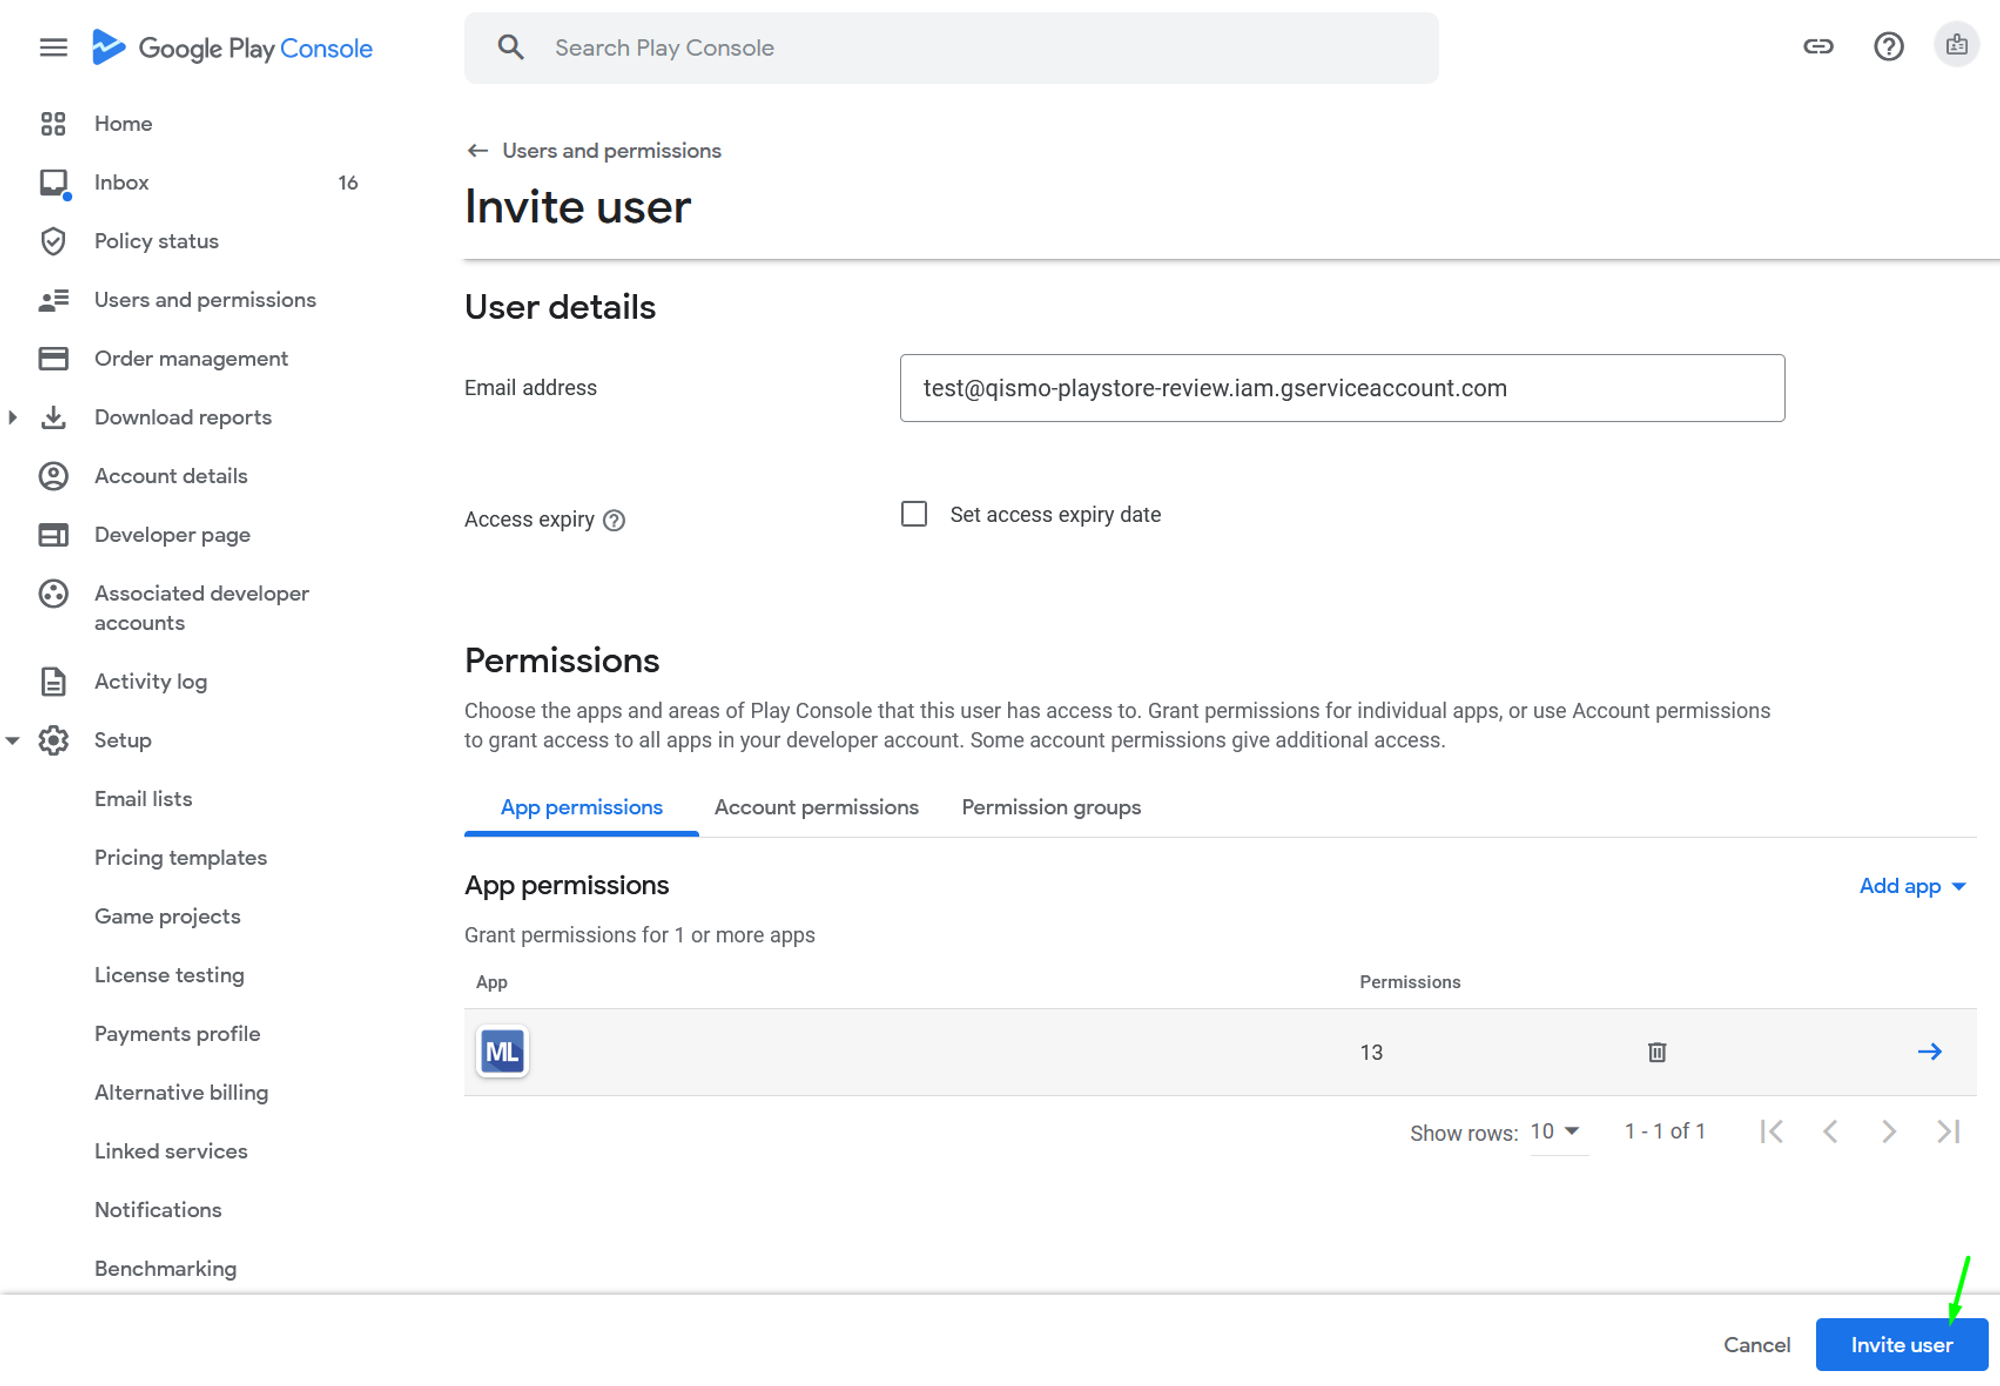
- Step 2 has been completed, the last step is Add the data to Qiscus App Center
III. Add data to Qiscus App Center
- Open Qiscus Omnichannel and go to Play Store Setting through My Apps in App Center menu
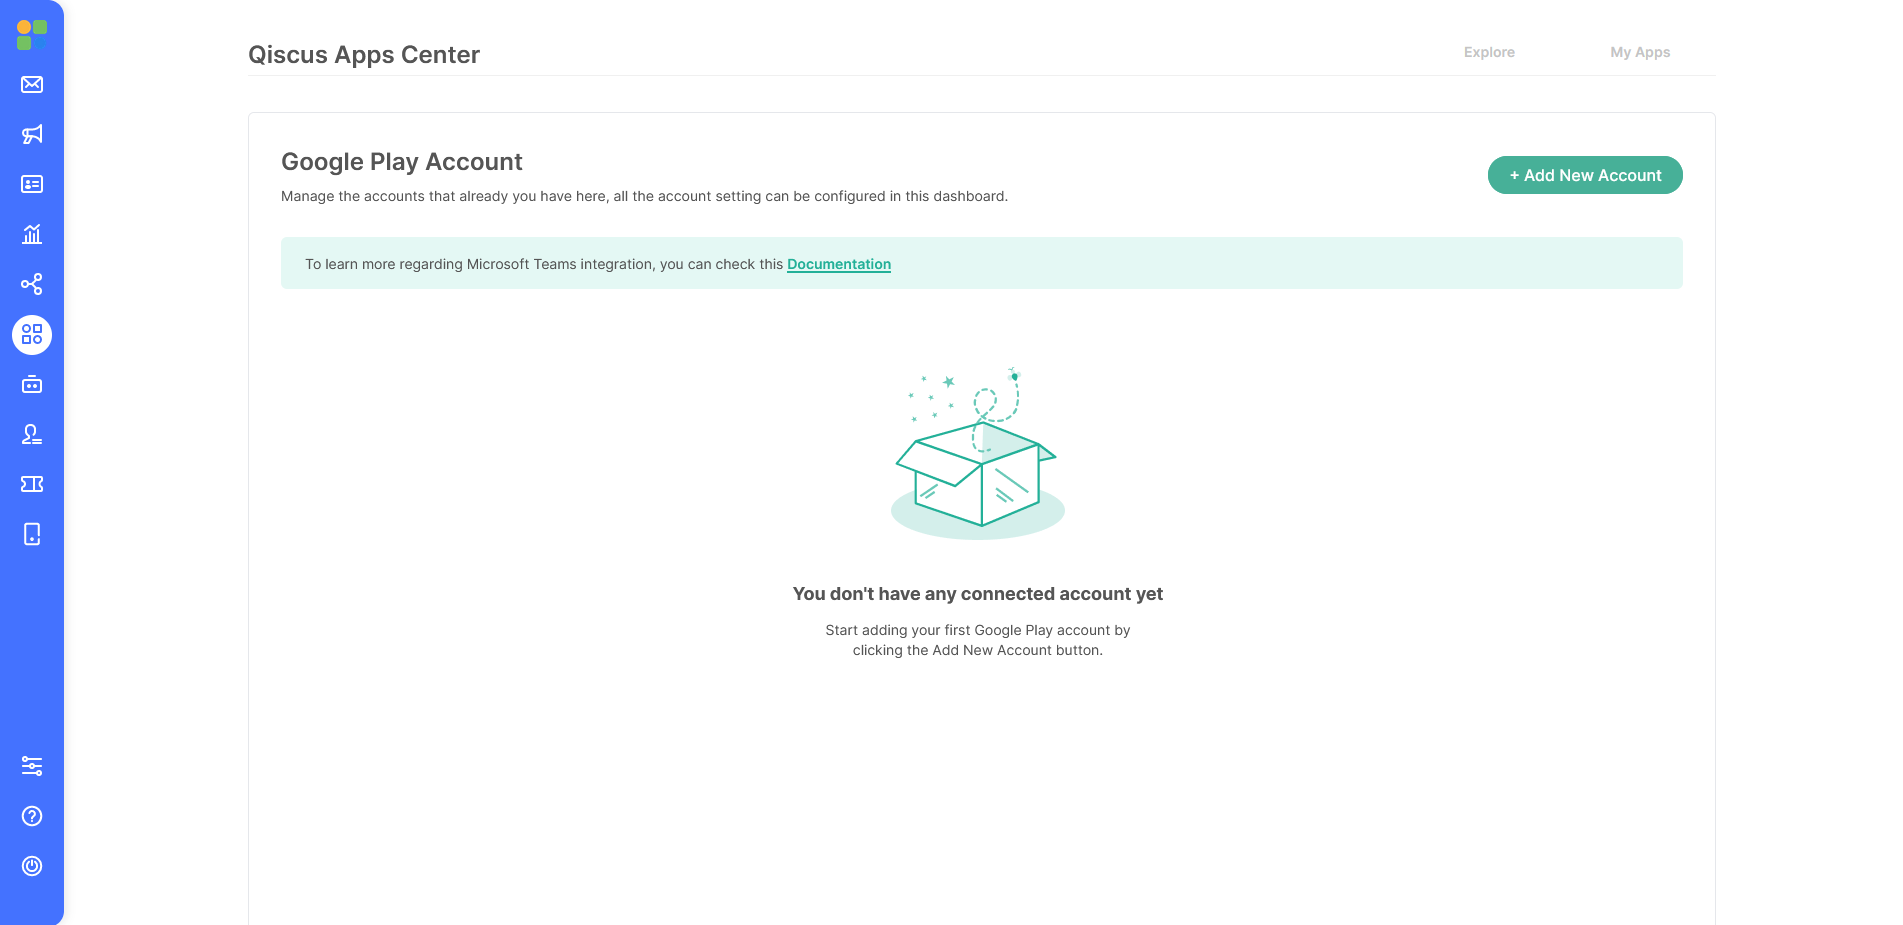
- Click “Add New Account” button to add new google play account to be connected with Qiscus Omnichannel dashboard
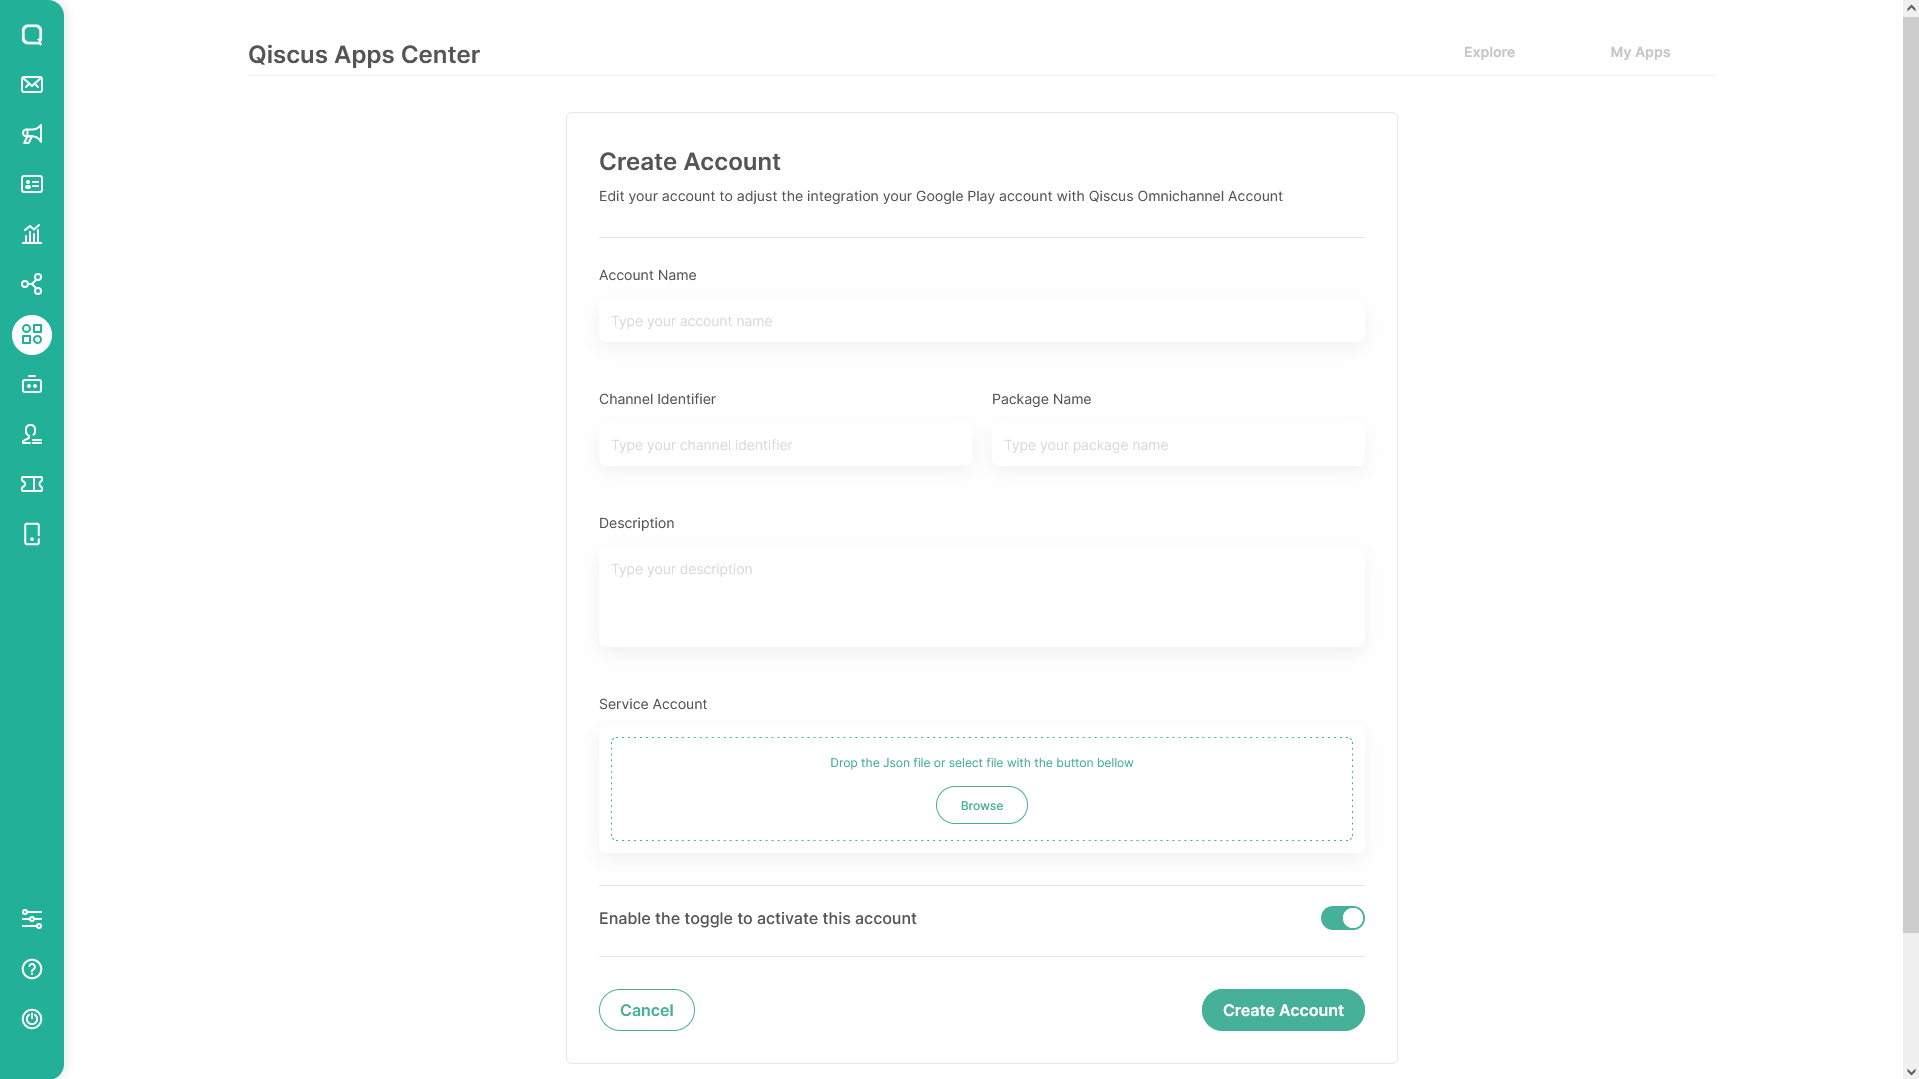
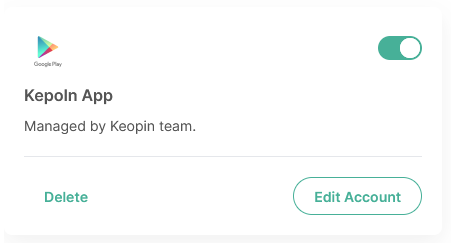
- Fill in the form according to the data you want to input with the guidance below:
- Account Name: Could be your app name or your google play account name (eg: Kepoin App)
- Channel Identifier: Anything to identify your channel
- Description: Write a description about the app or account (eg: Managed by Keopin team.)
- Package Name: Application package id that you already got on the first stage (eg: com.qiscus.qismo.chat)
- Service Account: Pick your downloaded private keys JSON File that you have saved in the previous stage
- Enable the toggle to activate this account: Turn on if you want to enable your Play Store integration account to Qiscus Omnichannel dashboard immediately, or turn it off if you want to do the activate the integration later
- Click “Create Account”
- You are ready!
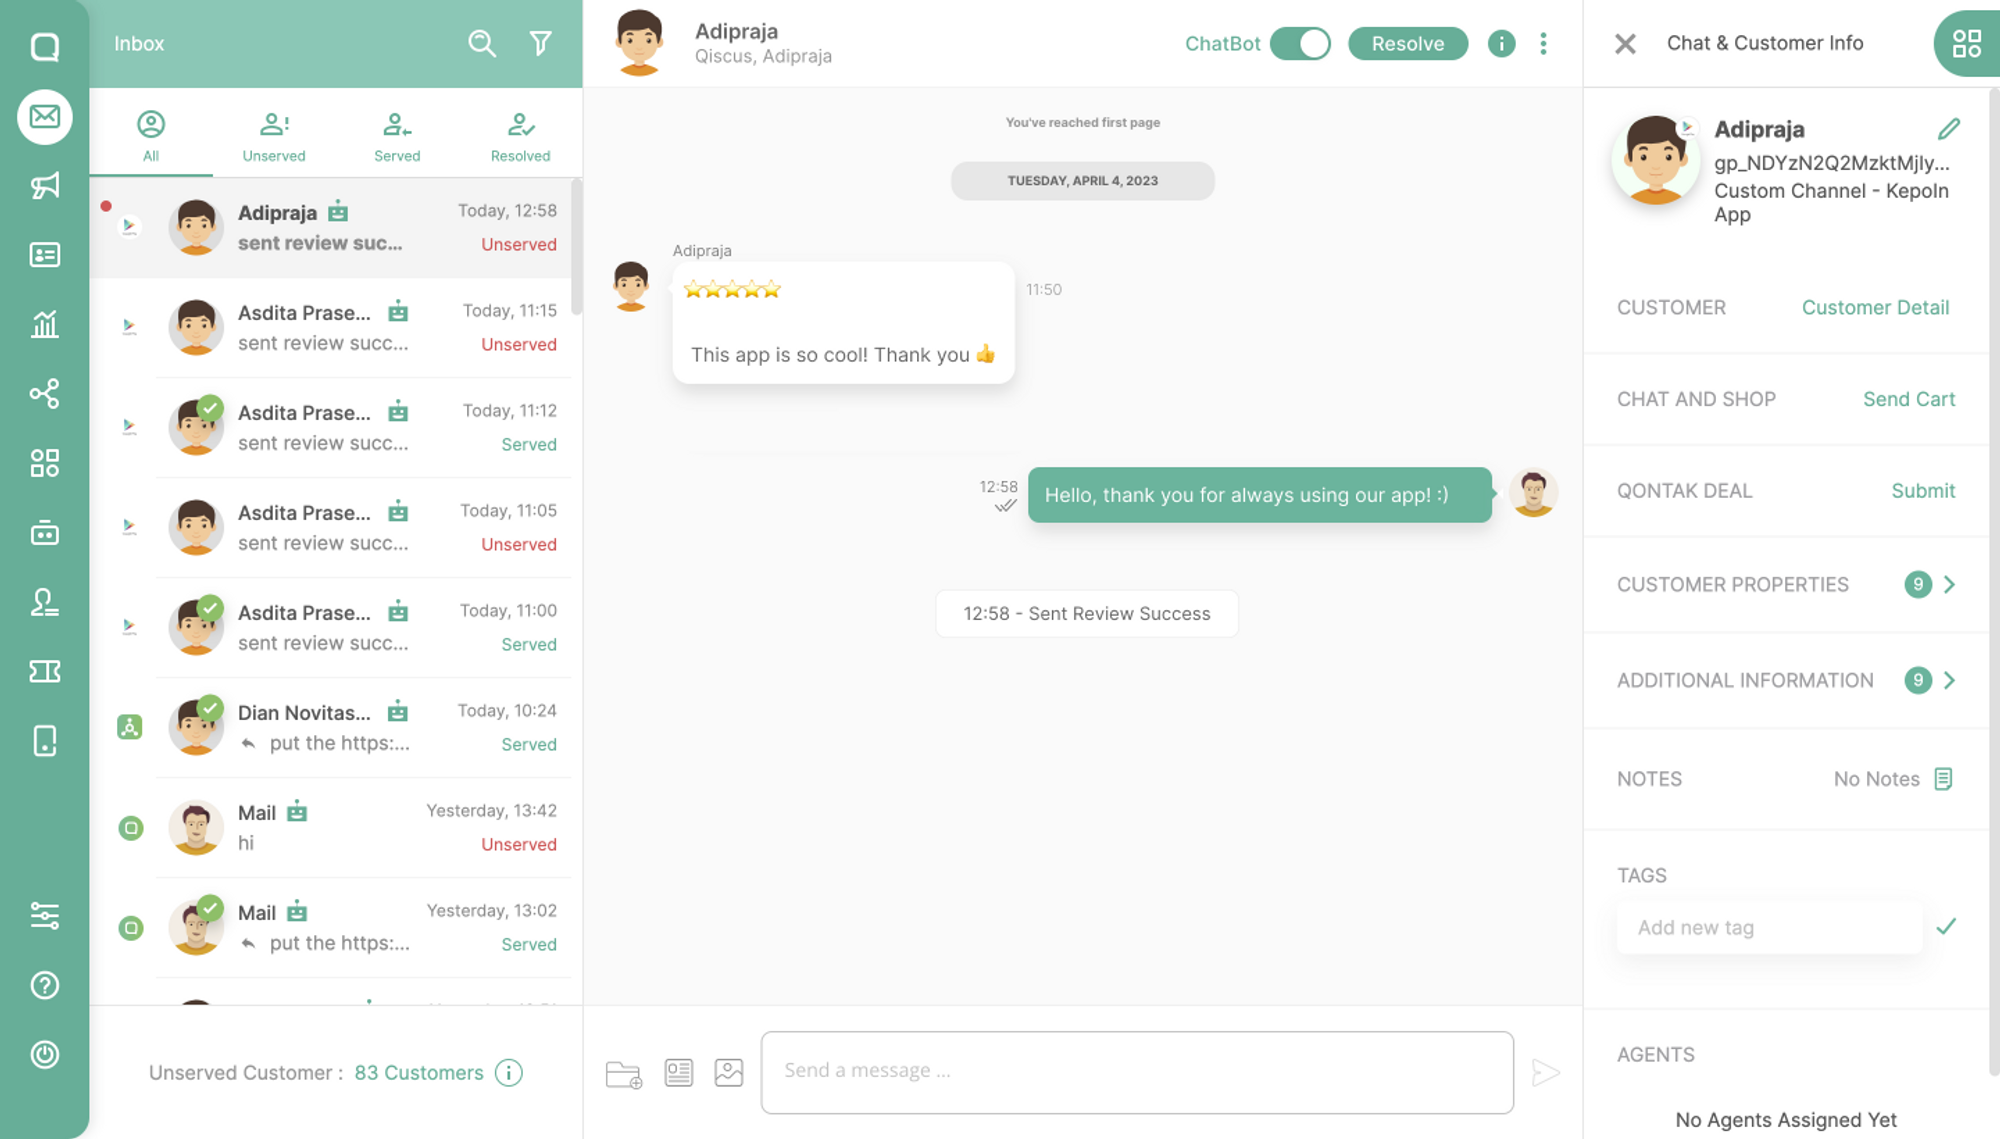
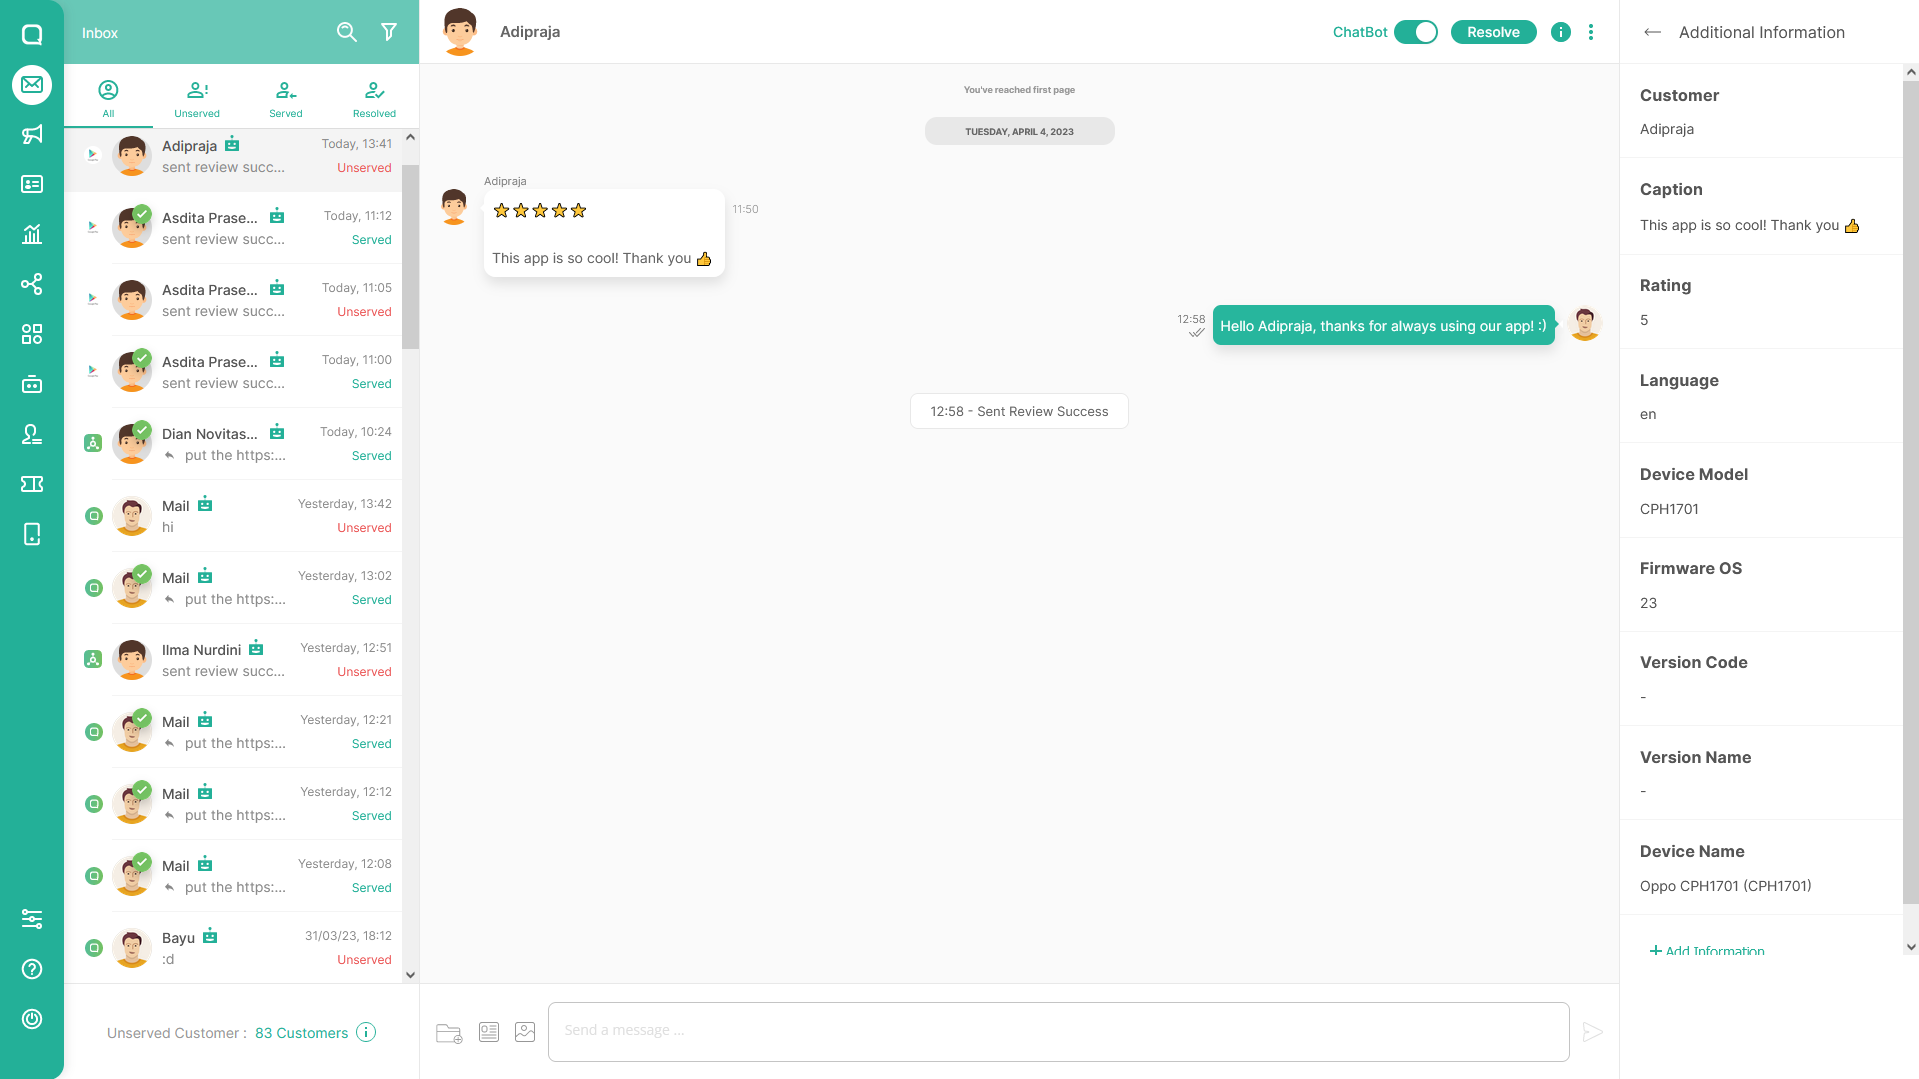
Integration Result
- Incoming Message

- Additional info to record user data
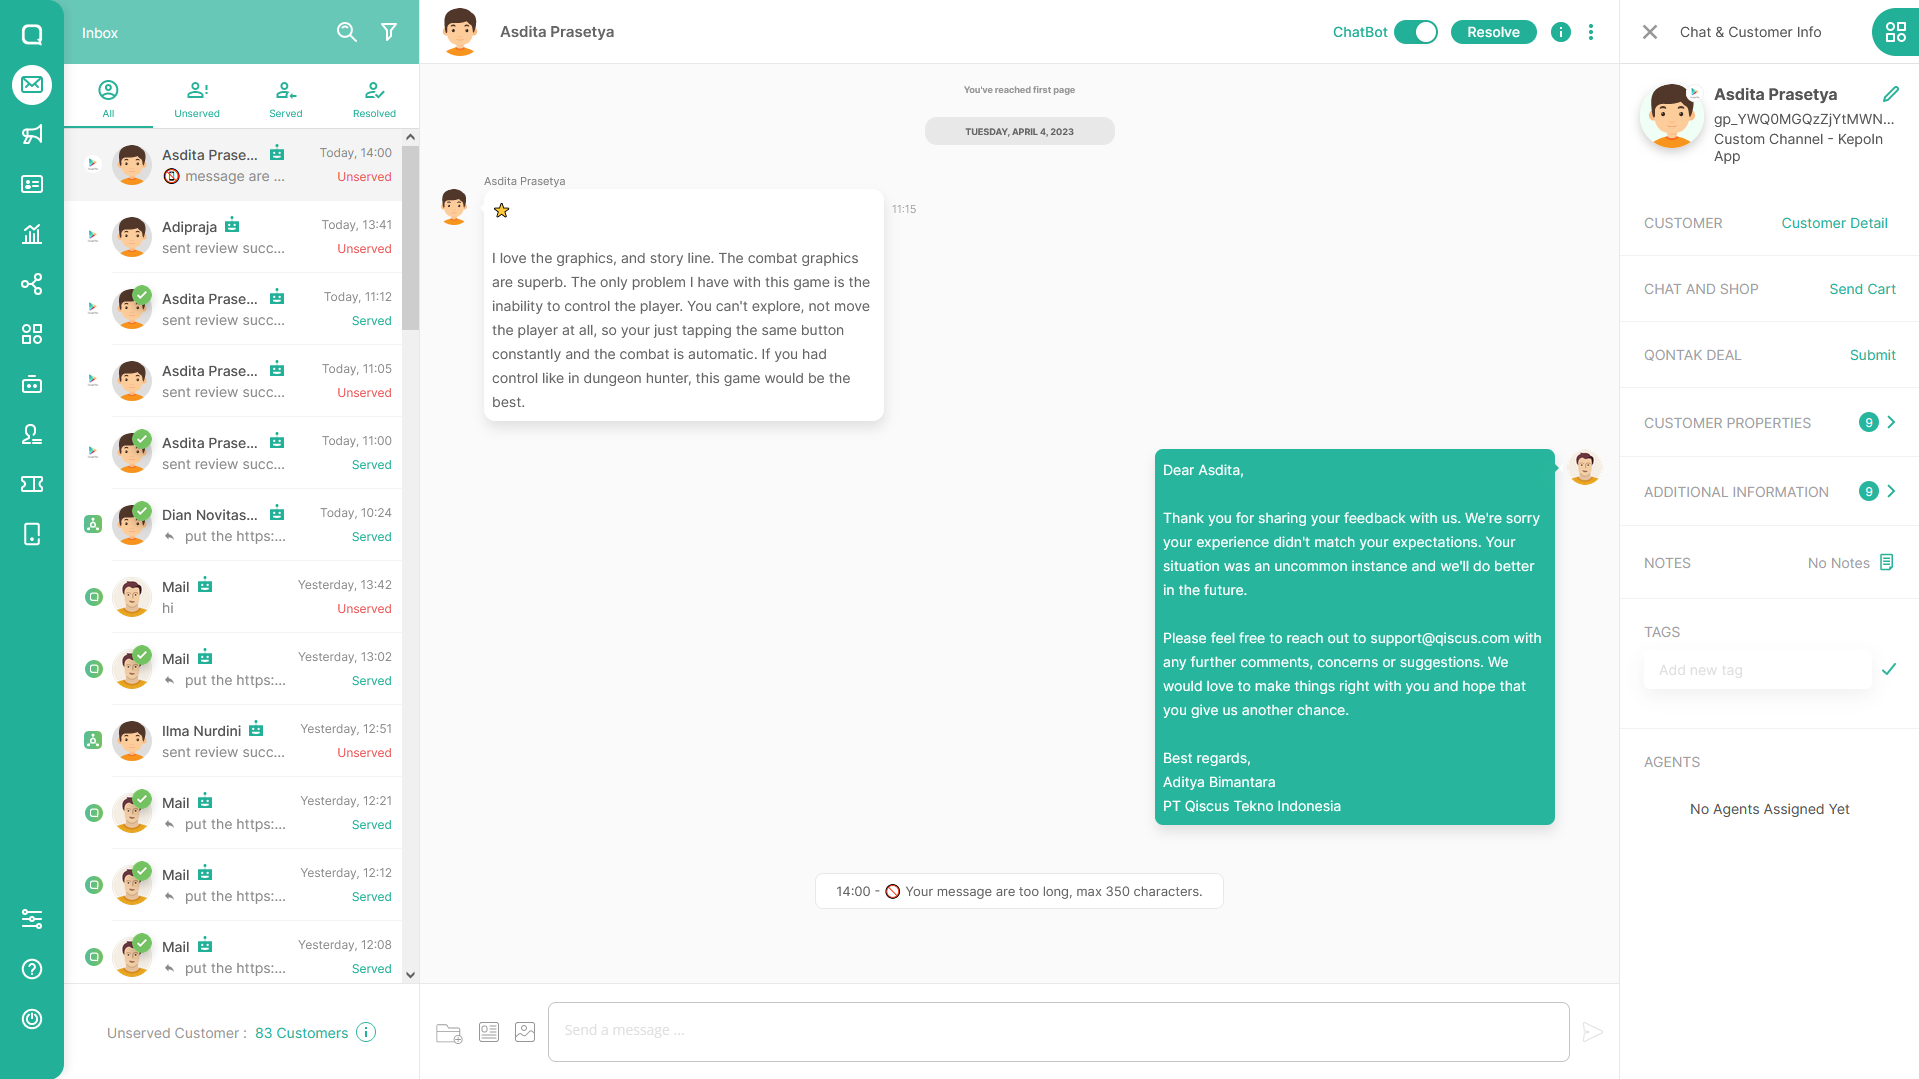
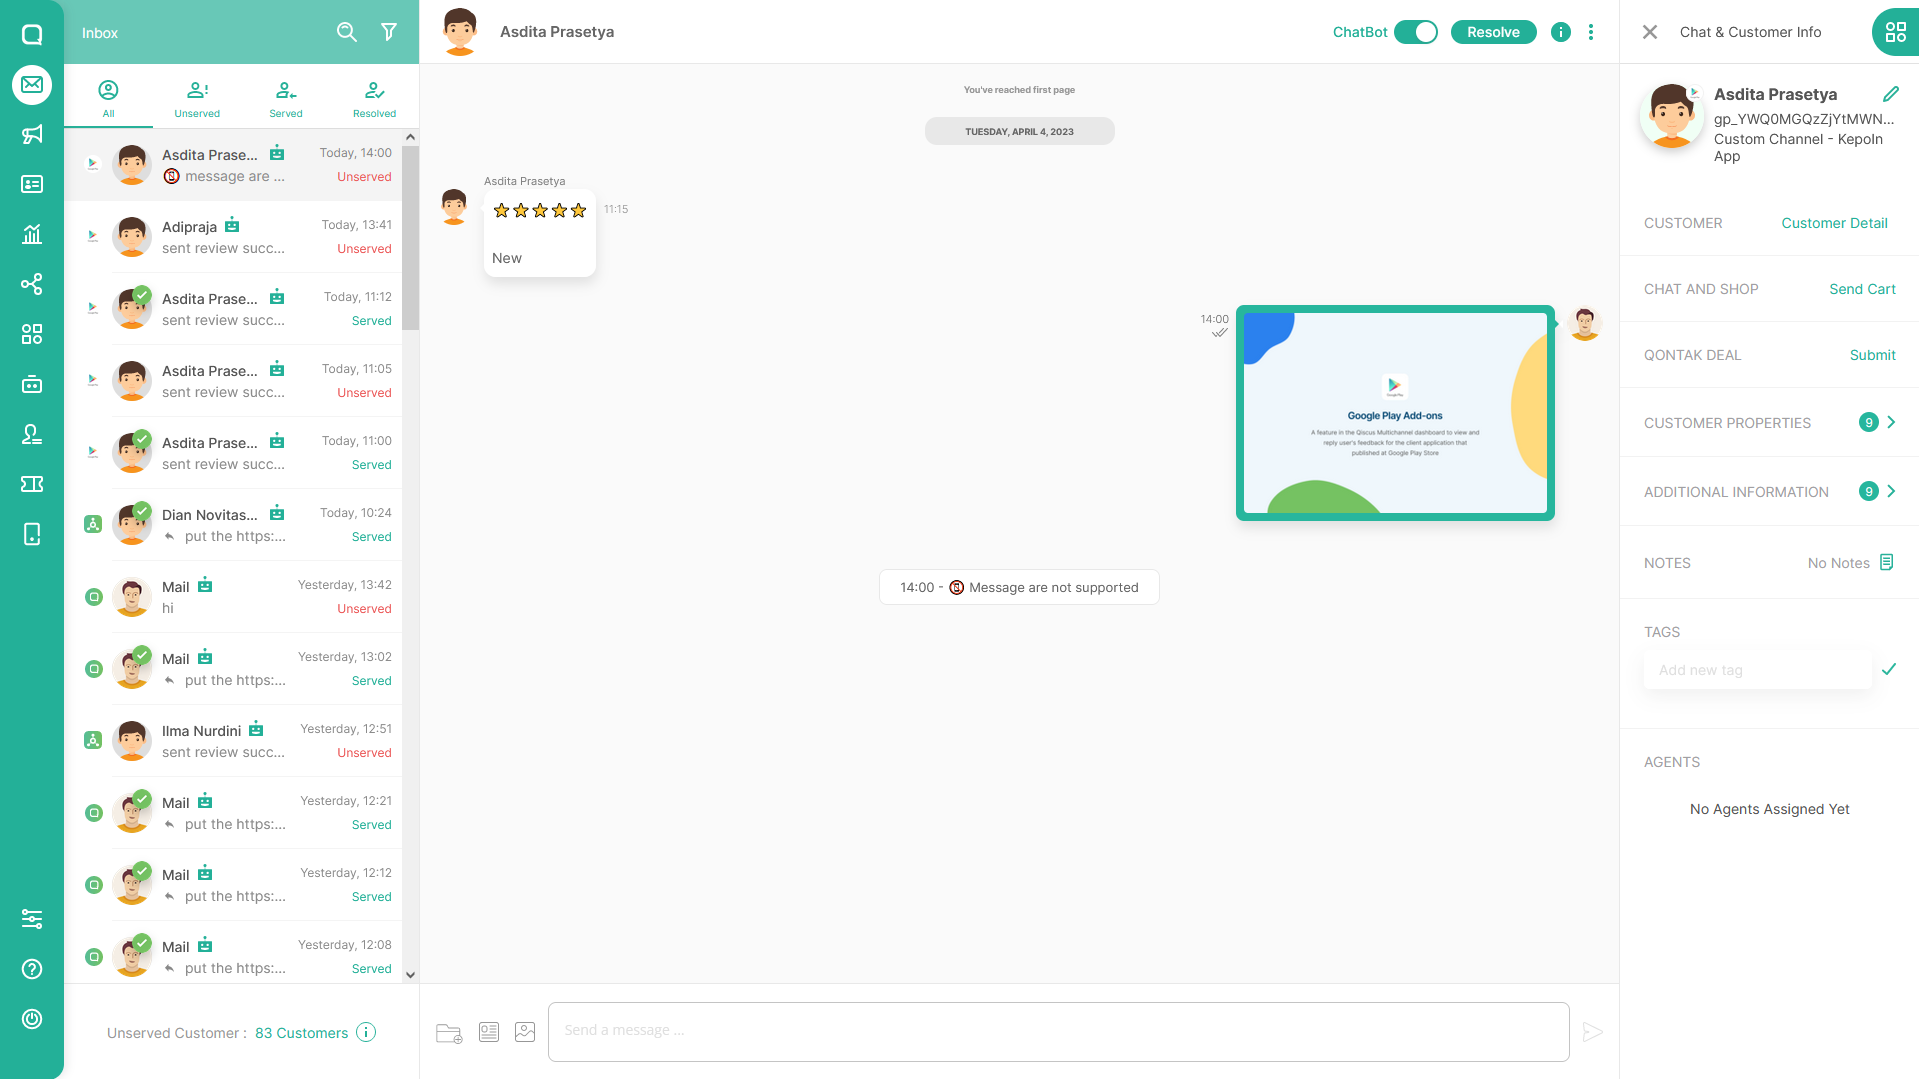
- Error message reply information
- Character limit
b. Unsupported message type (We only support text message, the other message type should be returning error)
c. Services are turned off
Limitation
- The character limit upon replying the customer review is 350 characters per bubble chat .
- The maximum number of messages that can be sent to reply customer review is 2000 replies per day.
- Incoming review messages will have a delay of approximately 5 minutes due to Google Play GET Method API Rate limiter.
- Only support text message type.
Reference: https://developers.google.com/android-publisher/reply-to-reviews#replying_to_reviews
Notes: The Play Store Review channel cannot be integrated with the Omnichannel Auto Responder feature. Automatic replies are not supported for this channel due to platform limitations.
Notes: The past user's review will not be added to the dashboard after finish the account integration setup.