The Qiscus Chat SDK receives pushes through both the Qiscus Chat SDK protocol and Apple Push Notification Service (APNS), depending on usage and other conditions. Default notification sent by Qiscus Chat SDK protocol.To enable your application to receive apple push notifications, some setup must be performed in both application and the Qiscus Dashboard.
Do the following steps to setup push notifications:
- Create a Certificate Signing Request(CSR).
- Create a Push Notification SSL certificate in Apple Developer site.
- Export a p12 file and upload it to Qiscus Dashboard.
- Register a device token in Qiscus SDK and parse Qiscus APNS messages.
Step 1: Create a Certificate Signing Request (CSR)
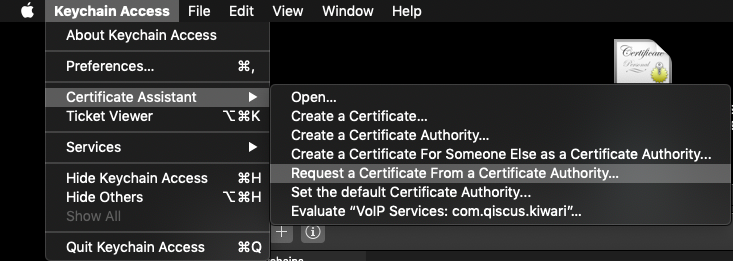
Open Keychain Access on your Mac (Applications -> Utilities -> Keychain Access). SelectRequest a Certificate From a Certificate Authority.
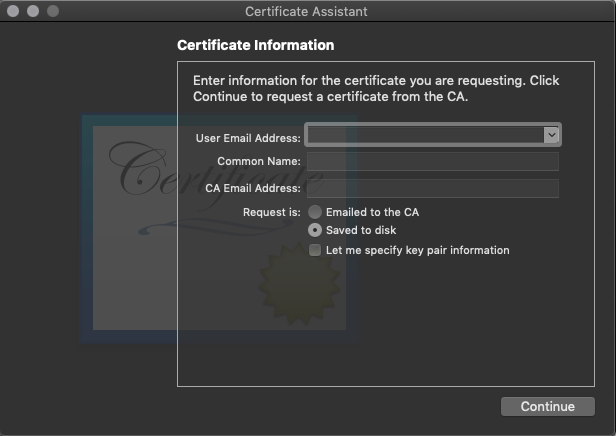
In the Certificate Information window, do the following:
- In the User Email Address field, enter your email address.
- In the Common Name field, create a name for your private key (for example, John Doe Dev Key).
- The CA Email Address field must be left empty.
- In the Request is group, select the Saved to disk option.
Step 2: Create a Push Notification SSL Certificate in Apple Developer Site
Log in to the Apple Developer Member Center and find the Certificates, Identifiers & Profiles menu. Select App IDs, find your target application, and click the Edit button.
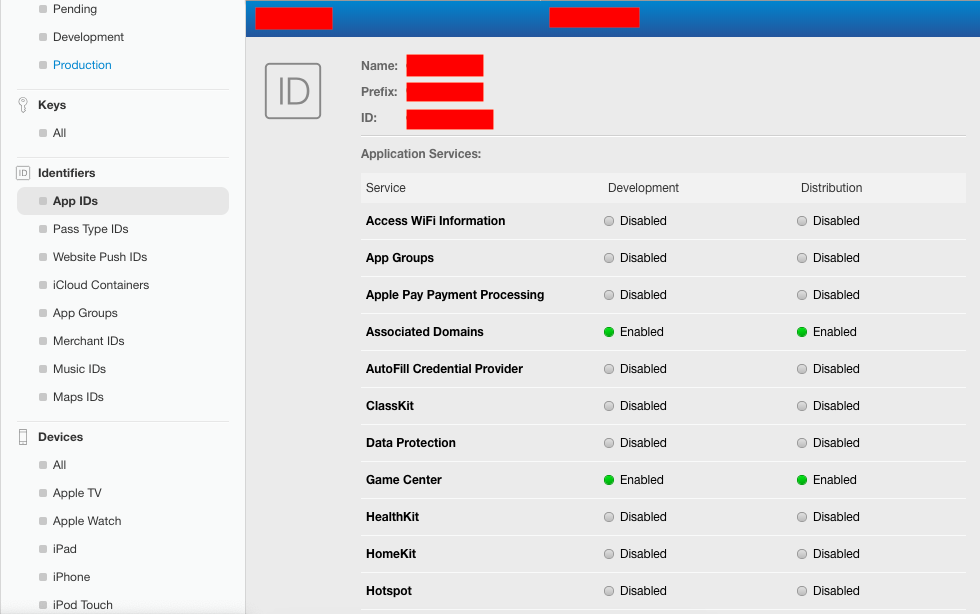
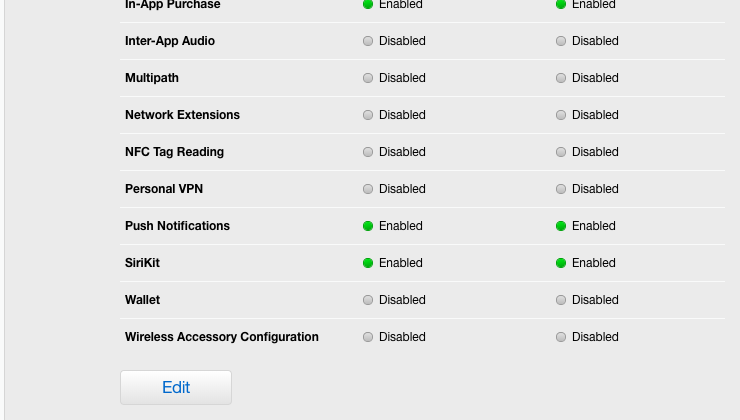
Turn on Push Notifications and create a development or production certificate to fit your purpose.
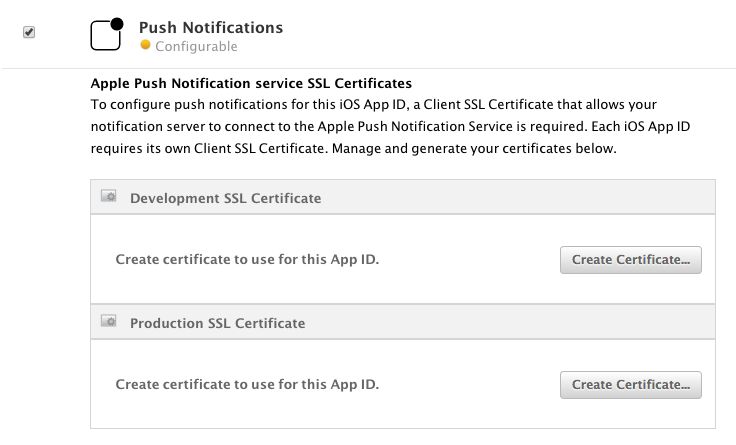
Upload the CSR file that you created in section (1) to complete this process. After doing so, download a SSL certificate. Double-click the file and register it to your login keychain.
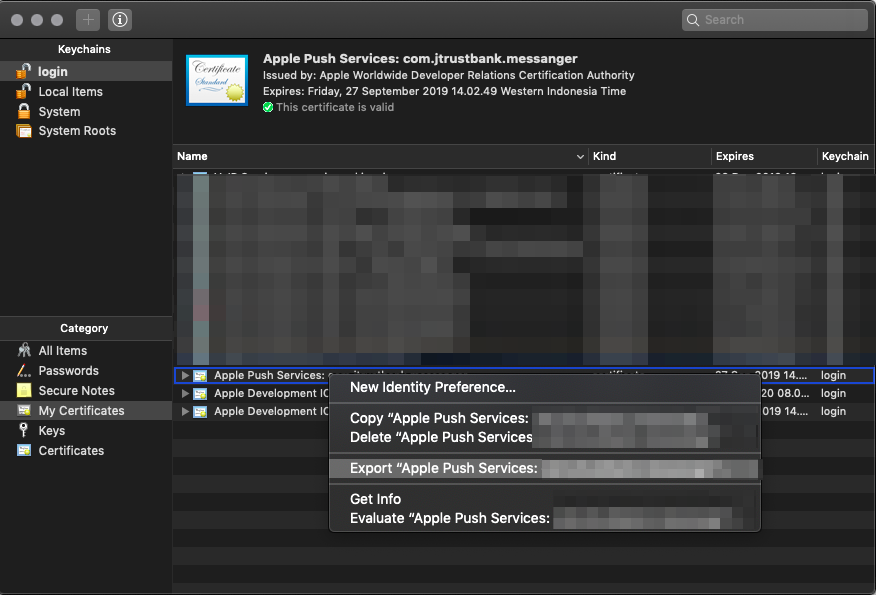
Step 3: Export a p12 File and Upload it to Qiscus Dashboard
Under the Keychain Access, click the Certificates category from the left menu. Find the Push SSL certificate you just registered and right-click it without expanding the certificate. Then select Export to save the file to your disk.
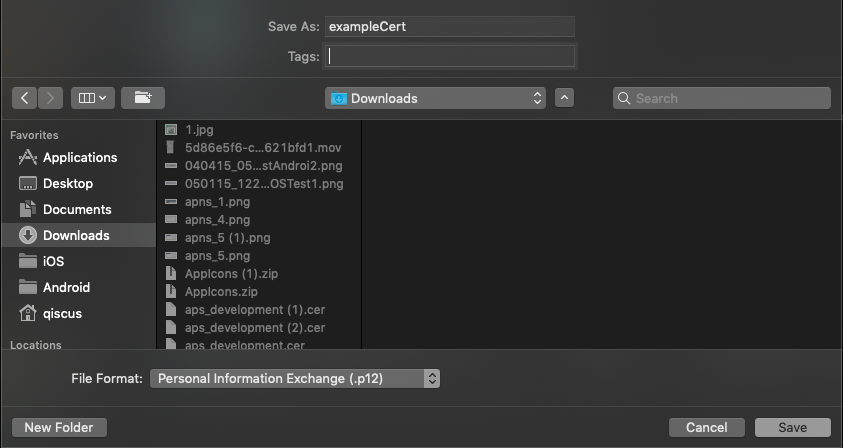
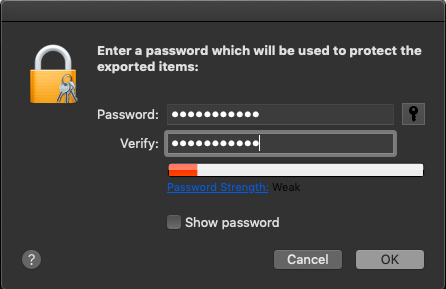
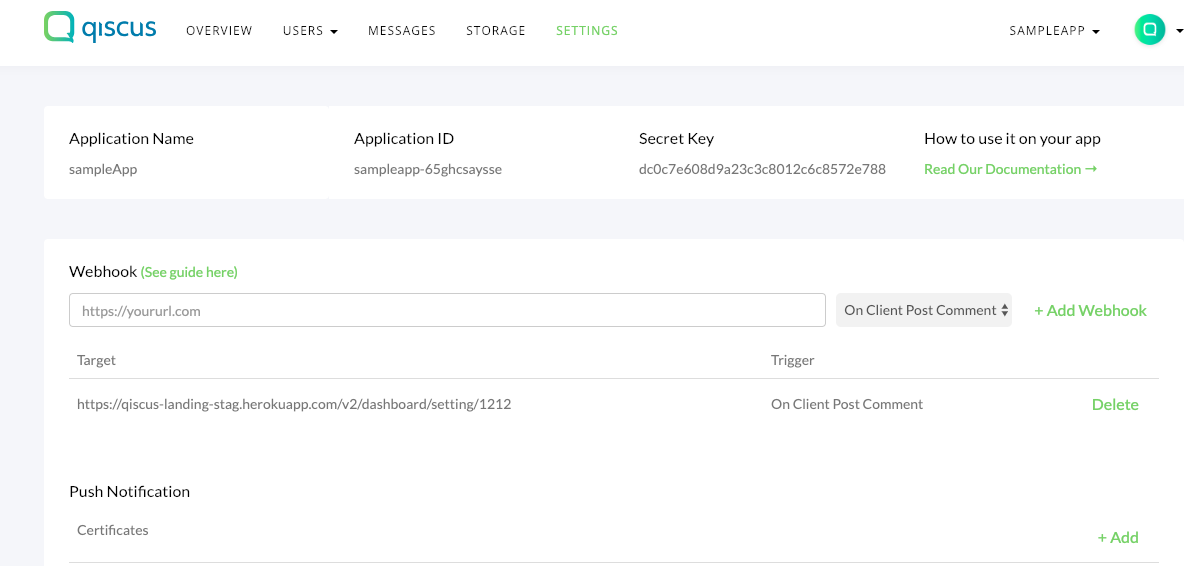
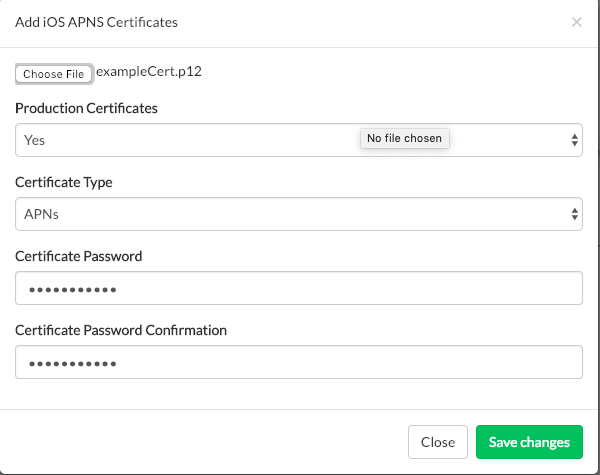
Then, log in to the dashboard and upload your .p12 file to the Push Notification section, under Settings.
Click +Add and then fill the upload certificates form
Step 4: Register a Device Token in Qiscus Chat SDK and Parse Qiscus APNS Message
In your app's AppDelegate, store your device token as a variable.
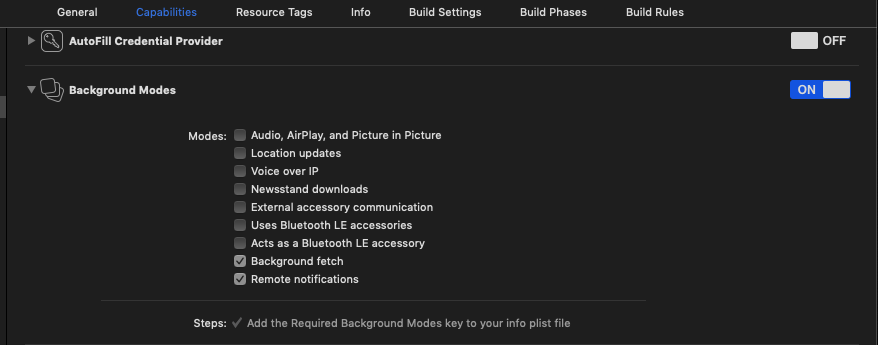
func application(_ application: UIApplication, didFinishLaunchingWithOptions launchOptions: [UIApplication.LaunchOptionsKey: Any]?) -> Bool { if #available(iOS 10.0, *) { // For iOS 10 display notification (sent via APNS) UNUserNotificationCenter.current().delegate = self let authOptions: UNAuthorizationOptions = [.alert, .badge, .sound] UNUserNotificationCenter.current().requestAuthorization( options: authOptions, completionHandler: {_, _ in }) } else { let settings: UIUserNotificationSettings = UIUserNotificationSettings(types: [.alert, .badge, .sound], categories: nil) application.registerUserNotificationSettings(settings) } application.registerForRemoteNotifications() return true } func application(_ application: UIApplication, didRegisterForRemoteNotificationsWithDeviceToken deviceToken: Data) { var tokenString: String = "" for i in 0..<deviceToken.count { tokenString += String(format: "%02.2hhx", deviceToken[i] as CVarArg) } print("token = \(tokenString)") QiscusCore.shared.registerDeviceToken(token: token, isDevelopment: isDevelopment, onSuccess: { (success) in print("success") }) { (error) in print(error.message) }}func application(_ application: UIApplication, didReceive notification: UILocalNotification) { print("AppDelegate. didReceive: \(notification)")}func application(_ application: UIApplication, didReceiveRemoteNotification userInfo: [AnyHashable : Any]) { print("AppDelegate. didReceiveRemoteNotification: \(userInfo)")}func application(_ application: UIApplication, didReceiveRemoteNotification userInfo: [AnyHashable : Any], fetchCompletionHandler completionHandler: @escaping (UIBackgroundFetchResult) -> Void) { print("AppDelegate. didReceiveRemoteNotification2: \(userInfo)")}// [START ios_10_message_handling]@available(iOS 10, *)extension AppDelegate : UNUserNotificationCenterDelegate { // Receive displayed notifications for iOS 10 devices. func userNotificationCenter(_ center: UNUserNotificationCenter, willPresent notification: UNNotification, withCompletionHandler completionHandler: @escaping (UNNotificationPresentationOptions) -> Void) { let userInfo = notification.request.content.userInfo // Print full message. print(userInfo) } func userNotificationCenter(_ center: UNUserNotificationCenter, didReceive response: UNNotificationResponse, withCompletionHandler completionHandler: @escaping () -> Void) { let userInfo = response.notification.request.content.userInfo // Print full message. print(userInfo) completionHandler() }}// [END ios_10_message_handling]Don't forget set Remote notifications and Background fetch in menu Capabilities
Step 5: Stop Receiving Push Notification
You need to stop receiving Push Notification (PN) when you don't need to receive Push Notification, for example when logout from Qiscus system. To stop receiving the PN , you can see below code:
QiscusCore.shared.removeDeviceToken(deviceToken: deviceToken, isDevelopment: isDevelopment, onSuccess: { (response) in= print("success") }) { (error) in print(error.message) }you need to remove the device token, by passing isDevelopment params to make sure your device token is completely removed. IsDevelopment set true when the apps running on development mode, otherwise you can set false for production mode
Notification Payload
Here complete payload of Qiscus Push Notifications. You can define Push Notification from Qiscus Chat SDK which has qiscus_sdk key within APNS response.
{ "payload": { "comment_before_id": 1234565, // message before id (long) "comment_before_id_str": "1234565", // message before id (string) "email": "[email protected]", // sender's user id (string) "extras": {}, // message extras (json) "id": 1234566, // message id (long) "id_str": "1234566", // message id (string) "is_public_channel": false, // whether is channel or not" "message": "Hi", // message (string) "payload": {}, // message payload (json) "room_avatar": "https://www.froala.com/assets/blog/pages/post41_2.png", // chat room avatar (string) "room_id": 12345, // chat room id (long) "room_id_str": "12345", // chat room id (string) "room_name": "[email protected]", // chat room name (string) "room_options": "{}", // chat room extras (json) "room_type": "single", // chat room type, e.g single (1-on-1), group, (string) "status": "sent", // message status (string) "timestamp": "2019-09-25T12:23:43Z", // message timestamp (string) "type": "text", // message type (text, file_attachment, custom) "unique_temp_id": "android_1569414179567g8j3kbe51fc5970fab0c30f7", // message unique id (string) "unix_nano_timestamp": 1569414223720735000, // message nano timestamp (string) "unix_timestamp": 1569414223, // message unix timestamp (string) "user_avatar": "https://www.froala.com/assets/blog/pages/post41_2.png", // sender's avatar (string) "username": "polo" // sender's username (string) }, "qiscus_room_id": 1235, // chat room id (long) "qiscus_sdk": "post_comment" // event notification e.g "post_comment", "delete_message", "clear_room"}###